
:max_bytes(150000):strip_icc()/work-from-home-final-cb19dcdff01545d693d7ecb1f9f9c9b2.jpg)
YouTube's Creative Commons License Explained Simply
YouTube’s Creative Commons License Explained Simply
What’s YouTube Creative Commons and How to Use it to Make Video

Richard Bennett
Mar 27, 2024• Proven solutions
Creative Commons is a non-profit organization internationally active in providing free licenses that creators can use in order to make their work available to the public. With the creative commons (CC) licenses, the creator has basically given others permission in order to use their work but under specific conditions.
Whenever a work is created, an article or a photograph was taken, there is a copyright that protects it so that it cannot be used in certain ways. On the other hand, the CC licenses allow the creator to choose how they would want others to use their creativity.
If you are new to the video editing world, and want to make your YouTube videos more beautiful, here I recommend an easy-to-use video editing software - Wondershare Filmora which not only allows you cut, crop, rotate, and split your videos in minutes, but also simplify the advanced video editing like green screen effect and PIP. You can also find over 300 video effects
 Download Mac Version ](https://tools.techidaily.com/wondershare/filmora/download/ )
- Part 1: What is YouTube Commons
- Part 2: How to Find Creative Commons (CC) Licensed Videos
- Part 3: Can You Download Creative Commons-licensed YouTube videos to Edit
- Part 4: How to Use YouTube Creative Commons to Make Videos
Part 1: What is YouTube Creative Commons
YouTube utilizes CC licenses in its content. With it, the content creators can grant others to use their work as sort of a standard. YouTube users can use the Creative Commons CC BY license in marking their videos. When they use the CC By license, the system will generate a signature to the video automatically. This indicates that you are using Creative Commons content and will show the source video’s titles below the video player. The creator retains the copyright of the video while others can reuse your video but under the terms of the license.
You May Also Like: Standard YouTube License vs. Creative Commons>>
Part 2: How to Find Creative Commons (CC) Licensed Videos
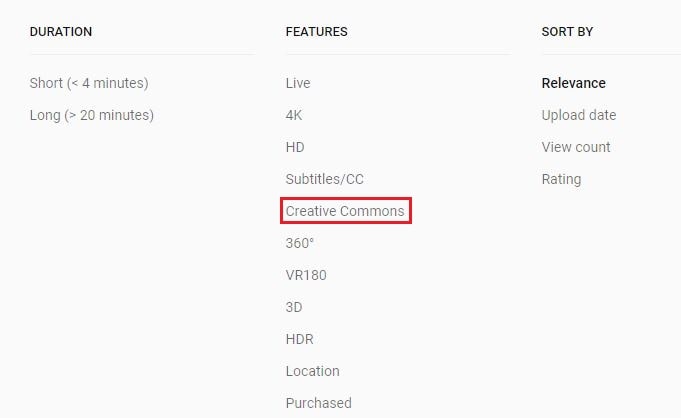
If you are looking for Creative Commons licensed videos, there are different ways or rather, different websites you can go to. These websites are the best place you can find CC-licensed videos and ensure that what you are sharing is legal.
- **YouTube **– YouTube is one of the most common websites you can find CC licensed videos. The easy way to search for CC licensed videos on YouTube is simply to search ‘creative commons’ to the end of the search term you are going for.
- Vimeo – This site offers different licenses complete with an explanation for each in the right side of the main page. Underneath each license, you can find a link to browse all the videos of the specific type of license you chose. You can also search using the Advance Option to find the right video you are looking for.
- SpinXpress – Lets you search for CC licensed videos using just a search term and the kind of Creative Commons license you are looking for. As long as it’s one of the sources they use, you can also specify the media source of the video.
Part 3: Can You Download Creative Commons-licensed YouTube videos to Edit
Many people are asking that can I edit creative commons videos? Well, this is a tricky question because it really depends on what creative commons license is used. If the video is CC-BY, it is no doubt that you can download and edit it. CC-BY-SA means you can edit video under the condition of you also allow others to edit it after you upload it to YouTube. If it is non-commercial, you are definitely not allowed to edit it.
Part 4: How to Use YouTube Creative Commons to Make Videos
YouTube Creative Commons provides you a simple way of using creative works to make your own videos. All you simply need is the YouTube Video Editor and the expanded library of Creative Commons videos o YouTube. There you can choose what videos to edit and then incorporate in your own projects. To find what videos to use, you simply have to search in the YouTube search bar from YouTube Video Editor.
Visit youtube.com/editor and then select CC tab to get started. In order to mark your video with CC license, select the ‘Creative Commons Attribution license’ on the Video Description page or upload page. When using a Creative Commons content to incorporate in your video, you will see the source title of the videos underneath your video player. With that a well, any or all of the videos you used with Creative Commons license, others will be able to share and remix your own creation as long as they give credit for your work.
Richard Bennett
Richard Bennett is a writer and a lover of all things video.
Follow @Richard Bennett
Richard Bennett
Mar 27, 2024• Proven solutions
Creative Commons is a non-profit organization internationally active in providing free licenses that creators can use in order to make their work available to the public. With the creative commons (CC) licenses, the creator has basically given others permission in order to use their work but under specific conditions.
Whenever a work is created, an article or a photograph was taken, there is a copyright that protects it so that it cannot be used in certain ways. On the other hand, the CC licenses allow the creator to choose how they would want others to use their creativity.
If you are new to the video editing world, and want to make your YouTube videos more beautiful, here I recommend an easy-to-use video editing software - Wondershare Filmora which not only allows you cut, crop, rotate, and split your videos in minutes, but also simplify the advanced video editing like green screen effect and PIP. You can also find over 300 video effects
Download Mac Version ](https://tools.techidaily.com/wondershare/filmora/download/ )
- Part 1: What is YouTube Commons
- Part 2: How to Find Creative Commons (CC) Licensed Videos
- Part 3: Can You Download Creative Commons-licensed YouTube videos to Edit
- Part 4: How to Use YouTube Creative Commons to Make Videos
Part 1: What is YouTube Creative Commons
YouTube utilizes CC licenses in its content. With it, the content creators can grant others to use their work as sort of a standard. YouTube users can use the Creative Commons CC BY license in marking their videos. When they use the CC By license, the system will generate a signature to the video automatically. This indicates that you are using Creative Commons content and will show the source video’s titles below the video player. The creator retains the copyright of the video while others can reuse your video but under the terms of the license.
You May Also Like: Standard YouTube License vs. Creative Commons>>
Part 2: How to Find Creative Commons (CC) Licensed Videos
If you are looking for Creative Commons licensed videos, there are different ways or rather, different websites you can go to. These websites are the best place you can find CC-licensed videos and ensure that what you are sharing is legal.
- **YouTube **– YouTube is one of the most common websites you can find CC licensed videos. The easy way to search for CC licensed videos on YouTube is simply to search ‘creative commons’ to the end of the search term you are going for.
- Vimeo – This site offers different licenses complete with an explanation for each in the right side of the main page. Underneath each license, you can find a link to browse all the videos of the specific type of license you chose. You can also search using the Advance Option to find the right video you are looking for.
- SpinXpress – Lets you search for CC licensed videos using just a search term and the kind of Creative Commons license you are looking for. As long as it’s one of the sources they use, you can also specify the media source of the video.
Part 3: Can You Download Creative Commons-licensed YouTube videos to Edit
Many people are asking that can I edit creative commons videos? Well, this is a tricky question because it really depends on what creative commons license is used. If the video is CC-BY, it is no doubt that you can download and edit it. CC-BY-SA means you can edit video under the condition of you also allow others to edit it after you upload it to YouTube. If it is non-commercial, you are definitely not allowed to edit it.
Part 4: How to Use YouTube Creative Commons to Make Videos
YouTube Creative Commons provides you a simple way of using creative works to make your own videos. All you simply need is the YouTube Video Editor and the expanded library of Creative Commons videos o YouTube. There you can choose what videos to edit and then incorporate in your own projects. To find what videos to use, you simply have to search in the YouTube search bar from YouTube Video Editor.
Visit youtube.com/editor and then select CC tab to get started. In order to mark your video with CC license, select the ‘Creative Commons Attribution license’ on the Video Description page or upload page. When using a Creative Commons content to incorporate in your video, you will see the source title of the videos underneath your video player. With that a well, any or all of the videos you used with Creative Commons license, others will be able to share and remix your own creation as long as they give credit for your work.
Richard Bennett
Richard Bennett is a writer and a lover of all things video.
Follow @Richard Bennett
5 Simplified Steps for Sequential YouTube Video Viewing (Free)
How to Go Frame by Frame on YouTube Video? [5 Methods]
Richard Bennett
Mar 27, 2024• Proven solutions
It’s always a handy process to be able to move the frame one by one if you binge-watch YouTube videos. Be it as complex as time-lapse or as simple as makeup tutorial, viewing YouTube video frame-by-frame is never an underestimated process.
To be able to achieve this, you ought to master the methods to move frame-by-frame using a frame by a frame video editor or frame by the frame video player.
But this might make you wonder which one would be best for you?
Then here are some methods to move a video frame-by-frame that may come handy for you.
Option 1: Frame-By-Frame Editing and Watching Video Offline
If you are looking for how to edit frame by frame on YouTube or how to go frame by frame on YouTube then you may use a variety of offline applications.
Below are the 2 highlighting benefits of making use of offline video editors instead of online ones:
- You are not required to have a fast and smooth internet connection once the targeted video has been downloaded and will have full liberty to edit or video vide while staying offline.
- You are granted with the full editing facilities whilst staying offline. You can trim, cut or do any video alterations using offline video editors.
If you don’t know how to download a YouTube video easily and quickly, check this guide on How to Download YouTube Videos without Any Software .
Beneath are some of the efficient offline video editors you can work with for editing and viewing videos of YouTube frame by frame.
How to Go Frame by Frame in YouTube Video Using Filmora
Filmora is a great video editor designed for those who are interested in video editing but lack professional experience. It’s very easy to use. Filmora is free to download. You can choose version that is compatible with your operating system.
Compatibility: Windows and Mac

Step 1: Tap on “New Project”.
Step 2: In “project settings” select the desired ratio rate.
Step 3: You can import files by clicking the “import” tab or drag-drop the desired file to this tool.

Step 4: Drag the file to the timeline.
Step 5: You can separate frames from video by hovering the mouse over the first desired frame and complete it by hovering mouse all the way to the end of the frame.
Step 6: Perform editing operations.
Step 7: Save the file by clicking “export” by selecting the desired format under the “format” option and set parameters in “advanced settings” or directly upload the final product to YouTube.

How to Move Frame by Frame in YouTube Video Using Movie Maker
Compatibility: windows
This video editing tool gives you enough option to perform basic editing. With its timeline option, one can edit the videos frame-by-frame which can be performed as guided below:
Step 1: The first step is to download the desired YouTube video.
Step 2: Import that video to movie maker.
Step 3: You have the facility to skip the video frame-by-frame and can also edit it by selecting a specific portion from the timeline.
Step 4: Tap on “edit” beneath video tools after selecting the targeted portion.
Step 5: You will have numerous editing options like transition, add texts, split, music, etc. for each of the frames one by one.
You may also like: YouTube to WAV File: 4 Best Free Convert Solutions >>
How to Advance Frame by Frame in YouTube Video Using iMovie
Compatibility: Mac
This is a free editing tool with a bundle of editing features. The steps are given below:
Step 1: Click “file”, then “new project” followed by “create” option
Step 2: Click “Import” to import video
Step 3: Tap on “edit” followed by the “play head” option to segregate the desired portion of the video to edit.
Step 4: Now apply editing features on the portion of the video given in this tool
Step 5: Press “share” and “export” option once done with editing.
Option 2: Frame-By-Frame Advancement Using YouTube Player
Why even bother ourselves to get a third-party program for the purpose of moving a video frame-by-frame when the YouTube player provides you the same facility within itself. Following are the steps to guide you about how to skip frame by frame on YouTube by using YouTube frame by frame hotkey:
Step 1: Make the video pause.
Step 2: To answer the query regarding how to go frame by frame on YouTube editor, you can make use of 2 keys on the keyboard which are basically used as a shortcut process for the sake of forwarding video frame-by-frame.
You can press “<” in order to skip a frame backward or you could either use a comma as well for the same purpose. For moving the frame forwards, you need to press “>” key or a full stop key will serve you with the same operation.
This is how to move frame by frame on YouTube.

Option 3: Go Frame-By-Frame In YouTube Video Using Online Application
If your work requires intricate analysis of the video where you have to view the view very closely then you may make use of an online external application for this purpose.
The following are the steps to show you how to advance frame by frame on YouTube using this online tool.
Step 1: Into the URL bar of the browser, paste the link www.watchframebyframe.com there where you will be redirected to the online tool which has quite an easy interface with several controls provided built-in.
Step 2: Tap on “Enter Video URL” box and paste the copied URL of a targeted YouTube video
Step 3: The video will get loaded after hitting enter. At the bottom, buttons are given to control accordingly for skipping the frame forwards and backward respectively.
Step 4: You can also personalize the frame skipping setting with the option given beside the forwards and backward button where you can customize fps (frame per second) setting and also adjust the number of frames to be skipped upon clicking forwards and backward button.
An application granting such diverse options gives precise accuracy level which would help make the learning process easier and accurate.

Where Will Need to Go Frame by Frame on YouTube?
- Viewing time-lapse:
Capturing minor details in a video having time-lapse is such a complicated task. It often becomes harder even after slowing the video down. Therefore, a frame-by-frame view is the perfect yet only way out to this problem.
- Viewing how-to video:
The main purpose of a learning video is to get the sound and thorough details of the process and hence can be made not only possible but easier through frame-by-frame scrolling.
- Video sharing or editing:
Clean editing or cropping from a particular position is an intricate process and becomes easier to pause at the desired moment by frame-by-frame forwarding.
- Learning tutorial
Learning needs an in-depth and clear delivery of the content which is made easier by the feature of frame-by-frame skipping of the video.
YouTube studio is the basement for YouTubers to upload and track their videos. To some newbies, they might don’t know how to use the YouTube Manager. If you happen to be one of them, check this article to get: Everything You Need to Know about YouTube Video Manager >>
Conclusion
The precise control over separate frames as well as set of frames, diverse OS support, and liberty to use a variety of editing features make Wondershare Filmora stand out among all other tools. But depending upon the suitability with respect to one’s available resources, any of the above tool will help you watch and edit YouTube video frame by frame.
Richard Bennett
Richard Bennett is a writer and a lover of all things video.
Follow @Richard Bennett
Richard Bennett
Mar 27, 2024• Proven solutions
It’s always a handy process to be able to move the frame one by one if you binge-watch YouTube videos. Be it as complex as time-lapse or as simple as makeup tutorial, viewing YouTube video frame-by-frame is never an underestimated process.
To be able to achieve this, you ought to master the methods to move frame-by-frame using a frame by a frame video editor or frame by the frame video player.
But this might make you wonder which one would be best for you?
Then here are some methods to move a video frame-by-frame that may come handy for you.
Option 1: Frame-By-Frame Editing and Watching Video Offline
If you are looking for how to edit frame by frame on YouTube or how to go frame by frame on YouTube then you may use a variety of offline applications.
Below are the 2 highlighting benefits of making use of offline video editors instead of online ones:
- You are not required to have a fast and smooth internet connection once the targeted video has been downloaded and will have full liberty to edit or video vide while staying offline.
- You are granted with the full editing facilities whilst staying offline. You can trim, cut or do any video alterations using offline video editors.
If you don’t know how to download a YouTube video easily and quickly, check this guide on How to Download YouTube Videos without Any Software .
Beneath are some of the efficient offline video editors you can work with for editing and viewing videos of YouTube frame by frame.
How to Go Frame by Frame in YouTube Video Using Filmora
Filmora is a great video editor designed for those who are interested in video editing but lack professional experience. It’s very easy to use. Filmora is free to download. You can choose version that is compatible with your operating system.
Compatibility: Windows and Mac
Step 1: Tap on “New Project”.
Step 2: In “project settings” select the desired ratio rate.
Step 3: You can import files by clicking the “import” tab or drag-drop the desired file to this tool.
Step 4: Drag the file to the timeline.
Step 5: You can separate frames from video by hovering the mouse over the first desired frame and complete it by hovering mouse all the way to the end of the frame.
Step 6: Perform editing operations.
Step 7: Save the file by clicking “export” by selecting the desired format under the “format” option and set parameters in “advanced settings” or directly upload the final product to YouTube.
How to Move Frame by Frame in YouTube Video Using Movie Maker
Compatibility: windows
This video editing tool gives you enough option to perform basic editing. With its timeline option, one can edit the videos frame-by-frame which can be performed as guided below:
Step 1: The first step is to download the desired YouTube video.
Step 2: Import that video to movie maker.
Step 3: You have the facility to skip the video frame-by-frame and can also edit it by selecting a specific portion from the timeline.
Step 4: Tap on “edit” beneath video tools after selecting the targeted portion.
Step 5: You will have numerous editing options like transition, add texts, split, music, etc. for each of the frames one by one.
You may also like: YouTube to WAV File: 4 Best Free Convert Solutions >>
How to Advance Frame by Frame in YouTube Video Using iMovie
Compatibility: Mac
This is a free editing tool with a bundle of editing features. The steps are given below:
Step 1: Click “file”, then “new project” followed by “create” option
Step 2: Click “Import” to import video
Step 3: Tap on “edit” followed by the “play head” option to segregate the desired portion of the video to edit.
Step 4: Now apply editing features on the portion of the video given in this tool
Step 5: Press “share” and “export” option once done with editing.
Option 2: Frame-By-Frame Advancement Using YouTube Player
Why even bother ourselves to get a third-party program for the purpose of moving a video frame-by-frame when the YouTube player provides you the same facility within itself. Following are the steps to guide you about how to skip frame by frame on YouTube by using YouTube frame by frame hotkey:
Step 1: Make the video pause.
Step 2: To answer the query regarding how to go frame by frame on YouTube editor, you can make use of 2 keys on the keyboard which are basically used as a shortcut process for the sake of forwarding video frame-by-frame.
You can press “<” in order to skip a frame backward or you could either use a comma as well for the same purpose. For moving the frame forwards, you need to press “>” key or a full stop key will serve you with the same operation.
This is how to move frame by frame on YouTube.
Option 3: Go Frame-By-Frame In YouTube Video Using Online Application
If your work requires intricate analysis of the video where you have to view the view very closely then you may make use of an online external application for this purpose.
The following are the steps to show you how to advance frame by frame on YouTube using this online tool.
Step 1: Into the URL bar of the browser, paste the link www.watchframebyframe.com there where you will be redirected to the online tool which has quite an easy interface with several controls provided built-in.
Step 2: Tap on “Enter Video URL” box and paste the copied URL of a targeted YouTube video
Step 3: The video will get loaded after hitting enter. At the bottom, buttons are given to control accordingly for skipping the frame forwards and backward respectively.
Step 4: You can also personalize the frame skipping setting with the option given beside the forwards and backward button where you can customize fps (frame per second) setting and also adjust the number of frames to be skipped upon clicking forwards and backward button.
An application granting such diverse options gives precise accuracy level which would help make the learning process easier and accurate.
Where Will Need to Go Frame by Frame on YouTube?
- Viewing time-lapse:
Capturing minor details in a video having time-lapse is such a complicated task. It often becomes harder even after slowing the video down. Therefore, a frame-by-frame view is the perfect yet only way out to this problem.
- Viewing how-to video:
The main purpose of a learning video is to get the sound and thorough details of the process and hence can be made not only possible but easier through frame-by-frame scrolling.
- Video sharing or editing:
Clean editing or cropping from a particular position is an intricate process and becomes easier to pause at the desired moment by frame-by-frame forwarding.
- Learning tutorial
Learning needs an in-depth and clear delivery of the content which is made easier by the feature of frame-by-frame skipping of the video.
YouTube studio is the basement for YouTubers to upload and track their videos. To some newbies, they might don’t know how to use the YouTube Manager. If you happen to be one of them, check this article to get: Everything You Need to Know about YouTube Video Manager >>
Conclusion
The precise control over separate frames as well as set of frames, diverse OS support, and liberty to use a variety of editing features make Wondershare Filmora stand out among all other tools. But depending upon the suitability with respect to one’s available resources, any of the above tool will help you watch and edit YouTube video frame by frame.
Richard Bennett
Richard Bennett is a writer and a lover of all things video.
Follow @Richard Bennett
Also read:
- [New] Boosting Visuals Mastering YouTube's Video Enhancement Tools
- Creative Music Videos A List of 15 YouTube Projects for 2024
- [Updated] Elevate Content Discovery The TubeBuddy Way
- 2024 Approved Cut Costs, Enhance Visuals – Free Banners for Video Makers
- Common Issues with YouTube Shorts Thumbnails
- In 2024, Connect with More Audiences Smart Multitasking on YouTube and Twitch
- Elevate Your Traffic Ethically YouTube's Best Practices for 2024
- Mastering YouTube's Prominent Channel Placement
- [New] Breaking Down the Process for YouTube Comment Highlights
- Create Identity A Quick Walkthrough of Customizing Your YouTube Url
- In 2024, Achieving Auditory Perfection Top Tips for Quality Audio
- [Updated] Dive Into Design Get a Complimentary Set of 50 Banner Pieces
- [New] Ceased Shorts Missing on YouTube Screen
- [New] Does Investing in Video Growth Pay Off on YT?
- [Updated] Countering Harshness Maintaining Poise Online
- Professional Movie Making on YouTube & Similar Software
- Exploring Alternatives to Buying Views for Authentic Audience Building
- Discovering and Dominating Unique Segments in YouTube
- Building a Fanbase with YouTube Streams
- Elite Yoga Routines YouTube's Leading Fitness Sites for 2024
- Top 8 Real-Time Strategies to Boost Viewership
- Elite 10 Audio Boosters for OS X, iOS, Android for 2024
- [New] Access Unlimited Stock Photos via Four Noteworthy YouTubes
- Top Viewership Archive YouTube Visionaries
- New Leading Audio-Modification Programs A Comprehensive Guide
- Thinking About Changing Your Netflix Region Without a VPN On Honor Magic V2? | Dr.fone
- [New] In 2024, Gastronomy Galore Cross-Country Foodie Favorites on TikTok
- In 2024, 3 Methods to Mirror Tecno Pop 7 Pro to Roku | Dr.fone
- In 2024, Unova Stone Pokémon Go Evolution List and How Catch Them For Motorola Moto E13 | Dr.fone
- 5 Ways to Restart Honor X50 Without Power Button | Dr.fone
- 2024 Approved The Compreayer's Resource for Optimal IO Screen Use
- Updated Locating the Dynamics of Whistling Audio
- In 2024, How to Transfer Contacts from Vivo S17t to iPhone XS/11 | Dr.fone
- [Updated] Effortless Screenshots on Dell - The Simple Way to Capture for 2024
- [Updated] 2024 Approved Next-Gen Recording IPhone/iPad Screens
- Unlock Your Disabled iPhone 12 Pro Without iTunes in 5 Ways
- [New] Mastering Discord's Profile Pics A Guide to Sizzling Pfps for 2024
- New Time-Lapse Video Editing Top Picks for Free and Paid Tools
- Updated Navigating the Modern Landscape of Live Audio Capturing for Streaming for 2024
- The Ultimate Guide to Choosing 5 Chrome Extensions for Facebook Videos for 2024
- Superior Visual Experience Ranking the Best 12 HTML5 Players
- [New] The Essential Guide to Streaming Quality via OBS, YouTube & Twitch for 2024
- How to get the dragon scale and evolution-enabled pokemon On Vivo V27 Pro? | Dr.fone
- 2024 Approved Essential Audio Setups for Personalized Mobile Soundscapes
- How To Change OnePlus Nord CE 3 Lite 5G Lock Screen Clock in Seconds
- How to Stop Google Chrome from Tracking Your Location On Honor X50? | Dr.fone
- In 2024, Two Ways to Track My Boyfriends Samsung Galaxy S23 without Him Knowing | Dr.fone
- How to Transfer Data After Switching From Lava Blaze 2 Pro to Latest Samsung | Dr.fone
- Title: YouTube's Creative Commons License Explained Simply
- Author: Brian
- Created at : 2024-05-25 13:29:33
- Updated at : 2024-05-26 13:29:33
- Link: https://youtube-video-recordings.techidaily.com/youtubes-creative-commons-license-explained-simply/
- License: This work is licensed under CC BY-NC-SA 4.0.
