
:max_bytes(150000):strip_icc()/ConnectedCarTech_metamorworks_GettyImages-966859036_CROPPED-a9460403602c4b67a7a8c1acd599c9be.jpg)
"YouTube Time Travel How to Flip Videos"
YouTube Time Travel: How to Flip Videos
Best YouTube Video Reverser Online

Richard Bennett
Mar 27, 2024• Proven solutions
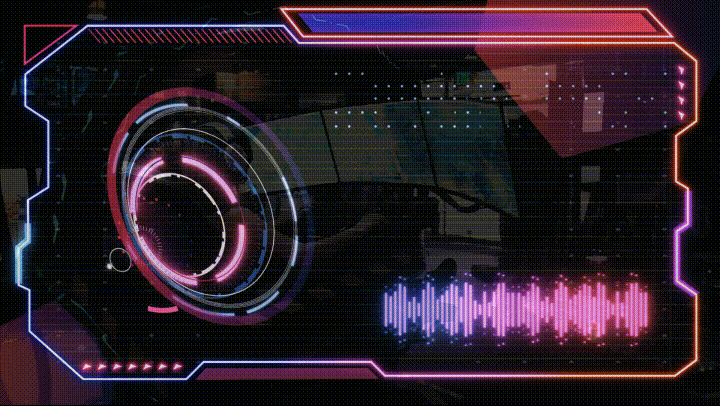
While working on the movies in a professional post-production environment, there might be instances where you want to reverse YouTube video to show flashback effect, or to replay a sequence so the audience can experience more thrills while watching.
With that said, not every media player or video editing application is capable enough to reverse a movie clip, not at least with merely a few mouse clicks. Therefore, the following sections suggest some such programs that can help you play YouTube video backward.
Part 1: Best Free YouTube Video Reversers Online
There are a few online web programs that are capable of reversing YouTube videos with efficiency. However, some of them may have certain restrictions like file size limit, number of supported formats, fewer or absolutely no editing options, etc.
Nevertheless, the best five online solutions to reverse YouTube video along with the process of using them are discussed below:
1. Clideo
Clideo is not merely a video reverser, but can also convert media files to your preferred format. You can paste the URL of a YouTube video to upload or import the videos from your computer, Dropbox or Google Drive storage. At the time of this writing, Clideo allows only up to 500MB videos to be uploaded to reverse or convert. As for the acceptability, the portal supports almost all the commonly used formats.

To play YouTube video backward with Clideo:
- Visit Clideo’s online reverse tool page: https://clideo.com/reverse-video ;
- Hover mouse over the down arrow icon next to the Choose file button and paste the URL of the YouTube video that you want to reverse;
- After Clideo fetches the video and opens the next page, choose your preferred speed from the right section
- Leave the Mute video box checked, or uncheck it if required and then click Reverse button to reverse YouTube video. The maximum reverse speed that you can apply is 2X.
2. Kapwing
This web solution also supports almost all types of video formats including 3GPP, AVI, MP4, etc. When talking about the limitations of a free user, you can only upload the videos that are up to 7 minutes long. At the time of this writing, Kapwing can accept the source files from your computer, and from the YouTube URL.

To reverse YouTube video with Kapwing:
- Go to Kapwing’s online video reverser page: https://www.kapwing.com/tools/reverse-video ;
- Paste the URL of the YouTube video in the Paste a URL field;
- Select your preferred playback speed of the reversed video from the Reverse speed section in the left pane;
- Choose whether or not Kapwing should mute the output video;
- Optionally, click Trim video from the upper-left corner of the right window to edit the footage if needed;
- Click CREATE from the bottom-left corner to play YouTube video backward. The maximum reverse speed that you can apply on Kapwing is also 2X.
3. EZGIF
With the ability to support almost all major video formats, and the capability to accept the media files of up to 100MB, Ezgif allows you to upload the footages from your PC, or paste their URL if they are published on YouTube. Even though the landing page has a few distracting adverts, the overall process to play YouTube video backward and save it to your PC is simple.

To reverse YouTube video with Ezgif:
- Go to the reverser tool page: https://ezgif.com/reverse-video and then paste the URL of the YouTube video in the available field;
- Click Upload video and optionally click the speed icon from the toolbar at the top;
- Use the checkboxes and input fields to mute the audio and adjust the playback speed as needed;
- Choose your preferred encoding method from the Output format and encoding drop-down list and then click Reverse video to reverse the video.
Note: It seems that you can’t customize the reverse speed on EZGif but you can choose to mute the reversed audio or not.
4. VideoReverser
Although this web solution has an extremely simple interface, the files that you can upload must not exceed 10MB in size. The portal supports formats like MPG, MPEG, MP4, AVI, M4V, 3GP, etc. for reversing. In addition to uploading the clips from your PC, VideoReverser also allows you to paste the URL of the footages if they are published on YouTube.

To play YouTube video backward with VideoReverser:
- Launch your favorite Internet browser, and then visit https://www.videoreverser.com/ ;
- Paste the URL of the YouTube video in the available text field;
- Choose your preferred output format from the Select output format drop-down list;
- Use the Remove audio track checkbox to get rid of the acoustics or leave the sound enabled;
- Click Start to reverse YouTube video.
5. Pixiko
With almost all formats’ support, Pixiko is yet another web-based media editor that can also reverse YouTube video with a few mouse clicks. At the time of this writing, Pixiko only accepts the source files from your PC, which means you can’t paste the YouTube link to it directly. At first, you need to download or save the YouTube video on computer and then either drag those clips from your local hard drive to the portal.

To play YouTube video backward with Pixiko:
- On the page https://pixiko.com/editor/video-reverse , click anywhere inside the Blue rectangle;
- Locate, select, and upload the downloaded YouTube source video from your PC;
- Click Reverse from the lower-right section of the video player window;
- Follow the on-screen instructions from there to manage and reverse YouTube video as needed;
Bonus: Reversing YouTube Video with Wondershare Filmora
With easily reachable editing options and self-explanatory buttons, Wondershare Filmora has gained a decent amount of popularity in the recent years. The program is available for both Windows and Mac platforms, and gives tough competition to other leading tools of the industry such as Adobe Premiere Pro, Final Cut Pro X, etc.
 Download Mac Version ](https://tools.techidaily.com/wondershare/filmora/download/ )
When talking about the playback speed, with the help of available presets, it can be increased or decreased by 100x or 0.01x respectively. One of the presets also enables you to reverse the direction of the playback quite easily, i.e. while keeping the speed intact. In addition, the ‘Custom Speed’ option lets you control the preferences more granularly.
You can follow the simple instructions given below to reverse YouTube video with Wondershare Filmora:
Note: To remain compliant with the terms and conditions, and to respect the copyright policies, Wondershare Filmora doesn’t allow you to download other people’s videos from YouTube. However, once you have a footage on your PC, you can jump to the following step-by-step process to reverse its playback.
1. Import the Source Video to the Timeline
Launch Wondershare Filmora on your Windows or Mac computer (Windows 10 here), making sure that the Media button in the standard toolbar at the top is selected, click inside the Media window, and select and import the YouTube source video to the program. Next, drag the YouTube video clip to the Timeline, and when the confirmation box appears, click the Match to Media or Keep Project Settings button as needed to get the footage to the Timeline.

2. Reverse the Video (Using the Preset)
Click and select the media clip in the Timeline, click the Speed icon present above the Timeline itself, and click the Reverse option from the menu that appears to reverse the video playback.
![]()
3. Reverse the Video (Manual Control)

Select the media clip in the Timeline and click the Speed icon as explained in the previous step. From the menu that appears, click Custom Speed this time. When the Custom Speed box appears, use the Speed slider to adjust the playback speed of the media clip, and check the Reverse box to reverse YouTube video. Optionally, you can also modify the Duration and Ripple options to customize the preferences. Finally, click OK to save the changes.
4. Export the Video or Upload to YouTube Directly
Back on the main window, click EXPORT from the top. Filmora provides several ways to saving and sharing the video.

You can select the Local tab, choose your preferred output format from the list in the left, in the right window, define a name and location for the file that you are about to export, and click EXPORT from the bottom-right corner to export the video with the reverse playback.

Or, go to the YouTube tab and sign in your YouTube account to upload the reversed video to YouTube directly. In the YouTube upload interface, you can optimize the YouTube SEO elements and revise the video title, description, category and tags.
Download Mac Version ](https://tools.techidaily.com/wondershare/filmora/download/ )
Conclusion
Even though the online video reversers are free and offer simple process to get the job done, the desktop programs like Wondershare Filmora offer more flexibility when it comes to making changes to the media clips, controlling the playback speed, adding effects, applying the modifications only to certain sections of the footage, selecting output preferences, etc. before you can reverse YouTube video.
Richard Bennett
Richard Bennett is a writer and a lover of all things video.
Follow @Richard Bennett
Richard Bennett
Mar 27, 2024• Proven solutions
While working on the movies in a professional post-production environment, there might be instances where you want to reverse YouTube video to show flashback effect, or to replay a sequence so the audience can experience more thrills while watching.
With that said, not every media player or video editing application is capable enough to reverse a movie clip, not at least with merely a few mouse clicks. Therefore, the following sections suggest some such programs that can help you play YouTube video backward.
Part 1: Best Free YouTube Video Reversers Online
There are a few online web programs that are capable of reversing YouTube videos with efficiency. However, some of them may have certain restrictions like file size limit, number of supported formats, fewer or absolutely no editing options, etc.
Nevertheless, the best five online solutions to reverse YouTube video along with the process of using them are discussed below:
1. Clideo
Clideo is not merely a video reverser, but can also convert media files to your preferred format. You can paste the URL of a YouTube video to upload or import the videos from your computer, Dropbox or Google Drive storage. At the time of this writing, Clideo allows only up to 500MB videos to be uploaded to reverse or convert. As for the acceptability, the portal supports almost all the commonly used formats.
To play YouTube video backward with Clideo:
- Visit Clideo’s online reverse tool page: https://clideo.com/reverse-video ;
- Hover mouse over the down arrow icon next to the Choose file button and paste the URL of the YouTube video that you want to reverse;
- After Clideo fetches the video and opens the next page, choose your preferred speed from the right section
- Leave the Mute video box checked, or uncheck it if required and then click Reverse button to reverse YouTube video. The maximum reverse speed that you can apply is 2X.
2. Kapwing
This web solution also supports almost all types of video formats including 3GPP, AVI, MP4, etc. When talking about the limitations of a free user, you can only upload the videos that are up to 7 minutes long. At the time of this writing, Kapwing can accept the source files from your computer, and from the YouTube URL.
To reverse YouTube video with Kapwing:
- Go to Kapwing’s online video reverser page: https://www.kapwing.com/tools/reverse-video ;
- Paste the URL of the YouTube video in the Paste a URL field;
- Select your preferred playback speed of the reversed video from the Reverse speed section in the left pane;
- Choose whether or not Kapwing should mute the output video;
- Optionally, click Trim video from the upper-left corner of the right window to edit the footage if needed;
- Click CREATE from the bottom-left corner to play YouTube video backward. The maximum reverse speed that you can apply on Kapwing is also 2X.
3. EZGIF
With the ability to support almost all major video formats, and the capability to accept the media files of up to 100MB, Ezgif allows you to upload the footages from your PC, or paste their URL if they are published on YouTube. Even though the landing page has a few distracting adverts, the overall process to play YouTube video backward and save it to your PC is simple.
To reverse YouTube video with Ezgif:
- Go to the reverser tool page: https://ezgif.com/reverse-video and then paste the URL of the YouTube video in the available field;
- Click Upload video and optionally click the speed icon from the toolbar at the top;
- Use the checkboxes and input fields to mute the audio and adjust the playback speed as needed;
- Choose your preferred encoding method from the Output format and encoding drop-down list and then click Reverse video to reverse the video.
Note: It seems that you can’t customize the reverse speed on EZGif but you can choose to mute the reversed audio or not.
4. VideoReverser
Although this web solution has an extremely simple interface, the files that you can upload must not exceed 10MB in size. The portal supports formats like MPG, MPEG, MP4, AVI, M4V, 3GP, etc. for reversing. In addition to uploading the clips from your PC, VideoReverser also allows you to paste the URL of the footages if they are published on YouTube.
To play YouTube video backward with VideoReverser:
- Launch your favorite Internet browser, and then visit https://www.videoreverser.com/ ;
- Paste the URL of the YouTube video in the available text field;
- Choose your preferred output format from the Select output format drop-down list;
- Use the Remove audio track checkbox to get rid of the acoustics or leave the sound enabled;
- Click Start to reverse YouTube video.
5. Pixiko
With almost all formats’ support, Pixiko is yet another web-based media editor that can also reverse YouTube video with a few mouse clicks. At the time of this writing, Pixiko only accepts the source files from your PC, which means you can’t paste the YouTube link to it directly. At first, you need to download or save the YouTube video on computer and then either drag those clips from your local hard drive to the portal.
To play YouTube video backward with Pixiko:
- On the page https://pixiko.com/editor/video-reverse , click anywhere inside the Blue rectangle;
- Locate, select, and upload the downloaded YouTube source video from your PC;
- Click Reverse from the lower-right section of the video player window;
- Follow the on-screen instructions from there to manage and reverse YouTube video as needed;
Bonus: Reversing YouTube Video with Wondershare Filmora
With easily reachable editing options and self-explanatory buttons, Wondershare Filmora has gained a decent amount of popularity in the recent years. The program is available for both Windows and Mac platforms, and gives tough competition to other leading tools of the industry such as Adobe Premiere Pro, Final Cut Pro X, etc.
Download Mac Version ](https://tools.techidaily.com/wondershare/filmora/download/ )
When talking about the playback speed, with the help of available presets, it can be increased or decreased by 100x or 0.01x respectively. One of the presets also enables you to reverse the direction of the playback quite easily, i.e. while keeping the speed intact. In addition, the ‘Custom Speed’ option lets you control the preferences more granularly.
You can follow the simple instructions given below to reverse YouTube video with Wondershare Filmora:
Note: To remain compliant with the terms and conditions, and to respect the copyright policies, Wondershare Filmora doesn’t allow you to download other people’s videos from YouTube. However, once you have a footage on your PC, you can jump to the following step-by-step process to reverse its playback.
1. Import the Source Video to the Timeline
Launch Wondershare Filmora on your Windows or Mac computer (Windows 10 here), making sure that the Media button in the standard toolbar at the top is selected, click inside the Media window, and select and import the YouTube source video to the program. Next, drag the YouTube video clip to the Timeline, and when the confirmation box appears, click the Match to Media or Keep Project Settings button as needed to get the footage to the Timeline.
2. Reverse the Video (Using the Preset)
Click and select the media clip in the Timeline, click the Speed icon present above the Timeline itself, and click the Reverse option from the menu that appears to reverse the video playback.
![]()
3. Reverse the Video (Manual Control)
Select the media clip in the Timeline and click the Speed icon as explained in the previous step. From the menu that appears, click Custom Speed this time. When the Custom Speed box appears, use the Speed slider to adjust the playback speed of the media clip, and check the Reverse box to reverse YouTube video. Optionally, you can also modify the Duration and Ripple options to customize the preferences. Finally, click OK to save the changes.
4. Export the Video or Upload to YouTube Directly
Back on the main window, click EXPORT from the top. Filmora provides several ways to saving and sharing the video.
You can select the Local tab, choose your preferred output format from the list in the left, in the right window, define a name and location for the file that you are about to export, and click EXPORT from the bottom-right corner to export the video with the reverse playback.
Or, go to the YouTube tab and sign in your YouTube account to upload the reversed video to YouTube directly. In the YouTube upload interface, you can optimize the YouTube SEO elements and revise the video title, description, category and tags.
Download Mac Version ](https://tools.techidaily.com/wondershare/filmora/download/ )
Conclusion
Even though the online video reversers are free and offer simple process to get the job done, the desktop programs like Wondershare Filmora offer more flexibility when it comes to making changes to the media clips, controlling the playback speed, adding effects, applying the modifications only to certain sections of the footage, selecting output preferences, etc. before you can reverse YouTube video.
Richard Bennett
Richard Bennett is a writer and a lover of all things video.
Follow @Richard Bennett
Channel Identity: Constructing Memorable Templates for Gamers
Gaming videos have become increasingly popular on YouTube, especially among young people. It is not uncommon for older folk to enjoy this type of content, especially if they want to unwind after a long day. However, the industry is becoming pretty crowded, making it harder for content creators to stand out from the crowd.
An excellent way to get your target audience to notice you would be to design a killer YouTube banner that will immediately cause anyone scrolling past to click on your video. Stick around to learn how to create a great gaming YouTube banner with templates.
Importance of a Banner for Your YouTube Gaming Channel
Imagine a scenario where you want to open a brick-and-mortar store. One of the most important things you need to get out of the way is the business name. Once you have settled on a fitting name, you will then move on to create a sign to place outside your shop.
For example, a banner for your YouTube gaming channel plays a similar role to signage for a brick-and-mortar shop.
- An excellent banner helps you make a solid first impression on your viewers, some of who is viewing your content for the first time.
- Secondly, a well-designed banner reflects positively on your brand and helps you grow your audience at a steady rate.
- Thirdly, you can use your banner to give your viewers a rough idea of what your video is about without them clicking to watch. A suitable banner can cause anticipation to build within your viewers. Once the video is over, they won’t resist visiting your channel to see what else you offer.
Guide to YouTube Gaming Banner Size
We can liken a banner for your YouTube video to a book cover to a novel you have been dying to read. Therefore, it would be wise to get the size right if you want to create an excellent first impression for yourself. Ideally, the best size for a YouTube banner is 2560*1440 pixels or an aspect ratio of 16:9.
We urge you not to upload a banner smaller than 2048*1152 pixels, or else the image will appear cropped. Keep your banner within 1235*338 pixels and centered on the screen to be on the safe side.
This YouTube banner dimension is ideal for viewing on any device since your audience might use their smartphones or laptop to watch your videos on YouTube. Lastly, ensure you keep the file to a maximum of 6MB. We believe this file size is pretty generous.
Tips for Designing an Attractive Gaming YouTube Banner
Below are some tips that will help you create beautiful YouTube banners.
Simplicity is key: Contrary to popular belief, a simple banner looks more polished than a complex one. If your YouTube banner has too many elements, your viewers using their mobile phones might have a challenge viewing the image.
Ensure the graphics are high-quality : Nothing is as frustrating to your viewers as seeing a blurry or pixelated YouTube banner. However, high-quality graphics with a resolution of at least 1920*1080 pixels make your work look polished and attract more viewers to your channel.
Leverage the grid system: Some of your viewers might watch your videos from their smartphones, and others on their laptops or tablets. The grid system allows you to ensure the full banner will be visible no matter what device your audience will use to watch your gaming videos.
Add a CTA: At the end of the day, you are trying to grow your audience on your YouTube channel. You might also have other social media platforms where you post content. Since your banner is one of the first things your audience will see, you could include a short, easy-to-read, and understandable call to action. For instance, you could encourage them to “Subscribe Now!”
Incorporate your unique color scheme: By now, you already have a theme for your YouTube channel that your existing subscribers associate with you. As you design your YouTube banner, ensure you incorporate your theme colors, so new visitors know what colors to look out for as they scroll on the platform.
Why Use Templates To Create Gaming YouTube Banners?
First and foremost, a gaming youtube banner template takes the tedium out of creating a design from scratch. They are also systematized, meaning you can download a template specifically for YouTube that comes in the correct dimensions. Most importantly, templates designed for gaming YouTube banners are optimized to help you generate more organic traffic to your channel.
You probably have other expenses breathing down your neck. No need to add your YouTube banner to the list. A youtube gaming channel banner template a budget-friendly way to create stunning designs for your banner that actually look good. If you are lucky, you might find free programs to help you create gorgeous YouTube banners for your gaming channel.
Make YouTube Gaming Banners With Templates in Filmora
Now that you understand why a gaming channel banner template is essential for your YouTube channel, you might wonder where you can find some good ones to incorporate into your videos. Don’t worry because Filmora is precisely what you need.
Wondershare Filmora has a fantastic template feature that helps you make creative videos effortlessly. You can use the preset templates in the platform, saving you lots of time you would have spent designing your template from scratch. We guarantee you cannot exhaust the 1000+ templates this platform offers, meaning you are spoilt for choice!
If you want to customize your video, you can replace the stock videos that come with the preset templates with footage from your internal storage. In addition, Wondershare Filmora lets you share your favorite templates with other content creators who would also like to try making their own cool videos.
Free Download For Win 7 or later(64-bit)
Free Download For macOS 10.14 or later
Below is a detailed step-by-step guide on how to make a gaming YouTuber banner template with Wondershare Filmora.
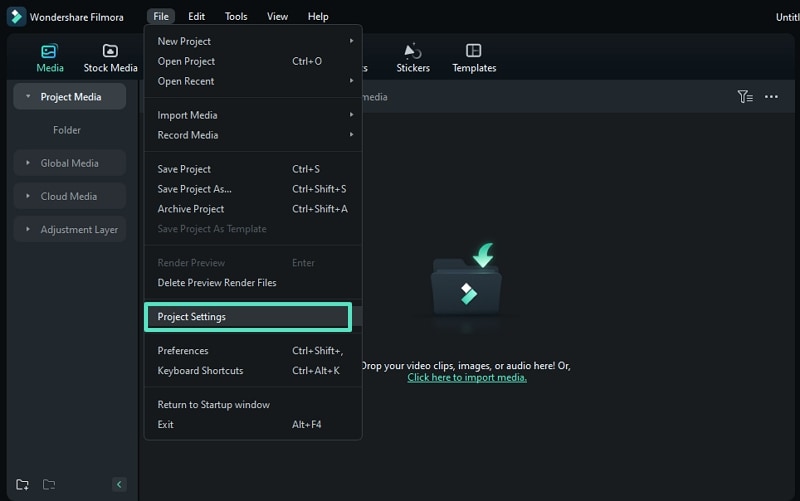
Step 1. After creating a project with Filmora, click on the “File” tab, wait for a drop-down menu to appear, and select “Project Settings.”
Step 2. Once a dialogue box appears, go to the “Resolution” tab and adjust the resolution to 2560*1140.
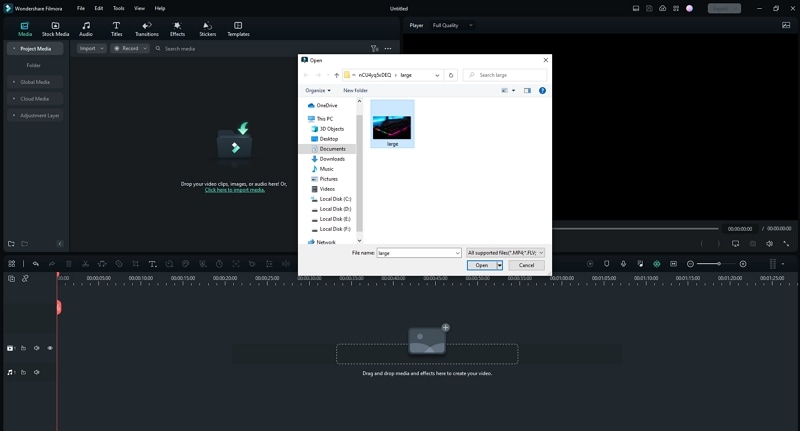
Step 3. Upload your footage or photo from your internal storage by clicking on the logo below.
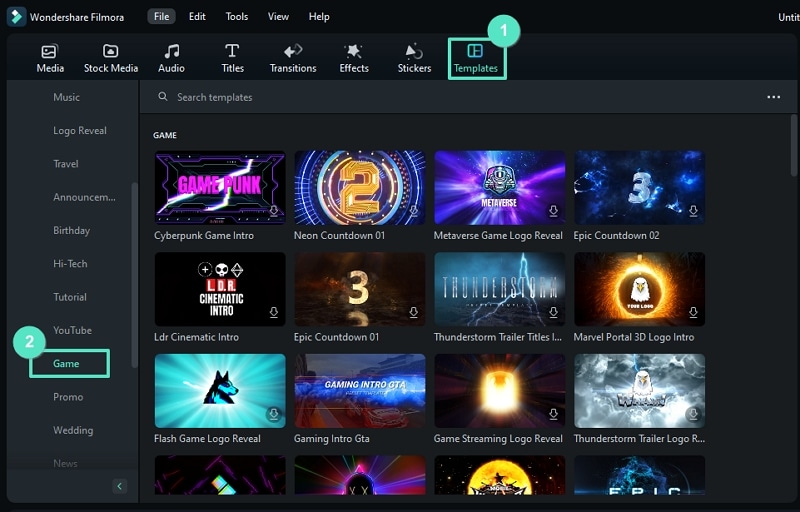
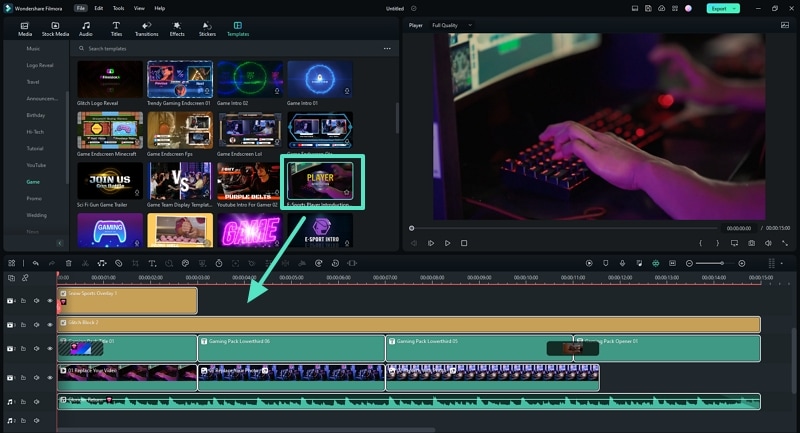
Step 4. Click on the “Template” tab at the top of the page and click “Game.” Browse the available templates till you see one you like.
Step 5. Drag and drop the template you have chosen to the timeline as shown below.
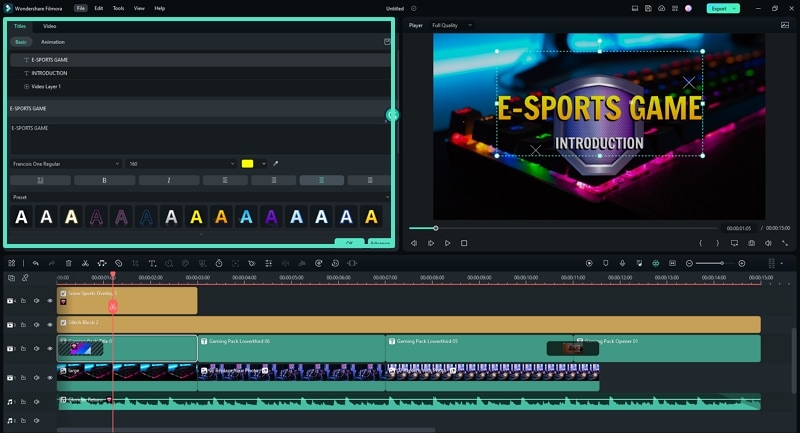
Step 6. Replace the sample footage in the template by dragging and dropping your own footage into the timeline.

Step 7. Customize the footage and change the settings until you are happy with the outcome. Edit the text using the tools provided in the platform.
Step 8. Take a screenshot of the final result.

Step 9. Specify the snapshot format and choose the storage location before saving a copy to your device.

Step 10. Once the snapshot appears in the Media Panel, right-click on it to open. Select “Reveal in Explorer” to locate the picture in your internal storage. You can now use the photo as your YouTube gaming banner.

5 Websites for Gaming Banner Templates Your YouTube
Wondershare Filmora is not the only platform you can use to create banner templates for your YouTube channel. Here is a list of 5 more websites you can try and a detailed breakdown of the remarkable features you are bound to enjoy.
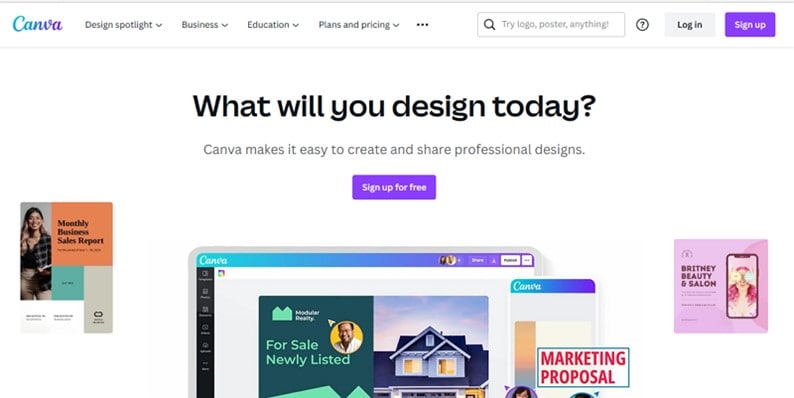
1. Canva
The first alternative to Filmora on our list is Canva, which has thousands of professional, ready-made designs to wow your audience. You can work alone or with a dedicated team to ensure you design only the best banner for your channel to attract the masses to the kind of content you create.
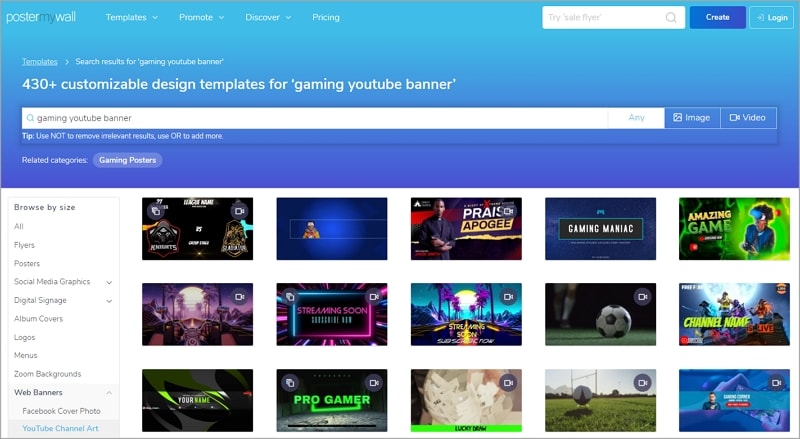
2. PosterMyWall
We couldn’t forget to include PosterMyWall to our list, which has pre-made templates you can customize to suit your needs. With PosterMyWall, you can save the time you could have used to design a banner from scratch to think of more content for your channel. The developers suggest various templates you might like, not to mention that you can sign up for free!
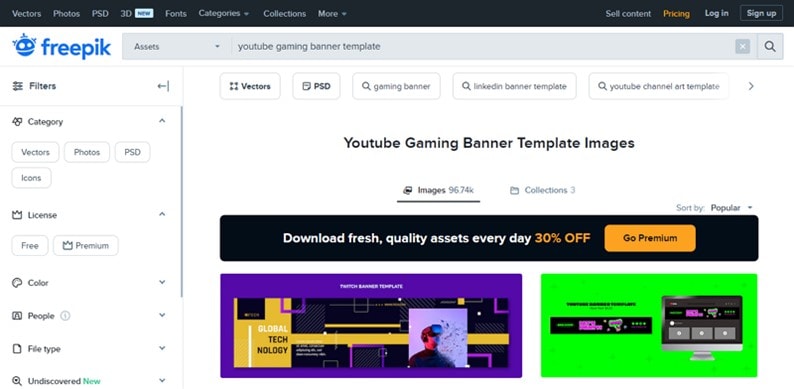
3. Freepik
Another suitable alternative to Filmora is Freepik. We guarantee you cannot exhaust all the numerous templates this platform offers. Each template is unique, with different color combinations and fonts to cater to the theme colors on your YouTube channel. You could opt for the free version or sign up for a Premium account and get 30% off.
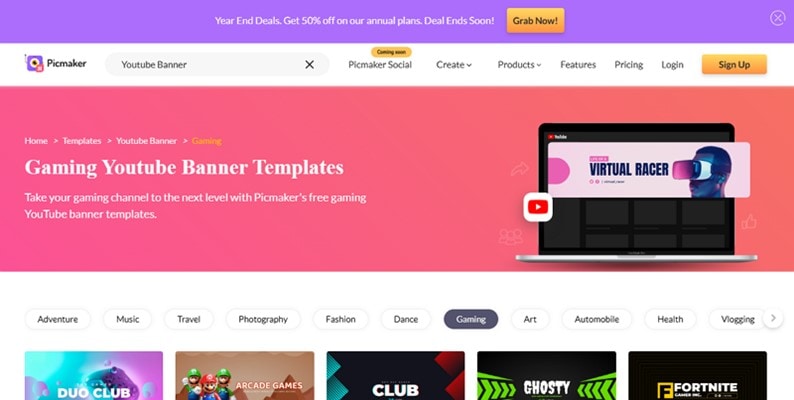
4. Pickmaker
The fourth alternative on our list is Pickmaker, a sure way to take your gaming channel to the next level. The templates are arranged in broad categories to help you pick the best one based on the type of content you post. In addition, you don’t have to part with your precious monies to start designing YouTube banners with Pickmaker.
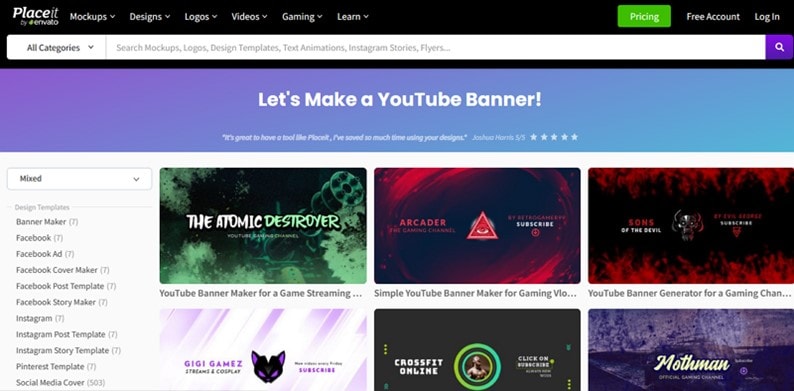
5. Placeit
Last but definitely not least is Placeit, which contains picturesque templates fitting for a gaming YouTube channel. We guarantee your audience won’t resist clicking on your videos once you use any of the templates within this platform. All you need to do is create a free account to enjoy the perks. Placeit makes your work easier by allowing you to indicate your favorite templates for use later.
Conclusion
Gaming content is far from boring, and neither should your banner. Remember, your audience will judge you based on your banner, the first content they interact with before they click to watch your video.
The better you can design your banner, the higher your chances of growing an audience that supports you by watching your content regularly. Once you have created an enticing banner, all that’s left is to ensure you have the content to match.
Free Download For macOS 10.14 or later
Below is a detailed step-by-step guide on how to make a gaming YouTuber banner template with Wondershare Filmora.
Step 1. After creating a project with Filmora, click on the “File” tab, wait for a drop-down menu to appear, and select “Project Settings.”
Step 2. Once a dialogue box appears, go to the “Resolution” tab and adjust the resolution to 2560*1140.
Step 3. Upload your footage or photo from your internal storage by clicking on the logo below.
Step 4. Click on the “Template” tab at the top of the page and click “Game.” Browse the available templates till you see one you like.
Step 5. Drag and drop the template you have chosen to the timeline as shown below.
Step 6. Replace the sample footage in the template by dragging and dropping your own footage into the timeline.
Step 7. Customize the footage and change the settings until you are happy with the outcome. Edit the text using the tools provided in the platform.
Step 8. Take a screenshot of the final result.
Step 9. Specify the snapshot format and choose the storage location before saving a copy to your device.
Step 10. Once the snapshot appears in the Media Panel, right-click on it to open. Select “Reveal in Explorer” to locate the picture in your internal storage. You can now use the photo as your YouTube gaming banner.
5 Websites for Gaming Banner Templates Your YouTube
Wondershare Filmora is not the only platform you can use to create banner templates for your YouTube channel. Here is a list of 5 more websites you can try and a detailed breakdown of the remarkable features you are bound to enjoy.
1. Canva
The first alternative to Filmora on our list is Canva, which has thousands of professional, ready-made designs to wow your audience. You can work alone or with a dedicated team to ensure you design only the best banner for your channel to attract the masses to the kind of content you create.
2. PosterMyWall
We couldn’t forget to include PosterMyWall to our list, which has pre-made templates you can customize to suit your needs. With PosterMyWall, you can save the time you could have used to design a banner from scratch to think of more content for your channel. The developers suggest various templates you might like, not to mention that you can sign up for free!
3. Freepik
Another suitable alternative to Filmora is Freepik. We guarantee you cannot exhaust all the numerous templates this platform offers. Each template is unique, with different color combinations and fonts to cater to the theme colors on your YouTube channel. You could opt for the free version or sign up for a Premium account and get 30% off.
4. Pickmaker
The fourth alternative on our list is Pickmaker, a sure way to take your gaming channel to the next level. The templates are arranged in broad categories to help you pick the best one based on the type of content you post. In addition, you don’t have to part with your precious monies to start designing YouTube banners with Pickmaker.
5. Placeit
Last but definitely not least is Placeit, which contains picturesque templates fitting for a gaming YouTube channel. We guarantee your audience won’t resist clicking on your videos once you use any of the templates within this platform. All you need to do is create a free account to enjoy the perks. Placeit makes your work easier by allowing you to indicate your favorite templates for use later.
Conclusion
Gaming content is far from boring, and neither should your banner. Remember, your audience will judge you based on your banner, the first content they interact with before they click to watch your video.
The better you can design your banner, the higher your chances of growing an audience that supports you by watching your content regularly. Once you have created an enticing banner, all that’s left is to ensure you have the content to match.
Also read:
- Bypassing Blackouts with Video Tips for 2024
- [New] Accelerate Thumbnail Designs for Professional Valorant Portraits
- Elevate Your Video Game with These 5 YouTube Thumbnail Builders for 2024
- 2024 Approved Alternative to YouTube for Video Lovers on iOS, Android
- [Updated] Cost-Effective Subscriber Growth - Hundreds at a Bargain Price
- Enhance Engagement Top 12 Tactics for YouTube Success
- Viral Verve Top 10 Music to Match Your Freshest YT Shorts
- Six Offbeat Sources for Customized Video Theme Elements
- 2024 Approved Crafting Stunning YouTubers' Imagery A Comprehensive Walkthrough
- Discovering the Secrets of ASMR Media for 2024
- [New] Easy Methods YouTube Shorts to High-Quality MP4
- Innovative Responses The Ultimate Guide to YouTube Reacts
- The Art of Warmth in Winter Top 5 Video Backdrop Choices
- Create Memorable Videos with the Right Thumbnail Font for 2024
- Harness Your View Count Cross-Platform Studio Methods
- In 2024, Backtrack with Flair Ingenious Ways to Watch Youtube Reverse
- [New] Aural Ascent Step-by-Step Guide to Audio Submission
- Elite 5 Earbuds YouTube's Best Companions
- In 2024, 10 Masterpieces in Job Market Insight
- 2024 Approved Dispelling Darkness, Enhancing Youtube Views
- In 2024, Discover the Best No-Cost Soundtracks for Video Production
- In 2024, 10 Must-Have Keyword Gurus for Video Success
- In 2024, Discovering Your YouTube Comments on Various Devices
- Steps for Controlling Video Comment Settings in YouTube
- In 2024, Cutting Through the Noise Optimal Thumbnail Sizes
- Revolutionize Your Music Playback with These High-Quality Free Audio Splits
- Elevate Your Online Video Quality Mastery in FinalCut for YouTube
- 2024 Approved Download YouTube Responsibly Legal MP4 Conversion Methods
- [Updated] Amplify Your Earnings Universal Strategies for YouTube Revenue
- In 2024, Cutting Edge Creativity Choosing High-Quality Camera Lenses
- 2024 Approved Crafting YouTube Entrance Videos with the Top Tools
- In 2024, A Peek Into Popularity List of the Top 10 YouTubers
- Path to YouTube Prosperity Unlocking Monetization with 500+ Views
- 2024 Approved Converting Your Twitch Showcase Into a YouTube Hit
- Avoid Monetization Mishaps Essential YouTube Checks for 2024
- In 2024, Channel Transformation with Strategic Use of YouTube Outros
- [New] Best 10 Screen Recorders for YouTube
- 2024 Approved Breakdown of Mr. Beast's Financial Powerhouse
- Instantly Professional Masterful Thumbnails Created Fast!
- In 2024, Clip Curator Platform
- In 2024, Boosting Engagement Perfect Time-Stamping Techniques for Videos
- Essential Elements for Implementing Channel Banners in Games
- Maximize Visibility A Guide to Constructing YouTube Backlinks
- Turning the Tide Top 10 Reasons for Non-Existent YouTube Views & Solutions
- The 17 Best Video Equipment for Shining on Screen
- Real-Time Trends Hourly Top 10 YouTube Pickers
- [Updated] Contrasting YouTube's Ownership Norms with CC Ideals
- Make Sense of iPhone Video Repetition Tech
- 2024 Approved Digital Cinematographer Hub
- [Updated] In 2024, Getting Acquainted with Zoom Segregated Sessions
- 2024 Approved Sony Vegas Audio Editor A Step-by-Step Tutorial for Professionals
- Impeccable Photo Editing Using the Virtual Background Effect on Instagram
- How to Hard Reset Vivo Y100t Without Password | Dr.fone
- Capture and Save FB Videos on Windows, Mac for 2024
- Fix the Error of Unfortunately the Process.com.android.phone Has Stopped on Xiaomi Redmi A2+ | Dr.fone
- 2024 Approved Top 8 Free and Premium Tools to Enhance Your Logic Pro X Experience
- New Essential Auditory Backtracking Applications The Best Software Selection for 2024
- Updated Windows 10 Video Editing Software Best iMovie Alternatives
- In 2024, Resolve Your iPhone XS Keeps Asking for Outlook Password | Dr.fone
- In 2024, 4 Feasible Ways to Fake Location on Facebook For your Motorola Moto G Stylus (2023) | Dr.fone
- [New] 2023'S Ultimate Toolwiz Photo Suite Analysis
- Step-by-Step Utilizing Aiseesoft for Video Captures
- [New] 2024 Approved The Straightforward Pathway for TikTok to Facebook
- [Updated] Integrating OBS Studio for Optimal Android Performance
- How to Fix Android.Process.Media Has Stopped on Nokia C12 Pro | Dr.fone
- Elevate Your TikTok Game Innovative Username Ideas for Growth for 2024
- 2024 Approved Microsoft Screen Recorder Download and Use Guide
- [New] VideoPilot Social Networks to Files
- [New] In 2024, Mastering PS4 Game Capture via OBS Studio
- How to Fix Realme GT 5 Find My Friends No Location Found? | Dr.fone
- [New] In 2024, Your Guide to The Most Hilarious, Tear-Jerking IG Memes
- [New] Mastering Aspect Ratio Compliance in Micro-Video Tweets for 2024
- [New] Giggle Gazette This Week's Funniest TikTok Stars for 2024
- Unlock Oppo Reno 11F 5G Phone Password Without Factory Reset Full Guide Here
- How to Rescue Lost Music from Realme GT 5
- [Updated] The Ultimate Playlist TikTok Hits that Stick in Your Memory
- Maximizing Your Social Reach Top 30 Out-of-the-Box TikTok Nicknames
- New Best 7 Whiteboard Explainer Videos to Inspire You
- [Updated] In 2024, Savvy Screens #10 Best Tools for Live Recording
- Wondering the Best Alternative to Hola On Realme C53? Here Is the Answer | Dr.fone
- Top 4 SIM Location Trackers To Easily Find Your Lost Poco C65 Device
- [New] 2024 Approved ClearShot Capture High-Quality Windows/Mac Imaging
- How to Detect and Remove Spyware on OnePlus Nord N30 5G? | Dr.fone
- Planning to Use a Pokemon Go Joystick on Samsung Galaxy F04? | Dr.fone
- Reduce MPEG2 File Size A Guide to Using VirtualDub for 2024
- Title: "YouTube Time Travel How to Flip Videos"
- Author: Brian
- Created at : 2024-05-25 13:29:12
- Updated at : 2024-05-26 13:29:12
- Link: https://youtube-video-recordings.techidaily.com/youtube-time-travel-how-to-flip-videos/
- License: This work is licensed under CC BY-NC-SA 4.0.
