
![[Updated] Essential Techniques for Designing YouTube Video Thumbnails](https://www.lifewire.com/thmb/PMVQJXnIFRUNfZBHZ5eU9JJ7-Ow=/400x300/filters:no_upscale():max_bytes(150000):strip_icc()/bestcarapps-5c06e60d46e0fb000125f08a.jpg)
[Updated] Essential Techniques for Designing YouTube Video Thumbnails
Essential Techniques for Designing YouTube Video Thumbnails
Best YouTube Thumbnail Size: How to Make a Thumbnail for YouTube in 2024

Benjamin Arango
Mar 27, 2024• Proven solutions
You must have heard the phrase, Never judge a book by its cover. But actually, we do judge everything by its cover. The same is the case with Youtube videos. No matter how good the content of your video is if you are unable to convey that with the thumbnail of your video, it will not bring any good to your channel. If you are looking forward to growing your channel and attracting more viewers, then having an appealing and eye-catching thumbnail is one of the most important factors. There are several things to be considered while creating a custom thumbnail if you want to make your videos look stunning and engaging. By following all these points, you can increase the chances of your channel’s growth.
In this article, we have 5 chapters for you:
- Best YouTube Thumbnail Size
- How Important is a Custom Thumbnail?
- Best Practices From Experiences
- How to Make a Fortnite Thumbnail
- How to Add a Custom Thumbnail to Your Video
Best YouTube Thumbnail Size
Being a content creator, you never know which device is being used by the viewer to watch your videos. It can be a smartphone, laptop, pc, or smart TV. It is very important to keep all these devices in mind while choosing a Youtube thumbnail size. For the best possible results, consider the following points while making a thumbnail for your Youtube videos.
- To cover all the devices perfectly, set the thumbnail resolution to 1280x720
- Save the thumbnail in JPG, GIF, or PNG format
- Try not to cross the 2MB limit
- Make sure to use a 16:9 aspect ratio for perfect results throughout the devices

How Important is a Custom Thumbnail?
Custom Thumbnail is a tool through which the viewers can understand everything about a video. It tells the viewers what to expect from a video, what not to expect, and what the video is all about. no matter if you create amazing content, if the thumbnail is not good enough to covey that to the viewers, all your hard work will be of no use and will not bring any good to your channel and its growth. According to Google ,90% of best-performing videos have custom thumbnails. It shows the importance of custom thumbnails.

Best Practice From Experiences
Now, since we know the importance of having a custom thumbnail, it is important to know how to make a thumbnail for Youtube look perfect, appealing, and eye-catching at the same time. There are some points to be considered while creating a thumbnail for Youtube. We will provide you with the best practices that we have learned throughout our journey of using Youtube and growing it from zero.
7 best practices can help you make your Youtube thumbnail stand out from the crowd and make its way out.
In a world full of machines and computers, people love to listen and interact with people instead of computer-generated voices and a voice without a face. Showing your face on a Youtube thumbnail makes it more appealing to users to click and listen to the person who is being shown in the thumbnail. Humans are more inclined towards faces. When there is a human element in a video, it increases its effectiveness. Check out the pics below, which one are you most likely to click through?

With your face, it is necessary to put some text on your Youtube thumbnail to let viewers know what this video is all about without clicking or watching it. Don’t use fancy fonts on Youtube thumbnail. It makes it hard for the viewers to read and understand what to expect in the video, especially for those watching YouTube on their 5 inches screen smartphone, ultimately decreasing the chances of your video being clicked and watched. I personally recommend you to use give these fonts a go while making YouTube thumbnail.

If you have ever noticed, Youtube thumbnails are very small in size, making it hard for viewers to notice any small elements. According to YouTube , more than 70% of Youtube watch time comes from mobile devices. While adding text in a thumbnail, instead of using sentences, make sure to use only words and make them large in size that can easily be noticed on small screens. Summurise your video in no more than 5 words.


When we navigate to a Youtube thumbnail and place the cursor on it, it shows us two icons, “Watch Later” and “Add to Queue,” located on its right size. Come on, you don’t want your beautiful thumbnail that cost you a few hours be covered. To avoid these icons from hiding your important stuff of thumbnail, make sure to put everything on the right side of your thumbnail.

Try to make all your thumbnails follow the same style. Following the same style for all your Youtube thumbnails will make your channel look unique and all your videos identical. It will be easy for viewers to identify your videos when they see them. It gives your channel a touch of its unique brand.

To make your Youtube thumbnail more appealing to the viewers, add circles and arrows to grab viewers’ attention to something very important in the video. It will increase the curiosity in the viewers and make them click your videos to learn more.

This whole process seems to be very hectic and time taking, but do you know, you can do everything on just one software? There is no need to edit a video in a different software then make a thumbnail in another software. With Filmora X, you can perform all these tasks on a single platform with so many amazing features. Whether you want to remove the background of your image or add attractive titles to it, Filmora X has got you covered.
It is one of the old tricks that so many people on Youtube use. It undoubtedly brings you clicks and more views, but once the viewer realizes that you have used irrelevant pictures or texts to attract them**. I**n reality, your video doesn’t contain any information related to it, you are going to lose their trust. They are never going to click on your videos again. Even if you don’t use such a trick anymore. Try to avoid such activities. Avoiding such activities can make your channel grow in the long term. Only use the text and images that are relevant to your content and stick to that.
Do you know that Youtube can show a 3-second preview of your video when someone hovers the cursor over it? It is one of the best ways to show the viewers the content of your video even when they don’t click on your video. These three seconds will help them decide whether to click on your video or not. This preview is selected by the system from the first half of your video according to its relevance and similarity with the topic. That’s why it is very important to add related information in the first half of the video, otherwise, Youtube will choose it randomly. If the preview is not selected for two days, it means your video is not eligible for it.

How to Make a Fortnite Thumbnail Super Fast and Free?
Many of you might be interested in how to make a fortnite thumbnail, so here it is. To make a Fortnite thumbnail for free, we are going to use Filmora X. Filmora X contains all kinds of features and elements that are required for a perfect and eye-catching thumbnail. To get started, make sure to download and install the latest version of Filmora X.
- Before we start making Fortnite Thumbnails, we have to take a screenshot of the gameplay. Open Fortnite and go to the Career tab. Here you will find Replays.

- It contains all your recent gameplays. We can use it to take a screenshot. If you are using a console, you will find 10 recent gameplays here. But if you are a PC user, you can find the last 100 gameplays. Select the gameplay you want to take a screenshot from.

- For our preferred angle, choose “Drone Free Camera” mode from the bottom right corner of the screen. It will allow us to use our preferred angle without any restriction. Choose an angle and take a screenshot.

- Open Filmora X, make sure to select the 16:9 screen ratio. Import the screenshot that you have taken from Fortnite.

- Place it into the timeline to start working on it.

- Now to separate the character from the background, go to the Effects. Under effects, you can find a tab named AI Portraits. Click on AI Portrait. Now drag the Human Segmentation and drop it on the screenshot in the timeline.

- It will ask you to purchase it. But there is no need to do that. Just hit Try It.

- This effect will remove the background of your screenshot.

- Now you can add a background of your choice. You can upload an image or choose a simple color from Filmora’s Media tab and drag it below the screenshot in the timeline.

- To add text to the screenshot, go to Titles. Here you can find a wide range of different and unique titles to choose from for your Fortnite Thumbnail. Choose any of the titles and place them accordingly.

- To make it more attractive, we can add icons and other elements from Filmora’s Element tab. You can also download the stickers from the internet and use them.

- After completing the thumbnail, click on the Snapshot icon located below the preview tab of Filmora. Or press “CTRL+ALT+S”. It will save a screenshot into the media panel of Filmora.

- Right-click on the screenshot and navigate to “Reveal in Explorer”. It will open the folder that contains all the screenshots taken from Filmora. Now you can use it as a Fortnite Thumbnail.

How to Add a Custom YouTube Thumbnail to Your Video in YouTube
Once you have successfully created a custom thumbnail, you can use it in your videos on Youtube.
- Open Youtube Studio and upload your video. While uploading the video, you can see a section named “Thumbnail”. Under this section, click on “Upload Thumbnail”.

- Select the thumbnail that you have made. Just like the one Fortnite thumbnail that we have created using Filmora X.

- The thumbnail will be uploaded and attached to the video. Now you can process all the settings and publish the video.

Conclusion
Thumbnail is the first thing that helps the viewer decide whether to click on a video or ignore it. Which increases the importance of having a well-structured and attractive thumbnail. By following the above guide, you can make an astonishing and clickable thumbnail in no time. For better and quick results, we recommend you using Filmora X. It allows you to perform all the tasks from video editing to thumbnail creation on a single platform.


Benjamin Arango
Benjamin Arango is a writer and a lover of all things video.
Follow @Benjamin Arango
Benjamin Arango
Mar 27, 2024• Proven solutions
You must have heard the phrase, Never judge a book by its cover. But actually, we do judge everything by its cover. The same is the case with Youtube videos. No matter how good the content of your video is if you are unable to convey that with the thumbnail of your video, it will not bring any good to your channel. If you are looking forward to growing your channel and attracting more viewers, then having an appealing and eye-catching thumbnail is one of the most important factors. There are several things to be considered while creating a custom thumbnail if you want to make your videos look stunning and engaging. By following all these points, you can increase the chances of your channel’s growth.
In this article, we have 5 chapters for you:
- Best YouTube Thumbnail Size
- How Important is a Custom Thumbnail?
- Best Practices From Experiences
- How to Make a Fortnite Thumbnail
- How to Add a Custom Thumbnail to Your Video
Best YouTube Thumbnail Size
Being a content creator, you never know which device is being used by the viewer to watch your videos. It can be a smartphone, laptop, pc, or smart TV. It is very important to keep all these devices in mind while choosing a Youtube thumbnail size. For the best possible results, consider the following points while making a thumbnail for your Youtube videos.
- To cover all the devices perfectly, set the thumbnail resolution to 1280x720
- Save the thumbnail in JPG, GIF, or PNG format
- Try not to cross the 2MB limit
- Make sure to use a 16:9 aspect ratio for perfect results throughout the devices
How Important is a Custom Thumbnail?
Custom Thumbnail is a tool through which the viewers can understand everything about a video. It tells the viewers what to expect from a video, what not to expect, and what the video is all about. no matter if you create amazing content, if the thumbnail is not good enough to covey that to the viewers, all your hard work will be of no use and will not bring any good to your channel and its growth. According to Google ,90% of best-performing videos have custom thumbnails. It shows the importance of custom thumbnails.
Best Practice From Experiences
Now, since we know the importance of having a custom thumbnail, it is important to know how to make a thumbnail for Youtube look perfect, appealing, and eye-catching at the same time. There are some points to be considered while creating a thumbnail for Youtube. We will provide you with the best practices that we have learned throughout our journey of using Youtube and growing it from zero.
7 best practices can help you make your Youtube thumbnail stand out from the crowd and make its way out.
In a world full of machines and computers, people love to listen and interact with people instead of computer-generated voices and a voice without a face. Showing your face on a Youtube thumbnail makes it more appealing to users to click and listen to the person who is being shown in the thumbnail. Humans are more inclined towards faces. When there is a human element in a video, it increases its effectiveness. Check out the pics below, which one are you most likely to click through?
With your face, it is necessary to put some text on your Youtube thumbnail to let viewers know what this video is all about without clicking or watching it. Don’t use fancy fonts on Youtube thumbnail. It makes it hard for the viewers to read and understand what to expect in the video, especially for those watching YouTube on their 5 inches screen smartphone, ultimately decreasing the chances of your video being clicked and watched. I personally recommend you to use give these fonts a go while making YouTube thumbnail.
If you have ever noticed, Youtube thumbnails are very small in size, making it hard for viewers to notice any small elements. According to YouTube , more than 70% of Youtube watch time comes from mobile devices. While adding text in a thumbnail, instead of using sentences, make sure to use only words and make them large in size that can easily be noticed on small screens. Summurise your video in no more than 5 words.
When we navigate to a Youtube thumbnail and place the cursor on it, it shows us two icons, “Watch Later” and “Add to Queue,” located on its right size. Come on, you don’t want your beautiful thumbnail that cost you a few hours be covered. To avoid these icons from hiding your important stuff of thumbnail, make sure to put everything on the right side of your thumbnail.
Try to make all your thumbnails follow the same style. Following the same style for all your Youtube thumbnails will make your channel look unique and all your videos identical. It will be easy for viewers to identify your videos when they see them. It gives your channel a touch of its unique brand.
To make your Youtube thumbnail more appealing to the viewers, add circles and arrows to grab viewers’ attention to something very important in the video. It will increase the curiosity in the viewers and make them click your videos to learn more.
This whole process seems to be very hectic and time taking, but do you know, you can do everything on just one software? There is no need to edit a video in a different software then make a thumbnail in another software. With Filmora X, you can perform all these tasks on a single platform with so many amazing features. Whether you want to remove the background of your image or add attractive titles to it, Filmora X has got you covered.
It is one of the old tricks that so many people on Youtube use. It undoubtedly brings you clicks and more views, but once the viewer realizes that you have used irrelevant pictures or texts to attract them**. I**n reality, your video doesn’t contain any information related to it, you are going to lose their trust. They are never going to click on your videos again. Even if you don’t use such a trick anymore. Try to avoid such activities. Avoiding such activities can make your channel grow in the long term. Only use the text and images that are relevant to your content and stick to that.
Do you know that Youtube can show a 3-second preview of your video when someone hovers the cursor over it? It is one of the best ways to show the viewers the content of your video even when they don’t click on your video. These three seconds will help them decide whether to click on your video or not. This preview is selected by the system from the first half of your video according to its relevance and similarity with the topic. That’s why it is very important to add related information in the first half of the video, otherwise, Youtube will choose it randomly. If the preview is not selected for two days, it means your video is not eligible for it.
How to Make a Fortnite Thumbnail Super Fast and Free?
Many of you might be interested in how to make a fortnite thumbnail, so here it is. To make a Fortnite thumbnail for free, we are going to use Filmora X. Filmora X contains all kinds of features and elements that are required for a perfect and eye-catching thumbnail. To get started, make sure to download and install the latest version of Filmora X.
- Before we start making Fortnite Thumbnails, we have to take a screenshot of the gameplay. Open Fortnite and go to the Career tab. Here you will find Replays.
- It contains all your recent gameplays. We can use it to take a screenshot. If you are using a console, you will find 10 recent gameplays here. But if you are a PC user, you can find the last 100 gameplays. Select the gameplay you want to take a screenshot from.
- For our preferred angle, choose “Drone Free Camera” mode from the bottom right corner of the screen. It will allow us to use our preferred angle without any restriction. Choose an angle and take a screenshot.
- Open Filmora X, make sure to select the 16:9 screen ratio. Import the screenshot that you have taken from Fortnite.
- Place it into the timeline to start working on it.
- Now to separate the character from the background, go to the Effects. Under effects, you can find a tab named AI Portraits. Click on AI Portrait. Now drag the Human Segmentation and drop it on the screenshot in the timeline.
- It will ask you to purchase it. But there is no need to do that. Just hit Try It.
- This effect will remove the background of your screenshot.
- Now you can add a background of your choice. You can upload an image or choose a simple color from Filmora’s Media tab and drag it below the screenshot in the timeline.
- To add text to the screenshot, go to Titles. Here you can find a wide range of different and unique titles to choose from for your Fortnite Thumbnail. Choose any of the titles and place them accordingly.
- To make it more attractive, we can add icons and other elements from Filmora’s Element tab. You can also download the stickers from the internet and use them.
- After completing the thumbnail, click on the Snapshot icon located below the preview tab of Filmora. Or press “CTRL+ALT+S”. It will save a screenshot into the media panel of Filmora.
- Right-click on the screenshot and navigate to “Reveal in Explorer”. It will open the folder that contains all the screenshots taken from Filmora. Now you can use it as a Fortnite Thumbnail.
How to Add a Custom YouTube Thumbnail to Your Video in YouTube
Once you have successfully created a custom thumbnail, you can use it in your videos on Youtube.
- Open Youtube Studio and upload your video. While uploading the video, you can see a section named “Thumbnail”. Under this section, click on “Upload Thumbnail”.
- Select the thumbnail that you have made. Just like the one Fortnite thumbnail that we have created using Filmora X.
- The thumbnail will be uploaded and attached to the video. Now you can process all the settings and publish the video.
Conclusion
Thumbnail is the first thing that helps the viewer decide whether to click on a video or ignore it. Which increases the importance of having a well-structured and attractive thumbnail. By following the above guide, you can make an astonishing and clickable thumbnail in no time. For better and quick results, we recommend you using Filmora X. It allows you to perform all the tasks from video editing to thumbnail creation on a single platform.
Benjamin Arango
Benjamin Arango is a writer and a lover of all things video.
Follow @Benjamin Arango
Synchronized Screenscape: TV Loops of Online Media
Loop is a YouTube video format that allows viewers to watch a continuous sequence of videos. Loop is similar to traditional YouTube videos, but it can be played on a TV screen like a traditional TV show. Loop is a great way to keep viewers engaged with your content. It’s like a one-stop shop for all your content needs. You can use it to promote your latest video series.
Why looping YouTube videos on a TV is a great idea? First, it can be a fun way to watch your favorite videos without having to worry about the time. Second, it can be a way to save money on your cable. By watching your favorite videos on loop, you can cut down on the number of times you need to watch them.
If you are watching a series of videos, for example, looping them can help you to remember what happened in each one. Secondly, it can help you to learn new information more easily. If you are watching a tutorial or a video about a new topic, looping can help you to remember the details better.
Free Download For Win 7 or later(64-bit)
Free Download For macOS 10.14 or later


Part 1: How to Create a Loop Video for YouTube
There is a lot of debate around whether or not creating a loop video is necessary for success on YouTube. Some people believe that it’s not necessary, while others believe that it is a must. The main benefit of creating a loop video is that it helps to keep your audience engaged. It also helps to create a sense of continuity between your videos.
Creating a loop video for your YouTube channel increases engagement because viewers can watch the video over and over again. This can lead to more clicks on your ads, which can lead to more revenue. It can also increase your subscribers and views. Maybe some people want to watch the same video multiple times in a row without having to keep pressing the play button on the remote.
Filmora is the best video loop editor:
If you need a powerful video editing tool that will let you create high-quality clips with multiple loops, look no further than Filmora . This software allows you to make various loops of your videos for use in social media, on your website or wherever desired. Plus, with Filmora, there is no limit on the number of loops you can create.
Loop video works well for corporate presentations, tutorials, explainer videos, and much more. You can create looping videos by choosing from one of Filmora’s many templates or creating your own. It’s easy to get started with looping video editing in Filmora! Some people want to watch a video while they do other things, like work on the computer.
Filmora is incredibly easy to use. You can quickly create videos by importing footage, editing and adding effects, and exporting your videos. Plus, the software has several built-in tools that let you customize your videos further. It has many features that make it an excellent choice for anyone looking to create high-quality videos quickly and easily.
How can we loop a video on Filmora? Follow these steps to create a looping video on Filmora:
Step 1 Download the Filmora and create a project
Free Download For Win 7 or later(64-bit)
Free Download For macOS 10.14 or later
You can download the Filmora for free. After installation of this software open it and click on Create New Project. Filmora is not only the video maker or editor, you can also add text and music to your videos, and share them on social media or with friends.

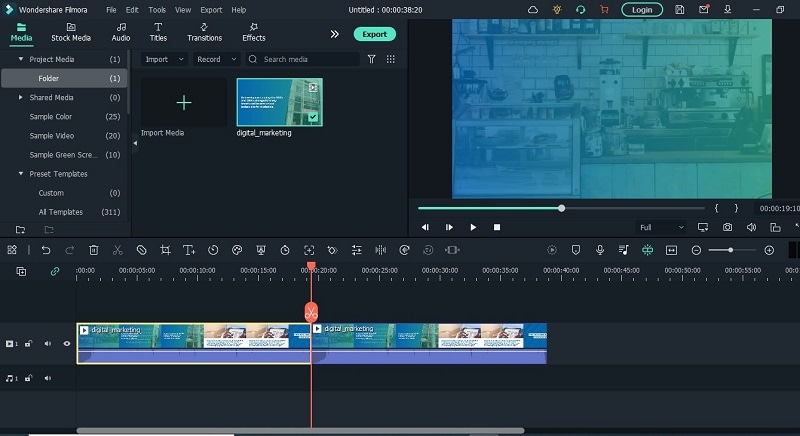
Step 2 Open the video and make copies
Open the video in your timeline. All you need to do is right-click on the video and click on copy. Then simply click or press Ctrl+V on your keyboard and do that for times. You can make as many copies as you want. Then you will have the same clip over and over again which creates the loop effect.
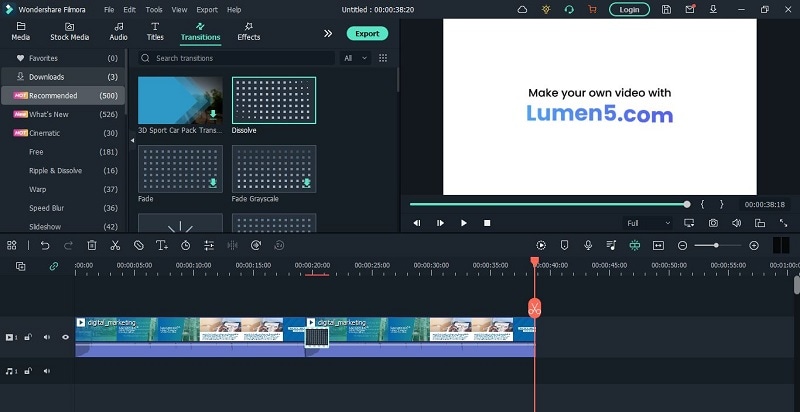
Step 3 Add Transition or any title in the video
After making copies of your video. Add some transitions in your video. Adding transitions to videos can help to keep your videos looking polished and professional. Not only do transitions add an extra layer of visual interest, but they can also help to underscore specific points in your video.
Benefits to create loop video on Filmora
There are many benefits to creating looping videos, especially when using a tool like Filmora. Loop videos are great for social media since they can be set to play on a loop and are viewable without sound. They’re also perfect for short attention spans since you can watch them over and over again without getting bored.
This can be useful for marketing purposes, as it can keep people interested in your video content. Additionally, looping can create a more engaging video experience for viewers, as it keeps them engaged by playing the same clip over and over again. You can easily add captions, and titles to your loop video.
When viewers can pause, rewind, and playback a video over and over again, they are more engaged with it. This increases the chances that they will watch the entire video, and may even share it with friends. You can create a sense of community and connection with your customers. And best of all? You can keep the magic going by adding sound effects and music!
Part 2: Loop a YouTube Video on TV from a Mobile
One of the great features of YouTube is that you can loop YouTube videos on your TV. This means that you can watch a video over and over again without having to fast forward through it. This is great for kids who are constantly asking to watch the same video over and over again. You can also use this feature to watch videos that you have missed.
There is something about relaxing music on the loop that can help to take the edge off. Whether it’s to help you wind down before bed, or to help you relax after a long day, there’s no doubt that looping YouTube on TV can be helpful. Whether you’re looking for something light and calming, or something to help you wind down after a long day, there’s sure to be something on YouTube that can fit the bill.
Let’s have a look at some steps that how to repeat YouTube videos on smart TV.
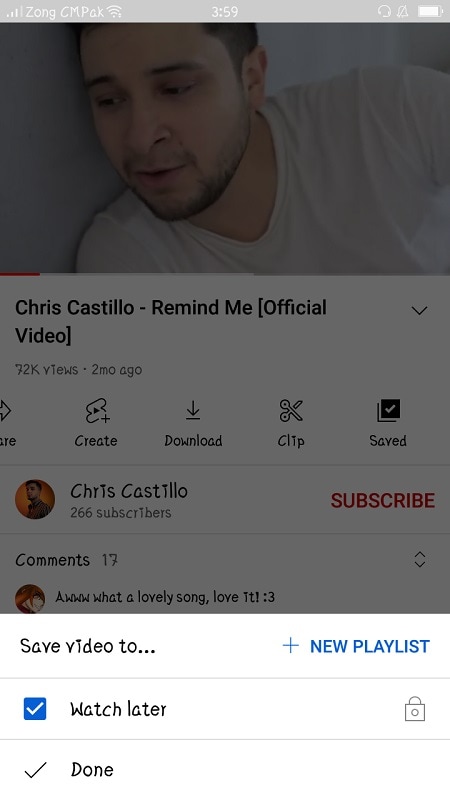
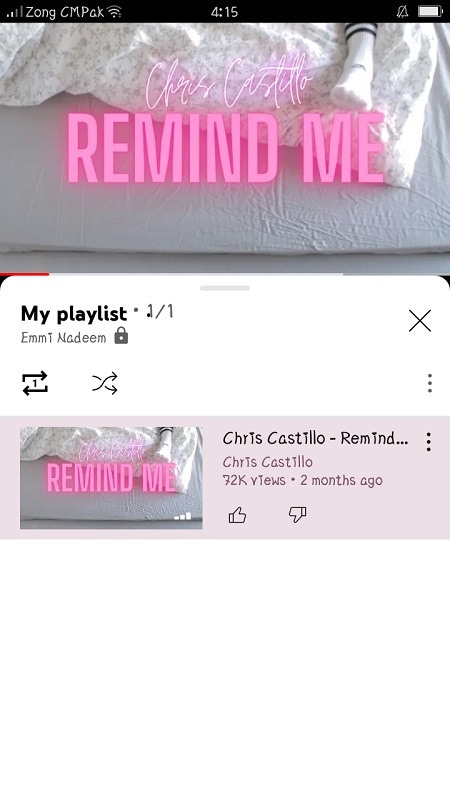
Step 1 Create a Playlist of one or multiple videos
The YouTube app is available on the google play store. You can easily download it from your mobile phones, android, etc. When you open a video on YouTube, several options will appear (like, share, subscribe). You can save the video in your existing playlist or you can create a new playlist.
Step 2 Go to the library and select the loop symbol
Click on library this will take you to a list of libraries that have YouTube collections. This can be a great way to find new material to watch, or to find old material that you may have missed. Play back the playlist that you want to loop on the smart TV.
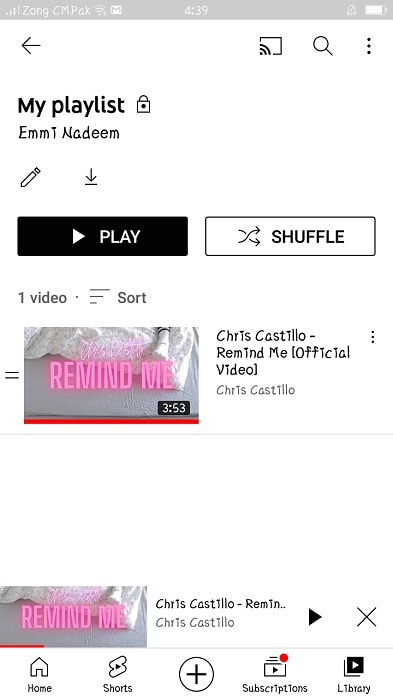
Step 3 Loop the playlist and send the list to the TV
Play the list and click on the loop symbol. At last, launch the YouTube video on your TV. The video will start playing in a loop. It can only be stopped from your mobile phone on which you start playing the list.
Why you might want to loop a YouTube video on a smart TV?
Some people want to watch a video over and over again without having to wait for it to load each time. Looping in a YouTube video can help you do this. Another reason to loop a YouTube video on your TV is if you want to watch it while you are doing something else. YouTube only loops the playlist.
Looping a YouTube video on your TV can also be useful if you have a lot of videos that you want to watch but don’t have enough time for. Looping YouTube videos on your television is a great way to keep your young ones entertained and engaged. Not only are they getting their daily dose of educational content, but they are also being kept enertained.
Wondershare Filmora Loop YouTube videos on PC and Mac with simple clicks.
Free Download Free Download Learn More

![]()
Conclusion
Looping YouTube videos on smart TV is an excellent way to watch the content you love, no matter where you are. While it may be true that loop YouTube videos on a smart TV are not imminent, there are some major benefits to be gained from implementing the new technology.
It’s easy to do, and it can be a great way to spend time with family members and friends. Looping YouTube videos on a smart TV is a great way to add some fun and excitement to your experience. The best part is, there are no limitations or restrictions you can loop as many videos as you want, and watch them in any order!
Free Download For Win 7 or later(64-bit)
Free Download For macOS 10.14 or later
Part 1: How to Create a Loop Video for YouTube
There is a lot of debate around whether or not creating a loop video is necessary for success on YouTube. Some people believe that it’s not necessary, while others believe that it is a must. The main benefit of creating a loop video is that it helps to keep your audience engaged. It also helps to create a sense of continuity between your videos.
Creating a loop video for your YouTube channel increases engagement because viewers can watch the video over and over again. This can lead to more clicks on your ads, which can lead to more revenue. It can also increase your subscribers and views. Maybe some people want to watch the same video multiple times in a row without having to keep pressing the play button on the remote.
Filmora is the best video loop editor:
If you need a powerful video editing tool that will let you create high-quality clips with multiple loops, look no further than Filmora . This software allows you to make various loops of your videos for use in social media, on your website or wherever desired. Plus, with Filmora, there is no limit on the number of loops you can create.
Loop video works well for corporate presentations, tutorials, explainer videos, and much more. You can create looping videos by choosing from one of Filmora’s many templates or creating your own. It’s easy to get started with looping video editing in Filmora! Some people want to watch a video while they do other things, like work on the computer.
Filmora is incredibly easy to use. You can quickly create videos by importing footage, editing and adding effects, and exporting your videos. Plus, the software has several built-in tools that let you customize your videos further. It has many features that make it an excellent choice for anyone looking to create high-quality videos quickly and easily.
How can we loop a video on Filmora? Follow these steps to create a looping video on Filmora:
Step 1 Download the Filmora and create a project
Free Download For Win 7 or later(64-bit)
Free Download For macOS 10.14 or later
You can download the Filmora for free. After installation of this software open it and click on Create New Project. Filmora is not only the video maker or editor, you can also add text and music to your videos, and share them on social media or with friends.
Step 2 Open the video and make copies
Open the video in your timeline. All you need to do is right-click on the video and click on copy. Then simply click or press Ctrl+V on your keyboard and do that for times. You can make as many copies as you want. Then you will have the same clip over and over again which creates the loop effect.
Step 3 Add Transition or any title in the video
After making copies of your video. Add some transitions in your video. Adding transitions to videos can help to keep your videos looking polished and professional. Not only do transitions add an extra layer of visual interest, but they can also help to underscore specific points in your video.
Benefits to create loop video on Filmora
There are many benefits to creating looping videos, especially when using a tool like Filmora. Loop videos are great for social media since they can be set to play on a loop and are viewable without sound. They’re also perfect for short attention spans since you can watch them over and over again without getting bored.
This can be useful for marketing purposes, as it can keep people interested in your video content. Additionally, looping can create a more engaging video experience for viewers, as it keeps them engaged by playing the same clip over and over again. You can easily add captions, and titles to your loop video.
When viewers can pause, rewind, and playback a video over and over again, they are more engaged with it. This increases the chances that they will watch the entire video, and may even share it with friends. You can create a sense of community and connection with your customers. And best of all? You can keep the magic going by adding sound effects and music!
Part 2: Loop a YouTube Video on TV from a Mobile
One of the great features of YouTube is that you can loop YouTube videos on your TV. This means that you can watch a video over and over again without having to fast forward through it. This is great for kids who are constantly asking to watch the same video over and over again. You can also use this feature to watch videos that you have missed.
There is something about relaxing music on the loop that can help to take the edge off. Whether it’s to help you wind down before bed, or to help you relax after a long day, there’s no doubt that looping YouTube on TV can be helpful. Whether you’re looking for something light and calming, or something to help you wind down after a long day, there’s sure to be something on YouTube that can fit the bill.
Let’s have a look at some steps that how to repeat YouTube videos on smart TV.
Step 1 Create a Playlist of one or multiple videos
The YouTube app is available on the google play store. You can easily download it from your mobile phones, android, etc. When you open a video on YouTube, several options will appear (like, share, subscribe). You can save the video in your existing playlist or you can create a new playlist.
Step 2 Go to the library and select the loop symbol
Click on library this will take you to a list of libraries that have YouTube collections. This can be a great way to find new material to watch, or to find old material that you may have missed. Play back the playlist that you want to loop on the smart TV.
Step 3 Loop the playlist and send the list to the TV
Play the list and click on the loop symbol. At last, launch the YouTube video on your TV. The video will start playing in a loop. It can only be stopped from your mobile phone on which you start playing the list.
Why you might want to loop a YouTube video on a smart TV?
Some people want to watch a video over and over again without having to wait for it to load each time. Looping in a YouTube video can help you do this. Another reason to loop a YouTube video on your TV is if you want to watch it while you are doing something else. YouTube only loops the playlist.
Looping a YouTube video on your TV can also be useful if you have a lot of videos that you want to watch but don’t have enough time for. Looping YouTube videos on your television is a great way to keep your young ones entertained and engaged. Not only are they getting their daily dose of educational content, but they are also being kept enertained.
Wondershare Filmora Loop YouTube videos on PC and Mac with simple clicks.
Free Download Free Download Learn More
![]()
Conclusion
Looping YouTube videos on smart TV is an excellent way to watch the content you love, no matter where you are. While it may be true that loop YouTube videos on a smart TV are not imminent, there are some major benefits to be gained from implementing the new technology.
It’s easy to do, and it can be a great way to spend time with family members and friends. Looping YouTube videos on a smart TV is a great way to add some fun and excitement to your experience. The best part is, there are no limitations or restrictions you can loop as many videos as you want, and watch them in any order!
Also read:
- Guide to Avoidable Exposure Hiding Objects and Faces Online
- [New] Creating User-Friendly YouTube Subscribe Icons
- Optimizing YouTube Closures A Comprehensive Guide to Crafting Effective End Screens and Cards
- Twice as Nice Sequential Video Playback via Television Setup
- [Updated] Enhancing Engagement IMovie Techniques for YouTube Intros
- Increasing YouTube Shorts Views Effective Tactics
- 2024 Approved Best 15 Sci-Fi & Educational YouTube Hubs
- Twist Your Way Through YouTube Mastering Rotation Techniques
- In 2024, 10 Best YouTube Stations for Market Reports
- Edit with Ease #10 Video-to-Mp3 Tools of the Trade
- In 2024, Download and Translate YouTube Videos for Free
- [New] Building an Auto-Subscribe Direct Link for Youtube
- 2024 Approved Coherent and Curated YouTube Playlists Online & Mobile Assembly Guide
- [New] Enhance Video Storytelling with Smart Chapter Insertion Techniques on YouTube
- Best Practices for Organizing Online Video Stories
- Keyword Mastery Unlocking the Potential of YouTube Tags
- Premier Composer of Media Experience
- Earning in a World Dominated by YouTubers
- Ideal Sound Devices for Digital Influencers
- [Updated] Brush Up Your Youtube Videos with Color Correction
- [Updated] Best Practices for YouTube Video Brightness and Contrast
- Boosting YouTube Visibility Mastering Titles & Tags
- In 2024, Enhance Your Shorts' Appeal with Personalized Thumbnails
- Corrected Non-Existence of Shorts on Feeds
- [New] Digital Converters Showcase Optimal YTVideo Text Extraction
- Building Your Ultimate YouTube Music List Step-by-Step Guide (Web/Mobile) for 2024
- In 2024, Converting YouTube to GIF A Comprehensive Online Process
- Leveraging the Power of Creative Commons Rights
- 2024 Approved A Visual Journey to Crafting a User-Friendly Subscribe Link
- [New] Cultivate Community Interest With Collaborative Lists
- [New] Elevate Your YouTube Presence Banners for Gamers
- Beginner's Blueprint for Online Content Simple, Straightforward Video Projects for 2024
- In 2024, Discovering the Excellent 10 Yoga Programs for Better Wellness
- [New] Creative Components FREE YouTube Visual Resources
- Understanding and Crafting YouTube Live Thumbnails
- 2024 Approved 3-Step Guide to Ascertain Google's Profitable Potential YouTube Analysis
- 2024 Approved Discovering Superior Mobile Video Platforms, Not YouTube
- Secure Your Watchlist Free Playlist Extractors Roundup
- YouTube Premium Subscription - Should You Get One?
- Dive Into Filmora’s Certified Creative Program
- Eye-Openers! Yearly Infographics on YT's Surprising Stats ('17)
- How To Make Profitable YouTube Ads for Free?
- 7 Free Video Editing Programs That Work Flawlessly for 2024
- In 2024, Convert YouTube Videos Smoothly Into Professional WebM Files
- [Updated] Evaluating the Financial Giants Mr. Beast
- How to Share Location in Messenger On Oppo Reno 11 Pro 5G? | Dr.fone
- [New] 2024 Approved Uncharted MMO Adventures Ranking the 10 Best Free Games
- Tailoring Medical Messages in Social Media Ads
- [New] In 2024, Best App for Gamers Fraps Vs. OBS Studio Review
- New 2024 Approved Best Video Translator App for PC You Cannot Miss
- Simplify Gaming Sessions with Xbox Zoom Techniques
- Easy Guide to Tecno Pop 7 Pro FRP Bypass With Best Methods
- How to Unlock iPhone 13 Pro With an Apple Watch & What to Do if It Doesnt Work
- [New] In 2024, Craft Your Countdown Adding Time Management to OBS Sessions
- [New] Emergency Recovery for a Misplaced TikTok Refresh for 2024
- Combat Chronicles In the Ring or on Screen, In 2024
- [Updated] 2024 Approved Recording Google Voice A Comprehensive Tutorial
- In 2024, Ultimate Library of Low-Volume Tunes for Calm Settings
- Title: [Updated] Essential Techniques for Designing YouTube Video Thumbnails
- Author: Brian
- Created at : 2024-05-25 13:25:08
- Updated at : 2024-05-26 13:25:08
- Link: https://youtube-video-recordings.techidaily.com/updated-essential-techniques-for-designing-youtube-video-thumbnails/
- License: This work is licensed under CC BY-NC-SA 4.0.
