
!["[Updated] Essential Guide 9 Cost-Free Editing Tools for Creatives"](https://www.lifewire.com/thmb/vOtdxq2XZSwA1Qf_IHXR3tZxNcM=/210x138/filters:no_upscale():max_bytes(150000):strip_icc()/googleaskphotosai-dc323a4a137549d59c5ac6ff0f98eb7b.png)
"[Updated] Essential Guide 9 Cost-Free Editing Tools for Creatives"
Essential Guide: 9 Cost-Free Editing Tools for Creatives
9 Best Free and Easy Editing Apps You Should Know

Richard Bennett
Dec 14, 2023• Proven solutions
Have you ever made a video 100% on your phone using a mobile video editing app?
If you’ve just started off on YouTube, there’s a good chance your main camera is the one in your phone. Actually, there’s a good chance of that even if you’ve been making YouTube videos for a while now.
Since you’re shooting videos on your phone, why shouldn’t you edit them there too? Here are 9 free video editing apps you can use for YouTube.
Note: This is not a ranked list. The apps will appear in alphabetical order.
- Adobe Premiere Clip (Android or iOS)
- Cameo (iOS)
- Clips (iOS)
- Filmora (Android or iOS)
- Funimate (Android or iOS)
- iMovie (iOS)
- Movie Maker Filmmaker by Alive (Android or iOS)
- PowerDirector (Android)
- Vlogit (Android or iOS)
Adobe Premiere Clip (Android or iOS )

Key Points:
- Automatic using clips. Times them to music
- Guides you with pop-up tips
- No text/title overlays
- Exports directly to YouTube
Adobe Premiere Pro is a professional-grade desktop editor, and Adobe Premiere Clip lives up to the quality standards set by its big-brother software. It is missing some features you might want for YouTube videos, like title effects, but it does have some bells and whistles. There’s a good selection of filters.

Making changes to your picture, like adjusting the exposure or the prevalence of highlights or shadows, is just a matter of sliding bars. The tools for splitting and duplicating clips are easy to find too. You just toggle between the two icons right above your video – the one that looks like a shutter and the one that looks like adjustment bars – to switch between the picture tools and the other tools.

You cannot add what you might normally think of as a title effect in Adobe Premiere Clip, so it’ll be hard to fully complete your video. You can add text cards to put in-between your video clips, but you can’t overlay the title on top of a clip.
You can share your video directly to YouTube when you export.
Cameo (iOS)

Key Points:
- Easy-to-apply themes
- Customizable titles
- Limited features
- Exports to 4K (if your clips are 4K)
Vimeo is a video sharing site with more of a ‘filmmaker’ focus than YouTube, so it isn’t a surprise that their mobile editing app Cameo can export high-quality 4K videos.
Like some of the other apps on this list, Cameo does not have a huge variety of functions. You can reorder your clips, trim them, add titles, and apply themes (essentially filter and title combos).
There are three icons on the main interface: Scissors, a Music Note, and Filters.
The Scissors will take you to the trimming screen, where you can make your clip shorter or longer.

You can also add a title in the trimming screen, but you will not be able to change the font style or color until you are in the Filter screen.
In the Filter screen (tap the overlapping filters icon on the main interface) you will be able to adjust the color of your text by tapping on the circle with the A in it. Tapping where it says ‘Font’ will change your font style.

You can also tap on Themes and choose a premade style.

Here’s what ‘Crush’ looks like applied:

My font was changed, and there’s also a filter now. In order to apply a filter, you must start with a theme.
Clips (iOS)

Key Points:
- Great selection of stickers
- Lacks some basic tools
- Simple interface
Clips is an intuitive app with a lot of options for decorating your videos. It is lacking in some of the more basic editings features you might expect (i.e. you cannot split clips or do any color correction), but it has a lot of fun features like stickers and emojis that could make up for that depending on your needs.

There are also more traditional effects, like filters and titles. There are a wide range of title options in styles that are popular on YouTube, and a fairly standard filter selection.

While you cannot split clips in this app, but trimming and reordering them is easy. For trimming, you just select the clip and then Trim to open a screen where you can drag the start and end points of the clip.
To rearrange your clips, just tap the clip you want to move and hold down. You’ll be able to drag it to a new location.
It’d be hard to rely on Clips exclusively as your YouTube video editor, but it’s well suited for Instagram or for making quick ‘on-the-go’ videos.
Filmora (Android or iOS)

Key Points:
- Export directly to YouTube
- 16:9 or 1:1 for Instagram
- Includes effects like transitions, filters, and overlays
- End-roll logo
You can make a complete video easily just by tapping and dragging in Filmora, and there are even effects like filters, transitions, and overlays you can add to make your video more polished.
After importing your media into Filmora (you can import videos and photos saved on your phone, or media which has been uploaded to a social media account like Facebook or Instagram) you can change the order of your clips by tapping one, pressing down for a moment, and then dragging your clips where you want them.
Trimming a clip is as simple as tapping on it and then Duration. You’ll get this screen where you can adjust the length easily by dragging the markers to beginning or endpoints.

Cropping and zooming are simple too.

Filmora comes with pre-made themes you can apply which include titles, filters, and other effects. These might not be ideal if you already have branding you like to use for YouTube, but in some situations, they can make video creation a lot faster.

Filmora comes loaded with music, or you can even import your own music from your phone.
Once you’re done, tap ‘save’ in the top right corner of your screen to export your video. From the save screen, you’ll be able to export your video directly to YouTube.

One potential drawback is that Filmora will add its own logo to the end of your exported video. This logo will not distract from your video content since it is added at the end and never overlaps any of your clips, but it still might not be ideal for all creators.
Funimate (Android or iOS )

Key Points:
- Easily add text and shapes
- Rainbow doodling
- Shake effects
- Small ‘Funimate’ watermark in videos from the free version
Funimate is lives up to the ‘fun’ promise in its name. It’s designed mostly for music videos/Musical.ly and while it is missing a lot of more typical editing options, there are a few free tools in Funimate that other apps just don’t have.
For example, there are shake and distortion effects available through Funimate that you usually only find in desktop software.
You can also draw rainbow designs on your video with your finger – no other app on this list can do that.
The text tool in Funimate is easy to use, and there are cool looking glow effects you can apply in the color selection screen. Those options are also available when you’re adding shapes, likes stars and sparkles.
Funimate is not built for typical editing, which is both its strength and its weakness. Trimming your clips is its own stage which you must complete before you start adding effects, and you cannot split clips or add multiple clips.
The free version of Funimate does add a small watermark to your videos in the bottom-right corner, but it is subtle enough that I almost missed it completely while reviewing the app.
iMovie (iOS)

Key Points:
- Trailer templates
- Themes
- Limited tools and resources
iMovie’s mobile app is designed for ease and includes things like ‘trailer templates’ and themes that allow you to make a video quickly and with minimal effort.
This streamlined app is limited in its features. Other apps on this list have left out color correction tools or clip splitting tools and instead loaded up on decorative features like stickers, emojis, and overlays. iMovie has left out these tools and does not have an abundance of decorative features either.
There are filters, themes, and titles, however.
The titles are simple but polished, and you’ll find all the standard types of filters.
The themes include a variety of graphics and are applied to your entire video, not individual clips. You can also apply one filter to your entire video.
iMovie also includes a decent selection of transitions, which you can apply easily by tapping the area between two clips.
Movie Maker Filmmaker by Alive (Android or iOS )

Key Points:
- Good title tool
- Stickers
- Change clip duration
- 16:9 or 1:1
Movie Maker Filmmaker (the app will be labeled ‘Alive’ in on your phone) has a lot of features that will help you put together a fun YouTube video. There’s a great selection of stickers, filters, and overlays and they’re all easy to apply. You just click on what you want and resize/reposition it in the player.

This app is missing a lot of basic editing features, however. You cannot adjust things like brightness or saturation. This won’t be a problem if you’re happy with your clips as-is, but it’s a bit odd to not have those options.
There is a text tool and while it is fairly basic, it is also flexible. There is a good selection of fonts to choose from, and you can also choose whether or not you want a colored background, and if your text should have a shadow.
Once you’ve decided on the look of your text you can drag it, resize it, and tilt it however you want in the preview screen.
A slightly odd feature of this app is that it doesn’t save your video to your phone or export it directly to YouTube. Instead, it saves it – and shares it – within the app and gives you the option of sharing it with YouTube after.
Power Director (Android)

Key Points:
- A timeline like desktop software
- All the basic editing features
- Lots of transitions
- Videos from the free version will be watermarked
The first thing you’ll notice when you open up Power Director is that the interface looks a lot like the interface of a lot of desktop editors with a very classic timeline. This familiarity could make it easy to jump into if you’re used to editing on your laptop.
However, Power Director is a bit less intuitive than most of the other apps on this list. I wouldn’t go so far as to say it’s difficult to use – it isn’t, it’s much easier than a lot of desktop software – but among mobile apps designed for streamlined efficiency it does stand out as being a bit harder to dive into.
That is partly because there’s a lot you can do with it. It has the tools you would expect in an editor. You can split and trim clips, and you have all the standard color tools including some that most mobile apps leave out.
A lot of apps have Brightness, Contrast, and Saturation, but PowerDirector also has Color Temperature and Tint.
In addition to editing tools, PowerDirector has bells and whistles like filters –
- and a ton of great transitions.
One drawback of PowerDirector is that the free version will watermark your videos. This watermark is not intrusive, but it isn’t as subtle as the Funimate one either.
You can export videos from PowerDirector directly to YouTube.
Vlogit (Android or iOS )

Key Points:
- Easy thumbnail maker
- Export directly to YouTube
- Animated stickers
Vlogit is also an app from the creators of the Filmora Video Editor. It isn’t quite as intuitive as Filmora, but the major benefit of Vlogit for YouTube creators is that it was designed with you in mind. It has features like animated stickers, emojis, and a thumbnail maker which were included specifically because YouTubers and vloggers need them.
All the usual adjustments you might want to make, like saturation or sharpness, are easy in Vlogit. So are adjustments to the length or crop of clips.
After you save your video you’ll have the option of creating a thumbnail using a screenshot from your video. You can add a colored border, text, emojis, and more!
Once you’re done, you can export directly to YouTube. Like Filmora, Vlogit does have a post-video logo roll.
Have you ever used a free mobile app to edit one of your YouTube videos? What did you use, and were you happy with the results?
Richard Bennett
Richard Bennett is a writer and a lover of all things video.
Follow @Richard Bennett
Richard Bennett
Dec 14, 2023• Proven solutions
Have you ever made a video 100% on your phone using a mobile video editing app?
If you’ve just started off on YouTube, there’s a good chance your main camera is the one in your phone. Actually, there’s a good chance of that even if you’ve been making YouTube videos for a while now.
Since you’re shooting videos on your phone, why shouldn’t you edit them there too? Here are 9 free video editing apps you can use for YouTube.
Note: This is not a ranked list. The apps will appear in alphabetical order.
- Adobe Premiere Clip (Android or iOS)
- Cameo (iOS)
- Clips (iOS)
- Filmora (Android or iOS)
- Funimate (Android or iOS)
- iMovie (iOS)
- Movie Maker Filmmaker by Alive (Android or iOS)
- PowerDirector (Android)
- Vlogit (Android or iOS)
Adobe Premiere Clip (Android or iOS )
Key Points:
- Automatic using clips. Times them to music
- Guides you with pop-up tips
- No text/title overlays
- Exports directly to YouTube
Adobe Premiere Pro is a professional-grade desktop editor, and Adobe Premiere Clip lives up to the quality standards set by its big-brother software. It is missing some features you might want for YouTube videos, like title effects, but it does have some bells and whistles. There’s a good selection of filters.
Making changes to your picture, like adjusting the exposure or the prevalence of highlights or shadows, is just a matter of sliding bars. The tools for splitting and duplicating clips are easy to find too. You just toggle between the two icons right above your video – the one that looks like a shutter and the one that looks like adjustment bars – to switch between the picture tools and the other tools.
You cannot add what you might normally think of as a title effect in Adobe Premiere Clip, so it’ll be hard to fully complete your video. You can add text cards to put in-between your video clips, but you can’t overlay the title on top of a clip.
You can share your video directly to YouTube when you export.
Cameo (iOS)
Key Points:
- Easy-to-apply themes
- Customizable titles
- Limited features
- Exports to 4K (if your clips are 4K)
Vimeo is a video sharing site with more of a ‘filmmaker’ focus than YouTube, so it isn’t a surprise that their mobile editing app Cameo can export high-quality 4K videos.
Like some of the other apps on this list, Cameo does not have a huge variety of functions. You can reorder your clips, trim them, add titles, and apply themes (essentially filter and title combos).
There are three icons on the main interface: Scissors, a Music Note, and Filters.
The Scissors will take you to the trimming screen, where you can make your clip shorter or longer.
You can also add a title in the trimming screen, but you will not be able to change the font style or color until you are in the Filter screen.
In the Filter screen (tap the overlapping filters icon on the main interface) you will be able to adjust the color of your text by tapping on the circle with the A in it. Tapping where it says ‘Font’ will change your font style.
You can also tap on Themes and choose a premade style.
Here’s what ‘Crush’ looks like applied:
My font was changed, and there’s also a filter now. In order to apply a filter, you must start with a theme.
Clips (iOS)
Key Points:
- Great selection of stickers
- Lacks some basic tools
- Simple interface
Clips is an intuitive app with a lot of options for decorating your videos. It is lacking in some of the more basic editings features you might expect (i.e. you cannot split clips or do any color correction), but it has a lot of fun features like stickers and emojis that could make up for that depending on your needs.
There are also more traditional effects, like filters and titles. There are a wide range of title options in styles that are popular on YouTube, and a fairly standard filter selection.
While you cannot split clips in this app, but trimming and reordering them is easy. For trimming, you just select the clip and then Trim to open a screen where you can drag the start and end points of the clip.
To rearrange your clips, just tap the clip you want to move and hold down. You’ll be able to drag it to a new location.
It’d be hard to rely on Clips exclusively as your YouTube video editor, but it’s well suited for Instagram or for making quick ‘on-the-go’ videos.
Filmora (Android or iOS)
Key Points:
- Export directly to YouTube
- 16:9 or 1:1 for Instagram
- Includes effects like transitions, filters, and overlays
- End-roll logo
You can make a complete video easily just by tapping and dragging in Filmora, and there are even effects like filters, transitions, and overlays you can add to make your video more polished.
After importing your media into Filmora (you can import videos and photos saved on your phone, or media which has been uploaded to a social media account like Facebook or Instagram) you can change the order of your clips by tapping one, pressing down for a moment, and then dragging your clips where you want them.
Trimming a clip is as simple as tapping on it and then Duration. You’ll get this screen where you can adjust the length easily by dragging the markers to beginning or endpoints.
Cropping and zooming are simple too.
Filmora comes with pre-made themes you can apply which include titles, filters, and other effects. These might not be ideal if you already have branding you like to use for YouTube, but in some situations, they can make video creation a lot faster.
Filmora comes loaded with music, or you can even import your own music from your phone.
Once you’re done, tap ‘save’ in the top right corner of your screen to export your video. From the save screen, you’ll be able to export your video directly to YouTube.
One potential drawback is that Filmora will add its own logo to the end of your exported video. This logo will not distract from your video content since it is added at the end and never overlaps any of your clips, but it still might not be ideal for all creators.
Funimate (Android or iOS )
Key Points:
- Easily add text and shapes
- Rainbow doodling
- Shake effects
- Small ‘Funimate’ watermark in videos from the free version
Funimate is lives up to the ‘fun’ promise in its name. It’s designed mostly for music videos/Musical.ly and while it is missing a lot of more typical editing options, there are a few free tools in Funimate that other apps just don’t have.
For example, there are shake and distortion effects available through Funimate that you usually only find in desktop software.
You can also draw rainbow designs on your video with your finger – no other app on this list can do that.
The text tool in Funimate is easy to use, and there are cool looking glow effects you can apply in the color selection screen. Those options are also available when you’re adding shapes, likes stars and sparkles.
Funimate is not built for typical editing, which is both its strength and its weakness. Trimming your clips is its own stage which you must complete before you start adding effects, and you cannot split clips or add multiple clips.
The free version of Funimate does add a small watermark to your videos in the bottom-right corner, but it is subtle enough that I almost missed it completely while reviewing the app.
iMovie (iOS)
Key Points:
- Trailer templates
- Themes
- Limited tools and resources
iMovie’s mobile app is designed for ease and includes things like ‘trailer templates’ and themes that allow you to make a video quickly and with minimal effort.
This streamlined app is limited in its features. Other apps on this list have left out color correction tools or clip splitting tools and instead loaded up on decorative features like stickers, emojis, and overlays. iMovie has left out these tools and does not have an abundance of decorative features either.
There are filters, themes, and titles, however.
The titles are simple but polished, and you’ll find all the standard types of filters.
The themes include a variety of graphics and are applied to your entire video, not individual clips. You can also apply one filter to your entire video.
iMovie also includes a decent selection of transitions, which you can apply easily by tapping the area between two clips.
Movie Maker Filmmaker by Alive (Android or iOS )
Key Points:
- Good title tool
- Stickers
- Change clip duration
- 16:9 or 1:1
Movie Maker Filmmaker (the app will be labeled ‘Alive’ in on your phone) has a lot of features that will help you put together a fun YouTube video. There’s a great selection of stickers, filters, and overlays and they’re all easy to apply. You just click on what you want and resize/reposition it in the player.
This app is missing a lot of basic editing features, however. You cannot adjust things like brightness or saturation. This won’t be a problem if you’re happy with your clips as-is, but it’s a bit odd to not have those options.
There is a text tool and while it is fairly basic, it is also flexible. There is a good selection of fonts to choose from, and you can also choose whether or not you want a colored background, and if your text should have a shadow.
Once you’ve decided on the look of your text you can drag it, resize it, and tilt it however you want in the preview screen.
A slightly odd feature of this app is that it doesn’t save your video to your phone or export it directly to YouTube. Instead, it saves it – and shares it – within the app and gives you the option of sharing it with YouTube after.
Power Director (Android)
Key Points:
- A timeline like desktop software
- All the basic editing features
- Lots of transitions
- Videos from the free version will be watermarked
The first thing you’ll notice when you open up Power Director is that the interface looks a lot like the interface of a lot of desktop editors with a very classic timeline. This familiarity could make it easy to jump into if you’re used to editing on your laptop.
However, Power Director is a bit less intuitive than most of the other apps on this list. I wouldn’t go so far as to say it’s difficult to use – it isn’t, it’s much easier than a lot of desktop software – but among mobile apps designed for streamlined efficiency it does stand out as being a bit harder to dive into.
That is partly because there’s a lot you can do with it. It has the tools you would expect in an editor. You can split and trim clips, and you have all the standard color tools including some that most mobile apps leave out.
A lot of apps have Brightness, Contrast, and Saturation, but PowerDirector also has Color Temperature and Tint.
In addition to editing tools, PowerDirector has bells and whistles like filters –
- and a ton of great transitions.
One drawback of PowerDirector is that the free version will watermark your videos. This watermark is not intrusive, but it isn’t as subtle as the Funimate one either.
You can export videos from PowerDirector directly to YouTube.
Vlogit (Android or iOS )
Key Points:
- Easy thumbnail maker
- Export directly to YouTube
- Animated stickers
Vlogit is also an app from the creators of the Filmora Video Editor. It isn’t quite as intuitive as Filmora, but the major benefit of Vlogit for YouTube creators is that it was designed with you in mind. It has features like animated stickers, emojis, and a thumbnail maker which were included specifically because YouTubers and vloggers need them.
All the usual adjustments you might want to make, like saturation or sharpness, are easy in Vlogit. So are adjustments to the length or crop of clips.
After you save your video you’ll have the option of creating a thumbnail using a screenshot from your video. You can add a colored border, text, emojis, and more!
Once you’re done, you can export directly to YouTube. Like Filmora, Vlogit does have a post-video logo roll.
Have you ever used a free mobile app to edit one of your YouTube videos? What did you use, and were you happy with the results?
Richard Bennett
Richard Bennett is a writer and a lover of all things video.
Follow @Richard Bennett
Unleash Your Potential: Skyrocketing Numbers of YouTubers’ Subscribers
How to Get More Subscribers on YouTube
Richard Bennett
Mar 27, 2024• Proven solutions
Working hard to produce exciting, informative and beautiful YouTube videos only to miss out on the exposure you’re hoping for can be very demoralizing, and many people give up the practice of video production after failing to generate interest in their work.
However, don’t accept defeat just yet if you’re not quite getting the numbers you’ve been aiming for. Take these steps to if you need to get subscribers for YouTube videos. Read on to find out more about the best ways to attract new YouTube subscribers for your online video channel.
- Part 1: How to Get More Subscribers on YouTube for Beginners
- Part 2: How to Get More Subscribers on YouTube for Pros
- Part 3: How to Get Free YouTube Subscribers [With Proven Methods]
Part 1: How to Get More Subscribers on YouTube for Beginners
1. Be Real and Approachable
You should always be yourself when you vlog. People will subscribe when they feel invested in you as a person, and that happens when they feel like you are being sincere. You do not need to share all of your innermost secrets on your vlog, but you should let your viewers feel like they know you.
2. Don’t forget to add a call to action
Some people need to be prompted to subscribe to your channel, no matter how much they enjoy your content. At the end of all your videos, ask your viewers to subscribe to your channel and like your social media page.
Don’t forget to explain the benefits of subscribing to them, such as to benefit from your informative tips and gain a deeper insight into your projects. If you have any interesting videos in the pipeline, let them know about them.
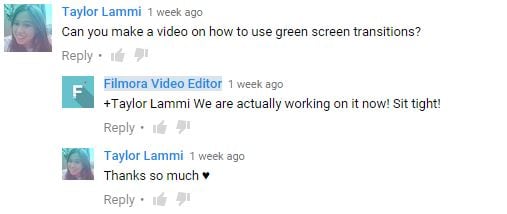
3. Listen To Your Subscribers
It feels nice to get positive comments on your videos. If people feel comfortable enough to leave you suggestions and requests then that is even better. It means that you have succeeded in making them feel like they are part of your community.
If you get a video request, try to do it. People like to feel that you are open to trying the things they want to see. However, there are also times when you should just ignore requests and suggestions. If the majority of your subscribers enjoy your jokes and you get one comment telling you to stop trying to be funny then it is fairly obvious that that ‘suggestion’ does not really reflect the wishes of your community.
4. Optimize your title
Try not to underestimate the importance of a great eye-catching title. Include relevant words and phrases that you think people will search for and don’t just hastily add the first title that comes into your head. The better your title is, the more viewers and subscribers you are likely to amass.
5. Be Patient
Almost all vlogs grow slowly at first; the first 1000 subscribers take the longest to get. It takes a lot of patience to keep producing content on a regular schedule when it seems like not many people are watching, but you need to stick with it in order to grow.
Part 2: How to Get more Subscribers on YouTube for Pros
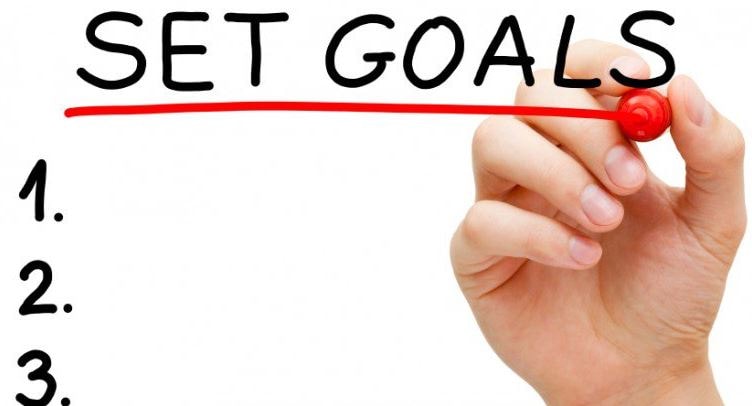
1. Set goals
You can gain extra drive and momentum by setting yourself attainable goals and encouraging your followers to help you achieve them. These goals can include milestones such as reaching 500 followers, 1,000 followers and so on. Don’t hesitate to tell your viewers about these goals – if they think your content is of real value, chances are they will be only too happy to assist you.
2. Contests can be funny – why not enter one?
One way to increase subscribers is to take part in a contest. A site called Gleam can oversee a contest for you. It’s up to you to choose how you want the contest to work, and you can gain an edge over your competitors by getting people to leave comments, follow you on Instagram, subscribe to your channel and more.
You will be provided with a landing page for promoting your channel, and you can share this in a variety of places, including on your Facebook, Twitter and blog. The best way to heighten your chances of success is to have a clear goal in mind.

3. Make a trailer
YouTube’s channel interface allows you to add a trailer to entice viewers into watching your videos and following you on the platform. Your trailer gives you a valuable opportunity to quickly explain what your channel is all about and what the benefits of following you are.
Don’t waffle on – try to get your clip down to 90 seconds maximum. Include clips from your videos and don’t forget to add a strong call to action at the end. The more effort you put into your videos, the bigger the rewards are likely to become. And here are some of the best trailer makers that you can use on both Windows and Mac .
4. Make a Schedule and Stick To It
You want to vlog at least once a week, and making a schedule will help you keep on top of that. It will also give your subscribers a chance to anticipate your videos and get excited. They are more likely to watch an update they have been expecting than one that was not already on their minds.
Sticking to your schedule is a good wait to build up credibility with your audience, but late or skipped updates will cause you to lose that credibility. If you do not post for a month then people who already subscribed to you might still ignore your update because it has been too long and they forgot about you.
5. Collaborate With Other Vloggers
Collaboration videos are always big hits. When you collaborate with another vlogger you are essentially introducing each other to your subscribers. This is a great way to grow your community quickly: by connecting it to another community.
Collaborations work best when the other vlogger is located close enough to you that you can actually meet up, but you can do distance collaborations too. When you collaborate you and the other vlogger should have close to the same number of subscribers, so the video will benefit you both equally.

Bonus: How to Get Free YouTube Subscribers [6 Proven Methods]
There are lots of ways to get free YouTube subscribers. This proven method involves networking with other creators! Making your presence felt on YouTube is an important part of creating your network of subscribers that watch, share and talk about your videos. Interaction with your subscribers, reaching new audiences every day, and a plethora of other factors influence how well your YouTube channel is doing.
In this part, we will show you how you can build your own network of loyal YouTube supporters and prove that you don’t need the services of paid providers who promise better reach for your channel.
1. Find YouTubers in your niche
The first step to building an enviable army of YouTube subscribers starts with the realization that you are not alone. Regardless of the niche, your videos are covering, there are probably thousands of people who are just starting out or that have as many subscribers as your YouTube channel. Focus on finding them. You may even want to make a list.
2. Subscribe to YouTube channels you really like
Of the channels you found in Step 1, choose the ones you genuinely like and subscribe to them.
It goes without saying that everyone enjoys support, especially if you are not asking for anything in return. By subscribing to YouTube channels in your genre you appreciate, you will make yourself known to the channel’s owner, and there is a chance they will check out and subscribe to your channel.
3. Spend time watching videos each day
Knowledge is power and, if you want to attract real people to your channel, you should learn how to use your knowledge to your advantage. By paying attention to other new videos in your genre you’ll gain insight into what is going over well with audiences like yours, and what isn’t.
Also, be especially sure to watch videos from those channels you found in Step 1 and subscribed to in Step 2. Try to watch at least two minutes of content from those channels whenever they upload.
4. Comment thoughtfully. Don’t ask for anything in return
Most YouTubers are delighted to hear someone else’s positive opinion or constructive criticism regarding their work. The reason you are watching 2 minutes of content per video in Step 3 is so that you will really have something to say in this step.
If you do make a thoughtful comment, and especially if you use the time stamp of the part of the video you’re referring to, the video creator will know you have watched the video and that you are not just another spammer. Avoid the sub-4-sub strategy, and don’t be the person who’s always saying ‘Subscribe to my channel’. You will be ignored by both the creator and other viewers, and the creator will find you annoying. However, if you comment regularly without asking for anything, the creator and some of their viewers will naturally decide to check out your channel.
5. Reach out on social media
YouTube is just one out of many channels through which you can reach like-minded people. Facebook, Instagram, Pinterest or any other social network can help you network with other creators and potential subscribers. Create accounts on social networks you find the most suitable for your video category and share links to your videos on these accounts as often as you can. Furthermore, if you try to foster real discussions about topics that are relevant, people who get to know you through these other platforms will probably decide to check out your YouTube channel.
Social media is also a great place to reach out to other creators, whether it’s for collabs or just to chat about doing YouTube.
6. Do it all again. And again. And again
You aren’t going to see great results overnight. You have to spend time almost every day repeating the steps we just described. This might seem intimidating, but as time passes it will become routine.
When you build your presence on YouTube in this way, other creators and their subscribers will naturally start becoming your subscribers. What’s your best tip for free YouTube subscribers?
Conclusion
Some people might need to watch multiple videos by you before they decide they want to subscribe. If you stop making videos because you did not get any subscribers or comments on your first few then chances are there were people who were paying attention who may have subscribed if you had kept at it.


Richard Bennett
Richard Bennett is a writer and a lover of all things video.
Follow @Richard Bennett
Richard Bennett
Mar 27, 2024• Proven solutions
Working hard to produce exciting, informative and beautiful YouTube videos only to miss out on the exposure you’re hoping for can be very demoralizing, and many people give up the practice of video production after failing to generate interest in their work.
However, don’t accept defeat just yet if you’re not quite getting the numbers you’ve been aiming for. Take these steps to if you need to get subscribers for YouTube videos. Read on to find out more about the best ways to attract new YouTube subscribers for your online video channel.
- Part 1: How to Get More Subscribers on YouTube for Beginners
- Part 2: How to Get More Subscribers on YouTube for Pros
- Part 3: How to Get Free YouTube Subscribers [With Proven Methods]
Part 1: How to Get More Subscribers on YouTube for Beginners
1. Be Real and Approachable
You should always be yourself when you vlog. People will subscribe when they feel invested in you as a person, and that happens when they feel like you are being sincere. You do not need to share all of your innermost secrets on your vlog, but you should let your viewers feel like they know you.
2. Don’t forget to add a call to action
Some people need to be prompted to subscribe to your channel, no matter how much they enjoy your content. At the end of all your videos, ask your viewers to subscribe to your channel and like your social media page.
Don’t forget to explain the benefits of subscribing to them, such as to benefit from your informative tips and gain a deeper insight into your projects. If you have any interesting videos in the pipeline, let them know about them.
3. Listen To Your Subscribers
It feels nice to get positive comments on your videos. If people feel comfortable enough to leave you suggestions and requests then that is even better. It means that you have succeeded in making them feel like they are part of your community.
If you get a video request, try to do it. People like to feel that you are open to trying the things they want to see. However, there are also times when you should just ignore requests and suggestions. If the majority of your subscribers enjoy your jokes and you get one comment telling you to stop trying to be funny then it is fairly obvious that that ‘suggestion’ does not really reflect the wishes of your community.
4. Optimize your title
Try not to underestimate the importance of a great eye-catching title. Include relevant words and phrases that you think people will search for and don’t just hastily add the first title that comes into your head. The better your title is, the more viewers and subscribers you are likely to amass.
5. Be Patient
Almost all vlogs grow slowly at first; the first 1000 subscribers take the longest to get. It takes a lot of patience to keep producing content on a regular schedule when it seems like not many people are watching, but you need to stick with it in order to grow.
Part 2: How to Get more Subscribers on YouTube for Pros
1. Set goals
You can gain extra drive and momentum by setting yourself attainable goals and encouraging your followers to help you achieve them. These goals can include milestones such as reaching 500 followers, 1,000 followers and so on. Don’t hesitate to tell your viewers about these goals – if they think your content is of real value, chances are they will be only too happy to assist you.
2. Contests can be funny – why not enter one?
One way to increase subscribers is to take part in a contest. A site called Gleam can oversee a contest for you. It’s up to you to choose how you want the contest to work, and you can gain an edge over your competitors by getting people to leave comments, follow you on Instagram, subscribe to your channel and more.
You will be provided with a landing page for promoting your channel, and you can share this in a variety of places, including on your Facebook, Twitter and blog. The best way to heighten your chances of success is to have a clear goal in mind.
3. Make a trailer
YouTube’s channel interface allows you to add a trailer to entice viewers into watching your videos and following you on the platform. Your trailer gives you a valuable opportunity to quickly explain what your channel is all about and what the benefits of following you are.
Don’t waffle on – try to get your clip down to 90 seconds maximum. Include clips from your videos and don’t forget to add a strong call to action at the end. The more effort you put into your videos, the bigger the rewards are likely to become. And here are some of the best trailer makers that you can use on both Windows and Mac .
4. Make a Schedule and Stick To It
You want to vlog at least once a week, and making a schedule will help you keep on top of that. It will also give your subscribers a chance to anticipate your videos and get excited. They are more likely to watch an update they have been expecting than one that was not already on their minds.
Sticking to your schedule is a good wait to build up credibility with your audience, but late or skipped updates will cause you to lose that credibility. If you do not post for a month then people who already subscribed to you might still ignore your update because it has been too long and they forgot about you.
5. Collaborate With Other Vloggers
Collaboration videos are always big hits. When you collaborate with another vlogger you are essentially introducing each other to your subscribers. This is a great way to grow your community quickly: by connecting it to another community.
Collaborations work best when the other vlogger is located close enough to you that you can actually meet up, but you can do distance collaborations too. When you collaborate you and the other vlogger should have close to the same number of subscribers, so the video will benefit you both equally.
Bonus: How to Get Free YouTube Subscribers [6 Proven Methods]
There are lots of ways to get free YouTube subscribers. This proven method involves networking with other creators! Making your presence felt on YouTube is an important part of creating your network of subscribers that watch, share and talk about your videos. Interaction with your subscribers, reaching new audiences every day, and a plethora of other factors influence how well your YouTube channel is doing.
In this part, we will show you how you can build your own network of loyal YouTube supporters and prove that you don’t need the services of paid providers who promise better reach for your channel.
1. Find YouTubers in your niche
The first step to building an enviable army of YouTube subscribers starts with the realization that you are not alone. Regardless of the niche, your videos are covering, there are probably thousands of people who are just starting out or that have as many subscribers as your YouTube channel. Focus on finding them. You may even want to make a list.
2. Subscribe to YouTube channels you really like
Of the channels you found in Step 1, choose the ones you genuinely like and subscribe to them.
It goes without saying that everyone enjoys support, especially if you are not asking for anything in return. By subscribing to YouTube channels in your genre you appreciate, you will make yourself known to the channel’s owner, and there is a chance they will check out and subscribe to your channel.
3. Spend time watching videos each day
Knowledge is power and, if you want to attract real people to your channel, you should learn how to use your knowledge to your advantage. By paying attention to other new videos in your genre you’ll gain insight into what is going over well with audiences like yours, and what isn’t.
Also, be especially sure to watch videos from those channels you found in Step 1 and subscribed to in Step 2. Try to watch at least two minutes of content from those channels whenever they upload.
4. Comment thoughtfully. Don’t ask for anything in return
Most YouTubers are delighted to hear someone else’s positive opinion or constructive criticism regarding their work. The reason you are watching 2 minutes of content per video in Step 3 is so that you will really have something to say in this step.
If you do make a thoughtful comment, and especially if you use the time stamp of the part of the video you’re referring to, the video creator will know you have watched the video and that you are not just another spammer. Avoid the sub-4-sub strategy, and don’t be the person who’s always saying ‘Subscribe to my channel’. You will be ignored by both the creator and other viewers, and the creator will find you annoying. However, if you comment regularly without asking for anything, the creator and some of their viewers will naturally decide to check out your channel.
5. Reach out on social media
YouTube is just one out of many channels through which you can reach like-minded people. Facebook, Instagram, Pinterest or any other social network can help you network with other creators and potential subscribers. Create accounts on social networks you find the most suitable for your video category and share links to your videos on these accounts as often as you can. Furthermore, if you try to foster real discussions about topics that are relevant, people who get to know you through these other platforms will probably decide to check out your YouTube channel.
Social media is also a great place to reach out to other creators, whether it’s for collabs or just to chat about doing YouTube.
6. Do it all again. And again. And again
You aren’t going to see great results overnight. You have to spend time almost every day repeating the steps we just described. This might seem intimidating, but as time passes it will become routine.
When you build your presence on YouTube in this way, other creators and their subscribers will naturally start becoming your subscribers. What’s your best tip for free YouTube subscribers?
Conclusion
Some people might need to watch multiple videos by you before they decide they want to subscribe. If you stop making videos because you did not get any subscribers or comments on your first few then chances are there were people who were paying attention who may have subscribed if you had kept at it.
Richard Bennett
Richard Bennett is a writer and a lover of all things video.
Follow @Richard Bennett
Also read:
- Digital Elites 8 The Speedy Video Channels for 2024
- Skyrocket Your Channel Mastery of YouTube Data Analysis
- Subscription Sensation Top 10 YouTube Personalities by Counts
- 2024 Approved Can Genuine Growth Outpace Faux Followers' Effects?
- Decoding YouTube Income How Much Does Each 1,000 Viewer Earn for 2024
- In 2024, Elevate Your Content Game Studio Aptitude Essentials
- YouTube Archiving A Guide to Moving to Dailymotion
- 2024 Approved Ace List of Low-Cost YouTube Caption Tools
- Budget-Friendly Video Recorder Sets Top 11 Picks
- [New] Building a Stronger Presence with Effective YouTube Pairings
- [New] Clip Description Creator
- What Is T Series Income on YouTube
- 2024 Approved Crafting GIFs From YouTube Detailed Step-by-Step Guide for PC/Mobile
- The Value of a Million-Viewing Spree on YouTube
- In 2024, Building Your ASMR Empire Key Concepts and Best Practices
- 2024 Approved Accelerate/Decelerate Your YouTube Videos A Step-by-Step Guide
- Breaking Barriers YouTube Marketing Mastery
- Decoding YouTube Stats Efficiency with Social Blade's Advanced Analysis
- Unwanted No More! Top 7 Android Apps to Eliminate Ads
- 15 YouTube Video Ideas for Musicians
- Elevate Your Youtube Presence Essential Tips for Engaging Shorts
- Best 10 Voice Recorder Apps for Android Phone
- How to Reset Motorola Moto G04 Without the Home Button | Dr.fone
- 2024 Approved Step Into the Shoes of a Pro Screen Capture Techniques for Mac Enthusiasts
- Breaking Down This Year's Latest TikTok Wave for 2024
- 5 Ways to Track Google Pixel 8 Pro without App | Dr.fone
- 2024 Approved Optimized Processes for Effective Live Streaming on Computer
- Updated In 2024, Remove Background Distractions Top Free Online Blur Tools
- In 2024, Top 5 Car Locator Apps for Motorola Moto G Stylus (2023) | Dr.fone
- [New] Unlocking Virtual Video Talks via WhatsApp Browser on Your PC for 2024
- Set Your Preferred Job Location on LinkedIn App of your Oppo Find X7 | Dr.fone
- [New] The Social Strategist's Guide to Capturing Feedback via Instagram Story Polls
- Solutions to Spy on Samsung Galaxy XCover 7 with and without jailbreak | Dr.fone
- 2024 Approved Top 5 Methods to OBS Studio Video Editing
- [New] Unveiling Social Media Stars Your Niche’s Influencers Guide
- [New] 2024 Approved How to Become an Instagram Influencer Easily
- 2024 Approved A Viral Phenomenon in Micro-Bites
- New Elite 4 Music Editing Tools for macOS The Ultimate Guide for 2024
- How to Hide/Fake Snapchat Location on Your Oppo A59 5G | Dr.fone
- Vignette Mastery The Best iOS and Android Apps Free & Paid
- [New] 2024 Approved Unlocking Verified Status Essential Strategies for Increasing Instagram Popularity
- Title: "[Updated] Essential Guide 9 Cost-Free Editing Tools for Creatives"
- Author: Brian
- Created at : 2024-05-25 13:24:53
- Updated at : 2024-05-26 13:24:53
- Link: https://youtube-video-recordings.techidaily.com/updated-essential-guide-9-cost-free-editing-tools-for-creatives/
- License: This work is licensed under CC BY-NC-SA 4.0.
