
![[Updated] Essential 10 Capture Hardware Recommendations for Online Videos](https://www.lifewire.com/thmb/Cf134RZWfKPf0IK4nvJEe0UWK6M=/540x405/filters:no_upscale():max_bytes(150000):strip_icc()/buy-used-iphone-5717c2523df78c3fa23ddc70.jpg)
[Updated] Essential 10 Capture Hardware Recommendations for Online Videos
Essential 10 Capture Hardware Recommendations for Online Videos
The Top 10 Capture Cards for YouTube

Richard Bennett
Nov 04, 2022• Proven solutions
If you are like to share gameplay videos, it’s very important that you have a high-quality capture card. With the help of a capture card, you can easily get all of the in-game footage that you need to make amazing videos and grow a healthy YouTube channel . In this article we will break down the top 10 capture cards for gaming YouTubers in 2018:
- Elgato Game Capture HD 60 Pro
- Elgato Game Capture HD 60 S
- Star Tech 4 Port PCI Firewire Adaptor Card with Digital Video Editing
- Hauppage Colossus 2 PCI Express Internal 1080P HD-PVR
- Elgato Game Capture HD
- Imillet HDMI Video Capture with USB 3.0/2.0 Dongle
- HDML Cloner Box Pro
- Pyle PVRC43 Standalone Digital Video Recorder
- HDML Cloner Box Evolve
- AVerMedia AVerCapture HD
Click here for more tips on being a YouTube gamer .
1. Elgato Game Capture HD 60 Pro
Price: $204
Compatibility: Windows, Switch, 360, Xbox One, PS4
Specs: Internal PCI 4k 30fps
Highlights: Made for streaming. Improved benchmark speeds.
This capture card works with an HDMI interface as well as the ability to be plugged into any type of PC game device. The process for setting it up and recording is extremely simple and the casing has been designed for improving the performance of the system and making it easier to integrate with many different devices. With an up to 16 MB per second capture bitrate, this is a pro tool.
2. Elgato Game Capture HD 60 S
Price: $160
Compatibility: Xbox one, switch, ps4
Specs: This device does 1080p at 60 fps
Highlights: This is one of very few game capture devices that come with USB 3.0 compatibility for easy access to almost any type of gaming device.
The card itself is mind-blowingly easy to set up with its external USB. It’s made for live streaming to YouTube, Twitch, and other platforms. There’s very low latency available on this card and it is one of the highest quality tools for console players.
3. Star Tech 4 Port PCI Firewire Adaptor Card with Digital Video Editing
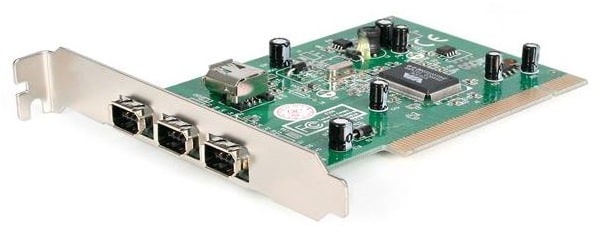
Price: $80
Compatibility: PC, Xbox, PS4
Specs: 1080p, 60 fps
Highlights: This USB 3.0 capture card can be quite easily installed almost anywhere and captures up to 60 frames per second for live streams.
This card comes with a wide range of ports including DVI, Component, HDMI, VGA, and USB. It’s tough to find a capture card that has so many different ports available and this can ensure that it’s possible to capture on almost any type of gaming system or device. A helpful tutorial is also included with this capture card to ensure that you can get the best video format from every console.
4. Hauppauge Colossus 2 PCI Express Internal Card
Price: $135
Compatibility: TV, DVR, Satellite, Xbox, PC, PlayStation
Specs: 1080p, 60 fps
Highlights: This card is an internal PCI card allowing it to remain as a consistent capture device inside a PC.
This card is perfect for recording live programs from a TV to your computer, offloading programs off of your DVR, as well as recording live game footage from PlayStation, Xbox, or your PC. Included alongside this card is the chance to use Stream EEZ for live streaming directly to platforms like Upstream, Twitch, and YouTube.
5. Elgato Game Capture HD
Price: $159
Compatibility: Xbox, PlayStation, Nintendo, PC, Mac
Specs: 1080p at 60fps
Highlights: The game capture HD offers a one-click sharing system to YouTube as well as flashback recording where you can turn back 10 or 15 minutes to record content that just happened.
Overall this is one of the easiest capture cards to set up because it comes with USB 3.0 and HDMI connections. For most modern gaming consoles, it offers the same type of features including the flashback recording solution to record retroactively. The device includes unlimited game capture at a fairly reasonable price and a creation suite so that you can do multitrack recording from your webcam. Editing footage from the card makes it very easy to quickly export clips for all of your content and publish them on social media. This game capture device is also known for its extremely compact design. It is only around the size of a mobile phone, meaning it can be quite easily carried in your pocket.
6. Imillet HDMI Capture Card with USB 3.0 Dongle
Price: $148
Compatibility: Plug and play with no drivers needed. PC, Mac, Linux, any iOS
Specs: 1080p 60 fps
Highlights: Doesn’t require any type of driver installation. This will work on any operating system or computer for quick recording.
The card itself is known for its USB 3.0 support as well as USB 2.0, and for not needing drivers. There is no more compatible card on the market right now. If you have had issues with other cards in the past or you regularly run Linux, you should consider this device to be prepared for all your recording needs. The device will detect the input and adjust output automatically to ensure a crystal-clear picture based on the type of device that you’re recording from. Imillet also offers a great warranty of six months free replacement as well as 12 months free repair on the card for anyone that is ordering it. The software that comes with the card is extremely simple but it does the job quite effectively, allowing for quick recording from multiple devices and simple detection for a video signal and output. Input formats can range from 480p to 1080p and frame rates can go as high as 60 frames per second. The device has great stats for its live capture but many people have experienced problems when trying to record from DVR specifically.
7. HDML Cloner Box Pro
Price: $135
Compatibility: Compatible with game consoles, windows, mac.
Specs: 1080p video at 60fps max
Highlights: The HDML Cloner Box comes with its own remote and the option to record using VGA, AV, YPbPr, and HDMI.
With so many different inputs available on this card it’s possible to record from almost any type of gaming device. With the hardware encoder which is on board, you can save videos as MP4 files and then instantly transfer them over to a flash drive on the device. You can get all of your saved files available without even having access to a PC. The box works as a standalone and it doesn’t have to be plugged into a computer to work. Free editing and converter software are included but with a storage memory card placed in the device and you can record a huge amount of footage and then edit it on your PC later on. With the quick connect feature, it is easy to set up recording and then perform all the functions you need for recording, stopping, and pausing on the remote as you use it. This remains one of the only cards available where it works as a standalone and allows for the chance to save videos to a flash drive or storage device without having to have a computer plugged in. The free converter software and video editing that comes with this device add extra value as well. An optional two-year warranty can make sure that you are ready for anything concerning this card.
8. Pyle PVRC43 Standalone Digital Video Recorder
Price: $80
Compatibility: TV, VCR, DVD, Digital camcorder, Laptop, PC, Mac, Game console
Specs: 480p
Highlights: This works as a standalone recorder with up to 32 GB of onboard memory. There’s no need to plug it into a computer for it to work and with the help of the memory card, you can record a wide range of output videos in AVI.
This card is designed as a standalone option and it’s extremely small with a USB 2.0 interface. Overall the quality of this card is not quite as technically advanced as some of the others on our list but it can record a video that is perfectly appropriate for the web or sharing over platforms like YouTube. The device can be set up quite easily with the help of an RCA connection cable, USB power cable, or other options. Generally, you may need access to an RCA to HDMI adapter if you want to record video off of a more modern laptop or camera. Where this device takes over on its competitors is the idea of just how simple it is to use. It weighs less than a pound and has a ‘one-button operation’ to start and pause recording. As of the completely standalone option, it doesn’t require any type of connection to a computer to record video. If you are looking for one of the simplest capture cards on the market that outputs to AVI in web quality, this is it.
9. HDML Cloner Box Evolve
Price: $121
Compatibility: HDMI input standalone mass compatibility
Specs: 4k video input, 1080p 60fps output
Highlights: This is a standalone USB capture device that comes with its remote. It also features dual HDMI slots allowing for up to two sources of video during recording (so you can also record from a facecam).
The card itself features a stream and capture function so that you can stream gameplay to any type of USB storage device. By plugging in a hard drive you can just press one button to record gaming videos and then handle the process of live streaming, editing, and more. Through two HDMI inputs supported and a very powerful remote control, you record on any device with fantastic image quality and without even having to plug it into any type of computer. While many of these standalone style capture boxes only support the use of minimal storage, this is a device that is capable of getting hooked up to any type of USB external hard drive for a chance to capture nearly unlimited video on your Cloner Box. As a bonus, the MP4 video editing software that is included will make the process of trimming, copying, and converting easier than ever. This has incredible value to the overall product. As an additional bonus, this Cloner Box also features a quick heat dissipation capability which can help to prevent lagging and other common problems that occur with many types of capture boxes when they overheat. A free microphone slot in addition to the HDMI slots makes recording professional voiceovers for any gameplay videos as easy as possible!
10. Avermedia Avercapture HD
Price: $99
Compatibility: Any console, PC, Mac
Specs: This device is capable of capture in full 1080p/60fps as well as the style encoding for quick streaming and easy video capture.
Highlights: The timeshift feature available on this device makes it simple to record retroactively as well as offer ultralow streaming and recording over time. The device makes it easy to capture and stream and it comes with a competitive two-year warranty.
This card works as a USB capture card from most any type of device, it captures through a component input or HDMI input and it has some of the lowest latency for any type of team capture. With one slot for video input as well as an audio input slot, it’s possible to record quick gameplay and voiceovers at any time with very minimal setup. Streaming and recording in full 1080p are done quite easily on this device and it’s designed to use less processing power than some of the competitors to ensure minimal game lag. RECental is included as part of this device so that you can set up live streaming to many of the top platforms available online. The timeshift function comes with a one-hour buffer ensuring if a great gameplay moment happens, you can shift back and begin recording from that time. Commentary and sharing are made easy with the software that’s included with this device. It makes sharing and recording an easy process for any avid video recorder.
Let us know what capture card you use and if you’re happy with it!
Richard Bennett
Richard Bennett is a writer and a lover of all things video.
Follow @Richard Bennett
Richard Bennett
Nov 04, 2022• Proven solutions
If you are like to share gameplay videos, it’s very important that you have a high-quality capture card. With the help of a capture card, you can easily get all of the in-game footage that you need to make amazing videos and grow a healthy YouTube channel . In this article we will break down the top 10 capture cards for gaming YouTubers in 2018:
- Elgato Game Capture HD 60 Pro
- Elgato Game Capture HD 60 S
- Star Tech 4 Port PCI Firewire Adaptor Card with Digital Video Editing
- Hauppage Colossus 2 PCI Express Internal 1080P HD-PVR
- Elgato Game Capture HD
- Imillet HDMI Video Capture with USB 3.0/2.0 Dongle
- HDML Cloner Box Pro
- Pyle PVRC43 Standalone Digital Video Recorder
- HDML Cloner Box Evolve
- AVerMedia AVerCapture HD
Click here for more tips on being a YouTube gamer .
1. Elgato Game Capture HD 60 Pro
Price: $204
Compatibility: Windows, Switch, 360, Xbox One, PS4
Specs: Internal PCI 4k 30fps
Highlights: Made for streaming. Improved benchmark speeds.
This capture card works with an HDMI interface as well as the ability to be plugged into any type of PC game device. The process for setting it up and recording is extremely simple and the casing has been designed for improving the performance of the system and making it easier to integrate with many different devices. With an up to 16 MB per second capture bitrate, this is a pro tool.
2. Elgato Game Capture HD 60 S
Price: $160
Compatibility: Xbox one, switch, ps4
Specs: This device does 1080p at 60 fps
Highlights: This is one of very few game capture devices that come with USB 3.0 compatibility for easy access to almost any type of gaming device.
The card itself is mind-blowingly easy to set up with its external USB. It’s made for live streaming to YouTube, Twitch, and other platforms. There’s very low latency available on this card and it is one of the highest quality tools for console players.
3. Star Tech 4 Port PCI Firewire Adaptor Card with Digital Video Editing
Price: $80
Compatibility: PC, Xbox, PS4
Specs: 1080p, 60 fps
Highlights: This USB 3.0 capture card can be quite easily installed almost anywhere and captures up to 60 frames per second for live streams.
This card comes with a wide range of ports including DVI, Component, HDMI, VGA, and USB. It’s tough to find a capture card that has so many different ports available and this can ensure that it’s possible to capture on almost any type of gaming system or device. A helpful tutorial is also included with this capture card to ensure that you can get the best video format from every console.
4. Hauppauge Colossus 2 PCI Express Internal Card
Price: $135
Compatibility: TV, DVR, Satellite, Xbox, PC, PlayStation
Specs: 1080p, 60 fps
Highlights: This card is an internal PCI card allowing it to remain as a consistent capture device inside a PC.
This card is perfect for recording live programs from a TV to your computer, offloading programs off of your DVR, as well as recording live game footage from PlayStation, Xbox, or your PC. Included alongside this card is the chance to use Stream EEZ for live streaming directly to platforms like Upstream, Twitch, and YouTube.
5. Elgato Game Capture HD
Price: $159
Compatibility: Xbox, PlayStation, Nintendo, PC, Mac
Specs: 1080p at 60fps
Highlights: The game capture HD offers a one-click sharing system to YouTube as well as flashback recording where you can turn back 10 or 15 minutes to record content that just happened.
Overall this is one of the easiest capture cards to set up because it comes with USB 3.0 and HDMI connections. For most modern gaming consoles, it offers the same type of features including the flashback recording solution to record retroactively. The device includes unlimited game capture at a fairly reasonable price and a creation suite so that you can do multitrack recording from your webcam. Editing footage from the card makes it very easy to quickly export clips for all of your content and publish them on social media. This game capture device is also known for its extremely compact design. It is only around the size of a mobile phone, meaning it can be quite easily carried in your pocket.
6. Imillet HDMI Capture Card with USB 3.0 Dongle
Price: $148
Compatibility: Plug and play with no drivers needed. PC, Mac, Linux, any iOS
Specs: 1080p 60 fps
Highlights: Doesn’t require any type of driver installation. This will work on any operating system or computer for quick recording.
The card itself is known for its USB 3.0 support as well as USB 2.0, and for not needing drivers. There is no more compatible card on the market right now. If you have had issues with other cards in the past or you regularly run Linux, you should consider this device to be prepared for all your recording needs. The device will detect the input and adjust output automatically to ensure a crystal-clear picture based on the type of device that you’re recording from. Imillet also offers a great warranty of six months free replacement as well as 12 months free repair on the card for anyone that is ordering it. The software that comes with the card is extremely simple but it does the job quite effectively, allowing for quick recording from multiple devices and simple detection for a video signal and output. Input formats can range from 480p to 1080p and frame rates can go as high as 60 frames per second. The device has great stats for its live capture but many people have experienced problems when trying to record from DVR specifically.
7. HDML Cloner Box Pro
Price: $135
Compatibility: Compatible with game consoles, windows, mac.
Specs: 1080p video at 60fps max
Highlights: The HDML Cloner Box comes with its own remote and the option to record using VGA, AV, YPbPr, and HDMI.
With so many different inputs available on this card it’s possible to record from almost any type of gaming device. With the hardware encoder which is on board, you can save videos as MP4 files and then instantly transfer them over to a flash drive on the device. You can get all of your saved files available without even having access to a PC. The box works as a standalone and it doesn’t have to be plugged into a computer to work. Free editing and converter software are included but with a storage memory card placed in the device and you can record a huge amount of footage and then edit it on your PC later on. With the quick connect feature, it is easy to set up recording and then perform all the functions you need for recording, stopping, and pausing on the remote as you use it. This remains one of the only cards available where it works as a standalone and allows for the chance to save videos to a flash drive or storage device without having to have a computer plugged in. The free converter software and video editing that comes with this device add extra value as well. An optional two-year warranty can make sure that you are ready for anything concerning this card.
8. Pyle PVRC43 Standalone Digital Video Recorder
Price: $80
Compatibility: TV, VCR, DVD, Digital camcorder, Laptop, PC, Mac, Game console
Specs: 480p
Highlights: This works as a standalone recorder with up to 32 GB of onboard memory. There’s no need to plug it into a computer for it to work and with the help of the memory card, you can record a wide range of output videos in AVI.
This card is designed as a standalone option and it’s extremely small with a USB 2.0 interface. Overall the quality of this card is not quite as technically advanced as some of the others on our list but it can record a video that is perfectly appropriate for the web or sharing over platforms like YouTube. The device can be set up quite easily with the help of an RCA connection cable, USB power cable, or other options. Generally, you may need access to an RCA to HDMI adapter if you want to record video off of a more modern laptop or camera. Where this device takes over on its competitors is the idea of just how simple it is to use. It weighs less than a pound and has a ‘one-button operation’ to start and pause recording. As of the completely standalone option, it doesn’t require any type of connection to a computer to record video. If you are looking for one of the simplest capture cards on the market that outputs to AVI in web quality, this is it.
9. HDML Cloner Box Evolve
Price: $121
Compatibility: HDMI input standalone mass compatibility
Specs: 4k video input, 1080p 60fps output
Highlights: This is a standalone USB capture device that comes with its remote. It also features dual HDMI slots allowing for up to two sources of video during recording (so you can also record from a facecam).
The card itself features a stream and capture function so that you can stream gameplay to any type of USB storage device. By plugging in a hard drive you can just press one button to record gaming videos and then handle the process of live streaming, editing, and more. Through two HDMI inputs supported and a very powerful remote control, you record on any device with fantastic image quality and without even having to plug it into any type of computer. While many of these standalone style capture boxes only support the use of minimal storage, this is a device that is capable of getting hooked up to any type of USB external hard drive for a chance to capture nearly unlimited video on your Cloner Box. As a bonus, the MP4 video editing software that is included will make the process of trimming, copying, and converting easier than ever. This has incredible value to the overall product. As an additional bonus, this Cloner Box also features a quick heat dissipation capability which can help to prevent lagging and other common problems that occur with many types of capture boxes when they overheat. A free microphone slot in addition to the HDMI slots makes recording professional voiceovers for any gameplay videos as easy as possible!
10. Avermedia Avercapture HD
Price: $99
Compatibility: Any console, PC, Mac
Specs: This device is capable of capture in full 1080p/60fps as well as the style encoding for quick streaming and easy video capture.
Highlights: The timeshift feature available on this device makes it simple to record retroactively as well as offer ultralow streaming and recording over time. The device makes it easy to capture and stream and it comes with a competitive two-year warranty.
This card works as a USB capture card from most any type of device, it captures through a component input or HDMI input and it has some of the lowest latency for any type of team capture. With one slot for video input as well as an audio input slot, it’s possible to record quick gameplay and voiceovers at any time with very minimal setup. Streaming and recording in full 1080p are done quite easily on this device and it’s designed to use less processing power than some of the competitors to ensure minimal game lag. RECental is included as part of this device so that you can set up live streaming to many of the top platforms available online. The timeshift function comes with a one-hour buffer ensuring if a great gameplay moment happens, you can shift back and begin recording from that time. Commentary and sharing are made easy with the software that’s included with this device. It makes sharing and recording an easy process for any avid video recorder.
Let us know what capture card you use and if you’re happy with it!
Richard Bennett
Richard Bennett is a writer and a lover of all things video.
Follow @Richard Bennett
Bite-Sized Broadcasting: Maintaining Quality in Quick Posts
The Dos and Don’ts of Daily Vlogging
Richard Bennett
Oct 26, 2023• Proven solutions
If you are making videos on YouTube, you’ll have come to a point where you feel daring enough to take on the ultimate challenge: daily vlogging.
You might have been inspired by other creators on YouTube or you might have heard of VEDA: Vlog every day April (or August). You might have also watched some videos from influencers telling you that the ruthless YouTube algorithm demands daily content if you aspire to grow an audience.
There are many reasons why you may want to try your hand at becoming a daily vlogger, but here are 3 motivating reasons to conquer your vlogging fears and get started.
Bonus Tip-The Best Daily Vlog Maker- Wondershare Filmora
Vlogging is an art and people use vlogging to upload videos daily to their YouTube channel. This is natural if you are recording videos daily, you will need a tool like Wondershare Filmora to edit your videos with precision. To make your task easy, Wondershare Filmora has all the features and effects that are required to edit a daily vlog video that you can upload directly from Filmora itself. You can make use of features like add text, background music, filters & effects, etc if you are a daily vlogger as it would help you a lot in making the video look professional in less time.


Why Daily Vlog Anyways?
Build discipline: Like exercising and eating healthy, you have to commit to it and do it regularly in order to see any lasting results. Vlogging is the same. However, if you’re a creator, making videos whenever you feel like it and want to give yourself a kick in the behind, daily vlogging is a practice that will keep you accountable. You have to do it every day. No excuses.
Practice more: How do the best become the best? They practice… every day. If what you want to do is become the greatest video creator you can be, make the best videos you can make, and build the largest following that you can, then let daily vlogging be your boot camp to reach those goals.
Please the YouTube algorithm: It’s true, YouTube wants to see that you are consistently posting fresh content. Every new video you upload will have a day or two to impress the algorithm, this metric is often referred to as view velocity . YouTube will give your video a lift, suggesting it to new viewers, if they see that it is being enjoyed. By publishing daily, you increase your chances of attracting more viewers.
Now that you know the benefits, how should you approach it?
The Dos and Don’ts of Daily Vlogging
1. Do Get Some Experience First
If you are starting out on YouTube, as in, you made one or two videos make sure you can vlog weekly for a few months before moving to daily. You wouldn’t run a marathon without training; you can hurt yourself if you do. Have an idea of what you are getting yourself into, otherwise, it can burn you out and ruin the joy of video creation for you completely.
2. Don’t Film Everything
Having a daily vlog does not mean always having the camera on. Every minute you film is a minute of footage you will have to watch later, a minute you will have to decide whether to cut from your final video. Every second of recorded footage is multiplied in the editing room and it would be impossible for you to meet your daily deadline if you have too much. The key is to start editing as you film, that way, you only film what you need. It doesn’t hurt to have extra footage, but being excessive can waste your time and add little to the final product.
3. Do Plan Out Your Day (Not Your Night)
Knowing where you need to go, who you are going to see and talk to, where you are going to have lunch, which route you are going to take home, and any other occurrences that can happen during the day will greatly increase your chances of success. A day is long and can be made longer when you have a video on your mind. Wouldn’t it be nice to save some of your decision making energy by having it all planned out? And if you are worried that over planning will reduce serendipitous moments that you want, don’t, your day won’t always go as planned… that’s just life.
Additionally, avoid filming at night. It will become a major stress to your health. Filming at night means pulling all-nighters to publish the next day, and then repeating that daily (nightly).
4. Don’t Spend too Long On a Script… Or Your Video
The beauty of daily vlog is to speak your mind and show your personality, not to perform a Shakespearean sonnet by heart. You shouldn’t try to memorize a whole script every day. That would be brutal! What you can have is an outline of the key points you want to hit, certain things you want to say, convey, or record to tell your story, knowing where you want certain cuts to happen helps too, but don’t workshop it too long, because tomorrow will be another show and done is better than perfect.
5. Do Use Templates, Presets, Hotkeys, and Shortcuts
Any chance you have to cut down on your editing time, use it. This means creating and properly storing templates of visuals you want to incorporate into your video. This means adding presets for effects that you feel you would use again. This means learning the editing hotkeys so you can streamline your process. Here are Filmora’s hotkeys .
6. Don’t Forget to Label Your Content
Staying organized is so important, especially as you begin to accumulate more and more footage. It might seem tedious initially, but this good habit can save you a lot of wasted hours later on when you need to find that specific shot that you swore you had…
7. Do Have A Goal
Have an idea of how long you are going to be going daily. Will it be one month, two months, or a year? Or will it be until you reach a certain amount of views, subscribers, or watch time? While it might feel liberating to venture into the great unknown without a clear destination, having a goal will allow you to keep motivated even when times are hard. After all, once you’ve hit your goal and still feel like there is more fuel in you, keep daily vlogging. There is no better feeling than exceeding your own expectations.
8. Don’t Worry About Equipment (But Be Aware of Bad Audio)
You’ve heard it before: you don’t need anything fancy to be a vlogger. If you are looking to increase your toolbox, we have a helpful YouTube gear starter guide for you. But look at it this way, there will be days when you realized that you forgot to charge the battery on your camera or that you left your tripod at home. Don’t abandon the whole project simply because you don’t have what you need.
The important thing is to film, tell a story, edit, and upload. You can do all that on your smartphone or computer webcam if you have to, so don’t let your equipment or lack thereof break your streak. If there is one thing you should put attention on is audio, if you don’t have excellent gear, try to avoid filming in loud places, such as construction sites, dance halls, or highway overpasses.
9. Do Bring a Camera With You Everywhere
Although you shouldn’t worry about your equipment, it is still a good habit to carry your camera with you everywhere. From the moment you wake up to the moment you go to sleep you are a daily vlogger, you never know when something will happen. Always be prepared. Your camera is to you, as a gun is to a soldier. It’s what sets you apart from all the civilians, so keep it close at hand.
10. Don’t Neglect Your Health
Earlier I compared daily vlogging to running a marathon, and like a marathon, there is a point where you need to be aware of yourself. You want to push yourself, but you don’t want to overdo it to a point where you damage your physical or mental health. Only you know when you have gone too far. If you feel like daily vlogging is ruining your life and the goal you set for yourself isn’t something you desire anymore, ask yourself: can I take a week off and decide if video creating is something I want to continue?
11. Do Watch Other Daily Vloggers
By seeing how other YouTubers have done daily vlogs, you can get ideas, see what aspect of their videos you like or dislike, and learn from their presentation, content, and community engagement. By watching daily vloggers, you can also start interacting with their content as well. It is always easier to stay motivated when you have support. By watching and reaching out to the daily vloggers you enjoy, you can build a network of people who are going through the same journey as you.
12. Don’t Forget About Your Audience
Remember that in the end, you are creating videos for someone else to enjoy. Even though you might be doing the daily vlog for yourself, if you want your viewers to return every day, you have to have an overall mission for your project. Is your message one that is aimed to motivate or do you want to document a journey? Don’t create your content in a vacuum, ask your viewers for feedback so you know how to improve.
Embarking on your daily vlogging adventure is not one to take lightly, but after 1 month, 1 season, or 1 year, you will be able to look back and see all that you have accomplished and feel proud. With the advice from this article, you can properly prepare yourself and enjoy each step of the process. Don’t overthink it, have fun!
Are you thinking of starting your daily vlog? Let us know what’s stopping you from the comments.
Richard Bennett
Richard Bennett is a writer and a lover of all things video.
Follow @Richard Bennett
Richard Bennett
Oct 26, 2023• Proven solutions
If you are making videos on YouTube, you’ll have come to a point where you feel daring enough to take on the ultimate challenge: daily vlogging.
You might have been inspired by other creators on YouTube or you might have heard of VEDA: Vlog every day April (or August). You might have also watched some videos from influencers telling you that the ruthless YouTube algorithm demands daily content if you aspire to grow an audience.
There are many reasons why you may want to try your hand at becoming a daily vlogger, but here are 3 motivating reasons to conquer your vlogging fears and get started.
Bonus Tip-The Best Daily Vlog Maker- Wondershare Filmora
Vlogging is an art and people use vlogging to upload videos daily to their YouTube channel. This is natural if you are recording videos daily, you will need a tool like Wondershare Filmora to edit your videos with precision. To make your task easy, Wondershare Filmora has all the features and effects that are required to edit a daily vlog video that you can upload directly from Filmora itself. You can make use of features like add text, background music, filters & effects, etc if you are a daily vlogger as it would help you a lot in making the video look professional in less time.
Why Daily Vlog Anyways?
Build discipline: Like exercising and eating healthy, you have to commit to it and do it regularly in order to see any lasting results. Vlogging is the same. However, if you’re a creator, making videos whenever you feel like it and want to give yourself a kick in the behind, daily vlogging is a practice that will keep you accountable. You have to do it every day. No excuses.
Practice more: How do the best become the best? They practice… every day. If what you want to do is become the greatest video creator you can be, make the best videos you can make, and build the largest following that you can, then let daily vlogging be your boot camp to reach those goals.
Please the YouTube algorithm: It’s true, YouTube wants to see that you are consistently posting fresh content. Every new video you upload will have a day or two to impress the algorithm, this metric is often referred to as view velocity . YouTube will give your video a lift, suggesting it to new viewers, if they see that it is being enjoyed. By publishing daily, you increase your chances of attracting more viewers.
Now that you know the benefits, how should you approach it?
The Dos and Don’ts of Daily Vlogging
1. Do Get Some Experience First
If you are starting out on YouTube, as in, you made one or two videos make sure you can vlog weekly for a few months before moving to daily. You wouldn’t run a marathon without training; you can hurt yourself if you do. Have an idea of what you are getting yourself into, otherwise, it can burn you out and ruin the joy of video creation for you completely.
2. Don’t Film Everything
Having a daily vlog does not mean always having the camera on. Every minute you film is a minute of footage you will have to watch later, a minute you will have to decide whether to cut from your final video. Every second of recorded footage is multiplied in the editing room and it would be impossible for you to meet your daily deadline if you have too much. The key is to start editing as you film, that way, you only film what you need. It doesn’t hurt to have extra footage, but being excessive can waste your time and add little to the final product.
3. Do Plan Out Your Day (Not Your Night)
Knowing where you need to go, who you are going to see and talk to, where you are going to have lunch, which route you are going to take home, and any other occurrences that can happen during the day will greatly increase your chances of success. A day is long and can be made longer when you have a video on your mind. Wouldn’t it be nice to save some of your decision making energy by having it all planned out? And if you are worried that over planning will reduce serendipitous moments that you want, don’t, your day won’t always go as planned… that’s just life.
Additionally, avoid filming at night. It will become a major stress to your health. Filming at night means pulling all-nighters to publish the next day, and then repeating that daily (nightly).
4. Don’t Spend too Long On a Script… Or Your Video
The beauty of daily vlog is to speak your mind and show your personality, not to perform a Shakespearean sonnet by heart. You shouldn’t try to memorize a whole script every day. That would be brutal! What you can have is an outline of the key points you want to hit, certain things you want to say, convey, or record to tell your story, knowing where you want certain cuts to happen helps too, but don’t workshop it too long, because tomorrow will be another show and done is better than perfect.
5. Do Use Templates, Presets, Hotkeys, and Shortcuts
Any chance you have to cut down on your editing time, use it. This means creating and properly storing templates of visuals you want to incorporate into your video. This means adding presets for effects that you feel you would use again. This means learning the editing hotkeys so you can streamline your process. Here are Filmora’s hotkeys .
6. Don’t Forget to Label Your Content
Staying organized is so important, especially as you begin to accumulate more and more footage. It might seem tedious initially, but this good habit can save you a lot of wasted hours later on when you need to find that specific shot that you swore you had…
7. Do Have A Goal
Have an idea of how long you are going to be going daily. Will it be one month, two months, or a year? Or will it be until you reach a certain amount of views, subscribers, or watch time? While it might feel liberating to venture into the great unknown without a clear destination, having a goal will allow you to keep motivated even when times are hard. After all, once you’ve hit your goal and still feel like there is more fuel in you, keep daily vlogging. There is no better feeling than exceeding your own expectations.
8. Don’t Worry About Equipment (But Be Aware of Bad Audio)
You’ve heard it before: you don’t need anything fancy to be a vlogger. If you are looking to increase your toolbox, we have a helpful YouTube gear starter guide for you. But look at it this way, there will be days when you realized that you forgot to charge the battery on your camera or that you left your tripod at home. Don’t abandon the whole project simply because you don’t have what you need.
The important thing is to film, tell a story, edit, and upload. You can do all that on your smartphone or computer webcam if you have to, so don’t let your equipment or lack thereof break your streak. If there is one thing you should put attention on is audio, if you don’t have excellent gear, try to avoid filming in loud places, such as construction sites, dance halls, or highway overpasses.
9. Do Bring a Camera With You Everywhere
Although you shouldn’t worry about your equipment, it is still a good habit to carry your camera with you everywhere. From the moment you wake up to the moment you go to sleep you are a daily vlogger, you never know when something will happen. Always be prepared. Your camera is to you, as a gun is to a soldier. It’s what sets you apart from all the civilians, so keep it close at hand.
10. Don’t Neglect Your Health
Earlier I compared daily vlogging to running a marathon, and like a marathon, there is a point where you need to be aware of yourself. You want to push yourself, but you don’t want to overdo it to a point where you damage your physical or mental health. Only you know when you have gone too far. If you feel like daily vlogging is ruining your life and the goal you set for yourself isn’t something you desire anymore, ask yourself: can I take a week off and decide if video creating is something I want to continue?
11. Do Watch Other Daily Vloggers
By seeing how other YouTubers have done daily vlogs, you can get ideas, see what aspect of their videos you like or dislike, and learn from their presentation, content, and community engagement. By watching daily vloggers, you can also start interacting with their content as well. It is always easier to stay motivated when you have support. By watching and reaching out to the daily vloggers you enjoy, you can build a network of people who are going through the same journey as you.
12. Don’t Forget About Your Audience
Remember that in the end, you are creating videos for someone else to enjoy. Even though you might be doing the daily vlog for yourself, if you want your viewers to return every day, you have to have an overall mission for your project. Is your message one that is aimed to motivate or do you want to document a journey? Don’t create your content in a vacuum, ask your viewers for feedback so you know how to improve.
Embarking on your daily vlogging adventure is not one to take lightly, but after 1 month, 1 season, or 1 year, you will be able to look back and see all that you have accomplished and feel proud. With the advice from this article, you can properly prepare yourself and enjoy each step of the process. Don’t overthink it, have fun!
Are you thinking of starting your daily vlog? Let us know what’s stopping you from the comments.
Richard Bennett
Richard Bennett is a writer and a lover of all things video.
Follow @Richard Bennett
Also read:
- 2024 Approved Drive More Viewers to Your Videos Top Growth Hacks
- [New] Essential Tips for WireCast Live Streaming to Youtube
- Maximize Video Discoverability Key YouTube SEO Techniques
- In 2024, Charting Your Financial Course The 3-Step Methodology for Estimating YouTube Income
- Demystifying The Process of Checking Subs
- Enjoy Endless Creativity Discover the Best in Cheap, Online Video Downloading
- Top Mobile ASMR Tools Essential Downloads
- 2024 Approved Deciphering the World of YouTube Media Conglomerates
- Boosting Visuals Mastering YouTube's Video Enhancement Tools
- [New] Discover 10 Swift-Growing YouTube Sources for Inspiration
- [Updated] Elite Content Makers Top Paid Online Stars
- 2024 Approved Cutting-Edge Techniques Elevating Your YouTube Edits Using iMovie
- A Step-by-Step Approach to Best YouTube Thumbnails
- Dissecting the Financial Strategy of T-Series in Video Platforms for 2024
- 2024 Approved Deciphering YouTube Monetization Success Codes
- Budget-Friendly Video Recorder Sets Top 11 Picks
- Delving Into the Advantages and Disadvantages of YouTube Premium for 2024
- Updated Top 5 Ways To Convert Hdr To Sdr Videos
- Does Airplane Mode Turn off GPS Location On Tecno Pop 7 Pro? | Dr.fone
- [New] Elevate Your Social Media Game 3 Techniques to Enhance Video Captions on IG for 2024
- In 2024, For People Wanting to Mock GPS on Nokia G22 Devices | Dr.fone
- New Trim, Cut, and Share Mastering Kapwings Video Editing Tools for 2024
- In 2024, Gaining Ground on Competitors with Your Instagram Videos
- In 2024, Still Using Pattern Locks with Xiaomi Redmi Note 12 4G? Tips, Tricks and Helpful Advice
- [New] In 2024, Mastering Siri Voice Commands for Dynamic and Efficient TikTok Videos
- [Updated] In 2024, Harnessing New Filters on Instagram A Modern Take (2023 Techniques)
- In 2024, OBS or Streamlabs? Expert's Take on Best Live Broadcast Software
- Title: [Updated] Essential 10 Capture Hardware Recommendations for Online Videos
- Author: Brian
- Created at : 2024-05-25 13:24:41
- Updated at : 2024-05-26 13:24:41
- Link: https://youtube-video-recordings.techidaily.com/updated-essential-10-capture-hardware-recommendations-for-online-videos/
- License: This work is licensed under CC BY-NC-SA 4.0.
