
!["[Updated] EpicEditor Hub Innovative PC Cutting with Tunes"](https://www.lifewire.com/thmb/FuDKvpD8bIq0WaxlcLQoWUX_DG4=/400x300/filters:no_upscale():max_bytes(150000):strip_icc()/100_0261-5806a1b05f9b5805c286a636.JPG)
"[Updated] EpicEditor Hub Innovative PC Cutting with Tunes"
EpicEditor Hub: Innovative PC Cutting with Tunes
The online world is steadily shifting from static photos to videos and it is quite evident from the social media users. Everyone prefers uploading short videos with music to get more attention rather than uploading a collection of photos. You can join multiple video clips and add background music as well as make a slideshow video with audio. You will require a video editor with music to get the job done.
There are different types of video editors available where you can upload photos and video clips along with songs and music. You turn them into an eye-catching music video instantly with different video effects and animations. Starting from online video editors with music to standalone video editing software, here is the list of the top 10 best video editors for creating and editing videos with music like a professional.
Part 1. Best music video editors for PC
1. Filmora
System compatibility: Windows 11/10/8/7 and Mac
Rating: 4.7/5
Wondershare Filmora is the best video editor with music. It is a premium software where you get all the features and functionalities you need to make and edit music videos like a pro. The software lets you capture screen video, webcam video, external audio as well as voiceover. Therefore, you can use your own music or song in the background of your video.
When it comes to video editing, all the standard tools are available for music video creation. There are loads of transitions, effects, elements, audio and titles available. Besides, there is a dedicated stock media library available. You can import and export different file formats and publish 4K videos as well. Here are the top features of Wondershare Filmora.
For Win 7 or later (64-bit)
For macOS 10.12 or later
- Drag and drop all media files for video creation.
- Easy timeline for organizing media files and editing them quickly.
- Crop, trim, split, cut, and combine media files.
- Wide range of video transitions and audio effects.
- Different motion elements, titles, and stock media files.
- Keyframing, noise removal, video stabilization options.
- Super intuitive user interface for all users.

2. Windows Movie Maker
System compatibility: Windows 11, 10
Rating: 4.0/5
If you are Windows user and you are looking for a free video editor with song, Windows Movie Maker is the perfect app you can get from Microsoft Store. Even though it comes free, the video editor is quite powerful. You can crop, trim, join video clips and add text and music to your video. There are image filters available for photo enhancement as well as transitions to apply in the video.
There are in-built music tracks available and it supports importing a wide range of media files. You can avail animated pan and zoom feature for photos and adjust volume and speed. There is also a Pro version available that supports 4K video and better project management as well as advanced tools. Here are the top features of Windows Movie Maker.
- Rotate, trim, flip, and join video clips to make music video.
- Make video from photos and add in-built or external music files.
- Add titles, credits, texts, stickers, as well as pan-zoom animation.
- Wide range of transition effects and photo filters available.
- Supports importing and exporting different file formats.
- Pro version supports 4K resolution and offers exclusive quick tools.

3. Blender
System compatibility: Windows 11, 10, 8.1 macOS 10.13+, Linux.
Rating: 4.5/5
If you are looking for an open-source video editor, Blender is the best choice. It is completely free to use and it comes with all the standard features for creating and editing music videos. The software is particularly popular for modelling, sculpting, rendering and creating animation-based videos. The video editor contains 32 slots where you can add your media files to create the video.
Blender allows you to change video speed, adjust different layers in the videos and add preferred transitions. Moreover, there are masks and filters available to enhance video content. The advance options of audio mixing and keyframing will surely come handy for advanced users. Here are the top features of Blender video editor.
- Cut, split, trim, and join videos clips.
- Color grading, photo filters and custom text options.
- Add effects, transitions, and animations to your video.
- Live visualization options for advanced users.
- Motion tracking, scene stabilization and compositing options.

4. Adobe Premiere Pro
System compatibility: Windows 10 and 11.
Rating: 4.5/5
Adobe Premiere Pro is the best video editor for professionals. The software has a slightly steep learning curve and it requires a high-end computer. Therefore, it is useful for you when you are serious about making professional-quality music video. In fact, Adobe Premiere Pro is widely used in the music video and video creation industry.
Adobe Premiere Pro is the perfect combination of standard and advanced video editing options. You can edit various video files at the same time. In fact, it is perfect for a team to work on your music video files. You can edit VR videos, multi-cam videos as well 3D videos. You can edit your photos, video clips and audio files perfectly as per your requirements. Here are the top features of Adobe Premiere Pro.
- Trim, split, crop, merge, adjust speed, color correction options.
- Edit video clips and audio files minutely with comparison view.
- Auto color correction, auto reframe, and configurable user interface.
- Editing advanced videos like VR and 3D as well as advance audio editor.
- Supports importing and exporting different media file formats.

5. Final Cut Pro
System compatibility: macOS 10.14 or higher
Rating: 4.4/5
Final Cut Pro for Mac users is equivalent to Adobe Premium Pro for Windows users. It is widely used by video creators to edit your videos and add effects and audio to get the desired result. You get the standard as well as the advanced video editing options and features. You can publish your music video at high resolution, and the software takes minimum time for rendering.
Final Cut Pro allows editing 3D, VR, multi-cam, and 360-degree videos. There are loads of effects, filters, and presets available to apply to your video clips and photos to create a music video. The presence of cinematic mode and object tracker could be useful for creating out-of-the-box videos. Here are the top features of Final Cut Pro.
- Trim, split, crop, change speed, color correction, and multi-cam video editing.
- Amazing cinematic mode to enhance music video content and quality.
- Add external music file and edit the music file as required.
- Proper organization tool for team to work collaboratively.
- Background rendering feature saves a lot of time in video processing.
- Publish your music video in high resolution without long processing time.

7. Clido
System compatibility: Windows, Mac, Linux, Android and iOS.
Rating: 4.5/5
Clido is an online platform where you get different tools for video editing. It is a premium online video editor with music and hence, it is suitable for all those who want to edit video with music on the go. There is no need to download any software and you can merge, compress, resize, cut and crop video as per your requirements.
You can even rotate and adjust speed to create slow-motion videos. To create your music video, you have to opt for its video maker where you can use photos, video clips, GIFs, and music. You can edit the duration for photos and video clips as per your preference. There is also a slideshow maker available for instant video creation with your photos. Here are the top features of Clido that you should be aware of.
- Flip, loop, reverse, crop, resize, and merge video clips.
- Create slideshow videos and add music of your choice instantly.
- Wide range of presets and video filters.
- Change aspect ratios to make videos for different platforms.
- Super intuitive user interface and secure platform.
- Compatible with popular browsers and suitable for PC and phone users

8. Adobe Express
System compatibility: Windows, Mac, Linux, Android, and iOS.
Rating: 4.5/5
Adobe Express is an online video editor with song that is compatible with popular browsers and all devices. You can create stunning music videos in a few minutes. There are various templates available to get started and finish your stunning music video in a few steps. There is a wide range of stock images available from Adobe. You get access to effects, textures, overlays, and filters to enhance video quality.
You can also remove background from your photos to improve video content. There are various graphical elements available to add to your video. You can resize your video to be compatible with online platforms and different devices. The software allows you to play with texts and titles by offering various customization options. Here are the top features of Adobe Express.
- Loads of video templates for quick video creation.
- Resize photos, convert to different formats, and remove background.
- Trim and crop video clips, convert to GIFs, resize as required.
- Access to stock media library of Adobe and experiment with text.
- Make video for different online platforms and different devices.

9. VideoPad
System compatibility: Windows 11, 10, 8, 7, Vista and XP & Mac OS X 10.5 or above.
Rating: 4.1/5
VideoPad from NCH Software is a simple but powerful video editor. You can create stunning music videos and edit them as per your requirements. The user interface is suitable for beginners and you can avail different video effects and transitions to apply to your video. There are also dedicated audio tools available to edit audio and music files.
The software supports editing 360-degree and 3D videos. In fact, it supports over 60 video file formats for importing them. The software is equally useful in video optimization and you can share the edited video on different online platforms as per your preference. Here are the top features of VideoPad.
- Standard video and audio editing options available.
- Mix music track, add audio effects, and record your narration.
- Wide range of templates for intro, outro and others for branding.
- Supports up to 4K resolution and lossless export.
- Video optimization, stabilization, color correction, and change speed.
- Upload videos directly to YouTube, Vimeo, and Flickr and cloud platforms.

Part 2. How to make a music video on my own?
In order to make a music video file, you will need a video editor, video clips or photos, and background music. We recommend Wondershare Filmora as the best video editor for music videos. Transfer the video clips or photos with which you want to make the music video from your phone to your computer. Choose and download the music file that you would want to add to the background of your video. You can also record your own song or music and use the same for background music. Here are the steps to make a music video on your own.
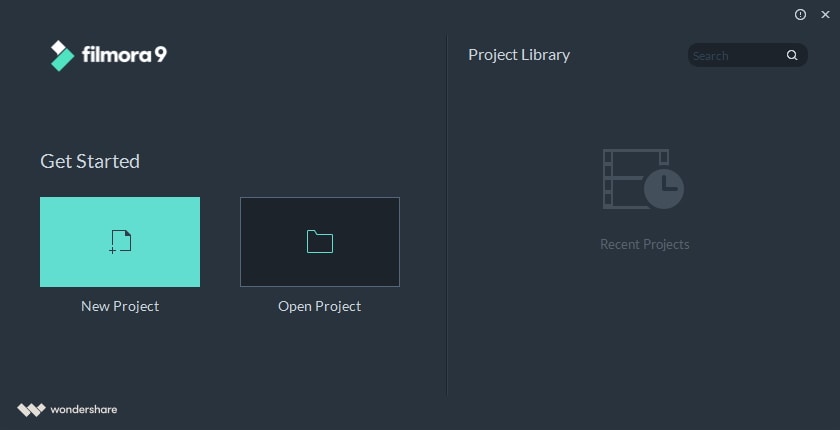
Step 1: Download and install Filmora as per your operating system. Launch the software and click on New Project.
Step 2: Drag and drop the video clips, photos, music and audio files on Project Media folder.
Step 3: Drag and drop the video clips or photos on Timeline and arrange them in order as you want in your video. You can stretch the duration of the photos and videos as per your requirements.

Step 4: Go to Transition option at the top bar and drag and drop the transition of your choice on the photos or video clips so that the transition is eye-catching and eye-soothing.

Step 5: Drag and drop the music file from Project Media folder on the Timeline below the photos or video clips. You can stretch or trim the music track to suit the video length. Check out Audio, Effects, Elements and Titles section at the top bar so that you can incorporate them in your music video to be more appealing and engaging.

Step 6: Preview the music video on Filmora and click on Export button to save it on your hard drive as per your selected file format.

Part 3. Related FAQs
1. How do I add music to video editor on PC?
Different video editor offers different options to add music. Some allow you to drag and drop music file from your hard drive to video editor directly. Otherwise, you have to browse and go to the location and select the music file. Online video editor also allows uploading music file from cloud storage.
2. What software is best for editing music videos?
Wondershare Filmora is the best video editor for editing music videos. This is because it is a premium software with all the features and functionalities that you need to edit your music video. The user interface is intuitive for everyone to enhance video content and quality.
3. What is the best app to put music to videos?
InShot is the best app to put music to videos for Android users. For iOS users, Video Maker with Music Editor is the best app to use where all the required features are readily available.
For macOS 10.12 or later
- Drag and drop all media files for video creation.
- Easy timeline for organizing media files and editing them quickly.
- Crop, trim, split, cut, and combine media files.
- Wide range of video transitions and audio effects.
- Different motion elements, titles, and stock media files.
- Keyframing, noise removal, video stabilization options.
- Super intuitive user interface for all users.
2. Windows Movie Maker
System compatibility: Windows 11, 10
Rating: 4.0/5
If you are Windows user and you are looking for a free video editor with song, Windows Movie Maker is the perfect app you can get from Microsoft Store. Even though it comes free, the video editor is quite powerful. You can crop, trim, join video clips and add text and music to your video. There are image filters available for photo enhancement as well as transitions to apply in the video.
There are in-built music tracks available and it supports importing a wide range of media files. You can avail animated pan and zoom feature for photos and adjust volume and speed. There is also a Pro version available that supports 4K video and better project management as well as advanced tools. Here are the top features of Windows Movie Maker.
- Rotate, trim, flip, and join video clips to make music video.
- Make video from photos and add in-built or external music files.
- Add titles, credits, texts, stickers, as well as pan-zoom animation.
- Wide range of transition effects and photo filters available.
- Supports importing and exporting different file formats.
- Pro version supports 4K resolution and offers exclusive quick tools.
3. Blender
System compatibility: Windows 11, 10, 8.1 macOS 10.13+, Linux.
Rating: 4.5/5
If you are looking for an open-source video editor, Blender is the best choice. It is completely free to use and it comes with all the standard features for creating and editing music videos. The software is particularly popular for modelling, sculpting, rendering and creating animation-based videos. The video editor contains 32 slots where you can add your media files to create the video.
Blender allows you to change video speed, adjust different layers in the videos and add preferred transitions. Moreover, there are masks and filters available to enhance video content. The advance options of audio mixing and keyframing will surely come handy for advanced users. Here are the top features of Blender video editor.
- Cut, split, trim, and join videos clips.
- Color grading, photo filters and custom text options.
- Add effects, transitions, and animations to your video.
- Live visualization options for advanced users.
- Motion tracking, scene stabilization and compositing options.
4. Adobe Premiere Pro
System compatibility: Windows 10 and 11.
Rating: 4.5/5
Adobe Premiere Pro is the best video editor for professionals. The software has a slightly steep learning curve and it requires a high-end computer. Therefore, it is useful for you when you are serious about making professional-quality music video. In fact, Adobe Premiere Pro is widely used in the music video and video creation industry.
Adobe Premiere Pro is the perfect combination of standard and advanced video editing options. You can edit various video files at the same time. In fact, it is perfect for a team to work on your music video files. You can edit VR videos, multi-cam videos as well 3D videos. You can edit your photos, video clips and audio files perfectly as per your requirements. Here are the top features of Adobe Premiere Pro.
- Trim, split, crop, merge, adjust speed, color correction options.
- Edit video clips and audio files minutely with comparison view.
- Auto color correction, auto reframe, and configurable user interface.
- Editing advanced videos like VR and 3D as well as advance audio editor.
- Supports importing and exporting different media file formats.
5. Final Cut Pro
System compatibility: macOS 10.14 or higher
Rating: 4.4/5
Final Cut Pro for Mac users is equivalent to Adobe Premium Pro for Windows users. It is widely used by video creators to edit your videos and add effects and audio to get the desired result. You get the standard as well as the advanced video editing options and features. You can publish your music video at high resolution, and the software takes minimum time for rendering.
Final Cut Pro allows editing 3D, VR, multi-cam, and 360-degree videos. There are loads of effects, filters, and presets available to apply to your video clips and photos to create a music video. The presence of cinematic mode and object tracker could be useful for creating out-of-the-box videos. Here are the top features of Final Cut Pro.
- Trim, split, crop, change speed, color correction, and multi-cam video editing.
- Amazing cinematic mode to enhance music video content and quality.
- Add external music file and edit the music file as required.
- Proper organization tool for team to work collaboratively.
- Background rendering feature saves a lot of time in video processing.
- Publish your music video in high resolution without long processing time.
7. Clido
System compatibility: Windows, Mac, Linux, Android and iOS.
Rating: 4.5/5
Clido is an online platform where you get different tools for video editing. It is a premium online video editor with music and hence, it is suitable for all those who want to edit video with music on the go. There is no need to download any software and you can merge, compress, resize, cut and crop video as per your requirements.
You can even rotate and adjust speed to create slow-motion videos. To create your music video, you have to opt for its video maker where you can use photos, video clips, GIFs, and music. You can edit the duration for photos and video clips as per your preference. There is also a slideshow maker available for instant video creation with your photos. Here are the top features of Clido that you should be aware of.
- Flip, loop, reverse, crop, resize, and merge video clips.
- Create slideshow videos and add music of your choice instantly.
- Wide range of presets and video filters.
- Change aspect ratios to make videos for different platforms.
- Super intuitive user interface and secure platform.
- Compatible with popular browsers and suitable for PC and phone users
8. Adobe Express
System compatibility: Windows, Mac, Linux, Android, and iOS.
Rating: 4.5/5
Adobe Express is an online video editor with song that is compatible with popular browsers and all devices. You can create stunning music videos in a few minutes. There are various templates available to get started and finish your stunning music video in a few steps. There is a wide range of stock images available from Adobe. You get access to effects, textures, overlays, and filters to enhance video quality.
You can also remove background from your photos to improve video content. There are various graphical elements available to add to your video. You can resize your video to be compatible with online platforms and different devices. The software allows you to play with texts and titles by offering various customization options. Here are the top features of Adobe Express.
- Loads of video templates for quick video creation.
- Resize photos, convert to different formats, and remove background.
- Trim and crop video clips, convert to GIFs, resize as required.
- Access to stock media library of Adobe and experiment with text.
- Make video for different online platforms and different devices.
9. VideoPad
System compatibility: Windows 11, 10, 8, 7, Vista and XP & Mac OS X 10.5 or above.
Rating: 4.1/5
VideoPad from NCH Software is a simple but powerful video editor. You can create stunning music videos and edit them as per your requirements. The user interface is suitable for beginners and you can avail different video effects and transitions to apply to your video. There are also dedicated audio tools available to edit audio and music files.
The software supports editing 360-degree and 3D videos. In fact, it supports over 60 video file formats for importing them. The software is equally useful in video optimization and you can share the edited video on different online platforms as per your preference. Here are the top features of VideoPad.
- Standard video and audio editing options available.
- Mix music track, add audio effects, and record your narration.
- Wide range of templates for intro, outro and others for branding.
- Supports up to 4K resolution and lossless export.
- Video optimization, stabilization, color correction, and change speed.
- Upload videos directly to YouTube, Vimeo, and Flickr and cloud platforms.
Part 2. How to make a music video on my own?
In order to make a music video file, you will need a video editor, video clips or photos, and background music. We recommend Wondershare Filmora as the best video editor for music videos. Transfer the video clips or photos with which you want to make the music video from your phone to your computer. Choose and download the music file that you would want to add to the background of your video. You can also record your own song or music and use the same for background music. Here are the steps to make a music video on your own.
Step 1: Download and install Filmora as per your operating system. Launch the software and click on New Project.
Step 2: Drag and drop the video clips, photos, music and audio files on Project Media folder.
Step 3: Drag and drop the video clips or photos on Timeline and arrange them in order as you want in your video. You can stretch the duration of the photos and videos as per your requirements.
Step 4: Go to Transition option at the top bar and drag and drop the transition of your choice on the photos or video clips so that the transition is eye-catching and eye-soothing.
Step 5: Drag and drop the music file from Project Media folder on the Timeline below the photos or video clips. You can stretch or trim the music track to suit the video length. Check out Audio, Effects, Elements and Titles section at the top bar so that you can incorporate them in your music video to be more appealing and engaging.
Step 6: Preview the music video on Filmora and click on Export button to save it on your hard drive as per your selected file format.
Part 3. Related FAQs
1. How do I add music to video editor on PC?
Different video editor offers different options to add music. Some allow you to drag and drop music file from your hard drive to video editor directly. Otherwise, you have to browse and go to the location and select the music file. Online video editor also allows uploading music file from cloud storage.
2. What software is best for editing music videos?
Wondershare Filmora is the best video editor for editing music videos. This is because it is a premium software with all the features and functionalities that you need to edit your music video. The user interface is intuitive for everyone to enhance video content and quality.
3. What is the best app to put music to videos?
InShot is the best app to put music to videos for Android users. For iOS users, Video Maker with Music Editor is the best app to use where all the required features are readily available.
Generating Auto-Subscribe Hyperlinks to Your Channel’s YT
Create High-Quality Video - Wondershare Filmora
An easy and powerful YouTube video editor
Numerous video and audio effects to choose from
Detailed tutorials provided by the official channel
Building a YouTube channel isn’t a walk-in-the-park. As a content creator, you go toiling several processes to ensure its success. More so, you are probably building a brand and want people to know about your product or services. What about one easy way to remember the URL and share it with your potential subscribers? Besides sending such links to people, you’ll be reminding them to subscribe with just a click. And that’s YouTube auto-subscribe link. It is a more effective way than asking or directing to check your YouTube channel. They’ll probably not find it easy, maneuvering around numbers of other channels that bear names close to your channel. A visitor will quickly give up. You can save them the crap and engage more effectively.

In this article
01 How to subscribe to a YouTube channel?
02 How to create an auto-subscribe link for your YouTube channel?
03 Other tricks that work besides YouTube auto-subscribe.
How to subscribe to a YouTube channel?
A YouTube auto-subscribe link will be beneficial in many ways. Here are the steps to subscribe to a YouTube channel. You can subscribe from your phone or computer.
Using a phone
- First, open the YouTube app. Look for it on your phone’s home screen or search through apps.
- Then sign in to your “Google” account for you to be able to subscribe to YouTube channels.
- Next, locate the channel that you want to subscribe to. You can either subscribe from the channel home page or watch the channel video.
- Tap on the “Subscribe” button. The text on the “Subscribe” button will immediately change to “Subscribed” once you hit the subscribe tab.
- Finally, hit the “Subscriptions” tab to manage your channel subscriptions. You’ll also manage to see other latest updates from your subscription.
- You can now easily manage your notifications. You now start to receive notifications of other new channels by default. It is possible to modify this by choosing “All,” “None,” or “Personalized” to determine how to get notifications.

Using a computer
- First, visit the YouTube web page https://www.youtube.com in a web browser. The YouTube website will then be open.
- Then sign in to your YT account. Remember, you must also be signed in to a Google account to subscribe to YouTube channels.
- Browse for a channel and find what’s trending in the left-side panel of the screen.
- Hit the “Subscribe” button to subscribe to a channel. Once you are subscribed, the Subscribe text button will turn grey and change to “Subscribed.”
- View subscriptions by clicking the “three horizontal lines” found at the top-left corner of YouTube. You can also adjust your notification preferences to receive more or fewer updates from a channel.

How an auto-subscribe link will help boost your YouTube channel?
1. Links will auto-prompt visitors to subscribe to your YouTube channel.
2. You can use the link anywhere and reach very many visitors.
3. It works automatically to boost your subscriber count.
How to create an auto-subscribe link for your YouTube channel?
Here are the steps to create YouTube auto subscribers’ links on your computer and mobile device.

How to create a YouTube subscribe link on your computer
- Step 1. First, go to your YouTube Channel URL.
- Step 2. Press on your “Profile,” then click on the “Settings” option in the drop-down menu.
- Step 3. Next, click on the “Profile” picture and copy the URL link.
- Step 4. Add your “YouTube” channel URL with an “Auto Subscribe Tag.” “YouTube channel URL + ?sub_confirmation=1 Then remove the Plus Sign in between to get a YouTube subscribe link.
How to create a YouTube subscribe link on your mobile
- Step 1. Launch the YouTube app on your mobile phone, then click on the “Profile” icon.
- Step 2. Then go to the “Menu” tab and click on the “Your Channel” option.
- Step 3. Select the “Share” option from the drop-down menu.
- Step 4. Next, click on the “Copy link” of your YouTube Channel.
- Step 5. Finally, add your “YouTube” channel URL with the Auto Subscribe Tag.
How to locate your YouTube Channel URL
Unfortunately, many people don’t know their YouTube Channel URL. Check out how to locate your URL.
- Click on your “Profile” icon in the top-right corner of the YouTube page.
- Choose the “Settings” option from the drop-down menu.
- Next, hit the “Advanced” tab below your name.
- Boom! You get your link.
- Finally, combine your channel URL with the “Auto Subscribe” Tag.
● The formula: YouTube channel URL + “?sub_confirmation=1.” Remember to remove the parenthesis to get your auto-subscribe link.
Other tricks that work besides YouTube auto-subscribe
As a content creator, you need to do more to add YouTube auto subscribers to your channel.
Use closed captions to improve accessibility
Including subtitles or closed captions can drive a larger audience to access your content. Some YouTube users have challenges, for example, the deaf or those with hearing problems. Creating a video and not considering this may limit such users from getting to your channel as they may not get all the needed information. Follow these steps to create subtitles or closed captions.
- Sign in to YouTube Studio.
- Then select the “Subtitles” option from the left menu.
- Click on the video that you wish to edit.
- Next, click on the “Add Language” button and select your language.
- Go to the “Subtitles” section and select the “Add” button.
- Finally, enter your captions as the video plays. It will enable viewers who find it challenging to understand your video in detail and probably hit the subscribe button.

Translate your video descriptions
YouTube is accessed worldwide and not necessarily by those who speak your language. You can increase the chances of subscribers by translating your video titles and descriptions to make them understandable to people from across the world. It will make your videos more discoverable and show that you care about those from other regions. Check out how to add translations to YouTube videos.
- First, sign in to YouTube Studio.
- Then go to the left menu and select the “Subtitles” option.
- Choose the video in which you want to add the translations.
- It would be best if you choose a language for your video. Click the “Confirm” button.
- Then select the “Add language” option and choose the language you wish to translate your video into
- Go to “Titles & descriptions” and select the “Add” tab.
- Lastly, enter the translated description and hit the “Publish” button.
Use end screens for extra content promotion
An end screen call-to-action is essential in every video that you post on YouTube. They appear in the last 10 seconds and are useful in directing viewers to your chosen destination. Use them to direct a viewer to visit another channel, subscribe to your channel, or play another video. Here’s how to do it:
- Firstly, sign in to YouTube Studio.
- Then go to the “Videos” page and select a video to use.
- Select the “Editor” tab from the left menu.
- Next, choose the “Add an end screen” option to direct viewers appropriately.
Add a comment to your feed
This functionality is essential if many commenters repeatedly ask the same question. Besides, it will help you to boost engagement with a question.
Here are the simple steps on how to pin a comment to the top of your feed.
- Go to your “Community” tab.
- Then choose the comment that you wish to pin.
- Click on the “More” tab > “Pin” option.

Bonus: Will YouTube auto-subscribe me to a new channel?
It is not necessarily true that YouTube auto-subscribe will subscribe to a new channel. However, some reasons may contribute to that. You may have realized that YouTube just subscribed you to random channels without asking you. Here are the possible reasons for that.
• Spinoff Channel
A content creator may decide to come up with a Spinoff channel. In this case, they may automatically subscribe you to their new channel. In most cases, such content creators want to promote their new channel.
• Check your extensions
One of your browsers may be playing tricks on your YouTube account. Extensions may change your browser’s settings and make the “Unsubscribe” option unavailable. Try disabling all of your browser extensions, then check back if YouTube still subscribes you to channels unknown to you. If so, solve the issue by uninstalling the specific extensions. These could be ad blockers or free VPN extensions.
• Someone else can hit the button
Do you share your computer with other fellows? The chances are that someone hit the “Subscribe” button without your consent. Just unsubscribe and keep watching next time.
Conclusion
● The internet arena is very competitive. It would be best if you did everything right to drive as many YouTube auto-subscribers as possible to your channel. And creating a YouTube auto-subscribe link is the first step to making things easier for your potential subscribers. We have covered how to create a YouTube subscribe link and shown other tricks to help you keep your viewers locked.
Building a YouTube channel isn’t a walk-in-the-park. As a content creator, you go toiling several processes to ensure its success. More so, you are probably building a brand and want people to know about your product or services. What about one easy way to remember the URL and share it with your potential subscribers? Besides sending such links to people, you’ll be reminding them to subscribe with just a click. And that’s YouTube auto-subscribe link. It is a more effective way than asking or directing to check your YouTube channel. They’ll probably not find it easy, maneuvering around numbers of other channels that bear names close to your channel. A visitor will quickly give up. You can save them the crap and engage more effectively.
In this article
01 How to subscribe to a YouTube channel?
02 How to create an auto-subscribe link for your YouTube channel?
03 Other tricks that work besides YouTube auto-subscribe.
How to subscribe to a YouTube channel?
A YouTube auto-subscribe link will be beneficial in many ways. Here are the steps to subscribe to a YouTube channel. You can subscribe from your phone or computer.
Using a phone
- First, open the YouTube app. Look for it on your phone’s home screen or search through apps.
- Then sign in to your “Google” account for you to be able to subscribe to YouTube channels.
- Next, locate the channel that you want to subscribe to. You can either subscribe from the channel home page or watch the channel video.
- Tap on the “Subscribe” button. The text on the “Subscribe” button will immediately change to “Subscribed” once you hit the subscribe tab.
- Finally, hit the “Subscriptions” tab to manage your channel subscriptions. You’ll also manage to see other latest updates from your subscription.
- You can now easily manage your notifications. You now start to receive notifications of other new channels by default. It is possible to modify this by choosing “All,” “None,” or “Personalized” to determine how to get notifications.
Using a computer
- First, visit the YouTube web page https://www.youtube.com in a web browser. The YouTube website will then be open.
- Then sign in to your YT account. Remember, you must also be signed in to a Google account to subscribe to YouTube channels.
- Browse for a channel and find what’s trending in the left-side panel of the screen.
- Hit the “Subscribe” button to subscribe to a channel. Once you are subscribed, the Subscribe text button will turn grey and change to “Subscribed.”
- View subscriptions by clicking the “three horizontal lines” found at the top-left corner of YouTube. You can also adjust your notification preferences to receive more or fewer updates from a channel.
How an auto-subscribe link will help boost your YouTube channel?
1. Links will auto-prompt visitors to subscribe to your YouTube channel.
2. You can use the link anywhere and reach very many visitors.
3. It works automatically to boost your subscriber count.
How to create an auto-subscribe link for your YouTube channel?
Here are the steps to create YouTube auto subscribers’ links on your computer and mobile device.
How to create a YouTube subscribe link on your computer
- Step 1. First, go to your YouTube Channel URL.
- Step 2. Press on your “Profile,” then click on the “Settings” option in the drop-down menu.
- Step 3. Next, click on the “Profile” picture and copy the URL link.
- Step 4. Add your “YouTube” channel URL with an “Auto Subscribe Tag.” “YouTube channel URL + ?sub_confirmation=1 Then remove the Plus Sign in between to get a YouTube subscribe link.
How to create a YouTube subscribe link on your mobile
- Step 1. Launch the YouTube app on your mobile phone, then click on the “Profile” icon.
- Step 2. Then go to the “Menu” tab and click on the “Your Channel” option.
- Step 3. Select the “Share” option from the drop-down menu.
- Step 4. Next, click on the “Copy link” of your YouTube Channel.
- Step 5. Finally, add your “YouTube” channel URL with the Auto Subscribe Tag.
How to locate your YouTube Channel URL
Unfortunately, many people don’t know their YouTube Channel URL. Check out how to locate your URL.
- Click on your “Profile” icon in the top-right corner of the YouTube page.
- Choose the “Settings” option from the drop-down menu.
- Next, hit the “Advanced” tab below your name.
- Boom! You get your link.
- Finally, combine your channel URL with the “Auto Subscribe” Tag.
● The formula: YouTube channel URL + “?sub_confirmation=1.” Remember to remove the parenthesis to get your auto-subscribe link.
Other tricks that work besides YouTube auto-subscribe
As a content creator, you need to do more to add YouTube auto subscribers to your channel.
Use closed captions to improve accessibility
Including subtitles or closed captions can drive a larger audience to access your content. Some YouTube users have challenges, for example, the deaf or those with hearing problems. Creating a video and not considering this may limit such users from getting to your channel as they may not get all the needed information. Follow these steps to create subtitles or closed captions.
- Sign in to YouTube Studio.
- Then select the “Subtitles” option from the left menu.
- Click on the video that you wish to edit.
- Next, click on the “Add Language” button and select your language.
- Go to the “Subtitles” section and select the “Add” button.
- Finally, enter your captions as the video plays. It will enable viewers who find it challenging to understand your video in detail and probably hit the subscribe button.
Translate your video descriptions
YouTube is accessed worldwide and not necessarily by those who speak your language. You can increase the chances of subscribers by translating your video titles and descriptions to make them understandable to people from across the world. It will make your videos more discoverable and show that you care about those from other regions. Check out how to add translations to YouTube videos.
- First, sign in to YouTube Studio.
- Then go to the left menu and select the “Subtitles” option.
- Choose the video in which you want to add the translations.
- It would be best if you choose a language for your video. Click the “Confirm” button.
- Then select the “Add language” option and choose the language you wish to translate your video into
- Go to “Titles & descriptions” and select the “Add” tab.
- Lastly, enter the translated description and hit the “Publish” button.
Use end screens for extra content promotion
An end screen call-to-action is essential in every video that you post on YouTube. They appear in the last 10 seconds and are useful in directing viewers to your chosen destination. Use them to direct a viewer to visit another channel, subscribe to your channel, or play another video. Here’s how to do it:
- Firstly, sign in to YouTube Studio.
- Then go to the “Videos” page and select a video to use.
- Select the “Editor” tab from the left menu.
- Next, choose the “Add an end screen” option to direct viewers appropriately.
Add a comment to your feed
This functionality is essential if many commenters repeatedly ask the same question. Besides, it will help you to boost engagement with a question.
Here are the simple steps on how to pin a comment to the top of your feed.
- Go to your “Community” tab.
- Then choose the comment that you wish to pin.
- Click on the “More” tab > “Pin” option.
Bonus: Will YouTube auto-subscribe me to a new channel?
It is not necessarily true that YouTube auto-subscribe will subscribe to a new channel. However, some reasons may contribute to that. You may have realized that YouTube just subscribed you to random channels without asking you. Here are the possible reasons for that.
• Spinoff Channel
A content creator may decide to come up with a Spinoff channel. In this case, they may automatically subscribe you to their new channel. In most cases, such content creators want to promote their new channel.
• Check your extensions
One of your browsers may be playing tricks on your YouTube account. Extensions may change your browser’s settings and make the “Unsubscribe” option unavailable. Try disabling all of your browser extensions, then check back if YouTube still subscribes you to channels unknown to you. If so, solve the issue by uninstalling the specific extensions. These could be ad blockers or free VPN extensions.
• Someone else can hit the button
Do you share your computer with other fellows? The chances are that someone hit the “Subscribe” button without your consent. Just unsubscribe and keep watching next time.
Conclusion
● The internet arena is very competitive. It would be best if you did everything right to drive as many YouTube auto-subscribers as possible to your channel. And creating a YouTube auto-subscribe link is the first step to making things easier for your potential subscribers. We have covered how to create a YouTube subscribe link and shown other tricks to help you keep your viewers locked.
Also read:
- How to Enhance Video Rankings on YouTube Through SEO
- 2024 Approved Enhancing Online Privacy YouTube's Access Controls
- Mastering YouTube Video Free Transcription Techniques
- [Updated] Enhancing User Engagement How to Use YouTube Tags Effectively
- [New] Bring Your Vision to Life YouTube Trailers Using Filmora's Magic
- Ultimate 10 Yoga Channels Boosting Physical Wellbeing
- In 2024, 10 Best Desktop & Online GIF Tools Ranked
- 2024 Approved Crafting Engaging Channels Using TubeBuddy's Framework
- 2024 Approved Dive Into the Deep End - Your Guide to the Best Free Movies on YouTube
- [New] How to Create a YouTube Music Playlist
- [New] Anime YouTube Essentials The Best 20 Channels
- Best YouTube Video Ideas to Spark Inspiration for 2024
- Beat the Competition Top 10 YouTube News Channels Listed
- Earning Excellence A Guide to Maximize Money From Mobile YouTube Viewers
- Capture the Essence of Your Favorite Series with These Extractors
- [New] Animated Text That Jumps Master Class with Easy Steps
- Early Bird's Youtube Strategies for Channel and Revenue for 2024
- [New] Engage Viewers From the Start Mobile Film Techniques for Thumbnails
- [Updated] 5 Key Aspects to Consider When Sizing Your YouTube Thumbnail
- In 2024, Breaking the Internet Hashtag Wisdom for Short Films
- New 11 Tools To Create Radial Blur Photo Mobile And Desktop
- [New] 2024 Approved Proven Strategies for TikTok Success Analyzing Effective Advertisements
- Updated Quality Movie Maker Turn Everyday Video Clips Into High Quality for 2024
- Optimal Zero Dollar Valorant Sound Manipulator Alert
- How to Transfer Music from Vivo S18 Pro to iPod | Dr.fone
- In 2024, Split Screen Video Makers The Best iOS and Android Apps
- Explore Instagram's Per-Video Limit Explained
- Resolve Your Apple iPhone 14 Keeps Asking for Outlook Password
- The Ultimate Guide to Get the Rare Candy on Pokemon Go Fire Red On Samsung Galaxy F14 5G | Dr.fone
- [Updated] Boosting Views Innovative TikTok Biographies for Enhanced Engagement on Filmora
- Updated Animated Logo Magic 11 Free Tools and Pro Design Tips for 2024
- In 2024, Easy Guide to Samsung FRP Bypass With Best Methods
- [New] Complete Guide for PowerDirector Experts - 2024
- How to Exit Android Factory Mode On Motorola Moto G13? | Dr.fone
- Title: "[Updated] EpicEditor Hub Innovative PC Cutting with Tunes"
- Author: Brian
- Created at : 2024-05-25 13:24:37
- Updated at : 2024-05-26 13:24:37
- Link: https://youtube-video-recordings.techidaily.com/updated-epiceditor-hub-innovative-pc-cutting-with-tunes/
- License: This work is licensed under CC BY-NC-SA 4.0.
