
!["[Updated] Enrich Thumbnails Introducing Radiant Neon Elements"](https://www.lifewire.com/thmb/B8k2v-qR8tcm_t0SyyeTNpnCEuI=/400x300/filters:no_upscale():max_bytes(150000):strip_icc()/man_using_ipad-568a92783df78ccc153c5b6e-26148b2d94364254b5ca9c86ebae17cf.jpg)
"[Updated] Enrich Thumbnails Introducing Radiant Neon Elements"
Enrich Thumbnails: Introducing Radiant Neon Elements
Your YouTube video, or any other clip published on any forum, gets a larger number of hits if it has an attractive thumbnail. And, the fact is, a thumbnail becomes 10x more attractive when the main character that the image has have a neon border around it.
With that said, in the following sections, you will learn a couple of methods on how to add a YouTube thumbnail border around the main characters and/or objects that are significant to the clip.
In this article
01 Add Glowing Neon Border to YouTube Thumbnail with Filmora
02 Add a Glowing Neon Border in YouTube Thumbnail with Canva
03 Outline a Person in a YouTube Thumbnail with Photoshop
Part 1: How to Add Neon Border to YouTube Thumbnail for Free with Filmora
Being one of the most versatile and intuitive post-production tools available in the market today, Wondershare Filmora X allows you to add a neon border to a YouTube thumbnail quite conveniently. You can learn how to get this done on Windows or Mac by following the steps given below.
For Win 7 or later (64-bit)
For macOS 10.12 or later
Step 1: Define Project Settings and Add Image to the Timeline
Launch Wondershare Filmora X on your PC (a MacBook Pro M1 is used here), ensure that the project aspect ratio is set to 16:9 (Widescreen) on the splash screen, and click New Project. On the main interface, click the Preview quality and display settings icon from the upper-right area of the Timeline, click Change Project Aspect Ratio, click to select 1280 x 720 (HD) from the Resolution menu of the Project Settings box, and click OK to save the custom project settings.

Then select My Media from the menu bar if not already selected, click Project Media from the navigation pane, and click Import from the Media box to select and import the image of the main character or object that you want to use in the thumbnail.

Now, drag the image from the Media box to the Timeline at the bottom.

Step 2: Clear Image Background, Add Border, and Add Custom Background
Go to Effects from the menu bar, click to select the Default tab and then AI Portrait from the navigation pane, and click and drag the Human Segmentation preset from the right box, and place it over the image track in the Timeline.

Double-click the image layer, scroll down the upper-left box to the Video Effects section, and use the Edge Thickness and Edge Feather sliders to adjust the character’s edges to make them as realistic as possible. Click OK when done.

Next, click and drag the Human Border preset over the image track in the Timeline, and follow the same procedure to customize the border. This will give the character a neon border effect.

Now, use the method explained earlier to import a custom image for the background, and drag and place it under the previous track in the Timeline.

If you are running the latest version of Filmora, you will find there are some neon light effects available under AI Portrait as well.

Step 3: Add Titles to Thumbnail
Go to Titles from the menu bar, click to select the Default tab and then Lower 3rds from the navigation pane, and click and drag your preferred lower-third preset from the right window to a separate layer in the Timeline. Double-click the lower-third layer, and use the available options in the upper-left window to change the text, its color, etc., and drag the textbox to place it to your preferred position on the image as well. Click OK to save the changes.
Next, click to select Titles from the navigation pane, and drag your preferred title from the right window to the upper-most track in the Timeline. Now use the method explained earlier to edit the text, its color, position, etc. to make it look professional.

For more tips and tricks for creating YouTube thumbnail, you can check this You Tube thumbnail creating guide .
Step 4: Get the Neon Border Thumbnail
Click the Snapshot (Camera) icon from the upper-right area of the Timeline, go to My Media from the menu bar, right-click the thumbnail of the screenshot you captured, and click Reveal in Finder (on Mac) or Reveal in Explorer (on Windows) to get to the folder the YouTube thumbnail border is saved in.

Part 2: How to Add a Glowing Neon Border in Your YouTube Thumbnail with Canva
Canva is another intuitive editing program that works on the web interface rather than having you download and install an app on your PC. You can add a neon border for YouTube thumbnails using Canva by following the instructions given below:
Step 1: Define Project Settings and Add a Background
After signing in to your Canva account, click Create a design from the top-right corner of the page, click Custom size from the bottom, define 1280 and 720 in the Width and Height fields on the box that appears respectively, and click Create new design.

Now, click to select Background from the navigation bar on the left (if the Background tool is not visible, click More and then choose Background from the expanded list), and click to select a background from the images available in the center pane.

Step 2: Upload an Image and Add Effects
Click Uploads from the navigation bar, click the More icon from the right of the Upload media button present at the top of the center pane, choose your preferred method to upload the image (with the transparent background) that you want to use, upload the image, and drag it from the center pane to the Canvas.
Note: You can use any of the tools available online to remove the background from your image for free.

To add a YouTube thumbnail border, make sure that the image that you added to the Canvas is selected, click the Duplicate icon from the upper-right area, and use the scaling handles of the copy of the image to increase its size a bit. Reposition the image back to its original location as well.
Then, click Edit image from the upper-left corner of the Canvas, click Duotone from the Edit image pane at the center, if need be, click See all, choose your preferred duotone effect to apply on the image, choose your preferred highlight and shadow colors from the box that appears next, and click Back from the top of the pane.

Next, click See all next to the Adjust section from the center pane, and drag the Blur slider to the right to increase the blur effect on the image.

Step 3: Position the Layers
While keeping the duplicate image selected, click the Position button from the upper-right area of the Canvas, and click Background to send the second image behind the first one to get the neon border effect for the photo.

Part 3: How to Outline a Person in a YouTube Thumbnail with Photoshop
Because YouTube thumbnails are nothing but static images, creating YouTube thumbnail border with Adobe Photoshop is comparatively easier. The process of doing this is given below:
Step 1: Define Document Preferences and Import an Image
Launch Adobe Photoshop on your PC, click Create new, and on the New Document customization box, define the width and height values to 1280 and 720 pixels respectively. Select Transparent from the Background Contents menu as well if not already selected. Click Create from the bottom to create a new Photoshop document with the specified document settings. Next, open the folder that contains the source image, drag the photo to Photoshop, and press Enter to place the photo.

Step 2: Remove Background from the Image
Make sure that the image layer is selected in the Layers panel on the right, go to Select from the menu bar at the top, and click Subject. From the bottom of the Layers panel, click the Add a mask icon to get rid of the background, leaving only the human on the Canvas.

Step 3: Add a Custom Background and an Outline Around the Subject
Use the method explained earlier to import a background image of your choice to Photoshop. Drag the background image layer to the bottom in the Layers panel. Double-click the masked layer, click to select Stroke from the left pane of the Layer Style box, and use the options available on the right to manage the size, color, position, etc. of the stroke that has been added around the human subject. Click OK when done, and then export the image normally to use it as a YouTube thumbnail border.

Summary
It is important to know that the default resolution of a YouTube thumbnail is 1280 x 720 pixels that is usually written and referred to as 720p. While adding a YouTube thumbnail border, it is also imperative to have a good sense of color combination and fonts. Furthermore, a decent tool like Wondershare Filmora X must be used to add an appealing neon border around the main subject in the thumbnail image easily and quickly.
02 Add a Glowing Neon Border in YouTube Thumbnail with Canva
03 Outline a Person in a YouTube Thumbnail with Photoshop
Part 1: How to Add Neon Border to YouTube Thumbnail for Free with Filmora
Being one of the most versatile and intuitive post-production tools available in the market today, Wondershare Filmora X allows you to add a neon border to a YouTube thumbnail quite conveniently. You can learn how to get this done on Windows or Mac by following the steps given below.
For Win 7 or later (64-bit)
For macOS 10.12 or later
Step 1: Define Project Settings and Add Image to the Timeline
Launch Wondershare Filmora X on your PC (a MacBook Pro M1 is used here), ensure that the project aspect ratio is set to 16:9 (Widescreen) on the splash screen, and click New Project. On the main interface, click the Preview quality and display settings icon from the upper-right area of the Timeline, click Change Project Aspect Ratio, click to select 1280 x 720 (HD) from the Resolution menu of the Project Settings box, and click OK to save the custom project settings.
Then select My Media from the menu bar if not already selected, click Project Media from the navigation pane, and click Import from the Media box to select and import the image of the main character or object that you want to use in the thumbnail.
Now, drag the image from the Media box to the Timeline at the bottom.
Step 2: Clear Image Background, Add Border, and Add Custom Background
Go to Effects from the menu bar, click to select the Default tab and then AI Portrait from the navigation pane, and click and drag the Human Segmentation preset from the right box, and place it over the image track in the Timeline.
Double-click the image layer, scroll down the upper-left box to the Video Effects section, and use the Edge Thickness and Edge Feather sliders to adjust the character’s edges to make them as realistic as possible. Click OK when done.
Next, click and drag the Human Border preset over the image track in the Timeline, and follow the same procedure to customize the border. This will give the character a neon border effect.
Now, use the method explained earlier to import a custom image for the background, and drag and place it under the previous track in the Timeline.
If you are running the latest version of Filmora, you will find there are some neon light effects available under AI Portrait as well.
Step 3: Add Titles to Thumbnail
Go to Titles from the menu bar, click to select the Default tab and then Lower 3rds from the navigation pane, and click and drag your preferred lower-third preset from the right window to a separate layer in the Timeline. Double-click the lower-third layer, and use the available options in the upper-left window to change the text, its color, etc., and drag the textbox to place it to your preferred position on the image as well. Click OK to save the changes.
Next, click to select Titles from the navigation pane, and drag your preferred title from the right window to the upper-most track in the Timeline. Now use the method explained earlier to edit the text, its color, position, etc. to make it look professional.
For more tips and tricks for creating YouTube thumbnail, you can check this You Tube thumbnail creating guide .
Step 4: Get the Neon Border Thumbnail
Click the Snapshot (Camera) icon from the upper-right area of the Timeline, go to My Media from the menu bar, right-click the thumbnail of the screenshot you captured, and click Reveal in Finder (on Mac) or Reveal in Explorer (on Windows) to get to the folder the YouTube thumbnail border is saved in.
Part 2: How to Add a Glowing Neon Border in Your YouTube Thumbnail with Canva
Canva is another intuitive editing program that works on the web interface rather than having you download and install an app on your PC. You can add a neon border for YouTube thumbnails using Canva by following the instructions given below:
Step 1: Define Project Settings and Add a Background
After signing in to your Canva account, click Create a design from the top-right corner of the page, click Custom size from the bottom, define 1280 and 720 in the Width and Height fields on the box that appears respectively, and click Create new design.
Now, click to select Background from the navigation bar on the left (if the Background tool is not visible, click More and then choose Background from the expanded list), and click to select a background from the images available in the center pane.
Step 2: Upload an Image and Add Effects
Click Uploads from the navigation bar, click the More icon from the right of the Upload media button present at the top of the center pane, choose your preferred method to upload the image (with the transparent background) that you want to use, upload the image, and drag it from the center pane to the Canvas.
Note: You can use any of the tools available online to remove the background from your image for free.
To add a YouTube thumbnail border, make sure that the image that you added to the Canvas is selected, click the Duplicate icon from the upper-right area, and use the scaling handles of the copy of the image to increase its size a bit. Reposition the image back to its original location as well.
Then, click Edit image from the upper-left corner of the Canvas, click Duotone from the Edit image pane at the center, if need be, click See all, choose your preferred duotone effect to apply on the image, choose your preferred highlight and shadow colors from the box that appears next, and click Back from the top of the pane.
Next, click See all next to the Adjust section from the center pane, and drag the Blur slider to the right to increase the blur effect on the image.
Step 3: Position the Layers
While keeping the duplicate image selected, click the Position button from the upper-right area of the Canvas, and click Background to send the second image behind the first one to get the neon border effect for the photo.
Part 3: How to Outline a Person in a YouTube Thumbnail with Photoshop
Because YouTube thumbnails are nothing but static images, creating YouTube thumbnail border with Adobe Photoshop is comparatively easier. The process of doing this is given below:
Step 1: Define Document Preferences and Import an Image
Launch Adobe Photoshop on your PC, click Create new, and on the New Document customization box, define the width and height values to 1280 and 720 pixels respectively. Select Transparent from the Background Contents menu as well if not already selected. Click Create from the bottom to create a new Photoshop document with the specified document settings. Next, open the folder that contains the source image, drag the photo to Photoshop, and press Enter to place the photo.
Step 2: Remove Background from the Image
Make sure that the image layer is selected in the Layers panel on the right, go to Select from the menu bar at the top, and click Subject. From the bottom of the Layers panel, click the Add a mask icon to get rid of the background, leaving only the human on the Canvas.
Step 3: Add a Custom Background and an Outline Around the Subject
Use the method explained earlier to import a background image of your choice to Photoshop. Drag the background image layer to the bottom in the Layers panel. Double-click the masked layer, click to select Stroke from the left pane of the Layer Style box, and use the options available on the right to manage the size, color, position, etc. of the stroke that has been added around the human subject. Click OK when done, and then export the image normally to use it as a YouTube thumbnail border.
Summary
It is important to know that the default resolution of a YouTube thumbnail is 1280 x 720 pixels that is usually written and referred to as 720p. While adding a YouTube thumbnail border, it is also imperative to have a good sense of color combination and fonts. Furthermore, a decent tool like Wondershare Filmora X must be used to add an appealing neon border around the main subject in the thumbnail image easily and quickly.
Innovators Designing Online Marvel Experiences
Top 4 Marvel Intro Makers Online

Richard Bennett
Mar 27, 2024• Proven solutions
Are you a fan of Marvel’s Tv series? If yes, you must have watched the intro that Marvel includes at the starting of its every video, and you may be looking for a marvel intro maker for yourself. The intro has some cool sound effects with amazing animations. Different superheroes appear on the screen and then fade away. It also features some scenes from other tv series. Overall it is a power-packed intro that grabs the users’ attention, and it becomes difficult to take your eyes off the screen when this intro is played.
When watching this intro, you may get excited and want to make your intro if you are a true Marvel fan. But you might be thinking that how it is possible to blend so many elements and characters in a single video and make the smooth transitions so that everything seems to be going in a flow. The answer to your question is straightforward. You can either use Marlvel intro makers online to make it or use Filmora to make it according to our tutorial. Either way, we get you covered!
Top 4 Marvel Online Intro Makers:
This article will share the top 4 online marvel intro makers that you can use to create your own intros similar to Marvel’s intro easily. So, let’s get started with our main topic.
1. Introchamp.com
Price: $8.38 for 1080p version/ $6.98 for 720p version
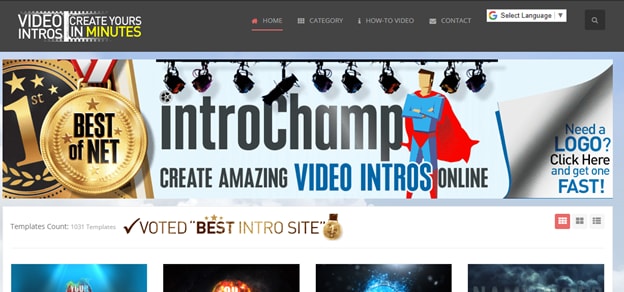
Intro champ is a website that allows you to create video intros in just a few minutes. It is one of the best online intro maker websites out there. If you want to make Marvel’s Intro video, then you can create it using this website. Just click the title to the website, and you will see the screen displayed in the above picture. You will see a search bar on the top right side of your screen. Type “Modern Marvel” in this search bar and hit the enter button. You will see a Marvel intro template that you can use to create your video.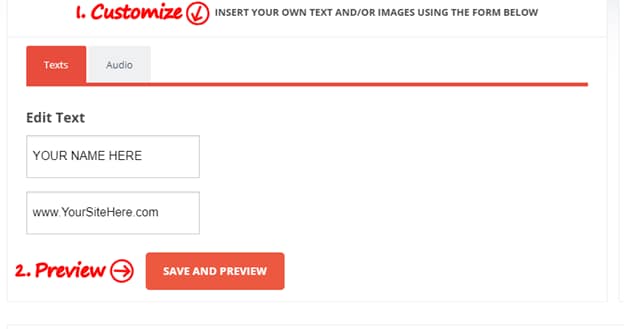
Creating your video is a straightforward process. You need to enter your desired text displayed in two different fields and click on the Save & Preview button. It allows you to try the intro video to have an idea how it will look like. There will be a watermark on the video. If you want to remove that watermark, you need to purchase this template. The 1080p version will cost you around $8.38, and the 780p version will cost around $6.98.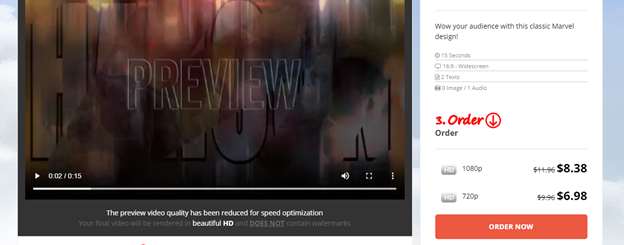
2. Videohive.com
Price: from $10 to $20 
The third website that can help you to create online Marvel’s intro videos is Video Hive. It is a website where you can find stock images and stock videos. Just search Marvel Intro in the search bar of the website, and it will display different stock videos that you can use to create intros. 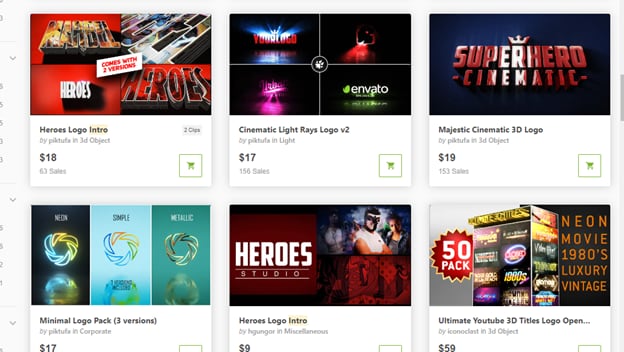
Every stock video has a different price, and you may need to hire a video editor online to create your intro video using this template. It is a bit expensive option, but the results are more convincing at the same time.
3. Tubearsenal.com
Price: $13 for 1080p version/ $9 for 720p version
Tube Arsenal is also one of the best and premium intro makers online. It is effortless to use, and you don’t need to download any software or effects because everything here is online. You also don’t need to have any prior experience because it is easy to use platform. 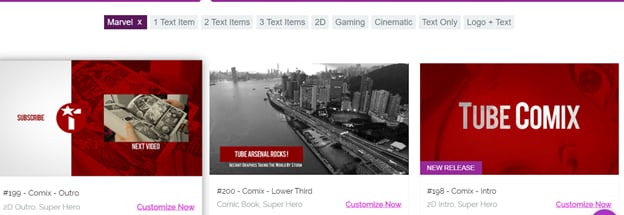
This website contains thousands of intro video templates that you can customize according to your videos’ needs and use. If you want to create Marvel’s intro video, then all you have to do is search “Marvel Intro” in the search bar and select “Comix Intro Template” from the results.
Click on the customize now button, and it will take you to a page where you will find plenty of customization options. You can add your desired text and choose the color of your text. You can also customize the background color and choose a custom music track played with your intro.
4. Filmora X
The fourth option that you have is to create Marvel’s intro video by using Filmora X. Filmora X is one of the latest and premium video editing software out there. You will develop your intro video manually on Filmora X by following a step-by-step procedure. Now you may think that it is not easy, but it is straightforward. You can include the elements that you want and exclude unwanted elements. Overall you can have an excellent experience by using this software.
Conclusion
Many intro maker programs and websites are available online. The websites are easier to use, and you can create your intros in just a few minutes, but they have some limitations. You cannot do much customization on those templates. However, if you use Filmora X, you have many options and can customize your intro how you want. We recommend you give it a try, and we assure you that you won’t regret your decision.


Richard Bennett
Richard Bennett is a writer and a lover of all things video.
Follow @Richard Bennett
Richard Bennett
Mar 27, 2024• Proven solutions
Are you a fan of Marvel’s Tv series? If yes, you must have watched the intro that Marvel includes at the starting of its every video, and you may be looking for a marvel intro maker for yourself. The intro has some cool sound effects with amazing animations. Different superheroes appear on the screen and then fade away. It also features some scenes from other tv series. Overall it is a power-packed intro that grabs the users’ attention, and it becomes difficult to take your eyes off the screen when this intro is played.
When watching this intro, you may get excited and want to make your intro if you are a true Marvel fan. But you might be thinking that how it is possible to blend so many elements and characters in a single video and make the smooth transitions so that everything seems to be going in a flow. The answer to your question is straightforward. You can either use Marlvel intro makers online to make it or use Filmora to make it according to our tutorial. Either way, we get you covered!
Top 4 Marvel Online Intro Makers:
This article will share the top 4 online marvel intro makers that you can use to create your own intros similar to Marvel’s intro easily. So, let’s get started with our main topic.
1. Introchamp.com
Price: $8.38 for 1080p version/ $6.98 for 720p version
Intro champ is a website that allows you to create video intros in just a few minutes. It is one of the best online intro maker websites out there. If you want to make Marvel’s Intro video, then you can create it using this website. Just click the title to the website, and you will see the screen displayed in the above picture. You will see a search bar on the top right side of your screen. Type “Modern Marvel” in this search bar and hit the enter button. You will see a Marvel intro template that you can use to create your video.
Creating your video is a straightforward process. You need to enter your desired text displayed in two different fields and click on the Save & Preview button. It allows you to try the intro video to have an idea how it will look like. There will be a watermark on the video. If you want to remove that watermark, you need to purchase this template. The 1080p version will cost you around $8.38, and the 780p version will cost around $6.98.
2. Videohive.com
Price: from $10 to $20
The third website that can help you to create online Marvel’s intro videos is Video Hive. It is a website where you can find stock images and stock videos. Just search Marvel Intro in the search bar of the website, and it will display different stock videos that you can use to create intros.
Every stock video has a different price, and you may need to hire a video editor online to create your intro video using this template. It is a bit expensive option, but the results are more convincing at the same time.
3. Tubearsenal.com
Price: $13 for 1080p version/ $9 for 720p version
Tube Arsenal is also one of the best and premium intro makers online. It is effortless to use, and you don’t need to download any software or effects because everything here is online. You also don’t need to have any prior experience because it is easy to use platform.
This website contains thousands of intro video templates that you can customize according to your videos’ needs and use. If you want to create Marvel’s intro video, then all you have to do is search “Marvel Intro” in the search bar and select “Comix Intro Template” from the results.
Click on the customize now button, and it will take you to a page where you will find plenty of customization options. You can add your desired text and choose the color of your text. You can also customize the background color and choose a custom music track played with your intro.
4. Filmora X
The fourth option that you have is to create Marvel’s intro video by using Filmora X. Filmora X is one of the latest and premium video editing software out there. You will develop your intro video manually on Filmora X by following a step-by-step procedure. Now you may think that it is not easy, but it is straightforward. You can include the elements that you want and exclude unwanted elements. Overall you can have an excellent experience by using this software.
Conclusion
Many intro maker programs and websites are available online. The websites are easier to use, and you can create your intros in just a few minutes, but they have some limitations. You cannot do much customization on those templates. However, if you use Filmora X, you have many options and can customize your intro how you want. We recommend you give it a try, and we assure you that you won’t regret your decision.
Richard Bennett
Richard Bennett is a writer and a lover of all things video.
Follow @Richard Bennett
Also read:
- 2024 Approved Elevate Your Videography with Top SEO Gadgets
- Audiovisual Improvement Voice Changing Apps Reviewed
- Essential Illumination Products for Video Creators
- Connecting YouTube & TikTok Your Ultimate Step-by-Step Walkthrough for 2024
- Top 5 YouTube Video Editor Alternatives for 2024
- [New] Dissecting Video Platform Features YouTube Vs. DailyMention
- Discover Leading Fonts Boosting Your YouTube Thumbnails
- Infographic Premier FIFA Videos Popularity Spotlight
- 2024 Approved Crafting Your YouTube Content for Specific Crowds
- [Updated] Audio Anomaly Top Disruptive Music Apps for iOS/Android
- [Updated] Direct YouTube Tunes to MP3s Online & Offline Options
- Essential Tips for Successful YouTube Broadcasts
- Simplify Your YouTube Presence with Flawless Shorts Thumbnails
- Ryan Kaji’s Riches The Tale of YouTube's Youngest Mogul
- 10 User-Friendly Free Tools to Create Professional Video Thumbnails
- Generating Direct Links for Automatic Channel Subscription
- 2024'S Lightning-Fast Video Growth Reaching 100 Million Quickly
- [New] Animating Elegance Self-Designed Tricks & Effects
- Creating Seamless Connections Spotify to YouTube Music Conversion for 2024
- 2024 Approved Analyzing the Income Generated by Every YouTube Viewer
- Rhythm's Companion Finding Premium Club Vids
- 2024 Approved Balancing Professional and Personal Profiles
- Bilateral Screen Tracking for 2024
- 2024 Approved Optimize Tasks The 8 Superior Facebook Schedulers
- New 2024 Approved Trim, Cut, and Split AVI Files Like a Pro Updated
- Waht Is AI Pixel Art Generator?
- In 2024, 5 Easy Ways to Copy Contacts from Tecno Spark 10 Pro to iPhone 14 and 15 | Dr.fone
- Steps to Decline Autoplayed and Suggested Podcasts on Spotify
- 2024 Approved Artful Depth Making Text Pop in AI
- 2024 Approved Instagram Story Straightforward Recording Tips
- [New] In 2024, Unlocking Hidden Potential of Instagram’s Question Marker
- New 2024 Approved Unlocking the Power 5 Little-Known Ways to Get More Out of Your 16X9 Ratio Calculator
- Title: "[Updated] Enrich Thumbnails Introducing Radiant Neon Elements"
- Author: Brian
- Created at : 2024-07-03 23:43:55
- Updated at : 2024-07-04 23:43:55
- Link: https://youtube-video-recordings.techidaily.com/updated-enrich-thumbnails-introducing-radiant-neon-elements/
- License: This work is licensed under CC BY-NC-SA 4.0.
