![[Updated] Efficiently Shifting Videos YouTube to Dailymotion Strategy](https://thmb.techidaily.com/5f5f5b93e7d5296621d28cc46446de06ad76f2671bd83441f8c16419df01fcdb.jpg)
"[Updated] Efficiently Shifting Videos YouTube to Dailymotion Strategy"
Efficiently Shifting Videos: YouTube to Dailymotion Strategy
How to Transfer Video From YouTube to Dailymotion?

Ollie Mattison
Mar 27, 2024• Proven solutions
It is significant for a business to stay connected to its customers and videos are a wonderful medium to build that connect! Dailymotion gives you a golden opportunity and platform to share your videos on websites other than YouTube. This means that you can transfer your videos from YouTube to dailymotion in few minutes and increase the audience. There is no direct transfer feature in YouTube and hence this post will help in guiding how can you transfer the video content from YouTube to Dailymotion!
- Method 1: Download YouTube video and upload to Dailymotion
- Method 2: Sync YouTube videos to Dailymotion
Note: We resolutely oppose all forms of copyright-infringing downloads. This tutorial is only for downloading YouTube videos/audio materials from your own channel.
Method 1: Download YouTube video and upload to Dailymotion
This one is little longer but many people vote for it as a safer one! All you have to do is to login to your YouTube official account and download all the videos that you have uploaded in MP4 format by clicking on Edit option appearing at right of the video.
Ready to learn How to Download YouTube Videos . It’s easy, fun and a great way to share your movies with the world.
Save it to the desired folder on your PC and navigate to the Dailymotion account page. Sign in with your credentials and click on upload video. Browse the video from the location where you saved, give it a title and description.
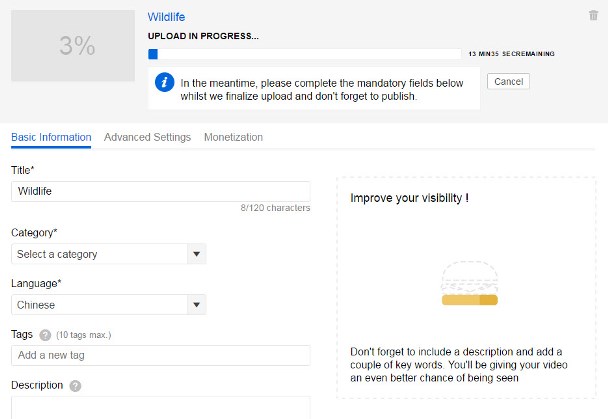
Next, click on channel drop-down menu and choose a category which best describes your video. Besides this, you would see a ‘Tags’ text box. You can add one or more tags (maximum 10) and select the privacy options as per your requirement. Tags act as a criterion for SEO optimization and help people in finding your video. Finally, just click on save to upload the video on dailymotion.
Method 2: Sync YouTube videos to Dailymotion
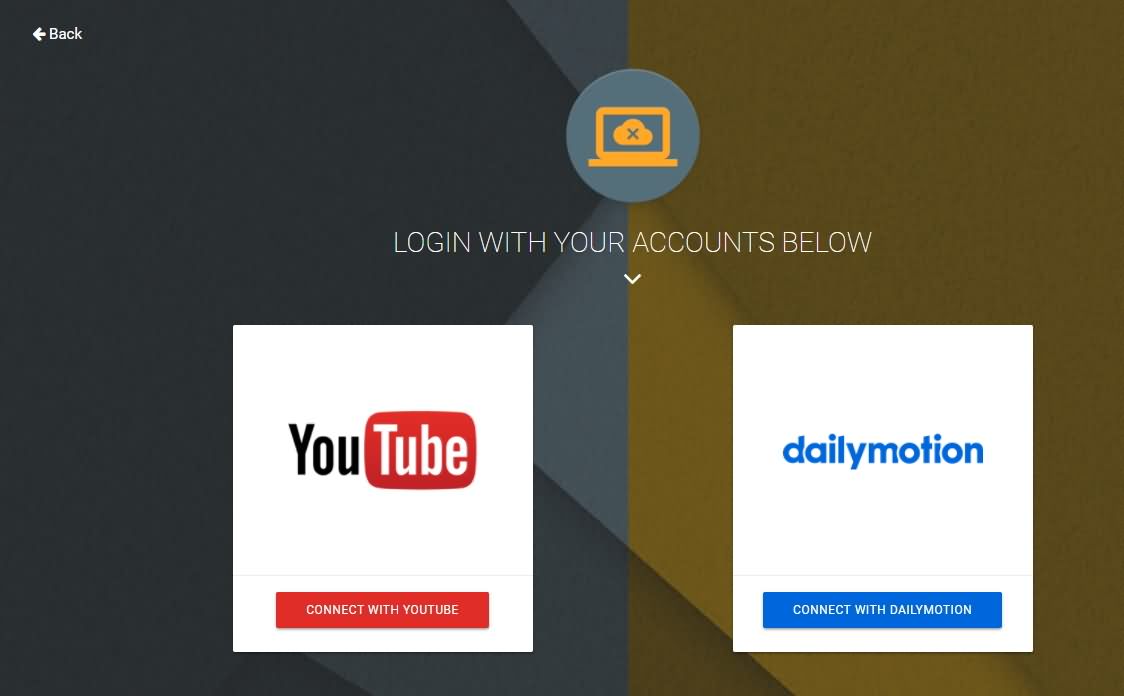
You can do this by liaising with Freedom MCN Network as it allows you to grow faster on Dailymotion. All you have to do is to search for ‘dashboard.tm’ on Google and sign in using you email and password. It will direct you to Dailymotion page; you can also opt to sign in with your Facebook credentials. When you will press enter and login, the first screen only will show the prompt if you want to synch YouTube and Dailymotion channels? Since, our answer is yes, the screen will ask you to login into your YouTube account and the screen will navigate you to the login into Google account linked to your YouTube account. Just like in all apps, you have to allow Freedom to access the data from your YouTube account. The next screen will list down number of videos that have been uploaded to your YouTube Account and the ones which are already synched with Dailymotion will have a check against their name. The ones which are not synched will have a box; you can simply check it and click on ‘Synch videos’ at the top right corner.
It will ask for your email address to get notifications, put in your email ID and click on Sync. Once they are active and synched you will receive a notification on your email with a subject ‘Done reuploading’ followed by the tile of the video. This simply means that you need not upload any video separately on dailymotion, you can simply synch it with YouTube and put in your efforts of uploading only once!
Ollie Mattison
Ollie Mattison is a writer and a lover of all things video.
Follow @Ollie Mattison
Ollie Mattison
Mar 27, 2024• Proven solutions
It is significant for a business to stay connected to its customers and videos are a wonderful medium to build that connect! Dailymotion gives you a golden opportunity and platform to share your videos on websites other than YouTube. This means that you can transfer your videos from YouTube to dailymotion in few minutes and increase the audience. There is no direct transfer feature in YouTube and hence this post will help in guiding how can you transfer the video content from YouTube to Dailymotion!
- Method 1: Download YouTube video and upload to Dailymotion
- Method 2: Sync YouTube videos to Dailymotion
Note: We resolutely oppose all forms of copyright-infringing downloads. This tutorial is only for downloading YouTube videos/audio materials from your own channel.
Method 1: Download YouTube video and upload to Dailymotion
This one is little longer but many people vote for it as a safer one! All you have to do is to login to your YouTube official account and download all the videos that you have uploaded in MP4 format by clicking on Edit option appearing at right of the video.
Ready to learn How to Download YouTube Videos . It’s easy, fun and a great way to share your movies with the world.
Save it to the desired folder on your PC and navigate to the Dailymotion account page. Sign in with your credentials and click on upload video. Browse the video from the location where you saved, give it a title and description.
Next, click on channel drop-down menu and choose a category which best describes your video. Besides this, you would see a ‘Tags’ text box. You can add one or more tags (maximum 10) and select the privacy options as per your requirement. Tags act as a criterion for SEO optimization and help people in finding your video. Finally, just click on save to upload the video on dailymotion.
Method 2: Sync YouTube videos to Dailymotion
You can do this by liaising with Freedom MCN Network as it allows you to grow faster on Dailymotion. All you have to do is to search for ‘dashboard.tm’ on Google and sign in using you email and password. It will direct you to Dailymotion page; you can also opt to sign in with your Facebook credentials. When you will press enter and login, the first screen only will show the prompt if you want to synch YouTube and Dailymotion channels? Since, our answer is yes, the screen will ask you to login into your YouTube account and the screen will navigate you to the login into Google account linked to your YouTube account. Just like in all apps, you have to allow Freedom to access the data from your YouTube account. The next screen will list down number of videos that have been uploaded to your YouTube Account and the ones which are already synched with Dailymotion will have a check against their name. The ones which are not synched will have a box; you can simply check it and click on ‘Synch videos’ at the top right corner.
It will ask for your email address to get notifications, put in your email ID and click on Sync. Once they are active and synched you will receive a notification on your email with a subject ‘Done reuploading’ followed by the tile of the video. This simply means that you need not upload any video separately on dailymotion, you can simply synch it with YouTube and put in your efforts of uploading only once!
Ollie Mattison
Ollie Mattison is a writer and a lover of all things video.
Follow @Ollie Mattison
How to Add Logo or Watermark to YouTube Video
How to Add Logo or Watermark to YouTube Video

Richard Bennett
Mar 27, 2024• Proven solutions
A watermark is a still image that is usually plugged in the videos, for the purpose of claiming copyrights or publicity purpose. YouTube generally carries a “branding” option where you can brand your video with your channel. This doesn’t provide a stable watermark. Therefore, when someone downloads that video using a second party (YouTube downloader) it gets removed. For this purpose the legal author will have to put a Channel watemark on their YouTube videos. In this guide, we will show you how to add watermark to your YouTube videos, existing or new.
You May Also Like:
Best Watermark Apps for iPhone - How to Watermark Photos on iPhone >>
Wondershare AniEraser Seamless, Effortless, Intuitive.
AniEraser makes it easy to perfect any photo or video; no matter the device or platform - experience a smooth, effortless transformation of your image and maximize its potential with just one click.
Make your moment perfect.
Free Download Free Download Edit online

![]()
How to Add a Watermark to Your YouTube Videos
- Part 1: How to add logo or watermark to in existing YouTube videos
- Part 2: Add logos or watermarks to your videos before uploading
Part 1: How to add logo or watermark to in existing YouTube videos
To add a watermark to your previously uploaded videos you will need to have created and saved your watermark outside of your video editing program.
- Sign in to your YouTube account. Click on the thumbnail image of your account at the top right corner. This will give you a drop down menu. Then Click on the small gear (indicating settings)

- This will lead you to setting center. Click on “view additional features”


- To the left of the window, Click the third option of “branding”
- Click on “add watermark”. Then you can choose an image from your computer. After your image is uploaded, click save.

Notes
YouTube watermark size: Your watermark should be transparent, square, and larger than 50x50 pixels, which is the size it will be shrunk down to when it appears in the corner of your videos.
YouTube watermark starting time: you will have the option of choosing a start time for your watermark, making it appear only at the end of your video, or having it there for the entire length of your video. Once that is done click ‘Update’ and your watermark will be applied to your videos.
YouTube watermark color: Youtube suggests that your watermark have only one color. The point is that you should not use anything flashy that will take attention away from your video, so having two or three colors is not necessarily wrong if your design is subtle.
Here is a tutorial video for how to add watermark to Your YouTube videos:
Part 2: Add logos or watermarks to your videos before uploading
1. Wondershare Filmora
Wondershare Filmora which is one of the ideal video editing tools especially when it comes to watermarking your videos . It helps you in adding static and video watermarks over the video. The basic theme of the video watermarking is the concept of picture-in-picture .
![]()
The following steps have to be taken to add a watermark:
- Add the video and watermarking data by drag dropping it into the workspace
- Drag the required video on the timeline and the watermark on it as well
- Adjust the watermark and add pre-made special effects to it
- Mask the watermark in the shape you like
- Save the video
 Download Mac Version ](https://tools.techidaily.com/wondershare/filmora/download/ )
2. Windows movie maker
Windows movie maker is free default windows software that can easily add watermark to your videos to secure your copyrights. It can cater two types of watermarks; images and text. For images, it just supports PNG and GIF format files and generally doesn’t support transparency. Moreover, an external file, Windows Logo Locator is needed for placing the logo at different positions.
How to add watermark to video with Windows Movie Maker
Adding Text watermark:
- Open windows movie maker
- Click on ‘videos’ under the title of import.
- Import your video to the timeline.
- Right beneath imports under the category of edit you will find ‘titles and credits’. Click.
- Enter the text for watermark.
- Choose the title positioning, font and transparency.
- Add title. You will find it along the length of timeline. You may drag to expand it, for viewing it during the entire videos length. Select file and click publish video.
Adding image watermark:
The image should be in .PNG or .GIF format.
- Save the image in >C:\Program Files\Movie Maker\Shared\AddOnTFX\.
- Download a logo Locator as per your installed windows from FX archives.
- Select the location of the logo in your video where you want it to appear.
- Choose the screen size and the logo size
- Type the name of the file of the logo you had already saved with the extension. For e.g. logo.png
- Copy the text that appears underneath and paste it on the notepad and save the typed file in >C:\Program Files\Movie Maker\Shared\AddOnTFX\.
- Open windows movie maker again.
- Choose title and credits underneath the edit category.
- Press space bar once and then click ‘change the title animation’.
- You will see your image there. Click on ad title and press Ctrl+p to publish.

Part 3: How to Create a Transparent logo for Youtube Channel
Do you want to make a transparent image as logo for your YouTube? If you want to brand your YouTube channel, we believe it is a must to add transparent logo for YouTube branding. Actually, you can do this in Filmora just with a green screen image. Check the steps below to know the secret.
Step 1: Import video and image to Filmora
Open Filmora. Choose Create New Project. Click import media files here in Media library. Select your video and a green screen image. In fact, a green screen video is also accessable, but usually brand logo is image. Now drag them onto timeline.

Step 2: Import video and image to Filmora
Right click on the image clip in the timeline. Choose Green Screen. You will see the image is transparent in the preview window. Now, you need to adjust some details. You can adjust edge thickness and edge feather to better edge. If the green screen background is not totally removed, drag tolerance to adjust it.

Step 3: Scale the logo
You can clip the image clip first and go to preview window to scale it down or up by dragging the green dot. You can put the YouTube logo at corner.
![]()
Richard Bennett
Richard Bennett is a writer and a lover of all things video.
Follow @Richard Bennett
Richard Bennett
Mar 27, 2024• Proven solutions
A watermark is a still image that is usually plugged in the videos, for the purpose of claiming copyrights or publicity purpose. YouTube generally carries a “branding” option where you can brand your video with your channel. This doesn’t provide a stable watermark. Therefore, when someone downloads that video using a second party (YouTube downloader) it gets removed. For this purpose the legal author will have to put a Channel watemark on their YouTube videos. In this guide, we will show you how to add watermark to your YouTube videos, existing or new.
You May Also Like:
Best Watermark Apps for iPhone - How to Watermark Photos on iPhone >>
Wondershare AniEraser Seamless, Effortless, Intuitive.
AniEraser makes it easy to perfect any photo or video; no matter the device or platform - experience a smooth, effortless transformation of your image and maximize its potential with just one click.
Make your moment perfect.
Free Download Free Download Edit online
![]()
How to Add a Watermark to Your YouTube Videos
- Part 1: How to add logo or watermark to in existing YouTube videos
- Part 2: Add logos or watermarks to your videos before uploading
Part 1: How to add logo or watermark to in existing YouTube videos
To add a watermark to your previously uploaded videos you will need to have created and saved your watermark outside of your video editing program.
- Sign in to your YouTube account. Click on the thumbnail image of your account at the top right corner. This will give you a drop down menu. Then Click on the small gear (indicating settings)
- This will lead you to setting center. Click on “view additional features”
- To the left of the window, Click the third option of “branding”
- Click on “add watermark”. Then you can choose an image from your computer. After your image is uploaded, click save.
Notes
YouTube watermark size: Your watermark should be transparent, square, and larger than 50x50 pixels, which is the size it will be shrunk down to when it appears in the corner of your videos.
YouTube watermark starting time: you will have the option of choosing a start time for your watermark, making it appear only at the end of your video, or having it there for the entire length of your video. Once that is done click ‘Update’ and your watermark will be applied to your videos.
YouTube watermark color: Youtube suggests that your watermark have only one color. The point is that you should not use anything flashy that will take attention away from your video, so having two or three colors is not necessarily wrong if your design is subtle.
Here is a tutorial video for how to add watermark to Your YouTube videos:
Part 2: Add logos or watermarks to your videos before uploading
1. Wondershare Filmora
Wondershare Filmora which is one of the ideal video editing tools especially when it comes to watermarking your videos . It helps you in adding static and video watermarks over the video. The basic theme of the video watermarking is the concept of picture-in-picture .
![]()
The following steps have to be taken to add a watermark:
- Add the video and watermarking data by drag dropping it into the workspace
- Drag the required video on the timeline and the watermark on it as well
- Adjust the watermark and add pre-made special effects to it
- Mask the watermark in the shape you like
- Save the video
Download Mac Version ](https://tools.techidaily.com/wondershare/filmora/download/ )
2. Windows movie maker
Windows movie maker is free default windows software that can easily add watermark to your videos to secure your copyrights. It can cater two types of watermarks; images and text. For images, it just supports PNG and GIF format files and generally doesn’t support transparency. Moreover, an external file, Windows Logo Locator is needed for placing the logo at different positions.
How to add watermark to video with Windows Movie Maker
Adding Text watermark:
- Open windows movie maker
- Click on ‘videos’ under the title of import.
- Import your video to the timeline.
- Right beneath imports under the category of edit you will find ‘titles and credits’. Click.
- Enter the text for watermark.
- Choose the title positioning, font and transparency.
- Add title. You will find it along the length of timeline. You may drag to expand it, for viewing it during the entire videos length. Select file and click publish video.
Adding image watermark:
The image should be in .PNG or .GIF format.
- Save the image in >C:\Program Files\Movie Maker\Shared\AddOnTFX\.
- Download a logo Locator as per your installed windows from FX archives.
- Select the location of the logo in your video where you want it to appear.
- Choose the screen size and the logo size
- Type the name of the file of the logo you had already saved with the extension. For e.g. logo.png
- Copy the text that appears underneath and paste it on the notepad and save the typed file in >C:\Program Files\Movie Maker\Shared\AddOnTFX\.
- Open windows movie maker again.
- Choose title and credits underneath the edit category.
- Press space bar once and then click ‘change the title animation’.
- You will see your image there. Click on ad title and press Ctrl+p to publish.
Part 3: How to Create a Transparent logo for Youtube Channel
Do you want to make a transparent image as logo for your YouTube? If you want to brand your YouTube channel, we believe it is a must to add transparent logo for YouTube branding. Actually, you can do this in Filmora just with a green screen image. Check the steps below to know the secret.
Step 1: Import video and image to Filmora
Open Filmora. Choose Create New Project. Click import media files here in Media library. Select your video and a green screen image. In fact, a green screen video is also accessable, but usually brand logo is image. Now drag them onto timeline.
Step 2: Import video and image to Filmora
Right click on the image clip in the timeline. Choose Green Screen. You will see the image is transparent in the preview window. Now, you need to adjust some details. You can adjust edge thickness and edge feather to better edge. If the green screen background is not totally removed, drag tolerance to adjust it.
Step 3: Scale the logo
You can clip the image clip first and go to preview window to scale it down or up by dragging the green dot. You can put the YouTube logo at corner.
![]()
Richard Bennett
Richard Bennett is a writer and a lover of all things video.
Follow @Richard Bennett
Also read:
- [New] Beyond the Basics Advanced Techniques for Improved Recordings
- [New] Changes in Instagram's Algorithm User Perspectives
- [New] Elevate Your Social Media Presence with These Snapchat Strategies for 2024
- [New] Engage Viewers From the Start Mobile Film Techniques for Thumbnails
- [Updated] Anonymous Sharing Simplified Blurring Techniques for Videos
- [Updated] From Disarray to Artwork Your Collage Journey
- 2024 Approved Best Talker Alteration Apps for Video Content Makers
- 2024 Approved Embedding YouTube Playlists with Minimal Complexity and Maximum Impact
- Adopting Nature-Positive Policies in Urban Governance
- Correcting Windows Files' Save Errors
- Cutting-Edge Tips for Low-Cost YouTube Sessions
- Elevate Your Profits YouTube's Studio Monetization Simplified
- How To Pause Life360 Location Sharing For Motorola Moto G23 | Dr.fone
- In 2024, A Comprehensive Guide to iPhone SE (2022) Blacklist Removal Tips and Tools | Dr.fone
- New Microsoft Software Refresh Risks Boosting Office Stress Levels, Says ZDNet Analysis
- Seamless Screen Choices Through ChatGPT Tips
- Secrets Unveiled? Learn to Hide Oneself on Video
- Unveiling Professional Techniques for APS HDR Creation for 2024
- YouTube Banner Blueprints A Gamers' Design Handbook
- Title: [Updated] Efficiently Shifting Videos YouTube to Dailymotion Strategy
- Author: Brian
- Created at : 2024-09-21 16:27:24
- Updated at : 2024-09-26 16:02:12
- Link: https://youtube-video-recordings.techidaily.com/updated-efficiently-shifting-videos-youtube-to-dailymotion-strategy/
- License: This work is licensed under CC BY-NC-SA 4.0.