
![[Updated] Download YouTube Gallery Files Instantly](https://www.lifewire.com/thmb/cYWko2t9itR_ENyceDuRtljqnZ4=/400x300/filters:no_upscale():max_bytes(150000):strip_icc()/jens-kreuter-85328-c5ada5fb87224444a49aaa4ad1e16897.jpg)
[Updated] Download YouTube Gallery Files Instantly
Download YouTube Gallery Files Instantly
10 Free YouTube Thumbnail Downloaders/Savers Online-Download YouTube Thumbnail

Shanoon Cox
Mar 27, 2024• Proven solutions
YouTube thumbnails can be required for download for various reasons ranging from personal to professional. Some thumbnails are very attractive, and users might want to download YouTube thumbnail to use as wallpaper or as inspiration. Whereas other times, thumbnails are required to be added to blogs.
In either case, you can take help from a YouTube thumbnail downloader that can save your day. As the name suggests, a YouTube thumbnail saver can let you save any thumbnail you like, and sometimes you can also custom select the quality. For your ease, we have rounded up the best tools to download YouTube thumbnail.
Let’s dive in.
- 10 Free Online YouTube Thumbnail Downloaders/Savers
- Bonus Tip: The Best YouTube Video Editor-Wondershare Filmora
10 Free Online YouTube Thumbnail Downloaders/Savers
There are tons of tools on the web that let you download YouTube thumbnail. But, not all of them are reliable and secure. Choosing the best YouTube thumbnail downloaders that offer all the features you are looking for can be time taking and tedious. So, we are here to save the day by listing the top YouTube thumbnail saver tools.
1. ThumbnailSave
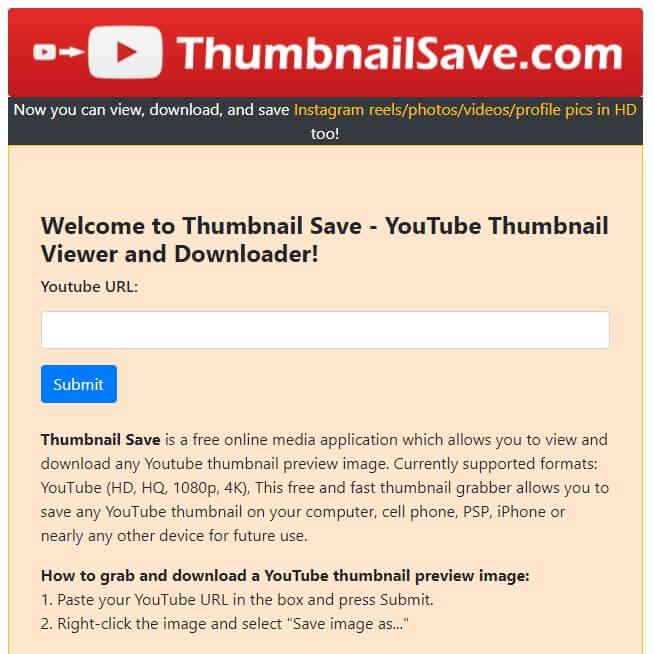
As a free YouTube thumbnail downloader, ThumbnailSave is frequently used by people. It enables users to download YouTube thumbnail without any hassle. There a variety of resolutions available, and you can choose the quality you like, ranging from HD to 360p. The simple interface of this downloader further makes it an excellent tool. All you have to do is enter the URL link and click Save As after the thumbnail is loaded. Also, this versatile YouTube thumbnail downloader works on almost every kind of device. Whether you are using a desktop PC or an iPhone, ThumbnailSave is compatible with all.
2. YouTube Thumbnail Grabber

Another powerful and free YouTube thumbnail downloader is this one, which can download both YouTube and Vimeo thumbnails. After you copy-paste the link of the video whose thumbnail you wish to save, you can press on Get Thumbnail Images. After that, you can choose the quality of the thumbnail as per your requirements. Moreover, you can also get a free extension of this YouTube thumbnail saver on both Chrome and Firefox browsers. This will allow fast and easy use of the YouTube thumbnail downloader. What’s more, unlike other downloaders, this one doesn’t bombard the user with pesky ads.
3. Youthumbnail.com
YouThumbnail, also known as YT YouTube thumbnail downloader, is a robust tool that allows users to quickly download YouTube thumbnail absolutely free of cost. It requires no installation. Three different sizes, namely medium, small, and HD, are available for download. By clicking on the desired quality, you can quickly and safely download YouTube thumbnail. Also, there is no limit to the number of downloads. Better yet, there are multiple languages available. So, a diverse population can use this online YouTube thumbnail saver with great ease.
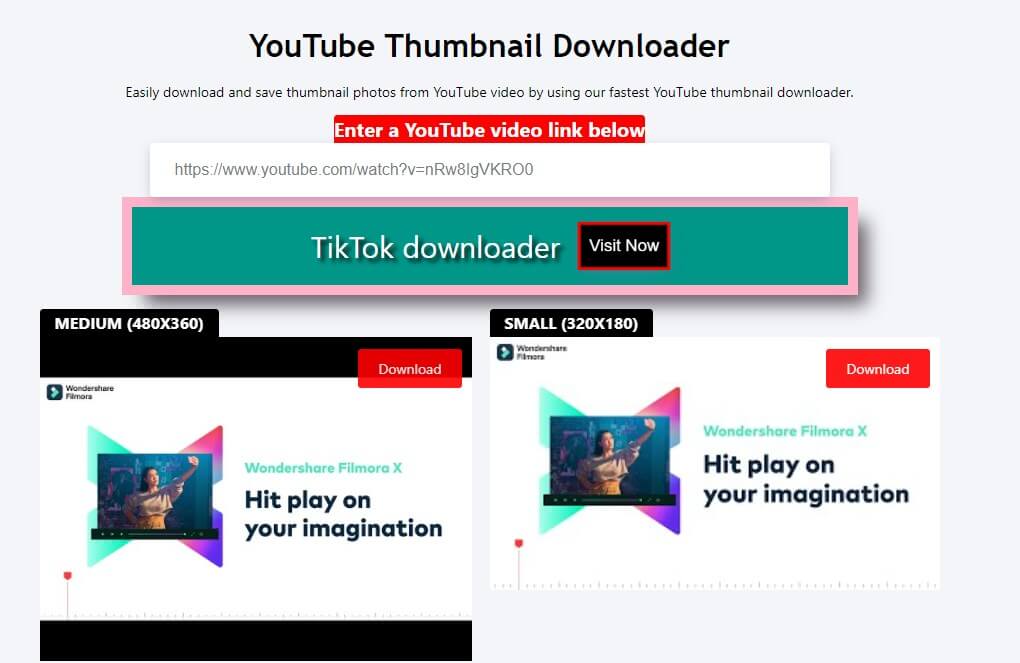
4. YouTube-thumbnails.com

As a free and open for all YouTube thumbnail saver, this one lets users get the thumbnail of their choice in the quality of their choice. Using this YouTube thumbnail downloader won’t cost a penny, no matter how many thumbnails are downloaded. It also has a very simple user interface. Just enter the YouTube video link and press Find. The qualities of the thumbnail supported by this tool are MQ 320x180, HQ 480x360, SD 640x480, and HD 1280x720 , and will be almost instantly displayed. Click on the quality you wish to save locally, and your download will start immediately.
5. YT Thumbnail Downloader
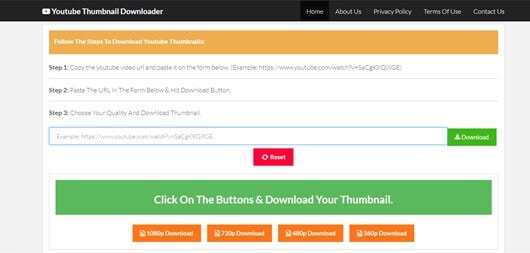
YT Thumbnail Downloader is an excellent and lightning-fast tool to download YouTube thumbnail. It poses no limitations or charges on the use. Moreover, you can custom select the resolution of the thumbnail before you click to save. This YouTube thumbnail downloader prides itself on being the fastest in the market. The thumbnail processing time is just 2 seconds, after which you can download YouTube thumbnail. Besides, this YouTube thumbnail saver is safe and secure as it doesn’t display tons of ads and also does not save the user’s data.
6. BoingBoing
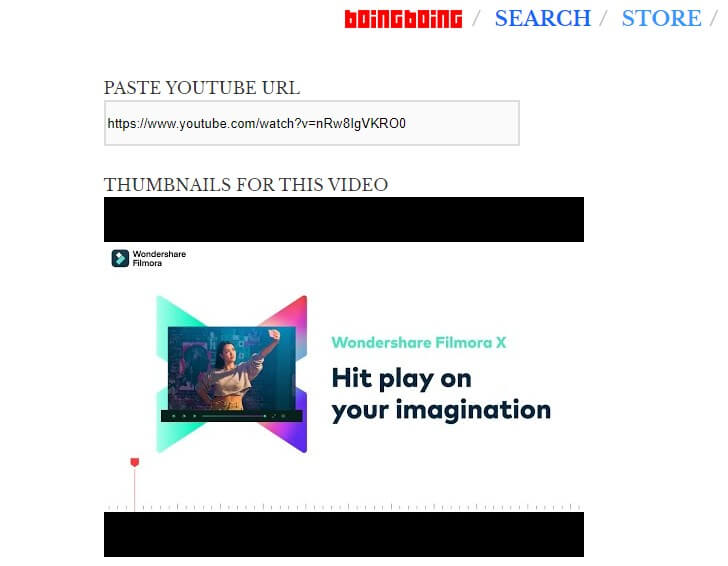
BoingBoing is also a free and very easy-to-use YouTube thumbnail saver. All you have to do is paste the URL you copied, and this YouTube thumbnail downloader will take care of the rest. There is no button to press to start the process. The thumbnails are almost instantly loaded. However, BoingBoing displays a lot of annoying ads. Also, the different qualities that are displayed don’t mention the size, and you will have to press and hold the image to download. All in all, this YouTube thumbnail saver is worth your time and effort as it is fast at what it does.
7. Get YouTube Thumbnail
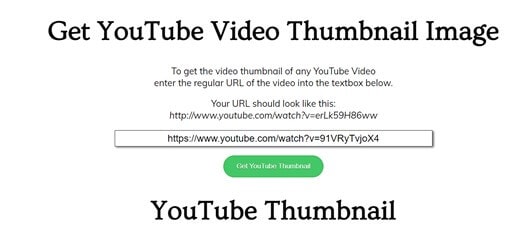
Get YouTube Thumbnail is a very simple tool to download YouTube thumbnail. It comes with no extra features. But, it is widely used due to the fact that it is a very straightforward YouTube thumbnail downloader. It doesn’t even display intrusive ads or pop-ups. But, the downside is that the quality options are limited. There are only 2 qualities available for download, and no size is mentioned on them. To download YouTube thumbnail, you will have to right-click and open the image URL created and then save it in the next tab.
8. YouTube Thumbnail Image
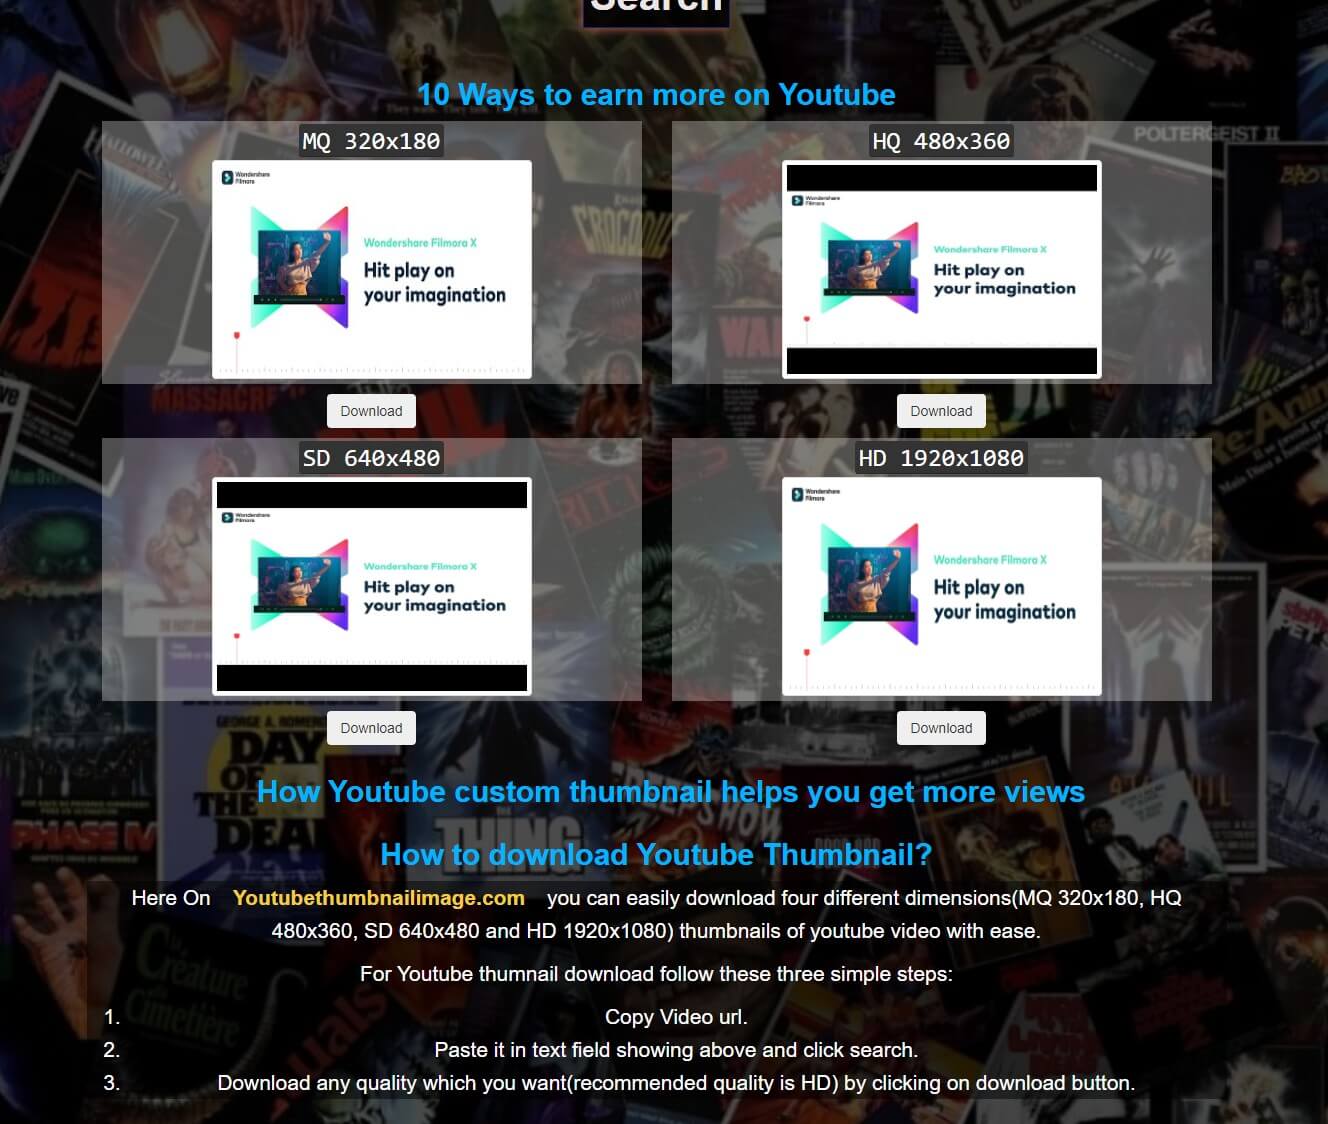
A fast and easy way to download YouTube thumbnail is by using this powerful tool available online. Without any hassle of downloading or registering an account, you can easily copy-paste the link of your favorite video and click on Search. You will be displayed with four qualities such as 1920x1080 (HD), 640X480 (SD), 480X360 (HQ), and 320x180 (MQ). This feature makes it a versatile YouTube thumbnail downloader as users can choose the quality depending on the space they have available. Other than this, the YouTube thumbnail saver offers round-the-clock customer support. So, in case you face any technical issue or are unable to download YouTube thumbnail, this tool will be present for prompt assistance.
9. Thumbnail-download.com
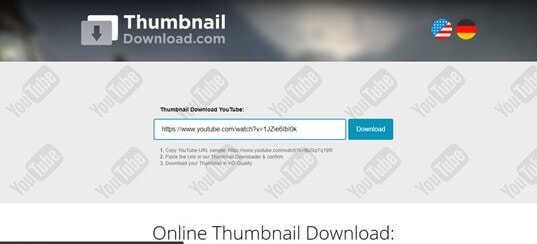
Another addition to the list of top YouTube thumbnail downloader tools is this one. Like the other tools, this one is also free for use and is renowned for being super fast. No matter which YouTube video you want to save the thumbnail from, this tool will allow you easy access to download it in HD quality. The website is SSL encrypted, so the user’s data is protected, and thus this is a safe site to download YouTube thumbnail. What’s more, this YouTube thumbnail downloader is robust. Although there a few ads displayed, they aren’t very intrusive and do not disrupt the user experience.
Bonus Tip: The Best YouTube Video Editor-Wondershare Filmora
With Wondershare Filmora, you can create captivating videos by using one-click tools. This powerful yet intuitive video editor is loaded with various high-end editing features that can help you add striking and cinematic effects to your videos. Motion tracking, color matching, and even keyframing are made easy through Filmora.
1.After you download and install Filmora on your PC, launch it. Then, click on File and tap on Import Media Files.

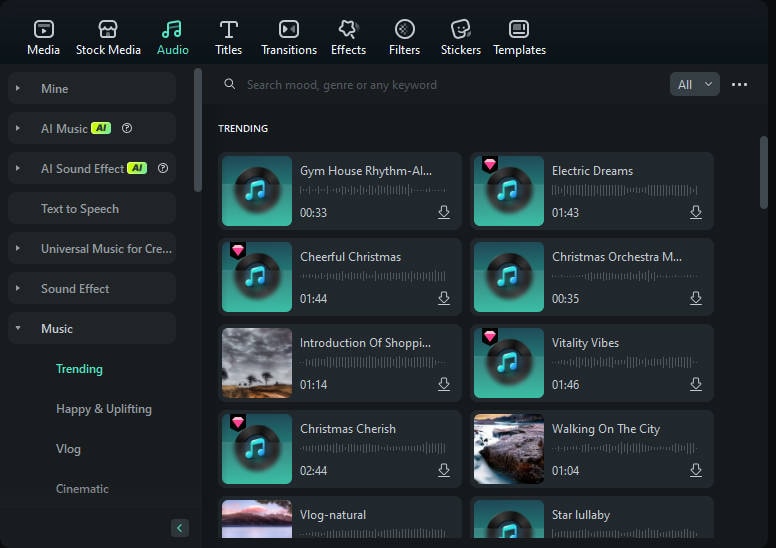
2.The Audio tab of Filmora offers a variety of music. Just click on the plus icon on any audio to add it to your video as background music. Cut the extra audio part to match your video length.
3.From the Titles tab, you can choose a preset template and then personalize it by double-clicking the title you have added to the timeline.

4.The Transition tab also displays multiple types of dynamic transitions; click to add to the timeline and then drag to adjust the duration of the effect.
5.You can also choose an aesthetic filter or overlay from the Effects tab.
6.The Elements tab features numerous categories like Love, Journey, Badges, and many more. You can add these elements to your video and then adjust their size, rotation, opacity, and much more.
7.Lastly, you can click on Export and either save the video locally or share it directly on social media.
Conclusion
Finally, you can download YouTube thumbnail at the site of your choice. Whether you want to download it in HD or in a lower quality, one of the YouTube thumbnail downloaders mentioned above will be able to fulfill your requirements.
No more browsing through unsecured and ad-laden sites to find a reliable YouTube thumbnail downloader. We have hand-picked, tried, and tested all these tools. All you have to do is take your pick of the YouTube thumbnail saver that best fits your needs. Any tool you choose, you will be able to download YouTube thumbnail with ease and security.
Shanoon Cox
Shanoon Cox is a writer and a lover of all things video.
Follow @Shanoon Cox
Shanoon Cox
Mar 27, 2024• Proven solutions
YouTube thumbnails can be required for download for various reasons ranging from personal to professional. Some thumbnails are very attractive, and users might want to download YouTube thumbnail to use as wallpaper or as inspiration. Whereas other times, thumbnails are required to be added to blogs.
In either case, you can take help from a YouTube thumbnail downloader that can save your day. As the name suggests, a YouTube thumbnail saver can let you save any thumbnail you like, and sometimes you can also custom select the quality. For your ease, we have rounded up the best tools to download YouTube thumbnail.
Let’s dive in.
- 10 Free Online YouTube Thumbnail Downloaders/Savers
- Bonus Tip: The Best YouTube Video Editor-Wondershare Filmora
10 Free Online YouTube Thumbnail Downloaders/Savers
There are tons of tools on the web that let you download YouTube thumbnail. But, not all of them are reliable and secure. Choosing the best YouTube thumbnail downloaders that offer all the features you are looking for can be time taking and tedious. So, we are here to save the day by listing the top YouTube thumbnail saver tools.
1. ThumbnailSave
As a free YouTube thumbnail downloader, ThumbnailSave is frequently used by people. It enables users to download YouTube thumbnail without any hassle. There a variety of resolutions available, and you can choose the quality you like, ranging from HD to 360p. The simple interface of this downloader further makes it an excellent tool. All you have to do is enter the URL link and click Save As after the thumbnail is loaded. Also, this versatile YouTube thumbnail downloader works on almost every kind of device. Whether you are using a desktop PC or an iPhone, ThumbnailSave is compatible with all.
2. YouTube Thumbnail Grabber
Another powerful and free YouTube thumbnail downloader is this one, which can download both YouTube and Vimeo thumbnails. After you copy-paste the link of the video whose thumbnail you wish to save, you can press on Get Thumbnail Images. After that, you can choose the quality of the thumbnail as per your requirements. Moreover, you can also get a free extension of this YouTube thumbnail saver on both Chrome and Firefox browsers. This will allow fast and easy use of the YouTube thumbnail downloader. What’s more, unlike other downloaders, this one doesn’t bombard the user with pesky ads.
3. Youthumbnail.com
YouThumbnail, also known as YT YouTube thumbnail downloader, is a robust tool that allows users to quickly download YouTube thumbnail absolutely free of cost. It requires no installation. Three different sizes, namely medium, small, and HD, are available for download. By clicking on the desired quality, you can quickly and safely download YouTube thumbnail. Also, there is no limit to the number of downloads. Better yet, there are multiple languages available. So, a diverse population can use this online YouTube thumbnail saver with great ease.
4. YouTube-thumbnails.com
As a free and open for all YouTube thumbnail saver, this one lets users get the thumbnail of their choice in the quality of their choice. Using this YouTube thumbnail downloader won’t cost a penny, no matter how many thumbnails are downloaded. It also has a very simple user interface. Just enter the YouTube video link and press Find. The qualities of the thumbnail supported by this tool are MQ 320x180, HQ 480x360, SD 640x480, and HD 1280x720 , and will be almost instantly displayed. Click on the quality you wish to save locally, and your download will start immediately.
5. YT Thumbnail Downloader
YT Thumbnail Downloader is an excellent and lightning-fast tool to download YouTube thumbnail. It poses no limitations or charges on the use. Moreover, you can custom select the resolution of the thumbnail before you click to save. This YouTube thumbnail downloader prides itself on being the fastest in the market. The thumbnail processing time is just 2 seconds, after which you can download YouTube thumbnail. Besides, this YouTube thumbnail saver is safe and secure as it doesn’t display tons of ads and also does not save the user’s data.
6. BoingBoing
BoingBoing is also a free and very easy-to-use YouTube thumbnail saver. All you have to do is paste the URL you copied, and this YouTube thumbnail downloader will take care of the rest. There is no button to press to start the process. The thumbnails are almost instantly loaded. However, BoingBoing displays a lot of annoying ads. Also, the different qualities that are displayed don’t mention the size, and you will have to press and hold the image to download. All in all, this YouTube thumbnail saver is worth your time and effort as it is fast at what it does.
7. Get YouTube Thumbnail
Get YouTube Thumbnail is a very simple tool to download YouTube thumbnail. It comes with no extra features. But, it is widely used due to the fact that it is a very straightforward YouTube thumbnail downloader. It doesn’t even display intrusive ads or pop-ups. But, the downside is that the quality options are limited. There are only 2 qualities available for download, and no size is mentioned on them. To download YouTube thumbnail, you will have to right-click and open the image URL created and then save it in the next tab.
8. YouTube Thumbnail Image
A fast and easy way to download YouTube thumbnail is by using this powerful tool available online. Without any hassle of downloading or registering an account, you can easily copy-paste the link of your favorite video and click on Search. You will be displayed with four qualities such as 1920x1080 (HD), 640X480 (SD), 480X360 (HQ), and 320x180 (MQ). This feature makes it a versatile YouTube thumbnail downloader as users can choose the quality depending on the space they have available. Other than this, the YouTube thumbnail saver offers round-the-clock customer support. So, in case you face any technical issue or are unable to download YouTube thumbnail, this tool will be present for prompt assistance.
9. Thumbnail-download.com
Another addition to the list of top YouTube thumbnail downloader tools is this one. Like the other tools, this one is also free for use and is renowned for being super fast. No matter which YouTube video you want to save the thumbnail from, this tool will allow you easy access to download it in HD quality. The website is SSL encrypted, so the user’s data is protected, and thus this is a safe site to download YouTube thumbnail. What’s more, this YouTube thumbnail downloader is robust. Although there a few ads displayed, they aren’t very intrusive and do not disrupt the user experience.
Bonus Tip: The Best YouTube Video Editor-Wondershare Filmora
With Wondershare Filmora, you can create captivating videos by using one-click tools. This powerful yet intuitive video editor is loaded with various high-end editing features that can help you add striking and cinematic effects to your videos. Motion tracking, color matching, and even keyframing are made easy through Filmora.
1.After you download and install Filmora on your PC, launch it. Then, click on File and tap on Import Media Files.
2.The Audio tab of Filmora offers a variety of music. Just click on the plus icon on any audio to add it to your video as background music. Cut the extra audio part to match your video length.
3.From the Titles tab, you can choose a preset template and then personalize it by double-clicking the title you have added to the timeline.
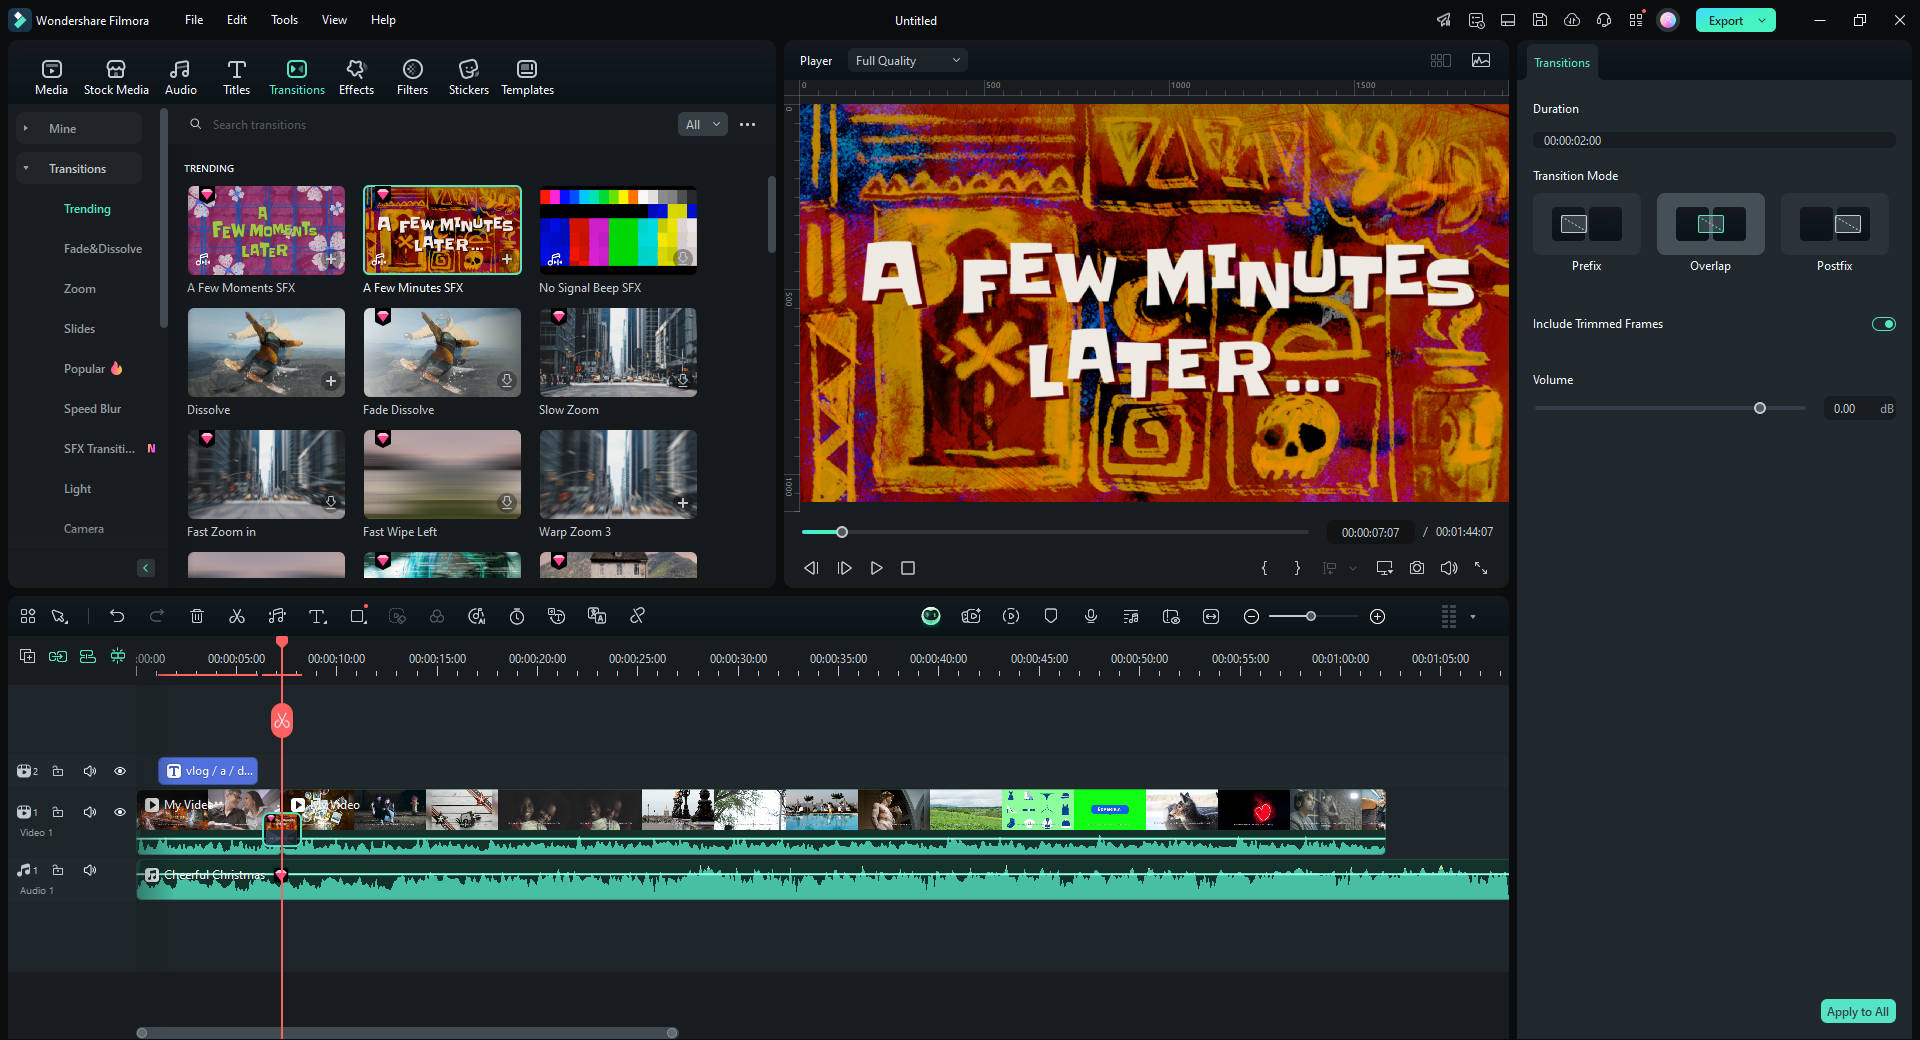
4.The Transition tab also displays multiple types of dynamic transitions; click to add to the timeline and then drag to adjust the duration of the effect.
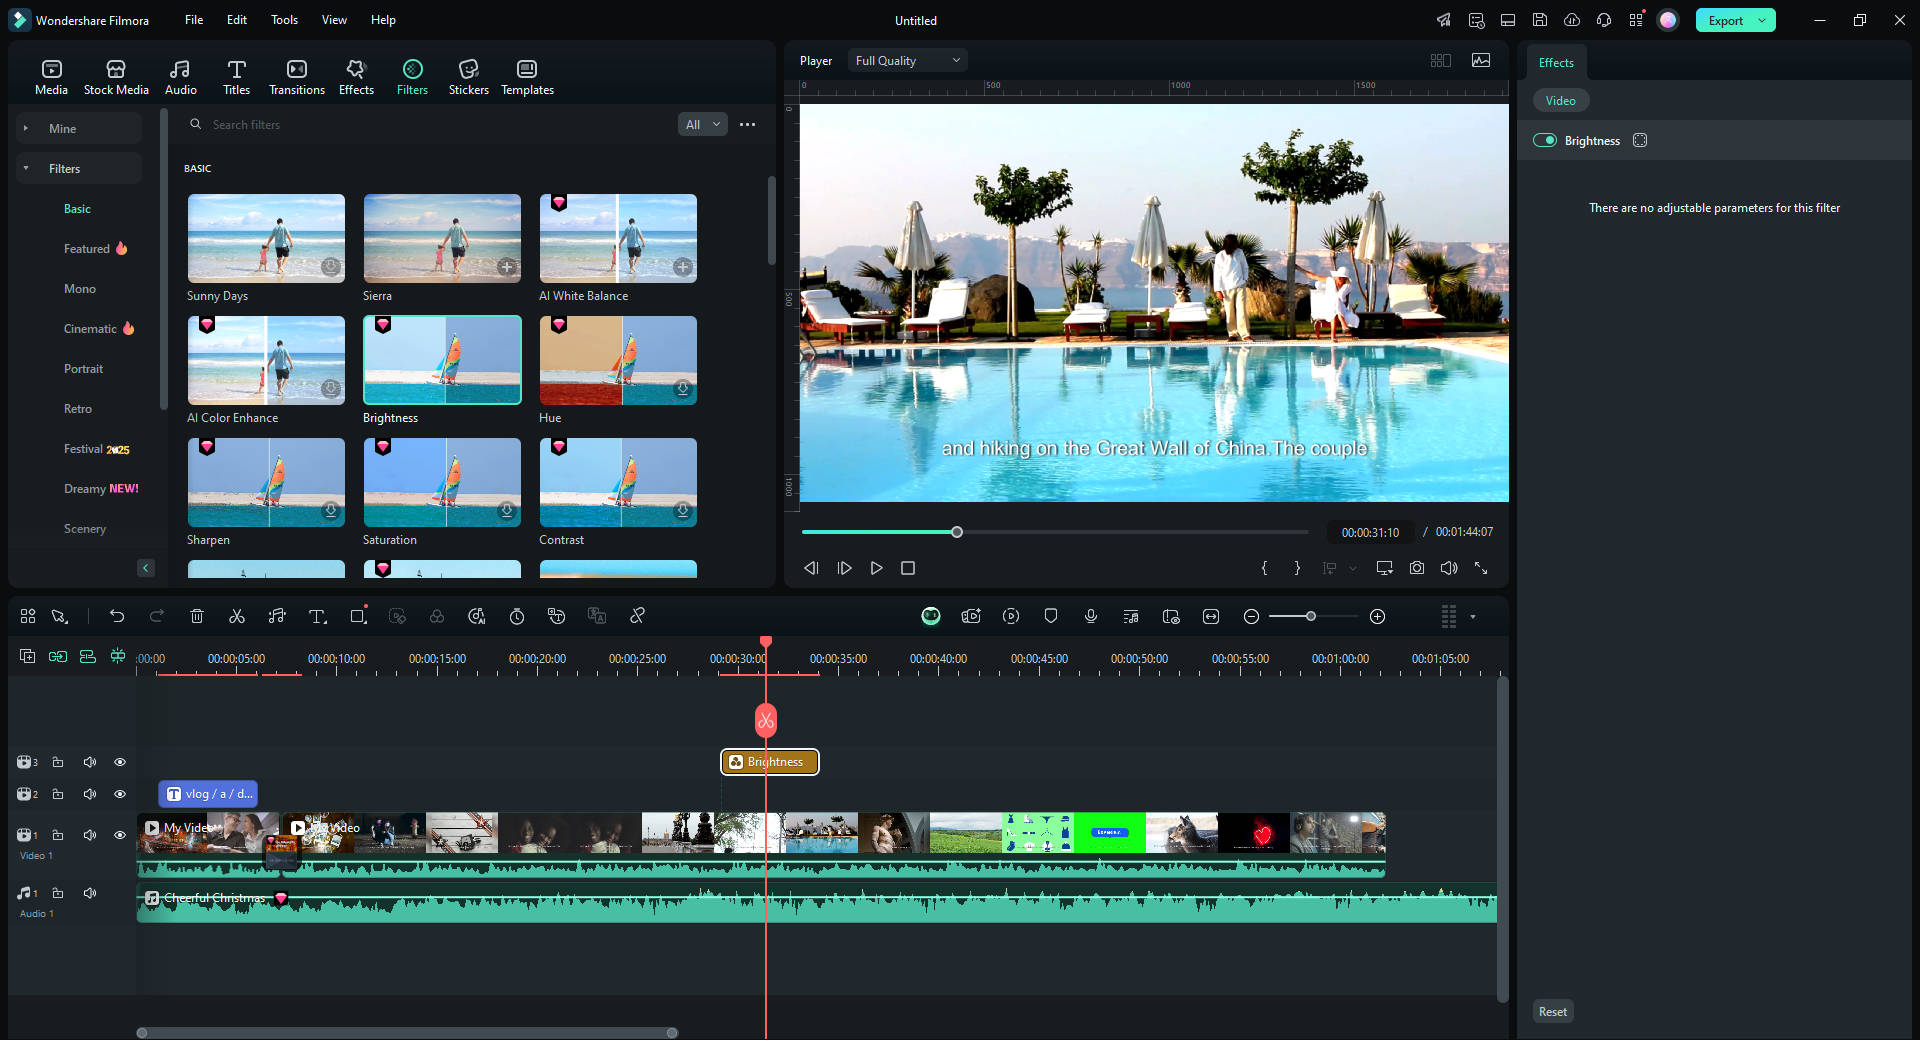
5.You can also choose an aesthetic filter or overlay from the Effects tab.
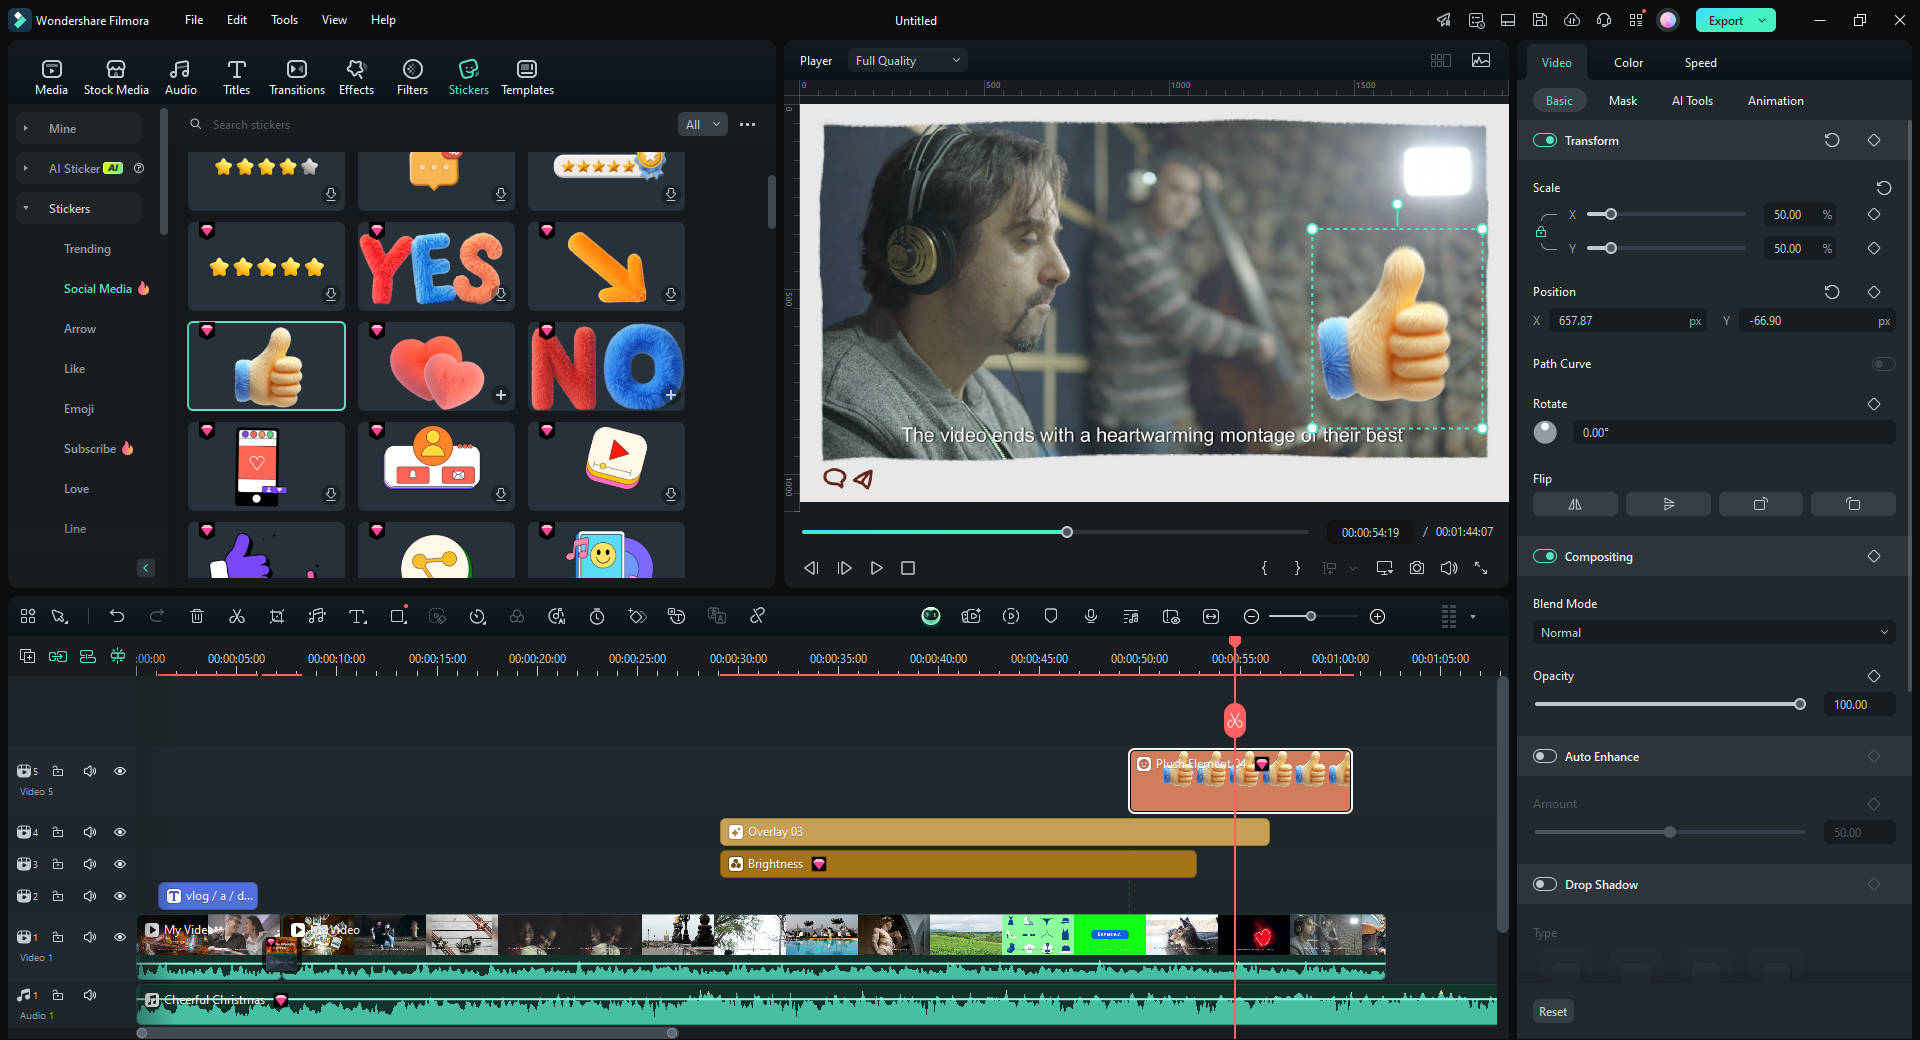
6.The Elements tab features numerous categories like Love, Journey, Badges, and many more. You can add these elements to your video and then adjust their size, rotation, opacity, and much more.
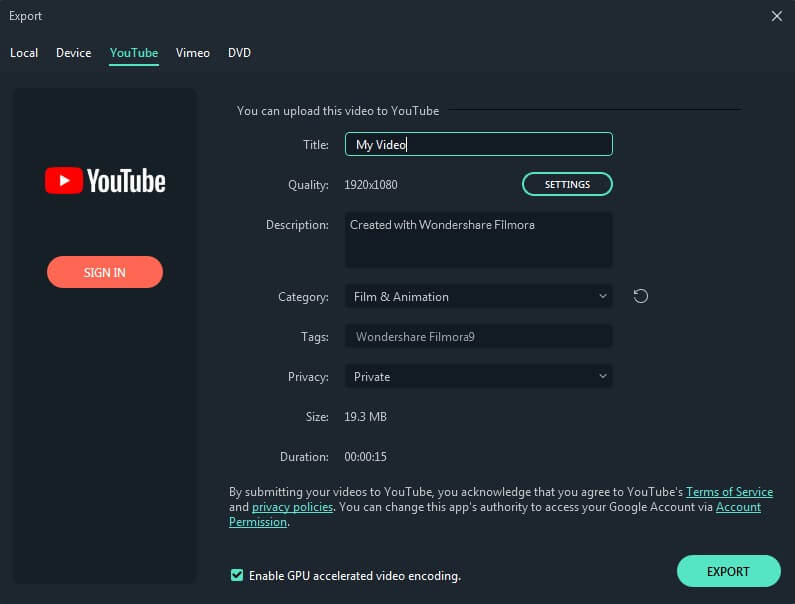
7.Lastly, you can click on Export and either save the video locally or share it directly on social media.
Conclusion
Finally, you can download YouTube thumbnail at the site of your choice. Whether you want to download it in HD or in a lower quality, one of the YouTube thumbnail downloaders mentioned above will be able to fulfill your requirements.
No more browsing through unsecured and ad-laden sites to find a reliable YouTube thumbnail downloader. We have hand-picked, tried, and tested all these tools. All you have to do is take your pick of the YouTube thumbnail saver that best fits your needs. Any tool you choose, you will be able to download YouTube thumbnail with ease and security.
Shanoon Cox
Shanoon Cox is a writer and a lover of all things video.
Follow @Shanoon Cox
Shanoon Cox
Mar 27, 2024• Proven solutions
YouTube thumbnails can be required for download for various reasons ranging from personal to professional. Some thumbnails are very attractive, and users might want to download YouTube thumbnail to use as wallpaper or as inspiration. Whereas other times, thumbnails are required to be added to blogs.
In either case, you can take help from a YouTube thumbnail downloader that can save your day. As the name suggests, a YouTube thumbnail saver can let you save any thumbnail you like, and sometimes you can also custom select the quality. For your ease, we have rounded up the best tools to download YouTube thumbnail.
Let’s dive in.
- 10 Free Online YouTube Thumbnail Downloaders/Savers
- Bonus Tip: The Best YouTube Video Editor-Wondershare Filmora
10 Free Online YouTube Thumbnail Downloaders/Savers
There are tons of tools on the web that let you download YouTube thumbnail. But, not all of them are reliable and secure. Choosing the best YouTube thumbnail downloaders that offer all the features you are looking for can be time taking and tedious. So, we are here to save the day by listing the top YouTube thumbnail saver tools.
1. ThumbnailSave
As a free YouTube thumbnail downloader, ThumbnailSave is frequently used by people. It enables users to download YouTube thumbnail without any hassle. There a variety of resolutions available, and you can choose the quality you like, ranging from HD to 360p. The simple interface of this downloader further makes it an excellent tool. All you have to do is enter the URL link and click Save As after the thumbnail is loaded. Also, this versatile YouTube thumbnail downloader works on almost every kind of device. Whether you are using a desktop PC or an iPhone, ThumbnailSave is compatible with all.
2. YouTube Thumbnail Grabber
Another powerful and free YouTube thumbnail downloader is this one, which can download both YouTube and Vimeo thumbnails. After you copy-paste the link of the video whose thumbnail you wish to save, you can press on Get Thumbnail Images. After that, you can choose the quality of the thumbnail as per your requirements. Moreover, you can also get a free extension of this YouTube thumbnail saver on both Chrome and Firefox browsers. This will allow fast and easy use of the YouTube thumbnail downloader. What’s more, unlike other downloaders, this one doesn’t bombard the user with pesky ads.
3. Youthumbnail.com
YouThumbnail, also known as YT YouTube thumbnail downloader, is a robust tool that allows users to quickly download YouTube thumbnail absolutely free of cost. It requires no installation. Three different sizes, namely medium, small, and HD, are available for download. By clicking on the desired quality, you can quickly and safely download YouTube thumbnail. Also, there is no limit to the number of downloads. Better yet, there are multiple languages available. So, a diverse population can use this online YouTube thumbnail saver with great ease.
4. YouTube-thumbnails.com
As a free and open for all YouTube thumbnail saver, this one lets users get the thumbnail of their choice in the quality of their choice. Using this YouTube thumbnail downloader won’t cost a penny, no matter how many thumbnails are downloaded. It also has a very simple user interface. Just enter the YouTube video link and press Find. The qualities of the thumbnail supported by this tool are MQ 320x180, HQ 480x360, SD 640x480, and HD 1280x720 , and will be almost instantly displayed. Click on the quality you wish to save locally, and your download will start immediately.
5. YT Thumbnail Downloader
YT Thumbnail Downloader is an excellent and lightning-fast tool to download YouTube thumbnail. It poses no limitations or charges on the use. Moreover, you can custom select the resolution of the thumbnail before you click to save. This YouTube thumbnail downloader prides itself on being the fastest in the market. The thumbnail processing time is just 2 seconds, after which you can download YouTube thumbnail. Besides, this YouTube thumbnail saver is safe and secure as it doesn’t display tons of ads and also does not save the user’s data.
6. BoingBoing
BoingBoing is also a free and very easy-to-use YouTube thumbnail saver. All you have to do is paste the URL you copied, and this YouTube thumbnail downloader will take care of the rest. There is no button to press to start the process. The thumbnails are almost instantly loaded. However, BoingBoing displays a lot of annoying ads. Also, the different qualities that are displayed don’t mention the size, and you will have to press and hold the image to download. All in all, this YouTube thumbnail saver is worth your time and effort as it is fast at what it does.
7. Get YouTube Thumbnail
Get YouTube Thumbnail is a very simple tool to download YouTube thumbnail. It comes with no extra features. But, it is widely used due to the fact that it is a very straightforward YouTube thumbnail downloader. It doesn’t even display intrusive ads or pop-ups. But, the downside is that the quality options are limited. There are only 2 qualities available for download, and no size is mentioned on them. To download YouTube thumbnail, you will have to right-click and open the image URL created and then save it in the next tab.
8. YouTube Thumbnail Image
A fast and easy way to download YouTube thumbnail is by using this powerful tool available online. Without any hassle of downloading or registering an account, you can easily copy-paste the link of your favorite video and click on Search. You will be displayed with four qualities such as 1920x1080 (HD), 640X480 (SD), 480X360 (HQ), and 320x180 (MQ). This feature makes it a versatile YouTube thumbnail downloader as users can choose the quality depending on the space they have available. Other than this, the YouTube thumbnail saver offers round-the-clock customer support. So, in case you face any technical issue or are unable to download YouTube thumbnail, this tool will be present for prompt assistance.
9. Thumbnail-download.com
Another addition to the list of top YouTube thumbnail downloader tools is this one. Like the other tools, this one is also free for use and is renowned for being super fast. No matter which YouTube video you want to save the thumbnail from, this tool will allow you easy access to download it in HD quality. The website is SSL encrypted, so the user’s data is protected, and thus this is a safe site to download YouTube thumbnail. What’s more, this YouTube thumbnail downloader is robust. Although there a few ads displayed, they aren’t very intrusive and do not disrupt the user experience.
Bonus Tip: The Best YouTube Video Editor-Wondershare Filmora
With Wondershare Filmora, you can create captivating videos by using one-click tools. This powerful yet intuitive video editor is loaded with various high-end editing features that can help you add striking and cinematic effects to your videos. Motion tracking, color matching, and even keyframing are made easy through Filmora.
1.After you download and install Filmora on your PC, launch it. Then, click on File and tap on Import Media Files.
2.The Audio tab of Filmora offers a variety of music. Just click on the plus icon on any audio to add it to your video as background music. Cut the extra audio part to match your video length.
3.From the Titles tab, you can choose a preset template and then personalize it by double-clicking the title you have added to the timeline.
4.The Transition tab also displays multiple types of dynamic transitions; click to add to the timeline and then drag to adjust the duration of the effect.
5.You can also choose an aesthetic filter or overlay from the Effects tab.
6.The Elements tab features numerous categories like Love, Journey, Badges, and many more. You can add these elements to your video and then adjust their size, rotation, opacity, and much more.
7.Lastly, you can click on Export and either save the video locally or share it directly on social media.
Conclusion
Finally, you can download YouTube thumbnail at the site of your choice. Whether you want to download it in HD or in a lower quality, one of the YouTube thumbnail downloaders mentioned above will be able to fulfill your requirements.
No more browsing through unsecured and ad-laden sites to find a reliable YouTube thumbnail downloader. We have hand-picked, tried, and tested all these tools. All you have to do is take your pick of the YouTube thumbnail saver that best fits your needs. Any tool you choose, you will be able to download YouTube thumbnail with ease and security.
Shanoon Cox
Shanoon Cox is a writer and a lover of all things video.
Follow @Shanoon Cox
Mastering Clear Sound: Recording Without Mic Techniques
How to Record Good Audio Without a Microphone?

Richard Bennett
Oct 26, 2023• Proven solutions
Audio quality is more important than video quality on YouTube. You’ve probably heard that before – viewers might forgive sub-par video quality if they’re interested in what you’re saying, but if it’s hard to understand what you’re saying they’ll click away.
Getting an external mic (even a $10 one-off Amazon ) is one of the best ways to improve your videos. That said, maybe your budget is $0. Or, maybe you just don’t happen to have a mic now and don’t want to wait to make videos. It could even be that you just don’t want to bother with an external mic.
Luckily, there are a lot of easy, free, things you can do to protect the quality of your audio recording even if you’re not using an external mic. Here are a few tips:
- 1. Keep Your Camera Close
- 2. Shoot Somewhere Quiet
- 3. Pick a Good Room
- 4. Protect your Built-In Mic from Wind
- 5. Use a Free Audio App
- 6. Do a Sound Check
1. Keep Your Camera Close (like, really close)
The biggest problem with the mic built into any camera or phone is just that, since it’s with the camera, it’s usually too far away from you. Built-in mics can record decent audio up close, but usually, your camera will be set up farther away from you than an external mic would be.
For example, your camera’s mic might be just as good as a clip-on LAV, but that LAV is right by your mouth and the camera is a couple of big steps away.
Moving your camera/smartphone physically closer to you will make it hard to include anything besides your head and shoulders in your shot, but it will get you significantly better audio.
2.Shoot Somewhere Quiet
The best way to limit the amount of background noise you pick up in your sound recording is to shoot somewhere where there’s no background noise. That probably seems really basic, but it’s something a lot of people just don’t do. It’s easy to default to recording in your home office, even though it’s right next to the kitchen where your family is bustling around, or in your bedroom even though there’s a busy street right outside your window.
Sometimes the best thing you can do for your audio is simply to scout out a quiet room in your house where the sound recording conditions are better. Speaking of recording conditions…
3. Pick a Good Room
There’s more that goes into picking a good room than how quiet it is. If you try to record in a room that’s too big your voice might sound to distant, and if you try to record in a room that’s too small your audio will be too echo-y. You need a room that’s just right.
You should also pay attention to what’s in the room you’re recording in. Avoid hard, reflective, surfaces like appliances and mirrors which your voice will bounce off of. The same conditions that make you sound great when you sing in the shower will – like recording in a small space -make your voiceover unpleasantly echo-y.
Look for a room that has a lot of soft things in it, like beds and sofas.
4. Protect your Built-In Mic from Wind
If you shoot outside, then the wind passing over your built-in mic will do terrible things to your audio. You can do a lot to counter-act this problem by physically blocking the wind.
There are a few ways to do this. If you’re doing hand-held shots you can partially cover your camera or phone’s mic with your finger. You don’t want to completely cover it/press down or your audio will be muffled. What you’re trying to do is create a barrier blocking out the wind.
On movie sets, they block out wind by covering the microphones with big fuzzy things called ‘dead cats’. You can also block out wind noise by attaching something fuzzy to your microphone. If your camera’s built-in mic is on front of it then you just need something big and fluffy you can loop around the lens. You can use a piece of a boa, a fuzzy novelty scrunchie – you can even murder a fuzzy stuffed animal! Do you have an old coat with a fuzz around the hood? That fuzz would do nicely.
The pompom used in this video cost $2, but you might already have something that would work!
If your built-in mic is on top of your camera you can get something called a ‘micromuff’. A micromuff is essentially a circular or rectangular piece of velcro with long strands of fluff on top. It’s open in the middle so it doesn’t actually cover your mic, but the surrounding fuzz blocks out the wind.

You use the adhesive backing to attach the base velcro to your camera. The other side of the velcro has your fluff attached to the back.
The only thing about a micromuff is that it costs about $30, and if you’re going to spend $30 on audio equipment then you could just buy yourself an inexpensive LAV mic. I only bring up the micromuff because it’s a very simple design you can probably DIY – you just need velcro with adhesive backing and any of the fluff-sources we just discussed.
5. Use a Free Audio App
If you’re recording on a smartphone, you can download a free app that will let you make adjustments to your audio as you record it. With the right app, you can adjust your gain (volume is how you control ‘output’ audio, and gain is for ‘input’ audio. By turning up your gain, you can make your mic more sensitive), tempo, and more. A lot of the time, your audio recording app will also let you edit your audio afterward.
Even if you’re not recording video from your smartphone, it might be a good idea to use your phone as your mic and record a separate audio file. You’ll be able to use an app to fine-tune your recording, and you can set your phone up closer to you the way you would an external mic while keeping your camera back a bit farther.
Free audio apps: Hi-Q MP3 Voice Recorder (Android), RecForge II (Android), Smart Voice Recorder (Android), Audio Memos (iOS), and Recorder Plus (iOS).
6. Do a Sound Check
Once you think you’ve got good audio set up – test it! You don’t want to do a whole video and find out when you play it back that your audio doesn’t sound good.
Do you have any of your own audio tips to pass on? Leave them in the comments!
This topic was suggested by RS Beauty over in the forums. Thanks for the idea!
Polish Your YouTube Videos with Filmora
As one of the most widely used video editing software in YouTube video editing, Filmora allows you to record voiceover and edit the recorded audio with mixer, equalizer and provides lots of templates and effects with an intuitive interface, which saves much time. Download the free trial version and get started now.


Richard Bennett
Richard Bennett is a writer and a lover of all things video.
Follow @Richard Bennett
Richard Bennett
Oct 26, 2023• Proven solutions
Audio quality is more important than video quality on YouTube. You’ve probably heard that before – viewers might forgive sub-par video quality if they’re interested in what you’re saying, but if it’s hard to understand what you’re saying they’ll click away.
Getting an external mic (even a $10 one-off Amazon ) is one of the best ways to improve your videos. That said, maybe your budget is $0. Or, maybe you just don’t happen to have a mic now and don’t want to wait to make videos. It could even be that you just don’t want to bother with an external mic.
Luckily, there are a lot of easy, free, things you can do to protect the quality of your audio recording even if you’re not using an external mic. Here are a few tips:
- 1. Keep Your Camera Close
- 2. Shoot Somewhere Quiet
- 3. Pick a Good Room
- 4. Protect your Built-In Mic from Wind
- 5. Use a Free Audio App
- 6. Do a Sound Check
1. Keep Your Camera Close (like, really close)
The biggest problem with the mic built into any camera or phone is just that, since it’s with the camera, it’s usually too far away from you. Built-in mics can record decent audio up close, but usually, your camera will be set up farther away from you than an external mic would be.
For example, your camera’s mic might be just as good as a clip-on LAV, but that LAV is right by your mouth and the camera is a couple of big steps away.
Moving your camera/smartphone physically closer to you will make it hard to include anything besides your head and shoulders in your shot, but it will get you significantly better audio.
2.Shoot Somewhere Quiet
The best way to limit the amount of background noise you pick up in your sound recording is to shoot somewhere where there’s no background noise. That probably seems really basic, but it’s something a lot of people just don’t do. It’s easy to default to recording in your home office, even though it’s right next to the kitchen where your family is bustling around, or in your bedroom even though there’s a busy street right outside your window.
Sometimes the best thing you can do for your audio is simply to scout out a quiet room in your house where the sound recording conditions are better. Speaking of recording conditions…
3. Pick a Good Room
There’s more that goes into picking a good room than how quiet it is. If you try to record in a room that’s too big your voice might sound to distant, and if you try to record in a room that’s too small your audio will be too echo-y. You need a room that’s just right.
You should also pay attention to what’s in the room you’re recording in. Avoid hard, reflective, surfaces like appliances and mirrors which your voice will bounce off of. The same conditions that make you sound great when you sing in the shower will – like recording in a small space -make your voiceover unpleasantly echo-y.
Look for a room that has a lot of soft things in it, like beds and sofas.
4. Protect your Built-In Mic from Wind
If you shoot outside, then the wind passing over your built-in mic will do terrible things to your audio. You can do a lot to counter-act this problem by physically blocking the wind.
There are a few ways to do this. If you’re doing hand-held shots you can partially cover your camera or phone’s mic with your finger. You don’t want to completely cover it/press down or your audio will be muffled. What you’re trying to do is create a barrier blocking out the wind.
On movie sets, they block out wind by covering the microphones with big fuzzy things called ‘dead cats’. You can also block out wind noise by attaching something fuzzy to your microphone. If your camera’s built-in mic is on front of it then you just need something big and fluffy you can loop around the lens. You can use a piece of a boa, a fuzzy novelty scrunchie – you can even murder a fuzzy stuffed animal! Do you have an old coat with a fuzz around the hood? That fuzz would do nicely.
The pompom used in this video cost $2, but you might already have something that would work!
If your built-in mic is on top of your camera you can get something called a ‘micromuff’. A micromuff is essentially a circular or rectangular piece of velcro with long strands of fluff on top. It’s open in the middle so it doesn’t actually cover your mic, but the surrounding fuzz blocks out the wind.
You use the adhesive backing to attach the base velcro to your camera. The other side of the velcro has your fluff attached to the back.
The only thing about a micromuff is that it costs about $30, and if you’re going to spend $30 on audio equipment then you could just buy yourself an inexpensive LAV mic. I only bring up the micromuff because it’s a very simple design you can probably DIY – you just need velcro with adhesive backing and any of the fluff-sources we just discussed.
5. Use a Free Audio App
If you’re recording on a smartphone, you can download a free app that will let you make adjustments to your audio as you record it. With the right app, you can adjust your gain (volume is how you control ‘output’ audio, and gain is for ‘input’ audio. By turning up your gain, you can make your mic more sensitive), tempo, and more. A lot of the time, your audio recording app will also let you edit your audio afterward.
Even if you’re not recording video from your smartphone, it might be a good idea to use your phone as your mic and record a separate audio file. You’ll be able to use an app to fine-tune your recording, and you can set your phone up closer to you the way you would an external mic while keeping your camera back a bit farther.
Free audio apps: Hi-Q MP3 Voice Recorder (Android), RecForge II (Android), Smart Voice Recorder (Android), Audio Memos (iOS), and Recorder Plus (iOS).
6. Do a Sound Check
Once you think you’ve got good audio set up – test it! You don’t want to do a whole video and find out when you play it back that your audio doesn’t sound good.
Do you have any of your own audio tips to pass on? Leave them in the comments!
This topic was suggested by RS Beauty over in the forums. Thanks for the idea!
Polish Your YouTube Videos with Filmora
As one of the most widely used video editing software in YouTube video editing, Filmora allows you to record voiceover and edit the recorded audio with mixer, equalizer and provides lots of templates and effects with an intuitive interface, which saves much time. Download the free trial version and get started now.
Richard Bennett
Richard Bennett is a writer and a lover of all things video.
Follow @Richard Bennett
Also read:
- [New] Channel Growth Hacks – The Ultimate List of 5 YouTube Strategies
- Cutting-Edge Guide to YouTube Audio Editing for 2024
- Essential Media Makers' Software Linux Edition for 2024
- 2024 Approved Discovering Superior Mobile Video Platforms, Not YouTube
- In 2024, Ensuring Visibility Fixing Missing Shorts Thumbnails
- [New] Content Makers' Compensation Breakdown for YouTube Shorts
- 2024 Approved Countdown in Forward The Counterintuitive Playlist Method
- [Updated] Essential YouTube Thumbnails Capture Your Top Views
- Navigating YouTube Video Production Tools
- Explore YouTube for an Endless Stream of Anime Pleasure
- 2024 Approved Downloading Videos Directly to iPhone/iPad - YouTube's Quick Guide
- Decoding Vtubers The Path From Concept to Career, In 2024
- In 2024, Best ASMR Apps for Android and iOS
- Essential Low-Cost Footage Source Directory
- Crafting an Auto-Subscription URL for Your Channel's YouTube Profile for 2024
- 2024 Approved Elevate Video Popularity with Smart Thumbnails
- Simplified Cross-Platform Listening Top 5 Playlist Conversion Resources
- Best YouTube Shorts Video Editor Tools for iOS & Android Devices
- In 2024, Amplify Your Video's Value Anywhere on Multiple Devices
- 2024 Approved A Filmmaker's Approach to YouTube Splitscreen Videos
- [New] Detailed Methods for Seamless WireCast Livestreams on YouTube
- [Updated] Essential Video Gear for YouTube Starters
- 2024 Approved Demystifying Creator Studio A Practical Handbook
- Efficiently Add Your Own Look to YouTube Shorts via Simple Steps for 2024
- Revolutionizing Video Views, Conquering YouTube Millions
- In 2024, Emulating Old Hollywood Style in Modern Videos
- Top 10 Free YouTube Video Trimming Apps Reviewed
- Designing Powerful YouTube Screens A Step-by-Step Guide
- Core Principles YouTube's Social Contract for 2024
- [New] Elevating Video Quality Sharing iMovie Work via YouTube
- Essential Steps to Implement Video Card Anchors on YouTube for 2024
- Prime Position Predictor Highest Charting Videos
- How to Upload a Video From iMovie to YouTube?
- [Updated] Conquer Zero Viewers 10 Essential Tips for Video Popularity
- Mastering YouTube Clips Beginnings & Conclusions on a Budget
- Transforming Raw Audio Into High-Quality YouTube Videos
- Ultimate Choice 5 Sound Devices for Streamers
- 5 Best Sites for Quick Templates on YouTube
- Deciding on the Best Videography Camera Type DSLR or Mirrorless, In 2024
- The Best-Free Video Translation YouTube's Extractors & Downloader List
- [New] Building a Broad-Spectrum Audience with Multichannel Strategy
- [Updated] Captivating Audiences A Guide to Making Haul Media
- Navigating to Your Own Custom-Arranged Music Library on Youtube
- [Updated] Crafting & Uploading Lengthy Video Masterpieces on YouTube
- Unveiling Profits How Much Do Creators Earn From Each Ad?
- Cultivating the Culture of Creativity Within YouTube Shorts
- In 2024, Content Creator's Den
- Proactive Measures Against Typical Short Video Issues
- Delve Into Discussions of Dedicated Viewers
- [Updated] Enhancing Facebook Nostalgia Video Tweaks
- [New] Elevate Your Content with Expertly Crafted 360 Videos for FB for 2024
- [Updated] Building a Fanbase Key Strategies for Desktop TikTok Videos
- [Updated] 2024 Approved Top 11 Audio Capture Devices for Live Broadcasts
- [New] In 2024, The Ultimate Checklist for Transferring Snaps to Photos Folder
- 2024 Approved Tailoring Tutorials for Square-Shaped Video Sharing
- Discover the Best Streaming Software Outside of OBS
- How to Factory Reset Vivo V30 Lite 5G without Losing Data | Dr.fone
- How to Fix Error 495 While Download/Updating Android Apps On Vivo T2 Pro 5G | Dr.fone
- In 2024, Overview of the Best Xiaomi Redmi A2+ Screen Mirroring App | Dr.fone
- Prime Acoustic Collectors at Schools
- In 2024, Capturing the Thrill Streaming Gameplay Like a Pro
- New 2024 Approved The Ultimate Guide to Free iPhone Video Rotators Top 5
- [Updated] Exclusive Top 6 Free Web-Based Converters for TikTok Audio for 2024
- Epic Environments Discover the Hottest 10 Themes at BetterDiscord for 2024
- [Updated] In-Depth Look Top 6 Screen Recording Software Reviewed
- How to Remove Apple iPhone 12 Pro Max SIM Lock?
- 2024 Approved Instagram's Slow Motion Secrets Reels Done Right
- [Updated] In 2024, Capturing Motion with Precision How to Choose Between 30 and 60Fps
- New In 2024, Rapid Video Resizing Techniques for Professionals
- The Ultimate VLLO Experience on Mac Download and Alternatives for 2024
- Updated In 2024, The Ultimate Guide to MP3 Modification Software for Mac Uncovering the Best Tools and Comparisons .
- In 2024, How Can I Catch the Regional Pokémon without Traveling On Vivo V30 Pro | Dr.fone
- [Updated] Aiseesoft Screen Recorder Review
- [New] Mobilesync Facebook Video Grabber for 2024
- 10 Catchy Pixel Art Wallpapers and How to Custom Your Own with Ease
- 2024 Approved Efficient Techniques for Capturing macOS Content
- [New] 2024 Approved Prime Mac GIF Cutter
- [New] Farmers' Fields The Essential 10 Agriculture Titles for Playmates
- How To Do Itel A60s Screen Sharing | Dr.fone
- In 2024, Hear the Difference Techniques for Neutralizing Unwanted Audio in Real-Time Settings (Digital vs Analog)
- Best Anti Tracker Software For Samsung Galaxy XCover 6 Pro Tactical Edition | Dr.fone
- New Desktop Recording Made Easy A Step-by-Step Guide to Using Filmora Scrn for 2024
- Top IMEI Unlokers for Your Lava Blaze 2 Pro Phone
- In 2024, Affordable HD Action Cam Hits Top List
- In 2024, Change Location on Yik Yak For your Lava Blaze 2 Pro to Enjoy More Fun | Dr.fone
- How to Change Google Play Location On Nokia 105 Classic | Dr.fone
- Top 15 Augmented Reality Games Like Pokémon GO To Play On Honor X50 GT | Dr.fone
- Updated Hear the Pitch Finding Professional-Grade Cricket Soundscape
- [New] 2024 Approved The Art of Scaling on Screen Giant Heads for TikToks
- Title: [Updated] Download YouTube Gallery Files Instantly
- Author: Brian
- Created at : 2024-05-25 13:20:36
- Updated at : 2024-05-26 13:20:36
- Link: https://youtube-video-recordings.techidaily.com/updated-download-youtube-gallery-files-instantly/
- License: This work is licensed under CC BY-NC-SA 4.0.
