
!["[Updated] Crafting Impactful Try-On Hauls for Maximum Views"](https://www.lifewire.com/thmb/5owBLzwnt_3v9IE_c1lfqXviKB8=/540x405/filters:no_upscale():max_bytes(150000):strip_icc()/GettyImages-1322139186-40ca0a58cede45ecb6d18fb76538658b.jpg)
"[Updated] Crafting Impactful Try-On Hauls for Maximum Views"
Crafting Impactful Try-On Hauls for Maximum Views
Versatile Video Editor - Wondershare Filmora
An easy yet powerful editor
Numerous effects to choose from
Detailed tutorials provided by the official channel
You’re probably familiar with haul videos if you’re highly familiar with YouTube in recent years. This type of content can offer immense benefits to both influencers and small retail businesses.
Though they may not be quite as existent as they once were, it’s still essential to know the potential effect of these try-on-haul videos. They are valuable to spread the word about your brand and attract helpful content for your target audience. Here’s a quick guide to learn the ins and outs of haul videos.
In this article
02 Why is Haul Videos Popular?
03 Get Inspired from Fashion YouTubers to Find Out the Point of Try on Hauls
04 How to Make a Catchy Haul Video?
Part 1: What is a Haul Video?
Generally, a haul video is a recording of someone showcasing a collection of purchases. They may go into depth about what each product is, their shopping experience, and their initial impressions as a whole. A haul generally consists of products from a single retailer, a specific collection of shops, or at least a particular category. The products can be confined to one niche or brand, or type.
Such haul videos initially gained importance or hype around 2006/2007 through the community of beauty vloggers on YouTube as YouTube try-on-haul videos. And since the market for them isn’t that saturated, it could be an exciting time for businesses to dive in.
Haul videos generally contain products that the influencer has selected to define why they liked each item promptly. In certain sections or niches like makeup or clothing haul videos, the person may even try to offer the viewer an honest whole first impression.
Part 2: Why is Haul Videos Popular?
Having YouTube as a source of everyone’s daily dose of entertainment, we can’t help but wonder why haul videos tend to be so famous. Most YouTubers create at least one haul video regardless of their niche. They could be grocery hauls; underwear hauls, weird candy hauls, face mask hauls, candle hauls, and more. And the list goes on and on.
They are popular because they can help you connect to potential consumers via influencers as a small retail business. Generally, viewers watch and subscribe to YouTube videos of influencers or creators they trust or share similar preferences in products.
So when that influencer shares a collection of their favorite products, the viewers might decide to purchase one as well.
On the influencer side, haul videos can offer a way to share valuable content with your audience. If you have a YouTube channel, Instagram account, Facebook page, or blog, providing insights on the products you love can help your audience shape their own purchasing decisions.
It also creates a natural way to infuse some brand-related content into your content creation strategy. This can lead to profitable connections for your business in the future.
And since we’re very much intrigued by the glorifying fast fashion, excessive materialism, and hoarding, I’m getting my hands dirty with information. So, here’s what I’ve gathered:
Part 3: Get Inspired from Fashion YouTubers to Find Out the Point of Try on Hauls
Admit it; we gather most of our fashion inspiration from celebrities or YouTubers who know what’s cooking in the fashion scenes. They’ve become trendsetters, and thus we follow in their footsteps as all of us want to look great, which is why we’ve culled up a shortlist of YouTubers who you can follow for your seasonal or daily fashion or beauty inspiration! So, read on and put your glam on!
1. Tanya Burr

Tanya is a UK-based influencer who continuously posts all you need to know about fashion and makeup. Her sense of style, comfy outfits, and easy-going personality will surely attract you and give you a good idea of some unique international brands as well.
2. Heli Ved
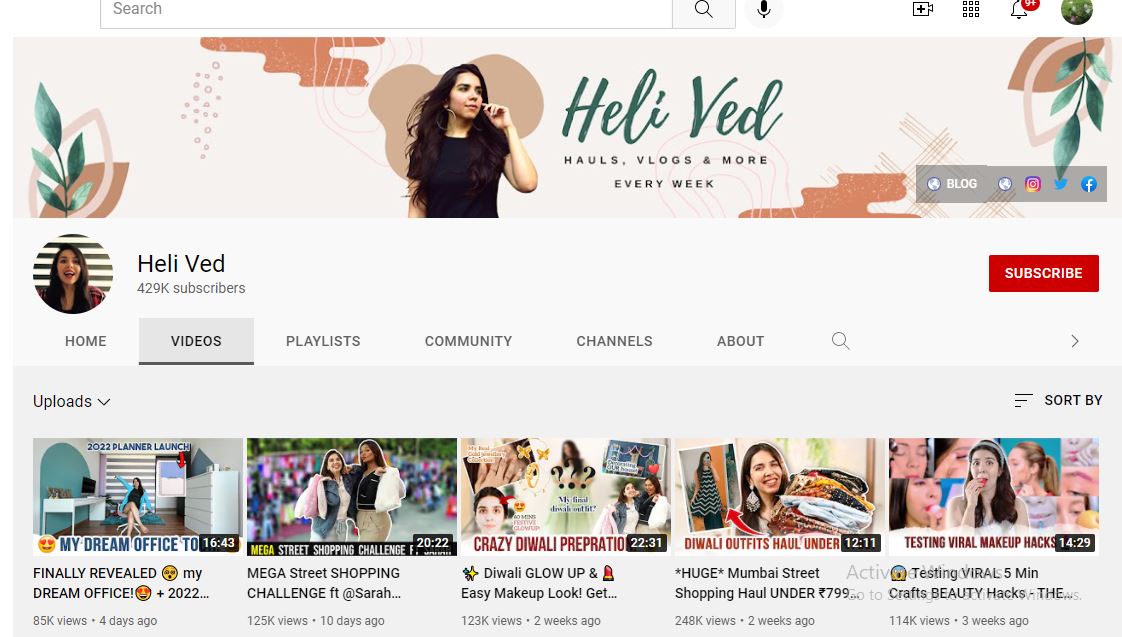
With her tons of try-on-haul videos and vlogs, she will entertain you like no other. A lively diva who preaches fashion, style, shopping, and much more.
3. Debasree Banerjee
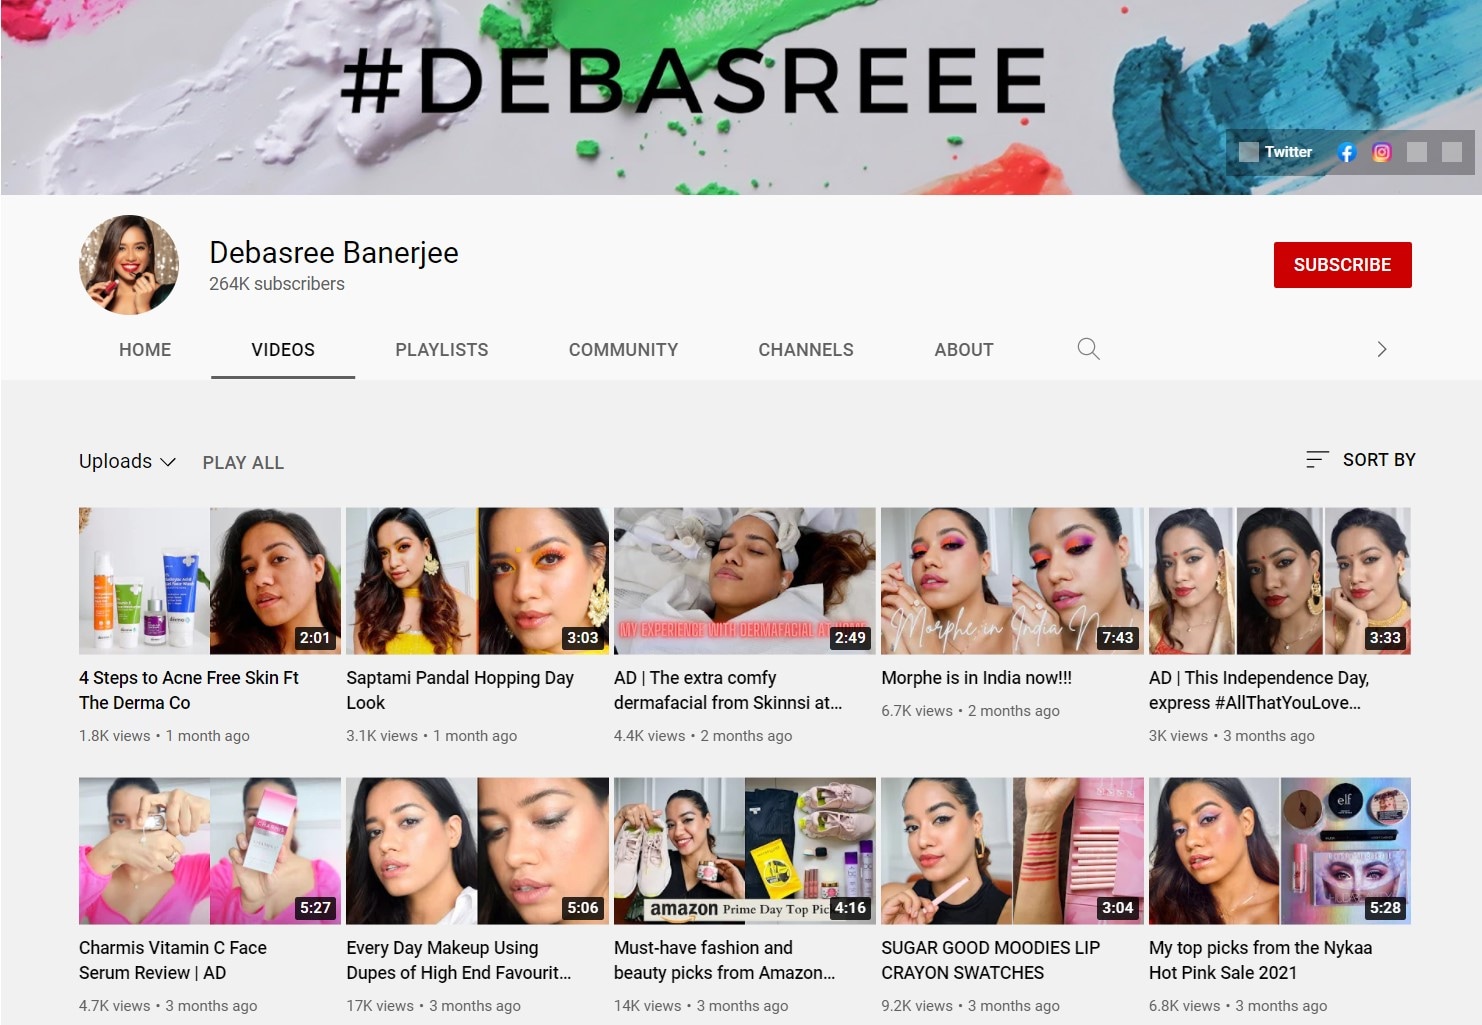
This YouTuber can be your long-distance shopping and makeup partner by showing you a diverse range of products that’ll suit you best, from high-end styles to skincare basics.
4. Kathleen Lights
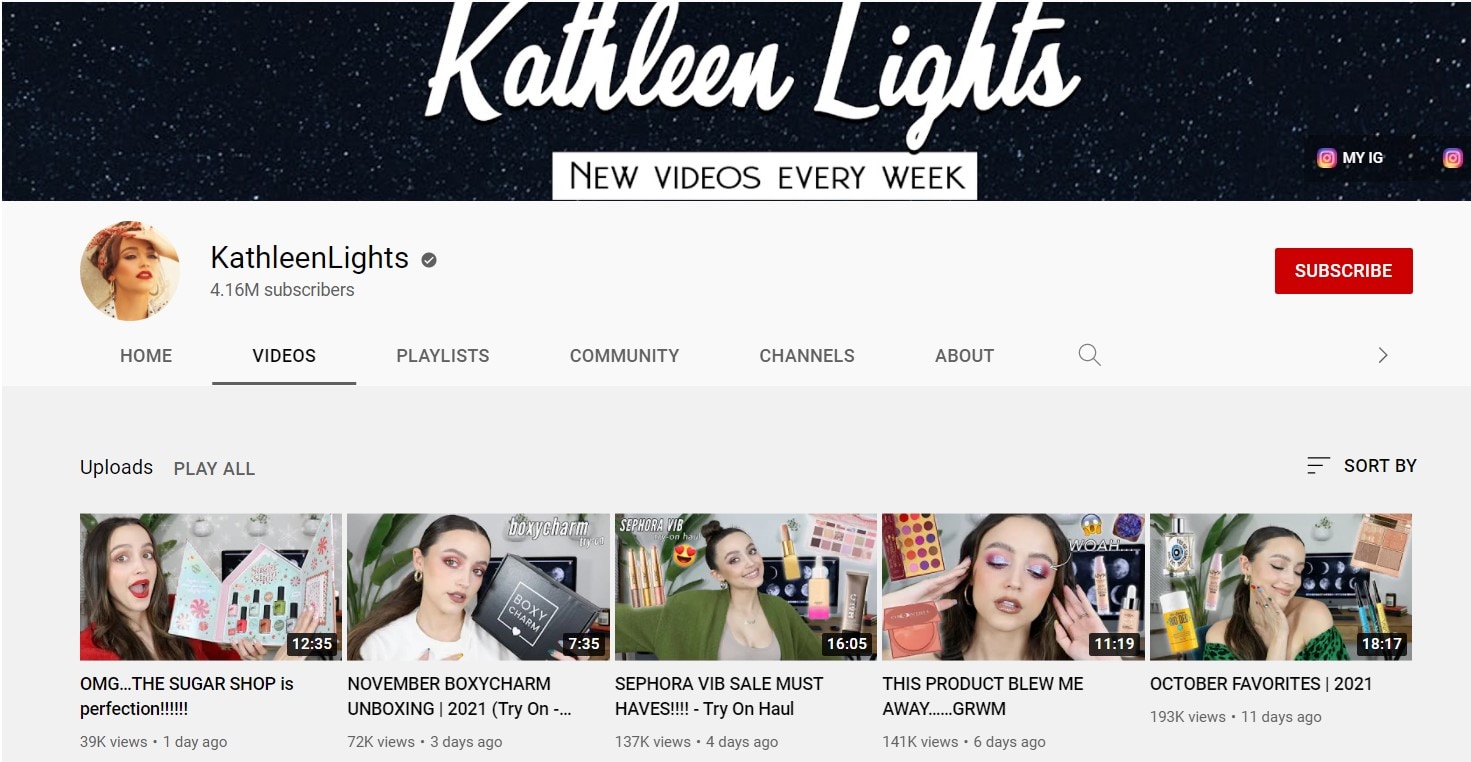
Kathleen is a 22-year-old beauty Youtuber who discusses everything from comparisons to product reviews to collection videos and entire product hauls.
5. Alexandra Garza
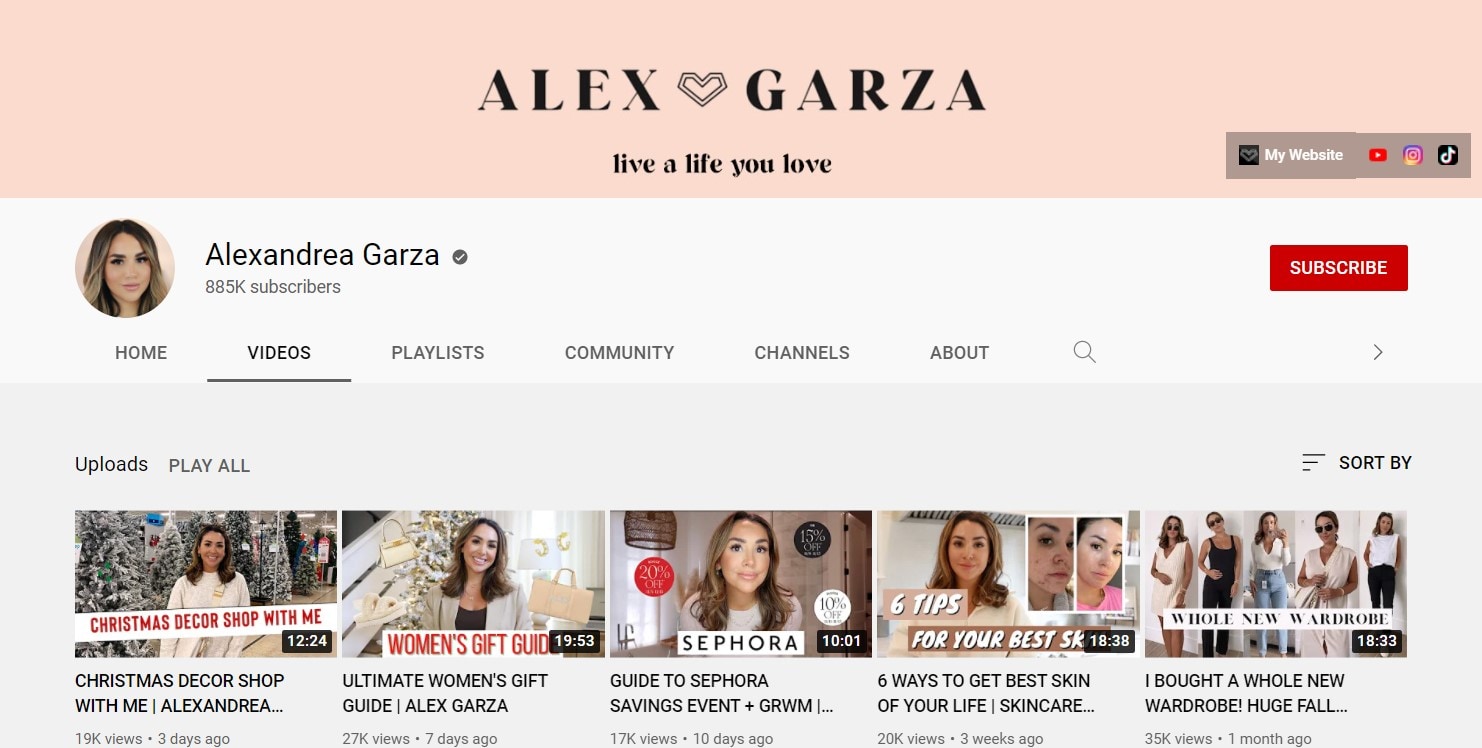
Alex Garza is a licensed cosmetologist, and she also works as a makeup artist for Benefit Cosmetics. Her channel features a cornucopia of reviews, haul videos, tutorials, and even wedding advice.
Part 4: How to Make a Catchy Haul Video?
Haul videos are easy and fun to shoot. It’s a great way of showcasing your followers and subscribers your personal style, how you shop and what your favorite stores are. Keeping in mind the mantras used by famous haul video creators, we’ve gathered a step-by-step guide below using which you can instantly create a catchy try-on haul video.
1. Create a good setup
Have ideal filming set up or area. Make sure that the lighting is accurate – not enough light will make the video dark. It is often best to film such haul videos during the day, using natural sunlight. However, you can also use desk lamps to help enhance the lighting situation.
2. Do a test video first with your shooting equipment
Put your camera on a flat surface if available. You can also use your computer’s webcam to shoot your haul video, once it is of excellent quality. You can sit on a chair or desk while facing the camera or even on the floor.
You can even take someone else to film the video for you! Try filming some test videos to check if the camera position is fine and the microphone is working. You’re ready to film once you’re satisfied.
3. Speak clearly and perform better
Speak in a clear voice, and gaze directly at the camera. You need to crack a few jokes or smile often throughout the video – you don’t want to come across as a serious or boring person to your viewers! Make sure that you’re comfortable presenting in front of a camera.
Begin by greeting the viewers (a simple “Hello, everyone!”), then you can offer a prompt description of your shopping trip. You can tell them the stores you visited or in-store events that occurred while there, like giveaways.
Act as if you’re directly conversing with one of your friends – it’s one of the comfy tricks you can follow. You can write some keywords if you think it would help and pin it somewhere where you can look through it quickly, such as the camera tripod or on the wall surface behind the camera or computer.
4. Clearly show off the products you bought
Show off the products you got! Hold the camera and show them to the audience in depth. You can also describe why you purchased each item, the price, plus any special discounts. Moreover, it is a great idea to keep all of your receipts and bills.
5. Don’t forget to use an ideal video editor
Use a video editing program to revamp your raw footage and make it look more professional. In excitement, you’d want to upload it as quickly as you can, but it’s better to invest a little time editing it so that you can publish a video with superb quality.
If there are any sections in your video that you don’t look for in the finished product, you can remove them. Plus, you can add special effects such as floating text and captions. All of this can be instantly done with the beginner-friendly and popular video editing program by Wondershare Filmora.
Within the new era of Filmora! Wondershare Filmora X is here with features like keyframing, motion tracking, audio ducking, and more. The audio ducking element is reliable for haul videos, notably as it lowers the background volume when a voiceover appears. And, this can be implemented in different ways while editing the video.
Wondershare Filmora
Get started easily with Filmora’s powerful performance, intuitive interface, and countless effects!
Try It Free Try It Free Try It Free Learn More >

6. Share among social network
If you have a social network page or a blog that you would like your YouTube viewers to consider worth checking, you can create short-form content either at the beginning or end of the video, with the short message and a URL. They’ll indeed check out your blog if your subscribers enjoy your content! And, it’s a friendly manner to build an audience and get traffic to your other pages!
Conclusion
Our final verdict is that haul videos are just entertaining to make and fun to watch with all the discussion above! Such videos can manipulate consumer trends and shape the meaning-making of individuals. They allow you to explore fun even just by living vicariously and shopping all the way long! Also, it’s equally important to consider further beautifying video through the most accessible yet professional editing programs like the Wondershare Filmora. What’s your favorite haul video to watch? Comment them down below.
You’re probably familiar with haul videos if you’re highly familiar with YouTube in recent years. This type of content can offer immense benefits to both influencers and small retail businesses.
Though they may not be quite as existent as they once were, it’s still essential to know the potential effect of these try-on-haul videos. They are valuable to spread the word about your brand and attract helpful content for your target audience. Here’s a quick guide to learn the ins and outs of haul videos.
In this article
02 Why is Haul Videos Popular?
03 Get Inspired from Fashion YouTubers to Find Out the Point of Try on Hauls
04 How to Make a Catchy Haul Video?
Part 1: What is a Haul Video?
Generally, a haul video is a recording of someone showcasing a collection of purchases. They may go into depth about what each product is, their shopping experience, and their initial impressions as a whole. A haul generally consists of products from a single retailer, a specific collection of shops, or at least a particular category. The products can be confined to one niche or brand, or type.
Such haul videos initially gained importance or hype around 2006/2007 through the community of beauty vloggers on YouTube as YouTube try-on-haul videos. And since the market for them isn’t that saturated, it could be an exciting time for businesses to dive in.
Haul videos generally contain products that the influencer has selected to define why they liked each item promptly. In certain sections or niches like makeup or clothing haul videos, the person may even try to offer the viewer an honest whole first impression.
Part 2: Why is Haul Videos Popular?
Having YouTube as a source of everyone’s daily dose of entertainment, we can’t help but wonder why haul videos tend to be so famous. Most YouTubers create at least one haul video regardless of their niche. They could be grocery hauls; underwear hauls, weird candy hauls, face mask hauls, candle hauls, and more. And the list goes on and on.
They are popular because they can help you connect to potential consumers via influencers as a small retail business. Generally, viewers watch and subscribe to YouTube videos of influencers or creators they trust or share similar preferences in products.
So when that influencer shares a collection of their favorite products, the viewers might decide to purchase one as well.
On the influencer side, haul videos can offer a way to share valuable content with your audience. If you have a YouTube channel, Instagram account, Facebook page, or blog, providing insights on the products you love can help your audience shape their own purchasing decisions.
It also creates a natural way to infuse some brand-related content into your content creation strategy. This can lead to profitable connections for your business in the future.
And since we’re very much intrigued by the glorifying fast fashion, excessive materialism, and hoarding, I’m getting my hands dirty with information. So, here’s what I’ve gathered:
Part 3: Get Inspired from Fashion YouTubers to Find Out the Point of Try on Hauls
Admit it; we gather most of our fashion inspiration from celebrities or YouTubers who know what’s cooking in the fashion scenes. They’ve become trendsetters, and thus we follow in their footsteps as all of us want to look great, which is why we’ve culled up a shortlist of YouTubers who you can follow for your seasonal or daily fashion or beauty inspiration! So, read on and put your glam on!
1. Tanya Burr
Tanya is a UK-based influencer who continuously posts all you need to know about fashion and makeup. Her sense of style, comfy outfits, and easy-going personality will surely attract you and give you a good idea of some unique international brands as well.
2. Heli Ved
With her tons of try-on-haul videos and vlogs, she will entertain you like no other. A lively diva who preaches fashion, style, shopping, and much more.
3. Debasree Banerjee
This YouTuber can be your long-distance shopping and makeup partner by showing you a diverse range of products that’ll suit you best, from high-end styles to skincare basics.
4. Kathleen Lights
Kathleen is a 22-year-old beauty Youtuber who discusses everything from comparisons to product reviews to collection videos and entire product hauls.
5. Alexandra Garza
Alex Garza is a licensed cosmetologist, and she also works as a makeup artist for Benefit Cosmetics. Her channel features a cornucopia of reviews, haul videos, tutorials, and even wedding advice.
Part 4: How to Make a Catchy Haul Video?
Haul videos are easy and fun to shoot. It’s a great way of showcasing your followers and subscribers your personal style, how you shop and what your favorite stores are. Keeping in mind the mantras used by famous haul video creators, we’ve gathered a step-by-step guide below using which you can instantly create a catchy try-on haul video.
1. Create a good setup
Have ideal filming set up or area. Make sure that the lighting is accurate – not enough light will make the video dark. It is often best to film such haul videos during the day, using natural sunlight. However, you can also use desk lamps to help enhance the lighting situation.
2. Do a test video first with your shooting equipment
Put your camera on a flat surface if available. You can also use your computer’s webcam to shoot your haul video, once it is of excellent quality. You can sit on a chair or desk while facing the camera or even on the floor.
You can even take someone else to film the video for you! Try filming some test videos to check if the camera position is fine and the microphone is working. You’re ready to film once you’re satisfied.
3. Speak clearly and perform better
Speak in a clear voice, and gaze directly at the camera. You need to crack a few jokes or smile often throughout the video – you don’t want to come across as a serious or boring person to your viewers! Make sure that you’re comfortable presenting in front of a camera.
Begin by greeting the viewers (a simple “Hello, everyone!”), then you can offer a prompt description of your shopping trip. You can tell them the stores you visited or in-store events that occurred while there, like giveaways.
Act as if you’re directly conversing with one of your friends – it’s one of the comfy tricks you can follow. You can write some keywords if you think it would help and pin it somewhere where you can look through it quickly, such as the camera tripod or on the wall surface behind the camera or computer.
4. Clearly show off the products you bought
Show off the products you got! Hold the camera and show them to the audience in depth. You can also describe why you purchased each item, the price, plus any special discounts. Moreover, it is a great idea to keep all of your receipts and bills.
5. Don’t forget to use an ideal video editor
Use a video editing program to revamp your raw footage and make it look more professional. In excitement, you’d want to upload it as quickly as you can, but it’s better to invest a little time editing it so that you can publish a video with superb quality.
If there are any sections in your video that you don’t look for in the finished product, you can remove them. Plus, you can add special effects such as floating text and captions. All of this can be instantly done with the beginner-friendly and popular video editing program by Wondershare Filmora.
Within the new era of Filmora! Wondershare Filmora X is here with features like keyframing, motion tracking, audio ducking, and more. The audio ducking element is reliable for haul videos, notably as it lowers the background volume when a voiceover appears. And, this can be implemented in different ways while editing the video.
Wondershare Filmora
Get started easily with Filmora’s powerful performance, intuitive interface, and countless effects!
Try It Free Try It Free Try It Free Learn More >
6. Share among social network
If you have a social network page or a blog that you would like your YouTube viewers to consider worth checking, you can create short-form content either at the beginning or end of the video, with the short message and a URL. They’ll indeed check out your blog if your subscribers enjoy your content! And, it’s a friendly manner to build an audience and get traffic to your other pages!
Conclusion
Our final verdict is that haul videos are just entertaining to make and fun to watch with all the discussion above! Such videos can manipulate consumer trends and shape the meaning-making of individuals. They allow you to explore fun even just by living vicariously and shopping all the way long! Also, it’s equally important to consider further beautifying video through the most accessible yet professional editing programs like the Wondershare Filmora. What’s your favorite haul video to watch? Comment them down below.
IPhone/iPad Efficiency: Uploading Content to YouTube
Create High-Quality Video - Wondershare Filmora
An easy and powerful YouTube video editor
Numerous video and audio effects to choose from
Detailed tutorials provided by the official channel
Initially, iOS users had the option to load videos directly to YouTube via the tap-to-upload feature. However, this option is missing in the recent iOS devices versions. Therefore, many users search for possible ways to post a video on YouTube from iPhone. For this, you have to put some considerations into place before moving on. The video title length should not exceed 100 characters, while the description is maintained at 5,000 characters. Also, ensure the video length doesn’t exceed 15 minutes. Let’s roll out the best ways to upload your videos and make that big catch on subscribers.

In this article
01 [ How to upload a video to YouTube from iPhone or iPad](#Part 1)
02 [Why your phone doesn’t post videos to YouTube](#Part 2)
03 [Make your YouTube video better with Filmora](#Part 3)
How to upload a video to YouTube from iPhone or iPad
Are you ready to start on that big adventure and share your videos on YouTube? Follow these steps to learn how to upload a video to YouTube from your iPhone.
Method 1: Upload using the YouTube iOS app
Using the YouTube app is the simplest way to upload your YouTube videos. The YouTube app should be installed on your iOS device.
Step 1. Launch the YouTube app on your device, then sign in to your account. If you don’t have an account yet, you will need to “Sign up” for a new one before continuing the upload process.
Step 2. Click on the “+” icon found at the bottom of the screen.
Step 3. Then choose the “Upload a video” option from the populated list of options.
Step 4. Check out the pop-up that appears and “Allow access” to it.
Step 5. Edit your video to your preference by trimming or cropping as you desire. Then click on the “Next” option.

Step 6. Add “title and description” to your video. Remember, the title should contain less than 100 characters and the description no more than 500 characters.
Step 7. Then set the visibility mode as “Public” to enable you to share your video over the internet.
Step 8. Click on the “Upload” button to finally upload your video to YouTube.

Method 2: Upload using Photo App
The Photo App has a “Share” option that you can use to upload your videos to YouTube. Here is the guide.
Step 1. Go to your iOS device and tap on the “Photos” app.
Step 2. Then tap on the “Videos Folder” to locate the video you wish to upload to YouTube.

Step 3. Next, tap on the video that you want to upload.
Step 4. Then tap on the “Share” icon located at the bottom left of your iOS device screen.
Step 5. You’ll then access a “Share” menu from where you have various share options for your video.
Step 6. Choose the “YouTube” option to continue to share your video there. At this juncture, ensure you have logged in to your Google Account.

Step 7. You need to provide a “Title” and “Description” of your video. Then go to the “Privacy” Options and make your video “Public.”
Step 8. Finally, tap on the “Publish” tab found at the top-right corner of your screen to make your video viewable by the public.

Method 3: Upload video to YouTube using Safari
Safari is another alternative method to upload a video to YouTube.
Step 1. First, go to “youtube.com” on Safari and sign in.

Step 2. Then tap on the “account” icon at the top right side of the screen.
Step 3. Hit on the “Upload” icon and wait to be redirected to the YouTube Studio desktop site.
Step 4. Click on the “Select Files” option.
Step 5. Choose the video you wish to add to YouTube from the “Photo” library and tap on the “Add” button.

Step 6. Add your video’s “title and description” and hit the “Next” button.
Step 7. Tap on the “Next” button once more to go to the “Visibility” page.
Step 8. Select the “Public” option to upload your video to the public.
Why your phone doesn’t post videos to YouTube
Despite learning how to upload to YouTube from iPhone, you may be perplexed to realize that your phone refuses to post videos to YouTube. What could be the reason?
1) YouTube issues
In most cases, the problem doesn’t arise from your phone but from YouTube. This streaming app may also experience some hitches along the way. Remember that even if your phone sync with your YouTube account to upload videos from the “Camera Roll,” YouTube isn’t managed from the Camera Roll but the YouTube app directly. You can solve the issue by signing out of your YouTube account and signing back in.
2) Connection Strength
Some videos may appear quite large and cause a time-out during the upload process. Check your Wi-Fi or internet connection strength to determine if it needs a boost or wait until the streaming strength is strong for a quick upload. Test your internet speed by searching “internet test speed” on Google. Then click the “Run Speed Test” in the search box. A window will open and give you an estimate of the Mbps that your connection is operating at. If too low, switch to other alternatives.
3) Verify your YouTube account
Verifying your account will help you to enjoy YouTube’s full features. It’s then that you’ll manage to upload videos without any drawbacks. Also, that’s when you’ll manage to upload longer videos that go beyond the 15-minute duration.
4) Pay attention to the video size
There is a limit for videos to post to YouTube. If it is too large or long, the upload will cancel before completion.
5) Be patient
YouTube can save your partial upload for 24 hours. So, you can continue to upload from where you left. Learn to be patient as there could be a surge of user traffic, especially during evenings.
Make your YouTube video better with Filmora
Good video quality will make you go miles ahead of your marketing gig. You can use Filmora mobile application to make your videos look better before uploading them to YouTube. This intuitive video editing app has advanced features and several ways to compose creative videos.
- Stunning video effects that let you add animated text to video
- Easily record your voice-overs with its perfect sound effects
- Split functionality that allows you to slice your video footage into two or more separate video clips
- Playback your clips in reverse and adjust the speed for fast or slow motion
- Select the best aspect ratio for your video
- Advanced camera to create emoji selfies and other video beautification
- Directly share your videos to social media sites like YouTube and Facebook.
Check out the steps to edit your video with Filmora on your iOS device
Step 1. Download and install Filmora
For iOS devices, go to the “Apple Store” to download and install the app. Also, allow it to access your videos, camera, and pictures in the process.
Step 2. Import video
You may already have a video in your library that you wish to upload to YouTube. Nonetheless, you can shoot a video afresh to add. To shoot one, you need to settle on a topic before recording and downloading other images you may need. Ensure you watch what you are filming and use adequate lighting during the shooting process.
Next, begin to import your video file. Just open the application and select the “Create new video” option. Then choose the “Video” icon and select a folder that contains the video to be added. Hit the “Add” button from the bottom right corner.
Step 3. Edit video
Filmora has several editing features to make your video better. Use the “Edit tools” feature to turn your video into an impeccable piece. Easily add filters, adjust the speed, or create subtitles, among other functions. You can also split, trim, or delete the unwanted clip parts.
It is important to add a title and description to your video. Just use the “Titles” button to add the title. Other precepts that you can add include transitions, sound like voice-over,
Step 4. Export and share
You’ve just finished creating and editing your video. Click on the “Save” tab and let the application export your video. Then select the “Save to Camera Roll” option to save the video to your iPhone. Finally, you can upload and share the video directly to your YouTube account.
Conclusion
● However, it appears to be a difficult task; you must have found relief after going through these procedures. You don’t need prior knowledge on how to upload a video to YouTube from your iPhone. Several options are at your disposal. You can use the Safari, YouTube app, or the Photo app to upload your videos. The better part is that you can create top-notch videos with Filmora. This mobile video editing app has a lot to offer, ensuring quality content.
Initially, iOS users had the option to load videos directly to YouTube via the tap-to-upload feature. However, this option is missing in the recent iOS devices versions. Therefore, many users search for possible ways to post a video on YouTube from iPhone. For this, you have to put some considerations into place before moving on. The video title length should not exceed 100 characters, while the description is maintained at 5,000 characters. Also, ensure the video length doesn’t exceed 15 minutes. Let’s roll out the best ways to upload your videos and make that big catch on subscribers.
In this article
01 [ How to upload a video to YouTube from iPhone or iPad](#Part 1)
02 [Why your phone doesn’t post videos to YouTube](#Part 2)
03 [Make your YouTube video better with Filmora](#Part 3)
How to upload a video to YouTube from iPhone or iPad
Are you ready to start on that big adventure and share your videos on YouTube? Follow these steps to learn how to upload a video to YouTube from your iPhone.
Method 1: Upload using the YouTube iOS app
Using the YouTube app is the simplest way to upload your YouTube videos. The YouTube app should be installed on your iOS device.
Step 1. Launch the YouTube app on your device, then sign in to your account. If you don’t have an account yet, you will need to “Sign up” for a new one before continuing the upload process.
Step 2. Click on the “+” icon found at the bottom of the screen.
Step 3. Then choose the “Upload a video” option from the populated list of options.
Step 4. Check out the pop-up that appears and “Allow access” to it.
Step 5. Edit your video to your preference by trimming or cropping as you desire. Then click on the “Next” option.
Step 6. Add “title and description” to your video. Remember, the title should contain less than 100 characters and the description no more than 500 characters.
Step 7. Then set the visibility mode as “Public” to enable you to share your video over the internet.
Step 8. Click on the “Upload” button to finally upload your video to YouTube.
Method 2: Upload using Photo App
The Photo App has a “Share” option that you can use to upload your videos to YouTube. Here is the guide.
Step 1. Go to your iOS device and tap on the “Photos” app.
Step 2. Then tap on the “Videos Folder” to locate the video you wish to upload to YouTube.
Step 3. Next, tap on the video that you want to upload.
Step 4. Then tap on the “Share” icon located at the bottom left of your iOS device screen.
Step 5. You’ll then access a “Share” menu from where you have various share options for your video.
Step 6. Choose the “YouTube” option to continue to share your video there. At this juncture, ensure you have logged in to your Google Account.
Step 7. You need to provide a “Title” and “Description” of your video. Then go to the “Privacy” Options and make your video “Public.”
Step 8. Finally, tap on the “Publish” tab found at the top-right corner of your screen to make your video viewable by the public.
Method 3: Upload video to YouTube using Safari
Safari is another alternative method to upload a video to YouTube.
Step 1. First, go to “youtube.com” on Safari and sign in.
Step 2. Then tap on the “account” icon at the top right side of the screen.
Step 3. Hit on the “Upload” icon and wait to be redirected to the YouTube Studio desktop site.
Step 4. Click on the “Select Files” option.
Step 5. Choose the video you wish to add to YouTube from the “Photo” library and tap on the “Add” button.
Step 6. Add your video’s “title and description” and hit the “Next” button.
Step 7. Tap on the “Next” button once more to go to the “Visibility” page.
Step 8. Select the “Public” option to upload your video to the public.
Why your phone doesn’t post videos to YouTube
Despite learning how to upload to YouTube from iPhone, you may be perplexed to realize that your phone refuses to post videos to YouTube. What could be the reason?
1) YouTube issues
In most cases, the problem doesn’t arise from your phone but from YouTube. This streaming app may also experience some hitches along the way. Remember that even if your phone sync with your YouTube account to upload videos from the “Camera Roll,” YouTube isn’t managed from the Camera Roll but the YouTube app directly. You can solve the issue by signing out of your YouTube account and signing back in.
2) Connection Strength
Some videos may appear quite large and cause a time-out during the upload process. Check your Wi-Fi or internet connection strength to determine if it needs a boost or wait until the streaming strength is strong for a quick upload. Test your internet speed by searching “internet test speed” on Google. Then click the “Run Speed Test” in the search box. A window will open and give you an estimate of the Mbps that your connection is operating at. If too low, switch to other alternatives.
3) Verify your YouTube account
Verifying your account will help you to enjoy YouTube’s full features. It’s then that you’ll manage to upload videos without any drawbacks. Also, that’s when you’ll manage to upload longer videos that go beyond the 15-minute duration.
4) Pay attention to the video size
There is a limit for videos to post to YouTube. If it is too large or long, the upload will cancel before completion.
5) Be patient
YouTube can save your partial upload for 24 hours. So, you can continue to upload from where you left. Learn to be patient as there could be a surge of user traffic, especially during evenings.
Make your YouTube video better with Filmora
Good video quality will make you go miles ahead of your marketing gig. You can use Filmora mobile application to make your videos look better before uploading them to YouTube. This intuitive video editing app has advanced features and several ways to compose creative videos.
- Stunning video effects that let you add animated text to video
- Easily record your voice-overs with its perfect sound effects
- Split functionality that allows you to slice your video footage into two or more separate video clips
- Playback your clips in reverse and adjust the speed for fast or slow motion
- Select the best aspect ratio for your video
- Advanced camera to create emoji selfies and other video beautification
- Directly share your videos to social media sites like YouTube and Facebook.
Check out the steps to edit your video with Filmora on your iOS device
Step 1. Download and install Filmora
For iOS devices, go to the “Apple Store” to download and install the app. Also, allow it to access your videos, camera, and pictures in the process.
Step 2. Import video
You may already have a video in your library that you wish to upload to YouTube. Nonetheless, you can shoot a video afresh to add. To shoot one, you need to settle on a topic before recording and downloading other images you may need. Ensure you watch what you are filming and use adequate lighting during the shooting process.
Next, begin to import your video file. Just open the application and select the “Create new video” option. Then choose the “Video” icon and select a folder that contains the video to be added. Hit the “Add” button from the bottom right corner.
Step 3. Edit video
Filmora has several editing features to make your video better. Use the “Edit tools” feature to turn your video into an impeccable piece. Easily add filters, adjust the speed, or create subtitles, among other functions. You can also split, trim, or delete the unwanted clip parts.
It is important to add a title and description to your video. Just use the “Titles” button to add the title. Other precepts that you can add include transitions, sound like voice-over,
Step 4. Export and share
You’ve just finished creating and editing your video. Click on the “Save” tab and let the application export your video. Then select the “Save to Camera Roll” option to save the video to your iPhone. Finally, you can upload and share the video directly to your YouTube account.
Conclusion
● However, it appears to be a difficult task; you must have found relief after going through these procedures. You don’t need prior knowledge on how to upload a video to YouTube from your iPhone. Several options are at your disposal. You can use the Safari, YouTube app, or the Photo app to upload your videos. The better part is that you can create top-notch videos with Filmora. This mobile video editing app has a lot to offer, ensuring quality content.
Also read:
- Essential Tools for Efficient MP4 Segmentation on Mac for 2024
- Music Mastery Essentials High-Quality DJ Video Samples
- How to Create a YouTube Account
- Toddler Tycoon Turned Teen Titan The Income of a Kid Star
- Strategies to Increase Views via Thumbnails
- Incorporating Cards and Annotations in YouTube Content
- Understanding TSeries' Financial Gain in YouTube Space
- Excellence Exchange Global Creators
- 2024 Approved Behind the Scenes YouTube's View Count Algorithm
- Crafting Captivating YouTube Presence The Ultimate Guide to Making Thumbnails on Phones for 2024
- [Updated] Best YouTube Names Generators [+ How to Brainstorm]
- Surviving YouTube's Copyright Enforcement Hurdles
- Cultivating Eco-Diversity in Metropolitan Land Use
- [Updated] Adopting Nature-Positive Policies in Urban Governance
- [Updated] Cultivate Creativity Inspiration-Driven Video Titles
- Convincing Audiences to Join A Positive Approach for 2024
- [Updated] Cutting Edge Top 8 Free Online Video Tools
- 2024 Approved Best 14 YouTube Gaming Video Ideas to Boost Gaming Channels
- In 2024, 3-Step Guide to Ascertain Google's Profitable Potential YouTube Analysis
- [New] Content Creator's Arena Vs. Beta Studio Evolutionary Path
- Discover 5 Exceptional Non-YouTube Video Platforms Today
- [Updated] Breakthrough Strategies for Peak Video Viewership Times
- 2024 Approved Diving Into Popularity Top 10 YouTube Creators by Views & Subs
- 2024 Approved Designing Short Trailers That Tell a Story
- Broadcasting Brilliance in Final Fragments for 2024
- Boosting Views Through Imaginative Video Thumbnails for 2024
- Path to YouTube Riches Optimal View Figures for Monetization Success
- Crafting Winning Titles & Tags for Your YouTube Videos
- Boosting Earning Potential on YouTube Shorts
- In 2024, Boosting Engagement Customizing Your Shorts' First Impressions
- Daytime Delights The Most Inspiring Anime Streaming Channels
- [New] Building a Sports Channel via macOS Step by Step Guide
- Best YouTube Video to Text Converters On-Line for 2024
- 2024 Approved Calculating Clickers' Contribution to YouTube Earnings
- Audio Amplified Today's Hits Backdropping YT Shorts
- A Guide to Top Alternatives Ranking 27 Video Streamers
- In 2024, Direct to Mp3 Ease Select 10 Video-to-Audio Devices
- [New] Crafting Chic Looks The Ultimate Cosmetic Compendium
- Team Videography Methods for Channel Expansion
- [New] Calculating Youtube's AdSense Gains Per Thousand Viewer Income
- [Updated] 2024 Approved Savoring Secrets #Tiktok Food Trends You Can't Miss
- [New] In 2024, Elevate Your Instagram Shots With Strategic Borders
- Updated In 2024, Best 12 Free Animation Software for Windows and Mac
- HTC U23 Pro Stuck on Screen – Finding Solutions For Stuck on Boot | Dr.fone
- In 2024, Will Pokémon Go Ban the Account if You Use PGSharp On Vivo V27e | Dr.fone
- [Updated] Efficient Facebook Post Planning - 2023'S Free Strategies
- 2024 Approved 2023 How to Create Successful Tiktok Videos on Desktop/Android/iPhone?
- How to Delete iCloud Account with or without Password from your iPhone 13 mini/Windows/Mac
- 2024 Approved Choreography of Chords 15 Premier Musical Selections for a Multitude of Video Types
- How To Fix Unresponsive Phone Touchscreen Of Itel A60s | Dr.fone
- [New] 2024 Approved Push Past Limitations Showcase Videos in Social Media
- [New] VLC Screen Recorder Review for 2024
- Top 15 Augmented Reality Games Like Pokémon GO To Play On Apple iPhone 8 Plus | Dr.fone
- In 2024, How to Convert Time-Lapse to Normal Video
- In 2024, How to Unlock SIM Card on Samsung Galaxy XCover 6 Pro Tactical Edition online without jailbreak
- [Updated] Playing with Time Unveiling Snapchat Video Tricks
- 2024 Approved Best Free Video Editing Apps for Android No Watermark, No Catch
- Updated 2024 Approved Uncovering Fragmentation Auditory Signal
- What are Location Permissions Life360 On Infinix Hot 40i? | Dr.fone
- VSDC Video Editor Not on Mac? No Problem! Here Are the Alternatives
- New Useful Tips for Tiktok Video Aspect Ratio Included
- Title: "[Updated] Crafting Impactful Try-On Hauls for Maximum Views"
- Author: Brian
- Created at : 2024-05-25 13:16:34
- Updated at : 2024-05-26 13:16:34
- Link: https://youtube-video-recordings.techidaily.com/updated-crafting-impactful-try-on-hauls-for-maximum-views/
- License: This work is licensed under CC BY-NC-SA 4.0.
