
![[Updated] Breakthrough Techniques for Outstanding YouTube Openers (Technique 1+2)](https://www.lifewire.com/thmb/BdGSDv2gz6zVZZNJkXd_bAztPRI=/400x300/filters:no_upscale():max_bytes(150000):strip_icc()/plaunk65-3ef6a0a6ceac48b88d3960884b581477.jpg)
[Updated] Breakthrough Techniques for Outstanding YouTube Openers (Technique 1+2)
Breakthrough Techniques for Outstanding YouTube Openers (Technique 1+2)
2024 | How to Make a YouTube Intro Video?

Richard Bennett
Mar 27, 2024• Proven solutions
Be it YouTube or any other streaming channel, or even for selling your videos on any e-commerce website, intros play a vital role in your brand promotion, and creating them is not as complicated as it sounds either.
The following sections describe in detail how to make a YouTube intro with Wondershare Filmora video editor, and keep it safe so it can be re-used easily in all your creations to maintain consistency and to give your brand a unique identity.
Part 1: How to Make a YouTube Intro Video with Filmora
With Wondershare Filmora, you can create your custom intros from scratch, i.e., even if you don’t have an existing image or footage to start with. You can follow the method given below to learn how to make YouTube intro with Filmora:
Step 1: Add Intro Background to Filmora
Launch Wondershare Filmora, go to Media tab at the top, select the Sample Colors category from the left pane.
Notice all the existing solid and gradient colors in the Media library in the right, hover the mouse over the tile of the color you want to use as a background, and click the + icon that appears in the center to add it to the timeline.

Note: The default duration of such solids is 5 seconds. You can increase or decrease this time by dragging the right handle of track in the timeline.
Alternatively, you can also use your own background image or video clip by selecting the Project Media category from the left pane, clicking anywhere inside the Media window, and then importing your favorite media file to Filmora. After importing, you can follow the procedure given above to add it to the timeline.
Step 2: Select and Add Audio/Sound Effect to YouTube Intro
With audio in the YouTube intro, your video will be more recognizable. If you have watched PewDiePie ‘s video, you’ll find that even though he changed the images on the intro often, he keeps the music and sound the same in the intro.

In Filmora, you can use the music and sound effect in the inbuilt audio library, double click the audio thumbnail from the library to listen to the soundtrack.
Repeat the process until you find the background music or sound effect that you can use in the intro. Once found, drag and drop it to the audio track below the video.

Note: You should keep the background and the audio at the same duration. For more details about audio editing in Filmora, please check this guide about how to edit audio .
Step 3: Add Text/Logo to Intro Video
In the intro video, you can add your channel name, company name, or other branding elements for brand awareness consideration.
Click Titles tab, hover the mouse over the tile with the text you want to use, and then drag and drop it to the track above the video.


To customize, double-click the title track in the timeline, use the new window that appears in the upper-left area of the interface to change, format, and animate the text as needed, and click OK from the bottom-right corner of the library.
Also, you need to adjust the position and duration of the title to get a better view.
In the intro video, it is recommended to add your logo or slogan as well. To add your logo, drag and drop it to the track above the video, and adjust its position and size. For more details, you can check the guide about How to Add Photo or Video to Watermark .
Step 4: Add Effects to YouTube Intro
Go to Effects tab, choose a category from the top-left pane, and click and drag your preferred effect from the Effects library to the timeline.
Adjust the playback duration by dragging the right handle of the track in the timeline as explained above. Optionally, double-click the Effects track to customize the appearance as needed.
Step 5: Export the Intro and Add to Shared Media
Once you are done creating your YouTube intro with all the required ingredients, click EXPORT from the top-center area of the interface, go to the Local tab on the Export box, choose your preferred output format from the left pane (the most common and widely used is MP4), adjust other preferences like destination location, resolution, framerate, etc. from the right pane of the box, and click EXPORT to export the YouTube intro.
Once exported, back on the main interface, select Media again from the standard toolbar, select the Shared Media container from the left pane, click anywhere inside the Media library, and import the YouTube intro video you just created to Shared Media so it can be reused every time you create a new video for the series.

Also, you can save the project, and then revise the element, effects or text to make a YouTube intro vibration.
You can find there are many video tutorials about how to use Filmora to make a YouTube intro, and below is one for you to have a quick glance.
Part 2: How to Make YouTube Intros with Templates
If the turnaround time of your project is about to end, and you need to hustle up, you can always use pre-built templates that not only expedite your creation process, they also look more professional because they are designed by the experts who already have decades of experience in the industry.
Besides the pre-programmed templates and effects in Filmora, you can find more visual effect packs in the effect store Filmstock .
You can learn how to make YouTube intro video in Filmora with a template downloaded from Filmstock.
Step 1: Visit Filmora Effects Page on Filmstock
Visit https://filmstock.wondershare.com/ and log in with the same WSID that you used on Filmora, and then click EFFECTS from the top of the webpage. Since Filmstock also provides templates for After Effects, you should select Filmora Effects to access the entire Filmora Effects library.

You can search the effects that you want in the Search bar, here, since I’m looking for effects for YouTube intro, I just enter “intro”. The effects related to intro will be displayed like below.
Step 2: Download Video Effect Packs for Filmora
Click your preferred intro effect template, click Download Now and follow the on-screen instructions to obtain and download the template.
After downloading, you will see these them in red circles under titles, transitions, or filters, based on the elements included in this effect pack. You can then add this downloaded titles or transitions to the intro video.

Looking for an online solution? Check the list of Top 10 Free Online YouTube Intro Makers .
Part 3: Creative Intro Makers Made with Filmora (Video Tutorial Included)
Both the above processes on how to make YouTube intro video are helpful as long as you use effective titles, decent effects, and extremely appealing color combinations. While the first method gives you full control over the creation as you can use all your imaginations to prepare one, the second method saves your time and yet lets you come up with a professionally-looking intro clip.
Below is a video tutorial from YouTuber Nash. He demonstrated how to create a YouTube Intro with the Sample Colors, Titles, filters and sound effects.
FAQs About YouTube Intro Video Making
- 1. What is a YouTube Intro Video?
A YouTube intro video is 5 seconds to 7 seconds short motion clip that comprises your company name and logo. Such intros help in your brand promotion and give any film or episode that follows them a unique identity. This allows audiences to recognize your organization, and with regular appearances, you can establish strong goodwill among your customers.
- 2. What Should I Put in a YouTube Intro Video?
A YouTube intro video should have your YouTube channel name, an effective and well-formatted text, brand logo, background music, effects, and a slight and simple animation.
Conclusion
To learn how to make a YouTube intro is easy, and things can get even simpler if you are using an efficient and robust post-production software like Wondershare Filmora, which not only allows you to create such clips from the scratch, it also enables you to access Filmstock’ online library to download more fantastic templates in order to expedite your workflow.
Richard Bennett
Richard Bennett is a writer and a lover of all things video.
Follow @Richard Bennett
Richard Bennett
Mar 27, 2024• Proven solutions
Be it YouTube or any other streaming channel, or even for selling your videos on any e-commerce website, intros play a vital role in your brand promotion, and creating them is not as complicated as it sounds either.
The following sections describe in detail how to make a YouTube intro with Wondershare Filmora video editor, and keep it safe so it can be re-used easily in all your creations to maintain consistency and to give your brand a unique identity.
Part 1: How to Make a YouTube Intro Video with Filmora
With Wondershare Filmora, you can create your custom intros from scratch, i.e., even if you don’t have an existing image or footage to start with. You can follow the method given below to learn how to make YouTube intro with Filmora:
Step 1: Add Intro Background to Filmora
Launch Wondershare Filmora, go to Media tab at the top, select the Sample Colors category from the left pane.
Notice all the existing solid and gradient colors in the Media library in the right, hover the mouse over the tile of the color you want to use as a background, and click the + icon that appears in the center to add it to the timeline.
Note: The default duration of such solids is 5 seconds. You can increase or decrease this time by dragging the right handle of track in the timeline.
Alternatively, you can also use your own background image or video clip by selecting the Project Media category from the left pane, clicking anywhere inside the Media window, and then importing your favorite media file to Filmora. After importing, you can follow the procedure given above to add it to the timeline.
Step 2: Select and Add Audio/Sound Effect to YouTube Intro
With audio in the YouTube intro, your video will be more recognizable. If you have watched PewDiePie ‘s video, you’ll find that even though he changed the images on the intro often, he keeps the music and sound the same in the intro.
In Filmora, you can use the music and sound effect in the inbuilt audio library, double click the audio thumbnail from the library to listen to the soundtrack.
Repeat the process until you find the background music or sound effect that you can use in the intro. Once found, drag and drop it to the audio track below the video.
Note: You should keep the background and the audio at the same duration. For more details about audio editing in Filmora, please check this guide about how to edit audio .
Step 3: Add Text/Logo to Intro Video
In the intro video, you can add your channel name, company name, or other branding elements for brand awareness consideration.
Click Titles tab, hover the mouse over the tile with the text you want to use, and then drag and drop it to the track above the video.
To customize, double-click the title track in the timeline, use the new window that appears in the upper-left area of the interface to change, format, and animate the text as needed, and click OK from the bottom-right corner of the library.
Also, you need to adjust the position and duration of the title to get a better view.
In the intro video, it is recommended to add your logo or slogan as well. To add your logo, drag and drop it to the track above the video, and adjust its position and size. For more details, you can check the guide about How to Add Photo or Video to Watermark .
Step 4: Add Effects to YouTube Intro
Go to Effects tab, choose a category from the top-left pane, and click and drag your preferred effect from the Effects library to the timeline.
Adjust the playback duration by dragging the right handle of the track in the timeline as explained above. Optionally, double-click the Effects track to customize the appearance as needed.
Step 5: Export the Intro and Add to Shared Media
Once you are done creating your YouTube intro with all the required ingredients, click EXPORT from the top-center area of the interface, go to the Local tab on the Export box, choose your preferred output format from the left pane (the most common and widely used is MP4), adjust other preferences like destination location, resolution, framerate, etc. from the right pane of the box, and click EXPORT to export the YouTube intro.
Once exported, back on the main interface, select Media again from the standard toolbar, select the Shared Media container from the left pane, click anywhere inside the Media library, and import the YouTube intro video you just created to Shared Media so it can be reused every time you create a new video for the series.
Also, you can save the project, and then revise the element, effects or text to make a YouTube intro vibration.
You can find there are many video tutorials about how to use Filmora to make a YouTube intro, and below is one for you to have a quick glance.
Part 2: How to Make YouTube Intros with Templates
If the turnaround time of your project is about to end, and you need to hustle up, you can always use pre-built templates that not only expedite your creation process, they also look more professional because they are designed by the experts who already have decades of experience in the industry.
Besides the pre-programmed templates and effects in Filmora, you can find more visual effect packs in the effect store Filmstock .
You can learn how to make YouTube intro video in Filmora with a template downloaded from Filmstock.
Step 1: Visit Filmora Effects Page on Filmstock
Visit https://filmstock.wondershare.com/ and log in with the same WSID that you used on Filmora, and then click EFFECTS from the top of the webpage. Since Filmstock also provides templates for After Effects, you should select Filmora Effects to access the entire Filmora Effects library.
You can search the effects that you want in the Search bar, here, since I’m looking for effects for YouTube intro, I just enter “intro”. The effects related to intro will be displayed like below.
Step 2: Download Video Effect Packs for Filmora
Click your preferred intro effect template, click Download Now and follow the on-screen instructions to obtain and download the template.
After downloading, you will see these them in red circles under titles, transitions, or filters, based on the elements included in this effect pack. You can then add this downloaded titles or transitions to the intro video.
Looking for an online solution? Check the list of Top 10 Free Online YouTube Intro Makers .
Part 3: Creative Intro Makers Made with Filmora (Video Tutorial Included)
Both the above processes on how to make YouTube intro video are helpful as long as you use effective titles, decent effects, and extremely appealing color combinations. While the first method gives you full control over the creation as you can use all your imaginations to prepare one, the second method saves your time and yet lets you come up with a professionally-looking intro clip.
Below is a video tutorial from YouTuber Nash. He demonstrated how to create a YouTube Intro with the Sample Colors, Titles, filters and sound effects.
FAQs About YouTube Intro Video Making
- 1. What is a YouTube Intro Video?
A YouTube intro video is 5 seconds to 7 seconds short motion clip that comprises your company name and logo. Such intros help in your brand promotion and give any film or episode that follows them a unique identity. This allows audiences to recognize your organization, and with regular appearances, you can establish strong goodwill among your customers.
- 2. What Should I Put in a YouTube Intro Video?
A YouTube intro video should have your YouTube channel name, an effective and well-formatted text, brand logo, background music, effects, and a slight and simple animation.
Conclusion
To learn how to make a YouTube intro is easy, and things can get even simpler if you are using an efficient and robust post-production software like Wondershare Filmora, which not only allows you to create such clips from the scratch, it also enables you to access Filmstock’ online library to download more fantastic templates in order to expedite your workflow.
Richard Bennett
Richard Bennett is a writer and a lover of all things video.
Follow @Richard Bennett
Studio Luminance: Ranking the Best 17 Light Devices
17 Best Lights and Lighting Equipment for YouTube Videos
Richard Bennett
Mar 27, 2024• Proven solutions
Great lighting is important if you want people to watch your YouTube videos from start to finish. Viewers want to be able to see you clearly and will click away if they cannot. Natural light works great, and it’s cheap, so if it is possible you might want to consider vlogging outside. Of course, not every type of vlog is suited to the outdoors.
Unfortunately, it is unlikely you will be able to get good quality light from the lamps and ceiling lights in your home. Floor lamps can be useful for filling shadows or backlighting but are not usually powerful enough to use as your main light. Natural light is, so one way you can get around needing a lot of lighting equipment is to use a window as your main light. This is not always possible, though. If you are going to vlog from inside your house then there is a good chance you will need to invest in some lighting equipment.
- Part 1: Best Types of Lightning Equipment for YouTube Videos
- Part 2: What Should Good Lighting Equipment Feature?
- Part 3: Best Lights and Lighting Equipment for YouTube Video Shooting
Part 1: Best Types of Lightning Equipment for YouTube Videos
Every video no matter how long or short depends on light, more than anything else. The natural light sources are often not powerful enough to light a scene you’re trying to capture, so to avoid having to deal with underexposed footage, the best solution is to use artificial lighting. Even if you want the light in your video to be completely natural, you still have to figure out a way to get rid of shadows, which brings us back to different types of lighting equipment that can be used to increase the quality of the footage you’re producing.
1. Softbox Lights
Shooting videos with only natural light will put a lot of challenges in front of you, and the best way to overcome them is to use softbox lights. These natural light emulators mimic the natural light by using diffusion panels to make the light look softer and less artificial.
Softbox lights enable you to direct light to the exact spot in the shot, and they make lighting subjects and particular parts of a scene much easier. Softboxes are available in all shapes and sizes at very reasonable prices, and they are a standard part of the equipment used for the production of YouTube videos.
2. Umbrella Lights
The newcomers to the world of YouTube video production are going to love using these lights. The umbrella lights provide a much broader source of light than the softbox lights and they are frequently used to light the entire scene. You can also add extra light on the video’s subject if you’re looking to get a more balanced shot.
They are portable and quite handy if you often shoot in different locations since you can easily pack and carry them to wherever you plan on shooting your next YouTube video.
3. Ring Lights
Although they are most frequently used for fashion and beauty videos, ring lights are a great option whenever you need to make sure that the subjects of the video are perfectly lit. These circular lights have an amount in the center, so the camera’s point of view is identical to the direction from which the light is coming.
Ring lights are powerful enough to provide light for an entire scene, and they also work nicely as a catch or fill light. Some of the most popular YouTubers like Casy Neistat or PewDiePie use ring lights in their videos.
Part 2: What Should Good Lighting Equipment Feature?
Now that you know which types of lights are commonly used on YouTube video sets, you can start looking at models that best fit your demands. There are thousands of different studio lights on the market, but only the best offer features that make the light setup process easier and faster. So before buying your lighting equipment, you should make sure that it has the following features.
1. Adjustable Beam Spread
The equipment you use should allow you to control how wide the light is spreading. This is particularly useful when you want to light just one subject in the shot while keeping the rest in the dark. Lights with an adjustable beam spread to give you versatility and enable you to adapt to a wider range of scenes.
2. The Height of the Light Stand
Most lighting kits include stands, but not all stands allow you to change the height at which the light is positioned. This can largely limit your options on the set, which is why you need to check if the stand is adjustable. You’ll also want to do a background check on the stand’s durability, because low-quality stands may cause damage to the lights and other equipment.
3. Portability
How portable your lighting equipment should be is directly related to the genre of YouTube videos you want to produce. If you are planning on shooting in studio conditions, then portability is not such an important factor, but if you want to shoot at a different location every day then portability becomes something you simply must consider.
4. Accessories
Most lightning kits include a number of handy accessories that help you achieve better results. Reflectors, barn doors, diffusers, scrims, and mounting accessories are all commonly featured in high-quality lighting kits, and you shouldn’t buy a kit that doesn’t offer at least some of the accessories we mentioned here.
5. All About Reflectors/Diffusers
White reflectors are used to simply bounce light. Silver reflectors make light a bit colder-looking, and gold reflectors give things a slightly warmer, more glamourous, look. Black and translucent ‘reflectors’ are not really for bouncing light. The black reflector blocks light, which is useful if you are trying to focus your main light so it is only lighting you and not everything behind you. The translucent reflector is actually a diffuser. Diffusers are usually set up between you and your main light to soften it and make it easier on your eyes.
Reflectors are used to bounce light towards your subject. They are great for filling shadows created by your main light. This reflector is five reflectors in one: silver, gold, black, white, and translucent.
Part 3: Best Lights and Lighting Equipment for YouTube Videos
Consumer-level camera sensors are nowhere close to being as sensitive to light as our eyes. So a scene that may look sufficiently lit to our eyes may be too dark for the camera. When you’re shooting video indoors, you’ll need additional lighting equipment. Here are some of the top seventeen best lighting equipment for YouTubers.
List of the Top 5 Best On-Camera LED Lights
What is an On-Camera LED Light?
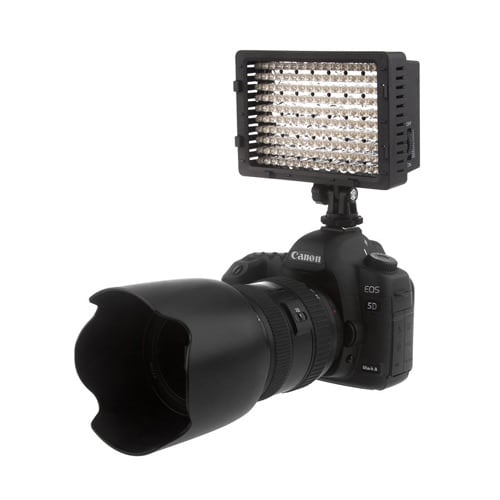
On-Camera LED lights are LED lights that can be mounted directly onto your camera’s hot/cold shoe (the little bracket on the top of a lot of DSLR cameras). On-camera LED lights are great for on-the-go YouTubers and YouTubers short on recording space because these lights are small and portable.
1. Julius Studio 160 LED Light with 4 Color Filters
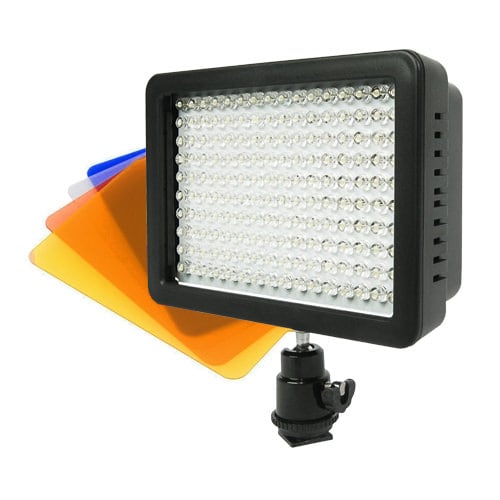
The Julius Studio 160 LED light not only can be mounted on any digital camera that has a hot/cold shoe but it can also be mounted on light stands so you can keep the same light setting even if you are moving the camera around. This lighting equipment also comes with four color filters so that you can control the color temperature of your light.
2. Viltrox L116B highest RA CRI95 LED Light Panel
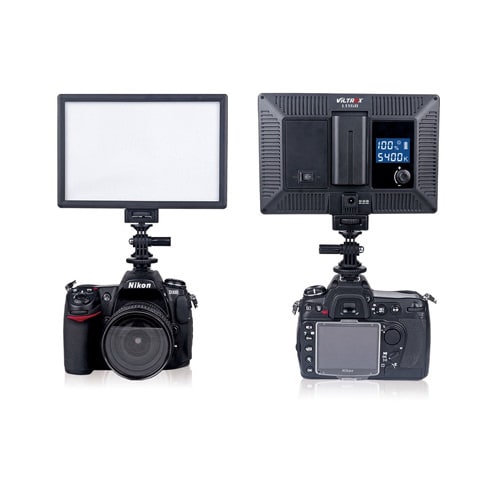
The VILTROX L116B LED light panel is a powerful piece of on-camera lighting equipment. As you can see from the back view of this light panel, you can see how much battery you have left as well as digitally set the color temperature of your light. It also features PWM light adjustment technology that reduces power consumption. As this equipment comes with an AC adapter, you can choose to use this outdoors or indoors.
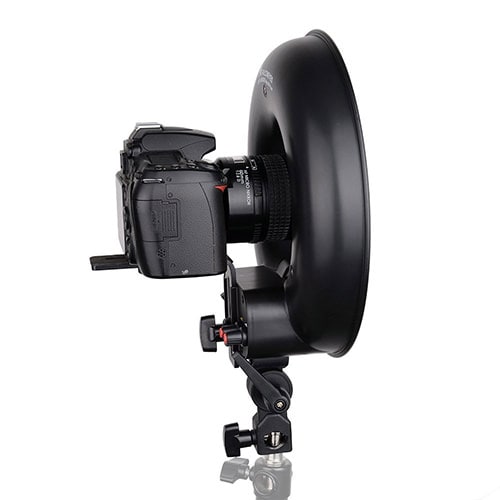
3. Chromo Inc CI55000230 Macro Ring 48 LED Power Light
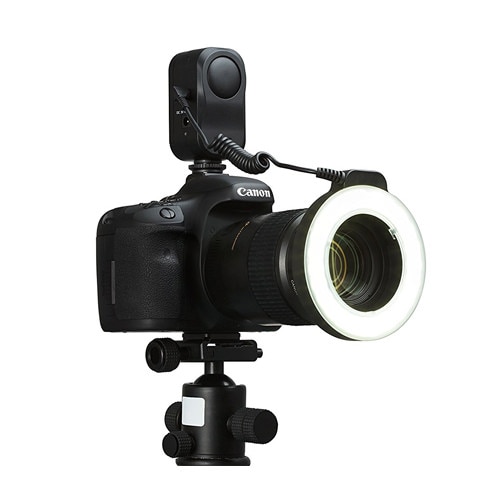
If you’re looking for an on-camera ring light, Chromo Inc’s macro ring light is a great option. This ring light mounts onto the lens of your SLR camera and its power source (two AA batteries) attaches to your camera’s hot/cold shoe. Get that nice-looking ring light reflection in your eyes as you film with this portable ring light!
4. Neewer CN-216 216PCS LED Dimmable Ultra High Power Panel
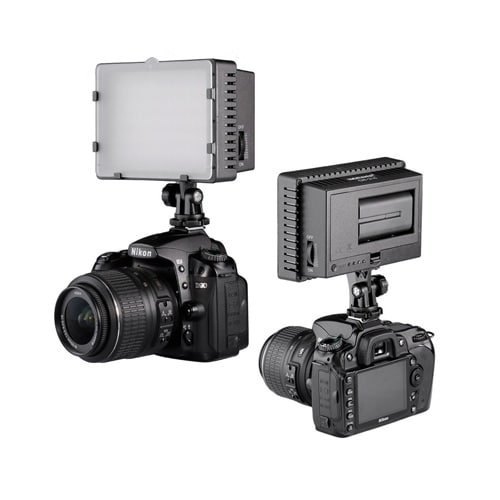
The Neewer 216 PCS LED dimmable light panel is powerful lighting equipment at a cheap price. You can adjust the color temperature of this light from 3200K up 5400K. This piece of equipment is only battery-powered, but you do have the option to either use six AA batteries or specific Sony NP series batteries, or Panasonic CGR-D16S rechargeable batteries.
5. Neewer 160 LED CN-160 Dimmable Ultra High Power Panel
This light is Neewer’s cheaper version of the CN-216. Instead of having 216 LED light bulbs, this light has 160 LED light bulbs. Other than the number of light bulbs, the two light panels are pretty much the same.
List of the Top 5 Best LED Ring Lights
LED ring lights are called ring lights because of their ring-like shape. The opening in the ring allows you to position your camera right in the center of this lighting equipment. These lights are great if you don’t have a lot of space.
1. Diva Ring Light Super Nova
The Diva ring light is a great ring light for divas, make-up artists, and anyone else wanting to look good right in front of the camera! This LED ring light has a dimming knob so that you can adjust the brightness of your light. It also comes with a cloth for you to diffuse your light (so that your light will be softer) and a gooseneck and z-bracket attachment if you want to use your camera and ring light with just one tripod.
2. Prismatic Halo Ring Light
The Prismatic Halo ring light is another great ring light option. It comes with a canvas travel bag, making it easier to store away or take around with you. The 110-120 VAC, 5400K light bulb produces light that can be dimmed as well. The Prismatic Halo Ring kit doesn’t include a light stand.
3. Neewer Dimmable 18” Ring Light
The 18-inch light ring uses fluorescent light. In addition, this kit includes a 59-inch light stand as well as white and orange filters and a hot shoe adapter that extends the capabilities of this affordable LED ring light kit.
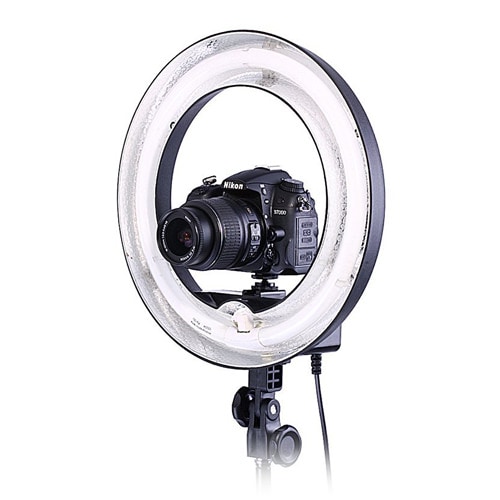
4. FalconEyes DVR-300
With 300 pcs LED and 150 yellow color and 150 white-color lights, FalconEyes DVR-300 is one of the best ring lights currently available on the market. It also features two control dials that enable you to adjust the color of the light the device produces and a white diffuser that makes the light softer.
5. Neewer 14″ Ring Light
The 10-inch inner rim diameter may seem small when compared with larger ring lights that offer more room to operate. The Neewer Camera Ring Light is undimmable and has 50W power. The ring light uses an AC adapter, which makes it difficult to use when filming outside of a studio.
List of the Top 2 Best Softbox Video Lights
A softbox is commonly used by photographers and videographers to simulate natural light. This effect is achieved with the aid of a diffusion panel that is placed around the light source that produces continuous light. Softboxes are often less expensive than other professional lighting equipment which makes them a great option if you are working on a budget.
1. StudioFX 2400 Watt Softbox
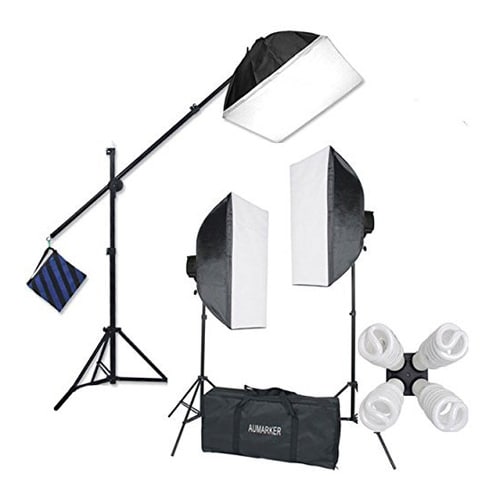
This lighting system contains two 16x24-inch softboxes and an overhead hair light boom softbox. The stands for all three softboxes are included in the kit. Each light head is capable of holding up to four bulbs.
2. Fancierstudio 2400 Watt Professional Lighting Kit
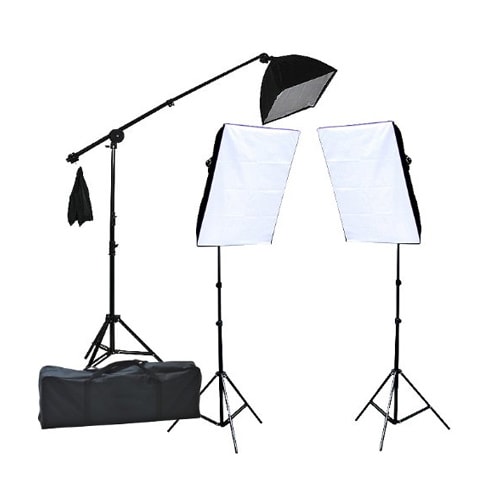
This is a standard light setup you want to use when recording interviews, product reviews, or vlogs. It contains two 16x24-inch and one 16x16-inch softbox light that all have their own stands. Each lighthead can hold four 5500K fluorescent or daylight bulbs that are perfectly suited for work in studio conditions.
List of the Top 5 Best Umbrella Video Lights
Unlike ring lights or softboxes that provide directional light, the umbrella video lights basically bounce the light off a reflecting surface onto a subject and enable you to get a more balanced light in your videos. They are often combined with other lighting equipment to create natural scenes without hard shadows.
1. LimoStudio 700W Photography Softbox Light Lighting Kit
In addition to three lamps (two white umbrellas with 86-inch light stands and one 28-inch light stand), this kit also comes with three 45W CFL bulbs. The lamps can be tilted upward or downward, so you can find the best light position for your shot. The 9-foot cords can be used with standard 110/120V USA sockets.
2. Neewer 8.5ft x 10ft Background With 600W Umbrella Kit
Besides featuring two umbrellas and two softboxes, this kit also includes a 6x9 feet background that is perfectly suited for video production in a home-based studio. This umbrella kit uses 45W bulbs that generate natural light and have an approximate color value of 5500K. However, both umbrellas and softboxes can hold just one bulb.
3. Emart 600W Studio Photography Photo/Video Portrait Kit
Chances are that you won’t need much more than what this photo/video kit has to offer. Emart’s 600W kit includes two white and two black/silver 33-inch umbrellas as well as two 83-inch light stands and a smaller 33-inch light stand. The heavy-duty carry case can store the entire kit.
4. LINCO 600W Photography/Video Continuous Lighting Kit
The Linco 600W continuous lighting kit contains two white translucent umbrellas that generate soft light, which is quite useful if you want to get even skin tones in your videos. The kit has three lamps that use 5500K 40W bulbs and light stands you can easily carry to any filming location.
5. Emart 1575W Umbrella Lighting Kit With Translucent White & Black/Silver & Black/Gold
The greatest advantage of this Emart 1575 W Lightning kit is the three pairs of 33-inch diameter translucent/white, black/silver, and black/gold umbrellas. The 105W daylight bulbs provide enough light to work even under the most difficult light conditions, while the lightweight stands enable you to use this kit outside of your studio.
Besides the best lighting equipment, we have also summarized some tips and tricks for lighting , you should check it as well. If you find the video lighting isn’t good after recording the video, you can still improve it by adjusting brightness in post-production. Wondershare Filmora video editor features the Auto enhance feature, which can adjust the video color and brightness with one click. You can download the free trial to try it out.
Richard Bennett
Richard Bennett is a writer and a lover of all things video.
Follow @Richard Bennett
Richard Bennett
Mar 27, 2024• Proven solutions
Great lighting is important if you want people to watch your YouTube videos from start to finish. Viewers want to be able to see you clearly and will click away if they cannot. Natural light works great, and it’s cheap, so if it is possible you might want to consider vlogging outside. Of course, not every type of vlog is suited to the outdoors.
Unfortunately, it is unlikely you will be able to get good quality light from the lamps and ceiling lights in your home. Floor lamps can be useful for filling shadows or backlighting but are not usually powerful enough to use as your main light. Natural light is, so one way you can get around needing a lot of lighting equipment is to use a window as your main light. This is not always possible, though. If you are going to vlog from inside your house then there is a good chance you will need to invest in some lighting equipment.
- Part 1: Best Types of Lightning Equipment for YouTube Videos
- Part 2: What Should Good Lighting Equipment Feature?
- Part 3: Best Lights and Lighting Equipment for YouTube Video Shooting
Part 1: Best Types of Lightning Equipment for YouTube Videos
Every video no matter how long or short depends on light, more than anything else. The natural light sources are often not powerful enough to light a scene you’re trying to capture, so to avoid having to deal with underexposed footage, the best solution is to use artificial lighting. Even if you want the light in your video to be completely natural, you still have to figure out a way to get rid of shadows, which brings us back to different types of lighting equipment that can be used to increase the quality of the footage you’re producing.
1. Softbox Lights
Shooting videos with only natural light will put a lot of challenges in front of you, and the best way to overcome them is to use softbox lights. These natural light emulators mimic the natural light by using diffusion panels to make the light look softer and less artificial.
Softbox lights enable you to direct light to the exact spot in the shot, and they make lighting subjects and particular parts of a scene much easier. Softboxes are available in all shapes and sizes at very reasonable prices, and they are a standard part of the equipment used for the production of YouTube videos.
2. Umbrella Lights
The newcomers to the world of YouTube video production are going to love using these lights. The umbrella lights provide a much broader source of light than the softbox lights and they are frequently used to light the entire scene. You can also add extra light on the video’s subject if you’re looking to get a more balanced shot.
They are portable and quite handy if you often shoot in different locations since you can easily pack and carry them to wherever you plan on shooting your next YouTube video.
3. Ring Lights
Although they are most frequently used for fashion and beauty videos, ring lights are a great option whenever you need to make sure that the subjects of the video are perfectly lit. These circular lights have an amount in the center, so the camera’s point of view is identical to the direction from which the light is coming.
Ring lights are powerful enough to provide light for an entire scene, and they also work nicely as a catch or fill light. Some of the most popular YouTubers like Casy Neistat or PewDiePie use ring lights in their videos.
Part 2: What Should Good Lighting Equipment Feature?
Now that you know which types of lights are commonly used on YouTube video sets, you can start looking at models that best fit your demands. There are thousands of different studio lights on the market, but only the best offer features that make the light setup process easier and faster. So before buying your lighting equipment, you should make sure that it has the following features.
1. Adjustable Beam Spread
The equipment you use should allow you to control how wide the light is spreading. This is particularly useful when you want to light just one subject in the shot while keeping the rest in the dark. Lights with an adjustable beam spread to give you versatility and enable you to adapt to a wider range of scenes.
2. The Height of the Light Stand
Most lighting kits include stands, but not all stands allow you to change the height at which the light is positioned. This can largely limit your options on the set, which is why you need to check if the stand is adjustable. You’ll also want to do a background check on the stand’s durability, because low-quality stands may cause damage to the lights and other equipment.
3. Portability
How portable your lighting equipment should be is directly related to the genre of YouTube videos you want to produce. If you are planning on shooting in studio conditions, then portability is not such an important factor, but if you want to shoot at a different location every day then portability becomes something you simply must consider.
4. Accessories
Most lightning kits include a number of handy accessories that help you achieve better results. Reflectors, barn doors, diffusers, scrims, and mounting accessories are all commonly featured in high-quality lighting kits, and you shouldn’t buy a kit that doesn’t offer at least some of the accessories we mentioned here.
5. All About Reflectors/Diffusers
White reflectors are used to simply bounce light. Silver reflectors make light a bit colder-looking, and gold reflectors give things a slightly warmer, more glamourous, look. Black and translucent ‘reflectors’ are not really for bouncing light. The black reflector blocks light, which is useful if you are trying to focus your main light so it is only lighting you and not everything behind you. The translucent reflector is actually a diffuser. Diffusers are usually set up between you and your main light to soften it and make it easier on your eyes.
Reflectors are used to bounce light towards your subject. They are great for filling shadows created by your main light. This reflector is five reflectors in one: silver, gold, black, white, and translucent.
Part 3: Best Lights and Lighting Equipment for YouTube Videos
Consumer-level camera sensors are nowhere close to being as sensitive to light as our eyes. So a scene that may look sufficiently lit to our eyes may be too dark for the camera. When you’re shooting video indoors, you’ll need additional lighting equipment. Here are some of the top seventeen best lighting equipment for YouTubers.
List of the Top 5 Best On-Camera LED Lights
What is an On-Camera LED Light?
On-Camera LED lights are LED lights that can be mounted directly onto your camera’s hot/cold shoe (the little bracket on the top of a lot of DSLR cameras). On-camera LED lights are great for on-the-go YouTubers and YouTubers short on recording space because these lights are small and portable.
1. Julius Studio 160 LED Light with 4 Color Filters
The Julius Studio 160 LED light not only can be mounted on any digital camera that has a hot/cold shoe but it can also be mounted on light stands so you can keep the same light setting even if you are moving the camera around. This lighting equipment also comes with four color filters so that you can control the color temperature of your light.
2. Viltrox L116B highest RA CRI95 LED Light Panel
The VILTROX L116B LED light panel is a powerful piece of on-camera lighting equipment. As you can see from the back view of this light panel, you can see how much battery you have left as well as digitally set the color temperature of your light. It also features PWM light adjustment technology that reduces power consumption. As this equipment comes with an AC adapter, you can choose to use this outdoors or indoors.
3. Chromo Inc CI55000230 Macro Ring 48 LED Power Light
If you’re looking for an on-camera ring light, Chromo Inc’s macro ring light is a great option. This ring light mounts onto the lens of your SLR camera and its power source (two AA batteries) attaches to your camera’s hot/cold shoe. Get that nice-looking ring light reflection in your eyes as you film with this portable ring light!
4. Neewer CN-216 216PCS LED Dimmable Ultra High Power Panel
The Neewer 216 PCS LED dimmable light panel is powerful lighting equipment at a cheap price. You can adjust the color temperature of this light from 3200K up 5400K. This piece of equipment is only battery-powered, but you do have the option to either use six AA batteries or specific Sony NP series batteries, or Panasonic CGR-D16S rechargeable batteries.
5. Neewer 160 LED CN-160 Dimmable Ultra High Power Panel
This light is Neewer’s cheaper version of the CN-216. Instead of having 216 LED light bulbs, this light has 160 LED light bulbs. Other than the number of light bulbs, the two light panels are pretty much the same.
List of the Top 5 Best LED Ring Lights
LED ring lights are called ring lights because of their ring-like shape. The opening in the ring allows you to position your camera right in the center of this lighting equipment. These lights are great if you don’t have a lot of space.
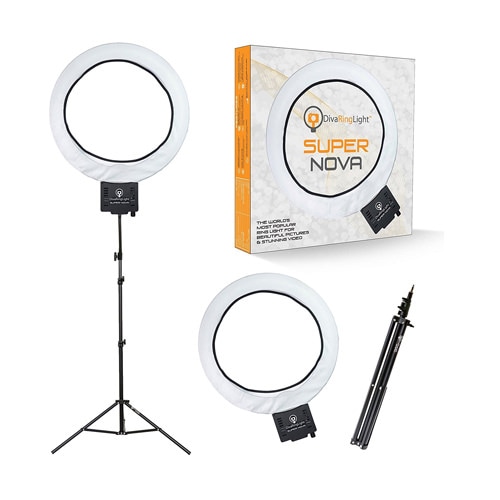
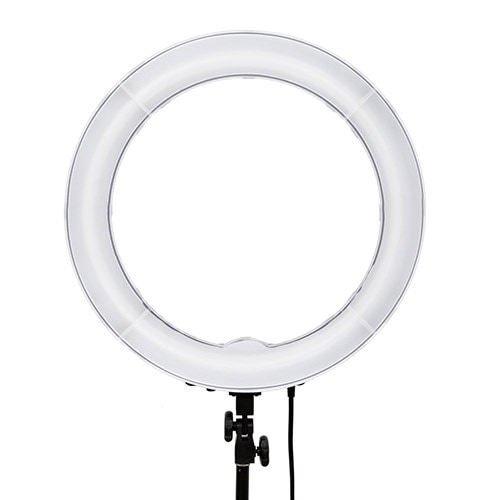
1. Diva Ring Light Super Nova
The Diva ring light is a great ring light for divas, make-up artists, and anyone else wanting to look good right in front of the camera! This LED ring light has a dimming knob so that you can adjust the brightness of your light. It also comes with a cloth for you to diffuse your light (so that your light will be softer) and a gooseneck and z-bracket attachment if you want to use your camera and ring light with just one tripod.
2. Prismatic Halo Ring Light
The Prismatic Halo ring light is another great ring light option. It comes with a canvas travel bag, making it easier to store away or take around with you. The 110-120 VAC, 5400K light bulb produces light that can be dimmed as well. The Prismatic Halo Ring kit doesn’t include a light stand.
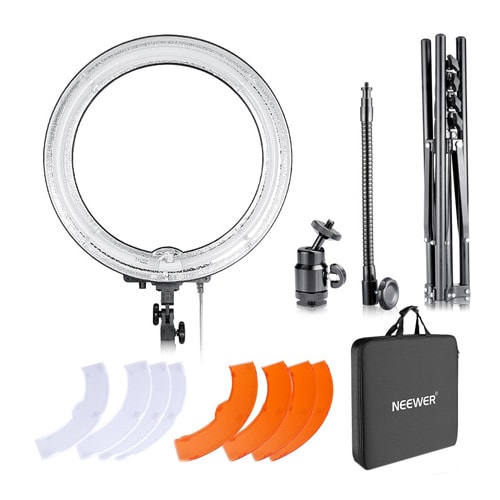
3. Neewer Dimmable 18” Ring Light
The 18-inch light ring uses fluorescent light. In addition, this kit includes a 59-inch light stand as well as white and orange filters and a hot shoe adapter that extends the capabilities of this affordable LED ring light kit.
4. FalconEyes DVR-300
With 300 pcs LED and 150 yellow color and 150 white-color lights, FalconEyes DVR-300 is one of the best ring lights currently available on the market. It also features two control dials that enable you to adjust the color of the light the device produces and a white diffuser that makes the light softer.
5. Neewer 14″ Ring Light
The 10-inch inner rim diameter may seem small when compared with larger ring lights that offer more room to operate. The Neewer Camera Ring Light is undimmable and has 50W power. The ring light uses an AC adapter, which makes it difficult to use when filming outside of a studio.
List of the Top 2 Best Softbox Video Lights
A softbox is commonly used by photographers and videographers to simulate natural light. This effect is achieved with the aid of a diffusion panel that is placed around the light source that produces continuous light. Softboxes are often less expensive than other professional lighting equipment which makes them a great option if you are working on a budget.
1. StudioFX 2400 Watt Softbox
This lighting system contains two 16x24-inch softboxes and an overhead hair light boom softbox. The stands for all three softboxes are included in the kit. Each light head is capable of holding up to four bulbs.
2. Fancierstudio 2400 Watt Professional Lighting Kit
This is a standard light setup you want to use when recording interviews, product reviews, or vlogs. It contains two 16x24-inch and one 16x16-inch softbox light that all have their own stands. Each lighthead can hold four 5500K fluorescent or daylight bulbs that are perfectly suited for work in studio conditions.
List of the Top 5 Best Umbrella Video Lights
Unlike ring lights or softboxes that provide directional light, the umbrella video lights basically bounce the light off a reflecting surface onto a subject and enable you to get a more balanced light in your videos. They are often combined with other lighting equipment to create natural scenes without hard shadows.
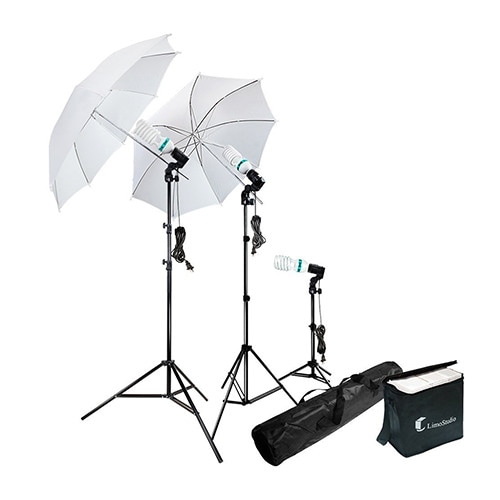
1. LimoStudio 700W Photography Softbox Light Lighting Kit
In addition to three lamps (two white umbrellas with 86-inch light stands and one 28-inch light stand), this kit also comes with three 45W CFL bulbs. The lamps can be tilted upward or downward, so you can find the best light position for your shot. The 9-foot cords can be used with standard 110/120V USA sockets.
2. Neewer 8.5ft x 10ft Background With 600W Umbrella Kit
Besides featuring two umbrellas and two softboxes, this kit also includes a 6x9 feet background that is perfectly suited for video production in a home-based studio. This umbrella kit uses 45W bulbs that generate natural light and have an approximate color value of 5500K. However, both umbrellas and softboxes can hold just one bulb.
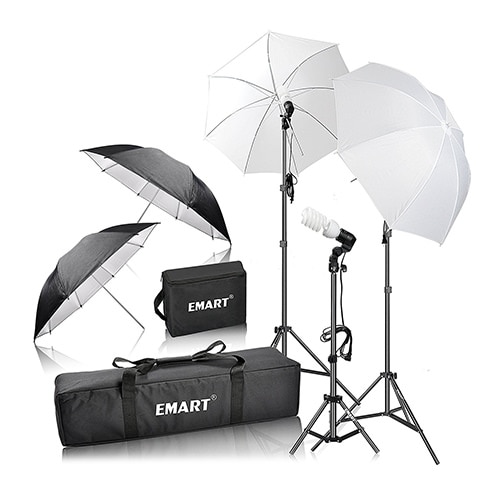
3. Emart 600W Studio Photography Photo/Video Portrait Kit
Chances are that you won’t need much more than what this photo/video kit has to offer. Emart’s 600W kit includes two white and two black/silver 33-inch umbrellas as well as two 83-inch light stands and a smaller 33-inch light stand. The heavy-duty carry case can store the entire kit.
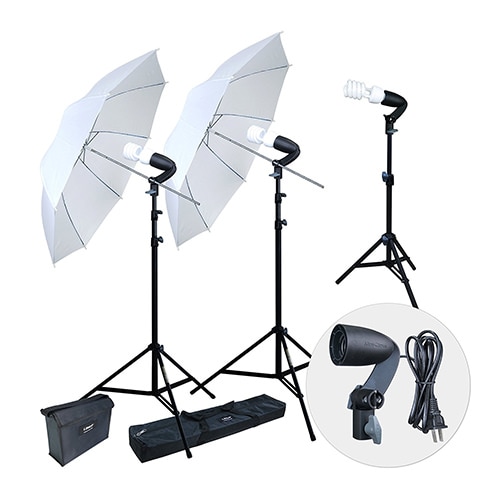
4. LINCO 600W Photography/Video Continuous Lighting Kit
The Linco 600W continuous lighting kit contains two white translucent umbrellas that generate soft light, which is quite useful if you want to get even skin tones in your videos. The kit has three lamps that use 5500K 40W bulbs and light stands you can easily carry to any filming location.
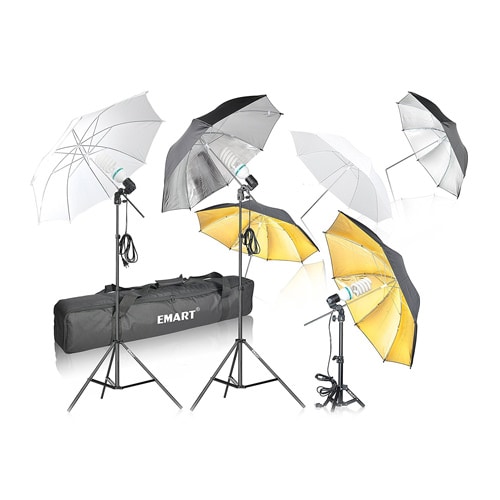
5. Emart 1575W Umbrella Lighting Kit With Translucent White & Black/Silver & Black/Gold
The greatest advantage of this Emart 1575 W Lightning kit is the three pairs of 33-inch diameter translucent/white, black/silver, and black/gold umbrellas. The 105W daylight bulbs provide enough light to work even under the most difficult light conditions, while the lightweight stands enable you to use this kit outside of your studio.
Besides the best lighting equipment, we have also summarized some tips and tricks for lighting , you should check it as well. If you find the video lighting isn’t good after recording the video, you can still improve it by adjusting brightness in post-production. Wondershare Filmora video editor features the Auto enhance feature, which can adjust the video color and brightness with one click. You can download the free trial to try it out.
Richard Bennett
Richard Bennett is a writer and a lover of all things video.
Follow @Richard Bennett
Richard Bennett
Mar 27, 2024• Proven solutions
Great lighting is important if you want people to watch your YouTube videos from start to finish. Viewers want to be able to see you clearly and will click away if they cannot. Natural light works great, and it’s cheap, so if it is possible you might want to consider vlogging outside. Of course, not every type of vlog is suited to the outdoors.
Unfortunately, it is unlikely you will be able to get good quality light from the lamps and ceiling lights in your home. Floor lamps can be useful for filling shadows or backlighting but are not usually powerful enough to use as your main light. Natural light is, so one way you can get around needing a lot of lighting equipment is to use a window as your main light. This is not always possible, though. If you are going to vlog from inside your house then there is a good chance you will need to invest in some lighting equipment.
- Part 1: Best Types of Lightning Equipment for YouTube Videos
- Part 2: What Should Good Lighting Equipment Feature?
- Part 3: Best Lights and Lighting Equipment for YouTube Video Shooting
Part 1: Best Types of Lightning Equipment for YouTube Videos
Every video no matter how long or short depends on light, more than anything else. The natural light sources are often not powerful enough to light a scene you’re trying to capture, so to avoid having to deal with underexposed footage, the best solution is to use artificial lighting. Even if you want the light in your video to be completely natural, you still have to figure out a way to get rid of shadows, which brings us back to different types of lighting equipment that can be used to increase the quality of the footage you’re producing.
1. Softbox Lights
Shooting videos with only natural light will put a lot of challenges in front of you, and the best way to overcome them is to use softbox lights. These natural light emulators mimic the natural light by using diffusion panels to make the light look softer and less artificial.
Softbox lights enable you to direct light to the exact spot in the shot, and they make lighting subjects and particular parts of a scene much easier. Softboxes are available in all shapes and sizes at very reasonable prices, and they are a standard part of the equipment used for the production of YouTube videos.
2. Umbrella Lights
The newcomers to the world of YouTube video production are going to love using these lights. The umbrella lights provide a much broader source of light than the softbox lights and they are frequently used to light the entire scene. You can also add extra light on the video’s subject if you’re looking to get a more balanced shot.
They are portable and quite handy if you often shoot in different locations since you can easily pack and carry them to wherever you plan on shooting your next YouTube video.
3. Ring Lights
Although they are most frequently used for fashion and beauty videos, ring lights are a great option whenever you need to make sure that the subjects of the video are perfectly lit. These circular lights have an amount in the center, so the camera’s point of view is identical to the direction from which the light is coming.
Ring lights are powerful enough to provide light for an entire scene, and they also work nicely as a catch or fill light. Some of the most popular YouTubers like Casy Neistat or PewDiePie use ring lights in their videos.
Part 2: What Should Good Lighting Equipment Feature?
Now that you know which types of lights are commonly used on YouTube video sets, you can start looking at models that best fit your demands. There are thousands of different studio lights on the market, but only the best offer features that make the light setup process easier and faster. So before buying your lighting equipment, you should make sure that it has the following features.
1. Adjustable Beam Spread
The equipment you use should allow you to control how wide the light is spreading. This is particularly useful when you want to light just one subject in the shot while keeping the rest in the dark. Lights with an adjustable beam spread to give you versatility and enable you to adapt to a wider range of scenes.
2. The Height of the Light Stand
Most lighting kits include stands, but not all stands allow you to change the height at which the light is positioned. This can largely limit your options on the set, which is why you need to check if the stand is adjustable. You’ll also want to do a background check on the stand’s durability, because low-quality stands may cause damage to the lights and other equipment.
3. Portability
How portable your lighting equipment should be is directly related to the genre of YouTube videos you want to produce. If you are planning on shooting in studio conditions, then portability is not such an important factor, but if you want to shoot at a different location every day then portability becomes something you simply must consider.
4. Accessories
Most lightning kits include a number of handy accessories that help you achieve better results. Reflectors, barn doors, diffusers, scrims, and mounting accessories are all commonly featured in high-quality lighting kits, and you shouldn’t buy a kit that doesn’t offer at least some of the accessories we mentioned here.
5. All About Reflectors/Diffusers
White reflectors are used to simply bounce light. Silver reflectors make light a bit colder-looking, and gold reflectors give things a slightly warmer, more glamourous, look. Black and translucent ‘reflectors’ are not really for bouncing light. The black reflector blocks light, which is useful if you are trying to focus your main light so it is only lighting you and not everything behind you. The translucent reflector is actually a diffuser. Diffusers are usually set up between you and your main light to soften it and make it easier on your eyes.
Reflectors are used to bounce light towards your subject. They are great for filling shadows created by your main light. This reflector is five reflectors in one: silver, gold, black, white, and translucent.
Part 3: Best Lights and Lighting Equipment for YouTube Videos
Consumer-level camera sensors are nowhere close to being as sensitive to light as our eyes. So a scene that may look sufficiently lit to our eyes may be too dark for the camera. When you’re shooting video indoors, you’ll need additional lighting equipment. Here are some of the top seventeen best lighting equipment for YouTubers.
List of the Top 5 Best On-Camera LED Lights
What is an On-Camera LED Light?
On-Camera LED lights are LED lights that can be mounted directly onto your camera’s hot/cold shoe (the little bracket on the top of a lot of DSLR cameras). On-camera LED lights are great for on-the-go YouTubers and YouTubers short on recording space because these lights are small and portable.
1. Julius Studio 160 LED Light with 4 Color Filters
The Julius Studio 160 LED light not only can be mounted on any digital camera that has a hot/cold shoe but it can also be mounted on light stands so you can keep the same light setting even if you are moving the camera around. This lighting equipment also comes with four color filters so that you can control the color temperature of your light.
2. Viltrox L116B highest RA CRI95 LED Light Panel
The VILTROX L116B LED light panel is a powerful piece of on-camera lighting equipment. As you can see from the back view of this light panel, you can see how much battery you have left as well as digitally set the color temperature of your light. It also features PWM light adjustment technology that reduces power consumption. As this equipment comes with an AC adapter, you can choose to use this outdoors or indoors.
3. Chromo Inc CI55000230 Macro Ring 48 LED Power Light
If you’re looking for an on-camera ring light, Chromo Inc’s macro ring light is a great option. This ring light mounts onto the lens of your SLR camera and its power source (two AA batteries) attaches to your camera’s hot/cold shoe. Get that nice-looking ring light reflection in your eyes as you film with this portable ring light!
4. Neewer CN-216 216PCS LED Dimmable Ultra High Power Panel
The Neewer 216 PCS LED dimmable light panel is powerful lighting equipment at a cheap price. You can adjust the color temperature of this light from 3200K up 5400K. This piece of equipment is only battery-powered, but you do have the option to either use six AA batteries or specific Sony NP series batteries, or Panasonic CGR-D16S rechargeable batteries.
5. Neewer 160 LED CN-160 Dimmable Ultra High Power Panel
This light is Neewer’s cheaper version of the CN-216. Instead of having 216 LED light bulbs, this light has 160 LED light bulbs. Other than the number of light bulbs, the two light panels are pretty much the same.
List of the Top 5 Best LED Ring Lights
LED ring lights are called ring lights because of their ring-like shape. The opening in the ring allows you to position your camera right in the center of this lighting equipment. These lights are great if you don’t have a lot of space.
1. Diva Ring Light Super Nova
The Diva ring light is a great ring light for divas, make-up artists, and anyone else wanting to look good right in front of the camera! This LED ring light has a dimming knob so that you can adjust the brightness of your light. It also comes with a cloth for you to diffuse your light (so that your light will be softer) and a gooseneck and z-bracket attachment if you want to use your camera and ring light with just one tripod.
2. Prismatic Halo Ring Light
The Prismatic Halo ring light is another great ring light option. It comes with a canvas travel bag, making it easier to store away or take around with you. The 110-120 VAC, 5400K light bulb produces light that can be dimmed as well. The Prismatic Halo Ring kit doesn’t include a light stand.
3. Neewer Dimmable 18” Ring Light
The 18-inch light ring uses fluorescent light. In addition, this kit includes a 59-inch light stand as well as white and orange filters and a hot shoe adapter that extends the capabilities of this affordable LED ring light kit.
4. FalconEyes DVR-300
With 300 pcs LED and 150 yellow color and 150 white-color lights, FalconEyes DVR-300 is one of the best ring lights currently available on the market. It also features two control dials that enable you to adjust the color of the light the device produces and a white diffuser that makes the light softer.
5. Neewer 14″ Ring Light
The 10-inch inner rim diameter may seem small when compared with larger ring lights that offer more room to operate. The Neewer Camera Ring Light is undimmable and has 50W power. The ring light uses an AC adapter, which makes it difficult to use when filming outside of a studio.
List of the Top 2 Best Softbox Video Lights
A softbox is commonly used by photographers and videographers to simulate natural light. This effect is achieved with the aid of a diffusion panel that is placed around the light source that produces continuous light. Softboxes are often less expensive than other professional lighting equipment which makes them a great option if you are working on a budget.
1. StudioFX 2400 Watt Softbox
This lighting system contains two 16x24-inch softboxes and an overhead hair light boom softbox. The stands for all three softboxes are included in the kit. Each light head is capable of holding up to four bulbs.
2. Fancierstudio 2400 Watt Professional Lighting Kit
This is a standard light setup you want to use when recording interviews, product reviews, or vlogs. It contains two 16x24-inch and one 16x16-inch softbox light that all have their own stands. Each lighthead can hold four 5500K fluorescent or daylight bulbs that are perfectly suited for work in studio conditions.
List of the Top 5 Best Umbrella Video Lights
Unlike ring lights or softboxes that provide directional light, the umbrella video lights basically bounce the light off a reflecting surface onto a subject and enable you to get a more balanced light in your videos. They are often combined with other lighting equipment to create natural scenes without hard shadows.
1. LimoStudio 700W Photography Softbox Light Lighting Kit
In addition to three lamps (two white umbrellas with 86-inch light stands and one 28-inch light stand), this kit also comes with three 45W CFL bulbs. The lamps can be tilted upward or downward, so you can find the best light position for your shot. The 9-foot cords can be used with standard 110/120V USA sockets.
2. Neewer 8.5ft x 10ft Background With 600W Umbrella Kit
Besides featuring two umbrellas and two softboxes, this kit also includes a 6x9 feet background that is perfectly suited for video production in a home-based studio. This umbrella kit uses 45W bulbs that generate natural light and have an approximate color value of 5500K. However, both umbrellas and softboxes can hold just one bulb.
3. Emart 600W Studio Photography Photo/Video Portrait Kit
Chances are that you won’t need much more than what this photo/video kit has to offer. Emart’s 600W kit includes two white and two black/silver 33-inch umbrellas as well as two 83-inch light stands and a smaller 33-inch light stand. The heavy-duty carry case can store the entire kit.
4. LINCO 600W Photography/Video Continuous Lighting Kit
The Linco 600W continuous lighting kit contains two white translucent umbrellas that generate soft light, which is quite useful if you want to get even skin tones in your videos. The kit has three lamps that use 5500K 40W bulbs and light stands you can easily carry to any filming location.
5. Emart 1575W Umbrella Lighting Kit With Translucent White & Black/Silver & Black/Gold
The greatest advantage of this Emart 1575 W Lightning kit is the three pairs of 33-inch diameter translucent/white, black/silver, and black/gold umbrellas. The 105W daylight bulbs provide enough light to work even under the most difficult light conditions, while the lightweight stands enable you to use this kit outside of your studio.
Besides the best lighting equipment, we have also summarized some tips and tricks for lighting , you should check it as well. If you find the video lighting isn’t good after recording the video, you can still improve it by adjusting brightness in post-production. Wondershare Filmora video editor features the Auto enhance feature, which can adjust the video color and brightness with one click. You can download the free trial to try it out.
Richard Bennett
Richard Bennett is a writer and a lover of all things video.
Follow @Richard Bennett
Also read:
- In 2024, End-Screen Magic Free Templates to Boost Video Appeal
- Turn YouTube Videos Into Soundtracks
- Superrich Streamers of the World
- 2024 Approved Does YouTube Offer Frequent Payments to You?
- Optimize Your Watch Habits The Ultimate Guide for Constructing YouTube Saved Lists
- [Updated] Craft Compelling Content Essential Youtube Short Video Edits
- 2024 Approved Effortless Conversions Selecting the 10 Prime Flv to YouTubes Options
- Your Next Travel Companion Best Youtubers' List
- What Is a Parody and How to Make a Parody Video
- Your Path to YouTube Earnings Setting Up and Selling Content
- [New] Access Unlimited Free, High-Quality Green Screen Footage Online
- Monetizing Content How Much AdSense Pays You Per Thousand Video Hits?
- Your iPhone/iPad YouTube Uploading Strategy Unveiled
- [New] 5 Winter YouTube Background Ideas to Warm Up Your Videos
- [Updated] Dive Into Maker's Earnings Exploring YouTube Shorts Revenue Structure
- The Art of Analytic Assessment in the YouTube Sphere
- YouTube Cover Pics Made Easy – Top 5 Free Downloader Lists
- Effortless Video Integration Into Blog Posts & Essays
- [Updated] Essential Video Gear for YouTube Starters
- The Art of Choosing and Utilizing CC License Types
- 2024 Approved Cutting-Edge Editing Meets Online Video Sharing
- 2024 Approved 24/7 Real-Time Follower Analysis
- Experience a Bundle of 9 Whole-Film Christmas Treasures for Free
- Deciphering YouTube Popularity Factors for Higher Placement for 2024
- Enhancing YouTube Visibility with Featured Channels Techniques
- Tailor Film Duration for YouTube Submission
- Boost Your Engagement Now! - Discover These Key YouTube Shortcuts
- [Updated] Achieving Virality YouTube Promotion No Cost Involved
- 2024 Approved Decoding T-Series' Online Earnings Stream
- Comparative Study of YouTubes and DailyMentions
- 2024 Approved Crafting a Simplified YouTube Auto-Subscribe URL
- [Updated] Safeguarding Your Snaps Secure Backup From Phone to Snapchat
- 2024 Approved Capture Live Camera Feed in VLC Media Player
- In 2024, Top-Ranked Broadcast Recorder Program
- New In 2024, Best Free Online Audio Waveform Converters for Videos
- [Updated] QuickScreenRecorder Easy Captures, Anytime for 2024
- [New] In 2024, Interactive Features
- Voice Change Mastery for Sony Game Systems
- How to Remove MDM from iPhone 15 Plus without Apple ID?
- Designing Captivating Instagram Feed Summaries for 2024
- 8 Workable Fixes to the SIM not provisioned MM#2 Error on Samsung Galaxy F54 5G | Dr.fone
- How To Transfer Data From Apple iPhone 12 Pro Max To Other iPhone 12 devices? | Dr.fone
- Read This Guide to Find a Reliable Alternative to Fake GPS On Realme GT Neo 5 SE | Dr.fone
- What Are the Best Video Background Changers Online, In 2024
- In 2024, Mastering Android Device Manager The Ultimate Guide to Unlocking Your Xiaomi Civi 3 Device
- [New] 2024 Approved Discovering Digital Dialogues Facebook Video Exchange
- The Complete WINDOWS 10 Know-How Reference
- [New] FrameFinesse Optimizing Visuals on Instagram for 2024
- [New] The Essential Twitter Archive User Manual
- Title: [Updated] Breakthrough Techniques for Outstanding YouTube Openers (Technique 1+2)
- Author: Brian
- Created at : 2024-05-25 13:12:54
- Updated at : 2024-05-26 13:12:54
- Link: https://youtube-video-recordings.techidaily.com/updated-breakthrough-techniques-for-outstanding-youtube-openers-technique-1plus2/
- License: This work is licensed under CC BY-NC-SA 4.0.
