
!["[Updated] Boost Your Content Access Free Vocal SFX"](https://www.lifewire.com/thmb/WFvU4ZL5NviLm9GFYkEUQ5kjayU=/400x300/filters:no_upscale():max_bytes(150000):strip_icc()/02LW4149830-HeroSquare-d2335ae2774942c09bf723276ea1a609.jpg)
"[Updated] Boost Your Content Access Free Vocal SFX"
Boost Your Content: Access Free Vocal SFX
Download Free Sound Effects for YouTubers

Richard Bennett
Oct 26, 2023• Proven solutions
Whether you’re making a short film and need sounds to go with your action sequences, or just want some fun noises for your vlog or challenge video, it’s easy to find great sound effects you can use for free online.
Here are 7 places to download free sound effects! Or, if you’re interested in making your own, click here to jump to ‘Make Your Own Sound Effects’.


Part 1: YouTube Free Sound Effects Download
1. Filmora Sound Effects
Filmora Video Editor provides you with a huge library of free sound effects without download from anywhere else. There are 25 pieces of sound effect available in Filmora, such as transition swoosh, cinematic horn, beep sound and phone ring.

If you do not see the sound effect you want in Filmora, you can also go to the online effect store to find out more sound effects. The sounds are in.wav or mp3 files, so you do not have to use them inside Filmora only. They’re free to use for everyone after downloading, no matter what video editor you use.
The Filmstock audio effect library covers sound effects in different categories: nature sounds, animal sounds, movie sounds, gun sounds, fireworks, bird sounds, cricket sounds, wet sounds, dog barking, water sounds, guitar sounds, city sounds, monster sounds, laughing sounds, dinosaur sounds, fart sounds, pet sounds, dog sounds, car sounds, video game, and thunderstorm.
2. Freesound
Sounds on Freesound are uploaded by users under various Creative Commons licenses (some may require attribution, some may not allow commercial use).
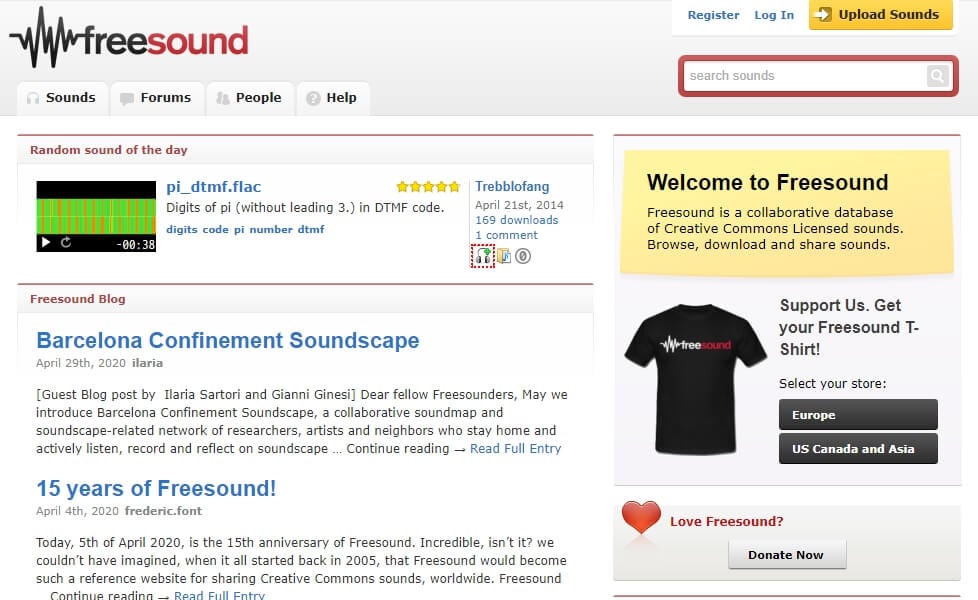
The easiest way to browse the sounds on Freesound is probably to click into Sounds in the top menu, and then ‘Browse tags’ in the menu on the right of your screen. All of the tags on the site will be displayed, and the most commonly used ones will be biggest. The tags include what the sounds are meant to be (i.e. percussion or thunder) and what type of sounds they are (i.e. field-recording or synth).
3. PacDV
PacDV has been producing sound effects since 2001. You can browse and download sounds individually from their site, or download all at once in a huge bundle. You can use all the sounds for free (you just can’t sell them or provide direct download links to other people).
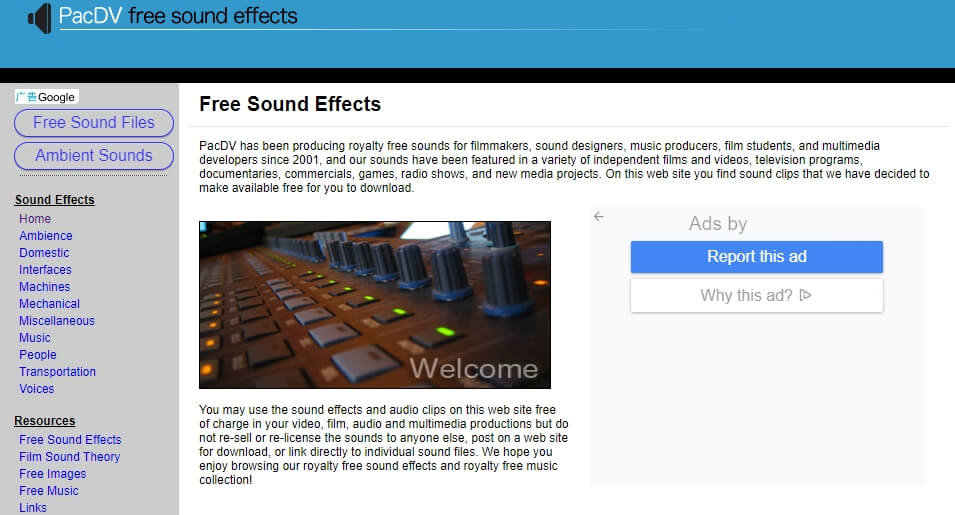
On the left of the website there’s a menu where you can choose what kinds of sound effects you’re interested in. The categories are:
Ambience: this is where you’ll find general background sounds, like ‘car interior’ or ‘grocery store’. Even when nothing in particular is happening, locations have sounds. This is also where you’ll find things like crowd noises.
Domestic: these are sounds you hear around the home, like sounds related to doors and appliances.
Interfaces: a lot of tech sounds live here, like beeps and clicks. Beeps are all titled ‘Beep’, but nothing else is really labeled beyond being called ‘Interface Sound’. You just have to listen and find out.
Machines: a variety of different machine sounds can be found here, from power tools like chainsaws and drills to things like typewriters or paper shredders.
Mechanical: this is where you’ll find sounds associated with cameras, coin slots, zippers, and more.
People: laughing, clapping, footsteps and even farts – this is where you’ll find human sounds.
Transportation: these sounds are all related to vehicles, be they cars or airplanes.
Voices: here you’ll find voices saying common things like ‘hi’, ‘aaah’, or ‘come on’.
Music: PacDV also has a selection of royalty free music. If you use it in your video, you need to give them credit by including Music by <www.pacdv.com/sounds/> in your video description.
Miscellaneous: sounds that don’t quite fit into other categories.
4. Sound Bible
The sounds on Sound Bible are either in the public domain, which means anyone can use them for anything without restriction, or licensed under the Creative Commons Attribution 3.0 License, which means you just need to provide a credit for the person who created the effect you use. When you click on sound effects on Sound Bible you’ll be able to see whether the effect is Public Domain or Attribution 3.0, and it will tell you who the sound was recorded by. Both public domain and Attribution 3.0 sounds are available for commercial use.
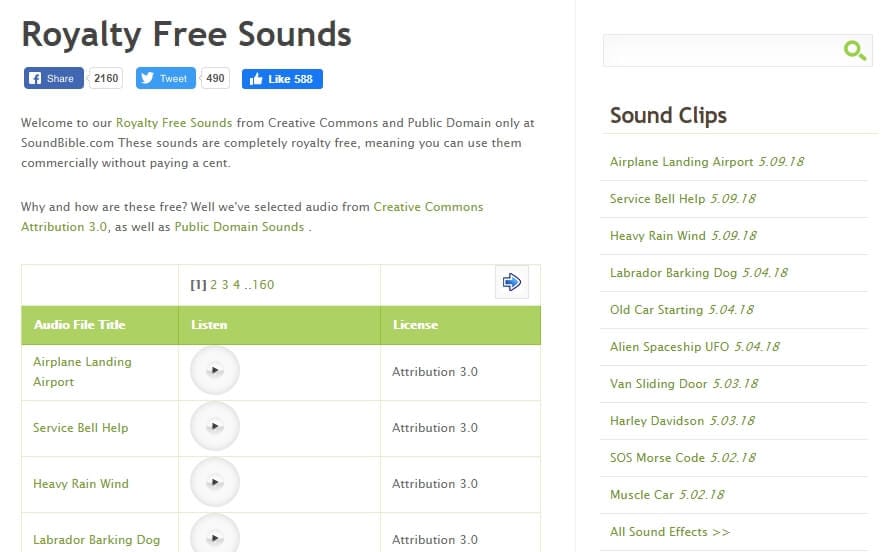
This site has a search function, so if you want dog sounds you can search for ‘dog’. This might be easier than trying to pick the category closest to what you’re looking for and just scrolling through, like you do on some sites.
Sound Bible is updated about 3 times a week, so you can always check back for fresh sounds.
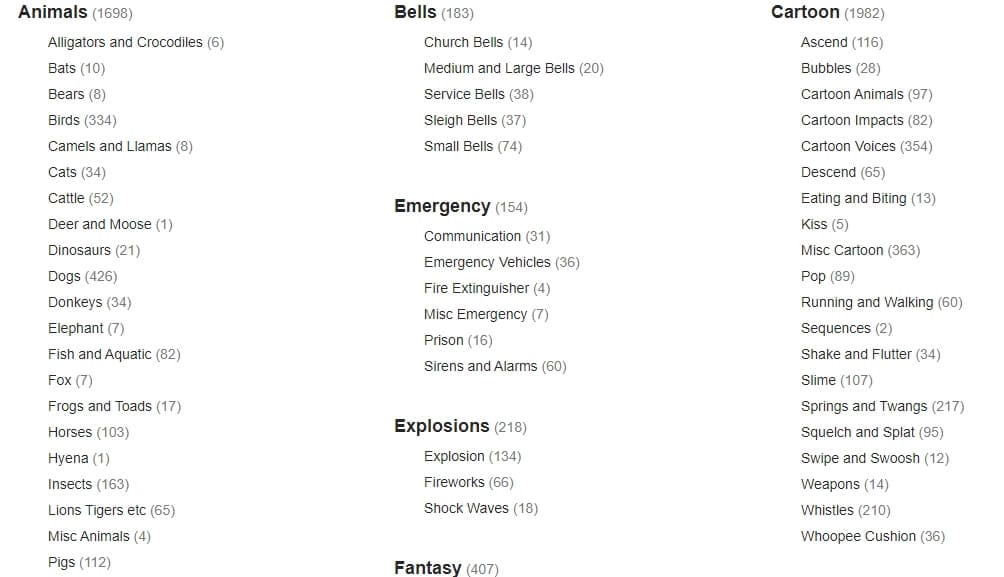
5. Sound Gator
Sound Gator has a huge number of sound effects divided into too many categories to list (24). The categories tend to be very specific, like ‘drink sound effects’ or ‘phone sound effects. If you don’t see a category that sounds like what you’re looking for, make sure to check under Misc Sound Effects because there are 68 Mp3#s in there for everything from tools to static.
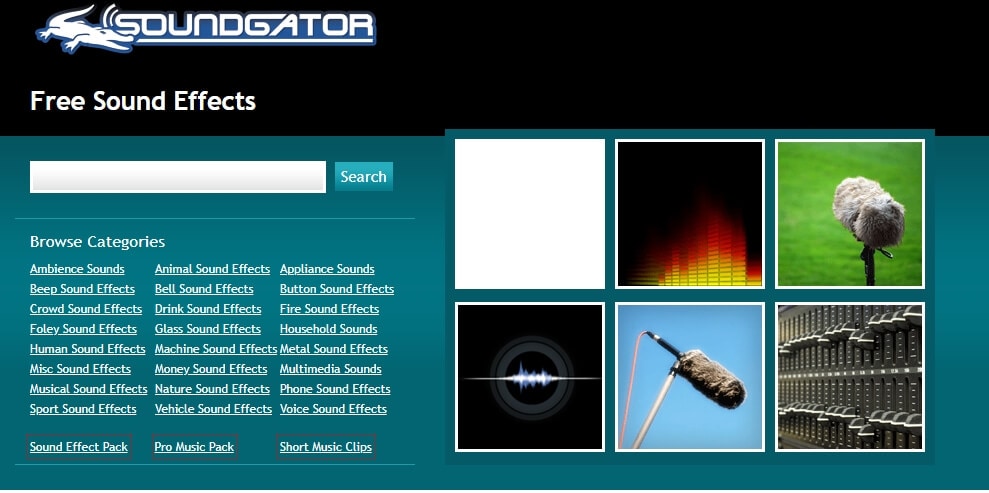
You can sort the sound effects on Sound Gator by date added, popularity, top rated, runtime, top favorites, or most discussed.
6. Sounds Crate
Sounds Crate is part of the larger Production Crate which provides all kinds of resources to creators for free (you can upgrade to a paid account to access exclusive content, but there’s a lot of great content available for free). The categories available on Sounds Crate are:

Ambient: room tones and general background noises from nature or cities.
Animal: includes things like puppy barks and angry cats.
Blades and Metal: you’ll find sounds from swords, chains, and other metal implements here.
Crashes and Debris: perfect for action, this is where you’ll find sounds associated with destruction.
Electricity: things like electrical blasts and charges can be found here.
Electronics: any sound made by anything electrical, like beeps and appliance sounds.
Explosions and Bangs: if you have a visual explosion effect, you’ll probably need to combine it with something from here.
Fight: find sounds associated with action sequences, like whooshes and punches.
Gun Related: everything from reloads to gunshots.
Impact: any kind of thud or shattering sound.
Lock n’ Load: although there are some ‘gun checking’ sounds in here, it’s mostly clothing related sounds like zippers and Velcro.
Movement: wind sounds and whooshes.
People: sounds humans make, from voices to footsteps.
Sci-Fi SFX: zaps, beeps, and sci-fi ambience.
Vehicle: includes both common vehicles like cars and less-common vehicles like tanks.
Weapons: both modern weapons like missiles and old-timey things like arrows.
7. Zapsplat
Zapsplat claims to be the fastest growing free sound effects library on the internet. With more than 23,999 professional sounds, and more being added every week, they might just be right. The owner of the site, Alan McKinney, adds 500 sound effects every week by himself and the site also accepts sounds from contributors. All of their sounds were recorded using professional equipment and then edited to make them perfect.
You can even send Alan a message and request specific sound effects if you can’t already find what you want on the site.
On Zapsplat you can browse 26 categories including fantasy, warfare, and animals for individual sounds. Or, you can visit the Free SFX Packs section and download a set of related sounds together. Packs include ‘Magic Wand’, ‘Science Fiction Alarms’, and ‘Cartoon Boings’.
Part 2: Make Your Own Sound Effects for YouTube Videos
Here are some easy ways you can make your own sound effects at home.
1. Making Natural Sounds
Fire using cellophane. Just crinkle the cellophane wrap to create a sound like a crackling fire. Chip bags work too.
Rain using rice. Sprinkle rice (or birdseed) onto a thin metal sheet.
Alternatively for rain, you could record the sound of bacon frying.
Wind using a Ziploc. Fill a large ziplock with air and then open the bag a bit and force the air out.
Thunder with aluminum. Just shake a sheet of aluminum to make a thunder sound.
2. Making Action or Sci-Fi Sounds
Ticking Bomb with a clock. Any clock that ticks will do.
Hits/Blows with a pillow. Hit a pillow to make a sound like a body blow. For really hard hits, you might want to whack a sofa cushion with a broomstick.
Bones breaking with celery. Just snap the celery stalks in half.
Richard Bennett
Richard Bennett is a writer and a lover of all things video.
Follow @Richard Bennett
Richard Bennett
Oct 26, 2023• Proven solutions
Whether you’re making a short film and need sounds to go with your action sequences, or just want some fun noises for your vlog or challenge video, it’s easy to find great sound effects you can use for free online.
Here are 7 places to download free sound effects! Or, if you’re interested in making your own, click here to jump to ‘Make Your Own Sound Effects’.
Part 1: YouTube Free Sound Effects Download
1. Filmora Sound Effects
Filmora Video Editor provides you with a huge library of free sound effects without download from anywhere else. There are 25 pieces of sound effect available in Filmora, such as transition swoosh, cinematic horn, beep sound and phone ring.
If you do not see the sound effect you want in Filmora, you can also go to the online effect store to find out more sound effects. The sounds are in.wav or mp3 files, so you do not have to use them inside Filmora only. They’re free to use for everyone after downloading, no matter what video editor you use.
The Filmstock audio effect library covers sound effects in different categories: nature sounds, animal sounds, movie sounds, gun sounds, fireworks, bird sounds, cricket sounds, wet sounds, dog barking, water sounds, guitar sounds, city sounds, monster sounds, laughing sounds, dinosaur sounds, fart sounds, pet sounds, dog sounds, car sounds, video game, and thunderstorm.
2. Freesound
Sounds on Freesound are uploaded by users under various Creative Commons licenses (some may require attribution, some may not allow commercial use).
The easiest way to browse the sounds on Freesound is probably to click into Sounds in the top menu, and then ‘Browse tags’ in the menu on the right of your screen. All of the tags on the site will be displayed, and the most commonly used ones will be biggest. The tags include what the sounds are meant to be (i.e. percussion or thunder) and what type of sounds they are (i.e. field-recording or synth).
3. PacDV
PacDV has been producing sound effects since 2001. You can browse and download sounds individually from their site, or download all at once in a huge bundle. You can use all the sounds for free (you just can’t sell them or provide direct download links to other people).
On the left of the website there’s a menu where you can choose what kinds of sound effects you’re interested in. The categories are:
Ambience: this is where you’ll find general background sounds, like ‘car interior’ or ‘grocery store’. Even when nothing in particular is happening, locations have sounds. This is also where you’ll find things like crowd noises.
Domestic: these are sounds you hear around the home, like sounds related to doors and appliances.
Interfaces: a lot of tech sounds live here, like beeps and clicks. Beeps are all titled ‘Beep’, but nothing else is really labeled beyond being called ‘Interface Sound’. You just have to listen and find out.
Machines: a variety of different machine sounds can be found here, from power tools like chainsaws and drills to things like typewriters or paper shredders.
Mechanical: this is where you’ll find sounds associated with cameras, coin slots, zippers, and more.
People: laughing, clapping, footsteps and even farts – this is where you’ll find human sounds.
Transportation: these sounds are all related to vehicles, be they cars or airplanes.
Voices: here you’ll find voices saying common things like ‘hi’, ‘aaah’, or ‘come on’.
Music: PacDV also has a selection of royalty free music. If you use it in your video, you need to give them credit by including Music by <www.pacdv.com/sounds/> in your video description.
Miscellaneous: sounds that don’t quite fit into other categories.
4. Sound Bible
The sounds on Sound Bible are either in the public domain, which means anyone can use them for anything without restriction, or licensed under the Creative Commons Attribution 3.0 License, which means you just need to provide a credit for the person who created the effect you use. When you click on sound effects on Sound Bible you’ll be able to see whether the effect is Public Domain or Attribution 3.0, and it will tell you who the sound was recorded by. Both public domain and Attribution 3.0 sounds are available for commercial use.
This site has a search function, so if you want dog sounds you can search for ‘dog’. This might be easier than trying to pick the category closest to what you’re looking for and just scrolling through, like you do on some sites.
Sound Bible is updated about 3 times a week, so you can always check back for fresh sounds.
5. Sound Gator
Sound Gator has a huge number of sound effects divided into too many categories to list (24). The categories tend to be very specific, like ‘drink sound effects’ or ‘phone sound effects. If you don’t see a category that sounds like what you’re looking for, make sure to check under Misc Sound Effects because there are 68 Mp3#s in there for everything from tools to static.
You can sort the sound effects on Sound Gator by date added, popularity, top rated, runtime, top favorites, or most discussed.
6. Sounds Crate
Sounds Crate is part of the larger Production Crate which provides all kinds of resources to creators for free (you can upgrade to a paid account to access exclusive content, but there’s a lot of great content available for free). The categories available on Sounds Crate are:
Ambient: room tones and general background noises from nature or cities.
Animal: includes things like puppy barks and angry cats.
Blades and Metal: you’ll find sounds from swords, chains, and other metal implements here.
Crashes and Debris: perfect for action, this is where you’ll find sounds associated with destruction.
Electricity: things like electrical blasts and charges can be found here.
Electronics: any sound made by anything electrical, like beeps and appliance sounds.
Explosions and Bangs: if you have a visual explosion effect, you’ll probably need to combine it with something from here.
Fight: find sounds associated with action sequences, like whooshes and punches.
Gun Related: everything from reloads to gunshots.
Impact: any kind of thud or shattering sound.
Lock n’ Load: although there are some ‘gun checking’ sounds in here, it’s mostly clothing related sounds like zippers and Velcro.
Movement: wind sounds and whooshes.
People: sounds humans make, from voices to footsteps.
Sci-Fi SFX: zaps, beeps, and sci-fi ambience.
Vehicle: includes both common vehicles like cars and less-common vehicles like tanks.
Weapons: both modern weapons like missiles and old-timey things like arrows.
7. Zapsplat
Zapsplat claims to be the fastest growing free sound effects library on the internet. With more than 23,999 professional sounds, and more being added every week, they might just be right. The owner of the site, Alan McKinney, adds 500 sound effects every week by himself and the site also accepts sounds from contributors. All of their sounds were recorded using professional equipment and then edited to make them perfect.
You can even send Alan a message and request specific sound effects if you can’t already find what you want on the site.
On Zapsplat you can browse 26 categories including fantasy, warfare, and animals for individual sounds. Or, you can visit the Free SFX Packs section and download a set of related sounds together. Packs include ‘Magic Wand’, ‘Science Fiction Alarms’, and ‘Cartoon Boings’.
Part 2: Make Your Own Sound Effects for YouTube Videos
Here are some easy ways you can make your own sound effects at home.
1. Making Natural Sounds
Fire using cellophane. Just crinkle the cellophane wrap to create a sound like a crackling fire. Chip bags work too.
Rain using rice. Sprinkle rice (or birdseed) onto a thin metal sheet.
Alternatively for rain, you could record the sound of bacon frying.
Wind using a Ziploc. Fill a large ziplock with air and then open the bag a bit and force the air out.
Thunder with aluminum. Just shake a sheet of aluminum to make a thunder sound.
2. Making Action or Sci-Fi Sounds
Ticking Bomb with a clock. Any clock that ticks will do.
Hits/Blows with a pillow. Hit a pillow to make a sound like a body blow. For really hard hits, you might want to whack a sofa cushion with a broomstick.
Bones breaking with celery. Just snap the celery stalks in half.
Richard Bennett
Richard Bennett is a writer and a lover of all things video.
Follow @Richard Bennett
Simplified Video Transferring Techniques for YouTube Enthusiasts
How To Upload Videos to YouTube [a Step-by-Step Guide]
Richard Bennett
Mar 27, 2024• Proven solutions
Want to learn how to upload videos to YouTube? Millions of people watch YouTube every day. Creating and posting YouTube videos can be a lot of fun, and if you get a lot of views and become popular you can also make money. YouTube videos are a creative way to connect with people all around the world.
These simple steps can assist you in learning how to upload YouTube videos from a desktop computer. You are going to Learn:
Edit YouTube with Powerful Video Editor
As a YouTuber, it is necessary to have an easy-to-use video editor, especially for beginners. Download Filmora for free and start your editing journey happily.
Part 1: Basic Rules You Need to Know Before Uploading
Clicking the ‘upload’ button is easy, but during the upload process, there are things you can do to help your video get views and maintain its quality. You should also keep an eye on the length and file size limits. The more basic things you need to consider carefully when you upload are the title, description, and tags of your video. These are part of what determines if and where your video comes up in people’s search results. There are also slightly more advanced video specs, like your video’s resolution, which will be helpful for you to understand as somebody who will be producing video content frequently. These sorts of specs will affect how long it takes your videos to upload and how much of the quality they maintain.
1. How Long Can my Video Be?
By default, your YouTube videos can only be 15 minutes long. You can post longer videos by going to the upload page and clicking on ‘Increase your Limit’ at the bottom. After you have followed the steps to verify your account you will be able to post videos that are a maximum of 11 hours long.
2. How Big a File Can I Upload?
Your file size was capped at 20GB, initially. If you follow the same steps for posting videos longer than 15 minutes then you can also increase your maximum file size to 128GB.
3. Other Basics
After you click the ‘upload’ button on YouTube you are taken to a page where you choose a category for your video and add a title, description, and tags. These are all important for getting hits so you should put some thought into them.
Title: Keep your title under 70 characters so none of it disappears into a ‘…’. The best titles make people curious or elicit an emotional response. Terms like ‘video’, ‘how-to’, and ‘tutorial’ are often typed into people’s searches so if they apply to your video it can help to put them in the title.
Description: A short synopsis of your video which includes your most important keyword. You have about three lines before your text is hidden by a ‘show more’ tab. If you are including the URL of your channel or other videos then you should make sure they are above the ‘show more’.
Tags: Use a lot of them. These are the keywords and terms people will be searching for when they find your video. YouTube will suggest some after you start adding. A quick way to find good keywords to use is to search for videos similar to yours and check out their tags. A while ago YouTube started hiding video tags by default but you can download a free, YouTube-certified, extension for Google Chrome which will allow you to see them from vidIQ.com.
4. Digging Deeper
To get your viewers to subscribe to your channel you will need to make sure your videos are not losing quality when you upload them. Here are some things to be aware of if you want your videos to look great on YouTube.
Resolution: the number of pixels in your image. For example when a video has a resolution of 1080p that means it has a grid of pixels that is 1920 x 1080. The more pixels you have the sharper your image.
Bitrate: Bitrate is a measurement of how compressed your file is, and the less compressed it is the more information there is per frame. Higher bitrates mean larger file sizes.
Your resolution and bitrate should complement each other. If you have a higher bitrate than is needed for your video’s resolution your file will be unnecessarily large. If your bitrate is too low for your resolution then you will not see the quality you expect.
YouTube has a list of recommended resolutions and bitrates at support.google.com/youtube/answer/1722171.
Aspect Ratio: the dimensions of your video, in terms of width and height. YouTube’s aspect ratio is 16:9, so your videos should also be 16:9. If they are not then you will get black bars on either side of your video after you upload it. The most common way that people end up with the wrong aspect ratio is by creating videos on their smartphones and holding them up and down instead of sideways.
Part 2: Steps to Upload Videos to YouTube
Uploading YouTube Video on Desktop:
1. Sign in to your YouTube account
2. Hit the upload button
3. Select your video type (Public, Private, Unlisted)
4. Manage the upload
5. Choose your thumbnail
Step 1: Sign in to your YouTube account
In order to upload videos to YouTube, the very first thing you need to do is sign in. The sign-in button is located at the top right corner of the YouTube homepage. If you have multiple accounts registered to one device, you will be asked to choose one to log in to.

Step 2: Hit the upload button
It is a simple step that you will have to follow right after you log in to YouTube. As soon as you enter YouTube, after using your Google account and password for login, you will find the upload button in the top right corner of the screen. Click on this button and it will take you to the dedicated upload page.
Step 3: Select your video type (Public, Private, Unlisted)
Choose your audience. If you wish to make your video available to everyone on YouTube, simply go to the privacy settings and choose the “Public” option from the drop-down menu.
If you do not want your video to be searchable, but still want to be able to easily share a link to it with your friends and family, choose the “Unlisted” option.
Those who wish to keep their video personal can choose the “Private” option from the drop-down menu. You can still share a private video with a limited number of people (as long as they have Google accounts).
The “Scheduled” option is available for choosing a future date and time to make the video available to viewers. Once you have selected your privacy level, simply upload your video from your device storage.

Step 4: Manage the upload
As soon as you have confirmed your video upload, you will find a progress bar on the screen. It will take some time depending on factors such as the resolution of the video and how long it is. In the meanwhile, you can write a title, description and add relevant tags for your video so that YouTube knows what search results to include it in and viewers can find it. Remember that YouTube is the second biggest search engine on the Internet, so take some time to optimize your keywords .
Step 5: Choose your thumbnail
Once your video uploading is complete, it is time to choose a creative thumbnail for your video. The system provides you with three options to choose from automatically, all of which will be screenshots from your video. It is usually better toupload your own custom thumbnail , as thumbnails are a very important factor in attracting viewers. Hit the “Done” button or use the “Publish” button to finalize your upload.
That’s how to upload a video on YouTube! Any questions?
Richard Bennett
Richard Bennett is a writer and a lover of all things video.
Follow @Richard Bennett
Richard Bennett
Mar 27, 2024• Proven solutions
Want to learn how to upload videos to YouTube? Millions of people watch YouTube every day. Creating and posting YouTube videos can be a lot of fun, and if you get a lot of views and become popular you can also make money. YouTube videos are a creative way to connect with people all around the world.
These simple steps can assist you in learning how to upload YouTube videos from a desktop computer. You are going to Learn:
Edit YouTube with Powerful Video Editor
As a YouTuber, it is necessary to have an easy-to-use video editor, especially for beginners. Download Filmora for free and start your editing journey happily.
Part 1: Basic Rules You Need to Know Before Uploading
Clicking the ‘upload’ button is easy, but during the upload process, there are things you can do to help your video get views and maintain its quality. You should also keep an eye on the length and file size limits. The more basic things you need to consider carefully when you upload are the title, description, and tags of your video. These are part of what determines if and where your video comes up in people’s search results. There are also slightly more advanced video specs, like your video’s resolution, which will be helpful for you to understand as somebody who will be producing video content frequently. These sorts of specs will affect how long it takes your videos to upload and how much of the quality they maintain.
1. How Long Can my Video Be?
By default, your YouTube videos can only be 15 minutes long. You can post longer videos by going to the upload page and clicking on ‘Increase your Limit’ at the bottom. After you have followed the steps to verify your account you will be able to post videos that are a maximum of 11 hours long.
2. How Big a File Can I Upload?
Your file size was capped at 20GB, initially. If you follow the same steps for posting videos longer than 15 minutes then you can also increase your maximum file size to 128GB.
3. Other Basics
After you click the ‘upload’ button on YouTube you are taken to a page where you choose a category for your video and add a title, description, and tags. These are all important for getting hits so you should put some thought into them.
Title: Keep your title under 70 characters so none of it disappears into a ‘…’. The best titles make people curious or elicit an emotional response. Terms like ‘video’, ‘how-to’, and ‘tutorial’ are often typed into people’s searches so if they apply to your video it can help to put them in the title.
Description: A short synopsis of your video which includes your most important keyword. You have about three lines before your text is hidden by a ‘show more’ tab. If you are including the URL of your channel or other videos then you should make sure they are above the ‘show more’.
Tags: Use a lot of them. These are the keywords and terms people will be searching for when they find your video. YouTube will suggest some after you start adding. A quick way to find good keywords to use is to search for videos similar to yours and check out their tags. A while ago YouTube started hiding video tags by default but you can download a free, YouTube-certified, extension for Google Chrome which will allow you to see them from vidIQ.com.
4. Digging Deeper
To get your viewers to subscribe to your channel you will need to make sure your videos are not losing quality when you upload them. Here are some things to be aware of if you want your videos to look great on YouTube.
Resolution: the number of pixels in your image. For example when a video has a resolution of 1080p that means it has a grid of pixels that is 1920 x 1080. The more pixels you have the sharper your image.
Bitrate: Bitrate is a measurement of how compressed your file is, and the less compressed it is the more information there is per frame. Higher bitrates mean larger file sizes.
Your resolution and bitrate should complement each other. If you have a higher bitrate than is needed for your video’s resolution your file will be unnecessarily large. If your bitrate is too low for your resolution then you will not see the quality you expect.
YouTube has a list of recommended resolutions and bitrates at support.google.com/youtube/answer/1722171.
Aspect Ratio: the dimensions of your video, in terms of width and height. YouTube’s aspect ratio is 16:9, so your videos should also be 16:9. If they are not then you will get black bars on either side of your video after you upload it. The most common way that people end up with the wrong aspect ratio is by creating videos on their smartphones and holding them up and down instead of sideways.
Part 2: Steps to Upload Videos to YouTube
Uploading YouTube Video on Desktop:
1. Sign in to your YouTube account
2. Hit the upload button
3. Select your video type (Public, Private, Unlisted)
4. Manage the upload
5. Choose your thumbnail
Step 1: Sign in to your YouTube account
In order to upload videos to YouTube, the very first thing you need to do is sign in. The sign-in button is located at the top right corner of the YouTube homepage. If you have multiple accounts registered to one device, you will be asked to choose one to log in to.
Step 2: Hit the upload button
It is a simple step that you will have to follow right after you log in to YouTube. As soon as you enter YouTube, after using your Google account and password for login, you will find the upload button in the top right corner of the screen. Click on this button and it will take you to the dedicated upload page.
Step 3: Select your video type (Public, Private, Unlisted)
Choose your audience. If you wish to make your video available to everyone on YouTube, simply go to the privacy settings and choose the “Public” option from the drop-down menu.
If you do not want your video to be searchable, but still want to be able to easily share a link to it with your friends and family, choose the “Unlisted” option.
Those who wish to keep their video personal can choose the “Private” option from the drop-down menu. You can still share a private video with a limited number of people (as long as they have Google accounts).
The “Scheduled” option is available for choosing a future date and time to make the video available to viewers. Once you have selected your privacy level, simply upload your video from your device storage.
Step 4: Manage the upload
As soon as you have confirmed your video upload, you will find a progress bar on the screen. It will take some time depending on factors such as the resolution of the video and how long it is. In the meanwhile, you can write a title, description and add relevant tags for your video so that YouTube knows what search results to include it in and viewers can find it. Remember that YouTube is the second biggest search engine on the Internet, so take some time to optimize your keywords .
Step 5: Choose your thumbnail
Once your video uploading is complete, it is time to choose a creative thumbnail for your video. The system provides you with three options to choose from automatically, all of which will be screenshots from your video. It is usually better toupload your own custom thumbnail , as thumbnails are a very important factor in attracting viewers. Hit the “Done” button or use the “Publish” button to finalize your upload.
That’s how to upload a video on YouTube! Any questions?
Richard Bennett
Richard Bennett is a writer and a lover of all things video.
Follow @Richard Bennett
Also read:
- [Updated] Evolving Tactics for Crafting Immersive Mukbang Sessions
- Maximize Engagement Discover the Right YouTube Thumbnail Size
- [Updated] Conquering Camera Fear Paving the Path to YouTube Success
- [New] Dish on Titles Creative Concepts for Cookery Vids
- A Treasure Trove of 9 Complete Holiday Flicks, Free Streaming
- What Is the Difference Between YouTube and Dailymotion
- [Updated] A Step-by-Step Expedition to YouTube's Unseen Layers
- 2024 Approved Digital Dream Teams 8 YouTube's Growth Phenoms
- 2024 Approved Achieving YouTube Live Prominence with Pro-Level Tips
- The Essential Blueprint for Inspiring Valorant Video Thumbnails
- Stepwise Strategy Creating Effective YouTube Subscriber Buttons
- Digital Phenoms Who Has the Most Followers?
- [Updated] Building Brands Together A Guide to Selecting YouTube Teams
- Learn the Role YouTube Shorts Music Plays
- Creating High-Impact YT Cover Images
- The Frugal Filmmaker's Guide to Affordable Camera Gear
- In 2024, Create Identity A Quick Walkthrough of Customizing Your YouTube Url
- Inside the Latest YouTube Income Regulations
- 2024 Approved Escalate Your Content Reach Leveraging Synergistic YouTube Outros
- In 2024, Easy Path From Spotify to YouTube Discover the Best Playlist Tools
- Revolutionize Your Content with These Top 10 Editing Strategies
- In 2024, Elevate Engagement Top Video Release Slots
- In 2024, Ace Your Shots Top Cameras & Lenses for YouTubers
- Affordable Strategies for Engaging YouTube Opening & End Titles for 2024
- 2024 Approved Boost Your Visual Storytelling Key Strategies for Solo Videos
- Efficiency in Conversion A Compact List of the Top 10 Video Transformers
- Spotlight on Top 8 Authentic YouTube Growth Tactics
- Balancing Act Tripod Use for Stable Vlogging
- [New] Digital Detox Ignoring Negativity on YouTube
- In 2024, Crafting a Continuous Youtube Video Stream From Separate Files
- [Updated] Earning the Big Bucks as a YouTube Star
- In 2024, ASMR Sound Mastery Selecting the Ideal Microphone
- Best YouTube Shorts Video Editor Tools for iOS & Android Devices
- Ephemeral Video Wizard
- In 2024, Crafting Content that Captivates YouTube Keyword Mastery
- In 2024, Boost Traffic with These Essential Hashtags for YouTube Gamers
- [New] Beyond the Box 27 Premium Videostreaming Alternatives
- Creating Dynamic Content with YouTube Playlist Embedding for 2024
- The Essentials of Choosing Between an Independent or Major Company Status on YouTube
- 2024 Approved Diving Deep Into Youtube Launching and Earning Your Way
- [Updated] Discover 7 Premium Android AdBlocking Tools
- Top 10 YouTube Video Trimmers Online for 2024
- [New] Effortless WebM Creation 10 Best YouTube Video Transformers
- Essential Listings for Easy Access to YouTube Intro Files for 2024
- Leveraging TikTok for Business Growth Strategies for 2024
- How to Change GPS Location on Vivo Y100A Easily & Safely | Dr.fone
- Top 10 Password Cracking Tools For Vivo Y200e 5G
- How to Stop My Spouse from Spying on My Motorola Edge 40 Neo | Dr.fone
- New Explore the Leading Websites for Legal Montage Music Downloads for 2024
- Updated Break Free From Adobe Top 4 Premiere Rush Alternatives for Video Creators for 2024
- [Updated] Mastering Video Descriptions on Instagram
- [Updated] 2024 Approved Mastering Discord Spoilers Key Insights Revealed
- In 2024, Using Compressor in Final Cut Pro X Best Practices and Workflows
- [Updated] In 2024, Discovering Collective Chat Content in Messenger
- In 2024, Crafting a Seamless Auditory Experience in OBS From Silence to Echoes and Everything In Between
- New Elevate Your Brand Expert Facebook Video Cover Creation Tips for 2024
- 2024 Approved Uncover Digital Entertainment Auditory Elements
- [New] Fix Facebook Media Failure on Devices
- How to Trim and Split 3GP Videos in Minutes
- [New] 2024 Approved Step-By Step Approach Crafting Quality Subtitles for Facebook Videos in Minutes
- In 2024, Change Location on Yik Yak For your Tecno Spark 10 Pro to Enjoy More Fun | Dr.fone
- Complete guide for recovering contacts files on A05s.
- How to Screen Mirroring Tecno Pova 6 Pro 5G? | Dr.fone
- 2024 Approved How to Make Subtitle Videos
- Gmail Not Working on Nubia Red Magic 8S Pro+ 7 Common Problems & Fixes | Dr.fone
- Top 30 Metaverse Gems DIY Meme Ideas Unleashed
- 2024 Approved Unveiling the Purpose and Capabilities of Google Podcast App
- 2024 Approved The Essence of Vimeo User-Friendly Video Service
- [New] 2024 Approved The Social Media Analyst's Toolkit Making Sense of Instagram Stats
- [New] In 2024, Game On 6 Efficient Techniques for Perfect PC Snapshots
- New Switching Between Aspect Ratios in Final Cut Pro Made Easy
- Updated In 2024, Voice Purification Solutions A Comprehensive List for All Singers Needs
- Resolving Social Media Puzzle Zippy FB Videos Not in View for 2024
- Title: "[Updated] Boost Your Content Access Free Vocal SFX"
- Author: Brian
- Created at : 2024-05-25 13:12:10
- Updated at : 2024-05-26 13:12:10
- Link: https://youtube-video-recordings.techidaily.com/updated-boost-your-content-access-free-vocal-sfx/
- License: This work is licensed under CC BY-NC-SA 4.0.
