
![[Updated] Achieving Profitability at Half a Million Viewers](https://www.lifewire.com/thmb/FuDKvpD8bIq0WaxlcLQoWUX_DG4=/400x300/filters:no_upscale():max_bytes(150000):strip_icc()/100_0261-5806a1b05f9b5805c286a636.JPG)
[Updated] Achieving Profitability at Half a Million Viewers
Achieving Profitability at Half a Million Viewers
For small creators on YouTube, getting monetized seemed like an uphill task. You had to accumulate over 1,000 subscribers and over 4,000 public watch hours. This can be difficult to attain, especially on a platform where creators are publishing new content every day. However, the 2023 update on the YouTube Partner Program (YPP) provided an easier way to start making money on YouTube. In this article, we look at how the YPP is changing and the beauty of the YouTube monetization 500 subscribers’ policy update.
YouTube Shorts Monetization A cross-platform for helping you present your content in the best way possible!
Free Download Free Download Learn More

Part 1. YouTube Monetization Revamp: 500 Subscribers Minimum Threshold Unveiled
The recent update in YouTube monetization requirements has made it easier than ever for small creators to make money on the platform. The YPP program changed and reduced the number of subscribers needed to be eligible. It has also reduced the amount of watch time needed. Let’s have a look at what the new eligibility criteria look like:

The eligibility criteria for the YPP program are now easier and more achievable than before. To apply, you now need:
- At least 500 subscribers
- Three Shorts or Video uploads in the last 90 days
- At least 3,000 public watch hours in the last 12 months or
- At least 3 million public Short videos in the last 90 days
The new requirements are lower than the old ones. Previously, you were required to have at least 1,000 subscribers with over 4,000 public watch hours. By lowering the threshold, YouTube makes it easier for all creators to monetize their content.
Part 2. YouTube Monetization with 500 Subscribers: A Brief Guide
YouTube announced in 2022 that they were evolving the YPP to continue rewarding more creators. Starting mid-June 2023, the program was expanded to allow more creators to access monetization benefits.
Know If You are Eligible
As a creator, you will want to know if you are eligible for the YouTube monetization 500 subscribers’ plan. Make sure that the notify feature on your channel is active to receive a notification. Go to the Earn area of the YouTube channel, and select Get Notified. Once selected, YouTube will send you an email when reach above the eligibility threshold.

What You Need to Join Expanded YPP
Joining the expanded YouTube Partner Program has the same requirements as the earlier version. These include:
- Being compliant with the YouTube channel monetization policies
- Active 2-Step verification on the Google Account
- Channel is based in any of the available regions or countries
- An active AdSense account linked to the channel
- No Community Guidelines strikes on your Channel
- Have advanced features access on YouTube
Where to Apply for Monetization
After meeting the eligibility criteria, you will need to apply to be enrolled in the YPP. Remember that being eligible does not automatically translate to instant income. You need to apply for the program and wait for the approval. Here are the steps to follow:
On Computer/Desktop
Step 1Sign in to YouTube Studio on your computer or desktop

Step 2Click Earn in the left menu

Step 3Click Apply Now to review and Accept the base terms

Step 4Click Start to set up an AdSense account

On Android, iPhone and iPad
Applying for YouTube monetization on your mobile devices follows the same process as the computer. Only in this case you will using the YouTube Studio app instead of the website. Follow these steps as outlined.
- Open the YouTube Studio mobile app on your Android device.
- Tap Earn from the bottom men
- Tap Apply now to review and accept the base terms.
- Set up an AdSense account as requested, or link an existing active one.
Once you complete these steps on your computer or mobile, In Progress status will surface in the Get Reviewed step. This means that YouTube will review your channel and provide feedback within a month.
What Monetization Review Entails
Once you submit your application, YouTube’s automated systems and human reviewers will look at your channel for a while. They will review it to make sure it follows all the platform’s policies and guidelines. As the reviews are in progress, creators are encouraged to back to the Earn section of YouTube Studio regularly. Typically, you will get the results within a month, but this may be affected by several factors:
- Application Volumes
- Resource Limitations
- System Issues
- Channel requiring several reviewers to determine suitability for YPP
Sometimes the first application may not be successful for some reason. In this case, creators are encouraged to continue uploading original content and try again after 30 days. For second or other rejections, you are allowed to try again after 90 days. During this period, make sure that your channel follows YouTube policies and guidelines to increase your chances of being accepted.
Choose How to Earn
The major way of earning money on YouTube is through ads that show in your videos. In the case of Shorts, the ad-sharing revenue involves YouTube sharing the revenue generated from the ads with creators. However, getting accepted to YPP also allows you to start earning with fan funding and Shopping features. This means that creators can earn money directly from their views using these unique features
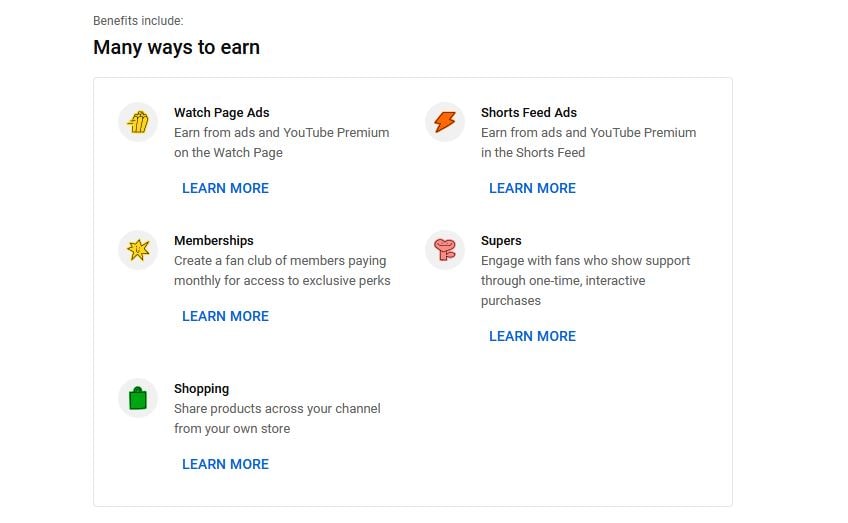
YouTube monetization 500 subscribers update allows you to earn money through monetization features that were not there before. This allows creators to interact more with their viewer while generating income. The main fan funding features include:
- Channel Membership: Offer a membership plan to your viewer through monthly payments in exchange for perks like emojis and badges.
- Super Thanks: Earn revenue from viewers who show extra gratitude for your videos.
- Super Stickers and Super Chat: Allows your fans to buy Super Chats that highlight their messages or add fun animated images in the live chat.
- Shopping: Allows you to connect your official merchandise story to YouTube to showcase your products.
Part 3. Edit Your Shorts for Monetization with WonderShare Filmora
The quality of your Shorts plays an essential role in determining whether your channel will be monetized. This is why you need good video editing software to help you present your content in the best way possible. Wondershare Filmora is a great choice when you want your YouTube Shorts to stand out. From cool green screen tricks to auto-reframing your videos for Shorts, Filmora gives you the whole editing package.
Free Download For Win 7 or later(64-bit)
Free Download For macOS 10.14 or later
Filmora offers creators fantastic editing features to create better Shorts. Let’s have a look at some of the features you may find helpful:
1. AI Copywriting
YouTube Shorts require quick content that covers everything within 60 seconds. With the Filmora AI Copywriting feature, you can get inspiration and add text to your videos. Express your thoughts more clearly and generate text that makes the video more engaging.
2. Split Screen Video Editor
YouTube Shorts are limited to a length of 1 minute only. Since 60 seconds is quite a short time, you may want to showcase your content on multiple screens. The Split Screen Video Editor on Filmora allows you to make a split screen instantly. Choose from the readily available templates and show your audience what you want from multiple perspectives in the same video.
3. Motion Tracking
With YouTube Shorts, you need to be more creative. Adding objects to your videos makes them fun and engaging. The motion tracking feature on Filmora allows you to track the movement of an object in the video. You can then pin graphics on the object, making the video more exciting. You can also add specific text and align it to an object, allowing your audience to follow through the story.
4. Speed Ramping
The way you present your video means a lot to the audience. No one wants a boring or a really slow-moving video. With the Speed Ramping feature on Filmora, you can adjust the speed of your Shorts with better control of your keyframes. This allows you to create unique cinematic effects that keep the audience wanting more of the content.
Conclusion
The introduction of the YouTube monetization 500 subscribers’ policy update was a special moment for small YouTubers. It meant that the platform was extending its YPP program to more creators, allowing them to earn money from their content. Lowering the monetization requirement gives more people a chance to make money faster. However, it is important to make sure that your videos are offering value to your audience. We recommend using Wondershare Filmora to edit your videos and make sure they stand out from the competition. The better your videos will be, the more views you will get, and the more money you will make.
Free Download Free Download Learn More
Part 1. YouTube Monetization Revamp: 500 Subscribers Minimum Threshold Unveiled
The recent update in YouTube monetization requirements has made it easier than ever for small creators to make money on the platform. The YPP program changed and reduced the number of subscribers needed to be eligible. It has also reduced the amount of watch time needed. Let’s have a look at what the new eligibility criteria look like:
The eligibility criteria for the YPP program are now easier and more achievable than before. To apply, you now need:
- At least 500 subscribers
- Three Shorts or Video uploads in the last 90 days
- At least 3,000 public watch hours in the last 12 months or
- At least 3 million public Short videos in the last 90 days
The new requirements are lower than the old ones. Previously, you were required to have at least 1,000 subscribers with over 4,000 public watch hours. By lowering the threshold, YouTube makes it easier for all creators to monetize their content.
Part 2. YouTube Monetization with 500 Subscribers: A Brief Guide
YouTube announced in 2022 that they were evolving the YPP to continue rewarding more creators. Starting mid-June 2023, the program was expanded to allow more creators to access monetization benefits.
Know If You are Eligible
As a creator, you will want to know if you are eligible for the YouTube monetization 500 subscribers’ plan. Make sure that the notify feature on your channel is active to receive a notification. Go to the Earn area of the YouTube channel, and select Get Notified. Once selected, YouTube will send you an email when reach above the eligibility threshold.
What You Need to Join Expanded YPP
Joining the expanded YouTube Partner Program has the same requirements as the earlier version. These include:
- Being compliant with the YouTube channel monetization policies
- Active 2-Step verification on the Google Account
- Channel is based in any of the available regions or countries
- An active AdSense account linked to the channel
- No Community Guidelines strikes on your Channel
- Have advanced features access on YouTube
Where to Apply for Monetization
After meeting the eligibility criteria, you will need to apply to be enrolled in the YPP. Remember that being eligible does not automatically translate to instant income. You need to apply for the program and wait for the approval. Here are the steps to follow:
On Computer/Desktop
Step 1Sign in to YouTube Studio on your computer or desktop
Step 2Click Earn in the left menu
Step 3Click Apply Now to review and Accept the base terms
Step 4Click Start to set up an AdSense account
On Android, iPhone and iPad
Applying for YouTube monetization on your mobile devices follows the same process as the computer. Only in this case you will using the YouTube Studio app instead of the website. Follow these steps as outlined.
- Open the YouTube Studio mobile app on your Android device.
- Tap Earn from the bottom men
- Tap Apply now to review and accept the base terms.
- Set up an AdSense account as requested, or link an existing active one.
Once you complete these steps on your computer or mobile, In Progress status will surface in the Get Reviewed step. This means that YouTube will review your channel and provide feedback within a month.
What Monetization Review Entails
Once you submit your application, YouTube’s automated systems and human reviewers will look at your channel for a while. They will review it to make sure it follows all the platform’s policies and guidelines. As the reviews are in progress, creators are encouraged to back to the Earn section of YouTube Studio regularly. Typically, you will get the results within a month, but this may be affected by several factors:
- Application Volumes
- Resource Limitations
- System Issues
- Channel requiring several reviewers to determine suitability for YPP
Sometimes the first application may not be successful for some reason. In this case, creators are encouraged to continue uploading original content and try again after 30 days. For second or other rejections, you are allowed to try again after 90 days. During this period, make sure that your channel follows YouTube policies and guidelines to increase your chances of being accepted.
Choose How to Earn
The major way of earning money on YouTube is through ads that show in your videos. In the case of Shorts, the ad-sharing revenue involves YouTube sharing the revenue generated from the ads with creators. However, getting accepted to YPP also allows you to start earning with fan funding and Shopping features. This means that creators can earn money directly from their views using these unique features
YouTube monetization 500 subscribers update allows you to earn money through monetization features that were not there before. This allows creators to interact more with their viewer while generating income. The main fan funding features include:
- Channel Membership: Offer a membership plan to your viewer through monthly payments in exchange for perks like emojis and badges.
- Super Thanks: Earn revenue from viewers who show extra gratitude for your videos.
- Super Stickers and Super Chat: Allows your fans to buy Super Chats that highlight their messages or add fun animated images in the live chat.
- Shopping: Allows you to connect your official merchandise story to YouTube to showcase your products.
Part 3. Edit Your Shorts for Monetization with WonderShare Filmora
The quality of your Shorts plays an essential role in determining whether your channel will be monetized. This is why you need good video editing software to help you present your content in the best way possible. Wondershare Filmora is a great choice when you want your YouTube Shorts to stand out. From cool green screen tricks to auto-reframing your videos for Shorts, Filmora gives you the whole editing package.
Free Download For Win 7 or later(64-bit)
Free Download For macOS 10.14 or later
Filmora offers creators fantastic editing features to create better Shorts. Let’s have a look at some of the features you may find helpful:
1. AI Copywriting
YouTube Shorts require quick content that covers everything within 60 seconds. With the Filmora AI Copywriting feature, you can get inspiration and add text to your videos. Express your thoughts more clearly and generate text that makes the video more engaging.
2. Split Screen Video Editor
YouTube Shorts are limited to a length of 1 minute only. Since 60 seconds is quite a short time, you may want to showcase your content on multiple screens. The Split Screen Video Editor on Filmora allows you to make a split screen instantly. Choose from the readily available templates and show your audience what you want from multiple perspectives in the same video.
3. Motion Tracking
With YouTube Shorts, you need to be more creative. Adding objects to your videos makes them fun and engaging. The motion tracking feature on Filmora allows you to track the movement of an object in the video. You can then pin graphics on the object, making the video more exciting. You can also add specific text and align it to an object, allowing your audience to follow through the story.
4. Speed Ramping
The way you present your video means a lot to the audience. No one wants a boring or a really slow-moving video. With the Speed Ramping feature on Filmora, you can adjust the speed of your Shorts with better control of your keyframes. This allows you to create unique cinematic effects that keep the audience wanting more of the content.
Conclusion
The introduction of the YouTube monetization 500 subscribers’ policy update was a special moment for small YouTubers. It meant that the platform was extending its YPP program to more creators, allowing them to earn money from their content. Lowering the monetization requirement gives more people a chance to make money faster. However, it is important to make sure that your videos are offering value to your audience. We recommend using Wondershare Filmora to edit your videos and make sure they stand out from the competition. The better your videos will be, the more views you will get, and the more money you will make.
Integrated Content Naming Protocols for Diverse Apps
Versatile Video Editor - Wondershare Filmora
An easy yet powerful editor
Numerous effects to choose from
Detailed tutorials provided by the official channel
The vertical video went to a mainstream media style. Nowadays, it’s common for online video, especially on social apps. Mobile video has become the most common way to watch online videos. It makes sense then that vertical is the preferred familiarization for videos. Users don’t want to twist their phones to watch a 30-second ad. Knowing YouTube shorts vertical size is important as well as Facebook vertical video specs.
Social juggernauts like Facebook and YouTube have adopted vertical video size or formats in current years. The newer social apps, like Snapchat and TikTok, use vertical video completely. While most platforms now prefer vertical video, they each have different patterns. Even Instagram vertical video dimensions premiere is different.
Users tinkering in video marketing know it’s essential to stay updated on social media video sizes across all platforms. But, we also know that it is time-consuming to dig through each technical specification of each social app. For that purpose, we have covered all network video sizes for each platform. So, browse the table of contents below and find the video dimensions, aspect ratios, and file sizes you need.
In this article
01 [What Vertical Video Size Do We Usually Use?](#Part 1)
02 [Vertical Video Dimension for Different Social Apps](#Part 2)
03 [Tips: How to Adjust Vertical Videos Size](#Part 3)
Part 1 What Vertical Video Size Do We Usually Use?
Videos come in different sizes. However, one principle is standard in creating them, the vertical video aspect ratio (width to height). This refers to how you compare and create the video height to video ratio (how you intend to record and produce your video).
Ideally, it is what you and viewers will see while watching your video. To create a perfect video, any video creator should decide on the relationship between the video height and width.
When creating YouTube vertical video dimensions, the width is usually longer than the height. Most television videos have a standard ratio of 4:3 and 16:9. However, social media videos are created using a 1:1 and 9:16 ratio.

A smartphone can shoot vertical videos perfectly, but some media players like cameras require editing and adjusting the sizes to get the correct aspect ratio. Experts won’t have difficulties adjusting horizontally shot videos, but an amateur will. Fortunately, you can avoid taking unprofessional shoots by focusing on the frame’s center to capture your subject wholly without clipping important aspects. While editing Facebook vertical video dimensions and other social apps, the results could vary depending on the editing software. But you can rotate the video within the software to get the correct dimensions lest you get ugly videos full of black backgrounds filling the frame.
Most cameras and video recorders have inbuilt settings that switch to aspect ratio when you start recording. And the good thing is that you can adjust the settings to your desired dimensions in the settings section. If you are shooting a vertical video without a preset aspect ratio, then:
- Shoot gently without switching your camera horizontally, especially if you are capturing a narrow view.
- Avoid fast spans as it appears intense on the camera that could result in blurry animations.
- Focus on what you are capturing, and if need be, zoom in to capture every essential detail.
The importance of applying aspect ratio in videos is to ensure your images and videos have excellent resolution. This way, you have a chance to present (market) your idea professionally.
Part 2 Vertical Video Dimension for Different Social Apps
Here is a guide on how to shoot vertical dimensions for various social apps –
1. YouTube Vertical Video Dimension Guide
It is common for viewers to switch to YouTube and watch videos, and this is why you need the work on the perfect YouTube vertical video size. Initially, you could display YouTube videos in different dimensions, but this is no longer the case since the app’s dynamic innovation to view animations in preferred sizes.

Usually, YouTube videos are recorded at a standard aspect ratio of 16: 9. It means that you cannot customize the dimensions as this is this ratio is the default.
Though the 16:9 dimensions are standard, you can also shoot your videos using different ratios like 1:1 (square), 4:3, or 9:16 (vertically). In this case, your video will fit different YouTube videos on each device but will display white or grey padding on the frames by default.
Manually adding padding to your videos reduces the ability to adjust them to different ratios on various devices. If you are yet to switch to YouTube vertical video dimensions, you are missing to increase brand awareness.
2. Facebook Vertical Video Dimension Guide
Facebook vertical video specs have mainly been using the 16:9 ratio. And since the app attracts billions of global users, it’s high time to optimize your snapshots and try posting in different formats.

For your next FB vertical video size for feed videos, think of square snapshots (1:1), 2:3, 4:5, or 16:9. If you love creating Facebook stories, you can stick to the 9:16 ratio. And for Facebook live videos, stick with the Facebook video vertical size, 16:9 dimensions. Note that most Facebook video posts will automatically have a standard measurement of 16:9.
3. Instagram Vertical Video Dimensions Guide
Since the inception of Instagram vertical video dimensions premiere, the ratio has always been 1:1. This dimension makes it optimal for phones and small-sized screens. Here is the ultimate guide for your new Instagram animations:
- 1:1 for square videos.
- 4:5 for portrait shots.
- 9:16 when shooting vertical animations.
If you are going live on Instagram, we recommend 9:16, while you can shoot in 1:1, 4:5, and 16:9 ratios for feed videos. For Instagram stories, we suggest 9:16, but you can always work around 1:1, 4:9, and 16:9.

4. Twitter Vertical Video Dimension Guide
Twitter is quite different when considering feed video dimensions; portrait and square. The former (portrait) is a favorite for ads and marketing videos display (increase brand visibility), whereas the latter is perfect for displaying videos on multiple devices.
Twitter videos can be perfect in the below dimensions:
- Promotional video ads 1:2 39 to 2.39:1
- Six-second short ads 1:2.39 – 2.39:1
- First video ads 1:2.39 – 2.39:1
- Personal portrait (vertical) videos 9:16
- Personal horizontal animations 1:2.39 – 2.39:1

5. WhatsApp Vertical Video Dimension Guide
Most people don’t know the importance of resizing WhatsApp videos. Sharing videos on your WhatsApp status is a marketing strategy, but you must resize your videos well. Most video WhatsApp vertical videos have 4:3 dimensions and a 1080 × 1920 pixels size.
Part 3 Tips: How to Adjust Vertical Videos Size
The smartphone has become the primary tool for taking photos or recording videos, but we hold our mobile phone in a different direction while shooting videos, which causes the wrong adjustment while uploading it. Fortunately, there are ways, and your video can fit any screen without any compromises. Bellow, we are going to tell you two methods to adjust vertical video size
Method 1: Filmora
Filmora allows users to rotate your video to any point they want. What’s more, you can zoom in or crop the undesired parts in the video with a snap. It also offers you preset aspect ratios like 16:9, 9:16; 4:5, 1:1, etc., to help you quickly find the perfect aspect ratio for YouTube, Instagram, and other social apps. Let’s see how to change video adjustment in Filmora.
How to crop aspect ratio at the starting interface:
In this method, you must upload the animation first. Follow these steps:
Step 1: Upload your video into the editing panel.
Step2: Scroll to the drop-down menu to see various dimensions (1:1. 4:3, 9:16, 16:9, and 21:9).
Step3: Select the desired ratio and apply.

Modifying aspect ratio in project settings:
This method allows you to preset the ratios before uploading your media. Most files are preset to a 4:3 ratio, but you can adjust as you wish. Note that uploading a video with other aspect ratios will automatically switch to the default one. However, you can change the ratio by clicking on the project settings tab.

Changing aspect ratio when editing:
You can crop your video after importing it to the Filmora panel using the crop and zoom tools.
Step 1: Right-click on the file in the panel.
Step 2: Select crop and zoom.
Step 3: Click on the desired ratio from the suggestions (16:9, 4:3, 1:1, and 9:16) and confirm the action by clicking OK.

You can also modify the aspect ratio manually, add filters, and blur the background to enhance resolution when editing.
Auto reframing:
Latest Filmora running versions like V10.5 have the auto-reframe feature that can help crop aspect ratio seamlessly. The good thing about this feature is that it detects any object and can remove it if need be. Plus, this video editor also comes with preset aspect ratios that conveniently suit different social apps.
You can auto reframe by:
Step 1: Import the video to the panel. Right-click on the file and select the auto-reframe icon.

Step 2: Choose the desired aspect ratio.

Step 3: Click the analyze icon and wait for the results in a preview window.
Step 4: Adjust the frame by dragging the box to balance the object or leave it if you love the results.

Step 5: When done, rename it and click the export feature to save your new file.

Step 6: Edit (add effects) as desired.
Modifying aspect ratio when exporting:
After saving your file, you can export it to your desired media display device and change the aspect ratio based on your platform settings, as discussed above.

Method 2: Final Cut Pro
Apple’s Final Cut Pro is a compelling software for video editing and compositing. The interface is designed similar with many other video editing programs such as Adobe Premiere and Combustion etc.
To prepare:
- Take vertical videos.
- Connect iPhone to an editing system.
- Enter a password on the iPhone.
- Started Final Cut Pro.
- Create a new library, named it “Vertical Video”.
Steps to adjust vertical video size with Final cut pro:
Step 1: To import the video clip, you want to edit, click on the File > Import Media. The connected iPhone screen appears in the top left corner. The circle icon shows that FCP is still collecting data from the phone and the pointing arrow allows to disconnect.
Step 2: When the iPhone is chosen in the sidebar, thumbnails appear at the bottom of the Media Import window. For example, you can see the four vertical video clips, choose one to edit.
Step 3: The iPhone compresses MP4 video. While editing a simple project, you don’t need to generate optimized media. However, optimizing media will save you time in the long run if you plan to add lots of effects.
Step 4: Now, generate a new project and apply the Automatic settings.
Step 5: Next, edit a vertical clip into the empty new project. Even if this isn’t the first clip you want the audience to see, it is essential because FCP uses this clip to configure the project settings.
Step 6: When that first video clip is edited into the timeline, this dialog arrives. Note that the frame size is already fixed by the size of the video you shot on the iPhone. Don’t change any settings. It allows FCP to automatically configure the project to match the specs of this clip. If you’ve done this correctly, your clip appears vertically in the Viewer.
Wondershare Filmora
Get started easily with Filmora’s powerful performance, intuitive interface, and countless effects!
Try It Free Try It Free Try It Free Learn More >

AI Portrait – The best feature of Wondershare Filmora for gameplay editing
The AI Portrait is a new add-on in Wondershare Filmora. It can easily remove video backgrounds without using a green screen or chroma key, allowing you to add borders, glitch effects, pixelated, noise, or segmentation video effects.

Conclusion
As you can tell, video dimensions significantly influence your media resolution and impact. Aspect ratio is the standard way to modify your media to fit YouTube, Instagram, Facebook, and other social apps. Changing dimensions is a DIY process; you can edit YouTube vertical video dimensions and other social apps like Facebook and Instagram through Filmora or Final Cut Pro.
The vertical video went to a mainstream media style. Nowadays, it’s common for online video, especially on social apps. Mobile video has become the most common way to watch online videos. It makes sense then that vertical is the preferred familiarization for videos. Users don’t want to twist their phones to watch a 30-second ad. Knowing YouTube shorts vertical size is important as well as Facebook vertical video specs.
Social juggernauts like Facebook and YouTube have adopted vertical video size or formats in current years. The newer social apps, like Snapchat and TikTok, use vertical video completely. While most platforms now prefer vertical video, they each have different patterns. Even Instagram vertical video dimensions premiere is different.
Users tinkering in video marketing know it’s essential to stay updated on social media video sizes across all platforms. But, we also know that it is time-consuming to dig through each technical specification of each social app. For that purpose, we have covered all network video sizes for each platform. So, browse the table of contents below and find the video dimensions, aspect ratios, and file sizes you need.
In this article
01 [What Vertical Video Size Do We Usually Use?](#Part 1)
02 [Vertical Video Dimension for Different Social Apps](#Part 2)
03 [Tips: How to Adjust Vertical Videos Size](#Part 3)
Part 1 What Vertical Video Size Do We Usually Use?
Videos come in different sizes. However, one principle is standard in creating them, the vertical video aspect ratio (width to height). This refers to how you compare and create the video height to video ratio (how you intend to record and produce your video).
Ideally, it is what you and viewers will see while watching your video. To create a perfect video, any video creator should decide on the relationship between the video height and width.
When creating YouTube vertical video dimensions, the width is usually longer than the height. Most television videos have a standard ratio of 4:3 and 16:9. However, social media videos are created using a 1:1 and 9:16 ratio.
A smartphone can shoot vertical videos perfectly, but some media players like cameras require editing and adjusting the sizes to get the correct aspect ratio. Experts won’t have difficulties adjusting horizontally shot videos, but an amateur will. Fortunately, you can avoid taking unprofessional shoots by focusing on the frame’s center to capture your subject wholly without clipping important aspects. While editing Facebook vertical video dimensions and other social apps, the results could vary depending on the editing software. But you can rotate the video within the software to get the correct dimensions lest you get ugly videos full of black backgrounds filling the frame.
Most cameras and video recorders have inbuilt settings that switch to aspect ratio when you start recording. And the good thing is that you can adjust the settings to your desired dimensions in the settings section. If you are shooting a vertical video without a preset aspect ratio, then:
- Shoot gently without switching your camera horizontally, especially if you are capturing a narrow view.
- Avoid fast spans as it appears intense on the camera that could result in blurry animations.
- Focus on what you are capturing, and if need be, zoom in to capture every essential detail.
The importance of applying aspect ratio in videos is to ensure your images and videos have excellent resolution. This way, you have a chance to present (market) your idea professionally.
Part 2 Vertical Video Dimension for Different Social Apps
Here is a guide on how to shoot vertical dimensions for various social apps –
1. YouTube Vertical Video Dimension Guide
It is common for viewers to switch to YouTube and watch videos, and this is why you need the work on the perfect YouTube vertical video size. Initially, you could display YouTube videos in different dimensions, but this is no longer the case since the app’s dynamic innovation to view animations in preferred sizes.
Usually, YouTube videos are recorded at a standard aspect ratio of 16: 9. It means that you cannot customize the dimensions as this is this ratio is the default.
Though the 16:9 dimensions are standard, you can also shoot your videos using different ratios like 1:1 (square), 4:3, or 9:16 (vertically). In this case, your video will fit different YouTube videos on each device but will display white or grey padding on the frames by default.
Manually adding padding to your videos reduces the ability to adjust them to different ratios on various devices. If you are yet to switch to YouTube vertical video dimensions, you are missing to increase brand awareness.
2. Facebook Vertical Video Dimension Guide
Facebook vertical video specs have mainly been using the 16:9 ratio. And since the app attracts billions of global users, it’s high time to optimize your snapshots and try posting in different formats.
For your next FB vertical video size for feed videos, think of square snapshots (1:1), 2:3, 4:5, or 16:9. If you love creating Facebook stories, you can stick to the 9:16 ratio. And for Facebook live videos, stick with the Facebook video vertical size, 16:9 dimensions. Note that most Facebook video posts will automatically have a standard measurement of 16:9.
3. Instagram Vertical Video Dimensions Guide
Since the inception of Instagram vertical video dimensions premiere, the ratio has always been 1:1. This dimension makes it optimal for phones and small-sized screens. Here is the ultimate guide for your new Instagram animations:
- 1:1 for square videos.
- 4:5 for portrait shots.
- 9:16 when shooting vertical animations.
If you are going live on Instagram, we recommend 9:16, while you can shoot in 1:1, 4:5, and 16:9 ratios for feed videos. For Instagram stories, we suggest 9:16, but you can always work around 1:1, 4:9, and 16:9.
4. Twitter Vertical Video Dimension Guide
Twitter is quite different when considering feed video dimensions; portrait and square. The former (portrait) is a favorite for ads and marketing videos display (increase brand visibility), whereas the latter is perfect for displaying videos on multiple devices.
Twitter videos can be perfect in the below dimensions:
- Promotional video ads 1:2 39 to 2.39:1
- Six-second short ads 1:2.39 – 2.39:1
- First video ads 1:2.39 – 2.39:1
- Personal portrait (vertical) videos 9:16
- Personal horizontal animations 1:2.39 – 2.39:1
5. WhatsApp Vertical Video Dimension Guide
Most people don’t know the importance of resizing WhatsApp videos. Sharing videos on your WhatsApp status is a marketing strategy, but you must resize your videos well. Most video WhatsApp vertical videos have 4:3 dimensions and a 1080 × 1920 pixels size.
Part 3 Tips: How to Adjust Vertical Videos Size
The smartphone has become the primary tool for taking photos or recording videos, but we hold our mobile phone in a different direction while shooting videos, which causes the wrong adjustment while uploading it. Fortunately, there are ways, and your video can fit any screen without any compromises. Bellow, we are going to tell you two methods to adjust vertical video size
Method 1: Filmora
Filmora allows users to rotate your video to any point they want. What’s more, you can zoom in or crop the undesired parts in the video with a snap. It also offers you preset aspect ratios like 16:9, 9:16; 4:5, 1:1, etc., to help you quickly find the perfect aspect ratio for YouTube, Instagram, and other social apps. Let’s see how to change video adjustment in Filmora.
How to crop aspect ratio at the starting interface:
In this method, you must upload the animation first. Follow these steps:
Step 1: Upload your video into the editing panel.
Step2: Scroll to the drop-down menu to see various dimensions (1:1. 4:3, 9:16, 16:9, and 21:9).
Step3: Select the desired ratio and apply.
Modifying aspect ratio in project settings:
This method allows you to preset the ratios before uploading your media. Most files are preset to a 4:3 ratio, but you can adjust as you wish. Note that uploading a video with other aspect ratios will automatically switch to the default one. However, you can change the ratio by clicking on the project settings tab.
Changing aspect ratio when editing:
You can crop your video after importing it to the Filmora panel using the crop and zoom tools.
Step 1: Right-click on the file in the panel.
Step 2: Select crop and zoom.
Step 3: Click on the desired ratio from the suggestions (16:9, 4:3, 1:1, and 9:16) and confirm the action by clicking OK.
You can also modify the aspect ratio manually, add filters, and blur the background to enhance resolution when editing.
Auto reframing:
Latest Filmora running versions like V10.5 have the auto-reframe feature that can help crop aspect ratio seamlessly. The good thing about this feature is that it detects any object and can remove it if need be. Plus, this video editor also comes with preset aspect ratios that conveniently suit different social apps.
You can auto reframe by:
Step 1: Import the video to the panel. Right-click on the file and select the auto-reframe icon.
Step 2: Choose the desired aspect ratio.
Step 3: Click the analyze icon and wait for the results in a preview window.
Step 4: Adjust the frame by dragging the box to balance the object or leave it if you love the results.
Step 5: When done, rename it and click the export feature to save your new file.
Step 6: Edit (add effects) as desired.
Modifying aspect ratio when exporting:
After saving your file, you can export it to your desired media display device and change the aspect ratio based on your platform settings, as discussed above.
Method 2: Final Cut Pro
Apple’s Final Cut Pro is a compelling software for video editing and compositing. The interface is designed similar with many other video editing programs such as Adobe Premiere and Combustion etc.
To prepare:
- Take vertical videos.
- Connect iPhone to an editing system.
- Enter a password on the iPhone.
- Started Final Cut Pro.
- Create a new library, named it “Vertical Video”.
Steps to adjust vertical video size with Final cut pro:
Step 1: To import the video clip, you want to edit, click on the File > Import Media. The connected iPhone screen appears in the top left corner. The circle icon shows that FCP is still collecting data from the phone and the pointing arrow allows to disconnect.
Step 2: When the iPhone is chosen in the sidebar, thumbnails appear at the bottom of the Media Import window. For example, you can see the four vertical video clips, choose one to edit.
Step 3: The iPhone compresses MP4 video. While editing a simple project, you don’t need to generate optimized media. However, optimizing media will save you time in the long run if you plan to add lots of effects.
Step 4: Now, generate a new project and apply the Automatic settings.
Step 5: Next, edit a vertical clip into the empty new project. Even if this isn’t the first clip you want the audience to see, it is essential because FCP uses this clip to configure the project settings.
Step 6: When that first video clip is edited into the timeline, this dialog arrives. Note that the frame size is already fixed by the size of the video you shot on the iPhone. Don’t change any settings. It allows FCP to automatically configure the project to match the specs of this clip. If you’ve done this correctly, your clip appears vertically in the Viewer.
Wondershare Filmora
Get started easily with Filmora’s powerful performance, intuitive interface, and countless effects!
Try It Free Try It Free Try It Free Learn More >
AI Portrait – The best feature of Wondershare Filmora for gameplay editing
The AI Portrait is a new add-on in Wondershare Filmora. It can easily remove video backgrounds without using a green screen or chroma key, allowing you to add borders, glitch effects, pixelated, noise, or segmentation video effects.
Conclusion
As you can tell, video dimensions significantly influence your media resolution and impact. Aspect ratio is the standard way to modify your media to fit YouTube, Instagram, Facebook, and other social apps. Changing dimensions is a DIY process; you can edit YouTube vertical video dimensions and other social apps like Facebook and Instagram through Filmora or Final Cut Pro.
Also read:
- Building Custom Auto Subscribe Hyperlink for Channels
- 2024 Approved Detailed Guide to Dollar Counts A Stepwise Strategy to Track YouTube Earnings
- Transforming Cityscapes Into Sustainable Havens of Life
- YouTube Has Your Back - Shorts Now Showing Up
- 2024 Approved Designing the Ideal YouTube Playlist for You
- Digital Dominance Highest Viewed YouTube Videos Today
- YouTube Shorts Guide What Is It and How To Make Shorts Video?
- [Updated] Channel Charisma Techniques for Amplifying YouTube Visibility
- [New] Essential MP4 Software Elevate Your Mac Productions
- Elevate Your Fitness with These Leading Yoga Vids
- 2024 Approved Direction and Intensity in Video Lighting
- Breaking Free From YouTube The Best 27 Online Video Sites Compared for 2024
- [New] Constructive Communication Leads to More Subscribers
- 2024 Approved Everything You Need to Know About the YouTube Shorts Fund
- 2024 Approved Best Free Downloaders Download YouTube Thumbnail for Free[Online/Win/Mac]
- [New] Choose Your Perfect Wedding Tales - Youtube's Finest 8
- The Art of Video Symbolism 6 Websites Where Creativity Thrives
- Mastering YouTube Thumbnails Essential Dimensions Explored
- 2024 Approved Boost Your View Count Explore These 12 Effective YouTube Strategies
- Boost Your YouTube Earnings with Effective AdSense Use
- Optimal Hash Tags for YouTube Success Story
- In 2024, 7 Insider Tips to Make Money Quickly on YouTube Shorts
- EpicCutter Pro Dynamic PC Video & Melody Assembly for 2024
- Top 10 Casual Gaming YouTube Personalities
- Jumpstart Your Channel’stopwatch-Seeking Viewers with These YouTube SEO Essentials
- Rising From the Void The Top Ten Strategies for Increasing Your YouTube Traffic
- In 2024, Elevate Your Brand - Discover the Riches in Our Gallery of 50 Free YouTube Banners
- [New] Analyzing Video Platforms Vimeo and YouTube
- The Rookie's Guide to YouTube Entrepreneurship and Earnings
- [New] Best Practices for Adding Content Enhancements (Cards)
- Bite-Sized Beatstories Role & Tune Fusion
- [New] Are You Violating Copyright by ScreenRecording YouTube?
- Transforming Viewers Into Livelihood with Right Numbers
- [Updated] In 2024, Eluding Digital Footprints While Enjoying Instagram Stories Online
- In 2024, Hacks to do pokemon go trainer battles For Asus ROG Phone 7 | Dr.fone
- [New] The Next Viral Platform Showdown Can Likes Beat TikTok's Frenzy, In 2024
- Top-Tier Zero-Cost Digital Picture Upscaler
- Updated The Mini Movie Mogul A Step-by-Step Guide for Kids for 2024
- How To Fix OEM Unlock Missing on Samsung Galaxy M14 4G?
- In 2024, Comprehensive Guide to the Top 8 Free Cartoon Sound Effect Downloads
- How To Transfer Data From iPhone 12 Pro To Other iPhone 11 Pro devices? | Dr.fone
- Best Top 5 Featherweight Camcorders for Adventures for 2024
- Connecting Through IG A Guide for Hyperlink Posts
- New In 2024, Your Go-To Guide The 12 Best Audio Converters for Easy Conversion
- Learn How to Use Face Tracking in After Effects to Quickly Mask Out Faces, Animate Objects on Faces, and More
- Video Editing on Android? Here Are the Top 10 iMovie Alternatives
- Title: [Updated] Achieving Profitability at Half a Million Viewers
- Author: Brian
- Created at : 2024-05-25 13:09:00
- Updated at : 2024-05-26 13:09:00
- Link: https://youtube-video-recordings.techidaily.com/updated-achieving-profitability-at-half-a-million-viewers/
- License: This work is licensed under CC BY-NC-SA 4.0.
