
:max_bytes(150000):strip_icc()/GettyImages-880446958-cfc12fc7b7144483a6334a1bf7c8cd62.jpg)
"Unlocking YouTube Simplified Methods for CC and Subtitle Integration"
Unlocking YouTube: Simplified Methods for CC and Subtitle Integration
How to Easily Add Subtitles and Closed Captions to YouTube Video

Richard Bennett
Mar 27, 2024• Proven solutions
In this article, we are going to show you how important it is to add subtitle and closed captions in your YouTube video, and how to add them.
The best video editor for YouTubers - Wondershare Filmora , not only allows you to cut, crop, rotate, reverse videos, but also offers your advanced features like PIP, Green Screen, or audio mixing. What’s more, you can find lots of effects for Fashion, gaming, education, tutorial, sports, etc. Check this article to know more.


Why subtitle and closed captions are important for YouTube videos?
- Forced closed captions and subtitles actually help the viewers to understand the content in your video if the audio quality of your video is bad, muffled or barely audible. Reading makes it easier for them to understand.
- This also helps people with hearing impairments. People with troubled ears can still watch and understand your content.
- It’s a great aid to such videos which have been recorded in other foreign languages that you don’t understand. Hence it will increase the number of viewers all around the world.
- They both are generally added for easy accessibility to the viewers who wish to watch in sound sensitive environments.
So, here we are going to show you two ways to add subtittles to video: directly or uploading caption or transcript files
Adding subtitles and closed captions manually
To add subtitles and closed captions to your YouTube video, fisrt, you should sign in to your YouTube account. On left right below ‘Home’ you will find ‘My Channel’. It will direct you to your personal YouTube page. On the top, right next to your subscribers lays the ‘Video manager’, giving you the list of your uploaded videos.
Select the video and click on edit to get a drop down menu. Click on subtitles and CC. This will take you to the subtitling interface. To the right of video select ‘add new subtitles’ and then ‘create new subtitles’. Select the subtitle language. Play the video to listen to the content and type down in the box. Click on ‘+’ button once you are done.
This will create a subtitle timeline right beneath the video. You can manage by dragging and expanding the subtitle duration according to the audio of the video. The subtitle will appear at the bottom of the video screen. Click ‘publish’ once done.
An interruption might occur with appearing of subtitles in accordance with video. Hence a lot precision is required while doing so.
Uploading Caption or Transcript Files automatically
To upload Caption or Transcript Files to YouTube Videos you first need to create a format on a text editor. For windows use Notepad and for Mac you may use TextEdit. Create a format of putting the number of subtitle first, time stamp and then text of the subtitle. For example
1\
00:02:34:12 using a format of (hour : minute : second : millisecond)
2. *text*
This is the sample text for first subtitle at zero hours, two minutes, thirty four seconds and twelve milliseconds. Once done with this. Go to file, select ‘save as’. Write the file name with an extension of .srt and select ‘All files’ for type of file. Click encoding menu and select UTF-8. Once saved, sign in to your YouTube account.
On left right below ‘Home’ you will find ‘My Channel’. It will direct you to your personal YouTube page. On the top, right next to your subscribers lays the ‘Video manager’, giving you the list of your uploaded videos.
Select the video and click on edit to get a drop down menu. Click on subtitles and CC. Go to ‘add subtitles’ and then ‘upload a file’. A pop-up menu will appear select ‘subtitles file’. Click upload. The file will send subtitles to your video.
This will create a subtitle timeline right beneath the video. You can manage by dragging and expanding the subtitle duration according to the audio of the video. The subtitle will appear at the bottom of the video screen. Click ‘publish’ once done.
3 Best Tools for add/managing video Subtitles/CC
1. Amara
Amara is a smart video editor which helps insert captions and subtitles to videos. It also helps in transcribing the videos. It takes help of crowd sourcing to subtitle any YouTube video. They take help from viewers to subtitle the videos. By making crowd subtitling available for any YouTube creator, they are allowing them to reach more viewers in more languages
2. DIY Captions
DIY captions help you to transcribe the YouTube videos, if not in most accurate manner, then in a little easier way. All you have to do is just paste the URL of the YouTube video and it will provide you all the subtitles. These may not be accurate but will provide you major base material which can be tweaked a bit here and there and is far better than making all the subtitles starting from scratch.
3 Subtitles for YouTube
Subtitles for YouTube is a Google Chrome extension which provides subtitles for YouTube videos. For this you will have to provide a subtitle file with .srt extension. The attractive feature of this is that you won’t have to download the video and still run the subtitles on it. This is very much helpful for people who work on YouTube or watch movies without subtitles.
Richard Bennett
Richard Bennett is a writer and a lover of all things video.
Follow @Richard Bennett
Richard Bennett
Mar 27, 2024• Proven solutions
In this article, we are going to show you how important it is to add subtitle and closed captions in your YouTube video, and how to add them.
The best video editor for YouTubers - Wondershare Filmora , not only allows you to cut, crop, rotate, reverse videos, but also offers your advanced features like PIP, Green Screen, or audio mixing. What’s more, you can find lots of effects for Fashion, gaming, education, tutorial, sports, etc. Check this article to know more.
Why subtitle and closed captions are important for YouTube videos?
- Forced closed captions and subtitles actually help the viewers to understand the content in your video if the audio quality of your video is bad, muffled or barely audible. Reading makes it easier for them to understand.
- This also helps people with hearing impairments. People with troubled ears can still watch and understand your content.
- It’s a great aid to such videos which have been recorded in other foreign languages that you don’t understand. Hence it will increase the number of viewers all around the world.
- They both are generally added for easy accessibility to the viewers who wish to watch in sound sensitive environments.
So, here we are going to show you two ways to add subtittles to video: directly or uploading caption or transcript files
Adding subtitles and closed captions manually
To add subtitles and closed captions to your YouTube video, fisrt, you should sign in to your YouTube account. On left right below ‘Home’ you will find ‘My Channel’. It will direct you to your personal YouTube page. On the top, right next to your subscribers lays the ‘Video manager’, giving you the list of your uploaded videos.
Select the video and click on edit to get a drop down menu. Click on subtitles and CC. This will take you to the subtitling interface. To the right of video select ‘add new subtitles’ and then ‘create new subtitles’. Select the subtitle language. Play the video to listen to the content and type down in the box. Click on ‘+’ button once you are done.
This will create a subtitle timeline right beneath the video. You can manage by dragging and expanding the subtitle duration according to the audio of the video. The subtitle will appear at the bottom of the video screen. Click ‘publish’ once done.
An interruption might occur with appearing of subtitles in accordance with video. Hence a lot precision is required while doing so.
Uploading Caption or Transcript Files automatically
To upload Caption or Transcript Files to YouTube Videos you first need to create a format on a text editor. For windows use Notepad and for Mac you may use TextEdit. Create a format of putting the number of subtitle first, time stamp and then text of the subtitle. For example
1\
00:02:34:12 using a format of (hour : minute : second : millisecond)
2. *text*
This is the sample text for first subtitle at zero hours, two minutes, thirty four seconds and twelve milliseconds. Once done with this. Go to file, select ‘save as’. Write the file name with an extension of .srt and select ‘All files’ for type of file. Click encoding menu and select UTF-8. Once saved, sign in to your YouTube account.
On left right below ‘Home’ you will find ‘My Channel’. It will direct you to your personal YouTube page. On the top, right next to your subscribers lays the ‘Video manager’, giving you the list of your uploaded videos.
Select the video and click on edit to get a drop down menu. Click on subtitles and CC. Go to ‘add subtitles’ and then ‘upload a file’. A pop-up menu will appear select ‘subtitles file’. Click upload. The file will send subtitles to your video.
This will create a subtitle timeline right beneath the video. You can manage by dragging and expanding the subtitle duration according to the audio of the video. The subtitle will appear at the bottom of the video screen. Click ‘publish’ once done.
3 Best Tools for add/managing video Subtitles/CC
1. Amara
Amara is a smart video editor which helps insert captions and subtitles to videos. It also helps in transcribing the videos. It takes help of crowd sourcing to subtitle any YouTube video. They take help from viewers to subtitle the videos. By making crowd subtitling available for any YouTube creator, they are allowing them to reach more viewers in more languages
2. DIY Captions
DIY captions help you to transcribe the YouTube videos, if not in most accurate manner, then in a little easier way. All you have to do is just paste the URL of the YouTube video and it will provide you all the subtitles. These may not be accurate but will provide you major base material which can be tweaked a bit here and there and is far better than making all the subtitles starting from scratch.
3 Subtitles for YouTube
Subtitles for YouTube is a Google Chrome extension which provides subtitles for YouTube videos. For this you will have to provide a subtitle file with .srt extension. The attractive feature of this is that you won’t have to download the video and still run the subtitles on it. This is very much helpful for people who work on YouTube or watch movies without subtitles.
Richard Bennett
Richard Bennett is a writer and a lover of all things video.
Follow @Richard Bennett
Top 8 Mirrorless Cameras Ideal for Vloggers
8 Best Mirrorless Cameras Vloggers Should Know
Richard Bennett
Nov 01, 2022• Proven solutions
Mirrorless cameras are great for vloggers wanting a powerful camera without the weight and size of a DSLR camera. As mirrorless cameras are becoming better with all the advancements in camera technology, more and more DSLR camera vloggers are switching over to vlogging with a mirrorless camera. Below is our list and review of the eight best mirrorless cameras for vlogging.
WHAT TO LOOK FOR IN A VLOGGING CAMERA
1. Fully articulated screen (flip screen)
2. Good continual autofocus while recording video
3. Good focus priority through face recognition
4. Touch to focus
5. Good low-light performance
6. external mic jack, hot/cold shoe bracket
7. optical image stabilization
8. good battery life
Check out my full list of 10 Things To Look For In A Vlogging Camera to understand the importance of these camera features.
THE 8 BEST MIRRORLESS CAMERAS FOR VLOGGING (2018)
| Camera | Release Date | Sensor Size | Flip Screen | Mic Port | Price | |
|---|---|---|---|---|---|---|
| CanonEOSM50 | 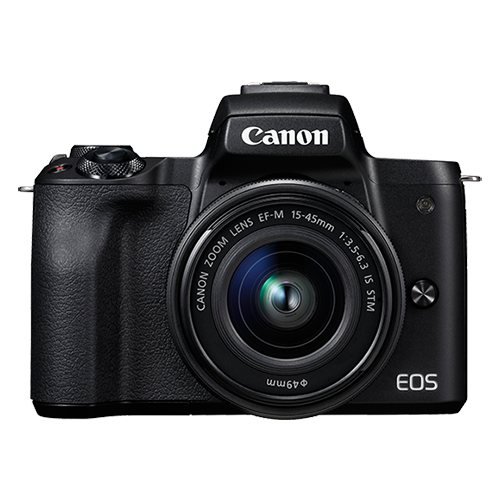 |
February2018 | APS-C(22.3 x 14.9 mm) | Fully Articulated | Yes | $- |
| PanasonicLumixDC-GH5S | 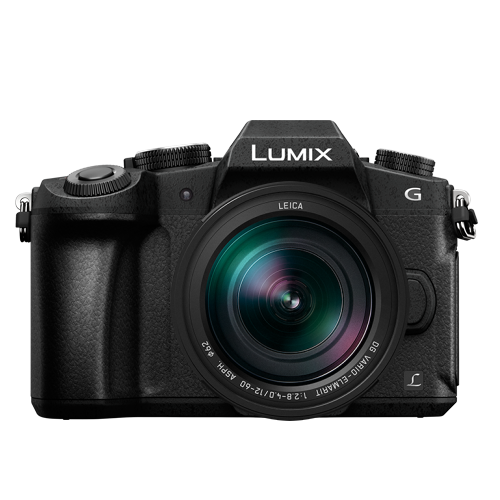 |
January2018 | Four Thirds(19.2 x 13 mm) | Fully Articulated | Yes | $$$ |
| SonyAlphaa7R III | 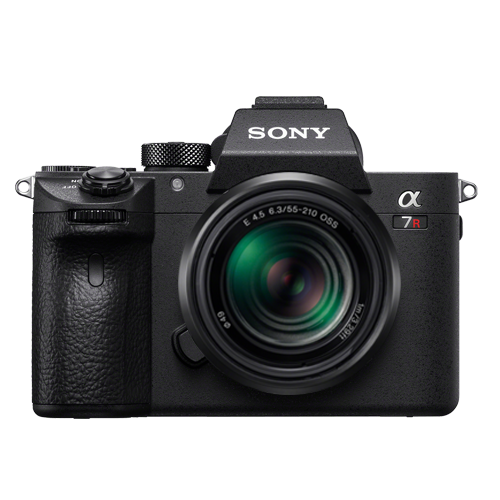 |
October2017 | Full Frame(35.9 x 24 mm) | Tilting | Yes | $$$ |
| CanonEOSM100 | 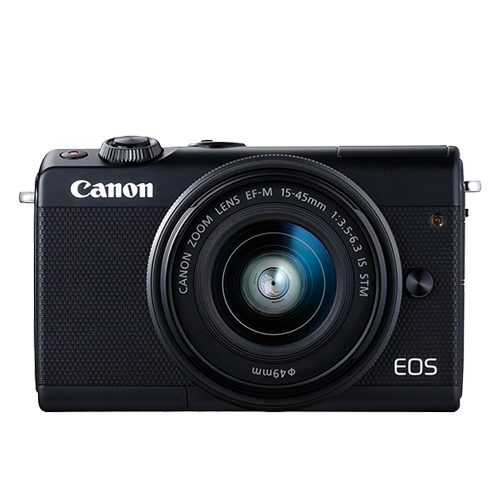 |
August2017 | APS-C(22.3 x 14.9 mm) | Flip Up | No | $ |
| CanonEOSM6 | 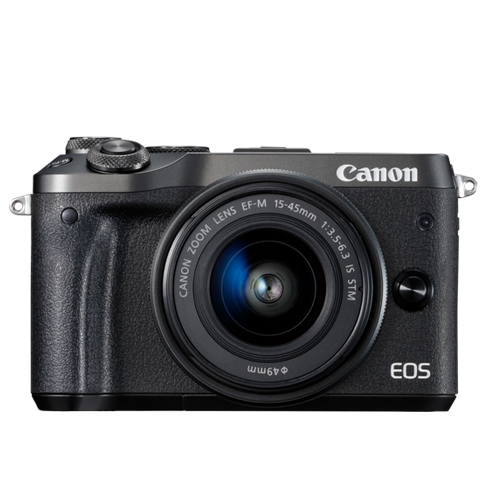 |
February2017 | APS-C(22.3 x 14.9 mm) | Flip Up | Yes | $- |
| SonyAlphaa6500 | 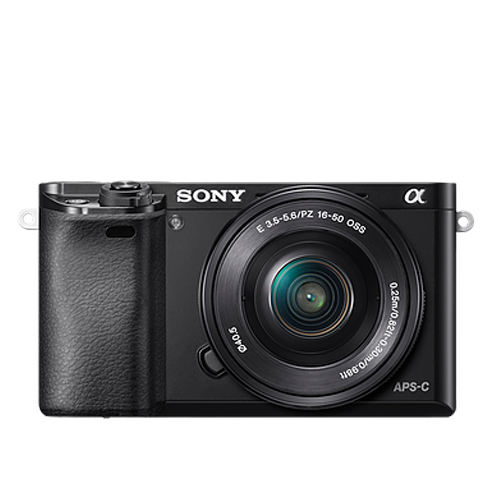 |
October2016 | APS-C(23.5 x 15.6 mm) | Tilting | Yes | $$- |
| PanasonicLumixDMC-G85 | 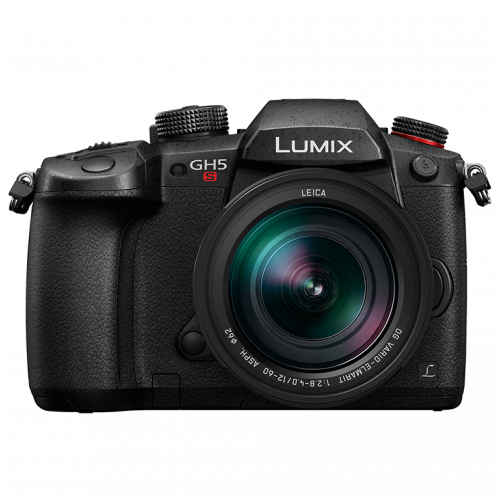 |
September2016 | Four Thirds(17.3 x 13 mm) | Fully Articulated | Yes | $- |
| PanasonicLumixDMC-G7 | 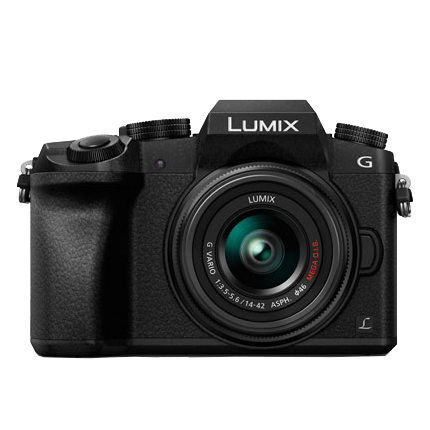 |
May2015 | Four Thirds(17.3 x 13 mm) | Fully Articulated | Yes | $ |
|
Best daily mirrorless camera for vlogging: Canon EOS M50 The Canon EOS M50 is Canon’s first mirrorless camera that comes equipped with both a fully-articulated screen and an external microphone jack. It came out only a few months ago and is already considered one of the best mirrorless cameras for vlogging. The M50 is also the only camera on our list that you can buy at a prosumer’s budget that shoots 4K video. Yes, the Sony a7R III and Panasonic GH5S also shoot 4K video, but they are much more expensive. With Canon’s new DIGIC 8 Image Processor, the camera’s dual-pixel autofocusing system will perform even better. PROS - Can shoot UHD 4K videos at 23.98 fps - Has a 2.36m-dot OLED electronic viewfinder CONS - No image stabilization - Battery life could be longer |
|---|---|
|
Best entry-level mirrorless camera for vlogging: Canon EOS M100 The Canon EOS M100 is a small, but powerful mirrorless camera for vlogging. This camera can shoot full HD 1080p videos at 60 fps. It cannot shoot 4K video, unfortunately. It uses its DIGIC 7 Image Processor and dual-pixel autofocusing system to ensure that your vlogs are always in focus. The M100 provides great ISO sensitivity options - it can reach up to ISO 25600. With its built-in Wi-Fi with NFC, you can transfer your media seamlessly to a computer. PROS - Affordable - Great connectivity options CONS - Lacks advanced video recording features - No viewfinder |
|
Best mid-range mirrorless camera for vlogging: Canon EOS M50 The Canon EOS M50 wins this category as well in our books. It is the only camera on our list that shoots 4K video that is priced much lower than the Sony a7R III and the Panasonic GH7S. In case you missed it, check out my review on the Canon EOS M50. |
|
Best professional mirrorless camera for vlogging: Panasonic Lumix DC-GH5S Originally, Panasonic had released it’s GH5 as a hybrid camera that handles both photography and videography well. In response to hearing customers’ interest in a more video-focused camera, Panasonic came up with the GH5S. In our list of the top mirrorless cameras, the Panasonic GH5S and the Sony a7R III are the two professional mirrorless cameras that can record 4K video. Between the two, though, the GH5S wins as the best professional mirrorless camera for vlogging because it sports a fully-articulated screen. Its micro four-thirds sensor is smaller than the a7R III’s full-frame sensor. Even with a smaller sensor, though, the GH5S is made to still autofocus well in low lighting conditions. Another amazing feature is its ability to record 240 fps slow-motion video at full HD 1080p. PROS - ISO sensitivity goes up to 204800 - High video bit rates CONS - Expensive - The camera body weighs about 1.5 lbs |
Want to compare even more cameras? Check out…
12 Best Vlogging Cameras (2018)
Top 11 Cheap Vlogging Cameras (2018)
7 Best DSLR Cameras For Vlogging (2018)
12 Best Vlogging Cameras With A Flip Screen (2018)
Richard Bennett
Richard Bennett is a writer and a lover of all things video.
Follow @Richard Bennett
Richard Bennett
Nov 01, 2022• Proven solutions
Mirrorless cameras are great for vloggers wanting a powerful camera without the weight and size of a DSLR camera. As mirrorless cameras are becoming better with all the advancements in camera technology, more and more DSLR camera vloggers are switching over to vlogging with a mirrorless camera. Below is our list and review of the eight best mirrorless cameras for vlogging.
WHAT TO LOOK FOR IN A VLOGGING CAMERA
1. Fully articulated screen (flip screen)
2. Good continual autofocus while recording video
3. Good focus priority through face recognition
4. Touch to focus
5. Good low-light performance
6. external mic jack, hot/cold shoe bracket
7. optical image stabilization
8. good battery life
Check out my full list of 10 Things To Look For In A Vlogging Camera to understand the importance of these camera features.
THE 8 BEST MIRRORLESS CAMERAS FOR VLOGGING (2018)
| Camera | Release Date | Sensor Size | Flip Screen | Mic Port | Price | |
|---|---|---|---|---|---|---|
| CanonEOSM50 | |
February2018 | APS-C(22.3 x 14.9 mm) | Fully Articulated | Yes | $- |
| PanasonicLumixDC-GH5S | |
January2018 | Four Thirds(19.2 x 13 mm) | Fully Articulated | Yes | $$$ |
| SonyAlphaa7R III | |
October2017 | Full Frame(35.9 x 24 mm) | Tilting | Yes | $$$ |
| CanonEOSM100 | |
August2017 | APS-C(22.3 x 14.9 mm) | Flip Up | No | $ |
| CanonEOSM6 | |
February2017 | APS-C(22.3 x 14.9 mm) | Flip Up | Yes | $- |
| SonyAlphaa6500 | |
October2016 | APS-C(23.5 x 15.6 mm) | Tilting | Yes | $$- |
| PanasonicLumixDMC-G85 | |
September2016 | Four Thirds(17.3 x 13 mm) | Fully Articulated | Yes | $- |
| PanasonicLumixDMC-G7 | |
May2015 | Four Thirds(17.3 x 13 mm) | Fully Articulated | Yes | $ |
|
Best daily mirrorless camera for vlogging: Canon EOS M50 The Canon EOS M50 is Canon’s first mirrorless camera that comes equipped with both a fully-articulated screen and an external microphone jack. It came out only a few months ago and is already considered one of the best mirrorless cameras for vlogging. The M50 is also the only camera on our list that you can buy at a prosumer’s budget that shoots 4K video. Yes, the Sony a7R III and Panasonic GH5S also shoot 4K video, but they are much more expensive. With Canon’s new DIGIC 8 Image Processor, the camera’s dual-pixel autofocusing system will perform even better. PROS - Can shoot UHD 4K videos at 23.98 fps - Has a 2.36m-dot OLED electronic viewfinder CONS - No image stabilization - Battery life could be longer |
|---|---|
|
Best entry-level mirrorless camera for vlogging: Canon EOS M100 The Canon EOS M100 is a small, but powerful mirrorless camera for vlogging. This camera can shoot full HD 1080p videos at 60 fps. It cannot shoot 4K video, unfortunately. It uses its DIGIC 7 Image Processor and dual-pixel autofocusing system to ensure that your vlogs are always in focus. The M100 provides great ISO sensitivity options - it can reach up to ISO 25600. With its built-in Wi-Fi with NFC, you can transfer your media seamlessly to a computer. PROS - Affordable - Great connectivity options CONS - Lacks advanced video recording features - No viewfinder |
|
Best mid-range mirrorless camera for vlogging: Canon EOS M50 The Canon EOS M50 wins this category as well in our books. It is the only camera on our list that shoots 4K video that is priced much lower than the Sony a7R III and the Panasonic GH7S. In case you missed it, check out my review on the Canon EOS M50. |
|
Best professional mirrorless camera for vlogging: Panasonic Lumix DC-GH5S Originally, Panasonic had released it’s GH5 as a hybrid camera that handles both photography and videography well. In response to hearing customers’ interest in a more video-focused camera, Panasonic came up with the GH5S. In our list of the top mirrorless cameras, the Panasonic GH5S and the Sony a7R III are the two professional mirrorless cameras that can record 4K video. Between the two, though, the GH5S wins as the best professional mirrorless camera for vlogging because it sports a fully-articulated screen. Its micro four-thirds sensor is smaller than the a7R III’s full-frame sensor. Even with a smaller sensor, though, the GH5S is made to still autofocus well in low lighting conditions. Another amazing feature is its ability to record 240 fps slow-motion video at full HD 1080p. PROS - ISO sensitivity goes up to 204800 - High video bit rates CONS - Expensive - The camera body weighs about 1.5 lbs |
Want to compare even more cameras? Check out…
12 Best Vlogging Cameras (2018)
Top 11 Cheap Vlogging Cameras (2018)
7 Best DSLR Cameras For Vlogging (2018)
12 Best Vlogging Cameras With A Flip Screen (2018)
Richard Bennett
Richard Bennett is a writer and a lover of all things video.
Follow @Richard Bennett
Also read:
- 2024 Approved Elevate Your YouTube Presence with Simple SEO Techniques
- In 2024, A Roadmap for Monetization Success on YouTube via AdSense
- 2024 Approved Discovering the Potential Apple Devices on Your YouTube Channel
- __Local Labor Costs__ The Availability and Rates of Skilled Electricians in the Area Can Affect Labor Costs Significantly
- [Updated] Elite Content Makers Top Paid Online Stars
- In 2024, Battle Royale Queens Top 10 Female YouTubers
- 2024 Approved 14- YouTube AdSense Earnings How Much Does AdSense Pay per 1,000 Views
- Converting Twitch Livestreams for YouTube Success
- [New] Amplifying Your YouTube Presence Through Consistent Content Release
- Playlist on a Page Embedding YT Videos Online
- [New] Elevate Your Game 14 Must-See Vids for YouTube Gaming Success
- In 2024, Decoding YouTube's Intricate View Count Mechanics
- A Step-by-Step Guide on Applying CC Rights Effectively
- [New] 20+ Hashes to Skyrocket Your Short Film's Popularity
- Mastering YouTube Dimensions A Comprehensive Guide
- Designing Distinctive Denouements
- [New] 8 Unbeatable Zero-Price Software Choices For Online Media Makers
- Charting Success Navigating a 3-Step Strategy for Tracking YouTube Income
- 2024 Approved Deciphering the Divergent Aspects of YouTubes & DailyMentions
- [Updated] Cutting Edge Top 8 Free Online Video Tools
- [New] Are You Sure About Using Subforsub to Grow Your YouTube Audience?
- In 2024, Crafting a Content Schedule The Path to Gaining Traction on YouTube
- Fostering Resilience in the Face of Cyber Haters
- In 2024, Empowering Audiences The Playlist Sharing Approach
- In 2024, Discovering the Speedy Scaling Channels Among YouTube Titans
- The Ultimate SEO Playbook Increase Channels with Effortless Techniques
- How To Acquire Standardized Thumbnails From Youtube Online & Desktop Options
- In 2024, Behind-the-Camera Glory Spotlight on Top 10 Female YouTubers
- [Updated] Decoding YouTube's Thumbnail Impact on Traffic
- Free, Easy-to-Use Online Editors for Quick Postings
- Strategic Use of Hashtags in Gaming Vlog Production
- Love in Motion Discovering YouTube & Vimeo's Top 7 Wedding Films
- [New] Engage Audiences on All Sides Live 360-Degree Video Broadcasting for YouTube
- Mastering YouTube Video Edits The Ultimate Step-by-Step Guide
- Initiate Internet Income Low-Cost YouTube Channel Buys
- [New] The Social Media Sensations Most Liked & Watched Amazon Originals
- 9 Quick Fixes to Unfortunately TouchWiz has stopped Of OnePlus 11R | Dr.fone
- [New] Prime Acoustic Collectors at Schools for 2024
- [Updated] In 2024, The IG Boom Technique How to Amass a Massive Follower Count Quickly
- 2024 Approved Harnessing the Power of MOV Recording in Windows 10
- Downloading SamFw FRP Tool 3.0 for Nokia G42 5G
- How to Reset a Locked OnePlus Open Phone
- [New] Webcam Innovations for Enhanced Connectivity
- How to Flash Dead Lava Blaze Pro 5G Safely | Dr.fone
- Why Is My Xiaomi Redmi 13C 5G Offline? Troubleshooting Guide | Dr.fone
- [New] In 2024, Smartphones & Tablets Leading GB Gameplayers
- 2024 Approved 5 Must-Have Linux Audio Capture Utilities and Advanced Strategies for High-Quality Recordings
- [Updated] Snap-Back on TikTok After Accidental Loadout
- In 2024, Forgot iPhone Passcode Again? Unlock Apple iPhone 6s Plus Without Passcode Now
- New 2024 Approved Free Movie Making Magic Top 16 Picks
- In 2024, The Magnificent Art of Pokemon Go Streaming On Samsung Galaxy M54 5G? | Dr.fone
- How to Come up With the Best Pokemon Team On Infinix Hot 30 5G? | Dr.fone
- Latest Guide How To Bypass Nokia C22 FRP Without Computer
- Best iPhone/iPad Apps to Enjoy Your Favorite PSP Games
- Exclusive Endorsements Premier Portals for Procuring SnapAlert Rhythms
- 2024 Approved From Concept to Capture The Breakdown of Apeak's Recorder Software
- New How to Make Foggy Text Reflection Effect
- [Updated] In 2024, Free Vimeo Tutorial to Craft Engaging Videos
- [Updated] 2024 Approved Maximizing Social Interaction with Innovative FB Slideshow Techniques
- [New] 2024 Approved Secrets Unveiled Top Five Mac Techniques for Capturing Gameplay
- [Updated] Inaugural Vision Preservation Review & Alternate Suggestions
- 8 Quick Fixes Unfortunately, Snapchat has Stopped on Realme 10T 5G | Dr.fone
- [Updated] In 2024, Smooth Operator’s Guide to Capturing Mac Lectures
- In 2024, Break Free From the Ordinary Top Tinder Profiles that Hook Readers
- In 2024, How to Reset a Samsung Galaxy A14 5G Phone that is Locked?
- How Oppo A2 Mirror Screen to PC? | Dr.fone
- Guide to Mirror Your Honor V Purse to Other Android devices | Dr.fone
- [Updated] 2024 Approved Logitech Webcam Filming Tips for Clear Visuals and Smooth Sessions
- [Updated] In 2024, Simplify Your Tech Life Capture and Store YouTube Streaming Effortlessly
- Title: "Unlocking YouTube Simplified Methods for CC and Subtitle Integration"
- Author: Brian
- Created at : 2024-05-25 13:05:54
- Updated at : 2024-05-26 13:05:54
- Link: https://youtube-video-recordings.techidaily.com/unlocking-youtube-simplified-methods-for-cc-and-subtitle-integration/
- License: This work is licensed under CC BY-NC-SA 4.0.
