
:max_bytes(150000):strip_icc()/SoftwareandApps_GettyImages-1318174723_OscarWong_CROPPED-0f8969cb51804bae823c37f02a6cd3e8.jpg)
Ultimate Sound Selection for Social Media Stars
Ultimate Sound Selection for Social Media Stars
Best Microphone for YouTubers

Richard Bennett
Mar 27, 2024• Proven solutions
If you want your viewers to be glued to their screens then quality audio is just as important as quality video for your YouTube channel. People will watch your vlog because they want to hear what you are saying. It can be tempting to use the audio your camera records rather than buy a separate microphone. Unfortunately, the microphones built into most cameras will only record mediocre audio. In this case, we have researched and found out the following best microphones for YouTube videos based on its price and performance. Besides, we will also highlight the best microphones for different recording scenarios. Whether you’re making gaming videos or recording yourself singing, or filming inside or outside, you will get to know which one is best for your situation. Let’s check out now.
- Best Microphones for YouTube Videos
- Best Microphones for Different Types of YouTube Creators
- Tips for Recording YouTube Audio
- How to Sync your Audio in Filmora
Part 1: Best Microphones for YouTube Videos [Best for All]
Here are examples of some of the best external microphones for YouTube:
1. Blue Snowball USB Mic - $60
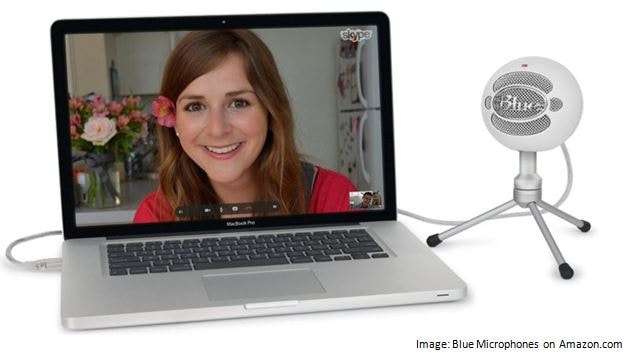
The Snowball is especially good for vlogging from your webcam because it is easy to hook up to your computer using a USB port. It will record your audio simultaneously while you are using your webcam. The biggest drawback of the Snowball is that it needs to be close to you while your record. This combined with its larger size means that it will probably need to be in your shot.
2. RØDE Video Shotgun Mic - $140
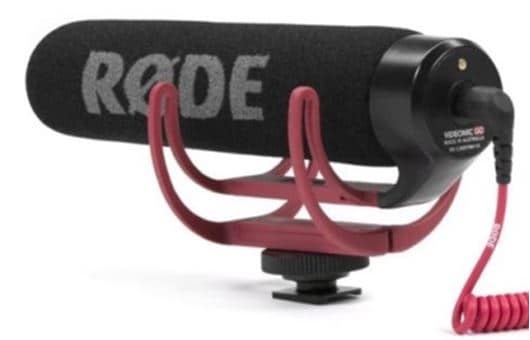
The Shotgun attaches to your DSLR camera and is great for capturing specific sounds, like dialogue, without a lot of background noise. To work well it needs to be pointing at the person who is speaking, and it should be fairly close to them as well. This means that the camera cannot be too far back from you while you vlog.
3. Audio-Technica AT875R Line + Gradient Condenser Microphone - $240
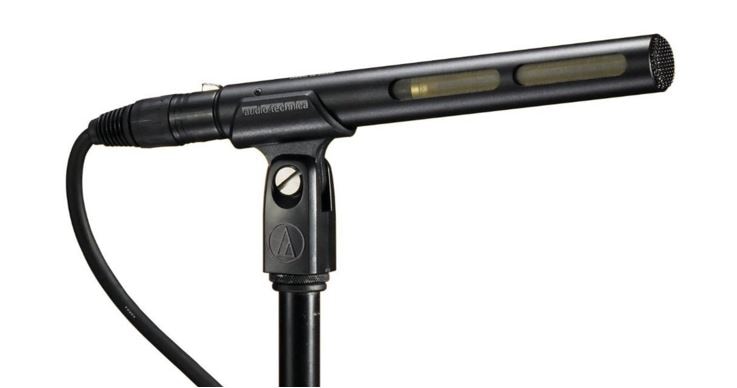
This microphone is similar to the ones you think of being mounted on boom poles on professional sets, and it can easily be mounted onto a pole and used the same way. This gradient condenser mic is good at picking up sound at a distance, and at only picking up sound coming from directly in front of it. If you are working alone then you can set this mic up on a stand so it is pointing at you, or if you have a friend to help you you can ask them to hold it on a boom pole.
4. Sony LAV Wireless Mic System - $600
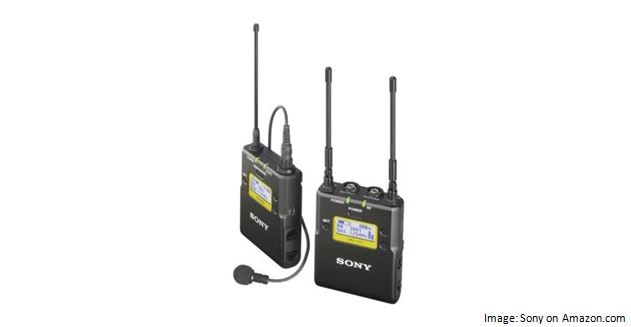
A LAV Mic, also called a lavalier or lapel mic, is a small microphone which can be clipped onto clothing. Wearing a LAV Mic while you vlog will allow you to move around freely and still capture great audio, rather than being stuck in range of a stationary mic. There are both wired and wireless options available in LAV Mics.
5. Roland R-05 WAVE/MP3 Recorder - $200
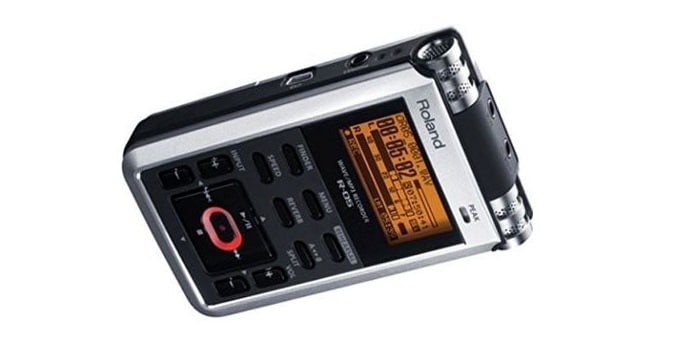
The R-05 is a pocket recorder that captures flawless audio. Its small size means you can hide it in your pocket and it will not show up in your video. Also, since it does not need to hook up to your camera or computer you will have freedom of movement.
Part 2: Best Microphones for All Types of YouTube Creators
If you have to invest in a new piece of equipment for your YouTube channel, consider upgrading your microphones. Your viewers can forgive your grainy video footage, poor lighting, and unsteady camera handling, but if your audio sounds like you’re speaking across the road on a busy highway, all your hard work will be wasted, because nobody will want to watch it.
But the thing about microphones is that they are not all created equal. Depending on the type of videos you’re filming and the environment where you’re recording, the capabilities of the microphone will differ.
1. Best Microphone for Live Streamers and Gamers
Blue Yeti USB - $150
As a live streamer, gamer, or vlogger such as beauty or lifestyle, you’ll want a balance of easy setup and high-quality audio. The Blue Yeti USB delivers on that.
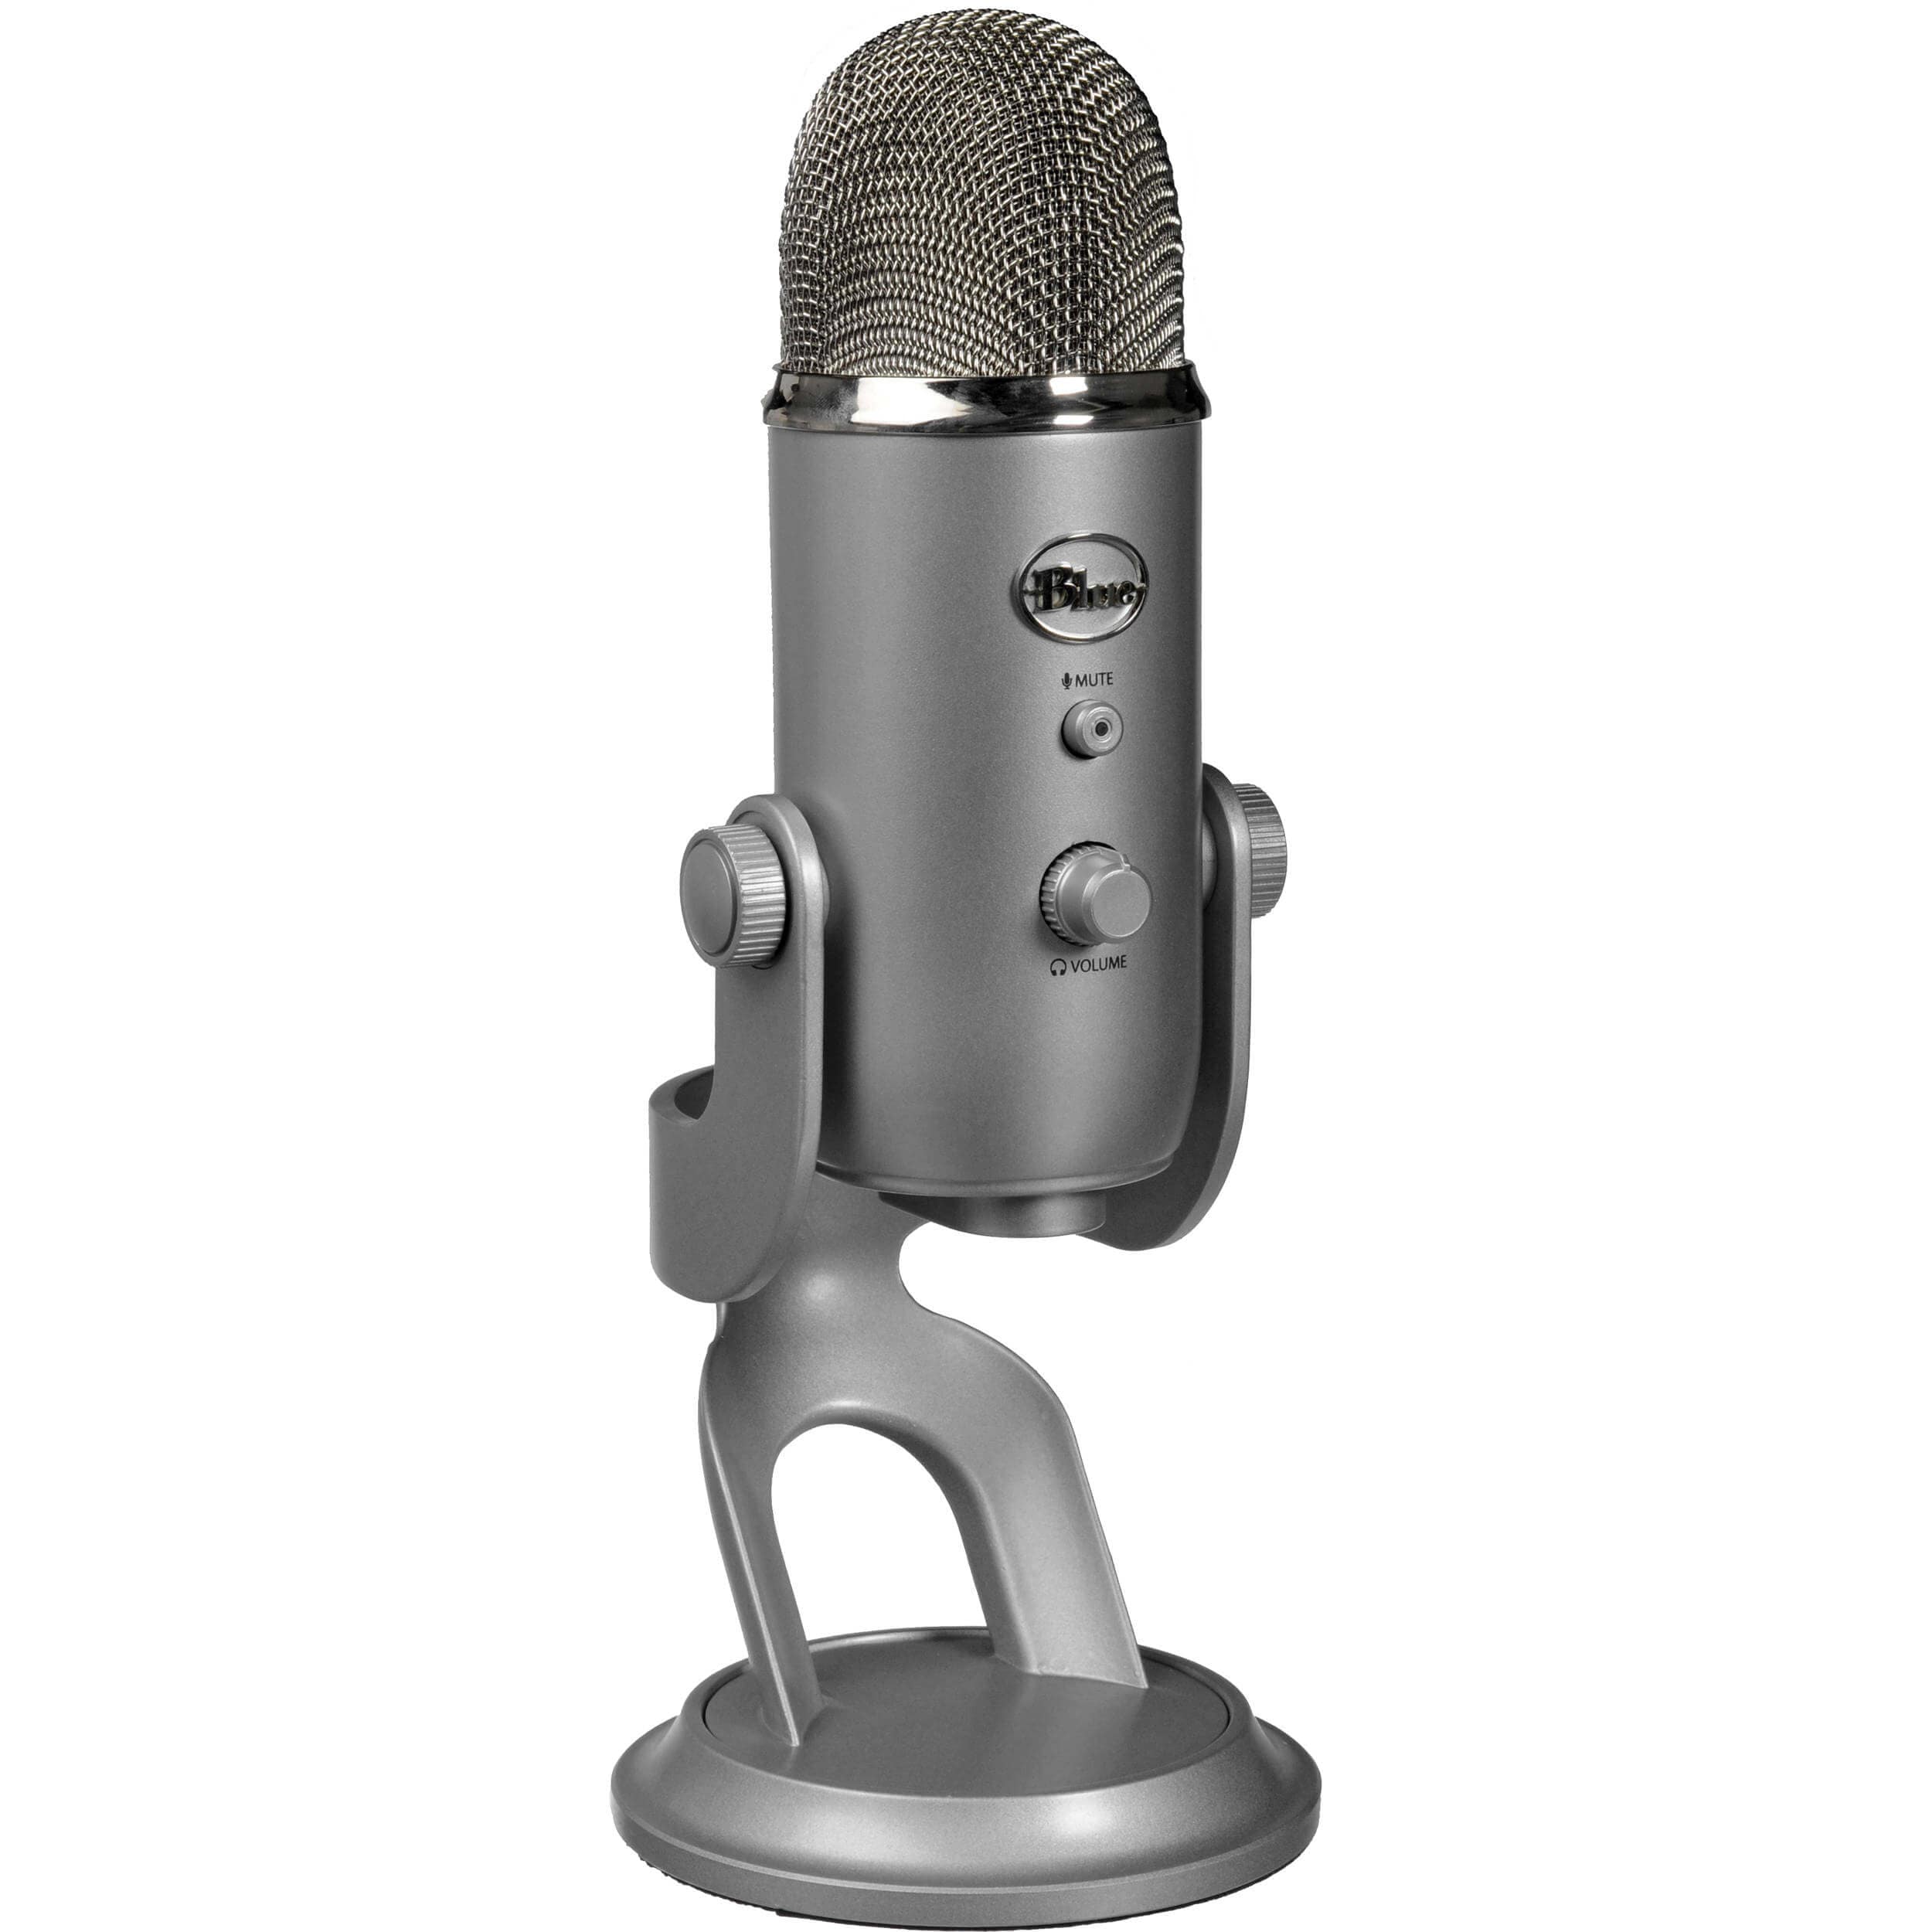
It’s the closest budget microphone to a professional studio mic on the market, and it feels that way when you hold its solid metal frame for the first time. Connecting directly to your computer via USB, the Blue Yeti comes with a 6-feet long USB cable. Out of the box, it sits upon a sturdy stand, which can be removed and the mic can be threaded a shock mount.
The Blue Yeti can pick up audio in four different polar patterns: cardioid, bidirectional, omnidirectional, and stereo. This makes it incredibly versatile, but if you are streaming, I recommend keeping it on cardioid.
Tip: In cardioid mode, speak into the front of the mic, not the top of it.
2. Best Microphones for Outdoor Locations
Rode VideoMic Pro Compact VMP Shotgun Microphone - $268
When you are filming outside, you are dealing with audio from all different directions: distant traffic, a gust of wind, the neighbor’s kids, etc.
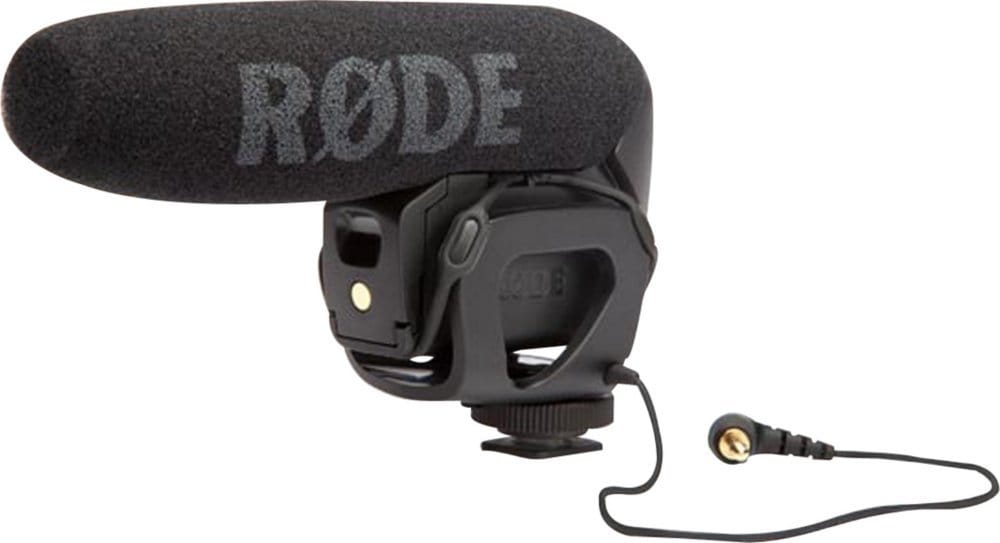
That’s why a shotgun mic is better than an omnidirectional one for outdoor situations. Shotgun microphones, such as the Rode VideoMic Pro, picks up audio only in the direction it’s pointing in. You can aim it at your subject and it will give you clear audio without a lot of background noises.
The Rode VideoMic Pro comes with a mount that attaches on top of your camera, if you are filming outdoors. So if you are holding the camera and vlogging, then the audio will be great. However, if you want to take advantage of the space, and set the camera further away, you should attach the mic on a boom or a stand to get the best audio.
Tip: With Rode VideoMic Pro, and any mic you use to shoot outdoors, always do a sound check to make sure the quality is up to standard. Ten seconds of your subject talking at the level they will be speaking in will be enough to judge the sound quality.
3. Best Microphone for Music (Vocals)
Audio-Technica AT2035 - $163
If you are a serious musician on YouTube, then you will need a serious microphone like the Audio-Technica AT2035. This microphone connects via an XLR cable and requires phantom power, so you will need to invest in an audio interface, if you don’t already have one.
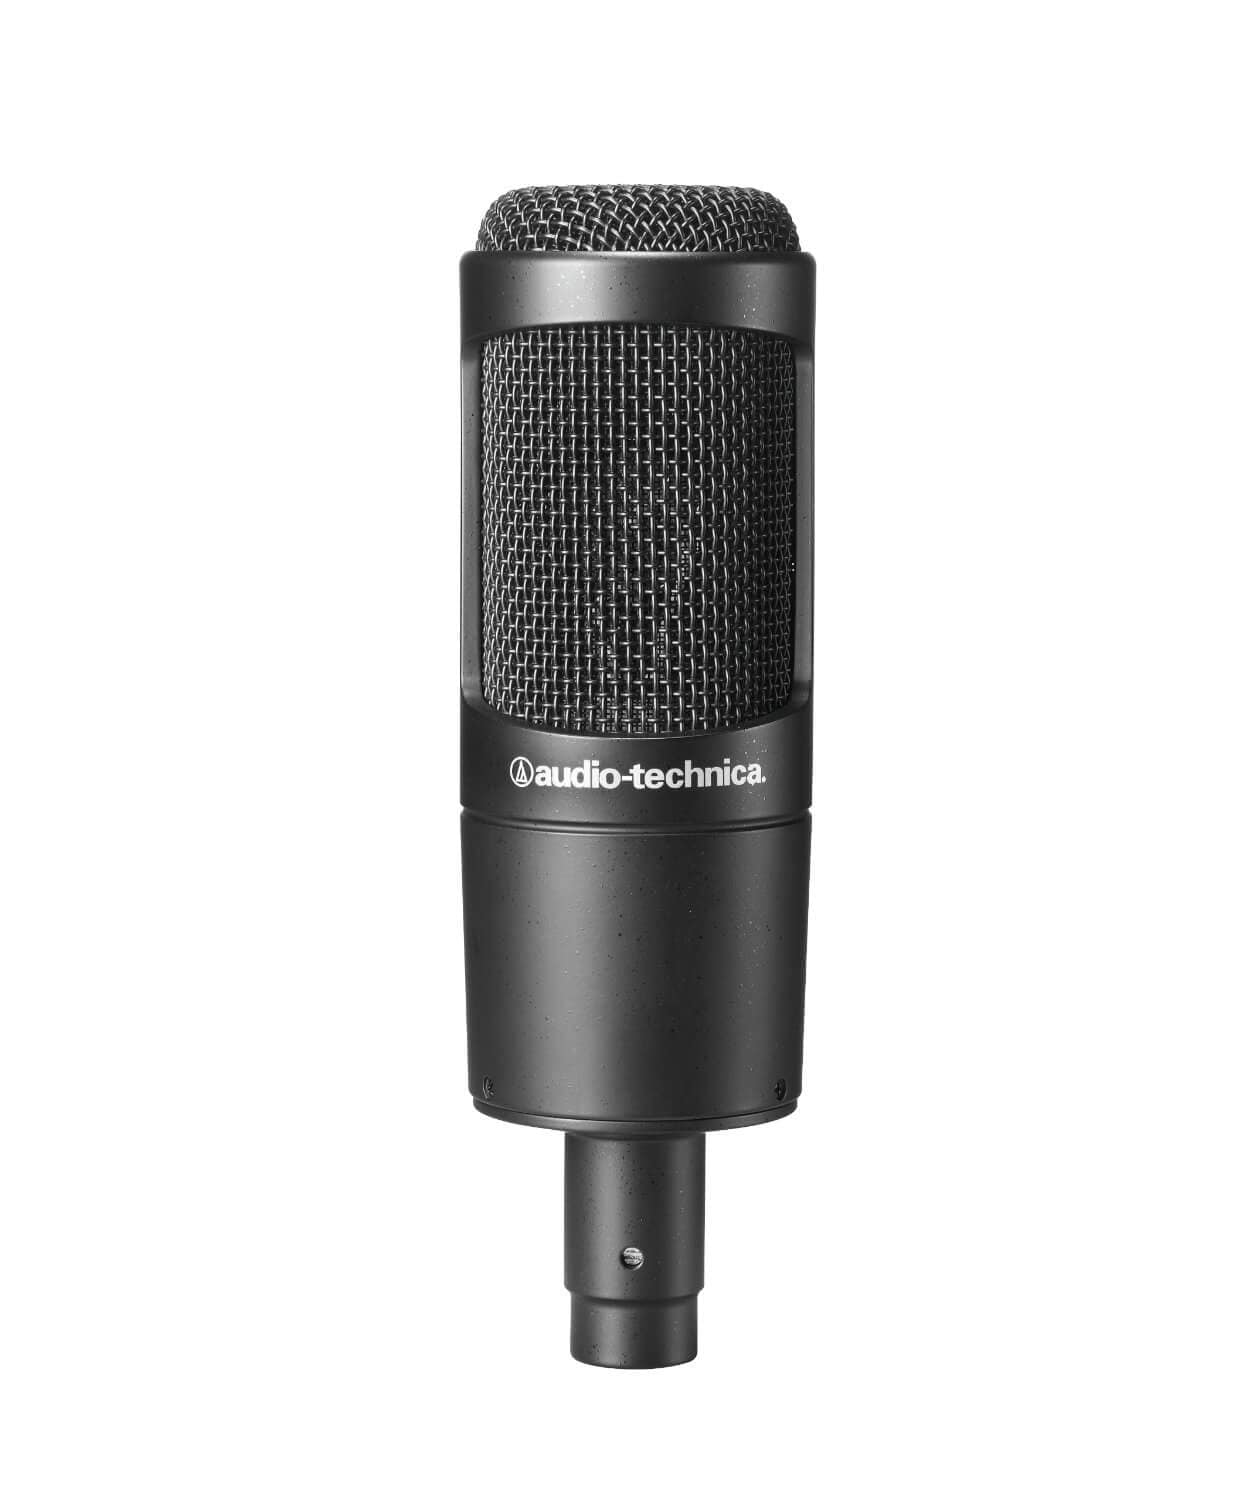
Nevertheless, this microphone does a fantastic job isolating the source of sound and eliminating background noise. Even if you’re recording in your bedroom, and not a professional studio, you’ll still get high quality vocals from this microphone.
Tip : Position yourself 8-12 inches away from the mic when singing. This allows your voice to sound more natural (too close and it’ll sound bassy) and it prevents the audio volume from fluctuating too dramatically as you move around or sing loudly one part and quietly at another.
4. Best Microphone for Voice Over
Rode NTK Tube Condenser Microphone - $529
The Rode NTK Tube is arguably one of the best microphone for its price. You can spend a thousand dollars and get a professional studio microphone, but you can’t do much better than the Rode NTK.
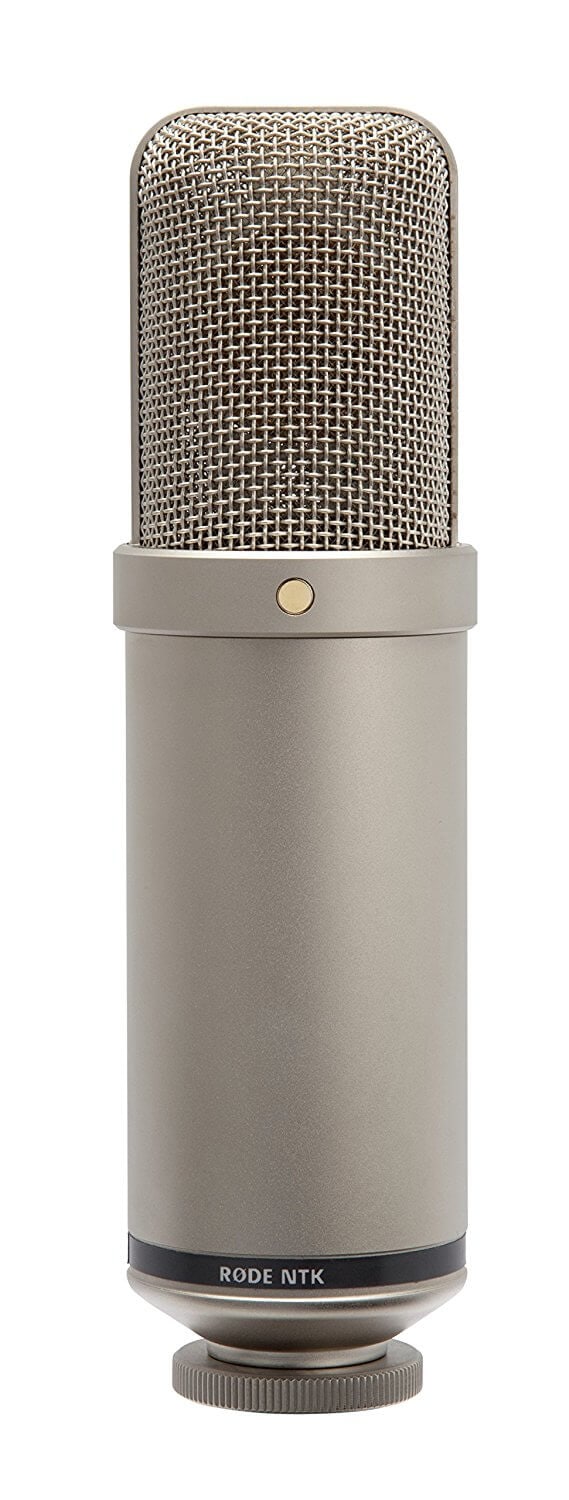
If you’re recording out of a studio environment, whether it’s a professional, semi-professional, or a closet with soft padded walls, the Rode NTK will give warmth and richness to every word you speak, while still offering crispness. Allow it to warm up for a few minutes before you start recording, and you’ll have awesome audio for your voice over.
This mic is great for YouTubers who are creating video essays, ADR, animated videos, or other videos that require top quality narrations.
Tip: Make sure you have a mic stand that you can raise to your standing height. Standing while recording voice over allows you diaphragm to open up, which will improve the quality of your voice.
5. Best Microphone for Big Echoey Space
Sennheiser MD 421 II Cardioid Dynamic Mic - $449
Commonly used to record isolated percussions or brass instruments, the Sennheiser MD 421 II is also wonderful if you need to record vocals in a large room. As a versatile dynamic mic, it doesn’t allow background noises or reverberations to bleed into the source vocal.
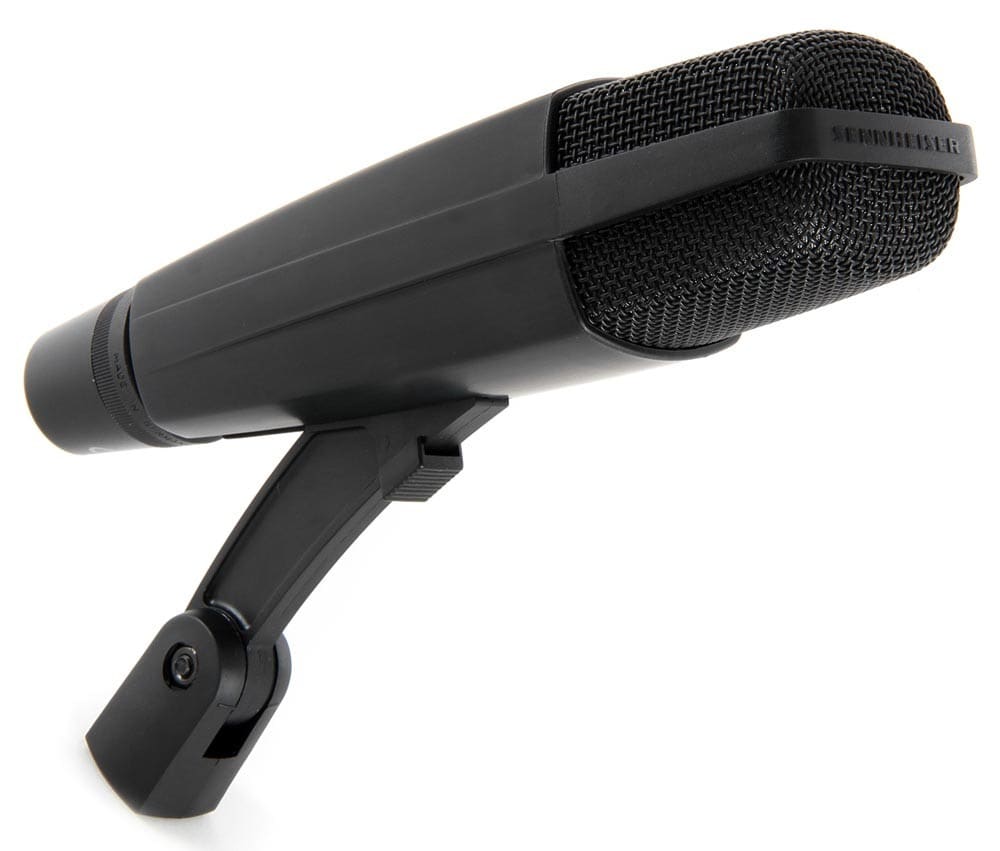
The Sennheiser MD 421 II has a rugged design as it’s built for live situations, such as concerts. This is a great microphone to have in your arsenal, should you end up recording in a large venue such as a conference or an arena.
If you are a YouTuber who makes a lot of video in warehouses, workshops, or rehearsal halls, then you should consider investing in a Sennheiser MD 421 II to get the most out of these acoustically complicated locations.
Tip : Sometimes audio in a loud, big environment can’t be saved by the best microphone. If that’s the case, film the source of the background noise. Get b-roll of people walking around, machinery operating, or whatever challenging sound you are dealing with in the large space. Cutting to these noise makers will give the audience a reference for the background noise, which helps conceal it.
6. Best Handheld Microphone for Interviews
Zoom ZH1 H1 Handy Portable Digital Recorder - $68.99
This unidirectional microphone delivers clear and crisp audio. Compact, portable, and lightweight, the Zoom ZH1 H1 is a terrific choice for YouTubers who are looking for a handheld option for a microphone.
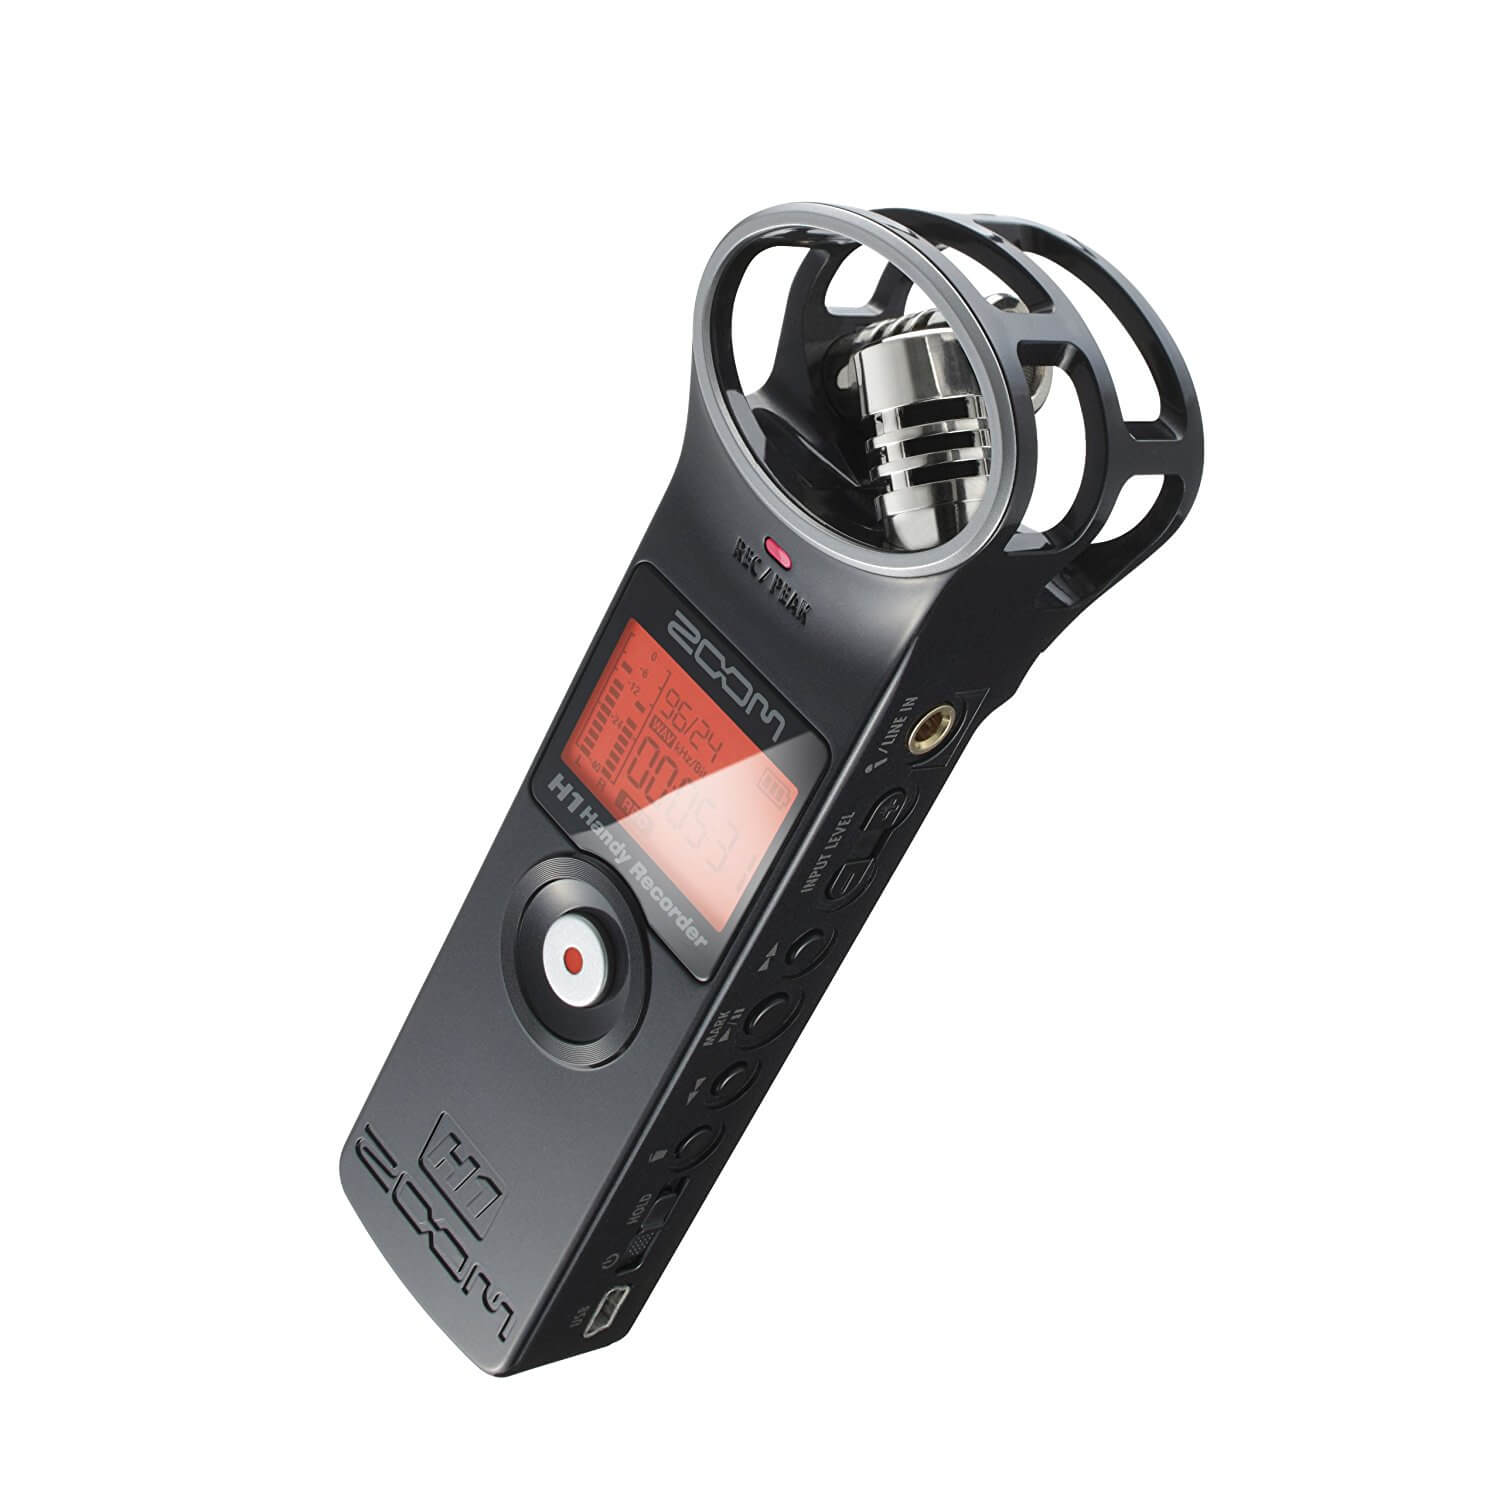
As a YouTuber, you may not have a crew to help you wrangle cable or a team member to help you monitor your audio levels, that is what makes Zoom ZH1 H1 a solid choice, as it is wireless and you can check the levels right in the palm of your hands as you record and even hear playback on the device.
The only thing that might slow you down, is that the audio will be captured directly onto the device, which means that you will need to sync up your audio to video afterward.
Tip : Before you start your interview, hit record on video and audio and then clap on camera, causing the audio to spike and giving you a video reference. This will give you a clear mark for syncing up, the sound of the clap and your hands coming together on camera.
7. Best Microphone for Action and Fitness
Rode VMPR VideoMic Pro R with Rycote Lyre Shockmount - $214.90
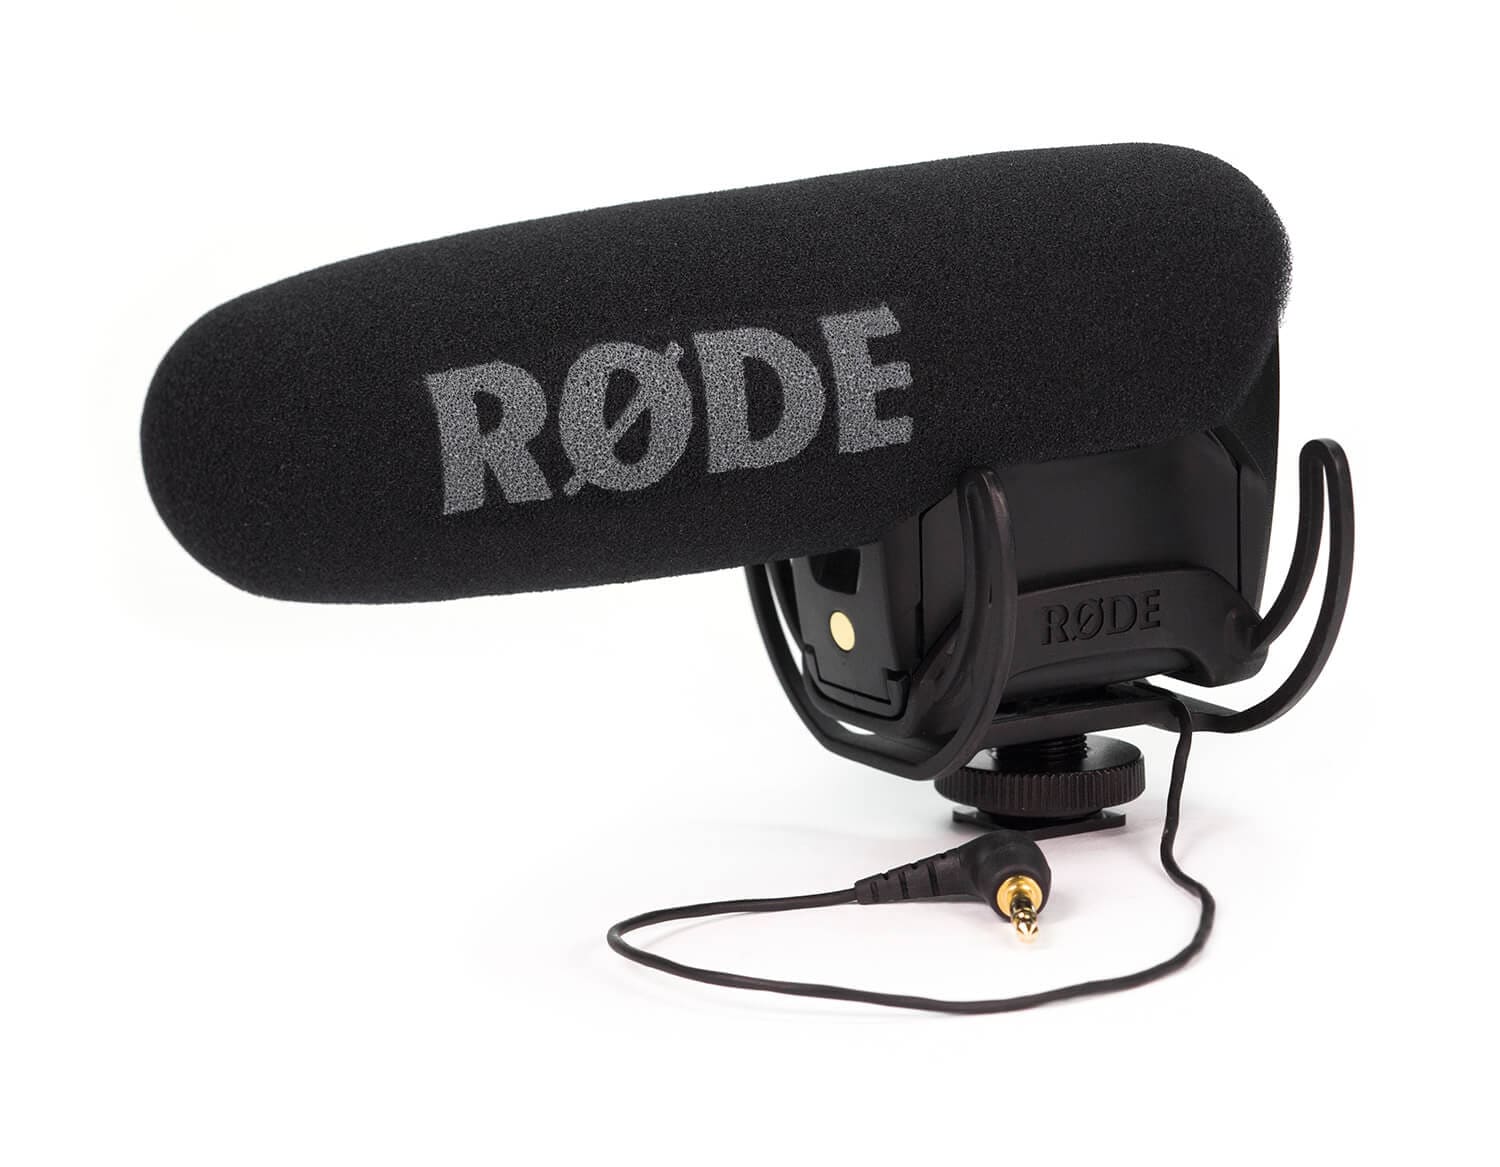
If you’re a YouTuber who films a lot of action shots or fitness videos, where you, your camera and your microphone are in motion, then I recommend the Rode VMPR VideoMic Pro R with Rycote Lyre Shockmount.
The Rode VMRP VideoMic Pro is a shotgun microphone that can focus on your subject in front of the camera with a low self-noise. This is excellent when you’re filming action shots, because you can always direct your mic at what you want to record knowing you won’t capture too much from other angles.
The Rycote Lyre shock mount eliminates any external audio that can be caused by movements to the microphone and camera. The shock mount is made of an elastic solution, so it’s incredibly durable.
Tip : For a greater range, the Rode VMRP Video Mic Pro can be mounted onto a boom pole, should the subject need to move around within the shot or if the camera needs to move away from the subject.
8. Best Waterproof Microphone
Sennheiser MKE 2 elements - Action Mic for the GoPro HERO4 - $200
In or around water, nothing can ruin a day of shooting faster than getting your equipment wet. If you’re using GoPro Hero4 for shooting all your intense water shots, you would be familiar with the awful audio you capture when the camera is inside the waterproof casing.
Lucky for you, Sennheiser has developed a waterproof microphone, the MKE 2 elements. This little furry ball that connects to your GoPro Hero4 can withstand up to 1 meter of water. Because underwater sound is captured differently (via a hydrophone ), the Sennheiser MKE 2 elements can’t actually record audio underwater, however, it’ll be ready to keep recording quality audio once it resurfaces.
Tip: Double check to make sure that the mic cable is not blocking the seal of the waterproof case of the camera before launching it into the water.
Different situations call for different equipment. This is the true for tradespeople, golfers, and YouTubers. If you want to get the best audio, it’s more than simply buying the most expensive one, you’ll also need to find the microphone most suited for that situation.
I hope this post helped you improve your audio quality. If you are having challenges finding a good microphone for a particular scenario, let us know in the comments below!
Part 3: 10 Tips for Recording YouTube Audio [Video Tutorial]
After picking up the best microphone based on your need, you can record your audio now. But wait, here are 10 tips for using the microphones to record better audio for your YouTube video. In case that you are in a hurry, we have summarized the following tips for a quick look.
- Silence everything you don’t want your mic to record.
- Put your mobile phone in airplane mode.
- Minimize echo.
- Block wind from reaching your mic.
- Upgrade your mic.
- Adjust your levels.
- Start with a sound cue if you’re planning to do some syncing in post.
- Get close to the sound.
- ADR.
- Record Ambient Sound.
 Download Mac Version ](https://tools.techidaily.com/wondershare/filmora/download/ )
Part 4: How to Sync your Audio in Filmora
Both the LAV Mics and the R-05 will create separate audio clips which you will need to sync up with your video when you are finished recording.
Note: when you start recording, clap two or three times. This will create distinct and visible audio spikes for you to look for when you sync the audio with video.
1. Import Video and Audio Files
Once you have finished recording and have opened up Filmora Video Editor , import your video and drag and drop it into your timeline. The audio recorded with the built in camera mic is already lined with your video clip and your audio and video will both automatically share the video track.
Now import the audio from your external microphone and drag and drop it to your audio track. The audio track is initially hidden, but it will appear when you pull an audio file into the timeline.
Download Mac Version ](https://tools.techidaily.com/wondershare/filmora/download/ )
2.Detach Default Audio from Video
Since you have recorded a separate audio file, you should detach the original audio recorded with the built-in camera mic from the video. To do this, just right click the video clip in the timeline and select Audio Detach from the drop down menu.

3.Align Spikes in Video Audio and Recorded Audio
Find the spikes that represent your clapping in both audio tracks. Then, adjust your external audio so its clapping patterns are in line with those in your camera’s audio track. You can magnify your timeline for a better control.
Once your external audio is synced to your camera’s audio it will also be synced to your video. You no longer need your camera’s audio and can delete it.
Watch the video below to check more features about Filmora.

Richard Bennett
Richard Bennett is a writer and a lover of all things video.
Follow @Richard Bennett
Richard Bennett
Mar 27, 2024• Proven solutions
If you want your viewers to be glued to their screens then quality audio is just as important as quality video for your YouTube channel. People will watch your vlog because they want to hear what you are saying. It can be tempting to use the audio your camera records rather than buy a separate microphone. Unfortunately, the microphones built into most cameras will only record mediocre audio. In this case, we have researched and found out the following best microphones for YouTube videos based on its price and performance. Besides, we will also highlight the best microphones for different recording scenarios. Whether you’re making gaming videos or recording yourself singing, or filming inside or outside, you will get to know which one is best for your situation. Let’s check out now.
- Best Microphones for YouTube Videos
- Best Microphones for Different Types of YouTube Creators
- Tips for Recording YouTube Audio
- How to Sync your Audio in Filmora
Part 1: Best Microphones for YouTube Videos [Best for All]
Here are examples of some of the best external microphones for YouTube:
1. Blue Snowball USB Mic - $60
The Snowball is especially good for vlogging from your webcam because it is easy to hook up to your computer using a USB port. It will record your audio simultaneously while you are using your webcam. The biggest drawback of the Snowball is that it needs to be close to you while your record. This combined with its larger size means that it will probably need to be in your shot.
2. RØDE Video Shotgun Mic - $140
The Shotgun attaches to your DSLR camera and is great for capturing specific sounds, like dialogue, without a lot of background noise. To work well it needs to be pointing at the person who is speaking, and it should be fairly close to them as well. This means that the camera cannot be too far back from you while you vlog.
3. Audio-Technica AT875R Line + Gradient Condenser Microphone - $240
This microphone is similar to the ones you think of being mounted on boom poles on professional sets, and it can easily be mounted onto a pole and used the same way. This gradient condenser mic is good at picking up sound at a distance, and at only picking up sound coming from directly in front of it. If you are working alone then you can set this mic up on a stand so it is pointing at you, or if you have a friend to help you you can ask them to hold it on a boom pole.
4. Sony LAV Wireless Mic System - $600
A LAV Mic, also called a lavalier or lapel mic, is a small microphone which can be clipped onto clothing. Wearing a LAV Mic while you vlog will allow you to move around freely and still capture great audio, rather than being stuck in range of a stationary mic. There are both wired and wireless options available in LAV Mics.
5. Roland R-05 WAVE/MP3 Recorder - $200
The R-05 is a pocket recorder that captures flawless audio. Its small size means you can hide it in your pocket and it will not show up in your video. Also, since it does not need to hook up to your camera or computer you will have freedom of movement.
Part 2: Best Microphones for All Types of YouTube Creators
If you have to invest in a new piece of equipment for your YouTube channel, consider upgrading your microphones. Your viewers can forgive your grainy video footage, poor lighting, and unsteady camera handling, but if your audio sounds like you’re speaking across the road on a busy highway, all your hard work will be wasted, because nobody will want to watch it.
But the thing about microphones is that they are not all created equal. Depending on the type of videos you’re filming and the environment where you’re recording, the capabilities of the microphone will differ.
1. Best Microphone for Live Streamers and Gamers
Blue Yeti USB - $150
As a live streamer, gamer, or vlogger such as beauty or lifestyle, you’ll want a balance of easy setup and high-quality audio. The Blue Yeti USB delivers on that.
It’s the closest budget microphone to a professional studio mic on the market, and it feels that way when you hold its solid metal frame for the first time. Connecting directly to your computer via USB, the Blue Yeti comes with a 6-feet long USB cable. Out of the box, it sits upon a sturdy stand, which can be removed and the mic can be threaded a shock mount.
The Blue Yeti can pick up audio in four different polar patterns: cardioid, bidirectional, omnidirectional, and stereo. This makes it incredibly versatile, but if you are streaming, I recommend keeping it on cardioid.
Tip: In cardioid mode, speak into the front of the mic, not the top of it.
2. Best Microphones for Outdoor Locations
Rode VideoMic Pro Compact VMP Shotgun Microphone - $268
When you are filming outside, you are dealing with audio from all different directions: distant traffic, a gust of wind, the neighbor’s kids, etc.
That’s why a shotgun mic is better than an omnidirectional one for outdoor situations. Shotgun microphones, such as the Rode VideoMic Pro, picks up audio only in the direction it’s pointing in. You can aim it at your subject and it will give you clear audio without a lot of background noises.
The Rode VideoMic Pro comes with a mount that attaches on top of your camera, if you are filming outdoors. So if you are holding the camera and vlogging, then the audio will be great. However, if you want to take advantage of the space, and set the camera further away, you should attach the mic on a boom or a stand to get the best audio.
Tip: With Rode VideoMic Pro, and any mic you use to shoot outdoors, always do a sound check to make sure the quality is up to standard. Ten seconds of your subject talking at the level they will be speaking in will be enough to judge the sound quality.
3. Best Microphone for Music (Vocals)
Audio-Technica AT2035 - $163
If you are a serious musician on YouTube, then you will need a serious microphone like the Audio-Technica AT2035. This microphone connects via an XLR cable and requires phantom power, so you will need to invest in an audio interface, if you don’t already have one.
Nevertheless, this microphone does a fantastic job isolating the source of sound and eliminating background noise. Even if you’re recording in your bedroom, and not a professional studio, you’ll still get high quality vocals from this microphone.
Tip : Position yourself 8-12 inches away from the mic when singing. This allows your voice to sound more natural (too close and it’ll sound bassy) and it prevents the audio volume from fluctuating too dramatically as you move around or sing loudly one part and quietly at another.
4. Best Microphone for Voice Over
Rode NTK Tube Condenser Microphone - $529
The Rode NTK Tube is arguably one of the best microphone for its price. You can spend a thousand dollars and get a professional studio microphone, but you can’t do much better than the Rode NTK.
If you’re recording out of a studio environment, whether it’s a professional, semi-professional, or a closet with soft padded walls, the Rode NTK will give warmth and richness to every word you speak, while still offering crispness. Allow it to warm up for a few minutes before you start recording, and you’ll have awesome audio for your voice over.
This mic is great for YouTubers who are creating video essays, ADR, animated videos, or other videos that require top quality narrations.
Tip: Make sure you have a mic stand that you can raise to your standing height. Standing while recording voice over allows you diaphragm to open up, which will improve the quality of your voice.
5. Best Microphone for Big Echoey Space
Sennheiser MD 421 II Cardioid Dynamic Mic - $449
Commonly used to record isolated percussions or brass instruments, the Sennheiser MD 421 II is also wonderful if you need to record vocals in a large room. As a versatile dynamic mic, it doesn’t allow background noises or reverberations to bleed into the source vocal.
The Sennheiser MD 421 II has a rugged design as it’s built for live situations, such as concerts. This is a great microphone to have in your arsenal, should you end up recording in a large venue such as a conference or an arena.
If you are a YouTuber who makes a lot of video in warehouses, workshops, or rehearsal halls, then you should consider investing in a Sennheiser MD 421 II to get the most out of these acoustically complicated locations.
Tip : Sometimes audio in a loud, big environment can’t be saved by the best microphone. If that’s the case, film the source of the background noise. Get b-roll of people walking around, machinery operating, or whatever challenging sound you are dealing with in the large space. Cutting to these noise makers will give the audience a reference for the background noise, which helps conceal it.
6. Best Handheld Microphone for Interviews
Zoom ZH1 H1 Handy Portable Digital Recorder - $68.99
This unidirectional microphone delivers clear and crisp audio. Compact, portable, and lightweight, the Zoom ZH1 H1 is a terrific choice for YouTubers who are looking for a handheld option for a microphone.
As a YouTuber, you may not have a crew to help you wrangle cable or a team member to help you monitor your audio levels, that is what makes Zoom ZH1 H1 a solid choice, as it is wireless and you can check the levels right in the palm of your hands as you record and even hear playback on the device.
The only thing that might slow you down, is that the audio will be captured directly onto the device, which means that you will need to sync up your audio to video afterward.
Tip : Before you start your interview, hit record on video and audio and then clap on camera, causing the audio to spike and giving you a video reference. This will give you a clear mark for syncing up, the sound of the clap and your hands coming together on camera.
7. Best Microphone for Action and Fitness
Rode VMPR VideoMic Pro R with Rycote Lyre Shockmount - $214.90
If you’re a YouTuber who films a lot of action shots or fitness videos, where you, your camera and your microphone are in motion, then I recommend the Rode VMPR VideoMic Pro R with Rycote Lyre Shockmount.
The Rode VMRP VideoMic Pro is a shotgun microphone that can focus on your subject in front of the camera with a low self-noise. This is excellent when you’re filming action shots, because you can always direct your mic at what you want to record knowing you won’t capture too much from other angles.
The Rycote Lyre shock mount eliminates any external audio that can be caused by movements to the microphone and camera. The shock mount is made of an elastic solution, so it’s incredibly durable.
Tip : For a greater range, the Rode VMRP Video Mic Pro can be mounted onto a boom pole, should the subject need to move around within the shot or if the camera needs to move away from the subject.
8. Best Waterproof Microphone
Sennheiser MKE 2 elements - Action Mic for the GoPro HERO4 - $200
In or around water, nothing can ruin a day of shooting faster than getting your equipment wet. If you’re using GoPro Hero4 for shooting all your intense water shots, you would be familiar with the awful audio you capture when the camera is inside the waterproof casing.
Lucky for you, Sennheiser has developed a waterproof microphone, the MKE 2 elements. This little furry ball that connects to your GoPro Hero4 can withstand up to 1 meter of water. Because underwater sound is captured differently (via a hydrophone ), the Sennheiser MKE 2 elements can’t actually record audio underwater, however, it’ll be ready to keep recording quality audio once it resurfaces.
Tip: Double check to make sure that the mic cable is not blocking the seal of the waterproof case of the camera before launching it into the water.
Different situations call for different equipment. This is the true for tradespeople, golfers, and YouTubers. If you want to get the best audio, it’s more than simply buying the most expensive one, you’ll also need to find the microphone most suited for that situation.
I hope this post helped you improve your audio quality. If you are having challenges finding a good microphone for a particular scenario, let us know in the comments below!
Part 3: 10 Tips for Recording YouTube Audio [Video Tutorial]
After picking up the best microphone based on your need, you can record your audio now. But wait, here are 10 tips for using the microphones to record better audio for your YouTube video. In case that you are in a hurry, we have summarized the following tips for a quick look.
- Silence everything you don’t want your mic to record.
- Put your mobile phone in airplane mode.
- Minimize echo.
- Block wind from reaching your mic.
- Upgrade your mic.
- Adjust your levels.
- Start with a sound cue if you’re planning to do some syncing in post.
- Get close to the sound.
- ADR.
- Record Ambient Sound.
Download Mac Version ](https://tools.techidaily.com/wondershare/filmora/download/ )
Part 4: How to Sync your Audio in Filmora
Both the LAV Mics and the R-05 will create separate audio clips which you will need to sync up with your video when you are finished recording.
Note: when you start recording, clap two or three times. This will create distinct and visible audio spikes for you to look for when you sync the audio with video.
1. Import Video and Audio Files
Once you have finished recording and have opened up Filmora Video Editor , import your video and drag and drop it into your timeline. The audio recorded with the built in camera mic is already lined with your video clip and your audio and video will both automatically share the video track.
Now import the audio from your external microphone and drag and drop it to your audio track. The audio track is initially hidden, but it will appear when you pull an audio file into the timeline.
Download Mac Version ](https://tools.techidaily.com/wondershare/filmora/download/ )
2.Detach Default Audio from Video
Since you have recorded a separate audio file, you should detach the original audio recorded with the built-in camera mic from the video. To do this, just right click the video clip in the timeline and select Audio Detach from the drop down menu.
3.Align Spikes in Video Audio and Recorded Audio
Find the spikes that represent your clapping in both audio tracks. Then, adjust your external audio so its clapping patterns are in line with those in your camera’s audio track. You can magnify your timeline for a better control.
Once your external audio is synced to your camera’s audio it will also be synced to your video. You no longer need your camera’s audio and can delete it.
Watch the video below to check more features about Filmora.
Richard Bennett
Richard Bennett is a writer and a lover of all things video.
Follow @Richard Bennett
Richard Bennett
Mar 27, 2024• Proven solutions
If you want your viewers to be glued to their screens then quality audio is just as important as quality video for your YouTube channel. People will watch your vlog because they want to hear what you are saying. It can be tempting to use the audio your camera records rather than buy a separate microphone. Unfortunately, the microphones built into most cameras will only record mediocre audio. In this case, we have researched and found out the following best microphones for YouTube videos based on its price and performance. Besides, we will also highlight the best microphones for different recording scenarios. Whether you’re making gaming videos or recording yourself singing, or filming inside or outside, you will get to know which one is best for your situation. Let’s check out now.
- Best Microphones for YouTube Videos
- Best Microphones for Different Types of YouTube Creators
- Tips for Recording YouTube Audio
- How to Sync your Audio in Filmora
Part 1: Best Microphones for YouTube Videos [Best for All]
Here are examples of some of the best external microphones for YouTube:
1. Blue Snowball USB Mic - $60
The Snowball is especially good for vlogging from your webcam because it is easy to hook up to your computer using a USB port. It will record your audio simultaneously while you are using your webcam. The biggest drawback of the Snowball is that it needs to be close to you while your record. This combined with its larger size means that it will probably need to be in your shot.
2. RØDE Video Shotgun Mic - $140
The Shotgun attaches to your DSLR camera and is great for capturing specific sounds, like dialogue, without a lot of background noise. To work well it needs to be pointing at the person who is speaking, and it should be fairly close to them as well. This means that the camera cannot be too far back from you while you vlog.
3. Audio-Technica AT875R Line + Gradient Condenser Microphone - $240
This microphone is similar to the ones you think of being mounted on boom poles on professional sets, and it can easily be mounted onto a pole and used the same way. This gradient condenser mic is good at picking up sound at a distance, and at only picking up sound coming from directly in front of it. If you are working alone then you can set this mic up on a stand so it is pointing at you, or if you have a friend to help you you can ask them to hold it on a boom pole.
4. Sony LAV Wireless Mic System - $600
A LAV Mic, also called a lavalier or lapel mic, is a small microphone which can be clipped onto clothing. Wearing a LAV Mic while you vlog will allow you to move around freely and still capture great audio, rather than being stuck in range of a stationary mic. There are both wired and wireless options available in LAV Mics.
5. Roland R-05 WAVE/MP3 Recorder - $200
The R-05 is a pocket recorder that captures flawless audio. Its small size means you can hide it in your pocket and it will not show up in your video. Also, since it does not need to hook up to your camera or computer you will have freedom of movement.
Part 2: Best Microphones for All Types of YouTube Creators
If you have to invest in a new piece of equipment for your YouTube channel, consider upgrading your microphones. Your viewers can forgive your grainy video footage, poor lighting, and unsteady camera handling, but if your audio sounds like you’re speaking across the road on a busy highway, all your hard work will be wasted, because nobody will want to watch it.
But the thing about microphones is that they are not all created equal. Depending on the type of videos you’re filming and the environment where you’re recording, the capabilities of the microphone will differ.
1. Best Microphone for Live Streamers and Gamers
Blue Yeti USB - $150
As a live streamer, gamer, or vlogger such as beauty or lifestyle, you’ll want a balance of easy setup and high-quality audio. The Blue Yeti USB delivers on that.
It’s the closest budget microphone to a professional studio mic on the market, and it feels that way when you hold its solid metal frame for the first time. Connecting directly to your computer via USB, the Blue Yeti comes with a 6-feet long USB cable. Out of the box, it sits upon a sturdy stand, which can be removed and the mic can be threaded a shock mount.
The Blue Yeti can pick up audio in four different polar patterns: cardioid, bidirectional, omnidirectional, and stereo. This makes it incredibly versatile, but if you are streaming, I recommend keeping it on cardioid.
Tip: In cardioid mode, speak into the front of the mic, not the top of it.
2. Best Microphones for Outdoor Locations
Rode VideoMic Pro Compact VMP Shotgun Microphone - $268
When you are filming outside, you are dealing with audio from all different directions: distant traffic, a gust of wind, the neighbor’s kids, etc.
That’s why a shotgun mic is better than an omnidirectional one for outdoor situations. Shotgun microphones, such as the Rode VideoMic Pro, picks up audio only in the direction it’s pointing in. You can aim it at your subject and it will give you clear audio without a lot of background noises.
The Rode VideoMic Pro comes with a mount that attaches on top of your camera, if you are filming outdoors. So if you are holding the camera and vlogging, then the audio will be great. However, if you want to take advantage of the space, and set the camera further away, you should attach the mic on a boom or a stand to get the best audio.
Tip: With Rode VideoMic Pro, and any mic you use to shoot outdoors, always do a sound check to make sure the quality is up to standard. Ten seconds of your subject talking at the level they will be speaking in will be enough to judge the sound quality.
3. Best Microphone for Music (Vocals)
Audio-Technica AT2035 - $163
If you are a serious musician on YouTube, then you will need a serious microphone like the Audio-Technica AT2035. This microphone connects via an XLR cable and requires phantom power, so you will need to invest in an audio interface, if you don’t already have one.
Nevertheless, this microphone does a fantastic job isolating the source of sound and eliminating background noise. Even if you’re recording in your bedroom, and not a professional studio, you’ll still get high quality vocals from this microphone.
Tip : Position yourself 8-12 inches away from the mic when singing. This allows your voice to sound more natural (too close and it’ll sound bassy) and it prevents the audio volume from fluctuating too dramatically as you move around or sing loudly one part and quietly at another.
4. Best Microphone for Voice Over
Rode NTK Tube Condenser Microphone - $529
The Rode NTK Tube is arguably one of the best microphone for its price. You can spend a thousand dollars and get a professional studio microphone, but you can’t do much better than the Rode NTK.
If you’re recording out of a studio environment, whether it’s a professional, semi-professional, or a closet with soft padded walls, the Rode NTK will give warmth and richness to every word you speak, while still offering crispness. Allow it to warm up for a few minutes before you start recording, and you’ll have awesome audio for your voice over.
This mic is great for YouTubers who are creating video essays, ADR, animated videos, or other videos that require top quality narrations.
Tip: Make sure you have a mic stand that you can raise to your standing height. Standing while recording voice over allows you diaphragm to open up, which will improve the quality of your voice.
5. Best Microphone for Big Echoey Space
Sennheiser MD 421 II Cardioid Dynamic Mic - $449
Commonly used to record isolated percussions or brass instruments, the Sennheiser MD 421 II is also wonderful if you need to record vocals in a large room. As a versatile dynamic mic, it doesn’t allow background noises or reverberations to bleed into the source vocal.
The Sennheiser MD 421 II has a rugged design as it’s built for live situations, such as concerts. This is a great microphone to have in your arsenal, should you end up recording in a large venue such as a conference or an arena.
If you are a YouTuber who makes a lot of video in warehouses, workshops, or rehearsal halls, then you should consider investing in a Sennheiser MD 421 II to get the most out of these acoustically complicated locations.
Tip : Sometimes audio in a loud, big environment can’t be saved by the best microphone. If that’s the case, film the source of the background noise. Get b-roll of people walking around, machinery operating, or whatever challenging sound you are dealing with in the large space. Cutting to these noise makers will give the audience a reference for the background noise, which helps conceal it.
6. Best Handheld Microphone for Interviews
Zoom ZH1 H1 Handy Portable Digital Recorder - $68.99
This unidirectional microphone delivers clear and crisp audio. Compact, portable, and lightweight, the Zoom ZH1 H1 is a terrific choice for YouTubers who are looking for a handheld option for a microphone.
As a YouTuber, you may not have a crew to help you wrangle cable or a team member to help you monitor your audio levels, that is what makes Zoom ZH1 H1 a solid choice, as it is wireless and you can check the levels right in the palm of your hands as you record and even hear playback on the device.
The only thing that might slow you down, is that the audio will be captured directly onto the device, which means that you will need to sync up your audio to video afterward.
Tip : Before you start your interview, hit record on video and audio and then clap on camera, causing the audio to spike and giving you a video reference. This will give you a clear mark for syncing up, the sound of the clap and your hands coming together on camera.
7. Best Microphone for Action and Fitness
Rode VMPR VideoMic Pro R with Rycote Lyre Shockmount - $214.90
If you’re a YouTuber who films a lot of action shots or fitness videos, where you, your camera and your microphone are in motion, then I recommend the Rode VMPR VideoMic Pro R with Rycote Lyre Shockmount.
The Rode VMRP VideoMic Pro is a shotgun microphone that can focus on your subject in front of the camera with a low self-noise. This is excellent when you’re filming action shots, because you can always direct your mic at what you want to record knowing you won’t capture too much from other angles.
The Rycote Lyre shock mount eliminates any external audio that can be caused by movements to the microphone and camera. The shock mount is made of an elastic solution, so it’s incredibly durable.
Tip : For a greater range, the Rode VMRP Video Mic Pro can be mounted onto a boom pole, should the subject need to move around within the shot or if the camera needs to move away from the subject.
8. Best Waterproof Microphone
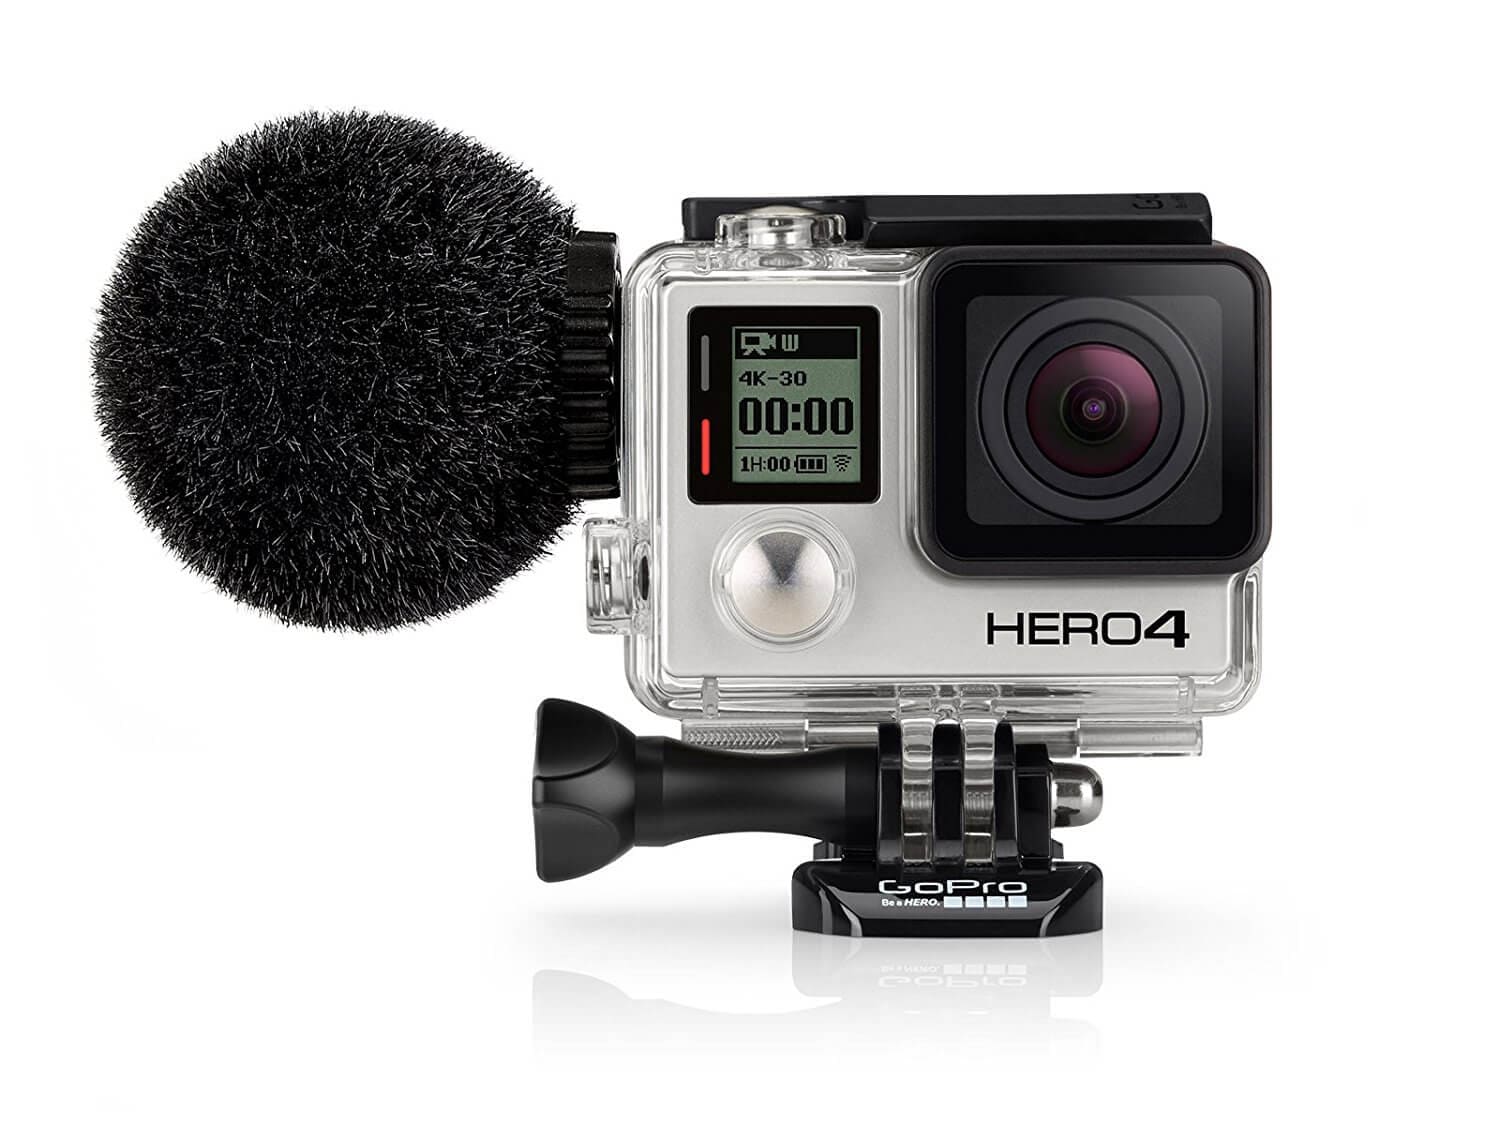
Sennheiser MKE 2 elements - Action Mic for the GoPro HERO4 - $200
In or around water, nothing can ruin a day of shooting faster than getting your equipment wet. If you’re using GoPro Hero4 for shooting all your intense water shots, you would be familiar with the awful audio you capture when the camera is inside the waterproof casing.
Lucky for you, Sennheiser has developed a waterproof microphone, the MKE 2 elements. This little furry ball that connects to your GoPro Hero4 can withstand up to 1 meter of water. Because underwater sound is captured differently (via a hydrophone ), the Sennheiser MKE 2 elements can’t actually record audio underwater, however, it’ll be ready to keep recording quality audio once it resurfaces.
Tip: Double check to make sure that the mic cable is not blocking the seal of the waterproof case of the camera before launching it into the water.
Different situations call for different equipment. This is the true for tradespeople, golfers, and YouTubers. If you want to get the best audio, it’s more than simply buying the most expensive one, you’ll also need to find the microphone most suited for that situation.
I hope this post helped you improve your audio quality. If you are having challenges finding a good microphone for a particular scenario, let us know in the comments below!
Part 3: 10 Tips for Recording YouTube Audio [Video Tutorial]
After picking up the best microphone based on your need, you can record your audio now. But wait, here are 10 tips for using the microphones to record better audio for your YouTube video. In case that you are in a hurry, we have summarized the following tips for a quick look.
- Silence everything you don’t want your mic to record.
- Put your mobile phone in airplane mode.
- Minimize echo.
- Block wind from reaching your mic.
- Upgrade your mic.
- Adjust your levels.
- Start with a sound cue if you’re planning to do some syncing in post.
- Get close to the sound.
- ADR.
- Record Ambient Sound.
Download Mac Version ](https://tools.techidaily.com/wondershare/filmora/download/ )
Part 4: How to Sync your Audio in Filmora
Both the LAV Mics and the R-05 will create separate audio clips which you will need to sync up with your video when you are finished recording.
Note: when you start recording, clap two or three times. This will create distinct and visible audio spikes for you to look for when you sync the audio with video.
1. Import Video and Audio Files
Once you have finished recording and have opened up Filmora Video Editor , import your video and drag and drop it into your timeline. The audio recorded with the built in camera mic is already lined with your video clip and your audio and video will both automatically share the video track.
Now import the audio from your external microphone and drag and drop it to your audio track. The audio track is initially hidden, but it will appear when you pull an audio file into the timeline.
Download Mac Version ](https://tools.techidaily.com/wondershare/filmora/download/ )
2.Detach Default Audio from Video
Since you have recorded a separate audio file, you should detach the original audio recorded with the built-in camera mic from the video. To do this, just right click the video clip in the timeline and select Audio Detach from the drop down menu.
3.Align Spikes in Video Audio and Recorded Audio
Find the spikes that represent your clapping in both audio tracks. Then, adjust your external audio so its clapping patterns are in line with those in your camera’s audio track. You can magnify your timeline for a better control.
Once your external audio is synced to your camera’s audio it will also be synced to your video. You no longer need your camera’s audio and can delete it.
Watch the video below to check more features about Filmora.
Richard Bennett
Richard Bennett is a writer and a lover of all things video.
Follow @Richard Bennett
Essential Tactics for YouTube Advertising with Banners
The Ultimate Guide to Effective YouTube Banners
Richard Bennett
Dec 30, 2022• Proven solutions
The following is a complete guide to YouTube banners, including instructions, tips, and free resources.
Channel art isn’t hard. Making video viewers enjoy enough that they click on your channel page - that’s hard. Channel art is just about reinforcing the positive feelings viewers have come away from your videos. Anyone who’s looking at your channel art is already thinking about subscribing to you. Your banner should make viewers feel happy with the choice they’ve already half-made.
- YouTube Banner Size and Other Basics
- Free YouTube Banner Templates and Other Resources
- Free Channel Art Makers
- How to Make Good Channel Art
- Channel Art Inspiration
YouTube Banner Size and Other Basics
YouTube channel art should be 2560 x 1440px.
As long as you upload an image or background that is that size, viewers looking at your channel on any device will be able to see that you’ve taken the time to personalize your channel page.
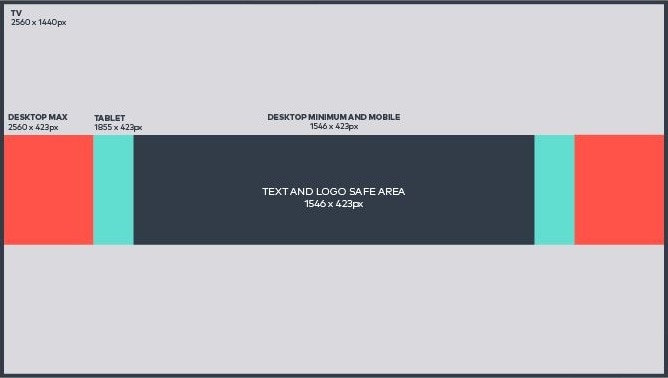
If you want to make a bit more of an impression, you can start thinking about banner dimensions. Depending on what type of screen (laptop, mobile, television) a viewer is visiting your channel on, they will see a different crop of that 2560 x 1440px channel art. That cropped image is your banner.
Television will display the entire image, but it is significantly smaller on other devices.
Desktop or laptop computers can show a view as large as 2560 x 423px, or as small as 1546 x 423px.
Tablets show an area that’s 1855 x 423px.
Mobile phones show an area that’s 1546 x 423px. This size is also the smallest possible desktop/laptop view, and it is considered the ‘safe area.’ Any important text or graphics in your banner should fit within this section, or they could be awkwardly cut off in some views.
Here’s a visual guide to channel art dimensions:
Another important detail to consider is the size of your file. YouTube will allow your channel art to have a file size of up to 6MB, but no larger.
Free YouTube Banner Templates and Other Resources
There are a lot of free resources online, which can make the process of designing your channel art simple, including templates, stock images, backgrounds, and fonts.
Free YouTube Banner Templates
The easiest way to get great channel art might be to find something pre-built you can personalize. There are a few places online you can find something free that will suit both your style and the types of videos you make:
Here on filmora.io, we have a selection of 50 free channel art templates you can download. The banners are divided into 10 categories representing both different types of YouTube channels (i.e., gaming and beauty) and different popular styles (i.e., minimalist and galaxy), so there’s something for everybody. When you download the free templates, you can choose between PSD files, so you can customize your banner in Photoshop and PNG files you can use with a free online program like Canva (or even Paint on your computer).
On Visme, you’ll find another 50 free YouTube banners with themes like ‘Rock Star,’ ‘Makeup Tutorial,’ and ‘Cooking Lessons.’ The banners all make use of beautiful high-quality photographs (no patterned backgrounds). You can add your own channel name right on Visme and customize your font/color.
There is a massive amount of resources available on YourTube, which you can download for free. The category labeled templates only has 14 options, but there are really hundreds of options for YouTube channel art. ‘Templates’ just means downloads, which include PSD files where you can edit text. Under ‘All YouTube Channel Art,’ there are over 500 options. Some are patterned backgrounds, some are pictures, but all of them were designed to be channel art. It’s easy to look and imagine where your channel’s name will go.
There are also a lot of Channel Art Makers, which include templates!
Free Stock Images, Backgrounds, and Fonts
Sometimes all you need to do is add some text to a really great photo or background pattern. You can find awesome-looking and free options for all three of these things and piece together your own unique channel art.
Free Stock Photos for YouTube Channel Art
Unlike templates, stock photos will not already be the exact right size for uploading to YouTube. You’ll have to adjust them, but you don’t need expensive software to do this. You can use a banner maker, or just do some trimming in Paint. While you are making adjustments, keep the dimensions from the first part of this article in mind, so important details aren’t partially cut off on some devices.
There are a lot of beautiful photographs available online, and sites like Stocksy are great if you have the budget available to purchase images. If you need free options, then there are lots of those too, but you do sometimes need to be careful that the way you want to use an image is allowed within the license provided by the site or photographer.
We recommend these two sites for anybody who finds copyright rules confusing because both of these sites allow you to use their photos for free, for any purpose (commercial or personal), without attribution (although they do appreciate attribution).
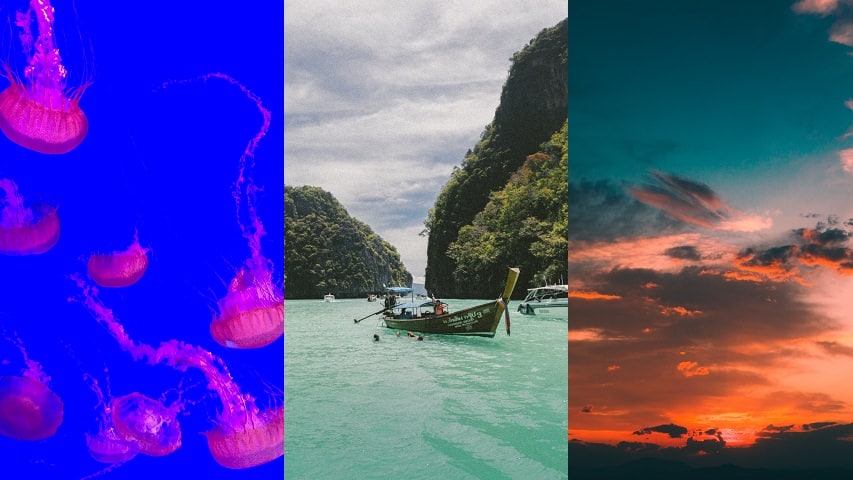
Unsplash: This site has a huge selection, and more photos are being added all the time. Finding what you want is as easy as typing a keyword (i.e., ‘sunset’) into the search bar on the home page.

Pexels: you can find a wide variety of images on Pexels just by using the search bar on the main page, much like Unsplash. There is actually some overlap in the images available on the two sites, but they also each have photos the other doesn’t, so it’s worth looking at both.
Free Background Patterns for YouTube Banners
Photographs just don’t suit every type of channel. If you don’t think photos of scenery match the style of your channel, you might want to consider a background pattern. Because patterns repeat, you don’t need to worry much about things being cut off when you upload a pattern as channel art (although you’ll still need to make sure any text you add is in the safe area).
One thing you should watch for when using a background pattern is that text can sometimes be hard to read if it’s sitting on top of a busy pattern. You might want to put a box of solid color between your channel name and the pattern.
The patterns on the following two sites are free to use.
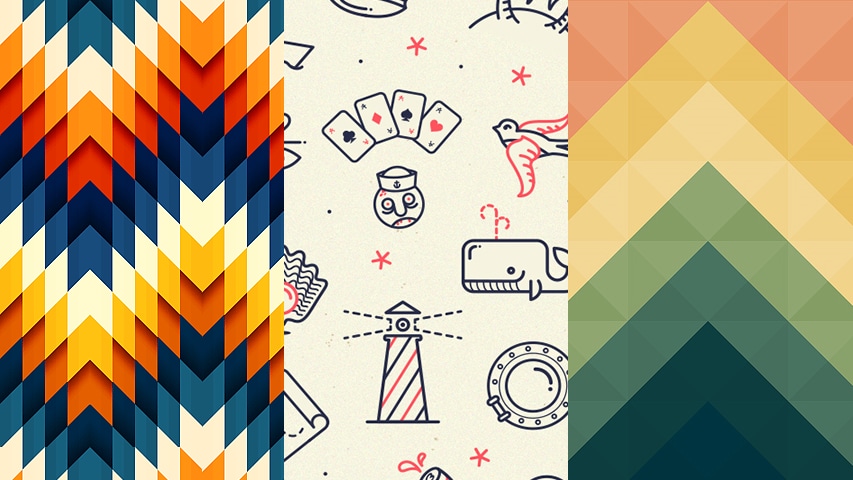
The Pattern Library: this truly is a library, and all the patterns were submitted by real graphic designers. When you first arrive on the site, all you’ll see is a randomly selected pattern filling your entire screen. Hovering over the designer’s name in the top left will allow you to download it for free.
Often, the download will not be as large as the image you see on the site. It will only be a few tiles (or just one tile), and you will need to copy/paste it a few times to create a background large enough to use as channel art.
You can use the navigation tools in the top right of the screen to see more patterns. Clicking the icon that looks like a bunch of squares will allow you to see multiple patterns at once.
Hero Patterns: the patterns on this site are editable before you download. You choose a foreground color, a background color, and the opacity of the design in the foreground. This means that you can make the pattern as subtle or vibrant as you want, which is a great thing to have control over when you’re creating channel art.
When you choose your custom colors and opacity, every pattern preview on the page will update. You can put in the colors you like for your channel first, and then find a pattern that looks good with them.
The only downside to Hero Patterns is that downloading your pattern is hard. You actually can’t just download it. Instead, the site generates a code you can embed on a website.
If you don’t have a website, the easiest thing is probably to use the Snipping Tool (included on all PCs since Vista) to save the preview and then just copy/paste it as a tile in a program like Paint or Photoshop.
Free Fonts for YouTube Channel Art
Whatever program you use to build your channel art will already have a selection of fonts. Finding the perfect font to use across your channel art, thumbnails, and for any text, you include in your videos isn’t something you need to think about until your channel is large enough that you’re thinking about your ‘brand’. If you feel like you’re at that stage, or want to get a jump start on it, here are a couple of sites where you can find free fonts and install them on your computer.
DaFont: there are categories on this site like fancy, gothic, and script, and there are even sub-categories like sci-fi and calligraphy. Licensing limits (whether the font is free and whether it is available for commercial use) will be clearly displayed next to every font. When browsing, you can even type your channel name in where it says ‘Preview’ and see what it will look like in all the different fonts.
Font Squirrel: the nice thing about this site is that everything is guaranteed to be free and available for commercial use. If you scroll down a bit on the main page, you’ll see a toolbar to the right of the screen, which will allow you to narrow down the fonts being displayed by selecting tags like grunge, headings, and casual.
Once you’ve got an image or images, and maybe even a font you want to use in your banner, you can create your channel art in either a software like Photoshop or a free banner maker (anchor) like the ones below.
Free Channel Art Makers
You don’t need an expensive program like Adobe Photoshop to make great channel art. There is a lot of photo editing and graphic design programs available for free online, and most of them are a lot easier to use.
All three of these sites will allow you to build your banner just by dragging images and text to where you want them, and they even provide premade templates (although those might not be free in some cases).
Canva is probably the most popular site for creating YouTube banners for free, for a good reason. It’s extremely intuitive for beginners who are making their first graphics, and it’s also a capable enough program to satisfy more intermediate-level users. Canva has stock images, banner templates, and other graphics available, but some of them cost $1 to use. You can also upload your own media instead of relying on Canva’s resources.
To build channel art in Canva, find ‘YouTube Channel Art’ as one of the options, and you’ll be working with a canvas that’s already the right size. You can also choose from a lot of different layout options, which will divide your canvas into different drop zones for images (pictures will be auto-sized to fit the zone).
One major benefit of Canva is the huge library of stock images, and one drawback is that you can’t have multiple images stretched to the end of your canvas.
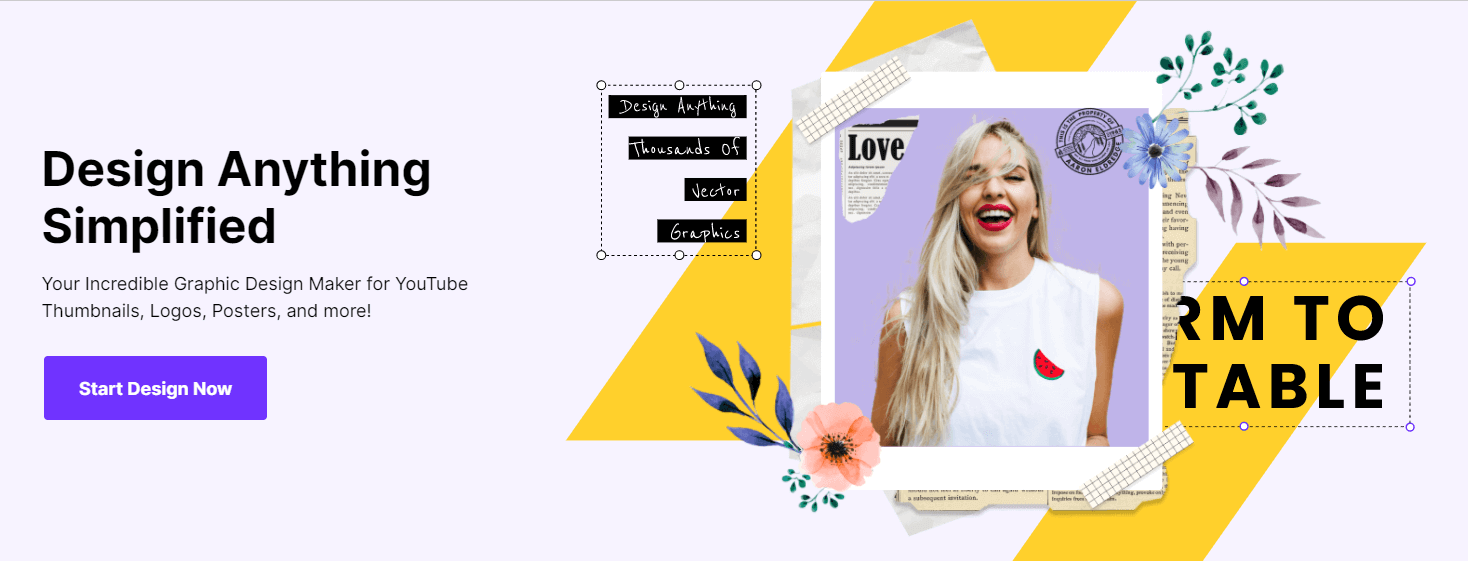
Wondershare PixStudio is an all-in-one and powerful online graphic design maker for everyone. This online platform empowers anyone to create a beautiful design within a few steps. No professional skills required! By simply dragging and dropping the creative elements and templates, you are capable to release your imagination and convert it to stunning artwork.
A major benefit of PixStudio is that it provides a feature to remove the image background, you can use the image more flexibility. One drawback is that the features will be used after payment of $7.99 per month.
This is another easy to use image editor with templates and stock images, like Canva. You just select YouTube Cover from the options in the Social Media menu (there are also options for YouTube Thumbnails and Profile Pics).
In Canva, images you drag into your layout will automatically shift to fit the area you put them into. This doesn’t happen in Design Wizard, which can either slow down or speed up your process, depending on which you prefer.
One major benefit of Design Wizard is that it provides you with a ‘safe zone box’ so you can see the smallest view of your channel art while you work. One drawback is that the photos in Design Wizard aren’t free, so you’ll either have to buy them or use your own.
Tip: the safe zone box costs $1, so the price of your download will always look like $1 until you delete it when you’re finished designing. Then your price will drop to $0 if you haven’t used any other paid elements.
Fotor works similarly to the other two programs on this list. Just look for ‘YouTube Channel Art’ in the Header & Cover section and click on it to start designing. It does not have layouts like Canva, but it is also a drag-and-drop program, and it is better than Canva if you like to edit with layers.
Fotor has more free templates than Canva or Design Wizard, although it does also have some premium options. Creating a paid account will allow you to access premium resources and get rid of ads (costs $39.99 for the year), but if all you want it for is to create channel art, a paid account probably isn’t worth it.
You can upload your own images to use in Fotor as well.
A major benefit of Fotor is that it has a lot of genuinely free channel art templates you can customize, and one drawback is that it doesn’t have as many stock photos.
How to Make Good Channel Art
Finding an image, cutting it to the right size, and uploading it to YouTube is easy, but how many of your favorite YouTubers use just an image for their channel art? Usually, there’s at least a little text stating the name of the channel.
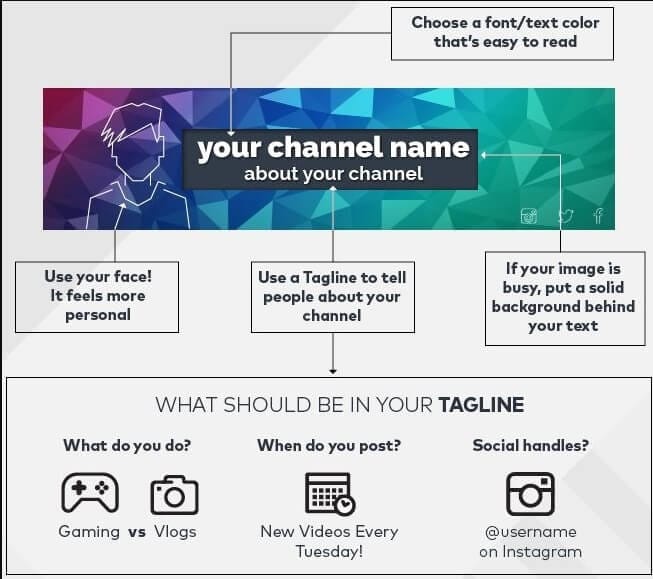
In this section, we’ll give you a quick checklist of things to include in your banner (anchor), and some tips on making excellent channel art.
Channel Art Checklist
Here are some things you might want to include in your YouTube banner. Not all of these are right for every type of channel.
- Channel name
- What kinds of videos you make
- Your posting schedule
- Social media handles
- Your face
- A tagline
Top 5 Tips for Making Great YouTube Banners
Besides looking good, your channel art can help convince more of your viewers to become subscribers. Here are our top 5 tips for making channel art that looks impressive and supports the growth of your channel.
- Solid Background Behind Text
- Keep Text to a Minimum
- Use Images and Colors That Suit Your Channel
- Include Your Face
- Give Viewers a Reason To Subscribe
Solid Background Behind Text
When viewers look at your channel page, you want your name and any other information your banner conveys to jump out at them. It is hard for text to jump out at anybody when it’s competing with a busy background, especially if some of the colors in the background are similar to the color of the text.
If possible, you can place your text on the part of your background pattern or image where there isn’t much happening behind it. When that isn’t possible, it doesn’t mean you need to find a new background. Instead, insert a solid-colored shape between the text and your background image. Your text will look great, and you won’t have to compromise on a background you like.
Keep Text to a Minimum
There is a lot you might want to say in your banner. You’ll want to tell viewers the name of the channel, what kinds of videos you make, when you upload those different kinds of videos, and maybe even the general philosophy driving your channel (i.e., ‘to spread positivity’). That’s all great, but try to say it fast.
Realistically, viewers probably won’t read more than one line of text. Writing more than that could also force you to use smaller text that viewers will have trouble reading. Ideally, a viewer should absorb all the information in your banner at a glance without having to make the decision to read it.
Keep your text to your channel name and one additional line underneath, if you can. Make sure your additional line of text is smaller than your channel name, so they aren’t competing.
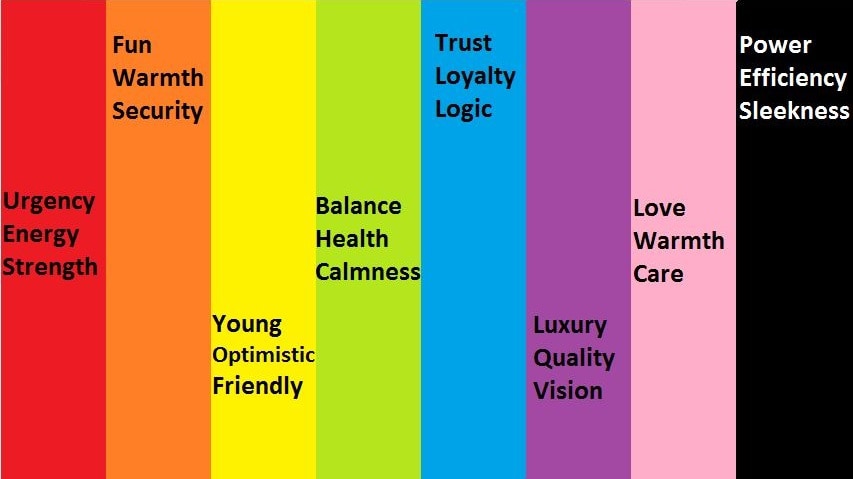
Use Images and Colors that Suit Your Channel
If you have an upbeat, positive, channel then a black and red banner with skulls on it might not be the best choice to convey that. Similarly, if you have a gaming channel, then a minimalist banner that includes an Instagram-worthy picture of you wearing the latest seasonal styles might send the wrong message. It will make the viewer that sees it think you have a lifestyle channel, and they may click away thinking the Let’s Play they just watched was a one-off.
Look at the kinds of colors and images other YouTubers in your niche are using for inspiration for what you should do, but also consider the unique message of your channel. If you consider yourself bold, use bolder colors. If your videos have a more relaxed vibe, something softer might make sense.
Here’s a guide to what people tend to associate with different colors:
Include Your Face
This isn’t essential for every type of channel. If you mostly post gaming content or screencast tutorials and you don’t appear much in your actual videos, there’s no need to appear in your banner.
However, if your channel is primarily about you as a personality, then including your face in your channel art can have a lot of benefits. People are automatically drawn in by eye contact and feel more connected when they can see a face. Besides just looking good, including your face in your banner can help build a relationship with new viewers and make them feel more comfortable subscribing. They’ll know they’re subscribing to a person, not just a channel.
Give Viewers a Reason to Subscribe
Someone who has chosen to check out your channel page is already thinking about subscribing, but they didn’t do it from the video page because they want to know a bit more about you. The things they are probably hoping to find out are:
- Do you have more videos like that one they just watched? Will you make more?
- Are you ever going to post again?
There are a lot of YouTubers that just give up at some point, or who have started a channel but don’t have time to post very often. That you might never post a new video again, or might not post one for so long that the new subscriber forgets who you are, is a real hesitation viewer can have about subscribing.
Viewers also want to know that when you do post again, the video you post will be something they like. If they liked the video, they found you through because it was funny, but there’s nothing on your channel page that suggests you do comedy videos regularly, then that can make someone think twice. If you subscribe because of a makeup tutorial, but then the creator only posts personal vlogs from then on, it can be disappointing.
By clearly stating what kinds of videos you make and when you post them in your banner, you are giving viewers a reason to subscribe.
Here are some examples:
“Vlogs & Comedy! New videos every Tuesday.”
“Two videos every week! Makeup Mondays and Fashion Fridays”
If you can create channel art that has a layout that makes sense and sends a clear message even at a glance, then that will help you look like a more experienced YouTuber.
Channel Art Inspiration
Sometimes your niche on YouTube will determine what kinds of channel art you should use. For example, it makes sense for gamers to include game-related graphics in their banners and for travel vloggers to use photos from the destinations they’ve visited.
However, for lots of YouTube niches, the channel art you make will be built around your personality. How do you know what fits your personality? Here’s some inspiration based on popular trends.
Minimalism
![]()
This is an example of a minimalist YouTube banner. This style typically uses only 2 or 3 colors and features clean lines, simple backgrounds, and not a lot of noise. If you want to project a calm, tidy, balanced vibe on your channel, then you should consider going in a minimalist direction with your banner.
This example is light and airy, but you can also create a minimalist look using brighter or darker colors. It just depends on your personality.
Galaxy Themed
![]()
Galaxy banners are exactly what they sound like: channel art featuring space scenes or photographs of the night sky. At first glance, you might think they belong with channels that talk about science or sci-fi, and they are great for that, but they’re also a fun choice for comedy, vlogging, or gaming.
The great thing about the galaxy style is that it’s cool and different, but it doesn’t take over and distract from your message. There is a lot of room for a space scene to be very personalized. The example above is bold and purple. You can find galaxy photos in just about any color, and they can be either bright like this one or quite dark.
Funky
![]()
There isn’t really one ‘funky’ style. A funky banner is anything that’s just a little off-beat but still makes sense while you’re looking at it. They tend to be bright and cheerful and are perfect for anyone who considers themselves a bit quirky.
If you’re looking for inspiration for a custom funky banner, go to your closet and find your favorite funny, cute, or ironic t-shirt. There’s probably something in its design you can bring into your channel art.
Comic
![]()
A banner featuring an actual comic book character probably belongs to a channel that discusses comics, but the style itself is great for just about anyone. It’s bold and communicates confidence. If your attitude towards YouTube is that you want to be fearless, why not go for something worthy of a superhuman?
Do you have any of your own tips to share about YouTube banners?
If you want to find a video editing solution that empowers your imagination and creativity yet takes less effort, please try this robust and user-friendly video editing software Wondershare Filmora. It provides special effects, stock photo & video, sound library, etc., which will definitely enhance your productivity and helps to make money by making videos much accessible.
Richard Bennett
Richard Bennett is a writer and a lover of all things video.
Follow @Richard Bennett
Richard Bennett
Dec 30, 2022• Proven solutions
The following is a complete guide to YouTube banners, including instructions, tips, and free resources.
Channel art isn’t hard. Making video viewers enjoy enough that they click on your channel page - that’s hard. Channel art is just about reinforcing the positive feelings viewers have come away from your videos. Anyone who’s looking at your channel art is already thinking about subscribing to you. Your banner should make viewers feel happy with the choice they’ve already half-made.
- YouTube Banner Size and Other Basics
- Free YouTube Banner Templates and Other Resources
- Free Channel Art Makers
- How to Make Good Channel Art
- Channel Art Inspiration
YouTube Banner Size and Other Basics
YouTube channel art should be 2560 x 1440px.
As long as you upload an image or background that is that size, viewers looking at your channel on any device will be able to see that you’ve taken the time to personalize your channel page.
If you want to make a bit more of an impression, you can start thinking about banner dimensions. Depending on what type of screen (laptop, mobile, television) a viewer is visiting your channel on, they will see a different crop of that 2560 x 1440px channel art. That cropped image is your banner.
Television will display the entire image, but it is significantly smaller on other devices.
Desktop or laptop computers can show a view as large as 2560 x 423px, or as small as 1546 x 423px.
Tablets show an area that’s 1855 x 423px.
Mobile phones show an area that’s 1546 x 423px. This size is also the smallest possible desktop/laptop view, and it is considered the ‘safe area.’ Any important text or graphics in your banner should fit within this section, or they could be awkwardly cut off in some views.
Here’s a visual guide to channel art dimensions:
Another important detail to consider is the size of your file. YouTube will allow your channel art to have a file size of up to 6MB, but no larger.
Free YouTube Banner Templates and Other Resources
There are a lot of free resources online, which can make the process of designing your channel art simple, including templates, stock images, backgrounds, and fonts.
Free YouTube Banner Templates
The easiest way to get great channel art might be to find something pre-built you can personalize. There are a few places online you can find something free that will suit both your style and the types of videos you make:
Here on filmora.io, we have a selection of 50 free channel art templates you can download. The banners are divided into 10 categories representing both different types of YouTube channels (i.e., gaming and beauty) and different popular styles (i.e., minimalist and galaxy), so there’s something for everybody. When you download the free templates, you can choose between PSD files, so you can customize your banner in Photoshop and PNG files you can use with a free online program like Canva (or even Paint on your computer).
On Visme, you’ll find another 50 free YouTube banners with themes like ‘Rock Star,’ ‘Makeup Tutorial,’ and ‘Cooking Lessons.’ The banners all make use of beautiful high-quality photographs (no patterned backgrounds). You can add your own channel name right on Visme and customize your font/color.
There is a massive amount of resources available on YourTube, which you can download for free. The category labeled templates only has 14 options, but there are really hundreds of options for YouTube channel art. ‘Templates’ just means downloads, which include PSD files where you can edit text. Under ‘All YouTube Channel Art,’ there are over 500 options. Some are patterned backgrounds, some are pictures, but all of them were designed to be channel art. It’s easy to look and imagine where your channel’s name will go.
There are also a lot of Channel Art Makers, which include templates!
Free Stock Images, Backgrounds, and Fonts
Sometimes all you need to do is add some text to a really great photo or background pattern. You can find awesome-looking and free options for all three of these things and piece together your own unique channel art.
Free Stock Photos for YouTube Channel Art
Unlike templates, stock photos will not already be the exact right size for uploading to YouTube. You’ll have to adjust them, but you don’t need expensive software to do this. You can use a banner maker, or just do some trimming in Paint. While you are making adjustments, keep the dimensions from the first part of this article in mind, so important details aren’t partially cut off on some devices.
There are a lot of beautiful photographs available online, and sites like Stocksy are great if you have the budget available to purchase images. If you need free options, then there are lots of those too, but you do sometimes need to be careful that the way you want to use an image is allowed within the license provided by the site or photographer.
We recommend these two sites for anybody who finds copyright rules confusing because both of these sites allow you to use their photos for free, for any purpose (commercial or personal), without attribution (although they do appreciate attribution).
Unsplash: This site has a huge selection, and more photos are being added all the time. Finding what you want is as easy as typing a keyword (i.e., ‘sunset’) into the search bar on the home page.
Pexels: you can find a wide variety of images on Pexels just by using the search bar on the main page, much like Unsplash. There is actually some overlap in the images available on the two sites, but they also each have photos the other doesn’t, so it’s worth looking at both.
Free Background Patterns for YouTube Banners
Photographs just don’t suit every type of channel. If you don’t think photos of scenery match the style of your channel, you might want to consider a background pattern. Because patterns repeat, you don’t need to worry much about things being cut off when you upload a pattern as channel art (although you’ll still need to make sure any text you add is in the safe area).
One thing you should watch for when using a background pattern is that text can sometimes be hard to read if it’s sitting on top of a busy pattern. You might want to put a box of solid color between your channel name and the pattern.
The patterns on the following two sites are free to use.
The Pattern Library: this truly is a library, and all the patterns were submitted by real graphic designers. When you first arrive on the site, all you’ll see is a randomly selected pattern filling your entire screen. Hovering over the designer’s name in the top left will allow you to download it for free.
Often, the download will not be as large as the image you see on the site. It will only be a few tiles (or just one tile), and you will need to copy/paste it a few times to create a background large enough to use as channel art.
You can use the navigation tools in the top right of the screen to see more patterns. Clicking the icon that looks like a bunch of squares will allow you to see multiple patterns at once.
Hero Patterns: the patterns on this site are editable before you download. You choose a foreground color, a background color, and the opacity of the design in the foreground. This means that you can make the pattern as subtle or vibrant as you want, which is a great thing to have control over when you’re creating channel art.
When you choose your custom colors and opacity, every pattern preview on the page will update. You can put in the colors you like for your channel first, and then find a pattern that looks good with them.
The only downside to Hero Patterns is that downloading your pattern is hard. You actually can’t just download it. Instead, the site generates a code you can embed on a website.
If you don’t have a website, the easiest thing is probably to use the Snipping Tool (included on all PCs since Vista) to save the preview and then just copy/paste it as a tile in a program like Paint or Photoshop.
Free Fonts for YouTube Channel Art
Whatever program you use to build your channel art will already have a selection of fonts. Finding the perfect font to use across your channel art, thumbnails, and for any text, you include in your videos isn’t something you need to think about until your channel is large enough that you’re thinking about your ‘brand’. If you feel like you’re at that stage, or want to get a jump start on it, here are a couple of sites where you can find free fonts and install them on your computer.
DaFont: there are categories on this site like fancy, gothic, and script, and there are even sub-categories like sci-fi and calligraphy. Licensing limits (whether the font is free and whether it is available for commercial use) will be clearly displayed next to every font. When browsing, you can even type your channel name in where it says ‘Preview’ and see what it will look like in all the different fonts.
Font Squirrel: the nice thing about this site is that everything is guaranteed to be free and available for commercial use. If you scroll down a bit on the main page, you’ll see a toolbar to the right of the screen, which will allow you to narrow down the fonts being displayed by selecting tags like grunge, headings, and casual.
Once you’ve got an image or images, and maybe even a font you want to use in your banner, you can create your channel art in either a software like Photoshop or a free banner maker (anchor) like the ones below.
Free Channel Art Makers
You don’t need an expensive program like Adobe Photoshop to make great channel art. There is a lot of photo editing and graphic design programs available for free online, and most of them are a lot easier to use.
All three of these sites will allow you to build your banner just by dragging images and text to where you want them, and they even provide premade templates (although those might not be free in some cases).
Canva is probably the most popular site for creating YouTube banners for free, for a good reason. It’s extremely intuitive for beginners who are making their first graphics, and it’s also a capable enough program to satisfy more intermediate-level users. Canva has stock images, banner templates, and other graphics available, but some of them cost $1 to use. You can also upload your own media instead of relying on Canva’s resources.
To build channel art in Canva, find ‘YouTube Channel Art’ as one of the options, and you’ll be working with a canvas that’s already the right size. You can also choose from a lot of different layout options, which will divide your canvas into different drop zones for images (pictures will be auto-sized to fit the zone).
One major benefit of Canva is the huge library of stock images, and one drawback is that you can’t have multiple images stretched to the end of your canvas.
Wondershare PixStudio is an all-in-one and powerful online graphic design maker for everyone. This online platform empowers anyone to create a beautiful design within a few steps. No professional skills required! By simply dragging and dropping the creative elements and templates, you are capable to release your imagination and convert it to stunning artwork.
A major benefit of PixStudio is that it provides a feature to remove the image background, you can use the image more flexibility. One drawback is that the features will be used after payment of $7.99 per month.
This is another easy to use image editor with templates and stock images, like Canva. You just select YouTube Cover from the options in the Social Media menu (there are also options for YouTube Thumbnails and Profile Pics).
In Canva, images you drag into your layout will automatically shift to fit the area you put them into. This doesn’t happen in Design Wizard, which can either slow down or speed up your process, depending on which you prefer.
One major benefit of Design Wizard is that it provides you with a ‘safe zone box’ so you can see the smallest view of your channel art while you work. One drawback is that the photos in Design Wizard aren’t free, so you’ll either have to buy them or use your own.
Tip: the safe zone box costs $1, so the price of your download will always look like $1 until you delete it when you’re finished designing. Then your price will drop to $0 if you haven’t used any other paid elements.
Fotor works similarly to the other two programs on this list. Just look for ‘YouTube Channel Art’ in the Header & Cover section and click on it to start designing. It does not have layouts like Canva, but it is also a drag-and-drop program, and it is better than Canva if you like to edit with layers.
Fotor has more free templates than Canva or Design Wizard, although it does also have some premium options. Creating a paid account will allow you to access premium resources and get rid of ads (costs $39.99 for the year), but if all you want it for is to create channel art, a paid account probably isn’t worth it.
You can upload your own images to use in Fotor as well.
A major benefit of Fotor is that it has a lot of genuinely free channel art templates you can customize, and one drawback is that it doesn’t have as many stock photos.
How to Make Good Channel Art
Finding an image, cutting it to the right size, and uploading it to YouTube is easy, but how many of your favorite YouTubers use just an image for their channel art? Usually, there’s at least a little text stating the name of the channel.
In this section, we’ll give you a quick checklist of things to include in your banner (anchor), and some tips on making excellent channel art.
Channel Art Checklist
Here are some things you might want to include in your YouTube banner. Not all of these are right for every type of channel.
- Channel name
- What kinds of videos you make
- Your posting schedule
- Social media handles
- Your face
- A tagline
Top 5 Tips for Making Great YouTube Banners
Besides looking good, your channel art can help convince more of your viewers to become subscribers. Here are our top 5 tips for making channel art that looks impressive and supports the growth of your channel.
- Solid Background Behind Text
- Keep Text to a Minimum
- Use Images and Colors That Suit Your Channel
- Include Your Face
- Give Viewers a Reason To Subscribe
Solid Background Behind Text
When viewers look at your channel page, you want your name and any other information your banner conveys to jump out at them. It is hard for text to jump out at anybody when it’s competing with a busy background, especially if some of the colors in the background are similar to the color of the text.
If possible, you can place your text on the part of your background pattern or image where there isn’t much happening behind it. When that isn’t possible, it doesn’t mean you need to find a new background. Instead, insert a solid-colored shape between the text and your background image. Your text will look great, and you won’t have to compromise on a background you like.
Keep Text to a Minimum
There is a lot you might want to say in your banner. You’ll want to tell viewers the name of the channel, what kinds of videos you make, when you upload those different kinds of videos, and maybe even the general philosophy driving your channel (i.e., ‘to spread positivity’). That’s all great, but try to say it fast.
Realistically, viewers probably won’t read more than one line of text. Writing more than that could also force you to use smaller text that viewers will have trouble reading. Ideally, a viewer should absorb all the information in your banner at a glance without having to make the decision to read it.
Keep your text to your channel name and one additional line underneath, if you can. Make sure your additional line of text is smaller than your channel name, so they aren’t competing.
Use Images and Colors that Suit Your Channel
If you have an upbeat, positive, channel then a black and red banner with skulls on it might not be the best choice to convey that. Similarly, if you have a gaming channel, then a minimalist banner that includes an Instagram-worthy picture of you wearing the latest seasonal styles might send the wrong message. It will make the viewer that sees it think you have a lifestyle channel, and they may click away thinking the Let’s Play they just watched was a one-off.
Look at the kinds of colors and images other YouTubers in your niche are using for inspiration for what you should do, but also consider the unique message of your channel. If you consider yourself bold, use bolder colors. If your videos have a more relaxed vibe, something softer might make sense.
Here’s a guide to what people tend to associate with different colors:
Include Your Face
This isn’t essential for every type of channel. If you mostly post gaming content or screencast tutorials and you don’t appear much in your actual videos, there’s no need to appear in your banner.
However, if your channel is primarily about you as a personality, then including your face in your channel art can have a lot of benefits. People are automatically drawn in by eye contact and feel more connected when they can see a face. Besides just looking good, including your face in your banner can help build a relationship with new viewers and make them feel more comfortable subscribing. They’ll know they’re subscribing to a person, not just a channel.
Give Viewers a Reason to Subscribe
Someone who has chosen to check out your channel page is already thinking about subscribing, but they didn’t do it from the video page because they want to know a bit more about you. The things they are probably hoping to find out are:
- Do you have more videos like that one they just watched? Will you make more?
- Are you ever going to post again?
There are a lot of YouTubers that just give up at some point, or who have started a channel but don’t have time to post very often. That you might never post a new video again, or might not post one for so long that the new subscriber forgets who you are, is a real hesitation viewer can have about subscribing.
Viewers also want to know that when you do post again, the video you post will be something they like. If they liked the video, they found you through because it was funny, but there’s nothing on your channel page that suggests you do comedy videos regularly, then that can make someone think twice. If you subscribe because of a makeup tutorial, but then the creator only posts personal vlogs from then on, it can be disappointing.
By clearly stating what kinds of videos you make and when you post them in your banner, you are giving viewers a reason to subscribe.
Here are some examples:
“Vlogs & Comedy! New videos every Tuesday.”
“Two videos every week! Makeup Mondays and Fashion Fridays”
If you can create channel art that has a layout that makes sense and sends a clear message even at a glance, then that will help you look like a more experienced YouTuber.
Channel Art Inspiration
Sometimes your niche on YouTube will determine what kinds of channel art you should use. For example, it makes sense for gamers to include game-related graphics in their banners and for travel vloggers to use photos from the destinations they’ve visited.
However, for lots of YouTube niches, the channel art you make will be built around your personality. How do you know what fits your personality? Here’s some inspiration based on popular trends.
Minimalism
![]()
This is an example of a minimalist YouTube banner. This style typically uses only 2 or 3 colors and features clean lines, simple backgrounds, and not a lot of noise. If you want to project a calm, tidy, balanced vibe on your channel, then you should consider going in a minimalist direction with your banner.
This example is light and airy, but you can also create a minimalist look using brighter or darker colors. It just depends on your personality.
Galaxy Themed
![]()
Galaxy banners are exactly what they sound like: channel art featuring space scenes or photographs of the night sky. At first glance, you might think they belong with channels that talk about science or sci-fi, and they are great for that, but they’re also a fun choice for comedy, vlogging, or gaming.
The great thing about the galaxy style is that it’s cool and different, but it doesn’t take over and distract from your message. There is a lot of room for a space scene to be very personalized. The example above is bold and purple. You can find galaxy photos in just about any color, and they can be either bright like this one or quite dark.
Funky
![]()
There isn’t really one ‘funky’ style. A funky banner is anything that’s just a little off-beat but still makes sense while you’re looking at it. They tend to be bright and cheerful and are perfect for anyone who considers themselves a bit quirky.
If you’re looking for inspiration for a custom funky banner, go to your closet and find your favorite funny, cute, or ironic t-shirt. There’s probably something in its design you can bring into your channel art.
Comic
![]()
A banner featuring an actual comic book character probably belongs to a channel that discusses comics, but the style itself is great for just about anyone. It’s bold and communicates confidence. If your attitude towards YouTube is that you want to be fearless, why not go for something worthy of a superhuman?
Do you have any of your own tips to share about YouTube banners?
If you want to find a video editing solution that empowers your imagination and creativity yet takes less effort, please try this robust and user-friendly video editing software Wondershare Filmora. It provides special effects, stock photo & video, sound library, etc., which will definitely enhance your productivity and helps to make money by making videos much accessible.
Richard Bennett
Richard Bennett is a writer and a lover of all things video.
Follow @Richard Bennett
Also read:
- Social Media Shifts Yearly Data Visualization Guide
- 2024 Approved Channel Success Strategies A Comprehensive Guide to Spotlighting
- [New] Amplify Video Dynamics A Guide to Perfecting Jump Cutting
- Streamline Your Soundtracks The Best Free YouTube to WAV Tools
- Capturing Crisp Sound A Guide to Superior Audio Recording for 2024
- In 2024, Boosting Video Appeal Implementing Neon Borders in Thumbnails
- Proven Strategies for Optimizing Video Content on YouTube
- The Path to YouTube Gaming Popularity
- Boost Engagement Innovative Templates for Your Video Closings
- A Symphony in Silence Mastering Audio with Precision for 2024
- Mr. Beast’s Financial Landscape
- Boost Conversion Rates Combining YouTube & GS Practices
- [Updated] Enhance TV Broadcasts with Seamless Video Loops From YouTube
- [New] 5 Winter YouTube Background Ideas to Warm Up Your Videos
- 2024 Approved Brand Yourself Differently Strategies for Finding Uncommon Names
- The Ultimate Guide to Editing Sportscasts
- Ultimate Tips for YouTube Content Creation Excellence
- Precision Poetry The News Outro Art
- [New] Avoiding YouTube Copyright Claims Understanding the Rules
- From Static to Sprightly Bouncing Text Animations
- 10 Quick Setup Ideas for Successful YouTube Business Ventures for 2024
- The Easy Guide to YouTube-to-AVI Conversion Technology
- Designing Distinctive Denouements
- Ahead of the Curve in Sub4sub Land This Is Your Guide First for 2024
- [Updated] Accelerate/Decelerate Your YouTube Videos A Step-by-Step Guide
- Theme Crafting for Gaming Channels A Visual Journey
- In 2024, Eliminating Grey Edges on Video A YouTube Fix Guide
- [Updated] A Compreayer's Guide to Growth Updating YouTube Metadata
- 2024 Approved Best Audio Modification Methods for YouTube Stars
- In 2024, Cutting Through the Noise Optimal Thumbnail Sizes
- Essential 8 Mirrorless Cams for Professional Videographers
- Acquire Unlimited Stock Images via Top 4 YouTube Sources
- In 2024, Bite-Sized Broadcasting Maintaining Quality in Quick Posts
- 2024 Approved Does Recording Your Viewed YouTube Content Violate Laws?
- 2024 Approved Essential Listings for Easy Access to YouTube Intro Files
- Engaging Everyone How to Multistream Effectively on YouTube and Twitch for 2024
- 2024 Approved Elevate Video Quality Mastering Aspect Ratio and Size Settings on YouTube
- Expert's Guide to Finding Cheap SBD Solutions
- 2024 Approved Conquer the Viewer Void 10 Tactics for YouTube Video Growth
- In-Depth Analysis The Dynamics of V-Tubers
- How to Choose Between Youtubers' Game Entrance Tutorials (Cost Included?)
- The Ultimate Guide to Pre-Recorded Yoga on YouTube
- [New] In 2024, The Art of Instagram Story Layering A Visual Journey
- 9 Solutions to Fix Infinix Hot 30i System Crash Issue | Dr.fone
- [Updated] In 2024, Emotional Journey Awaits Best Memes for Chuckles and Sighs on IG
- [New] Exclusive Review 10 Best Free Video Meeting Apps iOS/Android for 2024
- A Step-by-Step Guide on Using ADB and Fastboot to Remove FRP Lock on your Infinix
- How to Reset Oppo A78 5G Without the Home Button | Dr.fone
- [Updated] 2024 Approved Mindful Moments Easy, Engrossing Phone Games
- A Detailed Pokemon Go PvP Tier List to Make you a Pro Trainer For Apple iPhone 6 | Dr.fone
- Updated In 2024, Guide on How to Enable the Text to Speech Function on iPhone
- In 2024, How to Mirror Your Realme GT Neo 5 SE Screen to PC with Chromecast | Dr.fone
- 2024 Approved Advanced Techniques for Incor Written By Sarah Johnson
- [New] 2024 Approved From Novice to Pro Your Journey with the IO Screener
- 5 Solutions For Oppo F25 Pro 5G Unlock Without Password
- 3 Solutions to Hard Reset Motorola Edge 40 Neo Phone Using PC | Dr.fone
- [Updated] 2024 Approved Mastery of Storing Snaps on Devices Post-Snapchat Use
- What Is an AI Art Generator for 2024
- Unlock New Dimensions in TikTok Videos Through Exquisite BG Selection
- In 2024, Various Methods to Transfer Pictures from Apple iPhone XR to PC | Dr.fone
- In 2024, AddROM Bypass An Android Tool to Unlock FRP Lock Screen For your Tecno Pova 5
- How to remove OnePlus Ace 2V PIN
- In 2024, Top 15 Augmented Reality Games Like Pokémon GO To Play On Honor Magic 5 Lite | Dr.fone
- In 2024, Things You Should Know When Unlocking Total Wireless Of Apple iPhone 6 Plus
- [Updated] The Secret Language of Snapchat Behind Every Emoji
- Amazon Prime's Trending Series - Twitter's Choice, 2023
- New 2024 Approved Where Can I Find Funny Sound Effects?
- In 2024, Cheerful Media Extractor Analysis
- From Novice to Nexus Steps for Earning Your Verified Status on Discord
- Updated 2024 Approved The Ultimate List 10 Timecode Calculators for Film and Video Pros
- VN Video Editor Pro Review Pros, Cons, and Verdict for 2024
- [New] Partition Performance Topping Recorder Showdown for 2024
- Title: Ultimate Sound Selection for Social Media Stars
- Author: Brian
- Created at : 2024-05-25 13:03:16
- Updated at : 2024-05-26 13:03:16
- Link: https://youtube-video-recordings.techidaily.com/ultimate-sound-selection-for-social-media-stars/
- License: This work is licensed under CC BY-NC-SA 4.0.
