
:max_bytes(150000):strip_icc()/durable__omxi3w443rue_large_2x-1-732c438d9048476bb6103184b27ee893.jpg)
"The Ultimate Networking Haven Beyond VidCon"
The Ultimate Networking Haven: Beyond VidCon
Beyond VidCon - A Guide to the Most Important YouTube Events

Richard Bennett
Dec 30, 2022• Proven solutions
Want to meet your favorite creators? Or, do you want to become a better creator yourself? There are huge conventions you can go to where you can both indulge in fandom and work on your skills. Here are the 7 largest and most well-known:
- VidCon (US/Europe/Australia)
- PlayList Live (US)
- Beautycon (US/UK)
- YouTube Fanfest (Various international locations)
- RTX (US/UK/Australia)
- Amplify Live (Australia)
- Summer in the City (UK)
The Most Important YouTube Events
Want to be a youtube creator too? Go and get Wondershare Filmora, the video editing software for all creators.


1. VidCon
VidCon US: June (Anaheim, California)
VidCon Europe (Amsterdam): March/April
VidCon Australia: August/September
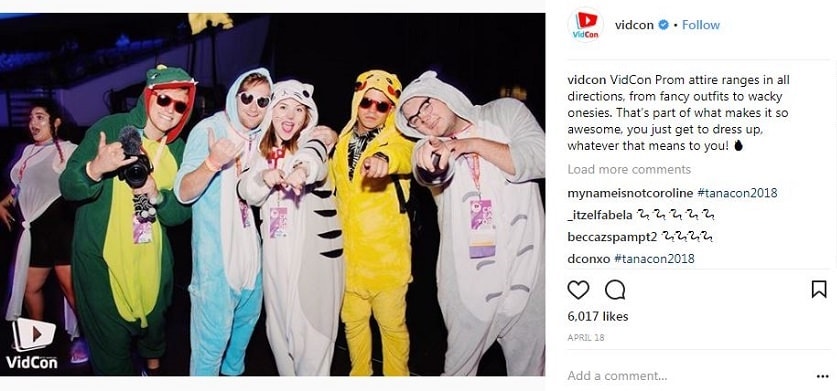
In 2017 over 30,000 YouTube enthusiasts – from fans to A-list creators – attended VidCon US, and that was thousands of more people than attended in 2016. It’s hard to imagine that this event – the biggest convention for YouTube and online video – will do anything but grow over the next few years.
VidCon was founded by the Vlogbrothers in 2010 as a place for internet friends to meet in real life.
Passes:
There are three different types of passes for VidCon – the Community Track, the Creator Track, and the Industry Track.
The Community Track is for anyone who loves YouTube and wants a chance to see their favorite creators and meet other fans. Pricing ranges from $100 to $180, depending on how early you buy your ticket.
The Creator Track gets you to access to all the same events as the Community badges (except for the Meet & Greet Lottery*), plus even more panels and workshops that will help you become a better creator. Pricing ranges from $150 to $250 depending on how early you buy your ticket.
The Industry Track is for anyone working in online video or video-adjacent industries, like advertising, branding, or talent management. There are panels on online marketing and working with influencers. Pricing ranges from $550 to $850, depending on when you buy your ticket.
*The Meet and Greet Lottery is a chance for anyone attending with a Community or Industry pass to meet their favorite creator. You rank the 15 creators you’d most like to meet according to how much you want to meet them. A computerized system will determine who gets into which Meet & Greet.
You have a two-week window (usually the first half of May) to submit your choices.
2. PlayList Live
Orlando, Florida: April/May
Tri-State (Secaucus, New Jersey): September
Washington DC: September
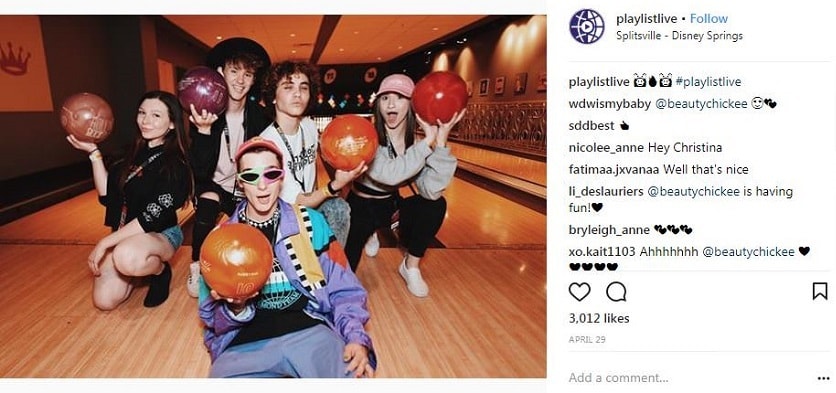
Playlist Live is a YouTube event for creators and their supporters that has a particular focus on music. Where VidCon is advertised using images of sunshine, crowded convention halls, and speakers, Playlist Live is advertised with images of city skylines, concerts, and fireworks.
Playlist Live prides itself on having ‘non-stop interactive activities.’ These include chances to meet your favorite creators on the Saturday and Sunday of the event. Which meetups you get to attend are determined by first-come-first-serve online signup.
Passes:
Pricing may vary depending on which event you are attending and how early you purchase your ticket. The following ranges are an estimate. Not all pass types are available for all events.
The Standard Pass ($75 - $130) is the basic pass for fans of the online video who want to meet their favorite creators, play games, and have a great time.
The Standard Pass + Merch ($100-$155) gets you into the same events as the standard pass plus a t-shirt and a wristband.
The Standard Deluxe ($120 - $205) comes with a hoodie, sunglasses, and a commemorative ticket.
The Parent Pass/Parent + Merch/Parent Deluxe ($75-$200) is for parents who want to chaperone their kids around Playlist Live and includes access to everything the Standard Pass can access.
The Insight Pass ($150-$205) is for anyone who wants to learn more about being a digital creator. You get Standard access as well as workshops and panels for successful creators and industry professionals designed to help you on your path.
The Insight + Merch/Insight Deluxe Passes ($175-$280) you get the same access as an Insight Pass plus goodies like shirts, wristbands, commemorative tickets, and sunglasses.
The Premium Pass ($250-$404) grants you standard access plus early access for meetup registration and a special VIP meetup.
There is also business Passes with Merch and Deluxe (Business Deluxe can cost up to $330) options for people working in marketing, publicity, production, etc. These passes include access to an extra day of business and industry-specific programming.
3. Beautycon Festivals
Los Angeles: July
New York: April
London, UK: November

Beautycon is an event meant to highlight innovators in the fields of Beauty, Makeup, and Lifestyle. They bring together online creators, fans, celebrities, and brands for two-day festivals full of fun, panel discussions, shopping, and free samples.
In 2017, 30,000 people attended Beautycon festivals internationally.
Passes:
Two-Day General Admission ($69) gets you in for the whole weekend, and you’ll also get a fabric wristband and other goodies.
You can also get a One-Day General Admission to pass for $49.
The Two-Day Hauler pass ($199) gets you in the doors 2 hours before the General Admission passes, plus a VIP swag bag.
General Admission and Hauler passes do not include access to programmed meetups.
Two-Day All Access passes ($999) include early entry as well as reserved seating in the front row at the Min Stage, photo opportunities in the Halo Room, a tour of the Creator Gifting Suite, custom merch, credit at the Beautycon Shop online, plus everything from the General and Hauler packs.
The final type of pass, the Two-Day Beauty Insider ($1999) pass, has everything the All-Access pass has plus a 2-night stay at a hotel downtown (for the LA festival).
4. YouTube FanFest
These events are customized to the wherever festival is visiting, so you’re always sure to see the big and rising YouTube stars from your region. Generally, these events include performances and activities as well as a Meet & Greet.
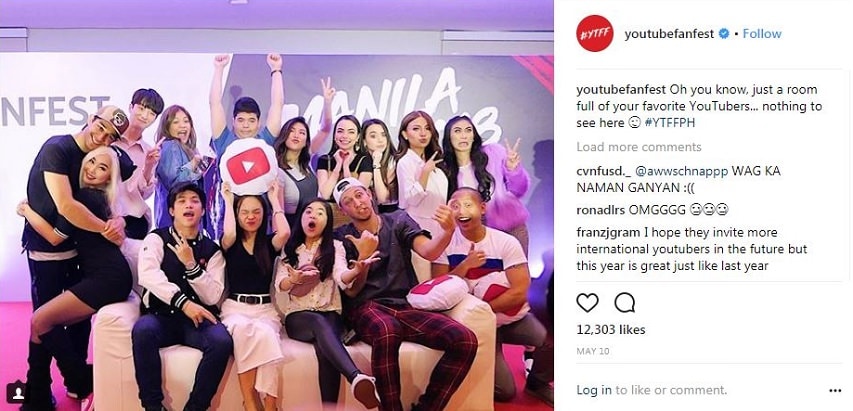
There is not a steady annual schedule for FanFests, but it has visited these cities in the past: Manila, Mumbai, Seoul, Toronto, Sao Paulo, Jakarta, Tokyo, Jeddah, Bangkok, Ho Chi Minh City, Hong Kong, and Washington, DC.
5. RTX
Austin, Texas: August
London: September
Sydney, Australia: February
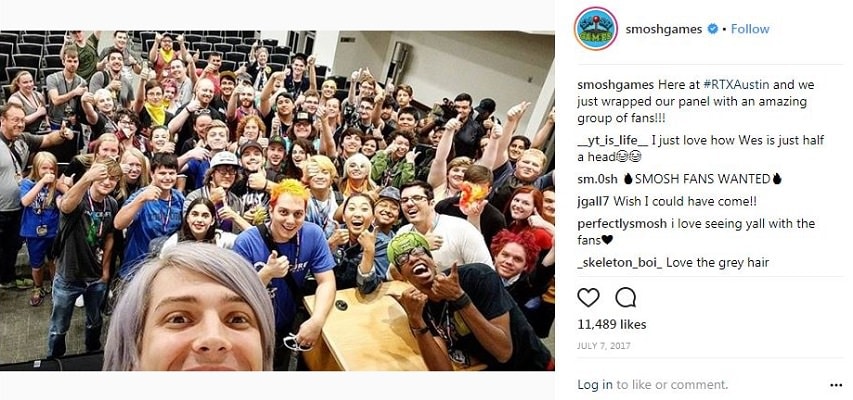
Brought to you by the creators behind Rooster Teeth, RTX is a celebration of internet culture and gaming. It includes exhibitors, live events, panels, and activities targeting gamers. Partners include Twitch and multiple gaming companies.
Passes:
It costs $50 for a Friday or Sunday pass, and $55 for just Saturday. You’ll get an attendee bag and lanyard with your pass.
The Weekend pass costs $110, and you get access to all 3 days plus the bag/lanyard and 1 autograph code.
A Weekend Plus ($335) pass gets you everything the Weekend pass gets you plus 2 autograph codes, early access to the Expo hall on Friday, lounge access, and reserved seating at the stage.
The Platinum pass is the most expensive at $729, and it includes everything the Weekend Plus pass does plus a priority line for panels, priority seating, and an exclusive party.
6. Amplify Live
Sydney, Australia: April
Melbourne, Australia: April
These events showcase the biggest social medial talent and musical acts in Australia and New Zealand. In 2017 the headliners of the Cool for Summer tour were Lindsey Stirling, Dan & Phil, and Nash Grier.
Tickets for the Cool for Summer tour cost $65 or $75 AUD depending on how early you buy them.
For VIP access, you can buy a Deluxe pass for $125-$150 AUD.
Meet and Greet tickets must be purchased separately from your event ticket.
Silver Meet and Greet, $80 AUD: access to the ‘Cool for Summer Celebrity Zone’ featuring non-headliner talent.
Gold Meet and Greet, $189 AUD: access to the ‘Cool for Summer Celebrity Zone’ plus a guaranteed meeting with one of the headliners (you choose which when you purchase).
Platinum Meet & Greet, $450 AUD: meet all the headliners and get access to an exclusive VIP area, merch pack, and special entry.
7. Summer in the City
London, UK: August

This is the largest online video festival in the UK. It features discussion panels, workshops, and live performances targeted at creators, fans of online video, and industry professionals. YouTubers might hang out on the show floor meeting fans, and there are also Meet and Greet sessions for top creators. All ticket holders can submit online ballots for a chance at Meet and Greet access.
Summer in the City even has its own awards show, SitC, to honor the best in online content. Previous winners include Dodie, Tomska, Jack & Dean, and Nathan Zed.
There is one day of Summer in the City called ‘Creator Day’ (generally on Friday), which features educational workshops for creators and industry professionals.
Passes:
If you buy your tickets during early bird pricing, the prices will look like this:
Saturday OR Sunday: £30.00
Saturday AND Sunday: £45.00
Creator Day: £30.00
Creator Day + Weekend: £60.00
Industry Ticket: £100.00
Have you ever attended an offline YouTube event? Which one, and how did you like it?
Richard Bennett
Richard Bennett is a writer and a lover of all things video.
Follow @Richard Bennett
Richard Bennett
Dec 30, 2022• Proven solutions
Want to meet your favorite creators? Or, do you want to become a better creator yourself? There are huge conventions you can go to where you can both indulge in fandom and work on your skills. Here are the 7 largest and most well-known:
- VidCon (US/Europe/Australia)
- PlayList Live (US)
- Beautycon (US/UK)
- YouTube Fanfest (Various international locations)
- RTX (US/UK/Australia)
- Amplify Live (Australia)
- Summer in the City (UK)
The Most Important YouTube Events
Want to be a youtube creator too? Go and get Wondershare Filmora, the video editing software for all creators.
1. VidCon
VidCon US: June (Anaheim, California)
VidCon Europe (Amsterdam): March/April
VidCon Australia: August/September
In 2017 over 30,000 YouTube enthusiasts – from fans to A-list creators – attended VidCon US, and that was thousands of more people than attended in 2016. It’s hard to imagine that this event – the biggest convention for YouTube and online video – will do anything but grow over the next few years.
VidCon was founded by the Vlogbrothers in 2010 as a place for internet friends to meet in real life.
Passes:
There are three different types of passes for VidCon – the Community Track, the Creator Track, and the Industry Track.
The Community Track is for anyone who loves YouTube and wants a chance to see their favorite creators and meet other fans. Pricing ranges from $100 to $180, depending on how early you buy your ticket.
The Creator Track gets you to access to all the same events as the Community badges (except for the Meet & Greet Lottery*), plus even more panels and workshops that will help you become a better creator. Pricing ranges from $150 to $250 depending on how early you buy your ticket.
The Industry Track is for anyone working in online video or video-adjacent industries, like advertising, branding, or talent management. There are panels on online marketing and working with influencers. Pricing ranges from $550 to $850, depending on when you buy your ticket.
*The Meet and Greet Lottery is a chance for anyone attending with a Community or Industry pass to meet their favorite creator. You rank the 15 creators you’d most like to meet according to how much you want to meet them. A computerized system will determine who gets into which Meet & Greet.
You have a two-week window (usually the first half of May) to submit your choices.
2. PlayList Live
Orlando, Florida: April/May
Tri-State (Secaucus, New Jersey): September
Washington DC: September
Playlist Live is a YouTube event for creators and their supporters that has a particular focus on music. Where VidCon is advertised using images of sunshine, crowded convention halls, and speakers, Playlist Live is advertised with images of city skylines, concerts, and fireworks.
Playlist Live prides itself on having ‘non-stop interactive activities.’ These include chances to meet your favorite creators on the Saturday and Sunday of the event. Which meetups you get to attend are determined by first-come-first-serve online signup.
Passes:
Pricing may vary depending on which event you are attending and how early you purchase your ticket. The following ranges are an estimate. Not all pass types are available for all events.
The Standard Pass ($75 - $130) is the basic pass for fans of the online video who want to meet their favorite creators, play games, and have a great time.
The Standard Pass + Merch ($100-$155) gets you into the same events as the standard pass plus a t-shirt and a wristband.
The Standard Deluxe ($120 - $205) comes with a hoodie, sunglasses, and a commemorative ticket.
The Parent Pass/Parent + Merch/Parent Deluxe ($75-$200) is for parents who want to chaperone their kids around Playlist Live and includes access to everything the Standard Pass can access.
The Insight Pass ($150-$205) is for anyone who wants to learn more about being a digital creator. You get Standard access as well as workshops and panels for successful creators and industry professionals designed to help you on your path.
The Insight + Merch/Insight Deluxe Passes ($175-$280) you get the same access as an Insight Pass plus goodies like shirts, wristbands, commemorative tickets, and sunglasses.
The Premium Pass ($250-$404) grants you standard access plus early access for meetup registration and a special VIP meetup.
There is also business Passes with Merch and Deluxe (Business Deluxe can cost up to $330) options for people working in marketing, publicity, production, etc. These passes include access to an extra day of business and industry-specific programming.
3. Beautycon Festivals
Los Angeles: July
New York: April
London, UK: November
Beautycon is an event meant to highlight innovators in the fields of Beauty, Makeup, and Lifestyle. They bring together online creators, fans, celebrities, and brands for two-day festivals full of fun, panel discussions, shopping, and free samples.
In 2017, 30,000 people attended Beautycon festivals internationally.
Passes:
Two-Day General Admission ($69) gets you in for the whole weekend, and you’ll also get a fabric wristband and other goodies.
You can also get a One-Day General Admission to pass for $49.
The Two-Day Hauler pass ($199) gets you in the doors 2 hours before the General Admission passes, plus a VIP swag bag.
General Admission and Hauler passes do not include access to programmed meetups.
Two-Day All Access passes ($999) include early entry as well as reserved seating in the front row at the Min Stage, photo opportunities in the Halo Room, a tour of the Creator Gifting Suite, custom merch, credit at the Beautycon Shop online, plus everything from the General and Hauler packs.
The final type of pass, the Two-Day Beauty Insider ($1999) pass, has everything the All-Access pass has plus a 2-night stay at a hotel downtown (for the LA festival).
4. YouTube FanFest
These events are customized to the wherever festival is visiting, so you’re always sure to see the big and rising YouTube stars from your region. Generally, these events include performances and activities as well as a Meet & Greet.
There is not a steady annual schedule for FanFests, but it has visited these cities in the past: Manila, Mumbai, Seoul, Toronto, Sao Paulo, Jakarta, Tokyo, Jeddah, Bangkok, Ho Chi Minh City, Hong Kong, and Washington, DC.
5. RTX
Austin, Texas: August
London: September
Sydney, Australia: February
Brought to you by the creators behind Rooster Teeth, RTX is a celebration of internet culture and gaming. It includes exhibitors, live events, panels, and activities targeting gamers. Partners include Twitch and multiple gaming companies.
Passes:
It costs $50 for a Friday or Sunday pass, and $55 for just Saturday. You’ll get an attendee bag and lanyard with your pass.
The Weekend pass costs $110, and you get access to all 3 days plus the bag/lanyard and 1 autograph code.
A Weekend Plus ($335) pass gets you everything the Weekend pass gets you plus 2 autograph codes, early access to the Expo hall on Friday, lounge access, and reserved seating at the stage.
The Platinum pass is the most expensive at $729, and it includes everything the Weekend Plus pass does plus a priority line for panels, priority seating, and an exclusive party.
6. Amplify Live
Sydney, Australia: April
Melbourne, Australia: April
These events showcase the biggest social medial talent and musical acts in Australia and New Zealand. In 2017 the headliners of the Cool for Summer tour were Lindsey Stirling, Dan & Phil, and Nash Grier.
Tickets for the Cool for Summer tour cost $65 or $75 AUD depending on how early you buy them.
For VIP access, you can buy a Deluxe pass for $125-$150 AUD.
Meet and Greet tickets must be purchased separately from your event ticket.
Silver Meet and Greet, $80 AUD: access to the ‘Cool for Summer Celebrity Zone’ featuring non-headliner talent.
Gold Meet and Greet, $189 AUD: access to the ‘Cool for Summer Celebrity Zone’ plus a guaranteed meeting with one of the headliners (you choose which when you purchase).
Platinum Meet & Greet, $450 AUD: meet all the headliners and get access to an exclusive VIP area, merch pack, and special entry.
7. Summer in the City
London, UK: August
This is the largest online video festival in the UK. It features discussion panels, workshops, and live performances targeted at creators, fans of online video, and industry professionals. YouTubers might hang out on the show floor meeting fans, and there are also Meet and Greet sessions for top creators. All ticket holders can submit online ballots for a chance at Meet and Greet access.
Summer in the City even has its own awards show, SitC, to honor the best in online content. Previous winners include Dodie, Tomska, Jack & Dean, and Nathan Zed.
There is one day of Summer in the City called ‘Creator Day’ (generally on Friday), which features educational workshops for creators and industry professionals.
Passes:
If you buy your tickets during early bird pricing, the prices will look like this:
Saturday OR Sunday: £30.00
Saturday AND Sunday: £45.00
Creator Day: £30.00
Creator Day + Weekend: £60.00
Industry Ticket: £100.00
Have you ever attended an offline YouTube event? Which one, and how did you like it?
Richard Bennett
Richard Bennett is a writer and a lover of all things video.
Follow @Richard Bennett
Avoid Shaky Footage: Proper Tripod Usage Techniques in Vlog Creation
How To Use a Tripod for Vlogging
Richard Bennett
Mar 27, 2024• Proven solutions
As you grow into a serious vlogger, a tripod will become an essential piece of equipment. You can get by for a long time setting your camera up on a stack of books, or an upside-down laundry hamper, but not forever. While these setups are great for a beginner, an intermediate vlogger will start to find them limiting. Even if you are an amazingly creative person who can create any camera setup without a tripod there will come a point where you will decide your creative energy is better spent on your video content.
This article will explain how to use a tripod and then introduce you to four different types.
Part 1: How To Set a Tripod for Vlogging
1. Setting Up Your Tripod
Step 1 – Pull out all three legs of your tripod and make sure it is standing stably. There will be tensioners on the legs which you can release in order to adjust your height. Once your legs are extended to the height you want continue adjusting them until your tripod is level. Some tripods have a built in bubble level, but if yours does not you can use a separate bubble level or make a guestimate.
Make sure when you are setting up your tripod that you point one of its legs towards your subject. This will give you room to stand behind your camera, in-between the other two legs. If you have one leg pointed directly behind your camera then you may trip over it. Or, you may knock over and damage your camera.
Step 2 – On the top of your tripod there will be a plate with a small hole and a screw. Remove this plate using either a clip or lever, depending on your tripod. Once your plate is detached screw it into the bottom of your camera. It should be tight, but not too tight or you risk damaging your camera.
Step 3 – Attach your plate, which now has your camera mounted to it, back onto your tripod.
Your tripod comes with a ‘head’. Your tripod’s head is what your camera is mounted on top of. There are several different types of tripod heads and mounts which are all useful for different things.
Ball Heads and Pan/Tilt Heads are the two most common types of tripod heads. Ball Heads allow you to adjust your camera’s position quite a bit before you start shooting. They are not good for adding in camera movements while you are filming, however, because you need to lock them in place. Pan/Tilt heads are great for creating camera movement. Most Pan/Tilt heads have a handle which you can use to make a smooth panning motion.
Part 2: Why Do You Need a Tripod: Benefits of Using Tripod
Why can’t you just hold a camera in your hand while shooting vlog entries for your YouTube channel? Honestly, you can, but the camera may shake a lot and your footage might end up being unusable. Putting a camera on a tripod reduces the probability of camera shake to the minimum and that is just the tip of the iceberg.
A huge amount of vlogs can be described as sit down videos, in which the host of the video sits in front of a camera and talks to the audience. Holding a camera while talking or trying to present a product to the viewers is next to impossible, so in order to avoid having to deal with a camera, you can simply put it on a tripod, find the best angle, and push the record button.
On the go videos, are recorded at exterior locations, and a lot of YouTubers choose to shoot these types of videos handheld, but this approach makes it difficult to maintain the same shot composition for long. A Monopod, Gorillapod or just a simple selfie stick can make your job much easier because they stabilize the camera. In addition, shooting smooth panning shots without a tripod is as difficult as it sounds.
Part 3: A Few Things You’ll Need to Consider Before You Buy a Tripod
There are thousands of different tripod models you can use for vlogging, but which model you’re going to choose depends mostly on the type of vlog you want to make. If you are planning on shooting all of your videos in the studio-like conditions, then portability isn’t such an important feature, while quite the opposite is true if you intend on filming all of your footage on outdoor locations.
However, there are certain traits you have to consider when choosing a tripod you’re going to use while recording your vlog entries.
Sturdiness: There is absolutely no point in spending money on a tripod that breaks easily. Although if your plan is to shoot vlogs at home or in a studio, then buying a cheaper plastic tripod isn’t such a bad option, since the clamps and joints won’t have to endure a lot of wear and tear. Consider buying a more durable tripod if you are going to be traveling a lot while working on your vlogs.
The Type of Camera: A number of factors can contribute to the weight of a camera, including battery grips or lenses, so before you buy a tripod make sure that it can support the weight of the camera you want to use to record your videos.
The Maximum Height: Most vloggers don’t really have to worry about how tall their tripod is, because they are not on their feet in any of the shots featured in the video. Vloggers working on DIY videos, cooking tutorials or any other type of vlog that involves movement and action should pay attention to this trait.
Photo or Video Tripods: Do you want to take beautiful panning shots? If the answer is yes then you should get a video tripod that enables you to move the camera smoothly in any direction. Photo tripods are a great option for static shots that don’t involve a lot of camera movement.
Mobility: The heavier a tripod is, the more stability it can provide, but carrying a tripod that weighs over 10 pounds to shoot sports or adventure vlogs can be a tiring endeavor. Although portability is a factor, it shouldn’t prevent you from buying a high-quality tripod that will ensure your footage is perfectly smooth and stable.
Part 4: 4 Types of Tripods
Full-Sized Tripods: are very sturdy, and as a result can be fairly heavy. Although you can take them a lot of places they are not convenient to carry for extended periods of time. They are the most reliable way to ensure you have absolutely no camera shake.
Compact Tripods: appear to be the same size as Full-Sized tripods, but they are actually much lighter. You can get the same height with a Compact Tripod as a Full-Sized tripod and it will be much easier to travel with. However, Compact Tripods are not as stable. If you are shooting for an extended period of time you may need to weigh your Compact Tripod down with sandbags to keep it steady.
Gorillapods: have flexible legs which can be wrapped around posts, fences, or anything else you may want to mount your camera on. They are also lightweight enough that you can carry them around while you shoot. If you bend it right you can essentially use your Gorillapod as a heavy-duty selfie-stick for your camera.
Table-Top Tripods: are very small and easy to travel with. You can leave one in your camera bag or your glove box. Table-Top Tripods are meant to be set up on top of desks or other stable surfaces and may not be ideal for heavier cameras.
Part 5: The 5 Best Tripods For YouTube Vlogging
Even if you know everything there is to know about tripods, the selection process can be daunting. That’s why we’ve shortlisted the top 5 tripods on the market, in an effort to make finding the right tripod for your vlog videos as quick an easy as it can possibly be. Let’s have a look.
1. CamRah Smartphone Tripod
Price: $24.99

An increasing number of Smartphones features powerful cameras that can record videos at high resolutions. Unfortunately, most iPhones and Android devices are lightweight, which makes it difficult to hold them perfectly still while shooting a video. CamRah Smartphone Tripod offers a perfect solution to this problem because it is easy to pack and you can carry it wherever you go, without needing the extra space.
It weighs just 0.6lbs and it is 10.8 inches tall. The tripod has a maximum load of 11lbs which means that besides Smartphones, you can also mount action cameras, webcams, or even smaller DSLR cameras onto it. The flexible legs made from high-density foam offer stability even when the CamRah Tripod is placed on an uneven surface.
Pros:
- Easily portable
- Affordable
- Jaws technology provides an extra strong grip of the camera
Cons:
- The tripod’s legs can’t be extended
- Can’t be used with professional cameras
2. Manfrotto Mini Travel Tripod
Price: $34.99

Yet another great option for shooting vlogs with a Smartphone. The Manfrotto Mini Travel Tripod kit is also an excellent choice for all vloggers who shoot their videos with compact cameras. The tripod weighs just 0.51lbs and it is 5.31 inches tall, which makes it a perfect travel companion. However, it can’t support cameras heavier than 2.2lbs, so you have to carefully choose the camera you want to put on this tripod.
The tripod’s rotatable head features a lock button that enables you to fix the camera at a certain position and to shoot a video from an angle you selected. You can’t extend the legs on this tripod so shooting high angle shots is not an option.
Pros:
- Small and durable
- Allows you to mount almost any Smartphone model
- Compatible with compact cameras
Cons:
- Limits your shot selection
- Tripod’s legs can’t be extended
3. Joby Gorilla Pod
Price: $22.50

This tripod is a superstar in the vlogging community because it is flexible, easy to set up and it fits into a pocket. Joby Gorilla Pod’s legs are segmented, so you can freely choose an angle from which you want to shoot, without having to worry about the camera’s stability. You can use this tripod on flat and uneven surfaces equally effectively.
Joby Gorilla weighs just 1lbs and its maximum height 11.6 inches, which makes it perfectly suited for talking heads videos. Using this tripod while you are on the go is also an option if you have a camera that weighs less than 3lbs.
Pros:
- Highly adjustable
- Sturdy and Lightweight
- Made from stainless steel
Cons:
- Can’t be used for panning shots
- Legs can be extended for just one inch
4. Manfrotto Compact Action Tripod
Price: $64.49
If you love shooting your vlogs at night or if you simply want a tripod you can use in the studio an outdoor conditions, then Manfrotto’s Compact Action Tripod is one the best options you have at your disposal. The ergonomic head features a mounting plate that is easy to use and which provides a perfect grip of a camera.
This tripod is designed to be used with consumer-level DSLR cameras, but you can use it to shoot videos with almost all types of cameras. The Compact Action Tripod has a maximum height of 51.57 inches, and it can’t hold cameras heavier than 3.30lbs.
Pros:
- Suitable for both photography and video
- Great for outdoor use
- Allows you to take a wide variety of shots
Cons:
- Can’t support a lot of weight
- Not perfectly suited for professional-level cameras
5. Magnus VT-4000 Fluid Head Tripod
Price: $159.95
Experienced vloggers who record their videos with professional cameras, will enjoy using the Magnus VT-4000 Fluid Head Tripod. The 59-inch tall tripod can support as much as 8.8lbs of weight, and it is designed to help you create perfectly stable shots. The superb panning and tilting option enable you to move your camera freely while recording smooth shots, free of camera shakes.
The quick release mounting plate is compatible with a wide range of cameras, so you can experiment and work with several different cameras while using the same tripod. You can hardly make a mistake if you choose to buy this tripod because you’ll be able to use it to record vlogs at interior and exterior locations.
Pros:
- Easily adjustable to any surface
- Perfect for high angle shots
- Heavy-duty locks
Cons:
- Weighs 7.9lbs
- Not the best choice for action and adventure vlogs
Richard Bennett
Richard Bennett is a writer and a lover of all things video.
Follow @Richard Bennett
Richard Bennett
Mar 27, 2024• Proven solutions
As you grow into a serious vlogger, a tripod will become an essential piece of equipment. You can get by for a long time setting your camera up on a stack of books, or an upside-down laundry hamper, but not forever. While these setups are great for a beginner, an intermediate vlogger will start to find them limiting. Even if you are an amazingly creative person who can create any camera setup without a tripod there will come a point where you will decide your creative energy is better spent on your video content.
This article will explain how to use a tripod and then introduce you to four different types.
Part 1: How To Set a Tripod for Vlogging
1. Setting Up Your Tripod
Step 1 – Pull out all three legs of your tripod and make sure it is standing stably. There will be tensioners on the legs which you can release in order to adjust your height. Once your legs are extended to the height you want continue adjusting them until your tripod is level. Some tripods have a built in bubble level, but if yours does not you can use a separate bubble level or make a guestimate.
Make sure when you are setting up your tripod that you point one of its legs towards your subject. This will give you room to stand behind your camera, in-between the other two legs. If you have one leg pointed directly behind your camera then you may trip over it. Or, you may knock over and damage your camera.
Step 2 – On the top of your tripod there will be a plate with a small hole and a screw. Remove this plate using either a clip or lever, depending on your tripod. Once your plate is detached screw it into the bottom of your camera. It should be tight, but not too tight or you risk damaging your camera.
Step 3 – Attach your plate, which now has your camera mounted to it, back onto your tripod.
Your tripod comes with a ‘head’. Your tripod’s head is what your camera is mounted on top of. There are several different types of tripod heads and mounts which are all useful for different things.
Ball Heads and Pan/Tilt Heads are the two most common types of tripod heads. Ball Heads allow you to adjust your camera’s position quite a bit before you start shooting. They are not good for adding in camera movements while you are filming, however, because you need to lock them in place. Pan/Tilt heads are great for creating camera movement. Most Pan/Tilt heads have a handle which you can use to make a smooth panning motion.
Part 2: Why Do You Need a Tripod: Benefits of Using Tripod
Why can’t you just hold a camera in your hand while shooting vlog entries for your YouTube channel? Honestly, you can, but the camera may shake a lot and your footage might end up being unusable. Putting a camera on a tripod reduces the probability of camera shake to the minimum and that is just the tip of the iceberg.
A huge amount of vlogs can be described as sit down videos, in which the host of the video sits in front of a camera and talks to the audience. Holding a camera while talking or trying to present a product to the viewers is next to impossible, so in order to avoid having to deal with a camera, you can simply put it on a tripod, find the best angle, and push the record button.
On the go videos, are recorded at exterior locations, and a lot of YouTubers choose to shoot these types of videos handheld, but this approach makes it difficult to maintain the same shot composition for long. A Monopod, Gorillapod or just a simple selfie stick can make your job much easier because they stabilize the camera. In addition, shooting smooth panning shots without a tripod is as difficult as it sounds.
Part 3: A Few Things You’ll Need to Consider Before You Buy a Tripod
There are thousands of different tripod models you can use for vlogging, but which model you’re going to choose depends mostly on the type of vlog you want to make. If you are planning on shooting all of your videos in the studio-like conditions, then portability isn’t such an important feature, while quite the opposite is true if you intend on filming all of your footage on outdoor locations.
However, there are certain traits you have to consider when choosing a tripod you’re going to use while recording your vlog entries.
Sturdiness: There is absolutely no point in spending money on a tripod that breaks easily. Although if your plan is to shoot vlogs at home or in a studio, then buying a cheaper plastic tripod isn’t such a bad option, since the clamps and joints won’t have to endure a lot of wear and tear. Consider buying a more durable tripod if you are going to be traveling a lot while working on your vlogs.
The Type of Camera: A number of factors can contribute to the weight of a camera, including battery grips or lenses, so before you buy a tripod make sure that it can support the weight of the camera you want to use to record your videos.
The Maximum Height: Most vloggers don’t really have to worry about how tall their tripod is, because they are not on their feet in any of the shots featured in the video. Vloggers working on DIY videos, cooking tutorials or any other type of vlog that involves movement and action should pay attention to this trait.
Photo or Video Tripods: Do you want to take beautiful panning shots? If the answer is yes then you should get a video tripod that enables you to move the camera smoothly in any direction. Photo tripods are a great option for static shots that don’t involve a lot of camera movement.
Mobility: The heavier a tripod is, the more stability it can provide, but carrying a tripod that weighs over 10 pounds to shoot sports or adventure vlogs can be a tiring endeavor. Although portability is a factor, it shouldn’t prevent you from buying a high-quality tripod that will ensure your footage is perfectly smooth and stable.
Part 4: 4 Types of Tripods
Full-Sized Tripods: are very sturdy, and as a result can be fairly heavy. Although you can take them a lot of places they are not convenient to carry for extended periods of time. They are the most reliable way to ensure you have absolutely no camera shake.
Compact Tripods: appear to be the same size as Full-Sized tripods, but they are actually much lighter. You can get the same height with a Compact Tripod as a Full-Sized tripod and it will be much easier to travel with. However, Compact Tripods are not as stable. If you are shooting for an extended period of time you may need to weigh your Compact Tripod down with sandbags to keep it steady.
Gorillapods: have flexible legs which can be wrapped around posts, fences, or anything else you may want to mount your camera on. They are also lightweight enough that you can carry them around while you shoot. If you bend it right you can essentially use your Gorillapod as a heavy-duty selfie-stick for your camera.
Table-Top Tripods: are very small and easy to travel with. You can leave one in your camera bag or your glove box. Table-Top Tripods are meant to be set up on top of desks or other stable surfaces and may not be ideal for heavier cameras.
Part 5: The 5 Best Tripods For YouTube Vlogging
Even if you know everything there is to know about tripods, the selection process can be daunting. That’s why we’ve shortlisted the top 5 tripods on the market, in an effort to make finding the right tripod for your vlog videos as quick an easy as it can possibly be. Let’s have a look.
1. CamRah Smartphone Tripod
Price: $24.99
An increasing number of Smartphones features powerful cameras that can record videos at high resolutions. Unfortunately, most iPhones and Android devices are lightweight, which makes it difficult to hold them perfectly still while shooting a video. CamRah Smartphone Tripod offers a perfect solution to this problem because it is easy to pack and you can carry it wherever you go, without needing the extra space.
It weighs just 0.6lbs and it is 10.8 inches tall. The tripod has a maximum load of 11lbs which means that besides Smartphones, you can also mount action cameras, webcams, or even smaller DSLR cameras onto it. The flexible legs made from high-density foam offer stability even when the CamRah Tripod is placed on an uneven surface.
Pros:
- Easily portable
- Affordable
- Jaws technology provides an extra strong grip of the camera
Cons:
- The tripod’s legs can’t be extended
- Can’t be used with professional cameras
2. Manfrotto Mini Travel Tripod
Price: $34.99
Yet another great option for shooting vlogs with a Smartphone. The Manfrotto Mini Travel Tripod kit is also an excellent choice for all vloggers who shoot their videos with compact cameras. The tripod weighs just 0.51lbs and it is 5.31 inches tall, which makes it a perfect travel companion. However, it can’t support cameras heavier than 2.2lbs, so you have to carefully choose the camera you want to put on this tripod.
The tripod’s rotatable head features a lock button that enables you to fix the camera at a certain position and to shoot a video from an angle you selected. You can’t extend the legs on this tripod so shooting high angle shots is not an option.
Pros:
- Small and durable
- Allows you to mount almost any Smartphone model
- Compatible with compact cameras
Cons:
- Limits your shot selection
- Tripod’s legs can’t be extended
3. Joby Gorilla Pod
Price: $22.50
This tripod is a superstar in the vlogging community because it is flexible, easy to set up and it fits into a pocket. Joby Gorilla Pod’s legs are segmented, so you can freely choose an angle from which you want to shoot, without having to worry about the camera’s stability. You can use this tripod on flat and uneven surfaces equally effectively.
Joby Gorilla weighs just 1lbs and its maximum height 11.6 inches, which makes it perfectly suited for talking heads videos. Using this tripod while you are on the go is also an option if you have a camera that weighs less than 3lbs.
Pros:
- Highly adjustable
- Sturdy and Lightweight
- Made from stainless steel
Cons:
- Can’t be used for panning shots
- Legs can be extended for just one inch
4. Manfrotto Compact Action Tripod
Price: $64.49
If you love shooting your vlogs at night or if you simply want a tripod you can use in the studio an outdoor conditions, then Manfrotto’s Compact Action Tripod is one the best options you have at your disposal. The ergonomic head features a mounting plate that is easy to use and which provides a perfect grip of a camera.
This tripod is designed to be used with consumer-level DSLR cameras, but you can use it to shoot videos with almost all types of cameras. The Compact Action Tripod has a maximum height of 51.57 inches, and it can’t hold cameras heavier than 3.30lbs.
Pros:
- Suitable for both photography and video
- Great for outdoor use
- Allows you to take a wide variety of shots
Cons:
- Can’t support a lot of weight
- Not perfectly suited for professional-level cameras
5. Magnus VT-4000 Fluid Head Tripod
Price: $159.95
Experienced vloggers who record their videos with professional cameras, will enjoy using the Magnus VT-4000 Fluid Head Tripod. The 59-inch tall tripod can support as much as 8.8lbs of weight, and it is designed to help you create perfectly stable shots. The superb panning and tilting option enable you to move your camera freely while recording smooth shots, free of camera shakes.
The quick release mounting plate is compatible with a wide range of cameras, so you can experiment and work with several different cameras while using the same tripod. You can hardly make a mistake if you choose to buy this tripod because you’ll be able to use it to record vlogs at interior and exterior locations.
Pros:
- Easily adjustable to any surface
- Perfect for high angle shots
- Heavy-duty locks
Cons:
- Weighs 7.9lbs
- Not the best choice for action and adventure vlogs
Richard Bennett
Richard Bennett is a writer and a lover of all things video.
Follow @Richard Bennett
Also read:
- In 2024, Building Audience Organically Tactics That Deliver Views
- Hone Your Hashtag Game Tripled Traffic, $6K+ Vistas
- Easy Steps to Youtubing Prosperity Channel Size Not a Barrier
- Digital Delights The Finest 15 Comedic Channels on YouTube for 2024
- 2024 Approved Breaking Down the Process for YouTube Comment Highlights
- [New] Becoming a Vlogger Voice Confident Content Creation Strategies
- Quick Guide Eradicating Unwanted YouTube Downloads on PC/Mac
- Stand Out on YouTube with These 20 Top Font Choices
- [New] Access Your Favorites Anytime The Leading 6 Free Video Downloaders
- [Updated] Essential Tips for Making YouTube Introductory Trailers
- Amplify Your Content Best Practices in Collaborative YouTube Outros
- Easy Customization Free YouTube Visual Templates
- 2024 Approved Can Buying Likes Improve YouTube Rankings?
- [New] Delving Deep YouTube's Revenue System From Publisher to You
- [New] Awe-Inspiring Allure Top YouTube Magic Editing Wonders
- Balancing Act Proper Techniques for Stable Photos for 2024
- [New] 9 YouTube Video Extraction Tools for Android Reviewed
- Unleash the Full Potential of YouTube With Variable Playback Rates
- [Updated] 2024 Approved IG Boomerangs Crafting Compelling Circular Content
- How to Check Distance and Radius on Google Maps For your Poco M6 Pro 5G | Dr.fone
- In 2024, 9 Best Phone Monitoring Apps for Realme V30 | Dr.fone
- In 2024, iPhone XR Backup Password Never Set But Still Asking? Heres the Fix | Dr.fone
- 2024 Approved Elevate Your TikTok Game Expert Mac Video Editing Guide
- In 2024, Expertise in Apps Enhancing Video Conferencing
- [New] Unlocking Audible Content From Twitter Videos
- [Updated] The Roadmap to Fandom 10 Secrets for Rampant FB Engagement
- Precise Mac Photo Tips Mastering Five Quick and Effective Methods for 2024
- Top 6 Online Webcam Recorders 2023
- New Alternatives to iMovie on Windows Top Picks for 2024
- Updated 2024 Approved The Best Online Photo Background Remover Tools for Free
- Title: "The Ultimate Networking Haven Beyond VidCon"
- Author: Brian
- Created at : 2024-05-25 12:59:05
- Updated at : 2024-05-26 12:59:05
- Link: https://youtube-video-recordings.techidaily.com/the-ultimate-networking-haven-beyond-vidcon/
- License: This work is licensed under CC BY-NC-SA 4.0.
