
:max_bytes(150000):strip_icc():format(webp)/before-you-buy-a-video-projector-1847845-v3-ED-8a08e03f2cfc4835a13872618bd4ad00.png)
"Step Into the World of YouTube Transcription A Comprehensive No-Fee Guide"
Step Into the World of YouTube Transcription: A Comprehensive No-Fee Guide
How to Transcribe a YouTube Video for FREE

Richard Bennett
Mar 27, 2024• Proven solutions
If you want to transcribe your videos to make the dialogs and speeches available in text format, you can use YouTube Transcribe feature that the streaming site offers for free. In this article, I’ll share with you a couple of methods to transcribe a YouTube video for free.
- Part 1: Transcribe YouTube Video Automatically for Free [2 Ways]
- Part 2: Transcribe YouTube Video to Text Online with Third-Party Service
- Part 3: Benefits of Transcribing YouTube Videos
- Part 4: YouTube Video Transcription FAQs
Part 1: How to Transcribe YouTube Video Automatically for Free [2 Ways]
Besides the basic video editing features on the YouTube platform, you can now quickly transcribe YouTube videos to the text as well. The good thing is, you can either use the automatic transcription feature that YouTube offers, or upload it manually while adjusting the timing as you go further.
Below are the two methods to transcribe your YouTube videos for free:
Method 1: Use the Automated Transcription Service on YouTube
As the name suggests, YouTube automatic transcription service works automatically. This means you don’t even have to click the ‘Transcribe’ button anymore to transcribe a YouTube video, and the website takes care of it on its own. All you need to do is, choose English as the language of the video when setting up subtitles. You can follow the instructions given below to do so:
Step 1 Upload a Video
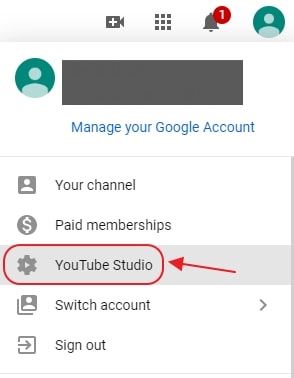
Sign in to your YouTube account, click your profile picture from the top-right corner, and click YouTube Studio from the menu. Next, click CREATE from the upper-right corner, click Upload videos from the menu, and drag and drop a video from your computer to the Upload videos box that appears next.

Step 2 Select Transcription Language
On the Details page of the next box that appears, scroll down and click MORE OPTIONS, and select English in the Video language drop-down list under the Language, subtitles, and closed captions (CC) section.

Step 3 Publish the Video
Follow the on-screen instructions from this point to publish the video, and wait while YouTube automatically transcribes and adds the close captions to it.
Note: Depending on the duration of the clip, the time YouTube would take to transcribe may vary.
After YouTube has transcribed the video, you can download the transcription file in your preferred format. The instructions are given below explain how you can do so:
- Get to the Subtitles Window
While on the YouTube Studio page, click Subtitles from the left pane to go to the Channel subtitles page. And then click the video you want to modify.
- Get to Classic Studio
In the video subtitle page of the target video, hover mouse on the Published Automatic status under the Subtitles column, click the Options icon (with three vertical dots) that appears, and click Edit on Classic Studio.

- Download Transcription File
Click and open the Actions drop-down list from the top-left corner of the left pane, click your preferred transcription format including .vtt, .srt and .sbv from the list, and save the file on your local hard disk.

Method 2: Get YouTube Transcription when Watching
In addition, if you are watching any other video, you can make YouTube transcribe that for you as well. You can follow the instructions given below to get the YouTube video to text transcription:
Step 1: Play the Video
Go to the video on YouTube and start playing it. Make sure NOT to get to full-screen mode as doing so would hide the option to transcribe the clip.
Step 2: Enable Transcription
Click the More icon (with three horizontal dots) from under the bottom-right corner of the video player, and click Open transcript to see the video transcription in the Transcript pane that appears in the right.
Step 3: Manage Timestamps
Click the Options icon (with three vertical dots) from the top-right corner of the Transcript pane, and click Toggle timestamp to enable or disable the timestamps in the video transcription.
Limitations of Using YouTube Transcribe
Although YouTube’s automatic transcription is a decent feature that saves you a lot of time, since Google uses machine learning algorithms to convert the speech to text, the level of accuracy may vary depending on the accent of the speaker, and the clarity of the audio the video has. Also, even sometime you may not be satisfied with the end-results.
Alternatively, you can use Kapwing to transcribe a YouTube video and download the transcription file with the below step-by-step instructions:
Step 1: Add YouTube Video
Copy the URL of YouTube video you want to transcribe, go to https://www.kapwing.com/subtitles , paste the URL in the Paste a URL field, wait while Kapwing fetches the content of the video, and opens the Add subtitles to Video page.
Step 2: Transcribe the Video
Click Auto-generate from the right window, and follow the on-screen instructions to transcribe YouTube video to text.

Step 3: Download the Transcription File
Click Download SRT from the left pane, and follow the instructions from there to download the transcription file in *.srt format.

Pros
- Kapwing is free to use
- The auto-transcription process is quick and less tedious
- Kapwing also allows manual transcription and uploading of an existing *.srt file
Cons
- The auto-transcribed text might lack accuracy as the task is done by the speech-to-text tools that work in the background
You can follow the step-by-step instructions to transcribe a YouTube video and download the transcription file using Kapwing:
Step 1: Add YouTube Video
Copy the URL of YouTube video you want to transcribe, go to https://www.kapwing.com/subtitles , paste the URL in the Paste a URL field, wait while Kapwing fetches the content of the video, and opens the Add subtitles to Video page.
Step 2: Transcribe the Video
Click Auto-generate from the right window, and follow the on-screen instructions to transcribe YouTube video to text.
Step 3: Download the Transcription File
Click Download SRT from the left pane, and follow the instructions from there to download the transcription file in *.srt format.
Pros
- Kapwing is free to use
- The auto-transcription process is quick and less tedious
- Kapwing also allows manual transcription and uploading of an existing *.srt file
Cons
- The auto-transcribed text might lack accuracy as the task is done by the speech-to-text tools that work in the background
Part 3: Benefits of Transcribing YouTube Videos
You may need video transcriptions for several reasons, such as analyzing the summary of the entire speech in the video, extracting a single phrase or quote that was spoken in the clip, or making the video helpful even for those suffering from hearing impairment. When you transcribe a YouTube video, the transcript can be useful in many ways. Some of the most common benefits of transcribing a video include:
- Search Engine Optimization
When you add subtitles, the text can appear in Google search results when someone types a similar phrase in the search box. This helps get more views to your videos, thus giving your channel popularity, and you, monetary gains in the long run.
- Accent
If the speaker in the video is from a different region and is using an accent that you are not much comfortable with, you can turn on the subtitles and read the dialogs along with the video.
- Repurposing on Blogs
If you own a blog that you have embedded your video to, the transcription could be used to add text to it so the target audience can get a fair idea of what the video is all about. This is useful because many people prefer reading over watching.
YouTube Video Transcription FAQs
1. How to Transcribe YouTube Video to Text
Usually the transcription files have *.srt extension that are globally accepted and supported by almost all media players. However, there might be instances when you want to have the subtitles in plain text.
That said, to convert an SRT file to TXT, you can:
- Right-click the SRT file
- Go to Rename
- Replace srt with txt and press Enter
- Click OK on the confirmation box that appears next to convert SRT to TXT
After this, you can simply double-click the file, and read and modify the transcribed content as needed.
2. How to Edit and Upload Edited Transcript to YouTube
If you made any modifications to the transcript that was automatically generated by YouTube or any other third-party transcription tool, you can follow the steps given below to upload the new file to the YouTube video:
- Go to YouTube Studio and then to the Channel subtitles page as explained earlier
- Expand the Languages column of the target video
- Click the Options icon that appears under the Subtitles column when you hover mouse on to it
- Click Edit on Classic Studio
- On the next page, click Edit from the top-right corner

- Click to open the Actions drop-down list from the upper-left corner
- Click Upload a file
- Follow the on-screen instructions from there to upload the modified transcription file
- Click Save Changes from the top-right corner of the page when done
Conclusion
If you are looking for a quick and easy way of adding subtitles to your videos, letting YouTube transcribe for you could be a good approach. However, because these auto-generated transcriptions are created by machine learning algorithms, their accuracy cannot be counted on. Therefore, the best way to get the job done accurately is, let YouTube auto-transcribe your video, download the transcription file, make the necessary changes to it, and then upload the file back to the video.
Richard Bennett
Richard Bennett is a writer and a lover of all things video.
Follow @Richard Bennett
Richard Bennett
Mar 27, 2024• Proven solutions
If you want to transcribe your videos to make the dialogs and speeches available in text format, you can use YouTube Transcribe feature that the streaming site offers for free. In this article, I’ll share with you a couple of methods to transcribe a YouTube video for free.
- Part 1: Transcribe YouTube Video Automatically for Free [2 Ways]
- Part 2: Transcribe YouTube Video to Text Online with Third-Party Service
- Part 3: Benefits of Transcribing YouTube Videos
- Part 4: YouTube Video Transcription FAQs
Part 1: How to Transcribe YouTube Video Automatically for Free [2 Ways]
Besides the basic video editing features on the YouTube platform, you can now quickly transcribe YouTube videos to the text as well. The good thing is, you can either use the automatic transcription feature that YouTube offers, or upload it manually while adjusting the timing as you go further.
Below are the two methods to transcribe your YouTube videos for free:
Method 1: Use the Automated Transcription Service on YouTube
As the name suggests, YouTube automatic transcription service works automatically. This means you don’t even have to click the ‘Transcribe’ button anymore to transcribe a YouTube video, and the website takes care of it on its own. All you need to do is, choose English as the language of the video when setting up subtitles. You can follow the instructions given below to do so:
Step 1 Upload a Video
Sign in to your YouTube account, click your profile picture from the top-right corner, and click YouTube Studio from the menu. Next, click CREATE from the upper-right corner, click Upload videos from the menu, and drag and drop a video from your computer to the Upload videos box that appears next.
Step 2 Select Transcription Language
On the Details page of the next box that appears, scroll down and click MORE OPTIONS, and select English in the Video language drop-down list under the Language, subtitles, and closed captions (CC) section.
Step 3 Publish the Video
Follow the on-screen instructions from this point to publish the video, and wait while YouTube automatically transcribes and adds the close captions to it.
Note: Depending on the duration of the clip, the time YouTube would take to transcribe may vary.
After YouTube has transcribed the video, you can download the transcription file in your preferred format. The instructions are given below explain how you can do so:
- Get to the Subtitles Window
While on the YouTube Studio page, click Subtitles from the left pane to go to the Channel subtitles page. And then click the video you want to modify.
- Get to Classic Studio
In the video subtitle page of the target video, hover mouse on the Published Automatic status under the Subtitles column, click the Options icon (with three vertical dots) that appears, and click Edit on Classic Studio.
- Download Transcription File
Click and open the Actions drop-down list from the top-left corner of the left pane, click your preferred transcription format including .vtt, .srt and .sbv from the list, and save the file on your local hard disk.
Method 2: Get YouTube Transcription when Watching
In addition, if you are watching any other video, you can make YouTube transcribe that for you as well. You can follow the instructions given below to get the YouTube video to text transcription:
Step 1: Play the Video
Go to the video on YouTube and start playing it. Make sure NOT to get to full-screen mode as doing so would hide the option to transcribe the clip.
Step 2: Enable Transcription
Click the More icon (with three horizontal dots) from under the bottom-right corner of the video player, and click Open transcript to see the video transcription in the Transcript pane that appears in the right.
Step 3: Manage Timestamps
Click the Options icon (with three vertical dots) from the top-right corner of the Transcript pane, and click Toggle timestamp to enable or disable the timestamps in the video transcription.
Limitations of Using YouTube Transcribe
Although YouTube’s automatic transcription is a decent feature that saves you a lot of time, since Google uses machine learning algorithms to convert the speech to text, the level of accuracy may vary depending on the accent of the speaker, and the clarity of the audio the video has. Also, even sometime you may not be satisfied with the end-results.
Alternatively, you can use Kapwing to transcribe a YouTube video and download the transcription file with the below step-by-step instructions:
Step 1: Add YouTube Video
Copy the URL of YouTube video you want to transcribe, go to https://www.kapwing.com/subtitles , paste the URL in the Paste a URL field, wait while Kapwing fetches the content of the video, and opens the Add subtitles to Video page.
Step 2: Transcribe the Video
Click Auto-generate from the right window, and follow the on-screen instructions to transcribe YouTube video to text.
Step 3: Download the Transcription File
Click Download SRT from the left pane, and follow the instructions from there to download the transcription file in *.srt format.
Pros
- Kapwing is free to use
- The auto-transcription process is quick and less tedious
- Kapwing also allows manual transcription and uploading of an existing *.srt file
Cons
- The auto-transcribed text might lack accuracy as the task is done by the speech-to-text tools that work in the background
You can follow the step-by-step instructions to transcribe a YouTube video and download the transcription file using Kapwing:
Step 1: Add YouTube Video
Copy the URL of YouTube video you want to transcribe, go to https://www.kapwing.com/subtitles , paste the URL in the Paste a URL field, wait while Kapwing fetches the content of the video, and opens the Add subtitles to Video page.
Step 2: Transcribe the Video
Click Auto-generate from the right window, and follow the on-screen instructions to transcribe YouTube video to text.
Step 3: Download the Transcription File
Click Download SRT from the left pane, and follow the instructions from there to download the transcription file in *.srt format.
Pros
- Kapwing is free to use
- The auto-transcription process is quick and less tedious
- Kapwing also allows manual transcription and uploading of an existing *.srt file
Cons
- The auto-transcribed text might lack accuracy as the task is done by the speech-to-text tools that work in the background
Part 3: Benefits of Transcribing YouTube Videos
You may need video transcriptions for several reasons, such as analyzing the summary of the entire speech in the video, extracting a single phrase or quote that was spoken in the clip, or making the video helpful even for those suffering from hearing impairment. When you transcribe a YouTube video, the transcript can be useful in many ways. Some of the most common benefits of transcribing a video include:
- Search Engine Optimization
When you add subtitles, the text can appear in Google search results when someone types a similar phrase in the search box. This helps get more views to your videos, thus giving your channel popularity, and you, monetary gains in the long run.
- Accent
If the speaker in the video is from a different region and is using an accent that you are not much comfortable with, you can turn on the subtitles and read the dialogs along with the video.
- Repurposing on Blogs
If you own a blog that you have embedded your video to, the transcription could be used to add text to it so the target audience can get a fair idea of what the video is all about. This is useful because many people prefer reading over watching.
YouTube Video Transcription FAQs
1. How to Transcribe YouTube Video to Text
Usually the transcription files have *.srt extension that are globally accepted and supported by almost all media players. However, there might be instances when you want to have the subtitles in plain text.
That said, to convert an SRT file to TXT, you can:
- Right-click the SRT file
- Go to Rename
- Replace srt with txt and press Enter
- Click OK on the confirmation box that appears next to convert SRT to TXT
After this, you can simply double-click the file, and read and modify the transcribed content as needed.
2. How to Edit and Upload Edited Transcript to YouTube
If you made any modifications to the transcript that was automatically generated by YouTube or any other third-party transcription tool, you can follow the steps given below to upload the new file to the YouTube video:
- Go to YouTube Studio and then to the Channel subtitles page as explained earlier
- Expand the Languages column of the target video
- Click the Options icon that appears under the Subtitles column when you hover mouse on to it
- Click Edit on Classic Studio
- On the next page, click Edit from the top-right corner
- Click to open the Actions drop-down list from the upper-left corner
- Click Upload a file
- Follow the on-screen instructions from there to upload the modified transcription file
- Click Save Changes from the top-right corner of the page when done
Conclusion
If you are looking for a quick and easy way of adding subtitles to your videos, letting YouTube transcribe for you could be a good approach. However, because these auto-generated transcriptions are created by machine learning algorithms, their accuracy cannot be counted on. Therefore, the best way to get the job done accurately is, let YouTube auto-transcribe your video, download the transcription file, make the necessary changes to it, and then upload the file back to the video.
Richard Bennett
Richard Bennett is a writer and a lover of all things video.
Follow @Richard Bennett
Step-by-Step: Finding Your Digital Filming Suite on YouTube
Where Is Youtube Video Manager? [All You Need to Know]
Richard Bennett
Mar 27, 2024• Proven solutions
If you are a YouTuber and uploads video to your channel then you must need to see the statistics and analytics of your uploads. Sometimes you might want to alter some of the settings in the video that you already have uploaded.
So if you are looking for ways how to manage your videos and your YouTube overall then look no further. The solution lies in the YouTube studio. This is where all your video and their settings can be managed whether using a desktop PC or any smartphone.
So if you are wondering the sole purpose of YouTube studio and how to manage your productions using video manager then stay with us!
You will Learn :
- How YouTube Studio Can Manage Your Uploads?
- What Does A Video Manager Do?
- How to Find Video Manager on YouTube?
- How To Access Video Manager On YouTube Using A Desktop PC?
- How To Access YouTube Manager In YouTube Using Mobile Phones?
- How to Access YouTube Manager on YouTube Using An iPad?
Best Video Editing Software for YouTubers
Making a video with Filmora is simple, as this movie maker enables its users to import virtually any type of footage in just a couple of clicks.
There are one hundred tracks available so you can combine audio and video files effortlessly or add visual effects to them.
Filmora also offers full support for 4K videos,fgxcsd which means that you can use it to edit footage captured with GoPro and other action cameras.
In addition to huge effects and transitions libraries, the Filmora also features a rich selection of royalty-free music and audio effects that you can use to create soundtracks for all of your videos.
Filmora is free to download now. And due to its small Installation package, it’s easy and quick to install.


How YouTube Studio Can Manage Your Uploads?
The primary purpose of the YouTube studio is to manage your YouTube channel overall.
Accessing YouTube studio will let you see the statistics regarding how many people have viewed your videos, replies of any of the comment you made on your videos, and much more. This is where you can access one of the most significant options of Video Manger where you can completely customize the video setting accordingly any time after the uploading of your YouTube video.
What Does A Video Manager Do?
In the YouTube studio option, you will find another great tab of a video manager which will let you edit your productions, add, edit or delete annotation or even caption and perform zillions of similar related options to personalize and manage your video accordingly even after your video has been uploaded.
This gives one a huge margin to change the initial settings of the uploaded video if they came across any error or lacking in the video.
But you may wonder how to actually access the video manager in your YouTube channel to avail such a vast variety of options to customize your video setting and making it into a masterpiece to gain views to a greater extent by viewing, analyzing and improvising the analytics of your productions.
How to Find Video Manager on YouTube?
You can go access video manager on your desktop application of YouTube. Although you might need to download YouTube studio if you are looking for a video manager YouTube app. YouTube studio has abundant options in it, including a video manager. So once you download this application in your smartphone, be it iPhone or Android, you can have complete access to all the management features under the video manager option.
Read More to Get : How to Reverse Search a Video >>
How To Access Video Manager On YouTube Using A Desktop PC?
If you need to modify and organize your productions from a single place or just need customization in a particular video to adjust its setting then you can do it with a single click.
Video manager gives you full liberty to tweak the settings of your uploads, making use of tools for video optimization or making bulk update alterations.
So, without further ado, let’s dig into the step by step guide to how to get to YouTube video manager using desktop PC.
Step 1: Sign in to your YouTube account by entering your correct credentials.
Step 2: You will be redirected to the homepage of your YouTube channel.
Step 3: At the top right corner of your YouTube main page, there will be your channel profile icon having a circular shape.

Step 4: Click on that icon.
Step 5: You will be served with abundant options in the dropdown, but you need to click on the YouTube studio (beta) option.
Step 6: This will redirect you to your channel’s dashboard where you will be facilitated with multiple options related to your video uploads, a complete and wholesome package to organize, monitor, improvise and manage your videos in general.
Step 7: At the left pane of the dashboard, you will see Creator Studio Classic at the bottom.
Step 8: Click on Creator Studio Classic.
Step 9: This will redirect you to creator studio. At the left on the window will be a bar full of multiple options where you will see the video manager option right there.
Step 10: Click on the video manager to manage.
Step 11: This will open a drop-down which gives you two options. One of managing your videos and others to organize your playlist or make any modifications as per your likeliness.
Voila! You are here in video manager, having full liberty to make any alteration to the metadata of your YouTube uploads. You are now a single click away to change the video title, its stale or non-captivating caption, adjust comment setting and literally everything right according to your choice.
How To Access YouTube Manager In YouTube Using Mobile Phones?
If you are used to operating your YouTube channel through smartphones like iPhone or any android phone or manage your account activities using a tablet then the process to manage your account remains quite the same.
You don’t need to stress out is you are using a mobile application of YouTube. You can still have complete authority to manage your videos using YouTube video manager mobile, YouTube studio applications.
YouTube studio application is an official tool dedicated to content creator introduced by Google for YouTube. This gives immense ease for the mobile users, either android or iPhone, to manage their videos and update the metadata of their upload by merely using this one application.
All thanks to Google to launch such an amazing and wholesome product, considering the ample number of content creators who use mobile phones to create and manage their productions.
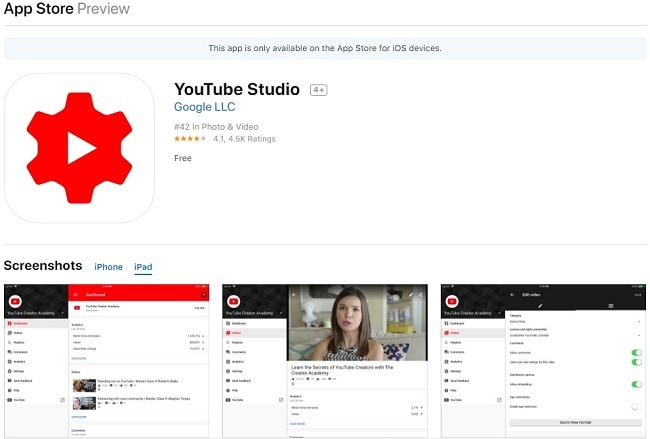
YouTube Studio Application Link for iOS
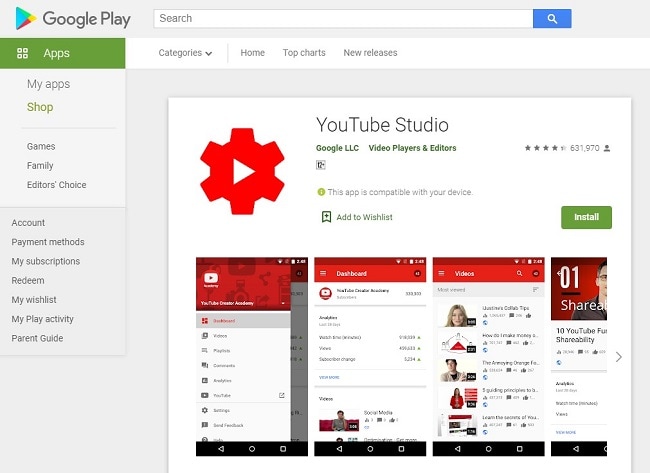
You can download this video manager YouTube application, named as YouTube studio, on your iPhone by clicking the link given here . You can download this YouTube video manager iPhone application on apple store which is absolutely free of cost.
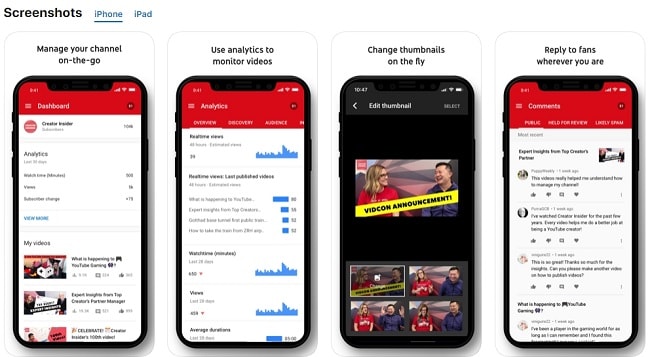
Downloading this tool will make the managing process of your YouTube channel quite easier and faster. Numerous list of options ranging from monitoring latest stats, create or update your productions’ thumbnail images to changing profile picture, reply to your comments, get notifications or organize your playlist on the go and stay connected from literally anywhere.
Features:
- Organize playlist
- Respond to the comments and also moderate them
- Get notified about important events and activities on your channel
- Update video settings like personalizing thumbnail pictures, adding a description, updating titles and monetization.
- Create and modify your profile images.
- Seek for help content using voice
How To Access YouTube Manager In YouTube Using Android?
Similar to the approach we used in for iPhone users, you can download YouTube studio application on google store by clicking on the link given here .
This application is available free on the internet.
If you are an android user and looking for an application that can manage your YouTube channel with an abundance of options, then The official application developed by Google, YouTube Studio is the answer to your question “how to get to YouTube video manager”. It is a powerful tool to give you all the controls to manage and efficiently organize your YouTube channel with great ease and speed.
Features:
- Filter and get an update with the response on the comments
- Monitor video performance and channel activity using user-friendly analytics
- Manage and organize playlist
- Update video settings like schedule dates, personalizing thumbnail pictures, adding description, updating titles and monetization settings.
How to Access YouTube Manager on YouTube Using An iPad?
You can enjoy all the same features as facilitated in the YouTube Studio app for iOS and Android users. All you need is to download this application by clicking on the link given here .
You may find this tool a little overwhelming at the fresh start. There are multiple options given to the users and given full control and independence to manage the video settings as per your requirement for improvisation purposes.
This may take some time to get yourself familiar with this tool. The more you explore deep into it, the more quickly you will get hold onto it.
Worry not! These experiments won’t do any harm to productions, but only make you expertise in a while.
To learn the fundamentals of YouTube Studio application and video manager, you can refer to this site .
Conclusion
The use of YouTube had outgrown to an extent that it has now become a professional career for many which once used to a merely an entertainment platform and get nothing in return for creating content.
But now with the shift of trend, YouTube is taken seriously as a professional domain to earn through the productions or spread awareness and joy to others through one’s creative content. For your content to make an impact, your channel needs thorough management and organization to view your content’s quality by seeing the stats and manage accordingly.
This is now possible to achieve all this within the snap of fingers with great ease offered by this great tool, Video Manager. With this, you can edit and customize your video’s metadata and improvise your video settings to elevate your channel to the next level.
Richard Bennett
Richard Bennett is a writer and a lover of all things video.
Follow @Richard Bennett
Richard Bennett
Mar 27, 2024• Proven solutions
If you are a YouTuber and uploads video to your channel then you must need to see the statistics and analytics of your uploads. Sometimes you might want to alter some of the settings in the video that you already have uploaded.
So if you are looking for ways how to manage your videos and your YouTube overall then look no further. The solution lies in the YouTube studio. This is where all your video and their settings can be managed whether using a desktop PC or any smartphone.
So if you are wondering the sole purpose of YouTube studio and how to manage your productions using video manager then stay with us!
You will Learn :
- How YouTube Studio Can Manage Your Uploads?
- What Does A Video Manager Do?
- How to Find Video Manager on YouTube?
- How To Access Video Manager On YouTube Using A Desktop PC?
- How To Access YouTube Manager In YouTube Using Mobile Phones?
- How to Access YouTube Manager on YouTube Using An iPad?
Best Video Editing Software for YouTubers
Making a video with Filmora is simple, as this movie maker enables its users to import virtually any type of footage in just a couple of clicks.
There are one hundred tracks available so you can combine audio and video files effortlessly or add visual effects to them.
Filmora also offers full support for 4K videos,fgxcsd which means that you can use it to edit footage captured with GoPro and other action cameras.
In addition to huge effects and transitions libraries, the Filmora also features a rich selection of royalty-free music and audio effects that you can use to create soundtracks for all of your videos.
Filmora is free to download now. And due to its small Installation package, it’s easy and quick to install.
How YouTube Studio Can Manage Your Uploads?
The primary purpose of the YouTube studio is to manage your YouTube channel overall.
Accessing YouTube studio will let you see the statistics regarding how many people have viewed your videos, replies of any of the comment you made on your videos, and much more. This is where you can access one of the most significant options of Video Manger where you can completely customize the video setting accordingly any time after the uploading of your YouTube video.
What Does A Video Manager Do?
In the YouTube studio option, you will find another great tab of a video manager which will let you edit your productions, add, edit or delete annotation or even caption and perform zillions of similar related options to personalize and manage your video accordingly even after your video has been uploaded.
This gives one a huge margin to change the initial settings of the uploaded video if they came across any error or lacking in the video.
But you may wonder how to actually access the video manager in your YouTube channel to avail such a vast variety of options to customize your video setting and making it into a masterpiece to gain views to a greater extent by viewing, analyzing and improvising the analytics of your productions.
How to Find Video Manager on YouTube?
You can go access video manager on your desktop application of YouTube. Although you might need to download YouTube studio if you are looking for a video manager YouTube app. YouTube studio has abundant options in it, including a video manager. So once you download this application in your smartphone, be it iPhone or Android, you can have complete access to all the management features under the video manager option.
Read More to Get : How to Reverse Search a Video >>
How To Access Video Manager On YouTube Using A Desktop PC?
If you need to modify and organize your productions from a single place or just need customization in a particular video to adjust its setting then you can do it with a single click.
Video manager gives you full liberty to tweak the settings of your uploads, making use of tools for video optimization or making bulk update alterations.
So, without further ado, let’s dig into the step by step guide to how to get to YouTube video manager using desktop PC.
Step 1: Sign in to your YouTube account by entering your correct credentials.
Step 2: You will be redirected to the homepage of your YouTube channel.
Step 3: At the top right corner of your YouTube main page, there will be your channel profile icon having a circular shape.
Step 4: Click on that icon.
Step 5: You will be served with abundant options in the dropdown, but you need to click on the YouTube studio (beta) option.
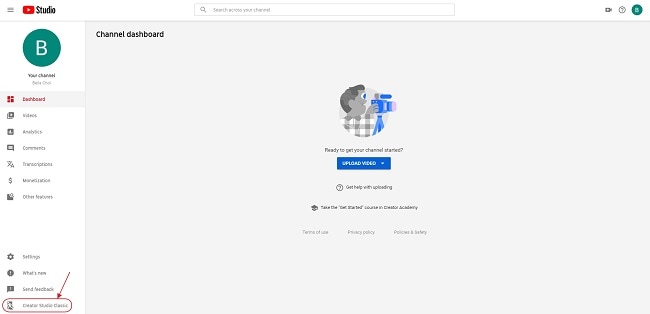
Step 6: This will redirect you to your channel’s dashboard where you will be facilitated with multiple options related to your video uploads, a complete and wholesome package to organize, monitor, improvise and manage your videos in general.
Step 7: At the left pane of the dashboard, you will see Creator Studio Classic at the bottom.
Step 8: Click on Creator Studio Classic.
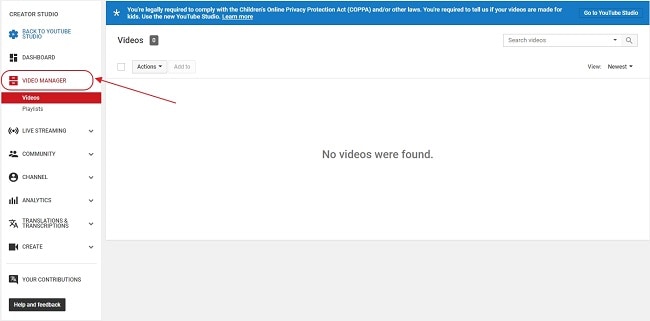
Step 9: This will redirect you to creator studio. At the left on the window will be a bar full of multiple options where you will see the video manager option right there.
Step 10: Click on the video manager to manage.
Step 11: This will open a drop-down which gives you two options. One of managing your videos and others to organize your playlist or make any modifications as per your likeliness.
Voila! You are here in video manager, having full liberty to make any alteration to the metadata of your YouTube uploads. You are now a single click away to change the video title, its stale or non-captivating caption, adjust comment setting and literally everything right according to your choice.
How To Access YouTube Manager In YouTube Using Mobile Phones?
If you are used to operating your YouTube channel through smartphones like iPhone or any android phone or manage your account activities using a tablet then the process to manage your account remains quite the same.
You don’t need to stress out is you are using a mobile application of YouTube. You can still have complete authority to manage your videos using YouTube video manager mobile, YouTube studio applications.
YouTube studio application is an official tool dedicated to content creator introduced by Google for YouTube. This gives immense ease for the mobile users, either android or iPhone, to manage their videos and update the metadata of their upload by merely using this one application.
All thanks to Google to launch such an amazing and wholesome product, considering the ample number of content creators who use mobile phones to create and manage their productions.
YouTube Studio Application Link for iOS
You can download this video manager YouTube application, named as YouTube studio, on your iPhone by clicking the link given here . You can download this YouTube video manager iPhone application on apple store which is absolutely free of cost.
Downloading this tool will make the managing process of your YouTube channel quite easier and faster. Numerous list of options ranging from monitoring latest stats, create or update your productions’ thumbnail images to changing profile picture, reply to your comments, get notifications or organize your playlist on the go and stay connected from literally anywhere.
Features:
- Organize playlist
- Respond to the comments and also moderate them
- Get notified about important events and activities on your channel
- Update video settings like personalizing thumbnail pictures, adding a description, updating titles and monetization.
- Create and modify your profile images.
- Seek for help content using voice
How To Access YouTube Manager In YouTube Using Android?
Similar to the approach we used in for iPhone users, you can download YouTube studio application on google store by clicking on the link given here .
This application is available free on the internet.
If you are an android user and looking for an application that can manage your YouTube channel with an abundance of options, then The official application developed by Google, YouTube Studio is the answer to your question “how to get to YouTube video manager”. It is a powerful tool to give you all the controls to manage and efficiently organize your YouTube channel with great ease and speed.
Features:
- Filter and get an update with the response on the comments
- Monitor video performance and channel activity using user-friendly analytics
- Manage and organize playlist
- Update video settings like schedule dates, personalizing thumbnail pictures, adding description, updating titles and monetization settings.
How to Access YouTube Manager on YouTube Using An iPad?
You can enjoy all the same features as facilitated in the YouTube Studio app for iOS and Android users. All you need is to download this application by clicking on the link given here .
You may find this tool a little overwhelming at the fresh start. There are multiple options given to the users and given full control and independence to manage the video settings as per your requirement for improvisation purposes.
This may take some time to get yourself familiar with this tool. The more you explore deep into it, the more quickly you will get hold onto it.
Worry not! These experiments won’t do any harm to productions, but only make you expertise in a while.
To learn the fundamentals of YouTube Studio application and video manager, you can refer to this site .
Conclusion
The use of YouTube had outgrown to an extent that it has now become a professional career for many which once used to a merely an entertainment platform and get nothing in return for creating content.
But now with the shift of trend, YouTube is taken seriously as a professional domain to earn through the productions or spread awareness and joy to others through one’s creative content. For your content to make an impact, your channel needs thorough management and organization to view your content’s quality by seeing the stats and manage accordingly.
This is now possible to achieve all this within the snap of fingers with great ease offered by this great tool, Video Manager. With this, you can edit and customize your video’s metadata and improvise your video settings to elevate your channel to the next level.
Richard Bennett
Richard Bennett is a writer and a lover of all things video.
Follow @Richard Bennett
Richard Bennett
Mar 27, 2024• Proven solutions
If you are a YouTuber and uploads video to your channel then you must need to see the statistics and analytics of your uploads. Sometimes you might want to alter some of the settings in the video that you already have uploaded.
So if you are looking for ways how to manage your videos and your YouTube overall then look no further. The solution lies in the YouTube studio. This is where all your video and their settings can be managed whether using a desktop PC or any smartphone.
So if you are wondering the sole purpose of YouTube studio and how to manage your productions using video manager then stay with us!
You will Learn :
- How YouTube Studio Can Manage Your Uploads?
- What Does A Video Manager Do?
- How to Find Video Manager on YouTube?
- How To Access Video Manager On YouTube Using A Desktop PC?
- How To Access YouTube Manager In YouTube Using Mobile Phones?
- How to Access YouTube Manager on YouTube Using An iPad?
Best Video Editing Software for YouTubers
Making a video with Filmora is simple, as this movie maker enables its users to import virtually any type of footage in just a couple of clicks.
There are one hundred tracks available so you can combine audio and video files effortlessly or add visual effects to them.
Filmora also offers full support for 4K videos,fgxcsd which means that you can use it to edit footage captured with GoPro and other action cameras.
In addition to huge effects and transitions libraries, the Filmora also features a rich selection of royalty-free music and audio effects that you can use to create soundtracks for all of your videos.
Filmora is free to download now. And due to its small Installation package, it’s easy and quick to install.
How YouTube Studio Can Manage Your Uploads?
The primary purpose of the YouTube studio is to manage your YouTube channel overall.
Accessing YouTube studio will let you see the statistics regarding how many people have viewed your videos, replies of any of the comment you made on your videos, and much more. This is where you can access one of the most significant options of Video Manger where you can completely customize the video setting accordingly any time after the uploading of your YouTube video.
What Does A Video Manager Do?
In the YouTube studio option, you will find another great tab of a video manager which will let you edit your productions, add, edit or delete annotation or even caption and perform zillions of similar related options to personalize and manage your video accordingly even after your video has been uploaded.
This gives one a huge margin to change the initial settings of the uploaded video if they came across any error or lacking in the video.
But you may wonder how to actually access the video manager in your YouTube channel to avail such a vast variety of options to customize your video setting and making it into a masterpiece to gain views to a greater extent by viewing, analyzing and improvising the analytics of your productions.
How to Find Video Manager on YouTube?
You can go access video manager on your desktop application of YouTube. Although you might need to download YouTube studio if you are looking for a video manager YouTube app. YouTube studio has abundant options in it, including a video manager. So once you download this application in your smartphone, be it iPhone or Android, you can have complete access to all the management features under the video manager option.
Read More to Get : How to Reverse Search a Video >>
How To Access Video Manager On YouTube Using A Desktop PC?
If you need to modify and organize your productions from a single place or just need customization in a particular video to adjust its setting then you can do it with a single click.
Video manager gives you full liberty to tweak the settings of your uploads, making use of tools for video optimization or making bulk update alterations.
So, without further ado, let’s dig into the step by step guide to how to get to YouTube video manager using desktop PC.
Step 1: Sign in to your YouTube account by entering your correct credentials.
Step 2: You will be redirected to the homepage of your YouTube channel.
Step 3: At the top right corner of your YouTube main page, there will be your channel profile icon having a circular shape.
Step 4: Click on that icon.
Step 5: You will be served with abundant options in the dropdown, but you need to click on the YouTube studio (beta) option.
Step 6: This will redirect you to your channel’s dashboard where you will be facilitated with multiple options related to your video uploads, a complete and wholesome package to organize, monitor, improvise and manage your videos in general.
Step 7: At the left pane of the dashboard, you will see Creator Studio Classic at the bottom.
Step 8: Click on Creator Studio Classic.
Step 9: This will redirect you to creator studio. At the left on the window will be a bar full of multiple options where you will see the video manager option right there.
Step 10: Click on the video manager to manage.
Step 11: This will open a drop-down which gives you two options. One of managing your videos and others to organize your playlist or make any modifications as per your likeliness.
Voila! You are here in video manager, having full liberty to make any alteration to the metadata of your YouTube uploads. You are now a single click away to change the video title, its stale or non-captivating caption, adjust comment setting and literally everything right according to your choice.
How To Access YouTube Manager In YouTube Using Mobile Phones?
If you are used to operating your YouTube channel through smartphones like iPhone or any android phone or manage your account activities using a tablet then the process to manage your account remains quite the same.
You don’t need to stress out is you are using a mobile application of YouTube. You can still have complete authority to manage your videos using YouTube video manager mobile, YouTube studio applications.
YouTube studio application is an official tool dedicated to content creator introduced by Google for YouTube. This gives immense ease for the mobile users, either android or iPhone, to manage their videos and update the metadata of their upload by merely using this one application.
All thanks to Google to launch such an amazing and wholesome product, considering the ample number of content creators who use mobile phones to create and manage their productions.
YouTube Studio Application Link for iOS
You can download this video manager YouTube application, named as YouTube studio, on your iPhone by clicking the link given here . You can download this YouTube video manager iPhone application on apple store which is absolutely free of cost.
Downloading this tool will make the managing process of your YouTube channel quite easier and faster. Numerous list of options ranging from monitoring latest stats, create or update your productions’ thumbnail images to changing profile picture, reply to your comments, get notifications or organize your playlist on the go and stay connected from literally anywhere.
Features:
- Organize playlist
- Respond to the comments and also moderate them
- Get notified about important events and activities on your channel
- Update video settings like personalizing thumbnail pictures, adding a description, updating titles and monetization.
- Create and modify your profile images.
- Seek for help content using voice
How To Access YouTube Manager In YouTube Using Android?
Similar to the approach we used in for iPhone users, you can download YouTube studio application on google store by clicking on the link given here .
This application is available free on the internet.
If you are an android user and looking for an application that can manage your YouTube channel with an abundance of options, then The official application developed by Google, YouTube Studio is the answer to your question “how to get to YouTube video manager”. It is a powerful tool to give you all the controls to manage and efficiently organize your YouTube channel with great ease and speed.
Features:
- Filter and get an update with the response on the comments
- Monitor video performance and channel activity using user-friendly analytics
- Manage and organize playlist
- Update video settings like schedule dates, personalizing thumbnail pictures, adding description, updating titles and monetization settings.
How to Access YouTube Manager on YouTube Using An iPad?
You can enjoy all the same features as facilitated in the YouTube Studio app for iOS and Android users. All you need is to download this application by clicking on the link given here .
You may find this tool a little overwhelming at the fresh start. There are multiple options given to the users and given full control and independence to manage the video settings as per your requirement for improvisation purposes.
This may take some time to get yourself familiar with this tool. The more you explore deep into it, the more quickly you will get hold onto it.
Worry not! These experiments won’t do any harm to productions, but only make you expertise in a while.
To learn the fundamentals of YouTube Studio application and video manager, you can refer to this site .
Conclusion
The use of YouTube had outgrown to an extent that it has now become a professional career for many which once used to a merely an entertainment platform and get nothing in return for creating content.
But now with the shift of trend, YouTube is taken seriously as a professional domain to earn through the productions or spread awareness and joy to others through one’s creative content. For your content to make an impact, your channel needs thorough management and organization to view your content’s quality by seeing the stats and manage accordingly.
This is now possible to achieve all this within the snap of fingers with great ease offered by this great tool, Video Manager. With this, you can edit and customize your video’s metadata and improvise your video settings to elevate your channel to the next level.
Richard Bennett
Richard Bennett is a writer and a lover of all things video.
Follow @Richard Bennett
Also read:
- Social Media Live Services Showdown Facebook Vs. YouTube Vs. Twitter Spaces
- Tackling the Mystery of Missing Shorts Video Images
- The Initial Step in YouTube Fame Account Registration
- In 2024, Beyond Youtube Our Choice of the Year's Top 27 Platforms
- The Power of Pausing Incorporating Effective Chapters in Your YouTube Series
- YouTube Integration A Beginner's Guide to Google Meet
- Elevate Your Video Presence Mastery of Channel Art and Banner Sizes
- In 2024, Elevate Your YouTube Thumbnails - Triple Neon Border Techniques
- 2024 Approved Enlightenment Echoes Best Ed Tutorials YT
- [New] Channel Gain Strategies for YouTube Aspirants
- Bridge Gaps in Generations of Viewers 6 Interactive Tests to Find Your YouTube Match for 2024
- 2024 Approved Decode the Art of YouTube Shorts with Hit Songs
- [New] Effortless YT Calls Mastering Green Backgrounds
- Unlock YouTube's Earnings in CP2024 Guide
- Access Short Videos Anywhere The Top 6 Free & Online YouTube Short Download Apps
- Elevating Your Vlogs A List of the Top 12 Professional Cameras for 2024
- Decoding Your YouTube's View-Zero Dilemma 10 Insights
- Seamless Channel Transitions with Customized End Screens
- [New] Cutting Edge Creativity Choosing High-Quality Camera Lenses
- In 2024, Elevating Your Channels' Profits with Impactful and Effective Trailers
- [New] Earnings Breakdown One Million Glances at Youtube
- Dynamic and Simple Building a Subscriber Button for YouTube Using Filmora for 2024
- In 2024, Elevate Your Content Steps to Boosting YouTube Visibility
- Visualize Your Vision – Access No-Cost Templates for YouTube Creators
- Maximizing Reach YouTube's Template Advantage Explained
- Dissecting YouTube Policies and Creative Commons Licensing Dichotomy for 2024
- Co-Create Content to Maximize YouTube Follower Count
- The Roadmap to YouTube Profits with Sourav Joshi
- [Updated] Day Jobs & Digital Passion Striking a Balance
- Spark Inspiration - Free Soundtracks to Enhance Projects!
- In 2024, Effortless WebM Creation 10 Best YouTube Video Transformers
- In 2024, Blitz 30-Second Guide to Fast Thumbnails
- Cross-Application Title Guidance YTB to Fb
- In 2024, Elite Collective Photo, Music + Visual Creation Fusion
- 2024 Approved Delving Deep YouTube's Revenue System From Publisher to You
- Top Edits Made Easy A Newbie's Guide to Video Trimming & Enhancing
- Amplify Your Content Two Approaches to Skyrocket Traffic for 2024
- [Updated] Essential YouTube Tagging Strategies for Optimal Visibility
- Best Lyric Video Makers You Should Try
- [New] Crafting Content that Captivates YouTube Keyword Mastery
- Enhance Your Projects with Free Green Screens From These Online Hubs
- [New] Brand Visualization Inserting Watermarks and Logos Into YouTube Media
- In 2024, Building Your Thriving YouTube Space for Gamers
- Bypassing Blockbusters 2023 Indie Favorites for 2024
- Best Pokemons for PVP Matches in Pokemon Go For Meizu 21 | Dr.fone
- Palette Strategies Utilizing Color Science in Art
- 2024 Approved Top 10 Invisible Peers for Hidden Stories
- [Updated] 2024 Approved Convert Any Instagram Video in Minutes Best Free Tools (Windows/Mac)
- [Updated] Transforming Home Security The Rise of Multi-Camera Recorders
- [New] 2024 Approved Boost Professional Look Adding Borders to Instagram Content
- Virtual Exploration, Real Understanding
- [Updated] Navigating Inverted Video Flows on Instagram [Guide] for 2024
- 2024 Approved Best Screen Grabber for Windows Users
- In 2024, Android Unlock Code Sim Unlock Your Xiaomi Redmi Note 13 Pro+ 5G Phone and Remove Locked Screen
- Windows 11 Photos Setup Guide Adding Aesthetic Overlays & Music
- 2024 Approved Social Media Spotlight Top TikTok Tweets
- In 2024, How Do You Get Sun Stone Evolutions in Pokémon For Lava Yuva 2? | Dr.fone
- New Top 10 Sony LUT for Different Purposes
- New Best Method to Split Video Into Parts Online for 2024
- [New] The Art of Instagram Videography Capturing Attention
- What Legendaries Are In Pokemon Platinum On Motorola Moto G13? | Dr.fone
- New 2024 Approved Easy Shortcut to Convert Videos to Gifs on iPhone
- New 2024 Approved The Ultimate Windows Movie Maker Handbook Tips, Tricks, and Techniques
- In 2024, The Best Android SIM Unlock Code Generators Unlock Your Vivo S17e Phone Hassle-Free
- 2024 Approved Unleash Your Creativity with These 10 Free, Mac-Friendly TikTok Editors
- In 2024, How To Fix Apple ID Verification Code Not Working On iPhone 7 Plus
- About Motorola Razr 40 Ultra FRP Bypass
- In 2024, Complete Tutorial Sending Photos From Apple iPhone 7 to iPad | Dr.fone
- Title: "Step Into the World of YouTube Transcription A Comprehensive No-Fee Guide"
- Author: Brian
- Created at : 2024-05-25 12:51:36
- Updated at : 2024-05-26 12:51:36
- Link: https://youtube-video-recordings.techidaily.com/step-into-the-world-of-youtube-transcription-a-comprehensive-no-fee-guide/
- License: This work is licensed under CC BY-NC-SA 4.0.
