
:max_bytes(150000):strip_icc()/GettyImages-688982955-596fff12519de200112ef724.jpg)
"Step-by-Step Adding Captions to YouTube Clips"
Step-by-Step: Adding Captions to YouTube Clips
How To Add Captions to YouTube Videos

Richard Bennett
Mar 27, 2024• Proven solutions
By captioning your YouTube videos you help to make them accessible to more potential viewers. Subtitles are useful to viewers who have hearing impairments, whose first language is different from yours, or who are unable to watch your video with sound. Closed captioning can also be useful for you as a YouTuber because it helps with your SEO, or search engine optimization. Practicing better SEO can get your videos ranked higher in search results. Google and YouTube both index subtitles and transcripts much like they do your video’s description, unless you use automated captions.
This article will first explain how you can turn on subtitles for the videos you watch and then walk you through adding captions to your own videos.
How To Turn On Captions on YouTube
In order for you to be able to view subtitles for a YouTube video the uploader of the video will need to have added them, unless you change your account settings to display automatic captions.

To toggle subtitles on and off click on the Closed Captioning icon in the bottom right of your video player.
If the creator of the video has not added captions then you can enable automatic captions by going into your Account Settings and selecting Playback. Check the box next to Always Show Captions, and then check Show Automatic Captions by Speech Recognition. These captions may be flawed, but you will still be able to see the more accurate user submitted captions on videos that have them. The Always Show Captions feature may be useful not only to the hearing impaired, but to users who do not speak the same language as the video producer.
If you want to change the language of the subtitles click on the settings icon (the one that looks like a gear) next to the closed captioning icon and choose your language next to Subtitles/CC . If the language you want is not there select Auto-Translate and then pick a language. Google Translate will be used to generate subtitles in your chosen language.
Adding YouTube Captions in 4 Steps
1. Go to Video Manager in your Creator Studio and then look at your videos. Decide which one you want to add captions to.
2. Click on the drop-down menu next to the video you want to add captions to and choose Subtitles and CC.
3. Select Add New Subtitles or CC.
4. Choose whether to create your captions, upload a file that has them, transcribe your video, use automatic captioning, or use captioning software.
Create Subtitles or Closed Captions will allow you to create your subtitles on YouTube.
Upload A File allows you to upload a pre-made subtitle file from your computer. Supported file types include SubRip (.srt) and SubViewer (.sbv). You cannot use a word or PDF document for your subtitles.
Transcribe and Set Timings is where you can type a transcript of your video and set timings to sync it to your video. This differs from Create Subtitles or Closed Captions in that your transcript is all typed in to one text field.
Use Automatic Captioning will automatically use speech recognition technology to create captions. You can edit these auto-generated captions later if there are mistakes.
Use Captioning Software or Services is what you choose if you want to use a program or service to create the subtitles for your video.
The easiest way to add subtitles to your videos is to use Automatic Captioning. However, Automatic Captioning is imperfect and may result in your viewers getting a sloppy, skewed, interpretation of your video. Automatic captions are also not indexed by YouTube and Google the way subtitles you create or upload are. This means that they will not have any value to your SEO strategy. If you do not input your own captions or transcript you are missing out on an opportunity for better search engine rankings. Automatic Captions are great if you do not have time to input subtitles and need a temporary solution, though.
Richard Bennett
Richard Bennett is a writer and a lover of all things video.
Follow @Richard Bennett
Richard Bennett
Mar 27, 2024• Proven solutions
By captioning your YouTube videos you help to make them accessible to more potential viewers. Subtitles are useful to viewers who have hearing impairments, whose first language is different from yours, or who are unable to watch your video with sound. Closed captioning can also be useful for you as a YouTuber because it helps with your SEO, or search engine optimization. Practicing better SEO can get your videos ranked higher in search results. Google and YouTube both index subtitles and transcripts much like they do your video’s description, unless you use automated captions.
This article will first explain how you can turn on subtitles for the videos you watch and then walk you through adding captions to your own videos.
How To Turn On Captions on YouTube
In order for you to be able to view subtitles for a YouTube video the uploader of the video will need to have added them, unless you change your account settings to display automatic captions.
To toggle subtitles on and off click on the Closed Captioning icon in the bottom right of your video player.
If the creator of the video has not added captions then you can enable automatic captions by going into your Account Settings and selecting Playback. Check the box next to Always Show Captions, and then check Show Automatic Captions by Speech Recognition. These captions may be flawed, but you will still be able to see the more accurate user submitted captions on videos that have them. The Always Show Captions feature may be useful not only to the hearing impaired, but to users who do not speak the same language as the video producer.
If you want to change the language of the subtitles click on the settings icon (the one that looks like a gear) next to the closed captioning icon and choose your language next to Subtitles/CC . If the language you want is not there select Auto-Translate and then pick a language. Google Translate will be used to generate subtitles in your chosen language.
Adding YouTube Captions in 4 Steps
1. Go to Video Manager in your Creator Studio and then look at your videos. Decide which one you want to add captions to.
2. Click on the drop-down menu next to the video you want to add captions to and choose Subtitles and CC.
3. Select Add New Subtitles or CC.
4. Choose whether to create your captions, upload a file that has them, transcribe your video, use automatic captioning, or use captioning software.
Create Subtitles or Closed Captions will allow you to create your subtitles on YouTube.
Upload A File allows you to upload a pre-made subtitle file from your computer. Supported file types include SubRip (.srt) and SubViewer (.sbv). You cannot use a word or PDF document for your subtitles.
Transcribe and Set Timings is where you can type a transcript of your video and set timings to sync it to your video. This differs from Create Subtitles or Closed Captions in that your transcript is all typed in to one text field.
Use Automatic Captioning will automatically use speech recognition technology to create captions. You can edit these auto-generated captions later if there are mistakes.
Use Captioning Software or Services is what you choose if you want to use a program or service to create the subtitles for your video.
The easiest way to add subtitles to your videos is to use Automatic Captioning. However, Automatic Captioning is imperfect and may result in your viewers getting a sloppy, skewed, interpretation of your video. Automatic captions are also not indexed by YouTube and Google the way subtitles you create or upload are. This means that they will not have any value to your SEO strategy. If you do not input your own captions or transcript you are missing out on an opportunity for better search engine rankings. Automatic Captions are great if you do not have time to input subtitles and need a temporary solution, though.
Richard Bennett
Richard Bennett is a writer and a lover of all things video.
Follow @Richard Bennett
The Novice’s Guide to Building a YouTube Studio Setup
YouTube Equipment Starter Guide For Beginners

Sumia Rafique
Feb 19, 2024• Proven solutions
If you want to start creating videos and uploading them onto YouTube, you’ll need to have access to some basic equipment. This guide will go over everything you’ll need to be a YouTuber.
Part 1: YOUTUBE EQUIPMENT: CAMERA
The best camera for beginners is the one you already have. Most smartphones these days already come equipped with a powerful camera that can record HD videos. If you still want to add a camera to your equipment list as a beginner YouTuber, you should look for a camera with the following eight qualities:
What To Look For In A Camera As A YouTuber
1. Fully articulated screen (flip screen)
2. Good continual auto focus while recording video
3. Good focus priority through face recognition
4. Touch to focus
5. Good low-light performance
6. external mic jack, hot/cold shoe bracket
7. optical image stabilization
8. good battery life
Check out my full list of 10 Things To Look For In A Vlogging Camera to understand the importance of these camera features.
Best Cheap Vlogging Cameras
Below are the best cheap vlogging cameras that you can get for under $500. They all record at least 1080p HD video and all but the Sony Alpha a5100 come with optical image stabilization (if you want OIS with the Sony a5100, you’ll have it get it in the lens).
| Camera | Release Date | Camera Type | Flip Screen | 4K | Price | |
|---|---|---|---|---|---|---|
| Yi 4KAction Camera | 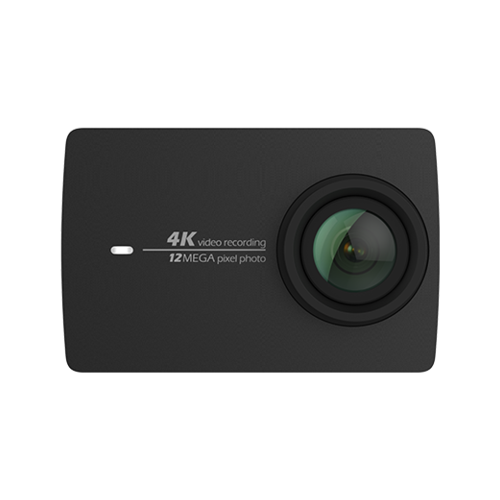 |
February2017 | Action Camera | No | Yes | $169 (MSRP) |
| NikonCoolpixA900 | 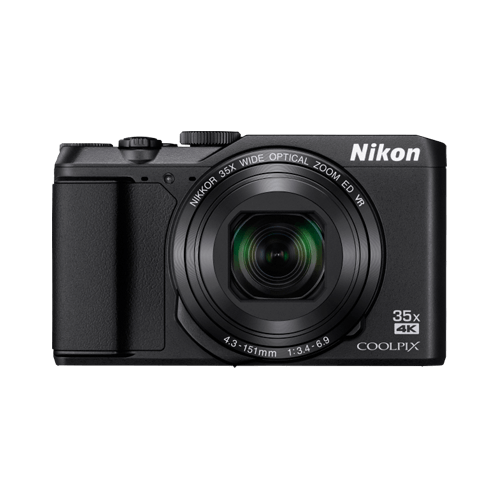 |
February2016 | Compact | Flip Up | Yes | $399 (MSRP) |
| NikonCoolpixB500 | 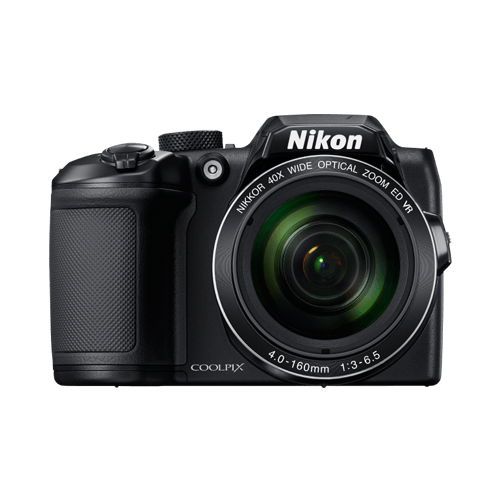 |
February2016 | SLR-like (bridge) | Tilting | No | $250 (MSRP) |
| PolaroidCube+ | 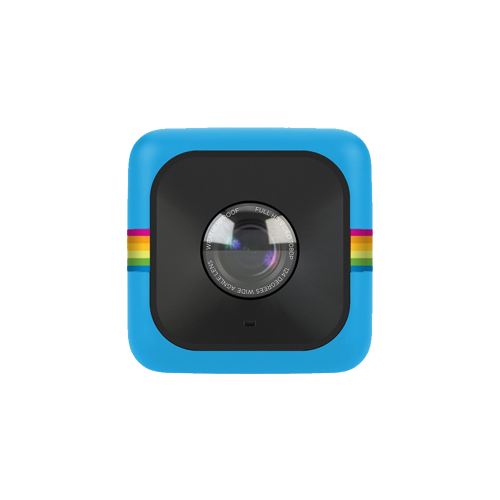 |
June2015 | Action Camera | No | No | $99 (MSRP) |
| SonyAlphaa5100 | 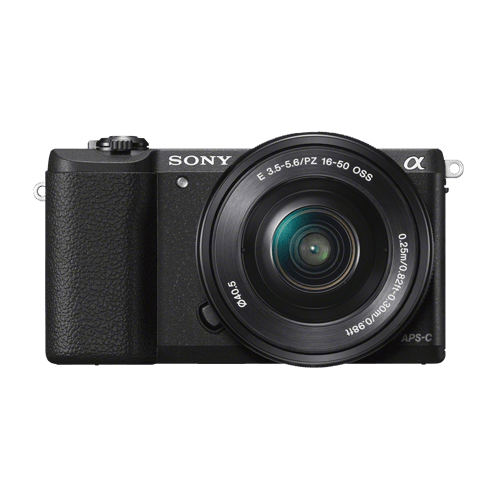 |
August2014 | Mirrorless | Flip Up | No | $450 (MSRP) |
|
Best cheap vlogging camera under $100: Polaroid Cube+ Even before GoPro released their GoPro Session, Polaroid was the first to come out with a 1.4-inch, cube-shaped action camera, small enough to mount on a bike or a helmet. This camera has built-in magnets so that you can attach them to metal surfaces. This action camera is water-resistant, shock-proof, and weather-proof. It can record full HD 1080p videos at 60 fps with its wide-angle lens. You can connect this camera with your phone to preview and take your shots. |
|---|---|
|
Best cheap vlogging camera under $200: Yi 4K At $200, you can record 4K videos with the Yi 4K action camera. Like many other action cameras, this camera is small, durable, and shoots through a wide-angle lens. You won’t be able to take this camera underwater though because it isn’t waterproof. You’ll need to buy the right accessories for that. |
|
Best cheap vlogging camera under $300: Nikon B500 The Nikon B500 gives you a non-interchangeable zoom lens so that you have more control over how you compose your shots. This camera records full HD 1080p videos at either 30 or 25 fps. You can only set its ISO as high as 3200, so it’s not going to perform the best in low-light conditions. The tilting LCD screen does not have touchscreen and cannot be fully flipped up or flipped to the side, it only tilts. For a camera in its price range, the Nikon B500 offers a lot of features. |
|
Best cheap vlogging camera under $400: Nikon A900 The Nikon A900 not only comes with a non-interchangeable zoom lens, but it can also record videos in UHD 4K quality. Like the Nikon B500, the A900’s ISO goes only up to 3200, making it a weak performer in poorly lit conditions. |
|
Best cheap vlogging camera under $500: Sony a5100 Among the cameras listed in our top cheap cameras list, the Sony a5100 is the only one you can interchange lenses with. All Sony E-mount lenses are compatible with this camera. This camera can record up to 1080p videos at 60 fps. Out of all of the above top cheap cameras, this one also auto focuses the best. |
Best Entry-Level and Mid-Range Vlogging Cameras
If you have a bigger budget to work with, the following vlogging cameras are great options:
| Camera | Release Date | Camera Type | Flip Screen | Mic Port | Price | |
|---|---|---|---|---|---|---|
| CanonEOSM50 | 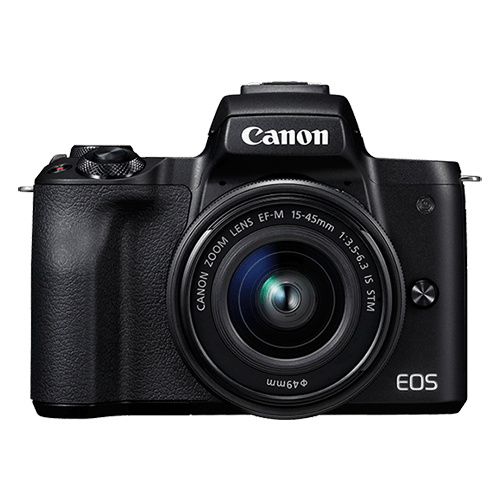 |
February2018 | Mirrorless | Fully Articulated | Yes | $- |
| CanonEOSM100 | 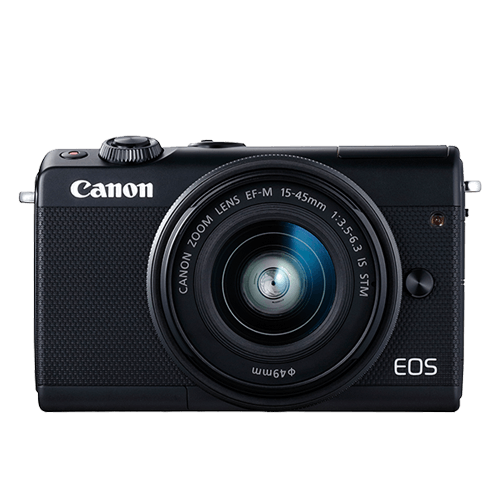 |
August2017 | Mirrorless | Flip Up | No | $ |
| CanonEOS RebelSL2 | 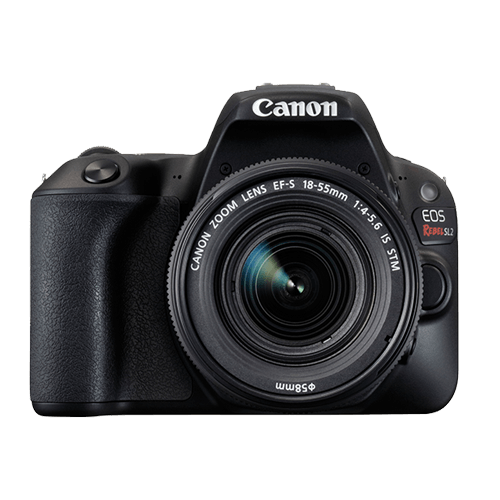 |
June2017 | Compact SLR | Fully Articulated | Yes | $ |
| CanonEOS RebelT7i |  |
February2017 | Mid-size SLR | Fully Articulated | Yes | $- |
| CanonEOS80D | 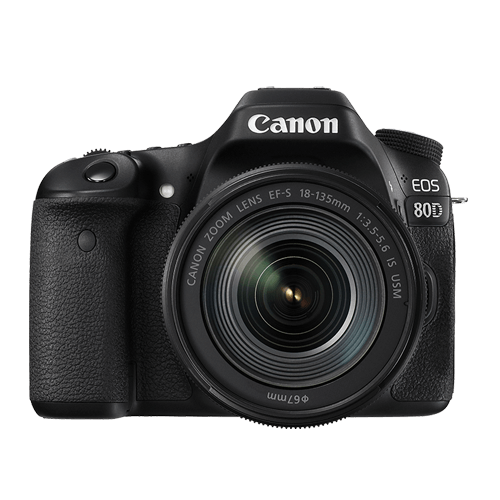 |
February2016 | Mid-size SLR | Fully Articulated | Yes | $$ |
|
Best entry-level mirrorless camera for vlogging: Canon EOS M100 The Canon M100 is a small and powerful camera that can shoot full HD (1080p) videos up to 60 fps. The touchscreen LCD of this camera flips up so that you can see yourself as you vlog in selfie mode. |
|---|---|
|
Best mid-range mirrorless camera for vlogging: Canon EOS M50 The Canon EOS M50 can shoot UHD 4K videos at 23.98 fps. You can also record 120 fps slow-motion videos at 720p. Unlike the M100, which only has a flip up screen, the M50 has a fully articulated screen, so you can use this camera in selfie mode, all while using an on-camera shotgun microphone attached to the camera hot/cold shoe. |
|
Best DSLR camera for daily vlogging: Canon EOS T7i The Canon EOS T7i is a great DSLR camera for daily vlogging. It can record full HD 1080p videos at 60 fps, it can create HDR and time-lapse movies, and it also has a fully articulated screen. |
|
Best entry-level DSLR camera for vlogging: Canon EOS SL2 The Canon EOS SL2 delivers a lot of power at a low price. This DSLR camera can capture full HD 1080p videos at 60 fps. |
|
Best mid-range DSLR camera for vlogging: Canon EOS 80D The Canon 80D is an exceptional mid-range DSLR vlogging camera with many features. Coming with a 45-point all cross phase detection autofocusing and a dual pixel CMOS AF system, the camera is great at finding the right focus while recording video. |
Part 2: YOUTUBE EQUIPMENT: LENS
A lot of compact cameras already come with the lens as a part of the camera body. When it comes to these kinds of cameras, you won’t have to worry about which lens is right for you since the decision has already been made for you!
When you start looking into bigger cameras, though, you’ll have to think about which lens you want to shoot with.
The Wide-Angle Lens
Every YouTuber should have a wide-angle lens. With this kind of lens, you can fit much more of a scene into your camera frame, including your own face when you’re just an arm’s length away from your camera. This is especially important for YouTubers because most YouTubers have to operate their camera on their own, without the assistance of an additional camera person.
Optical Image Stabilization
You should also look for a lens with optical image stabilization if you’re shooting a lot of your YouTube videos handheld.
For more information on camera lenses, check out my Vlogger’s Guide To Camera Lenses .
Part 3: YOUTUBE EQUIPMENT: TRIPOD
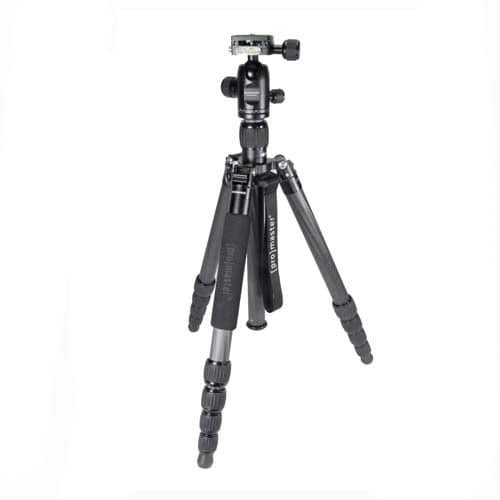 |
Tripod If you plan to film yourself talking in front of the same, unchanging background for an extended period of time, it doesn’t make sense to film yourself handheld the entire time. You’ll just end up tiring your arm out and adding distracting shakiness to your footage. A tripod is a great solution to this problem. You can set up your framing once, press record, and leave your camera in its fixed position while you talk with both hands free. |
|---|---|
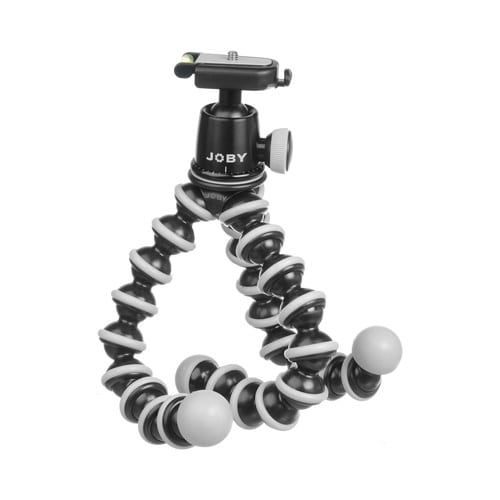 |
Joby GorillaPod With Ballhead When you film yourself handheld, it’s difficult to keep your arm higher up so that your camera shoots down at an ideal angle. You may also notice that a lot of your arm gets into your shot, which you and other viewers might find distracting. Holding your camera up by a GorillaPod, however, can give you the extension you need to get that higher angle shot more easily, all without so much of your arm getting into your shot. |
Part 4: YOUTUBE EQUIPMENT: MICROPHONE
Most vlogging cameras come with a built-in microphone that gets the job done. If you want higher quality audio recordings, though, you should check out the following list of top microphones.
| Top Condenser Mics For Music and Singing | Top Condenser Mics For Voiceovers-Podcasts, Interviews | Top On-Camera Shotgun Mics | Top Shotgun Mics | Top Low-Profile Lavalier Mics |
|---|---|---|---|---|
| Audio-Technica AT2035 Rode NT1-A AKG C214 | Apogee Mic 96K Blue Yeti Rode NT-USB Blue Snowball Audio-Technica AT2020 Rode Procaster | Rode VideoMic Go Shure VP83 Rode VideoMic Pro+ Sennheiser MKE 440 | Rode NTG-3 Audio-Technica AT4053B Sennheiser MKH416 | Rode SmartLav+ Audio-Technica ATR3350iS Sennheiser ME2 |
To read more about each of these microphones, check out our post on The 19 Best YouTube Microphones 2018 – Options for Music, Voiceovers, Vlogging, and more!
Part 5: YOUTUBE EQUIPMENT: SMARTPHONE ACCESSORIES

Using your smartphone’s camera to film your YouTube videos is a great idea since it’s light, portable, and most likely always with you. The following six smartphone accessories can help you make better YouTube videos:
- Arkon Tripod Mount
- FLII Selfie Ring Light
- RODE VideoMic Me
- Aukey Optic 3-in-1 Smartphone Lens Set
- iOgrapher Go for Android and iPhone
- Manfrotto TwistGrip System
Read about each one of these items and more in The 9 Best Smartphone Camera Accessories For Vloggers .
Part 6: YOUTUBE EQUIPMENT: LIGHT
Lighting for home living and lighting for filming is very different. If you try to make use of just the lights you have at home, you may find that your footage is too dark, grainy, and orange-tinted.
The solution to this problem is getting additional video lighting equipment with daytime light bulbs.
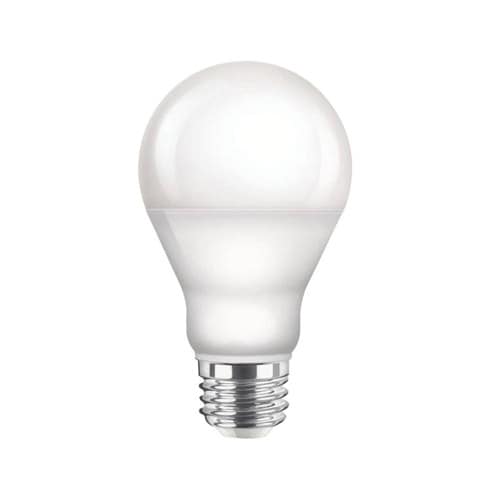 |
Daytime Light Bulbs Your home is most likely lit with incandescent light bulbs that illuminate orange-tinted light. You can remove those light bulbs and replace them with daytime light bulbs that illuminate more of a white colored light. |
|---|---|
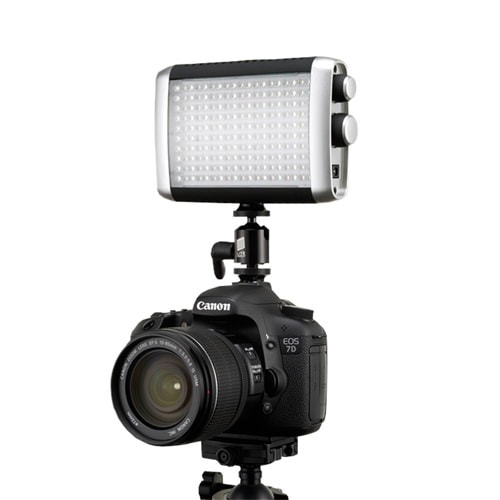 |
On-Camera LED Light If you need more light just in front of the camera and you need this light to be portable, LED lights that attach to your camera’s hot/cold shoe will do the job. |
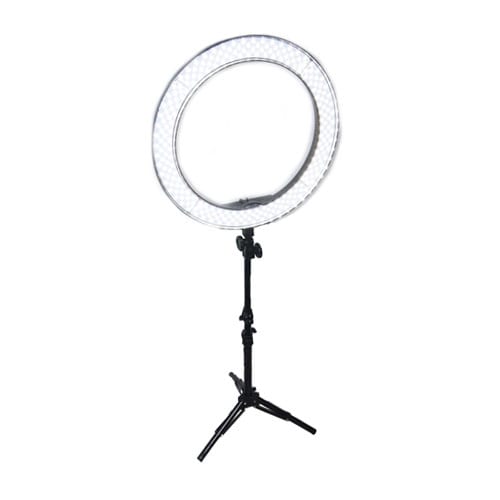 |
LED Ring Light If you need more light just in front of the camera, you don’t have a lot of space, and you don’t need this light to be small and portable, an LED ring light is the best piece of equipment for you. You can position your camera inside the circular space of the ring light. This kind of light also gives your eyes the circular shaped highlight that many people like to see. |
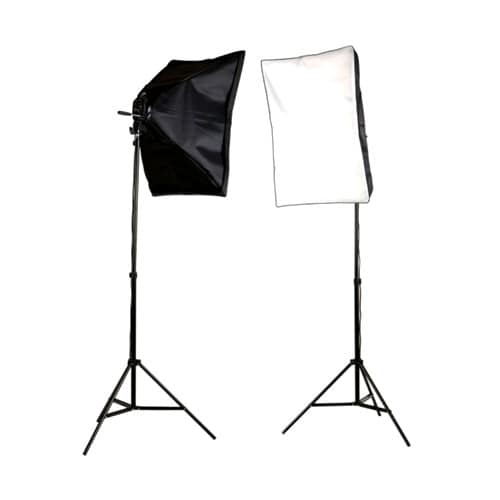 |
Softbox Video Light If you need more light and have more space, another piece of lighting equipment good for beginners is a softbox video light. |
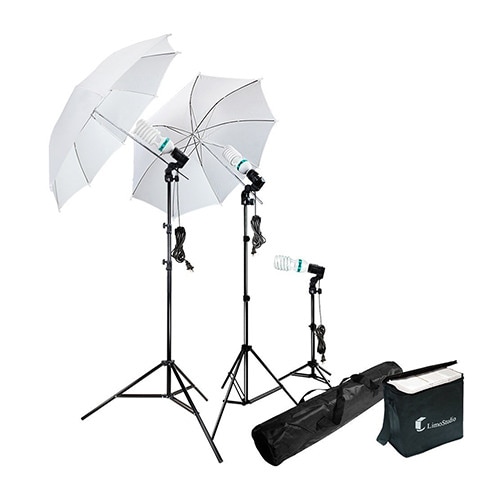 |
Umbrella Video Light Umbrella video lights are very portable and affordable. The direction of the light from umbrella lights are more difficult to control than the light from softbox video lights. |
If you’re looking for recommendations on which piece of lighting equipment to buy, check out my list of the Top 17 Video Lighting Equipment For YouTubers .
Part 7: YOUTUBE EQUIPMENT: COMPUTER
After you’ve recorded all your footage, you’ll need a computer to edit your video clips together. You can perform basic video editing tasks and upload your video onto YouTube with any computer less than ten years old.
Laptop computers are popular among YouTubers because their portability allows you to work on your videos from anywhere. This way, you can finish and upload your videos more frequently, which is another important part of being a YouTuber.
The following three laptop computers handle video editing very well:
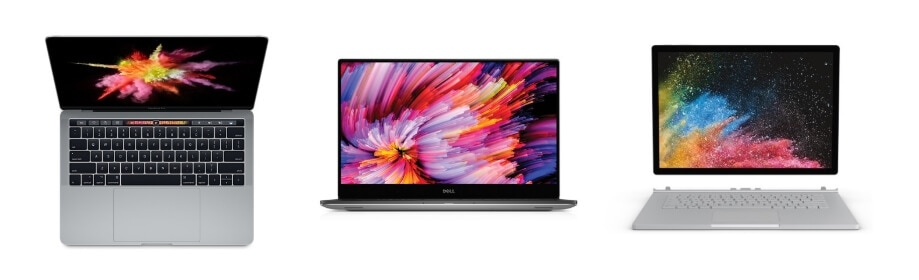
- MacBook Pro With Touch Bar
- Dell XPS 15
- Microsoft Surface Book 2
Read more about these laptop computers for 4K video editing in The Best Laptops for 4K Video Editing .
Part 8: YOUTUBE EQUIPMENT: VIDEO EDITING SOFTWARE


| FREE VIDEO EDITING SOFTWARES | PAID VIDEO EDITING SOFTWARES |
|---|---|
| OpenShot Video Editor (Windows, Mac, Linux) ShotCut (Windows, Mac, Linux) Hitfilm Express (Windows, Mac) VideoPad Video Editor (Windows) Lightworks (Windows, Mac, Linux) VSDC Video Editor (Windows) Machete Video Editor Lite (Windows) Avidemux (Windows, Mac, Linux, BSD) Read more about each of these softwares in our post about The Best Free Video Editing Software for YouTube . | Filmora Video Editor (Windows, Mac) - $40 one year license, $79.99 perpetual license. Free trial Final Cut Pro (Mac) - $299.99, Free trial Vegas Movie Studio (Windows) - $49.99 |
YOUTUBE EQUIPMENT: AUDIO
Music Libraries
Music is an important part of YouTube video creation. Here’s where you can get access to music:
| ROYALTY-FREE MUSIC LIBRARIES | PAID MUSIC LIBRARIES | PAID SUBSCRIPTION MUSIC LIBRARIES |
|---|---|---|
| Audionautix Bensound dig.ccMixter Free Music Archive Free Stock Music Incompetech Josh Woodward Moby Gratis Musopen Purple Planet Music TeknoAXE YouTube Audio Library | Premium Beat Audio Jungle | Audio Network Audio Blocks Epidemic Sound |
Sound Effects
Free Sound Effect Sites
- Filmstock Sound Effects
- Freesound
- PacDV
- Sound Bible
- Sound Gator
- Sounds Crate
- Zapsplat
Sumia Rafique
Sumia Rafique is a writer and a lover of all things video.
Follow @Sumia Rafique
Sumia Rafique
Feb 19, 2024• Proven solutions
If you want to start creating videos and uploading them onto YouTube, you’ll need to have access to some basic equipment. This guide will go over everything you’ll need to be a YouTuber.
Part 1: YOUTUBE EQUIPMENT: CAMERA
The best camera for beginners is the one you already have. Most smartphones these days already come equipped with a powerful camera that can record HD videos. If you still want to add a camera to your equipment list as a beginner YouTuber, you should look for a camera with the following eight qualities:
What To Look For In A Camera As A YouTuber
1. Fully articulated screen (flip screen)
2. Good continual auto focus while recording video
3. Good focus priority through face recognition
4. Touch to focus
5. Good low-light performance
6. external mic jack, hot/cold shoe bracket
7. optical image stabilization
8. good battery life
Check out my full list of 10 Things To Look For In A Vlogging Camera to understand the importance of these camera features.
Best Cheap Vlogging Cameras
Below are the best cheap vlogging cameras that you can get for under $500. They all record at least 1080p HD video and all but the Sony Alpha a5100 come with optical image stabilization (if you want OIS with the Sony a5100, you’ll have it get it in the lens).
| Camera | Release Date | Camera Type | Flip Screen | 4K | Price | |
|---|---|---|---|---|---|---|
| Yi 4KAction Camera | |
February2017 | Action Camera | No | Yes | $169 (MSRP) |
| NikonCoolpixA900 | |
February2016 | Compact | Flip Up | Yes | $399 (MSRP) |
| NikonCoolpixB500 | |
February2016 | SLR-like (bridge) | Tilting | No | $250 (MSRP) |
| PolaroidCube+ | |
June2015 | Action Camera | No | No | $99 (MSRP) |
| SonyAlphaa5100 | |
August2014 | Mirrorless | Flip Up | No | $450 (MSRP) |
|
Best cheap vlogging camera under $100: Polaroid Cube+ Even before GoPro released their GoPro Session, Polaroid was the first to come out with a 1.4-inch, cube-shaped action camera, small enough to mount on a bike or a helmet. This camera has built-in magnets so that you can attach them to metal surfaces. This action camera is water-resistant, shock-proof, and weather-proof. It can record full HD 1080p videos at 60 fps with its wide-angle lens. You can connect this camera with your phone to preview and take your shots. |
|---|---|
|
Best cheap vlogging camera under $200: Yi 4K At $200, you can record 4K videos with the Yi 4K action camera. Like many other action cameras, this camera is small, durable, and shoots through a wide-angle lens. You won’t be able to take this camera underwater though because it isn’t waterproof. You’ll need to buy the right accessories for that. |
|
Best cheap vlogging camera under $300: Nikon B500 The Nikon B500 gives you a non-interchangeable zoom lens so that you have more control over how you compose your shots. This camera records full HD 1080p videos at either 30 or 25 fps. You can only set its ISO as high as 3200, so it’s not going to perform the best in low-light conditions. The tilting LCD screen does not have touchscreen and cannot be fully flipped up or flipped to the side, it only tilts. For a camera in its price range, the Nikon B500 offers a lot of features. |
|
Best cheap vlogging camera under $400: Nikon A900 The Nikon A900 not only comes with a non-interchangeable zoom lens, but it can also record videos in UHD 4K quality. Like the Nikon B500, the A900’s ISO goes only up to 3200, making it a weak performer in poorly lit conditions. |
|
Best cheap vlogging camera under $500: Sony a5100 Among the cameras listed in our top cheap cameras list, the Sony a5100 is the only one you can interchange lenses with. All Sony E-mount lenses are compatible with this camera. This camera can record up to 1080p videos at 60 fps. Out of all of the above top cheap cameras, this one also auto focuses the best. |
Best Entry-Level and Mid-Range Vlogging Cameras
If you have a bigger budget to work with, the following vlogging cameras are great options:
| Camera | Release Date | Camera Type | Flip Screen | Mic Port | Price | |
|---|---|---|---|---|---|---|
| CanonEOSM50 | |
February2018 | Mirrorless | Fully Articulated | Yes | $- |
| CanonEOSM100 | |
August2017 | Mirrorless | Flip Up | No | $ |
| CanonEOS RebelSL2 | |
June2017 | Compact SLR | Fully Articulated | Yes | $ |
| CanonEOS RebelT7i | |
February2017 | Mid-size SLR | Fully Articulated | Yes | $- |
| CanonEOS80D | |
February2016 | Mid-size SLR | Fully Articulated | Yes | $$ |
|
Best entry-level mirrorless camera for vlogging: Canon EOS M100 The Canon M100 is a small and powerful camera that can shoot full HD (1080p) videos up to 60 fps. The touchscreen LCD of this camera flips up so that you can see yourself as you vlog in selfie mode. |
|---|---|
|
Best mid-range mirrorless camera for vlogging: Canon EOS M50 The Canon EOS M50 can shoot UHD 4K videos at 23.98 fps. You can also record 120 fps slow-motion videos at 720p. Unlike the M100, which only has a flip up screen, the M50 has a fully articulated screen, so you can use this camera in selfie mode, all while using an on-camera shotgun microphone attached to the camera hot/cold shoe. |
|
Best DSLR camera for daily vlogging: Canon EOS T7i The Canon EOS T7i is a great DSLR camera for daily vlogging. It can record full HD 1080p videos at 60 fps, it can create HDR and time-lapse movies, and it also has a fully articulated screen. |
|
Best entry-level DSLR camera for vlogging: Canon EOS SL2 The Canon EOS SL2 delivers a lot of power at a low price. This DSLR camera can capture full HD 1080p videos at 60 fps. |
|
Best mid-range DSLR camera for vlogging: Canon EOS 80D The Canon 80D is an exceptional mid-range DSLR vlogging camera with many features. Coming with a 45-point all cross phase detection autofocusing and a dual pixel CMOS AF system, the camera is great at finding the right focus while recording video. |
Part 2: YOUTUBE EQUIPMENT: LENS
A lot of compact cameras already come with the lens as a part of the camera body. When it comes to these kinds of cameras, you won’t have to worry about which lens is right for you since the decision has already been made for you!
When you start looking into bigger cameras, though, you’ll have to think about which lens you want to shoot with.
The Wide-Angle Lens
Every YouTuber should have a wide-angle lens. With this kind of lens, you can fit much more of a scene into your camera frame, including your own face when you’re just an arm’s length away from your camera. This is especially important for YouTubers because most YouTubers have to operate their camera on their own, without the assistance of an additional camera person.
Optical Image Stabilization
You should also look for a lens with optical image stabilization if you’re shooting a lot of your YouTube videos handheld.
For more information on camera lenses, check out my Vlogger’s Guide To Camera Lenses .
Part 3: YOUTUBE EQUIPMENT: TRIPOD
|
Tripod If you plan to film yourself talking in front of the same, unchanging background for an extended period of time, it doesn’t make sense to film yourself handheld the entire time. You’ll just end up tiring your arm out and adding distracting shakiness to your footage. A tripod is a great solution to this problem. You can set up your framing once, press record, and leave your camera in its fixed position while you talk with both hands free. |
|---|---|
|
Joby GorillaPod With Ballhead When you film yourself handheld, it’s difficult to keep your arm higher up so that your camera shoots down at an ideal angle. You may also notice that a lot of your arm gets into your shot, which you and other viewers might find distracting. Holding your camera up by a GorillaPod, however, can give you the extension you need to get that higher angle shot more easily, all without so much of your arm getting into your shot. |
Part 4: YOUTUBE EQUIPMENT: MICROPHONE
Most vlogging cameras come with a built-in microphone that gets the job done. If you want higher quality audio recordings, though, you should check out the following list of top microphones.
| Top Condenser Mics For Music and Singing | Top Condenser Mics For Voiceovers-Podcasts, Interviews | Top On-Camera Shotgun Mics | Top Shotgun Mics | Top Low-Profile Lavalier Mics |
|---|---|---|---|---|
| Audio-Technica AT2035 Rode NT1-A AKG C214 | Apogee Mic 96K Blue Yeti Rode NT-USB Blue Snowball Audio-Technica AT2020 Rode Procaster | Rode VideoMic Go Shure VP83 Rode VideoMic Pro+ Sennheiser MKE 440 | Rode NTG-3 Audio-Technica AT4053B Sennheiser MKH416 | Rode SmartLav+ Audio-Technica ATR3350iS Sennheiser ME2 |
To read more about each of these microphones, check out our post on The 19 Best YouTube Microphones 2018 – Options for Music, Voiceovers, Vlogging, and more!
Part 5: YOUTUBE EQUIPMENT: SMARTPHONE ACCESSORIES
Using your smartphone’s camera to film your YouTube videos is a great idea since it’s light, portable, and most likely always with you. The following six smartphone accessories can help you make better YouTube videos:
- Arkon Tripod Mount
- FLII Selfie Ring Light
- RODE VideoMic Me
- Aukey Optic 3-in-1 Smartphone Lens Set
- iOgrapher Go for Android and iPhone
- Manfrotto TwistGrip System
Read about each one of these items and more in The 9 Best Smartphone Camera Accessories For Vloggers .
Part 6: YOUTUBE EQUIPMENT: LIGHT
Lighting for home living and lighting for filming is very different. If you try to make use of just the lights you have at home, you may find that your footage is too dark, grainy, and orange-tinted.
The solution to this problem is getting additional video lighting equipment with daytime light bulbs.
|
Daytime Light Bulbs Your home is most likely lit with incandescent light bulbs that illuminate orange-tinted light. You can remove those light bulbs and replace them with daytime light bulbs that illuminate more of a white colored light. |
|---|---|
|
On-Camera LED Light If you need more light just in front of the camera and you need this light to be portable, LED lights that attach to your camera’s hot/cold shoe will do the job. |
|
LED Ring Light If you need more light just in front of the camera, you don’t have a lot of space, and you don’t need this light to be small and portable, an LED ring light is the best piece of equipment for you. You can position your camera inside the circular space of the ring light. This kind of light also gives your eyes the circular shaped highlight that many people like to see. |
|
Softbox Video Light If you need more light and have more space, another piece of lighting equipment good for beginners is a softbox video light. |
|
Umbrella Video Light Umbrella video lights are very portable and affordable. The direction of the light from umbrella lights are more difficult to control than the light from softbox video lights. |
If you’re looking for recommendations on which piece of lighting equipment to buy, check out my list of the Top 17 Video Lighting Equipment For YouTubers .
Part 7: YOUTUBE EQUIPMENT: COMPUTER
After you’ve recorded all your footage, you’ll need a computer to edit your video clips together. You can perform basic video editing tasks and upload your video onto YouTube with any computer less than ten years old.
Laptop computers are popular among YouTubers because their portability allows you to work on your videos from anywhere. This way, you can finish and upload your videos more frequently, which is another important part of being a YouTuber.
The following three laptop computers handle video editing very well:
- MacBook Pro With Touch Bar
- Dell XPS 15
- Microsoft Surface Book 2
Read more about these laptop computers for 4K video editing in The Best Laptops for 4K Video Editing .
Part 8: YOUTUBE EQUIPMENT: VIDEO EDITING SOFTWARE
| FREE VIDEO EDITING SOFTWARES | PAID VIDEO EDITING SOFTWARES |
|---|---|
| OpenShot Video Editor (Windows, Mac, Linux) ShotCut (Windows, Mac, Linux) Hitfilm Express (Windows, Mac) VideoPad Video Editor (Windows) Lightworks (Windows, Mac, Linux) VSDC Video Editor (Windows) Machete Video Editor Lite (Windows) Avidemux (Windows, Mac, Linux, BSD) Read more about each of these softwares in our post about The Best Free Video Editing Software for YouTube . | Filmora Video Editor (Windows, Mac) - $40 one year license, $79.99 perpetual license. Free trial Final Cut Pro (Mac) - $299.99, Free trial Vegas Movie Studio (Windows) - $49.99 |
YOUTUBE EQUIPMENT: AUDIO
Music Libraries
Music is an important part of YouTube video creation. Here’s where you can get access to music:
| ROYALTY-FREE MUSIC LIBRARIES | PAID MUSIC LIBRARIES | PAID SUBSCRIPTION MUSIC LIBRARIES |
|---|---|---|
| Audionautix Bensound dig.ccMixter Free Music Archive Free Stock Music Incompetech Josh Woodward Moby Gratis Musopen Purple Planet Music TeknoAXE YouTube Audio Library | Premium Beat Audio Jungle | Audio Network Audio Blocks Epidemic Sound |
Sound Effects
Free Sound Effect Sites
- Filmstock Sound Effects
- Freesound
- PacDV
- Sound Bible
- Sound Gator
- Sounds Crate
- Zapsplat
Sumia Rafique
Sumia Rafique is a writer and a lover of all things video.
Follow @Sumia Rafique
Also read:
- In 2024, Essential Choices Top 10 Best Video Editing Software (Free, 2023)
- [New] 10 Best Intro Maker Apps for iPhone and Android
- Best YouTube To GIF Makers You Should Use (Online & Desktop)
- [Updated] Discover the Leading YouTube-to-WebM Converter Tools
- 2024 Approved Discover YouTube's Frame Advantage - Five Free Tools
- In 2024, Best Practices for Sharing Videos on Mobile Devices
- Expert MP3 Creation Guide Top Video-to-Audio Devices
- Fast Tip Mastering Green Screen Techniques
- 2024 Approved Average Income for YouTubers per Ad Displayed?
- Capture It Right Essential Camera Lenses for Video Blogging for 2024
- 3 Innovative Ways to Neon-Border YouTube Thumbnails for 2024
- Earth's Richest Digital Content Wizard
- In 2024, Cutting-Edge Chapter Tactics to Complement Your YouTube Presentations
- Step-by-Step to Creating an Unbeatable Biz YouTube Channel
- Maximize Views with These Top-Rated Keyword Analysis Tools
- [Updated] Engage and Inspire Audiences Professional-Level Tips for YouTube Edits
- Enhance Clips Best Winter Bg's for Video Warmth for 2024
- Maximizing Your Creations Uploading IMovie Videos to YouTube
- Directly Posting Your Videos From iDevice to YouTube
- [New] Best Practices in YouTube Thumbnail Sizes and Ratios
- Best Practices for Designing an Engaging YouTube Teaser
- Discover Keyword Power 30 Must-Use Hashtags for FreeGame Content for 2024
- 2024 Approved Essential Strategies for Profitable YouTube Videos
- 2024 Approved A Guide to Profit Sharing for Creators of Video Clips
- 2024 Approved Charting the Course of Knowledge Best History YT Channels for Students
- MP3 Export Made Easy Select Free Apps for iPhone & YouTube
- [Updated] Digital Dominion for Techno Gamers
- What Lies Behind the 'Unlisted' Tag on YouTube?
- Track Your Traffic The Straightforward Strategy for Scrutinizing YouTube Earnings
- In 2024, 360 Video Editors How to Upload 360 Video to YouTube
- 2024 Approved Break Free From Linearity Mastering Jump Cut Transitions
- 2024 Approved Best YouTube-to-WebM Tools A Compreenasive Review & Ranking
- [Updated] Deciphering the Language of Copyright Notices From YouTube
- [Updated] Crafting Engaging Music Reactions The YouTube Enthusiast's Blueprint
- Updated Top 5 Online Text to Speech Websites for 2024
- [Updated] 2024 Approved Adjust Twitter Video Excerpt
- New Eclectic Mix Modern Emotional Tracks on the Horizon
- How to Change GPS Location on Honor 80 Pro Straight Screen Edition Easily & Safely | Dr.fone
- [Updated] In 2024, The Leading Free Online Screencasting Solutions
- iPogo will be the new iSpoofer On Apple iPhone 12 Pro Max? | Dr.fone
- Navigating Through the Maze Choosing Top-Tier Audio Formats Explained
- Updated 2024 Approved Top 10 Singing Suppression Programs & Solutions
- New What Wikipedia Cant Tell You About the 10 Batman Cartoons for 2024
- New In 2024, | Best WMV to GIF Converters
- [Updated] Clearer Facebook Audio Addressing Half-Volume Problems for 2024
- [New] In 2024, Navigating the Trending TikTok Landscape with Hashes
- In 2024, Downloading SamFw FRP Tool 3.0 for Vivo Y36
- Android Unlock Code Sim Unlock Your OnePlus Ace 3 Phone and Remove Locked Screen
- [Updated] Amplifying Instagram Video Reach & Traffic for 2024
- [New] In 2024, Mastering Snaps in Zoom's Camera Feature
- Pleasurable Stream Capture Evaluation
- Dynamic and Diverse 10 Essential Text Presets for Adobe AE
- New Bridging AIFF and MP3 Techniques for High-Quality Audio Conversion for 2024
- 4 Methods to Turn off Life 360 On Oppo Reno 10 Pro 5G without Anyone Knowing | Dr.fone
- In 2024, Must-See HD Video Snaps for Mac Users (Char Limit 156)
- Windows Enthusiasts Guide to Premium Free Audio Editing Applications
- [New] 2024 Approved Unlocking the Process for Final Deactivation of an Account on Instagram
- Nokia 105 Classic Not Receiving Texts? 10 Hassle-Free Solutions Here | Dr.fone
- New 2024 Approved Animation Powerhouses Top 8 Software for Mac and Windows Creators
- How to Stop Life360 from Tracking You On OnePlus Nord 3 5G? | Dr.fone
- Title: "Step-by-Step Adding Captions to YouTube Clips"
- Author: Brian
- Created at : 2024-05-25 12:50:59
- Updated at : 2024-05-26 12:50:59
- Link: https://youtube-video-recordings.techidaily.com/step-by-step-adding-captions-to-youtube-clips/
- License: This work is licensed under CC BY-NC-SA 4.0.
