

"Starting a YouTube Channel The Ultimate Blueprint"
Starting a YouTube Channel: The Ultimate Blueprint
How to Create A YouTube Channel Today

Richard Bennett
Oct 26, 2023• Proven solutions
After all the planning and brainstorming, you are ready to create a YouTube channel. You have spent countless hours watching videos and aspiring to be a creator. You know it will be work, but you are passionate. You are willing to learn. You are ready!
YouTube fame is in your future, but where do you start?
In this guide, we’ll start at the beginning, at the point before you even have a YouTube channel. From there, we will walk you through your content strategy and properly prepare you for the journey of creating videos for a massive YouTube following. Then we will wrap it up by teaching you the best practices for YouTube video optimization, ensuring that all your efforts will lead to the best results.
Part 1: Setting Up Your YouTube Channel
Part 2: Building Out a YouTube Content Plan
Part 3: Producing Your Content
Part 4: Optimizing and Distributing Your YouTube Video
Okay, there is a lot to cover, so enough small talk. Let’s get started.
Part 1: Setting Up Your YouTube Channel
Before you start making awesome videos, you got to set up your YouTube account. Activating YouTube is pretty straightforward if you already have a Google account. The odds are you have already set one up to subscribe to all your favorite channels. If not, here are the steps:
Step 1: Sign in to YouTube with your Google account
Step 2: Access YouTube Creator Studio to Activate YouTube
Step 3: Create a Channel
1. Picking a YouTube Channel Name
A YouTube channel name is beneficial to your channel’s growth if selected strategically. It can separate you from all the other channels on the platform, it can help the viewers understand what your channel is all about, and it will represent you and your brand. When naming your channel, here are 3 things to remember:
- Memorable: You’d want a name that sticks in people’s brains. Picking a name that is hard to forget will be a huge advantage for you while growing your channel. But what makes a name memorable?
- Alliteration and assonance: By using the repetition of consonant or vowel sounds, you create a fluidity to the name. examples: Pewdiepie, GoPro, or League of Legend.
- Fun to say: Some words stay in the brain because it is simply pleasurable to say. It could have a genuine meaning or it can be an abstract word. Commonly these names have one of these sharp, biting consonants: C, K, Q, X, or Z. examples: Markiplier, Kwebbelkop, Squeezie, and Vox.
- Abbreviations: A name can have a greater meaning, but long names might not be catchy, therefore, you should abbreviate it to a few memorable letters. Examples: TED ED, TGFbro, ERB, and FBE.
- Longer Phrases: You may think that having a long name may be hard to remember, but sometimes, depending on your channel, a snappy phrase works. Example: How It Should Have Ended, You Always Win, and People Are Awesome.
- Your Name Plus Descriptor: Combining two words effectively can make a name more memorable like Markiplier (Mark + Multiplier), LaurDIY (Lauren and she makes DIY projects), and Shameless Maya (Maya and she’s shameless).
- Unique: Be creative with your name, especially if your real name is generic. YouTube is a crowded space and if you simply call your channel: Jake, not only will you be competing with all the creators named Jake, but also all the content with Jake as the keywords.
Also, avoid generic names that are based around your channel topics. For example, Fashion Talk sounds like a good name, but if you do a quick search you will see that it is a crowded space with vloggers, keynote presentations, and product reviews.
If you are starting a fashion channel why not try to find a link between your name and the topic? The connection between two different things often spawns something creative: Fabric Feud, for example. Just by the name, I know this channel will contain interesting perspectives on garments.
- Keep it Simple: In the end, simplicity is the way to go. Don’t make it hard to type or hard to remember: cantunderstandthistopic88768 is not a good name, even if it’s strange and cryptic.
If you have a simple name in mind, it’s also a good idea to do a quick search on YouTube and Google to make sure it isn’t already used or similar to another account. Additionally, it’s worth knowing whether the social media handle is available as you will need it to expand your channel.
Consider using your real full name, it’s unlikely to ever change. Many YouTubers start out with a stage name but end up growing out of it and simply using their real name later on in their journey.
We’ve summarized some creative ways of picking up a YouTube name, you can check our guide to picking YouTube Channel Name [4 Aspects]
2. Writing a YouTube Channel Description
YouTube is a search engine and the channel description can be treated much like an About page for a website. That is why keywords are important when composing the channel description.
What are YouTube SEO keywords?
Keywords are the words and phrases people use when they are typing into the search engine to find content. Without the right keywords, your audience may never find your videos.
If you want to start discovering new keywords for your YouTube channel, you can use Ubersuggest . This tool shows you the search volume (how frequently it is searched for) as well as how competitive (how many other channels are using it) the keyword is.
Heighten your chance of discoverability by putting keywords as close to the beginning of the description as possible. Later on in this post, we will go through how to properly conduct a keyword strategy. Hang tight.
In addition to keywords, you should also introduce who you are and what the channel is about. Give them a reason to care about your channel, how is it different than all the other ones on YouTube? Why are you the best person to be producing the content on your channel?
Then encourage the viewers to subscribe if they are interested in what the channel offers: education, entertainment, adventure, or something they can’t get anywhere else. It’s your channel, sell it.
Finally supply some extra details, including when to expect videos to be published and other social platforms where you are active on. If someone is reading your YouTube description , you have already hooked them. Here is your chance to reel them in with your channel’s purpose.
3. Creating the Perfect Logo for Your YouTube Channel
#1. What Icon Should You Use for YouTube?
You may choose an icon that best represents the content your channel is producing. For example, if your channel is about technology, you can have an icon of a robot or an iPhone. This way, when viewers only see your icon, they have an idea that they can expect content around tech.
Here are some websites in which you can download logos and icons for YouTube videos .
#2. What Color Should Your YouTube Logo Be?
When creating your logo, avoid trendy colors as they may go out of style. Instead, consider the psychology of color .
What emotions do you want your channel to evoke to your viewers?
Answering this question helps you develop a consistent branding that applies to all your content as your channel grows. Blue evokes calm and trust, whereas, red is known to increase heart rate and is associated with danger. Before you select a color scheme, know how you want your audience to feel.
#3. What Font Should Your YouTube Logo Have?
While YouTube doesn’t offer a lot of real-estate for text, you might still want to include the name of your brand on your logo.
Potentially, the font you choose for your logo will also be the font for the text that appears on your YouTube videos and your channel art. With that in mind, it is important that you pick one that works best for you at the start. Here are some details to look for when selecting a font.
Legibility: Does the font get too hard to read the smaller it gets? It’s not uncommon for some fonts to become a messy blur once the size is reduced on desktop and mobile.
Simplicity: The most important thing about the font is its readability. If it looks like your doctor’s handwriting, then it might not be the best choice.
Consistency: Placed next to your icon, does the font look natural? You might not want to put an icon of a robot next to a font that looks like calligraphy.
#4. How Should You Design Your YouTube Logo?
Do you really need borders or supporting texts? I ask because the more you have on your logo, the less space it will have to stand out.
White space is your friend, it keeps the viewer’s attention focused on what matters and keeps the design uncluttered.
Save your logo as a vector so that you have the ability to scale without losing the image’s quality.
I get it, you are here to make a YouTube channel, not to design a logo. You’re not a designer. Don’t fret, we have a bunch of free logo making tools for you to create an awesome logo.
If you don’t want to create a logo or if the channel is of your own personal brand, then use a quality photograph or headshot of yourself. Doing so allows people to see who you are and develop an instant connection with you.
#5. What Makes A Good YouTube Channel Banner?
Your YouTube banner, or sometimes known as the channel art, is the cover page for your YouTube channel.
While the old adage tells us not to judge anything by the cover, in a world where we have a surplus of content, it is something we all must do for the sake of our time. If we see channel art that doesn’t appeal to us or doesn’t match the video content created, it is jarring. We are distracted from what matters and left questioning why we are on this channel in the first place.
Alternatively, if YouTube channel art is well designed and matches the aesthetic of the channel, then it can inspire your viewers to watch more, share, and subscribe.
So with that said, what makes a great YouTube banner?
Sizing: YouTube comes with sizing recommendations . The size they suggest is because of all the different devices viewers use to consume content.
You cannot control where and how your viewers consume your content. They can be watching on desktop, smartphone, tablet, or tv via Apple TV or Chromecast. That is why it is so important to have a responsive design: appropriate sizing and layout ensures that nothing important is cut off.

Less is more: There is already a lot happening on your YouTube channel page. Crowding your channel art will add more chaos than clarity. Additionally, since the design will shift from device to device, you may lose elements of the design if it is overcrowded.
Keep it in the middle: By keeping all the design elements and text within the safe zone, you can assure nothing will be cut out even if it is viewed on a less than optimal screen. It is a shame when you see that a headline is cut out and you cannot read the whole banner. Use YouTube’s template to help guide your design and ensure that everything important is visible.
High-resolution images: Nothing shouts “I’m an amateur” like having a pixelated image for your banner. Setting a high standard for images at the start will ensure that your whole channel will look professional from the beginning.
Take a go at creating your own channel art with some great YouTube design tools such as Canva and Crello.
Don’t have time to design at the moment? Download 50 free YouTube banner that we created to help busy creators like yourself get a professional page up and running right away.
Part 2: Building Out a YouTube Content Plan
Now that you know how to create a YouTube channel, you will need content to fill it up.
There are many factors to having success on YouTube and one has always been delivering content consistently. You may feel at this moment, that your brain is storming with ideas, but believe me, you don’t want to get caught in a drought. The way to avoid major blockers for your channel is to have a content plan at the onset.
A content plan helps guide you towards the mission, the reason you are building this YouTube channel in the first place.
Topics: Your YouTube channel will be focused on one broad topic, whether it be fashion, health, food, etc. It is hard to fly on a whim with a topic that covers such a wide scope. Creating content for these topics will require preparations and that’s why the earlier you have the content ideas for your video the more time you’ll have to research, rehearse, and get the best result.
Begin with a blank piece of paper and break down your topic into 5-10 different categories. If you have a channel about cooking, it may look something like this: breakfast, lunch, dinner, dessert, snack, etc.
From there, you can drill down more and explore specific topics such as “cheap meals,” “street food,” , etc. Niching down allows those who are looking for a more specific piece of content to find your material. Also, when one specific piece of content performs well, it will give a boost to all the other content related to that broader topic.
Researching Your Ideas: Now that you have a big list of ideas, it’s time to do some research. With so many idea options, it’s easy to get overwhelmed by the work ahead, but stay focused and tackle one idea at a time.
When it comes to videos, discoverability is an important aspect of everything you create. You aren’t only competing with other YouTube channels, you are competing with everything in the world that can turn your viewer away from your channel. That is why you should make it as easy as possible for your content to be discovered.
Pro Tip: Search on YouTube and see if there is already a video for the idea you have. By taking a quick look at what content is out there, you can see who you’ll be competing with and determine if it is worth pursuing. If there are already a lot of existing videos on that topic, it might be too hard to for people find your content at first.
Keyword Research: For each of your ideas, you will want to conduct extensive keyword research. This research will help dictate the tags, titles, and descriptions of your videos once they are ready to publish.
There are a few ways to conduct keyword research, but we suggest using free online tools to help cut down the time spent.
1. Free tools
Ubersuggest : Type in a keyword and Ubersuggest will populate with related terms that you can use in your strategy.
Google Trends : Examine the historical trends of a keyword and determine its popularity in Google search and how it is affected annually and seasonally. Google Trends is also a good tool for seeing which topics are trending. By understanding this, you can plan your content around the hottest trends and ride the wave.
YouTube search bar : Enter your keyword into the YouTube search bar and the platform will automatically suggest the most popular searches with your keywords.
VidIQ : See what keywords other popular videos in your niche are using.
Google Adwords : Created as an advertising platform, Google Adwords also has a tool called Keyword Planner that allows you to see the monthly search traffic and the level of competition for each keyword. This tool is extremely useful for trimming down your long list of keyword ideas.
2. What Are Some Value-adding Content for YouTube?
Inspirational, educational, and entertaining: these are 3 resonating types of content as defined by Google for a YouTube audience.
Inspirational content that triggers an emotion in your audience. These content lean on good storytelling and relatable or unique experiences.
Educational content teaches the audience how to accomplish a task, improve a skill set, and discover new products or ideas.
Entertaining content is an escape for the audience. It allows them to sit back and enjoy your content and forget about what they have to deal with in real life.
You might be interested in:
3. Set Up a Content Calendar to Be Consistent on YouTube
A common issue for many YouTubers is consistency and accountability. Without a proper routine and schedule, YouTubers will end up procrastinating and publishing whenever they finish their content.
In order to properly establish an audience for your channel, there needs to be consistency and that is why it is so important to have a content calendar to affirm when a piece of content is due to be published, thus giving the creator a good idea of when to start each step of the process to meet publishing date.
There are many ways to build out a content calendar, you can simply use a spreadsheet, a calendar, or you can use other management/organization tools such as Trello or Asana . We recommend using Google Sheet and Google Calendar to start, as it is free and easy to use.
Since you are starting out, we suggest that you plan on a monthly basis, as it’ll allow you to be flexible to trending topics and adjust to insights that you’ll acquire as you analyze your content’s performance.
Part 3: Producing Your Content

Now that you have a plan it is time to start producing your content. There are many ways to approach this, as different types of channels will have different processes for researching, capturing footage, and editing.
Planning: It doesn’t have to be a fully flushed script, but any bit of planning before hitting the record button will help you prepare some valuable content to be captured. It can be an outline, breaking down the topics you want to touch on.
If it’s a food YouTube channel, you’d want the recipe and all the ingredients ready on hand. Mise en place is the French phrase that chefs use meaning “everything in its place” or having everything they need on hand so when dinner rush comes preparation is done and now they are ready to produce. This same mentality works when preparing to shoot a YouTube video. The more you prepare the easier the shoot and the editing will be.
Equipment: At the start, you can get everything done on your smartphone. But that does depend on what your channel is going to be about and who your target audiences are. If you want to film some simple sketches to entertain people, yes, a smartphone camera can work for start. But if you are reaching a professional crowd or want to appear credible, then it might be worth it to invest in a better camera, audio, and lighting equipment.
Filming/Capturing: Always do some checks before shooting your YouTube videos as bad camera angles, poor audio quality, inadequate lighting are all easier to fix before rather than after the filming. Additionally, set a reminder to backup your footage and charge your batteries after every shoot and have an extension cord or a separate hard drive ready.
Editing: Over time, you will develop your own editing style. At the start, it is best to learn the fundamentals and improve on the basics.
Selecting the software: Some video editing software programs are free and others cost a lot. Do your research, sign up for free trials, and understand the limitations of the applications and the requirements you need. If money is a factor, you might want to stick with the free options such as iMovie or affordable options such as Filmora .


Storytelling: Skilled editing enables YouTube creators to tell the story in the most effective way. This does not mean in chronological order. Think of what will hook the audience right away and what will be most impactful at the very end. Pro-tip: Use pre-set transitions sparingly, jump cuts are often the most effective and least distracting. Editing is an invisible art.
Text, graphic or special effects: Video is a show that doesn’t tell medium, so use text sparingly. People aren’t going to your channel to read. However, text when used properly compliments the video and supplies context. Graphics and special effects are good when they support the story you are telling and cheesy when used egregiously to impress the viewer.
Export to the right format: You can pretty much upload any video format to YouTube and they can figure it out. Nevertheless, YouTube recommends using MP4 and encoded with the codec.
Part 4: Optimizing and Distributing Your YouTube Video
Your job is not done after you’ve filmed, edited, and published your video on YouTube. In order to help it get discovered, you’ll need to understand what will drive your audience to click and watch your video as opposed to all the other videos on YouTube.
By performing video optimization and sharing your content in communities interested in what you are creating, you can increase the chances that your video will be seen.
1. Tips for Writing the Best Title for YouTube Video
When coming up with titles for your YouTube video, you should always have your keyword research-ready on hand for reference.
YouTube keyword crawlers read from top to bottom, so it is most effective to have your keywords at the beginning of the title. Strive to build click-worthy titles that inspire curiosity, evoke an emotion, or offer a benefit.
Example:
Good: How to Deep Fry Chicken
Better: Deep Frying Chicken That’s Better Than KFC
While you have 100 characters to work with, anything beyond 70 characters will be truncated by YouTube.
Caution: Always deliver what your title is selling. Misleading viewers can cause mistrust in your content and will turn people off your channel.
2. Tips for Writing the Best Description for YouTube Video
Treat the description as a short synopsis for your video with the keywords strategically placed at the beginning. Include a URL to your website or blog and have any other supporting information or links.
Also, the description is where you can include some boilerplate channel information.
You have 5,000 characters to work with, but only the first three lines will be above the fold.
Pro Tip: If your video is on the longer end (over 20 minutes) or has multiple sections, then you should consider adding timestamps in the description to help the viewer skip to the spot they are most interested in.
3. Tips for Writing the Best Tags for YouTube Video
Keeping that keyword research handy write 5-15 tags. Start with specific keywords, then move into general keywords, and then branded keywords.
Specific keywords: how to deep fry chicken
General keywords: fried chicken recipe
Branded keywords: KFC
4. Tips for Designing the Best Thumbnail Image
Customize thumbnails: It is recommended that you take some time to customize a thumbnail image for your video. This is the first impression and you want to entice the viewer to click and watch.
YouTube auto-selects your thumbnail from a random position on your timeline, so it isn’t mandatory to create a thumbnail, however, the image YouTube selects might not be what you want to use to attract your audience.
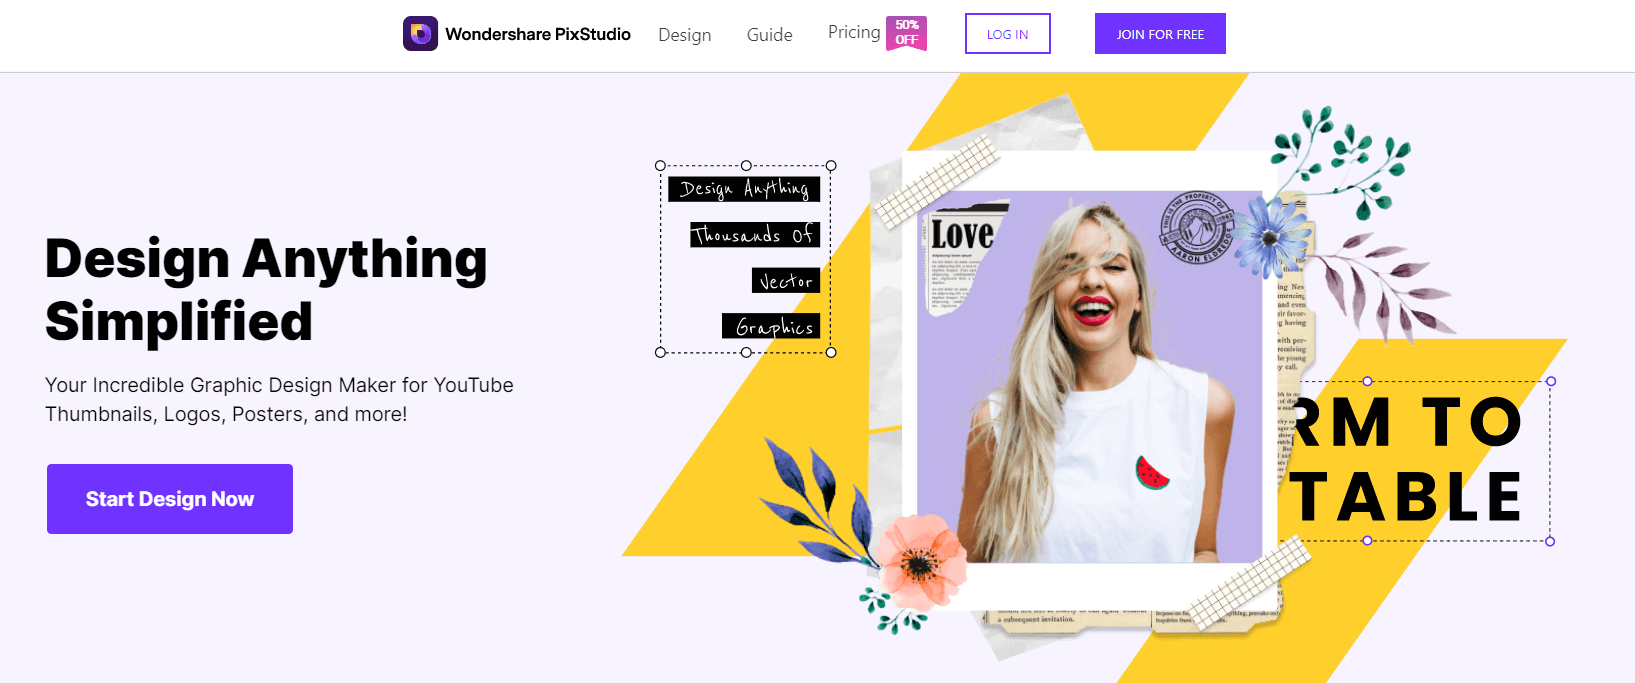
Use photo editing software: To control how you want an image to look, you will need to choose a photo editing software. Wondershare PixStudio is a good choice that provides various types of templates for YouTube Thumbnails, Logos, Posters, etc.
Have a consistent look: By having consistency, people will begin to recognize your thumbnails and even getting them excited to watch your video.
Pro Tips:
- Avoid using YouTube’s randomly selected thumbnail. Personalize it to stay consistent with your brand.
- Don’t clutter thumbnails. Less is more.
- Make fonts big if you are going to use text.
- Thumbnails have to have context, what is their story? Deliver on that promise.
- Using emotive faces have shown to appeal to people’s emotional cues and increases the likelihood of them clicking.
- Thumbnail file size should be 1280 x 720
5. Closed Captions and Uploading a Transcript
There are two key reasons why it is worth your time to use closed captions or upload a transcript for your YouTube videos.
- Having closed captions improves the video’s SEO, as Google indexes and crawls the keywords.
- For those that don’t want to or can’t hear the audio will appreciate having closed caption to allow them to enjoy the content.
6. How to Share Your Video with Social Media
Unless you have a huge social media following, it will be challenging to get many views from those channels at the start.
Grow your social media channel gradually by targeting your ideal viewer persona and hashtagging your content. On social media channels such as Facebook and Twitter, keep producing content for them, but don’t forget to share content from other YouTubers. If you see a cool video relevant to your audience, share it as well.
Lead your followers to your YouTube channel with content designed specifically for your social media channel. For example, Instagram Stories are a great way to engage directly with your followers, giving them a sneak peek or letting them know that your latest YouTube videos are up. You can even link directly to your YouTube channel from your Instagram story.
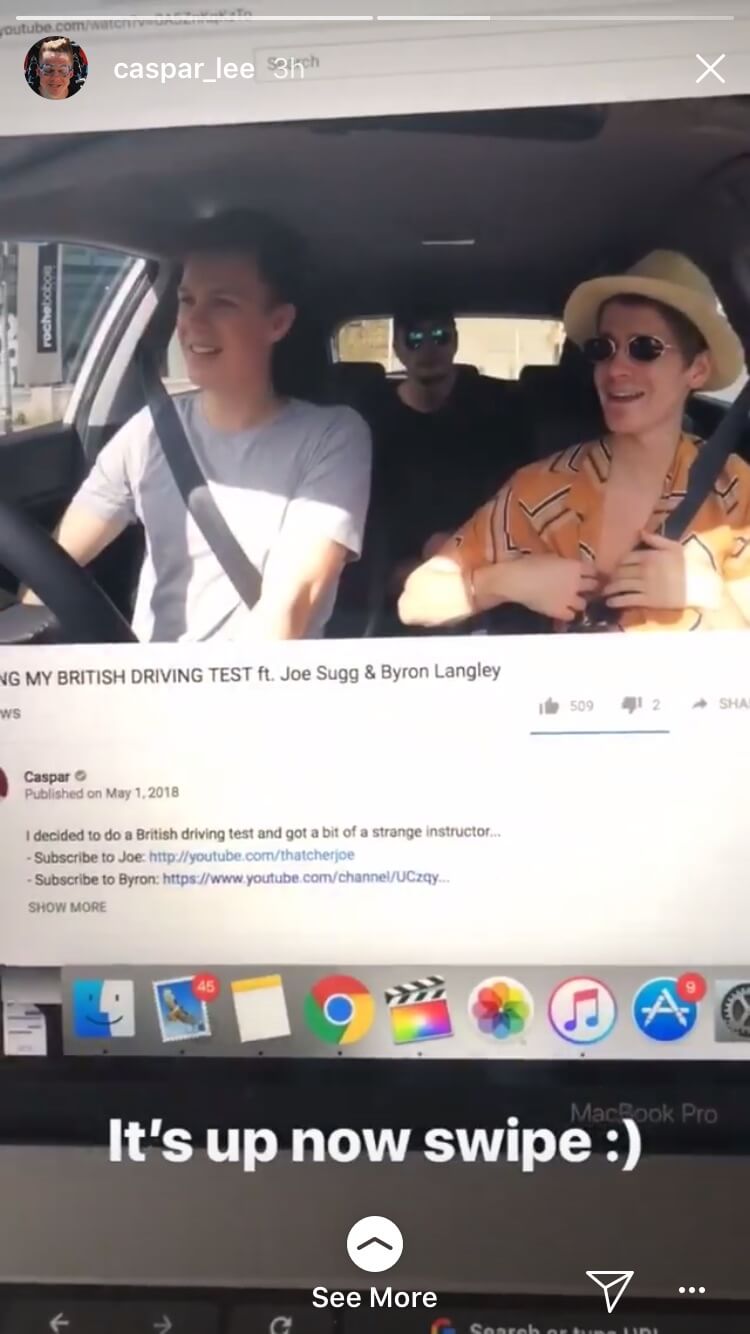
YouTuber, Caspar Lee
Join groups on social networks such as Facebook, Reddit, etc. and engage in conversations that are related or complementary to your YouTube channel. The key is to find communities that are interested in the content you are producing, but approach those groups with caution and ensure that anything you share won’t be perceived as spam.
Conclusion
There you go, now you have made your first YouTube video. It might be something you are incredibly proud of or it might have been a great learning experience. It might have gone without a hitch or you might have encountered obstacles you weren’t anticipating. Either way, you followed through and we are happy for you.
Now, get ready for the next one. The job of a YouTuber is never complete as there is always another video to make. By executing what we taught you in this guide, you now have the foundation to grow your channel. Good luck!
Richard Bennett
Richard Bennett is a writer and a lover of all things video.
Follow @Richard Bennett
Richard Bennett
Oct 26, 2023• Proven solutions
After all the planning and brainstorming, you are ready to create a YouTube channel. You have spent countless hours watching videos and aspiring to be a creator. You know it will be work, but you are passionate. You are willing to learn. You are ready!
YouTube fame is in your future, but where do you start?
In this guide, we’ll start at the beginning, at the point before you even have a YouTube channel. From there, we will walk you through your content strategy and properly prepare you for the journey of creating videos for a massive YouTube following. Then we will wrap it up by teaching you the best practices for YouTube video optimization, ensuring that all your efforts will lead to the best results.
Part 1: Setting Up Your YouTube Channel
Part 2: Building Out a YouTube Content Plan
Part 3: Producing Your Content
Part 4: Optimizing and Distributing Your YouTube Video
Okay, there is a lot to cover, so enough small talk. Let’s get started.
Part 1: Setting Up Your YouTube Channel
Before you start making awesome videos, you got to set up your YouTube account. Activating YouTube is pretty straightforward if you already have a Google account. The odds are you have already set one up to subscribe to all your favorite channels. If not, here are the steps:
Step 1: Sign in to YouTube with your Google account
Step 2: Access YouTube Creator Studio to Activate YouTube
Step 3: Create a Channel
1. Picking a YouTube Channel Name
A YouTube channel name is beneficial to your channel’s growth if selected strategically. It can separate you from all the other channels on the platform, it can help the viewers understand what your channel is all about, and it will represent you and your brand. When naming your channel, here are 3 things to remember:
- Memorable: You’d want a name that sticks in people’s brains. Picking a name that is hard to forget will be a huge advantage for you while growing your channel. But what makes a name memorable?
- Alliteration and assonance: By using the repetition of consonant or vowel sounds, you create a fluidity to the name. examples: Pewdiepie, GoPro, or League of Legend.
- Fun to say: Some words stay in the brain because it is simply pleasurable to say. It could have a genuine meaning or it can be an abstract word. Commonly these names have one of these sharp, biting consonants: C, K, Q, X, or Z. examples: Markiplier, Kwebbelkop, Squeezie, and Vox.
- Abbreviations: A name can have a greater meaning, but long names might not be catchy, therefore, you should abbreviate it to a few memorable letters. Examples: TED ED, TGFbro, ERB, and FBE.
- Longer Phrases: You may think that having a long name may be hard to remember, but sometimes, depending on your channel, a snappy phrase works. Example: How It Should Have Ended, You Always Win, and People Are Awesome.
- Your Name Plus Descriptor: Combining two words effectively can make a name more memorable like Markiplier (Mark + Multiplier), LaurDIY (Lauren and she makes DIY projects), and Shameless Maya (Maya and she’s shameless).
- Unique: Be creative with your name, especially if your real name is generic. YouTube is a crowded space and if you simply call your channel: Jake, not only will you be competing with all the creators named Jake, but also all the content with Jake as the keywords.
Also, avoid generic names that are based around your channel topics. For example, Fashion Talk sounds like a good name, but if you do a quick search you will see that it is a crowded space with vloggers, keynote presentations, and product reviews.
If you are starting a fashion channel why not try to find a link between your name and the topic? The connection between two different things often spawns something creative: Fabric Feud, for example. Just by the name, I know this channel will contain interesting perspectives on garments.
- Keep it Simple: In the end, simplicity is the way to go. Don’t make it hard to type or hard to remember: cantunderstandthistopic88768 is not a good name, even if it’s strange and cryptic.
If you have a simple name in mind, it’s also a good idea to do a quick search on YouTube and Google to make sure it isn’t already used or similar to another account. Additionally, it’s worth knowing whether the social media handle is available as you will need it to expand your channel.
Consider using your real full name, it’s unlikely to ever change. Many YouTubers start out with a stage name but end up growing out of it and simply using their real name later on in their journey.
We’ve summarized some creative ways of picking up a YouTube name, you can check our guide to picking YouTube Channel Name [4 Aspects]
2. Writing a YouTube Channel Description
YouTube is a search engine and the channel description can be treated much like an About page for a website. That is why keywords are important when composing the channel description.
What are YouTube SEO keywords?
Keywords are the words and phrases people use when they are typing into the search engine to find content. Without the right keywords, your audience may never find your videos.
If you want to start discovering new keywords for your YouTube channel, you can use Ubersuggest . This tool shows you the search volume (how frequently it is searched for) as well as how competitive (how many other channels are using it) the keyword is.
Heighten your chance of discoverability by putting keywords as close to the beginning of the description as possible. Later on in this post, we will go through how to properly conduct a keyword strategy. Hang tight.
In addition to keywords, you should also introduce who you are and what the channel is about. Give them a reason to care about your channel, how is it different than all the other ones on YouTube? Why are you the best person to be producing the content on your channel?
Then encourage the viewers to subscribe if they are interested in what the channel offers: education, entertainment, adventure, or something they can’t get anywhere else. It’s your channel, sell it.
Finally supply some extra details, including when to expect videos to be published and other social platforms where you are active on. If someone is reading your YouTube description , you have already hooked them. Here is your chance to reel them in with your channel’s purpose.
3. Creating the Perfect Logo for Your YouTube Channel
#1. What Icon Should You Use for YouTube?
You may choose an icon that best represents the content your channel is producing. For example, if your channel is about technology, you can have an icon of a robot or an iPhone. This way, when viewers only see your icon, they have an idea that they can expect content around tech.
Here are some websites in which you can download logos and icons for YouTube videos .
#2. What Color Should Your YouTube Logo Be?
When creating your logo, avoid trendy colors as they may go out of style. Instead, consider the psychology of color .
What emotions do you want your channel to evoke to your viewers?
Answering this question helps you develop a consistent branding that applies to all your content as your channel grows. Blue evokes calm and trust, whereas, red is known to increase heart rate and is associated with danger. Before you select a color scheme, know how you want your audience to feel.
#3. What Font Should Your YouTube Logo Have?
While YouTube doesn’t offer a lot of real-estate for text, you might still want to include the name of your brand on your logo.
Potentially, the font you choose for your logo will also be the font for the text that appears on your YouTube videos and your channel art. With that in mind, it is important that you pick one that works best for you at the start. Here are some details to look for when selecting a font.
Legibility: Does the font get too hard to read the smaller it gets? It’s not uncommon for some fonts to become a messy blur once the size is reduced on desktop and mobile.
Simplicity: The most important thing about the font is its readability. If it looks like your doctor’s handwriting, then it might not be the best choice.
Consistency: Placed next to your icon, does the font look natural? You might not want to put an icon of a robot next to a font that looks like calligraphy.
#4. How Should You Design Your YouTube Logo?
Do you really need borders or supporting texts? I ask because the more you have on your logo, the less space it will have to stand out.
White space is your friend, it keeps the viewer’s attention focused on what matters and keeps the design uncluttered.
Save your logo as a vector so that you have the ability to scale without losing the image’s quality.
I get it, you are here to make a YouTube channel, not to design a logo. You’re not a designer. Don’t fret, we have a bunch of free logo making tools for you to create an awesome logo.
If you don’t want to create a logo or if the channel is of your own personal brand, then use a quality photograph or headshot of yourself. Doing so allows people to see who you are and develop an instant connection with you.
#5. What Makes A Good YouTube Channel Banner?
Your YouTube banner, or sometimes known as the channel art, is the cover page for your YouTube channel.
While the old adage tells us not to judge anything by the cover, in a world where we have a surplus of content, it is something we all must do for the sake of our time. If we see channel art that doesn’t appeal to us or doesn’t match the video content created, it is jarring. We are distracted from what matters and left questioning why we are on this channel in the first place.
Alternatively, if YouTube channel art is well designed and matches the aesthetic of the channel, then it can inspire your viewers to watch more, share, and subscribe.
So with that said, what makes a great YouTube banner?
Sizing: YouTube comes with sizing recommendations . The size they suggest is because of all the different devices viewers use to consume content.
You cannot control where and how your viewers consume your content. They can be watching on desktop, smartphone, tablet, or tv via Apple TV or Chromecast. That is why it is so important to have a responsive design: appropriate sizing and layout ensures that nothing important is cut off.
Less is more: There is already a lot happening on your YouTube channel page. Crowding your channel art will add more chaos than clarity. Additionally, since the design will shift from device to device, you may lose elements of the design if it is overcrowded.
Keep it in the middle: By keeping all the design elements and text within the safe zone, you can assure nothing will be cut out even if it is viewed on a less than optimal screen. It is a shame when you see that a headline is cut out and you cannot read the whole banner. Use YouTube’s template to help guide your design and ensure that everything important is visible.
High-resolution images: Nothing shouts “I’m an amateur” like having a pixelated image for your banner. Setting a high standard for images at the start will ensure that your whole channel will look professional from the beginning.
Take a go at creating your own channel art with some great YouTube design tools such as Canva and Crello.
Don’t have time to design at the moment? Download 50 free YouTube banner that we created to help busy creators like yourself get a professional page up and running right away.
Part 2: Building Out a YouTube Content Plan
Now that you know how to create a YouTube channel, you will need content to fill it up.
There are many factors to having success on YouTube and one has always been delivering content consistently. You may feel at this moment, that your brain is storming with ideas, but believe me, you don’t want to get caught in a drought. The way to avoid major blockers for your channel is to have a content plan at the onset.
A content plan helps guide you towards the mission, the reason you are building this YouTube channel in the first place.
Topics: Your YouTube channel will be focused on one broad topic, whether it be fashion, health, food, etc. It is hard to fly on a whim with a topic that covers such a wide scope. Creating content for these topics will require preparations and that’s why the earlier you have the content ideas for your video the more time you’ll have to research, rehearse, and get the best result.
Begin with a blank piece of paper and break down your topic into 5-10 different categories. If you have a channel about cooking, it may look something like this: breakfast, lunch, dinner, dessert, snack, etc.
From there, you can drill down more and explore specific topics such as “cheap meals,” “street food,” , etc. Niching down allows those who are looking for a more specific piece of content to find your material. Also, when one specific piece of content performs well, it will give a boost to all the other content related to that broader topic.
Researching Your Ideas: Now that you have a big list of ideas, it’s time to do some research. With so many idea options, it’s easy to get overwhelmed by the work ahead, but stay focused and tackle one idea at a time.
When it comes to videos, discoverability is an important aspect of everything you create. You aren’t only competing with other YouTube channels, you are competing with everything in the world that can turn your viewer away from your channel. That is why you should make it as easy as possible for your content to be discovered.
Pro Tip: Search on YouTube and see if there is already a video for the idea you have. By taking a quick look at what content is out there, you can see who you’ll be competing with and determine if it is worth pursuing. If there are already a lot of existing videos on that topic, it might be too hard to for people find your content at first.
Keyword Research: For each of your ideas, you will want to conduct extensive keyword research. This research will help dictate the tags, titles, and descriptions of your videos once they are ready to publish.
There are a few ways to conduct keyword research, but we suggest using free online tools to help cut down the time spent.
1. Free tools
Ubersuggest : Type in a keyword and Ubersuggest will populate with related terms that you can use in your strategy.
Google Trends : Examine the historical trends of a keyword and determine its popularity in Google search and how it is affected annually and seasonally. Google Trends is also a good tool for seeing which topics are trending. By understanding this, you can plan your content around the hottest trends and ride the wave.
YouTube search bar : Enter your keyword into the YouTube search bar and the platform will automatically suggest the most popular searches with your keywords.
VidIQ : See what keywords other popular videos in your niche are using.
Google Adwords : Created as an advertising platform, Google Adwords also has a tool called Keyword Planner that allows you to see the monthly search traffic and the level of competition for each keyword. This tool is extremely useful for trimming down your long list of keyword ideas.
2. What Are Some Value-adding Content for YouTube?
Inspirational, educational, and entertaining: these are 3 resonating types of content as defined by Google for a YouTube audience.
Inspirational content that triggers an emotion in your audience. These content lean on good storytelling and relatable or unique experiences.
Educational content teaches the audience how to accomplish a task, improve a skill set, and discover new products or ideas.
Entertaining content is an escape for the audience. It allows them to sit back and enjoy your content and forget about what they have to deal with in real life.
You might be interested in:
3. Set Up a Content Calendar to Be Consistent on YouTube
A common issue for many YouTubers is consistency and accountability. Without a proper routine and schedule, YouTubers will end up procrastinating and publishing whenever they finish their content.
In order to properly establish an audience for your channel, there needs to be consistency and that is why it is so important to have a content calendar to affirm when a piece of content is due to be published, thus giving the creator a good idea of when to start each step of the process to meet publishing date.
There are many ways to build out a content calendar, you can simply use a spreadsheet, a calendar, or you can use other management/organization tools such as Trello or Asana . We recommend using Google Sheet and Google Calendar to start, as it is free and easy to use.
Since you are starting out, we suggest that you plan on a monthly basis, as it’ll allow you to be flexible to trending topics and adjust to insights that you’ll acquire as you analyze your content’s performance.
Part 3: Producing Your Content
Now that you have a plan it is time to start producing your content. There are many ways to approach this, as different types of channels will have different processes for researching, capturing footage, and editing.
Planning: It doesn’t have to be a fully flushed script, but any bit of planning before hitting the record button will help you prepare some valuable content to be captured. It can be an outline, breaking down the topics you want to touch on.
If it’s a food YouTube channel, you’d want the recipe and all the ingredients ready on hand. Mise en place is the French phrase that chefs use meaning “everything in its place” or having everything they need on hand so when dinner rush comes preparation is done and now they are ready to produce. This same mentality works when preparing to shoot a YouTube video. The more you prepare the easier the shoot and the editing will be.
Equipment: At the start, you can get everything done on your smartphone. But that does depend on what your channel is going to be about and who your target audiences are. If you want to film some simple sketches to entertain people, yes, a smartphone camera can work for start. But if you are reaching a professional crowd or want to appear credible, then it might be worth it to invest in a better camera, audio, and lighting equipment.
Filming/Capturing: Always do some checks before shooting your YouTube videos as bad camera angles, poor audio quality, inadequate lighting are all easier to fix before rather than after the filming. Additionally, set a reminder to backup your footage and charge your batteries after every shoot and have an extension cord or a separate hard drive ready.
Editing: Over time, you will develop your own editing style. At the start, it is best to learn the fundamentals and improve on the basics.
Selecting the software: Some video editing software programs are free and others cost a lot. Do your research, sign up for free trials, and understand the limitations of the applications and the requirements you need. If money is a factor, you might want to stick with the free options such as iMovie or affordable options such as Filmora .
Storytelling: Skilled editing enables YouTube creators to tell the story in the most effective way. This does not mean in chronological order. Think of what will hook the audience right away and what will be most impactful at the very end. Pro-tip: Use pre-set transitions sparingly, jump cuts are often the most effective and least distracting. Editing is an invisible art.
Text, graphic or special effects: Video is a show that doesn’t tell medium, so use text sparingly. People aren’t going to your channel to read. However, text when used properly compliments the video and supplies context. Graphics and special effects are good when they support the story you are telling and cheesy when used egregiously to impress the viewer.
Export to the right format: You can pretty much upload any video format to YouTube and they can figure it out. Nevertheless, YouTube recommends using MP4 and encoded with the codec.
Part 4: Optimizing and Distributing Your YouTube Video
Your job is not done after you’ve filmed, edited, and published your video on YouTube. In order to help it get discovered, you’ll need to understand what will drive your audience to click and watch your video as opposed to all the other videos on YouTube.
By performing video optimization and sharing your content in communities interested in what you are creating, you can increase the chances that your video will be seen.
1. Tips for Writing the Best Title for YouTube Video
When coming up with titles for your YouTube video, you should always have your keyword research-ready on hand for reference.
YouTube keyword crawlers read from top to bottom, so it is most effective to have your keywords at the beginning of the title. Strive to build click-worthy titles that inspire curiosity, evoke an emotion, or offer a benefit.
Example:
Good: How to Deep Fry Chicken
Better: Deep Frying Chicken That’s Better Than KFC
While you have 100 characters to work with, anything beyond 70 characters will be truncated by YouTube.
Caution: Always deliver what your title is selling. Misleading viewers can cause mistrust in your content and will turn people off your channel.
2. Tips for Writing the Best Description for YouTube Video
Treat the description as a short synopsis for your video with the keywords strategically placed at the beginning. Include a URL to your website or blog and have any other supporting information or links.
Also, the description is where you can include some boilerplate channel information.
You have 5,000 characters to work with, but only the first three lines will be above the fold.
Pro Tip: If your video is on the longer end (over 20 minutes) or has multiple sections, then you should consider adding timestamps in the description to help the viewer skip to the spot they are most interested in.
3. Tips for Writing the Best Tags for YouTube Video
Keeping that keyword research handy write 5-15 tags. Start with specific keywords, then move into general keywords, and then branded keywords.
Specific keywords: how to deep fry chicken
General keywords: fried chicken recipe
Branded keywords: KFC
4. Tips for Designing the Best Thumbnail Image
Customize thumbnails: It is recommended that you take some time to customize a thumbnail image for your video. This is the first impression and you want to entice the viewer to click and watch.
YouTube auto-selects your thumbnail from a random position on your timeline, so it isn’t mandatory to create a thumbnail, however, the image YouTube selects might not be what you want to use to attract your audience.
Use photo editing software: To control how you want an image to look, you will need to choose a photo editing software. Wondershare PixStudio is a good choice that provides various types of templates for YouTube Thumbnails, Logos, Posters, etc.
Have a consistent look: By having consistency, people will begin to recognize your thumbnails and even getting them excited to watch your video.
Pro Tips:
- Avoid using YouTube’s randomly selected thumbnail. Personalize it to stay consistent with your brand.
- Don’t clutter thumbnails. Less is more.
- Make fonts big if you are going to use text.
- Thumbnails have to have context, what is their story? Deliver on that promise.
- Using emotive faces have shown to appeal to people’s emotional cues and increases the likelihood of them clicking.
- Thumbnail file size should be 1280 x 720
5. Closed Captions and Uploading a Transcript
There are two key reasons why it is worth your time to use closed captions or upload a transcript for your YouTube videos.
- Having closed captions improves the video’s SEO, as Google indexes and crawls the keywords.
- For those that don’t want to or can’t hear the audio will appreciate having closed caption to allow them to enjoy the content.
6. How to Share Your Video with Social Media
Unless you have a huge social media following, it will be challenging to get many views from those channels at the start.
Grow your social media channel gradually by targeting your ideal viewer persona and hashtagging your content. On social media channels such as Facebook and Twitter, keep producing content for them, but don’t forget to share content from other YouTubers. If you see a cool video relevant to your audience, share it as well.
Lead your followers to your YouTube channel with content designed specifically for your social media channel. For example, Instagram Stories are a great way to engage directly with your followers, giving them a sneak peek or letting them know that your latest YouTube videos are up. You can even link directly to your YouTube channel from your Instagram story.
YouTuber, Caspar Lee
Join groups on social networks such as Facebook, Reddit, etc. and engage in conversations that are related or complementary to your YouTube channel. The key is to find communities that are interested in the content you are producing, but approach those groups with caution and ensure that anything you share won’t be perceived as spam.
Conclusion
There you go, now you have made your first YouTube video. It might be something you are incredibly proud of or it might have been a great learning experience. It might have gone without a hitch or you might have encountered obstacles you weren’t anticipating. Either way, you followed through and we are happy for you.
Now, get ready for the next one. The job of a YouTuber is never complete as there is always another video to make. By executing what we taught you in this guide, you now have the foundation to grow your channel. Good luck!
Richard Bennett
Richard Bennett is a writer and a lover of all things video.
Follow @Richard Bennett
Create with Colors: YouTube Banner Creation Guide
YouTube Channel Art: How to Make Banners, Icons, and Thumbnails?

Shanoon Cox
Oct 26, 2023• Proven solutions
YouTube channel art refers to your banner, icon, and watermark along with the thumbnails of your videos. Creating custom channel art is a great way to express yourself and communicate the tone of your videos.
YouTube supports JPG, GIF, BMP, and PNG files for channel art, although they do not allow animated GIFs.
Part 1: Top Sites for YouTube Channel Art
You can make your channel art in Photoshop, or another photo editing program, but there are also some excellent tools online which you can access for free. Here are two of the best:
Canva.com
Canva has templates for YouTube banners as well as a variety of stock images. You can also upload and edit your own images on Canva. It is a free service, but they do have some premium features which cost $1 each. Canva has a desktop version and an iPad app.
PicMonkey.com
PicMonkey lets you import images from your computer or social media accounts, edit them, and use them in templates for YouTube banners or other kinds of social media graphics. It’s free to use, but you can only access their more advanced editing tools if you buy a paid subscription for either $4.99 a month, or $2.75 a month for a year.
Part 2: Banners
Your banner is the header for your channel page. Its dimensions are 2560 x 1440 px.
Not all of your banner will be visible on all devices. The full 2560 x 1440 px image will only be seen by viewers watching on tv screens.
Only 1546 x 423 px of your banner will be visible on computers, and this ‘safe area’ can vary for different tablets and smartphones depending on the width of their screens. Make sure any important text or logos are placed in a central location so everybody can see them.
Also, keep in mind that your icon will hover over the top left corner of your banner and that your social media icons will be located in the bottom right corner.
The file size of your banner cannot be over 4MB.
Part 3: Icons
Your icon is the avatar you use when leaving and replying to comments on YouTube. It also hovers over your banner on your channel page.
By default, your icon will be the picture associated with your Google account.
If you upload a new icon, it will render down to 98 x 98 px. So, any square image larger than 98 x 98 px will work. However, YouTube recommends you use one as large as 800 x 800 px. This will give you a sharper, higher quality, image.
Part 4: Thumbnails
Thumbnails are the images that represent your videos on your channel page and in search results.
You can browse through your video and choose a still frame you want to use as your video’s thumbnail. Or, you can upload a custom image.
Custom thumbnails should have an aspect ratio of 16:9, the same as YouTube’s video player. The files should be under 2MB and have a resolution of 1280 x 720.
To upload a custom thumbnail, select the custom thumbnail option under Video Thumbnails at the end of the video uploading process. You can also change the thumbnails of your existing videos to custom ones through Video Manager.
Remember that your thumbnail will be rendered down to a much smaller size. If you use text, like the title of your video, then you should make it really big so that it is easy to read when it gets shrunk down.
Part 5: Watermarks
A watermark is a small, usually 50 x 50 px image displayed in the bottom right corner of your video.
Watermarks protect your videos by making them harder for others to steal and take credit for.
Ideally, your watermark will be a transparent version of your logo. Try not to use more than three colors – you do not want your watermark to distract your viewers.
If you add a branding watermark through YouTube then that watermark will also double as a subscribe link.
Here is how you can add a branding watermark through YouTube:
- On YouTube, go to your Creator Studio and select Branding under the Channel menu.
- Click the blue add a watermark button on the Branding page.
- An upload of a watermark window will pop up. Select your image file and click Save.
- Choose between having a start time for your watermark, making it appear only at the end of your videos, or having it there for the entire length of your videos. The popular choice is to have it visible through the entire video.
- Click Update. Your watermark will be applied to all of your videos.
If you want to find a video editing solution that empowers your imagination and creativity yet takes less effort, please try this robust and user-friendly video editing software Filmora, which is equipped with its own footage stock Wondershare Filmstock and will definitely enhance your productivity and helps you to make money by making videos much easier.
Shanoon Cox
Shanoon Cox is a writer and a lover of all things video.
Follow @Shanoon Cox
Shanoon Cox
Oct 26, 2023• Proven solutions
YouTube channel art refers to your banner, icon, and watermark along with the thumbnails of your videos. Creating custom channel art is a great way to express yourself and communicate the tone of your videos.
YouTube supports JPG, GIF, BMP, and PNG files for channel art, although they do not allow animated GIFs.
Part 1: Top Sites for YouTube Channel Art
You can make your channel art in Photoshop, or another photo editing program, but there are also some excellent tools online which you can access for free. Here are two of the best:
Canva.com
Canva has templates for YouTube banners as well as a variety of stock images. You can also upload and edit your own images on Canva. It is a free service, but they do have some premium features which cost $1 each. Canva has a desktop version and an iPad app.
PicMonkey.com
PicMonkey lets you import images from your computer or social media accounts, edit them, and use them in templates for YouTube banners or other kinds of social media graphics. It’s free to use, but you can only access their more advanced editing tools if you buy a paid subscription for either $4.99 a month, or $2.75 a month for a year.
Part 2: Banners
Your banner is the header for your channel page. Its dimensions are 2560 x 1440 px.
Not all of your banner will be visible on all devices. The full 2560 x 1440 px image will only be seen by viewers watching on tv screens.
Only 1546 x 423 px of your banner will be visible on computers, and this ‘safe area’ can vary for different tablets and smartphones depending on the width of their screens. Make sure any important text or logos are placed in a central location so everybody can see them.
Also, keep in mind that your icon will hover over the top left corner of your banner and that your social media icons will be located in the bottom right corner.
The file size of your banner cannot be over 4MB.
Part 3: Icons
Your icon is the avatar you use when leaving and replying to comments on YouTube. It also hovers over your banner on your channel page.
By default, your icon will be the picture associated with your Google account.
If you upload a new icon, it will render down to 98 x 98 px. So, any square image larger than 98 x 98 px will work. However, YouTube recommends you use one as large as 800 x 800 px. This will give you a sharper, higher quality, image.
Part 4: Thumbnails
Thumbnails are the images that represent your videos on your channel page and in search results.
You can browse through your video and choose a still frame you want to use as your video’s thumbnail. Or, you can upload a custom image.
Custom thumbnails should have an aspect ratio of 16:9, the same as YouTube’s video player. The files should be under 2MB and have a resolution of 1280 x 720.
To upload a custom thumbnail, select the custom thumbnail option under Video Thumbnails at the end of the video uploading process. You can also change the thumbnails of your existing videos to custom ones through Video Manager.
Remember that your thumbnail will be rendered down to a much smaller size. If you use text, like the title of your video, then you should make it really big so that it is easy to read when it gets shrunk down.
Part 5: Watermarks
A watermark is a small, usually 50 x 50 px image displayed in the bottom right corner of your video.
Watermarks protect your videos by making them harder for others to steal and take credit for.
Ideally, your watermark will be a transparent version of your logo. Try not to use more than three colors – you do not want your watermark to distract your viewers.
If you add a branding watermark through YouTube then that watermark will also double as a subscribe link.
Here is how you can add a branding watermark through YouTube:
- On YouTube, go to your Creator Studio and select Branding under the Channel menu.
- Click the blue add a watermark button on the Branding page.
- An upload of a watermark window will pop up. Select your image file and click Save.
- Choose between having a start time for your watermark, making it appear only at the end of your videos, or having it there for the entire length of your videos. The popular choice is to have it visible through the entire video.
- Click Update. Your watermark will be applied to all of your videos.
If you want to find a video editing solution that empowers your imagination and creativity yet takes less effort, please try this robust and user-friendly video editing software Filmora, which is equipped with its own footage stock Wondershare Filmstock and will definitely enhance your productivity and helps you to make money by making videos much easier.
Shanoon Cox
Shanoon Cox is a writer and a lover of all things video.
Follow @Shanoon Cox
Also read:
- In 2024, Effortless YouTube File Extraction
- 2024 Approved Decrypting the Mystery Understanding 'Unlisted' Content on YouTube
- Amplify Engagement Increase YouTube Viewers for 2024
- 2024 Approved Cutting Edge Advanced Techniques in YouTube Video Editing
- Best Practices Choosing YouTube's Most Popular Video Formats for 2024
- 2024 Approved Captivate Audiences Unveiling Secrets for Striking YouTube Banners
- Co-Create Content to Maximize YouTube Follower Count
- Crafting Winning Titles & Tags for Your YouTube Videos
- In 2024, Brightening Up Your Online Videos
- [Updated] 10 Premium Online Yoga Classrooms for Physical Transformation
- Video Sharing Techniques From YouTube to Insta
- In 2024, 80+ Catchy Cooking Channel Names to Attract More Audience
- Unleash the Full Potential of YouTube With Variable Playback Rates
- [Updated] Download YouTube's Best Moments Without Full Streaming
- Evade Robotic Ratings for Real-Time Traffic Surge
- 2024 Approved Charting a Successful Course in YouTube Keywords
- [Updated] Edu-Stream 100 Cutting-Edge Learning YT
- In 2024, Crafting Your Perfect YouTube Playlists A Step-by-Step Guide
- In 2024, Best Alternatives to Blockbuster Flicks
- 2024 Approved Dialing Up Deliverables A Comprehensive Guide to Gainful Vlogging
- Thriving Online A Strategy Guide for Building YouTube Links
- [New] Audiovisual Excellence The Premier Video Formats for YouTube
- [New] A Gamer's Guide to Twisting Videos on YouTube (2E)
- Crafting Revenue in 20-Second Chunks YouTube Shorts Magic
- Achieving Precise YouTube Content Extraction for 2024
- Chilly Ambiance Ideal Winter BGs for Videos for 2024
- 2024 Approved Channel Boosting Strategies Effortless Sponsorship Securing Tips
- Overcoming Green Tint in YouTubes on Mac A Guide
- In 2024, Dominate Search Results Powerful YouTube SEO Techniques Exposed
- 2024 Approved Elevate Visuals Thumbnails with Flair
- In 2024, 3 Easy YouTube Audio Extraction Methods Free & Secure
- [New] Crafting Captivating Intros on Mobile Platforms
- 2024 Approved Best 7 High-Motion DSLRs for Dynamic Live Content Creation
- In 2024, Clear Cut Content How to Minimize Unwanted Elements in Video
- [New] Break Free From Youtube Top 5 Innovative Video Editing Tools
- In 2024, Academic History Lovers' Guide to Top YT Content
- 2024 Approved Connect with More Audiences Smart Multitasking on YouTube and Twitch
- Unlock Immersive Worlds with YouTube's Top 10 VR Videos
- [Updated] Designing an Easy Access Subscribe Link to Channels
- [Updated] Add More Minutes to YouTube Content
- [New] Charting Growth The Best Online Stock YTs
- In 2024, Channel Up The Essential Guide to Computer & Mobile Video Upload
- New 2024 Approved How to Use Audio Ducking in Adobe Premiere Pro on Win
- In 2024, The Ultimate Guide to Video Editing Splitting Videos in Windows Live Movie Maker
- Mastering Virtual Backgrounds with Kinemaster's Stepwise Guide to Green Screen
- In 2024, Does Airplane Mode Turn off GPS Location On Apple iPhone 6s Plus? | Dr.fone
- 2024 Approved Craft Your Countdown Adding Time Management to OBS Sessions
- New In 2024, The Dos and Donts of Converting MP3 Files Into MP4 Videos
- How To Fix Unresponsive Touch Screen on Xiaomi Redmi Note 13 5G | Dr.fone
- In 2024, Top 3 Sites to Find Free Oppo Unlock Codes to Unlock Your Oppo Phone
- Essential Techniques for Blurring Photos on iPhone
- [New] In 2024, Expert Picks Top 12 Screen Recording Software, No Time Limit!
- Enhanced Game Recorders Beyond FBX Frameworks for 2024
- [New] Get FB Videos Down as MP4 – Swiftly & Simply for 2024
- In 2024, Complete Tutorial to Use GPS Joystick to Fake GPS Location On Poco C51 | Dr.fone
- In 2024, How To Leave a Life360 Group On Asus ROG Phone 8 Pro Without Anyone Knowing? | Dr.fone
- In 2024, Life360 Circle Everything You Need to Know On Vivo X100 | Dr.fone
- In 2024, Insta-Reversal Unlock the Power of Video Rotation
- [New] Expert Advice for Flawless Recordings on Mi 11 Phones
- [New] TikTok Secrets Revealed – Unravel Top 7 Charms + Their Covert Counterparts
- 2024 Approved In-Depth Analysis of Excellent Zoom Screen Recorders
- In 2024, Why does the pokemon go battle league not available On Xiaomi Redmi A2 | Dr.fone
- Updated 2024 Approved 10 Best 2D Animation Software Free/Paid
- Top 10 Best Spy Watches For your Samsung Galaxy A24 | Dr.fone
- The Ultimate Guide to Massive Characters on TikTok for 2024
- New Essential Knowledge What to Understand Before Using an M4R Converter for 2024
- Artisan's Nexus Reports In-Depth Studio Scrutiny, 2023 Edition
- Bandicam Screen Recorder Review
- 2024 Approved Unlock the Power of Mp3 Conversion on Windows A Must-Read
- [New] Crafting Traditional Eastern Abodes in MC World
- Efficient Date-Adding Strategies for Photos
- 6 Ways to Change Spotify Location On Your Apple iPhone X | Dr.fone
- [Updated] Crafting Co-Branded Narratives for YouTube Audiences
- In 2024, Guide to Mirror Your Samsung Galaxy F54 5G to Other Android devices | Dr.fone
- New In 2024, Boost Your Editing Speed 40 Expert-Level Keyboard Shortcuts for FCPX
- [Updated] 2024 Approved The Captivating Realm of TikTok Dance, Music & Visual Effects
- How To Stream Anything From Oppo A59 5G to Apple TV | Dr.fone
- In 2024, How to Hide/Fake Snapchat Location on Your Realme 12 Pro+ 5G | Dr.fone
- Title: "Starting a YouTube Channel The Ultimate Blueprint"
- Author: Brian
- Created at : 2024-06-09 08:54:55
- Updated at : 2024-06-10 08:54:55
- Link: https://youtube-video-recordings.techidaily.com/starting-a-youtube-channel-the-ultimate-blueprint/
- License: This work is licensed under CC BY-NC-SA 4.0.
