"Smooth Streaming Elite Stabilizers Reviewed"
Smooth Streaming: Elite Stabilizers Reviewed
Best Camera Stabilizers for YouTube

Richard Bennett
Mar 27, 2024• Proven solutions
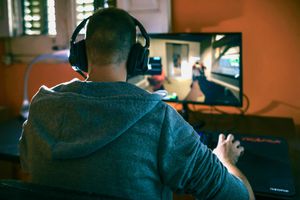
When a YouTube video is shaky it’s hard to focus on what is happening in it. Camera shake is a huge distraction and, if it is a persistent problem in your YouTube videos, it will be hard to get subscribers. Shakiness is an easy problem to correct. With a bit of equipment, or a bit of creativity, it is easy to make sure your YouTube videos are nice and smooth.
Best Camera Stabilizers for YouTube
This article will talk about different types of equipment you can use to stabilize your camera. For vloggers on a budget, there is even one tip on stabilizing your camera without camera equipment. Here are some of the best stabilizers for YouTube videos:
Part 1. Tripod
A tripod is a three-legged stand you can mount your camera to. The height of a tripod can be adjusted so you can set your camera up at the level that works best for you. Because tripods can stand alone you can set your camera up to record yourself without needing a helper.
Tripods are the best choice for vlogs that revolve around you standing (or sitting) and delivering information, like opinion or beauty vlogs.
Part 2. Monopod
A monopod is like a tripod in the sense that you can adjust its height, but unlike a tripod a monopod has only one leg and cannot stand by itself. You will need a helper to stay with your camera if you plan to film yourself using a monopod. A monopod is more portable than a tripod, though, and can be used in a wider variety of places. You can even use a monopod to record aerial shots just by picking it up.
Part 3. Pistol Grip
A pistol grip is a handle you mount your camera to the top of. You can carry your camera around on top of the pistol grip, or you can mount the grip itself to your tripod or monopod. Once the grip is mounted you can use it to more easily control your camera movements. This is a great way to get even, steady, camera pans.
Part 4. Selfie Stick
A selfie stick is a long pole you mount your smartphone to one end of in order to take selfies from farther away. Selfie sticks also make great stabilizers if you are shooting video on your smartphone. To stabilize your smartphone place the handle of your selfie stick on the ground as if it were a monopod. When you are shooting using a selfie stick you can also hold it up in the air to get interesting high angle shots.
Some YouTubers even like to shoot selfie-style vlogs where the hold the selfie stick just like they are taking a photo of themselves.
Part 5. OIS – Optical Image Stabilization
‘Optical Image Stabilization’ is fairly new hardware which is built in to a lot of new smartphones, like the iPhone 6S Plus and the Samsung Galaxy S6 Edge Plus. OIS reduces camera shake by a lot, although it is still a good idea to stabilize your smartphone while you record. OIS will also help you take sharper still photos without using any software.
Part 6. Tables, Desks, Trees, ect
If you do not have equipment, or cannot bring it where you want to shoot, then you can still record steady footage. You just have to get creative with where you put your camera. Any stable surface will do. You can set your camera down on a shelf in your house, a picnic bench, or up in a tree.
If you are able to lean your elbows onto a desk or table while you hold your camera then that will also significantly cut down on camera shake. This works best for footage you are not in, or which you can have a helper film for you. If you are open to shooting a selfie-style vlog then you can use anything you can rest your hand on, like a fence or a railing.
Richard Bennett
Richard Bennett is a writer and a lover of all things video.
Follow @Richard Bennett
Richard Bennett
Mar 27, 2024• Proven solutions
When a YouTube video is shaky it’s hard to focus on what is happening in it. Camera shake is a huge distraction and, if it is a persistent problem in your YouTube videos, it will be hard to get subscribers. Shakiness is an easy problem to correct. With a bit of equipment, or a bit of creativity, it is easy to make sure your YouTube videos are nice and smooth.
Best Camera Stabilizers for YouTube
This article will talk about different types of equipment you can use to stabilize your camera. For vloggers on a budget, there is even one tip on stabilizing your camera without camera equipment. Here are some of the best stabilizers for YouTube videos:
Part 1. Tripod
A tripod is a three-legged stand you can mount your camera to. The height of a tripod can be adjusted so you can set your camera up at the level that works best for you. Because tripods can stand alone you can set your camera up to record yourself without needing a helper.
Tripods are the best choice for vlogs that revolve around you standing (or sitting) and delivering information, like opinion or beauty vlogs.
Part 2. Monopod
A monopod is like a tripod in the sense that you can adjust its height, but unlike a tripod a monopod has only one leg and cannot stand by itself. You will need a helper to stay with your camera if you plan to film yourself using a monopod. A monopod is more portable than a tripod, though, and can be used in a wider variety of places. You can even use a monopod to record aerial shots just by picking it up.
Part 3. Pistol Grip
A pistol grip is a handle you mount your camera to the top of. You can carry your camera around on top of the pistol grip, or you can mount the grip itself to your tripod or monopod. Once the grip is mounted you can use it to more easily control your camera movements. This is a great way to get even, steady, camera pans.
Part 4. Selfie Stick
A selfie stick is a long pole you mount your smartphone to one end of in order to take selfies from farther away. Selfie sticks also make great stabilizers if you are shooting video on your smartphone. To stabilize your smartphone place the handle of your selfie stick on the ground as if it were a monopod. When you are shooting using a selfie stick you can also hold it up in the air to get interesting high angle shots.
Some YouTubers even like to shoot selfie-style vlogs where the hold the selfie stick just like they are taking a photo of themselves.
Part 5. OIS – Optical Image Stabilization
‘Optical Image Stabilization’ is fairly new hardware which is built in to a lot of new smartphones, like the iPhone 6S Plus and the Samsung Galaxy S6 Edge Plus. OIS reduces camera shake by a lot, although it is still a good idea to stabilize your smartphone while you record. OIS will also help you take sharper still photos without using any software.
Part 6. Tables, Desks, Trees, ect
If you do not have equipment, or cannot bring it where you want to shoot, then you can still record steady footage. You just have to get creative with where you put your camera. Any stable surface will do. You can set your camera down on a shelf in your house, a picnic bench, or up in a tree.
If you are able to lean your elbows onto a desk or table while you hold your camera then that will also significantly cut down on camera shake. This works best for footage you are not in, or which you can have a helper film for you. If you are open to shooting a selfie-style vlog then you can use anything you can rest your hand on, like a fence or a railing.
Richard Bennett
Richard Bennett is a writer and a lover of all things video.
Follow @Richard Bennett
Synthesizing Waterway Content with Impact
How to Make a Channel Trailer
Richard Bennett
Oct 26, 2023• Proven solutions
Your channel trailer is the video viewers who are not already subscribed to you will see when they visit your channel page. It is your chance to make a quick pitch to them about why they should subscribe. You can use your channel trailer to let new visitors to your channel know what kind of videos you make and to convince them to subscribe. Here are 5 tips to make an effective YouTube channel trailer.
Part 1: 5 Tips for Making a Great Channel Trailer
Here are our top 5 recommendations for anybody creating a YouTube channel trailer:
Reach Out – It’s All About Your Viewers
Use your channel trailer to try to connect to the individual viewer watching it. Greet that one person as one person, as a ‘you’, instead of as a member of a group (i.e., avoid saying ‘you guys’).
The more you can make your trailer about the person watching it, the better. You are telling them about yourself, but you are doing it for their benefit. Address them directly (i.e. ‘If you like…’ or ‘you don’t want to miss’.) and make everything you say about them. For example, instead of saying ‘I post tutorials about’, try ‘you can learn about’.
Flaunt Your Personality – It’s All About You
One of the golden rules of YouTube is ‘be yourself’. People will subscribe because they enjoy your personality and want to see more of it.
Use your trailer as an opportunity to showcase your unique perspective. Be yourself, and be the person that is excited to be making great YouTube videos. You are at your best when you let people see how much you care about something, so show your viewers how much you care about delivering great video content. This is what will make people want to subscribe.
Talk about All the Cool Stuff You Do
The best channel trailers give viewers a window into your channel. You need to show people what to expect from you as a personality, but you also need to tell them what to expect in terms of your videos.
Your channel trailer should include information like: what kinds of videos you make, why you make them, and what your upload schedule is.
Be specific. Instead of saying you make videos about makeup, say you make look tutorials and talk about your favorite styles. Instead of saying you are a gamer, tell your potential subscribers what games you post about and what some of your favorites are.
A specific schedule is important for getting people to subscribe. Generally, viewers do not subscribe to channels that have not posted in a long time. They subscribe because they do not want to miss out on new content, and if you follow a schedule, they will trust that that new content is on its way.
Ask Them to Subscribe
Do not forget to ask the person to view your trailer to subscribe.
A lot of people go into YouTube thinking people will subscribe if they like their videos, and so making great videos is the only way to get people to subscribe. This is not true.
Making great videos is the first step to getting subscribers, but the second step is to ask for them. Not everyone subscribes to every channel they visit and enjoy. A person who enjoys your videos is more likely to subscribe if you prompt them to.
30 Seconds
The ideal length for a YouTube channel trailer is 30 seconds, or between 30 seconds and 1 minute.
The people viewing your trailer did not come to YouTube for the purpose of watching it. They are unlikely to give it much time before they continue browsing. This means you need to grab their attention tightly right away, but it also means you need to keep your trailer bite-sized.
Thirty seconds should be long enough to tell people what your channel is about, show off your personality, and ask them to subscribe. If you take much longer, viewers will click away before they hear your full pitch.
Part 2: How to Add a Channel Trailer Using Wondershare Filmora
Here are a few simple steps to setting up your channel trailer.
- Turn on channel customization. Go to My Channel and click the gear icon over your channel’s banner. Switch Customize the layout of your channel from off to on.
- Upload your trailer video like you would any other video.
- Go to your channel and click on the For new visitors tab, which should appear after you’ve turned on customization.
- Click Channel trailer and choose your video, or paste in its URL.
If you want to find a video editing solution that empowers your imagination and creativity yet takes less effort, please try this robust and user-friendly video editing software Wondershare Filmora. It provides special effects, stock photo & video, sound library, etc., which will definitely enhance your productivity and helps to make money by making videos much accessible.


Richard Bennett
Richard Bennett is a writer and a lover of all things video.
Follow @Richard Bennett
Richard Bennett
Oct 26, 2023• Proven solutions
Your channel trailer is the video viewers who are not already subscribed to you will see when they visit your channel page. It is your chance to make a quick pitch to them about why they should subscribe. You can use your channel trailer to let new visitors to your channel know what kind of videos you make and to convince them to subscribe. Here are 5 tips to make an effective YouTube channel trailer.
Part 1: 5 Tips for Making a Great Channel Trailer
Here are our top 5 recommendations for anybody creating a YouTube channel trailer:
Reach Out – It’s All About Your Viewers
Use your channel trailer to try to connect to the individual viewer watching it. Greet that one person as one person, as a ‘you’, instead of as a member of a group (i.e., avoid saying ‘you guys’).
The more you can make your trailer about the person watching it, the better. You are telling them about yourself, but you are doing it for their benefit. Address them directly (i.e. ‘If you like…’ or ‘you don’t want to miss’.) and make everything you say about them. For example, instead of saying ‘I post tutorials about’, try ‘you can learn about’.
Flaunt Your Personality – It’s All About You
One of the golden rules of YouTube is ‘be yourself’. People will subscribe because they enjoy your personality and want to see more of it.
Use your trailer as an opportunity to showcase your unique perspective. Be yourself, and be the person that is excited to be making great YouTube videos. You are at your best when you let people see how much you care about something, so show your viewers how much you care about delivering great video content. This is what will make people want to subscribe.
Talk about All the Cool Stuff You Do
The best channel trailers give viewers a window into your channel. You need to show people what to expect from you as a personality, but you also need to tell them what to expect in terms of your videos.
Your channel trailer should include information like: what kinds of videos you make, why you make them, and what your upload schedule is.
Be specific. Instead of saying you make videos about makeup, say you make look tutorials and talk about your favorite styles. Instead of saying you are a gamer, tell your potential subscribers what games you post about and what some of your favorites are.
A specific schedule is important for getting people to subscribe. Generally, viewers do not subscribe to channels that have not posted in a long time. They subscribe because they do not want to miss out on new content, and if you follow a schedule, they will trust that that new content is on its way.
Ask Them to Subscribe
Do not forget to ask the person to view your trailer to subscribe.
A lot of people go into YouTube thinking people will subscribe if they like their videos, and so making great videos is the only way to get people to subscribe. This is not true.
Making great videos is the first step to getting subscribers, but the second step is to ask for them. Not everyone subscribes to every channel they visit and enjoy. A person who enjoys your videos is more likely to subscribe if you prompt them to.
30 Seconds
The ideal length for a YouTube channel trailer is 30 seconds, or between 30 seconds and 1 minute.
The people viewing your trailer did not come to YouTube for the purpose of watching it. They are unlikely to give it much time before they continue browsing. This means you need to grab their attention tightly right away, but it also means you need to keep your trailer bite-sized.
Thirty seconds should be long enough to tell people what your channel is about, show off your personality, and ask them to subscribe. If you take much longer, viewers will click away before they hear your full pitch.
Part 2: How to Add a Channel Trailer Using Wondershare Filmora
Here are a few simple steps to setting up your channel trailer.
- Turn on channel customization. Go to My Channel and click the gear icon over your channel’s banner. Switch Customize the layout of your channel from off to on.
- Upload your trailer video like you would any other video.
- Go to your channel and click on the For new visitors tab, which should appear after you’ve turned on customization.
- Click Channel trailer and choose your video, or paste in its URL.
If you want to find a video editing solution that empowers your imagination and creativity yet takes less effort, please try this robust and user-friendly video editing software Wondershare Filmora. It provides special effects, stock photo & video, sound library, etc., which will definitely enhance your productivity and helps to make money by making videos much accessible.
Richard Bennett
Richard Bennett is a writer and a lover of all things video.
Follow @Richard Bennett
Also read:
- [Updated] Top Corporate Cloud Storage Platforms
- 「効果的な方法でセーガティス雲保存を構築するコツ」
- 2024 Approved Quick Screen Grabs for Win 11 Users
- Best 20 Free MP3 Gradulation Anthems: A Comprehensive Playlist
- Discover These 5 Exceptional Free Tools That Outshine Freemake Video Downloader: Get Them Now
- In 2024, Full Tutorial to Bypass Your Honor Magic 5 Lite Face Lock?
- In 2024, ListenLeap Escaping DaCast's Grip
- In 2024, Mastering Mac's Screenshots Best FREE Software Compared
- Is Keepvid Safe From Malware? Comprehensive Guide to Identifying and Removing Any Potential Threats
- My Videos Arent Playing on Lenovo ThinkPhone – What Can I Do? | Dr.fone
- MyRecover: Professionelle Lösungen Zur Wiederherstellung Verlorener Partitionen Auf Micro SD Speicherkarten
- Top 23 Terrifying Terrors: The Ultimate List of Chilling Horror Movies
- Top Learning Video Resources for Little Ones: Free Downloads & Viewing
- Unveiling the Mystery Behind 'YouTube Kids' Outage – Expert Advice for Restoration Steps
- Why does the pokemon go battle league not available On Realme C51 | Dr.fone
- Title: Smooth Streaming Elite Stabilizers Reviewed
- Author: Brian
- Created at : 2024-10-13 17:46:59
- Updated at : 2024-10-18 16:50:34
- Link: https://youtube-video-recordings.techidaily.com/smooth-streaming-elite-stabilizers-reviewed/
- License: This work is licensed under CC BY-NC-SA 4.0.