
:max_bytes(150000):strip_icc()/is-uber-cheaper-or-a-taxi-5a68b71ffa6bcc003664df84.jpg)
"Quick Start Making Your Own Sports Highlight Film"
Quick Start: Making Your Own Sports Highlight Film
How to Create a Sports Highlight Video

Richard Bennett
Mar 27, 2024• Proven solutions
“I want to make a sports highlight video, but I don’t know how to edit it or what kind of tools I need to use. Can someone tell me how to work on a sports video?”
As I read this query posted on a popular online forum, I realized that so many people out there find it hard to create a sports video. Well, unlike a standard video, working on a sports highlight video can be tough. This is because it needs a lot of editing and we need to handpick the right moments from hours of footage. Though, if you use the right tools, then you can easily work on highlight videos like a pro. In this guide, I will let you know how to create sports videos in a step by step manner.
- Part 1: Why is a sports highlight video and why important?
- Part 2: Highlight Video vs. Skills Video
- Part 3: Use Excellent Video Editor to Make a Sports Highlight Video
- Part 4: How to Create a Sports Highlight Video?
- Part 5: Expert Tips for Creating Highlight Videos
Why is a sports highlight video and why important?
As the name suggests, a highlight video basically includes all the vital events of a game in a short duration of time. You can include the details of some players at the start or focus on a particular player as well. Besides that, a sports highlight video would have fast-forward, slow motion, and frozen clips to skip or focus on certain details.
A lot of times, people don’t have the time to watch the entire game, which can span for a couple of hours. Therefore, they can watch a sports highlight video that would include all the major events of the game and will let them enjoy their thrill in a few moments.

Besides that, if you are applying for a college/academy or just want to showcase your skills, then you can consider making a sports video of an impressive game of yours. You can simply showcase a player and try to highlight their skills in the video.
Highlight Videos vs. Skills Videos: the Major Differences
While making a sports video, you might encounter two different types of content – a highlight video and a skills video. As I have mentioned above, a sports highlight video would include the shots of an actual game. You can either focus on the event of a single game or include clips from multiple games that were played in a genuine setup. If you want, you can highlight a particular player while making the video as well.
On the other hand, a skills video is mostly made to demonstrate the skills of a player and is not focused on the game. In fact, most of the skills videos are made outside of a real game setting. For instance, if you have mastered a skill or would like to demonstrate your game-related actions, then you can make a skills video. Some of these videos are also tutorial game-plays to teach others about a particular skill that they can master.
Use Excellent Video Editor to Make a Sports Highlight Video
If you want to come up with engaging and visually appealing highlight videos, then consider using a versatile video editor like Filmora. Equipped with several video editing tools, it will let you create a sports highlight video in no time. Since the tool has so many features, you can save your time in editing and come up with a new sports video in minutes.


- Filmora is extremely easy to use and runs on all the leading Windows and macOS versions without any issue.
- Using its inbuilt tools, you can clip out the most important events from a sports video or include them in your highlights.
- There are also features to change the motion and pace of the video (like fast forward or slow motion).
- You can also focus on any athlete and freeze a frame on a particular skill or action.
- Besides that, you can also add voiceovers in your sports highlight video, add media layers, use its inbuilt transitions, and fine-tune the overall aesthetics of your videos.
- There are also tons of filters and presets in Filmora that you can use to save your time in editing. You can work on videos of almost every format with seamless 4K support.
Why we picked it
- Options to import/export files in different formats
- Tons of features in one place (extremely easy to use)
- Split-screen support to include multiple events in a highlight video
How to Create a Sports Highlight Video with Filmora?
With the help of Filmora , anyone can create a sports video without even prior editing/designing experience. Firstly, you can install Filmora on your Windows or Mac by visiting its website and have the footage you wish to edit. Now, you can just follow these steps to work on your next sports highlight video.
Filmstock Stock Media Library ](https://filmstock.wondershare.com/creative-theme-sports?spm=rs.filmora%5Fweb&source%5Fchannel=seo%5Farticle )
Step 1: Add a video to Filmora
To start with, just launch Filmora on your computer and add the video that you wish to work on. You can just drag and drop the video to its interface or go to its Menu > File > Import Media to browse and load the file.

Step 2: Edit the Sports Video
In order to create a sports highlight video, the first thing that people do is trim any unwanted part. Once the video is loaded, you can view it on the timeline of the interface. Now, go to the timeline and get the trim tool to manually select the part of the video you wish to trim. After selecting the desired fragment, you can trim the clip or just delete it by clicking on their respective icons.

In the same way, you can also split your video and make other changes in it. You can also include multiple videos together and include them in your timeline as well.
If you are including multiple videos, then make sure they have the same dimensions and aspect ratio. For this, you can select the video, right-click on the timeline, and click on the crop icon. Now, select the same aspect ratio for the entire video to keep it uniform.

Most of the game highlights that we see have different speeds for various sections. That is, some actions would be fast-forwarded while some would be in slow motion. To apply this, simply select the section in the timeline, right-click, and go to the Speed and Duration settings. This will open a dedicated interface from where you can change the speed of the sports video.
Apart from manually setting the speed, you can also take the assistance of the custom speed options that are available in the timeline tools.

Step 3: Make Advanced Edits in your Sports Video
With the user-friendly interface of Filmora, you can do some basic edits and make a sports highlight video in minutes. Though, if you want to focus on some parts and make more changes, then you can use its advanced options as well.
For instance, in a highlight video, we often wish to freeze certain frames. To do this, just select a frame and use the “Freeze Frame” option from the timeline tools. You can even set the duration to freeze the selected frame.
If you have included clips from different videos, then you can apply all kinds of transitions from Filmora. In the end, you can go to its edit options and choose to close gaps as well.
To give your video a uniform and aesthetically pleasing appeal, you can also add different overlays and effects on it from Filmora’s library.
Lastly, make sure that you added sound or voiceover to your video. You can add a sound from its library or import any other music file to it. Since highlight videos mostly have voiceovers, you add the same by visiting the Record > Record Voiceover option.

Step 4: Export your video in the desired format
That’s it! Once your sports highlight video is ready, you can export it in different formats. Just go to the Export option and select the location to save the video and a preferred resolution. You can save your video in formats like MP4, WMV, AVI, FLV, MKV, and so on.
Expert Tips for Creating Highlight Videos
As you can see, making a sports highlight video with a tool like Filmora is extremely easy. Although to be a pro and make better videos, you can consider the following tips:
Keep it short
Make sure that you only include the highlights of the game in your video to keep it interesting. Your aim is to have a short and crisp video without any unwanted footage.
Use freeze frames and slow motion
Some games can be pretty fast-paced and the viewers might miss out on a few key details. To showcase them, you can freeze certain frames or apply slow motion.
Include other details
A sports highlight video can also be informative. You can include details about the players or the team at the start. Also, it is recommended to have sound or a voiceover in the background to narrate the events.
Pick the best clips
When you watch a game, make a note of the best moments that you know your viewers would enjoy. You can also focus on different skills that you found impressive and include them in your sports video.
I’m sure that after reading this guide, you would be able to come up with an impressive sports highlight video as well. Since you might need to make a lot of edits on a sports video, I would recommend using a diverse tool like Filmora. With the tons of editing options that it provides, you can easily create all sorts of highlight videos while saving your time and resources.
Richard Bennett
Richard Bennett is a writer and a lover of all things video.
Follow @Richard Bennett
Richard Bennett
Mar 27, 2024• Proven solutions
“I want to make a sports highlight video, but I don’t know how to edit it or what kind of tools I need to use. Can someone tell me how to work on a sports video?”
As I read this query posted on a popular online forum, I realized that so many people out there find it hard to create a sports video. Well, unlike a standard video, working on a sports highlight video can be tough. This is because it needs a lot of editing and we need to handpick the right moments from hours of footage. Though, if you use the right tools, then you can easily work on highlight videos like a pro. In this guide, I will let you know how to create sports videos in a step by step manner.
- Part 1: Why is a sports highlight video and why important?
- Part 2: Highlight Video vs. Skills Video
- Part 3: Use Excellent Video Editor to Make a Sports Highlight Video
- Part 4: How to Create a Sports Highlight Video?
- Part 5: Expert Tips for Creating Highlight Videos
Why is a sports highlight video and why important?
As the name suggests, a highlight video basically includes all the vital events of a game in a short duration of time. You can include the details of some players at the start or focus on a particular player as well. Besides that, a sports highlight video would have fast-forward, slow motion, and frozen clips to skip or focus on certain details.
A lot of times, people don’t have the time to watch the entire game, which can span for a couple of hours. Therefore, they can watch a sports highlight video that would include all the major events of the game and will let them enjoy their thrill in a few moments.
Besides that, if you are applying for a college/academy or just want to showcase your skills, then you can consider making a sports video of an impressive game of yours. You can simply showcase a player and try to highlight their skills in the video.
Highlight Videos vs. Skills Videos: the Major Differences
While making a sports video, you might encounter two different types of content – a highlight video and a skills video. As I have mentioned above, a sports highlight video would include the shots of an actual game. You can either focus on the event of a single game or include clips from multiple games that were played in a genuine setup. If you want, you can highlight a particular player while making the video as well.
On the other hand, a skills video is mostly made to demonstrate the skills of a player and is not focused on the game. In fact, most of the skills videos are made outside of a real game setting. For instance, if you have mastered a skill or would like to demonstrate your game-related actions, then you can make a skills video. Some of these videos are also tutorial game-plays to teach others about a particular skill that they can master.
Use Excellent Video Editor to Make a Sports Highlight Video
If you want to come up with engaging and visually appealing highlight videos, then consider using a versatile video editor like Filmora. Equipped with several video editing tools, it will let you create a sports highlight video in no time. Since the tool has so many features, you can save your time in editing and come up with a new sports video in minutes.
- Filmora is extremely easy to use and runs on all the leading Windows and macOS versions without any issue.
- Using its inbuilt tools, you can clip out the most important events from a sports video or include them in your highlights.
- There are also features to change the motion and pace of the video (like fast forward or slow motion).
- You can also focus on any athlete and freeze a frame on a particular skill or action.
- Besides that, you can also add voiceovers in your sports highlight video, add media layers, use its inbuilt transitions, and fine-tune the overall aesthetics of your videos.
- There are also tons of filters and presets in Filmora that you can use to save your time in editing. You can work on videos of almost every format with seamless 4K support.
Why we picked it
- Options to import/export files in different formats
- Tons of features in one place (extremely easy to use)
- Split-screen support to include multiple events in a highlight video
How to Create a Sports Highlight Video with Filmora?
With the help of Filmora , anyone can create a sports video without even prior editing/designing experience. Firstly, you can install Filmora on your Windows or Mac by visiting its website and have the footage you wish to edit. Now, you can just follow these steps to work on your next sports highlight video.
Filmstock Stock Media Library ](https://filmstock.wondershare.com/creative-theme-sports?spm=rs.filmora%5Fweb&source%5Fchannel=seo%5Farticle )
Step 1: Add a video to Filmora
To start with, just launch Filmora on your computer and add the video that you wish to work on. You can just drag and drop the video to its interface or go to its Menu > File > Import Media to browse and load the file.
Step 2: Edit the Sports Video
In order to create a sports highlight video, the first thing that people do is trim any unwanted part. Once the video is loaded, you can view it on the timeline of the interface. Now, go to the timeline and get the trim tool to manually select the part of the video you wish to trim. After selecting the desired fragment, you can trim the clip or just delete it by clicking on their respective icons.
In the same way, you can also split your video and make other changes in it. You can also include multiple videos together and include them in your timeline as well.
If you are including multiple videos, then make sure they have the same dimensions and aspect ratio. For this, you can select the video, right-click on the timeline, and click on the crop icon. Now, select the same aspect ratio for the entire video to keep it uniform.
Most of the game highlights that we see have different speeds for various sections. That is, some actions would be fast-forwarded while some would be in slow motion. To apply this, simply select the section in the timeline, right-click, and go to the Speed and Duration settings. This will open a dedicated interface from where you can change the speed of the sports video.
Apart from manually setting the speed, you can also take the assistance of the custom speed options that are available in the timeline tools.
Step 3: Make Advanced Edits in your Sports Video
With the user-friendly interface of Filmora, you can do some basic edits and make a sports highlight video in minutes. Though, if you want to focus on some parts and make more changes, then you can use its advanced options as well.
For instance, in a highlight video, we often wish to freeze certain frames. To do this, just select a frame and use the “Freeze Frame” option from the timeline tools. You can even set the duration to freeze the selected frame.
If you have included clips from different videos, then you can apply all kinds of transitions from Filmora. In the end, you can go to its edit options and choose to close gaps as well.
To give your video a uniform and aesthetically pleasing appeal, you can also add different overlays and effects on it from Filmora’s library.
Lastly, make sure that you added sound or voiceover to your video. You can add a sound from its library or import any other music file to it. Since highlight videos mostly have voiceovers, you add the same by visiting the Record > Record Voiceover option.
Step 4: Export your video in the desired format
That’s it! Once your sports highlight video is ready, you can export it in different formats. Just go to the Export option and select the location to save the video and a preferred resolution. You can save your video in formats like MP4, WMV, AVI, FLV, MKV, and so on.
Expert Tips for Creating Highlight Videos
As you can see, making a sports highlight video with a tool like Filmora is extremely easy. Although to be a pro and make better videos, you can consider the following tips:
Keep it short
Make sure that you only include the highlights of the game in your video to keep it interesting. Your aim is to have a short and crisp video without any unwanted footage.
Use freeze frames and slow motion
Some games can be pretty fast-paced and the viewers might miss out on a few key details. To showcase them, you can freeze certain frames or apply slow motion.
Include other details
A sports highlight video can also be informative. You can include details about the players or the team at the start. Also, it is recommended to have sound or a voiceover in the background to narrate the events.
Pick the best clips
When you watch a game, make a note of the best moments that you know your viewers would enjoy. You can also focus on different skills that you found impressive and include them in your sports video.
I’m sure that after reading this guide, you would be able to come up with an impressive sports highlight video as well. Since you might need to make a lot of edits on a sports video, I would recommend using a diverse tool like Filmora. With the tons of editing options that it provides, you can easily create all sorts of highlight videos while saving your time and resources.
Richard Bennett
Richard Bennett is a writer and a lover of all things video.
Follow @Richard Bennett
Starting Out on YouTube - Top Gear Essentials
YouTube Equipment Starter Guide For Beginners

Sumia Rafique
Feb 19, 2024• Proven solutions
If you want to start creating videos and uploading them onto YouTube, you’ll need to have access to some basic equipment. This guide will go over everything you’ll need to be a YouTuber.
Part 1: YOUTUBE EQUIPMENT: CAMERA
The best camera for beginners is the one you already have. Most smartphones these days already come equipped with a powerful camera that can record HD videos. If you still want to add a camera to your equipment list as a beginner YouTuber, you should look for a camera with the following eight qualities:
What To Look For In A Camera As A YouTuber
1. Fully articulated screen (flip screen)
2. Good continual auto focus while recording video
3. Good focus priority through face recognition
4. Touch to focus
5. Good low-light performance
6. external mic jack, hot/cold shoe bracket
7. optical image stabilization
8. good battery life
Check out my full list of 10 Things To Look For In A Vlogging Camera to understand the importance of these camera features.
Best Cheap Vlogging Cameras
Below are the best cheap vlogging cameras that you can get for under $500. They all record at least 1080p HD video and all but the Sony Alpha a5100 come with optical image stabilization (if you want OIS with the Sony a5100, you’ll have it get it in the lens).
| Camera | Release Date | Camera Type | Flip Screen | 4K | Price | |
|---|---|---|---|---|---|---|
| Yi 4KAction Camera | 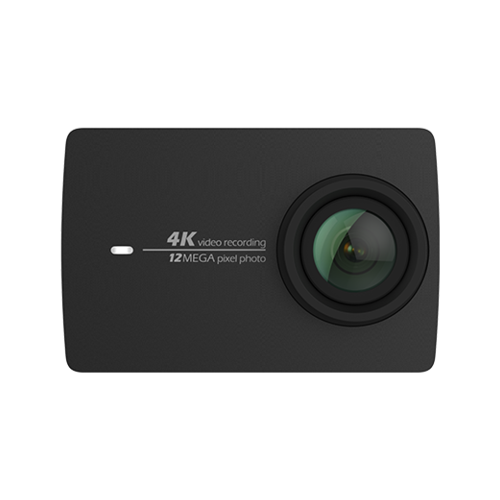 |
February2017 | Action Camera | No | Yes | $169 (MSRP) |
| NikonCoolpixA900 | 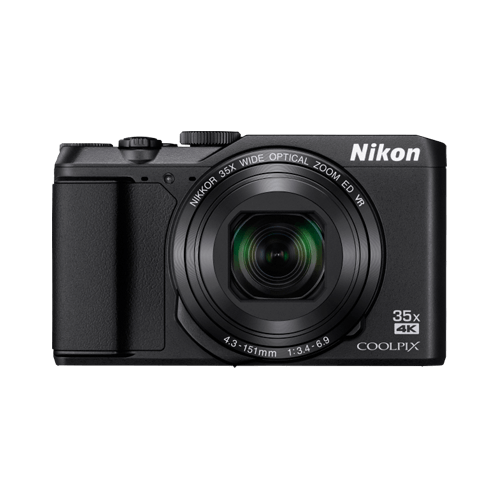 |
February2016 | Compact | Flip Up | Yes | $399 (MSRP) |
| NikonCoolpixB500 | 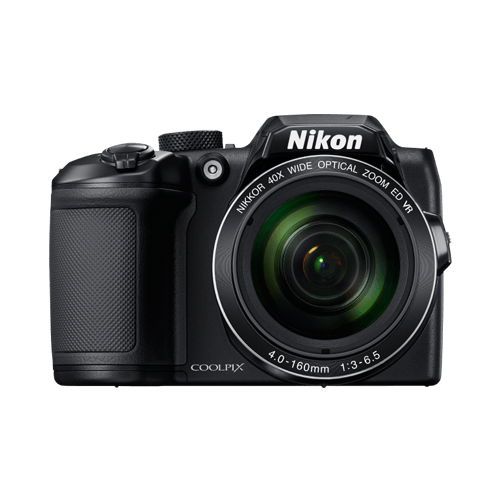 |
February2016 | SLR-like (bridge) | Tilting | No | $250 (MSRP) |
| PolaroidCube+ | 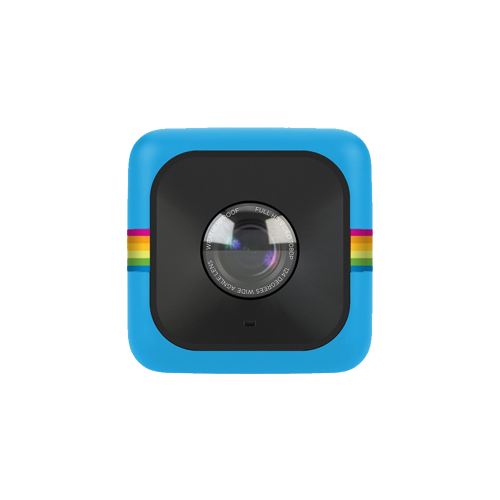 |
June2015 | Action Camera | No | No | $99 (MSRP) |
| SonyAlphaa5100 | 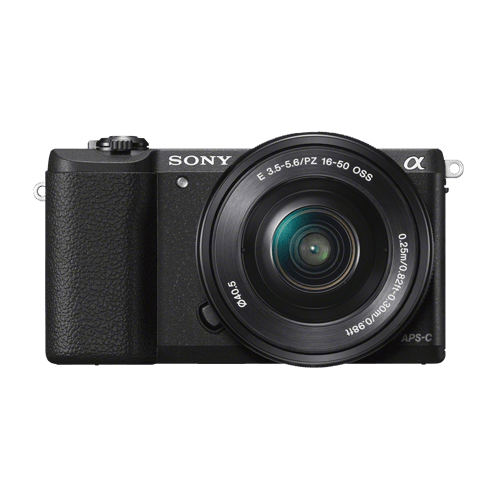 |
August2014 | Mirrorless | Flip Up | No | $450 (MSRP) |
|
Best cheap vlogging camera under $100: Polaroid Cube+ Even before GoPro released their GoPro Session, Polaroid was the first to come out with a 1.4-inch, cube-shaped action camera, small enough to mount on a bike or a helmet. This camera has built-in magnets so that you can attach them to metal surfaces. This action camera is water-resistant, shock-proof, and weather-proof. It can record full HD 1080p videos at 60 fps with its wide-angle lens. You can connect this camera with your phone to preview and take your shots. |
|---|---|
|
Best cheap vlogging camera under $200: Yi 4K At $200, you can record 4K videos with the Yi 4K action camera. Like many other action cameras, this camera is small, durable, and shoots through a wide-angle lens. You won’t be able to take this camera underwater though because it isn’t waterproof. You’ll need to buy the right accessories for that. |
|
Best cheap vlogging camera under $300: Nikon B500 The Nikon B500 gives you a non-interchangeable zoom lens so that you have more control over how you compose your shots. This camera records full HD 1080p videos at either 30 or 25 fps. You can only set its ISO as high as 3200, so it’s not going to perform the best in low-light conditions. The tilting LCD screen does not have touchscreen and cannot be fully flipped up or flipped to the side, it only tilts. For a camera in its price range, the Nikon B500 offers a lot of features. |
|
Best cheap vlogging camera under $400: Nikon A900 The Nikon A900 not only comes with a non-interchangeable zoom lens, but it can also record videos in UHD 4K quality. Like the Nikon B500, the A900’s ISO goes only up to 3200, making it a weak performer in poorly lit conditions. |
|
Best cheap vlogging camera under $500: Sony a5100 Among the cameras listed in our top cheap cameras list, the Sony a5100 is the only one you can interchange lenses with. All Sony E-mount lenses are compatible with this camera. This camera can record up to 1080p videos at 60 fps. Out of all of the above top cheap cameras, this one also auto focuses the best. |
Best Entry-Level and Mid-Range Vlogging Cameras
If you have a bigger budget to work with, the following vlogging cameras are great options:
| Camera | Release Date | Camera Type | Flip Screen | Mic Port | Price | |
|---|---|---|---|---|---|---|
| CanonEOSM50 | 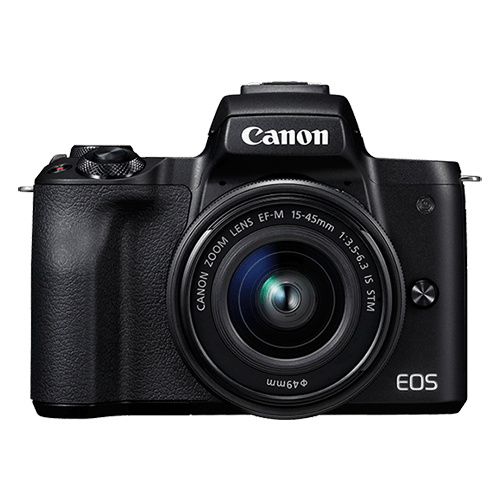 |
February2018 | Mirrorless | Fully Articulated | Yes | $- |
| CanonEOSM100 | 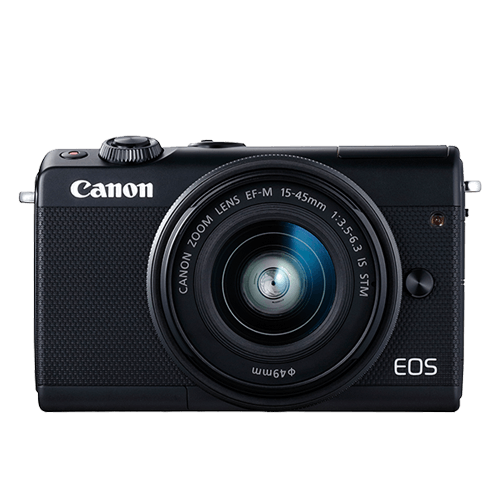 |
August2017 | Mirrorless | Flip Up | No | $ |
| CanonEOS RebelSL2 | 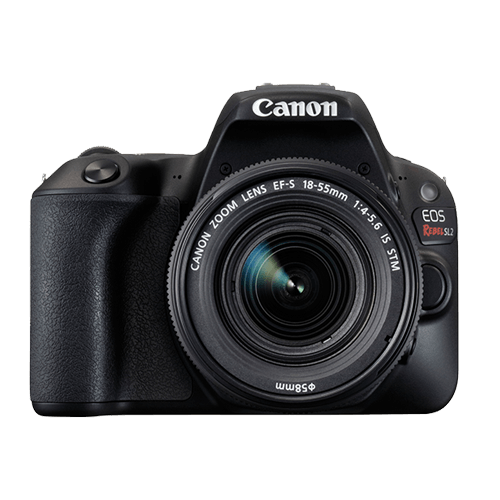 |
June2017 | Compact SLR | Fully Articulated | Yes | $ |
| CanonEOS RebelT7i |  |
February2017 | Mid-size SLR | Fully Articulated | Yes | $- |
| CanonEOS80D | 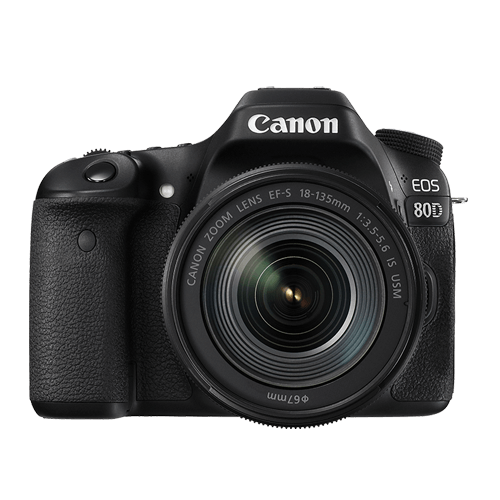 |
February2016 | Mid-size SLR | Fully Articulated | Yes | $$ |
|
Best entry-level mirrorless camera for vlogging: Canon EOS M100 The Canon M100 is a small and powerful camera that can shoot full HD (1080p) videos up to 60 fps. The touchscreen LCD of this camera flips up so that you can see yourself as you vlog in selfie mode. |
|---|---|
|
Best mid-range mirrorless camera for vlogging: Canon EOS M50 The Canon EOS M50 can shoot UHD 4K videos at 23.98 fps. You can also record 120 fps slow-motion videos at 720p. Unlike the M100, which only has a flip up screen, the M50 has a fully articulated screen, so you can use this camera in selfie mode, all while using an on-camera shotgun microphone attached to the camera hot/cold shoe. |
|
Best DSLR camera for daily vlogging: Canon EOS T7i The Canon EOS T7i is a great DSLR camera for daily vlogging. It can record full HD 1080p videos at 60 fps, it can create HDR and time-lapse movies, and it also has a fully articulated screen. |
|
Best entry-level DSLR camera for vlogging: Canon EOS SL2 The Canon EOS SL2 delivers a lot of power at a low price. This DSLR camera can capture full HD 1080p videos at 60 fps. |
|
Best mid-range DSLR camera for vlogging: Canon EOS 80D The Canon 80D is an exceptional mid-range DSLR vlogging camera with many features. Coming with a 45-point all cross phase detection autofocusing and a dual pixel CMOS AF system, the camera is great at finding the right focus while recording video. |
Part 2: YOUTUBE EQUIPMENT: LENS
A lot of compact cameras already come with the lens as a part of the camera body. When it comes to these kinds of cameras, you won’t have to worry about which lens is right for you since the decision has already been made for you!
When you start looking into bigger cameras, though, you’ll have to think about which lens you want to shoot with.
The Wide-Angle Lens
Every YouTuber should have a wide-angle lens. With this kind of lens, you can fit much more of a scene into your camera frame, including your own face when you’re just an arm’s length away from your camera. This is especially important for YouTubers because most YouTubers have to operate their camera on their own, without the assistance of an additional camera person.
Optical Image Stabilization
You should also look for a lens with optical image stabilization if you’re shooting a lot of your YouTube videos handheld.
For more information on camera lenses, check out my Vlogger’s Guide To Camera Lenses .
Part 3: YOUTUBE EQUIPMENT: TRIPOD
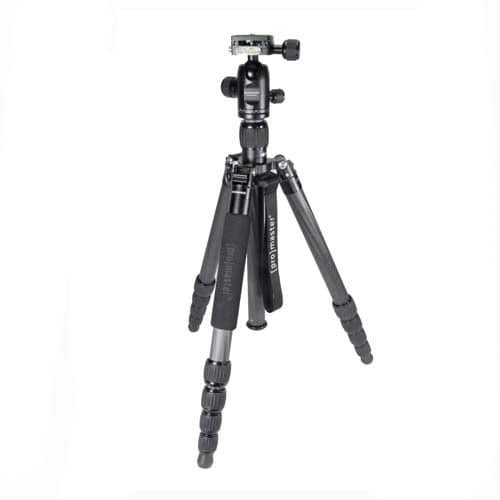 |
Tripod If you plan to film yourself talking in front of the same, unchanging background for an extended period of time, it doesn’t make sense to film yourself handheld the entire time. You’ll just end up tiring your arm out and adding distracting shakiness to your footage. A tripod is a great solution to this problem. You can set up your framing once, press record, and leave your camera in its fixed position while you talk with both hands free. |
|---|---|
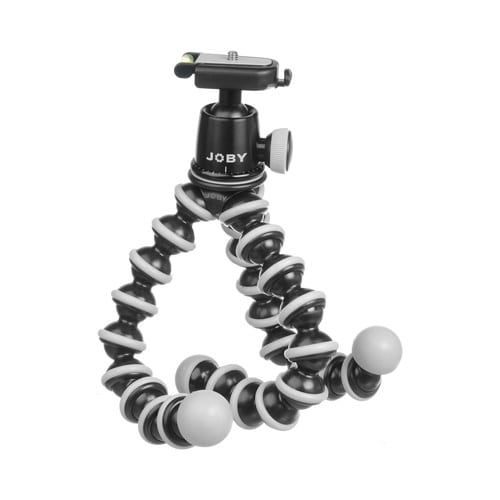 |
Joby GorillaPod With Ballhead When you film yourself handheld, it’s difficult to keep your arm higher up so that your camera shoots down at an ideal angle. You may also notice that a lot of your arm gets into your shot, which you and other viewers might find distracting. Holding your camera up by a GorillaPod, however, can give you the extension you need to get that higher angle shot more easily, all without so much of your arm getting into your shot. |
Part 4: YOUTUBE EQUIPMENT: MICROPHONE
Most vlogging cameras come with a built-in microphone that gets the job done. If you want higher quality audio recordings, though, you should check out the following list of top microphones.
| Top Condenser Mics For Music and Singing | Top Condenser Mics For Voiceovers-Podcasts, Interviews | Top On-Camera Shotgun Mics | Top Shotgun Mics | Top Low-Profile Lavalier Mics |
|---|---|---|---|---|
| Audio-Technica AT2035 Rode NT1-A AKG C214 | Apogee Mic 96K Blue Yeti Rode NT-USB Blue Snowball Audio-Technica AT2020 Rode Procaster | Rode VideoMic Go Shure VP83 Rode VideoMic Pro+ Sennheiser MKE 440 | Rode NTG-3 Audio-Technica AT4053B Sennheiser MKH416 | Rode SmartLav+ Audio-Technica ATR3350iS Sennheiser ME2 |
To read more about each of these microphones, check out our post on The 19 Best YouTube Microphones 2018 – Options for Music, Voiceovers, Vlogging, and more!
Part 5: YOUTUBE EQUIPMENT: SMARTPHONE ACCESSORIES

Using your smartphone’s camera to film your YouTube videos is a great idea since it’s light, portable, and most likely always with you. The following six smartphone accessories can help you make better YouTube videos:
- Arkon Tripod Mount
- FLII Selfie Ring Light
- RODE VideoMic Me
- Aukey Optic 3-in-1 Smartphone Lens Set
- iOgrapher Go for Android and iPhone
- Manfrotto TwistGrip System
Read about each one of these items and more in The 9 Best Smartphone Camera Accessories For Vloggers .
Part 6: YOUTUBE EQUIPMENT: LIGHT
Lighting for home living and lighting for filming is very different. If you try to make use of just the lights you have at home, you may find that your footage is too dark, grainy, and orange-tinted.
The solution to this problem is getting additional video lighting equipment with daytime light bulbs.
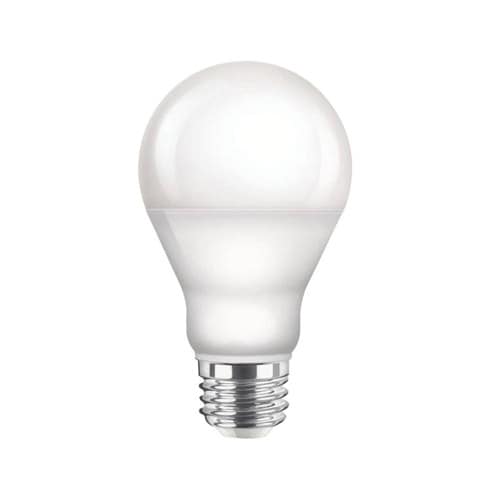 |
Daytime Light Bulbs Your home is most likely lit with incandescent light bulbs that illuminate orange-tinted light. You can remove those light bulbs and replace them with daytime light bulbs that illuminate more of a white colored light. |
|---|---|
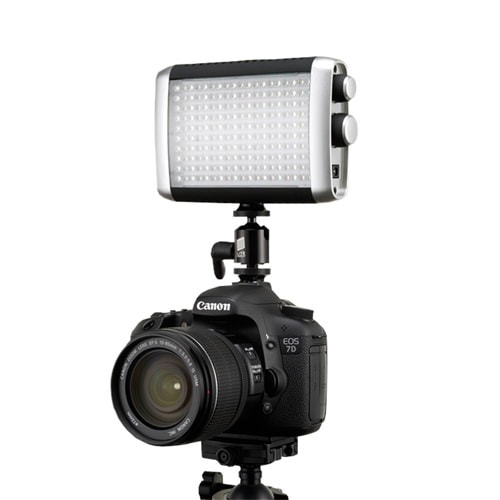 |
On-Camera LED Light If you need more light just in front of the camera and you need this light to be portable, LED lights that attach to your camera’s hot/cold shoe will do the job. |
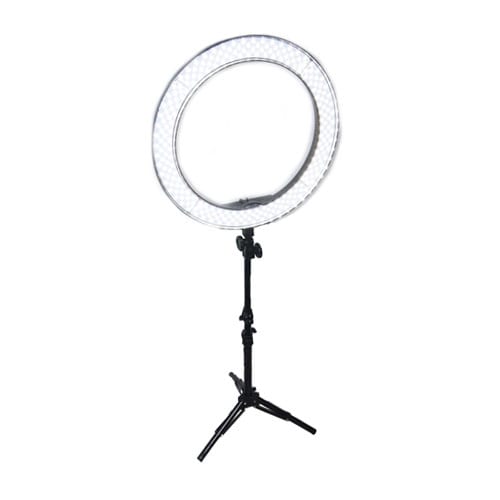 |
LED Ring Light If you need more light just in front of the camera, you don’t have a lot of space, and you don’t need this light to be small and portable, an LED ring light is the best piece of equipment for you. You can position your camera inside the circular space of the ring light. This kind of light also gives your eyes the circular shaped highlight that many people like to see. |
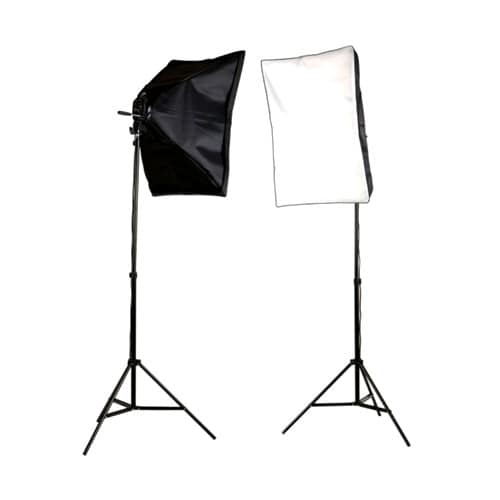 |
Softbox Video Light If you need more light and have more space, another piece of lighting equipment good for beginners is a softbox video light. |
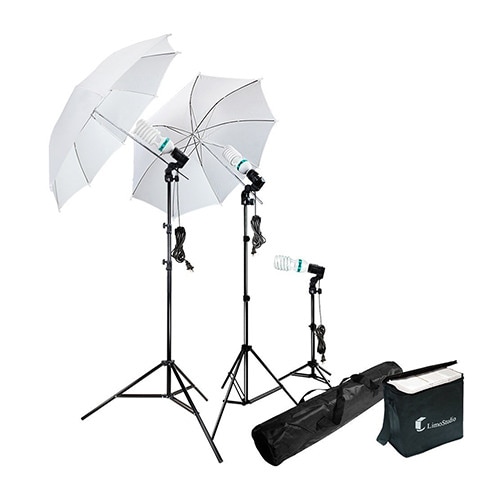 |
Umbrella Video Light Umbrella video lights are very portable and affordable. The direction of the light from umbrella lights are more difficult to control than the light from softbox video lights. |
If you’re looking for recommendations on which piece of lighting equipment to buy, check out my list of the Top 17 Video Lighting Equipment For YouTubers .
Part 7: YOUTUBE EQUIPMENT: COMPUTER
After you’ve recorded all your footage, you’ll need a computer to edit your video clips together. You can perform basic video editing tasks and upload your video onto YouTube with any computer less than ten years old.
Laptop computers are popular among YouTubers because their portability allows you to work on your videos from anywhere. This way, you can finish and upload your videos more frequently, which is another important part of being a YouTuber.
The following three laptop computers handle video editing very well:
- MacBook Pro With Touch Bar
- Dell XPS 15
- Microsoft Surface Book 2
Read more about these laptop computers for 4K video editing in The Best Laptops for 4K Video Editing .
Part 8: YOUTUBE EQUIPMENT: VIDEO EDITING SOFTWARE
| FREE VIDEO EDITING SOFTWARES | PAID VIDEO EDITING SOFTWARES |
|---|---|
| OpenShot Video Editor (Windows, Mac, Linux) ShotCut (Windows, Mac, Linux) Hitfilm Express (Windows, Mac) VideoPad Video Editor (Windows) Lightworks (Windows, Mac, Linux) VSDC Video Editor (Windows) Machete Video Editor Lite (Windows) Avidemux (Windows, Mac, Linux, BSD) Read more about each of these softwares in our post about The Best Free Video Editing Software for YouTube . | Filmora Video Editor (Windows, Mac) - $40 one year license, $79.99 perpetual license. Free trial Final Cut Pro (Mac) - $299.99, Free trial Vegas Movie Studio (Windows) - $49.99 |
YOUTUBE EQUIPMENT: AUDIO
Music Libraries
Music is an important part of YouTube video creation. Here’s where you can get access to music:
| ROYALTY-FREE MUSIC LIBRARIES | PAID MUSIC LIBRARIES | PAID SUBSCRIPTION MUSIC LIBRARIES |
|---|---|---|
| Audionautix Bensound dig.ccMixter Free Music Archive Free Stock Music Incompetech Josh Woodward Moby Gratis Musopen Purple Planet Music TeknoAXE YouTube Audio Library | Premium Beat Audio Jungle | Audio Network Audio Blocks Epidemic Sound |
Sound Effects
Free Sound Effect Sites
- Filmstock Sound Effects
- Freesound
- PacDV
- Sound Bible
- Sound Gator
- Sounds Crate
- Zapsplat
Sumia Rafique
Sumia Rafique is a writer and a lover of all things video.
Follow @Sumia Rafique
Sumia Rafique
Feb 19, 2024• Proven solutions
If you want to start creating videos and uploading them onto YouTube, you’ll need to have access to some basic equipment. This guide will go over everything you’ll need to be a YouTuber.
Part 1: YOUTUBE EQUIPMENT: CAMERA
The best camera for beginners is the one you already have. Most smartphones these days already come equipped with a powerful camera that can record HD videos. If you still want to add a camera to your equipment list as a beginner YouTuber, you should look for a camera with the following eight qualities:
What To Look For In A Camera As A YouTuber
1. Fully articulated screen (flip screen)
2. Good continual auto focus while recording video
3. Good focus priority through face recognition
4. Touch to focus
5. Good low-light performance
6. external mic jack, hot/cold shoe bracket
7. optical image stabilization
8. good battery life
Check out my full list of 10 Things To Look For In A Vlogging Camera to understand the importance of these camera features.
Best Cheap Vlogging Cameras
Below are the best cheap vlogging cameras that you can get for under $500. They all record at least 1080p HD video and all but the Sony Alpha a5100 come with optical image stabilization (if you want OIS with the Sony a5100, you’ll have it get it in the lens).
| Camera | Release Date | Camera Type | Flip Screen | 4K | Price | |
|---|---|---|---|---|---|---|
| Yi 4KAction Camera | |
February2017 | Action Camera | No | Yes | $169 (MSRP) |
| NikonCoolpixA900 | |
February2016 | Compact | Flip Up | Yes | $399 (MSRP) |
| NikonCoolpixB500 | |
February2016 | SLR-like (bridge) | Tilting | No | $250 (MSRP) |
| PolaroidCube+ | |
June2015 | Action Camera | No | No | $99 (MSRP) |
| SonyAlphaa5100 | |
August2014 | Mirrorless | Flip Up | No | $450 (MSRP) |
|
Best cheap vlogging camera under $100: Polaroid Cube+ Even before GoPro released their GoPro Session, Polaroid was the first to come out with a 1.4-inch, cube-shaped action camera, small enough to mount on a bike or a helmet. This camera has built-in magnets so that you can attach them to metal surfaces. This action camera is water-resistant, shock-proof, and weather-proof. It can record full HD 1080p videos at 60 fps with its wide-angle lens. You can connect this camera with your phone to preview and take your shots. |
|---|---|
|
Best cheap vlogging camera under $200: Yi 4K At $200, you can record 4K videos with the Yi 4K action camera. Like many other action cameras, this camera is small, durable, and shoots through a wide-angle lens. You won’t be able to take this camera underwater though because it isn’t waterproof. You’ll need to buy the right accessories for that. |
|
Best cheap vlogging camera under $300: Nikon B500 The Nikon B500 gives you a non-interchangeable zoom lens so that you have more control over how you compose your shots. This camera records full HD 1080p videos at either 30 or 25 fps. You can only set its ISO as high as 3200, so it’s not going to perform the best in low-light conditions. The tilting LCD screen does not have touchscreen and cannot be fully flipped up or flipped to the side, it only tilts. For a camera in its price range, the Nikon B500 offers a lot of features. |
|
Best cheap vlogging camera under $400: Nikon A900 The Nikon A900 not only comes with a non-interchangeable zoom lens, but it can also record videos in UHD 4K quality. Like the Nikon B500, the A900’s ISO goes only up to 3200, making it a weak performer in poorly lit conditions. |
|
Best cheap vlogging camera under $500: Sony a5100 Among the cameras listed in our top cheap cameras list, the Sony a5100 is the only one you can interchange lenses with. All Sony E-mount lenses are compatible with this camera. This camera can record up to 1080p videos at 60 fps. Out of all of the above top cheap cameras, this one also auto focuses the best. |
Best Entry-Level and Mid-Range Vlogging Cameras
If you have a bigger budget to work with, the following vlogging cameras are great options:
| Camera | Release Date | Camera Type | Flip Screen | Mic Port | Price | |
|---|---|---|---|---|---|---|
| CanonEOSM50 | |
February2018 | Mirrorless | Fully Articulated | Yes | $- |
| CanonEOSM100 | |
August2017 | Mirrorless | Flip Up | No | $ |
| CanonEOS RebelSL2 | |
June2017 | Compact SLR | Fully Articulated | Yes | $ |
| CanonEOS RebelT7i | |
February2017 | Mid-size SLR | Fully Articulated | Yes | $- |
| CanonEOS80D | |
February2016 | Mid-size SLR | Fully Articulated | Yes | $$ |
|
Best entry-level mirrorless camera for vlogging: Canon EOS M100 The Canon M100 is a small and powerful camera that can shoot full HD (1080p) videos up to 60 fps. The touchscreen LCD of this camera flips up so that you can see yourself as you vlog in selfie mode. |
|---|---|
|
Best mid-range mirrorless camera for vlogging: Canon EOS M50 The Canon EOS M50 can shoot UHD 4K videos at 23.98 fps. You can also record 120 fps slow-motion videos at 720p. Unlike the M100, which only has a flip up screen, the M50 has a fully articulated screen, so you can use this camera in selfie mode, all while using an on-camera shotgun microphone attached to the camera hot/cold shoe. |
|
Best DSLR camera for daily vlogging: Canon EOS T7i The Canon EOS T7i is a great DSLR camera for daily vlogging. It can record full HD 1080p videos at 60 fps, it can create HDR and time-lapse movies, and it also has a fully articulated screen. |
|
Best entry-level DSLR camera for vlogging: Canon EOS SL2 The Canon EOS SL2 delivers a lot of power at a low price. This DSLR camera can capture full HD 1080p videos at 60 fps. |
|
Best mid-range DSLR camera for vlogging: Canon EOS 80D The Canon 80D is an exceptional mid-range DSLR vlogging camera with many features. Coming with a 45-point all cross phase detection autofocusing and a dual pixel CMOS AF system, the camera is great at finding the right focus while recording video. |
Part 2: YOUTUBE EQUIPMENT: LENS
A lot of compact cameras already come with the lens as a part of the camera body. When it comes to these kinds of cameras, you won’t have to worry about which lens is right for you since the decision has already been made for you!
When you start looking into bigger cameras, though, you’ll have to think about which lens you want to shoot with.
The Wide-Angle Lens
Every YouTuber should have a wide-angle lens. With this kind of lens, you can fit much more of a scene into your camera frame, including your own face when you’re just an arm’s length away from your camera. This is especially important for YouTubers because most YouTubers have to operate their camera on their own, without the assistance of an additional camera person.
Optical Image Stabilization
You should also look for a lens with optical image stabilization if you’re shooting a lot of your YouTube videos handheld.
For more information on camera lenses, check out my Vlogger’s Guide To Camera Lenses .
Part 3: YOUTUBE EQUIPMENT: TRIPOD
|
Tripod If you plan to film yourself talking in front of the same, unchanging background for an extended period of time, it doesn’t make sense to film yourself handheld the entire time. You’ll just end up tiring your arm out and adding distracting shakiness to your footage. A tripod is a great solution to this problem. You can set up your framing once, press record, and leave your camera in its fixed position while you talk with both hands free. |
|---|---|
|
Joby GorillaPod With Ballhead When you film yourself handheld, it’s difficult to keep your arm higher up so that your camera shoots down at an ideal angle. You may also notice that a lot of your arm gets into your shot, which you and other viewers might find distracting. Holding your camera up by a GorillaPod, however, can give you the extension you need to get that higher angle shot more easily, all without so much of your arm getting into your shot. |
Part 4: YOUTUBE EQUIPMENT: MICROPHONE
Most vlogging cameras come with a built-in microphone that gets the job done. If you want higher quality audio recordings, though, you should check out the following list of top microphones.
| Top Condenser Mics For Music and Singing | Top Condenser Mics For Voiceovers-Podcasts, Interviews | Top On-Camera Shotgun Mics | Top Shotgun Mics | Top Low-Profile Lavalier Mics |
|---|---|---|---|---|
| Audio-Technica AT2035 Rode NT1-A AKG C214 | Apogee Mic 96K Blue Yeti Rode NT-USB Blue Snowball Audio-Technica AT2020 Rode Procaster | Rode VideoMic Go Shure VP83 Rode VideoMic Pro+ Sennheiser MKE 440 | Rode NTG-3 Audio-Technica AT4053B Sennheiser MKH416 | Rode SmartLav+ Audio-Technica ATR3350iS Sennheiser ME2 |
To read more about each of these microphones, check out our post on The 19 Best YouTube Microphones 2018 – Options for Music, Voiceovers, Vlogging, and more!
Part 5: YOUTUBE EQUIPMENT: SMARTPHONE ACCESSORIES
Using your smartphone’s camera to film your YouTube videos is a great idea since it’s light, portable, and most likely always with you. The following six smartphone accessories can help you make better YouTube videos:
- Arkon Tripod Mount
- FLII Selfie Ring Light
- RODE VideoMic Me
- Aukey Optic 3-in-1 Smartphone Lens Set
- iOgrapher Go for Android and iPhone
- Manfrotto TwistGrip System
Read about each one of these items and more in The 9 Best Smartphone Camera Accessories For Vloggers .
Part 6: YOUTUBE EQUIPMENT: LIGHT
Lighting for home living and lighting for filming is very different. If you try to make use of just the lights you have at home, you may find that your footage is too dark, grainy, and orange-tinted.
The solution to this problem is getting additional video lighting equipment with daytime light bulbs.
|
Daytime Light Bulbs Your home is most likely lit with incandescent light bulbs that illuminate orange-tinted light. You can remove those light bulbs and replace them with daytime light bulbs that illuminate more of a white colored light. |
|---|---|
|
On-Camera LED Light If you need more light just in front of the camera and you need this light to be portable, LED lights that attach to your camera’s hot/cold shoe will do the job. |
|
LED Ring Light If you need more light just in front of the camera, you don’t have a lot of space, and you don’t need this light to be small and portable, an LED ring light is the best piece of equipment for you. You can position your camera inside the circular space of the ring light. This kind of light also gives your eyes the circular shaped highlight that many people like to see. |
|
Softbox Video Light If you need more light and have more space, another piece of lighting equipment good for beginners is a softbox video light. |
|
Umbrella Video Light Umbrella video lights are very portable and affordable. The direction of the light from umbrella lights are more difficult to control than the light from softbox video lights. |
If you’re looking for recommendations on which piece of lighting equipment to buy, check out my list of the Top 17 Video Lighting Equipment For YouTubers .
Part 7: YOUTUBE EQUIPMENT: COMPUTER
After you’ve recorded all your footage, you’ll need a computer to edit your video clips together. You can perform basic video editing tasks and upload your video onto YouTube with any computer less than ten years old.
Laptop computers are popular among YouTubers because their portability allows you to work on your videos from anywhere. This way, you can finish and upload your videos more frequently, which is another important part of being a YouTuber.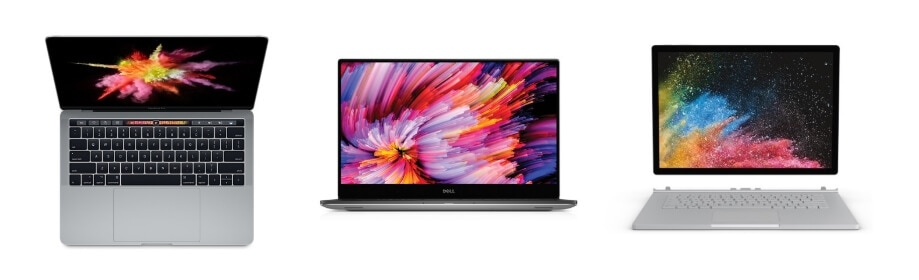
The following three laptop computers handle video editing very well:
- MacBook Pro With Touch Bar
- Dell XPS 15
- Microsoft Surface Book 2
Read more about these laptop computers for 4K video editing in The Best Laptops for 4K Video Editing .
Part 8: YOUTUBE EQUIPMENT: VIDEO EDITING SOFTWARE
| FREE VIDEO EDITING SOFTWARES | PAID VIDEO EDITING SOFTWARES |
|---|---|
| OpenShot Video Editor (Windows, Mac, Linux) ShotCut (Windows, Mac, Linux) Hitfilm Express (Windows, Mac) VideoPad Video Editor (Windows) Lightworks (Windows, Mac, Linux) VSDC Video Editor (Windows) Machete Video Editor Lite (Windows) Avidemux (Windows, Mac, Linux, BSD) Read more about each of these softwares in our post about The Best Free Video Editing Software for YouTube . | Filmora Video Editor (Windows, Mac) - $40 one year license, $79.99 perpetual license. Free trial Final Cut Pro (Mac) - $299.99, Free trial Vegas Movie Studio (Windows) - $49.99 |
YOUTUBE EQUIPMENT: AUDIO
Music Libraries
Music is an important part of YouTube video creation. Here’s where you can get access to music:
| ROYALTY-FREE MUSIC LIBRARIES | PAID MUSIC LIBRARIES | PAID SUBSCRIPTION MUSIC LIBRARIES |
|---|---|---|
| Audionautix Bensound dig.ccMixter Free Music Archive Free Stock Music Incompetech Josh Woodward Moby Gratis Musopen Purple Planet Music TeknoAXE YouTube Audio Library | Premium Beat Audio Jungle | Audio Network Audio Blocks Epidemic Sound |
Sound Effects
Free Sound Effect Sites
- Filmstock Sound Effects
- Freesound
- PacDV
- Sound Bible
- Sound Gator
- Sounds Crate
- Zapsplat
Sumia Rafique
Sumia Rafique is a writer and a lover of all things video.
Follow @Sumia Rafique
Also read:
- Download and Translate YouTube Videos for Free for 2024
- Elevate Your Video Entrance with These Tools
- Maximize Online Revenue Monetizing on Youtube with 500+ Viewers
- 2024 Approved Enhance Visibility 11 Must-Know YouTube Video SEO Tactics
- A Guide to Essential ASMR Video Facts
- [New] Creative Vlog Ideas for Daily Use
- Boosting Video Reach on YouTube An In-Depth Guide to SEO Techniques for 2024
- Prime Screen Recording Tech for YouTube Broadcasts
- 2024 Approved Cutting the Excess A Guide to Shortening YouTube Videos
- Decoding the Art of ASMR Filmmaking Techniques for 2024
- Elevate Your YouTube Thumbnails - Triple Neon Border Techniques
- Securing Successful Video Ventures Through Team Choices
- Dive Into the World of Youtuber Shorts
- [Updated] A Guide to Top Alternatives Ranking 27 Video Streamers
- Beyond Mainstream A List of 6 Exclusive Icon & Logo Providers
- In 2024, Champion Toolkit 10 Budget-Friendly Caption Extractors
- Stellar Showmanship YouTube’s Best Magic Tricks Edited!
- [New] YouTube Alternatives 3 Best Video Sharing Sites
- Tailoring Audio Rate on Mobile and Desktops for YouTube
- Vlogger’s Guide to Going Viral with Hilarious Reactions – 3 Must-Know Strategies
- [Updated] Channel Your Inner Videographer to Produce Top-Tier Edu-Videos
- In 2024, Cutting-Edge Techniques for YouTube Thumbnails, Made for macOS
- Best Movie Swaps Top 7 Alternate Films for 2024
- Laughing Along to Mimicked Melodies
- In 2024, Are Annual Payments for YouTube Premium Better Than Monthly?
- Getting the Most Out of Live Sports on YouTube TV
- [Updated] Elevate Your Engagement Top 10 Video Response Insights
- [New] Channel Your Creativity Crafting YouTube Trailers in Filmora
- In 2024, Charting Success Top 15 Investment Educational Videos
- 2024 Approved Blueprint for Buzzing Outro
- [Updated] Eliminating Odd Shades A Step-by-Step Guide to Flawless Greenscreens
- Maximize Impact with These 11 Economical YouTube Naming Tools
- Essential Insights for ASMR Aficionados for 2024
- Satire Skills Video Comedy Mastery Tips
- Conquer the Blackened Canvas of YouTube
- Elevate Your Videos with Complimentary Banners, Here for 2024
- 10 Quick Setup Ideas for Successful YouTube Business Ventures
- Charting the Course to YouTube Fame Strategic Video Release Frequency for 2024
- 2024 Approved Digital Wealth Creation Through Video Networking
- [New] Engage Audiences on All Sides Live 360-Degree Video Broadcasting for YouTube
- Elevate Your Content's Appeal How to Resize YouTube Thumbnails Right
- Employing Google Trends to Discover Compelling Video Themes
- In 2024, Aural Alchemy Transforming Sound Tracks In Logic Pro X
- Updated Transform Your GoPro Footage Quick and Easy Video Editing on MacBook
- [New] Leading Edge Top 10 Advanced Vimeo Video Extraction Sites for 2024
- Essential Adobe Premiere Pro Extensions Free & Paid Options for 2024
- In 2024, Recommended Best Applications for Mirroring Your Oppo A56s 5G Screen | Dr.fone
- [Updated] Unveiling Advanced Game Recording Techniques in Windows 11
- How to Put Music Over a Video, In 2024
- Download Facebook Audio as MP3 Top Online Converters
- 2024 Approved VHS Vibes Best Mobile Apps for Retro Video Editing
- Super Easy Ways To Deal with Infinix Note 30 5G Unresponsive Screen | Dr.fone
- [Updated] How to Transcribe Live Broadcasts Into Digital Format for 2024
- [New] In 2024, The Ultimate No-Return Path to TikTok Deactivation
- [New] Free Voice-Overhaul Techniques for Discord Users - Top Picks 2023 for 2024
- How To Save Funny Tweet Graphics (GIFs) in Minutes
- In 2024, How to Cast Vivo T2 Pro 5G Screen to PC Using WiFi | Dr.fone
- 8 Workable Fixes to the SIM not provisioned MM#2 Error on Infinix Hot 40i | Dr.fone
- New Video Editing Software Like VirtualDub Top Alternatives for 2024
- Title: "Quick Start Making Your Own Sports Highlight Film"
- Author: Brian
- Created at : 2024-05-25 12:46:43
- Updated at : 2024-05-26 12:46:43
- Link: https://youtube-video-recordings.techidaily.com/quick-start-making-your-own-sports-highlight-film/
- License: This work is licensed under CC BY-NC-SA 4.0.
