
:max_bytes(150000):strip_icc()/chatgptlogin-d176b679eef94d49ab45a5b3ec340b5e.jpg)
"Optimizing Your Live Content From Twitch to YouTube Platform"
Optimizing Your Live Content: From Twitch to YouTube Platform
Create High-Quality Video - Wondershare Filmora
An easy and powerful YouTube video editor
Numerous video and audio effects to choose from
Detailed tutorials provided by the official channel
Amidst many online applications is Twitch. This live streaming platform takes your experience to another level. You can use it to make crafts, play games, attract broadcasters, and many more. Twitch was launched in 2011, and since then, it has attracted millions of users, managing a database of about 4 million broadcasters by early 2020. With it, users can stream their activities as others watch in real-time. Just browse a category to find a stream.
You can also follow streamers that you like on the platform and get updates and notifications immediately after they are posted. But how do you start a career on a platform like Twitch? You need to broadcast and gather a large following. You can use built-in audiences from other platforms like Facebook. Let’s dive into the core of the matter and look at how to upload Twitch streams to YouTube and build your platform.

In this article
02 What is the benefit of uploading your Twitch Streams to YouTube
03 How to upload your Twitch Streams to YouTube
What is Twitch VOD?
Twitch Video on Demand (VOD) is a recording of previously streamed content. It provides briefings if you missed catching the Twitch live stream. Just watch the VOD from your favorite streamer and be engaged the best way possible. However, VODs don’t last forever. They are removed after two weeks of broadcast. But streamers with Partner Status can have their VODs last up to 60 days.
- How to enable Twitch VOD?
VODs are the best form to archive streams that your fans missed. Even though they are not enabled by default, you can manually enable them and not let your fans miss any important event from your channel. They’ll find it under the “Videos” tab on any Twitch channel. Follow these steps to enable VOD on your channel.
Step 1. Go to your profile icon in the top right corner of Twitch
Check in the “Channel & Video” section and locate the “Stream Key & Preferences” menu.

Step 2. Click on “Creator Dashboard”
Remember, you can enable VODs from your creator dashboard. Just go under the “Settings” tab and click on the “Stream section” of the creator dashboard. Check under the subtitle “VOD Settings” and get the option to store past broadcasts. You can also toggle the slider to store your past broadcasts.

Step 3 Click on the “Settings” tab on the left-hand side and go to Stream
You’ll get various drop-down menu options. Click on the “Settings” tab and choose the “Stream” option. The system will navigate to a new page, thus setting your preferences for VODs and clips.
Step 4. Go to “VOD Settings” and toggle on the “Store Past Broadcast.”
Ensure you have the toggle option turned ON under the “VOD Settings.” If it’s “ON,” you’ll realize the toggle will be purple, with a checkmark in it. Twitch will be confirmed to be enabled if it’s purple.

- Frequently Asked Question about Twitch VOD
These are some questions frequently asked by Twitch users.
1. How long will Twitch store my VOD
Your Twitch can either be stored for 14 or 60 days, depending on your level. For Twitch Prime, Twitch Partner or a Twitch Turbo user has their past broadcasts automatically saved for 60 days before deletion. But if you are not connected to these three options, your past broadcasts will be saved for only 14 days before deletion.
Since your past broadcasts cannot be live for more than 60 days, you have the option to download the video to your computer before the validity days expire and Twitch deletes it. You can use an External Hard drive to save the past broadcast content. Likewise, it is possible to turn your past broadcast content into Highlight and, in turn, permanently store them on Twitch.
2. What is the difference between Twitch VOD, Highlights, and Clips
Twitch VOD is a previously saved video of your live stream content. You choose to save either part or the entire content of your previously streamed content. More so, you don’t need any additional requirements to use VOD.
Highlights are short videos that have been edited from your past broadcast content. You can save them on Twitch permanently. Streamers majorly use highlights to save video game achievements. Unlike VOD Twitch that can be saved up to 60 days, Highlights usually lasts no more than 3 minutes.
- To make Highlights on Twitch, first, navigate to your Dashboard.
- Then scroll down and click on “Content” > “Video Producer.
- Next, press on “All Videos” to change them to “Past Broadcasts.”
- Now press the “Highlight” button, and Twitch will immediately open a new tab for “Twitch Highlighter Tool.”
- Then select the video part to include as “Highlight” and press the “Create Highlights” button.
- Wait a while for the process to be completed, and Voila! You have your Highlights created.
When it comes to Twitch Clip, you can capture special moments in a stream you are currently watching. On the same note, you can share clips with friends and other users on social media platforms. Such shared clips contain a link where others view the source or video from.
The clips you create will automatically be saved on the streamer’s channel on the “Clips” page, where other viewers can see them too. Nonetheless, you can download “clips” to your computer and, in turn, upload them whenever you want to. And note that you can help your stream grow via “Clips” by letting your viewers clip and share your stream moments.
- To create “Clips” on Twitch, identify which Streamers channel you wish to create a clip from.
- Then click on the “Clapper board” icon. Next, edit your clip between 5 and 60 seconds long.
- Finally, create a title and publish your Clip. You’ll also enjoy the privilege to share your clip’s link to other social media networks.
What is the benefit of uploading your Twitch Streams to YouTube
You stand to gain a lot when you upload your Twitch Streams to YouTube.
1) To enlighten your followers
Your followers will see your streams and make the best decisions. Viewers can check out your recordings and other highlights from past streams. It will help them decide whether they like what they see and probably join your live streams.
2) Twitch provides content for you to share and monetize on YouTube
Since Twitch streaming is more popular nowadays, many people throng it for content. It is not wise to rely entirely on Twitch to discover as a Twitch Streamer. Posting to YouTube will make it known within a short time. You would have announced your streams most nobly and kept your followers up to date, attracting new ones as well.
3) To keep your followers engaged even when you are offline
Even though live streaming is important, some viewers may not attend the live sessions due to different time zones or other commitments. In this regard, when uploaded to YouTube, Twitch will give them a chance to watch your content just whenever they log in. They, therefore, have the option to watch a Twitch VOD of the live stream they missed.
How to upload your Twitch Streams to YouTube
Check how to upload Twitch streams to YouTube from the Twitch website.
Step 1. Identify the little arrow next to your name on the Twitch website and click on it. Then click on the “Video Producer” to take you to a list of your Twitch videos.

Step 2. Check out and click on the “three-dots” on the video you wish to upload to YouTube. Click on the “Export” tab.
Step 3. A menu will then pop up. Here, you can fill in the description, title, and tags that you would like to appear on the YouTube video. There is an option for Twitch to split your video automatically. If you wish so, then tick the “Checkbox” to enable it. Then click on the “Start Export” option to export your Twitch streams to YouTube.

Bouns! Edit Your Twitch Video with Filmora
The quality of your video matters when it comes to uploading Twitch Streams to YouTube. Using a third-party tool to edit your video is the first step in ensuring your videos communicate meaningful content. Filmora comes in handy to bring your imaginations to life. Use it for simple creation without limits, even for beginners.
- Use it to track moving objects in video clips
- Easily match any image of the selected clip
- Its powerful tools let you edit your video by cropping, splitting, adjusting speed, etc
- The video keyframe easily indicates the beginning and end of the parameters
For Win 7 or later (64-bit)
For macOS 10.12 or later
Conclusion
● Don’t just focus on how to upload Twitch streams to YouTube but also consider the quality of video you are posting to YouTube. Remember, your video quality will speak much more of you than any other description. So, strive to produce quality videos using the best tool, Filmora. The app is easy to use and will elevate your views and imaginations through your video in the most impactful way.
Amidst many online applications is Twitch. This live streaming platform takes your experience to another level. You can use it to make crafts, play games, attract broadcasters, and many more. Twitch was launched in 2011, and since then, it has attracted millions of users, managing a database of about 4 million broadcasters by early 2020. With it, users can stream their activities as others watch in real-time. Just browse a category to find a stream.
You can also follow streamers that you like on the platform and get updates and notifications immediately after they are posted. But how do you start a career on a platform like Twitch? You need to broadcast and gather a large following. You can use built-in audiences from other platforms like Facebook. Let’s dive into the core of the matter and look at how to upload Twitch streams to YouTube and build your platform.
In this article
02 What is the benefit of uploading your Twitch Streams to YouTube
03 How to upload your Twitch Streams to YouTube
What is Twitch VOD?
Twitch Video on Demand (VOD) is a recording of previously streamed content. It provides briefings if you missed catching the Twitch live stream. Just watch the VOD from your favorite streamer and be engaged the best way possible. However, VODs don’t last forever. They are removed after two weeks of broadcast. But streamers with Partner Status can have their VODs last up to 60 days.
- How to enable Twitch VOD?
VODs are the best form to archive streams that your fans missed. Even though they are not enabled by default, you can manually enable them and not let your fans miss any important event from your channel. They’ll find it under the “Videos” tab on any Twitch channel. Follow these steps to enable VOD on your channel.
Step 1. Go to your profile icon in the top right corner of Twitch
Check in the “Channel & Video” section and locate the “Stream Key & Preferences” menu.
Step 2. Click on “Creator Dashboard”
Remember, you can enable VODs from your creator dashboard. Just go under the “Settings” tab and click on the “Stream section” of the creator dashboard. Check under the subtitle “VOD Settings” and get the option to store past broadcasts. You can also toggle the slider to store your past broadcasts.
Step 3 Click on the “Settings” tab on the left-hand side and go to Stream
You’ll get various drop-down menu options. Click on the “Settings” tab and choose the “Stream” option. The system will navigate to a new page, thus setting your preferences for VODs and clips.
Step 4. Go to “VOD Settings” and toggle on the “Store Past Broadcast.”
Ensure you have the toggle option turned ON under the “VOD Settings.” If it’s “ON,” you’ll realize the toggle will be purple, with a checkmark in it. Twitch will be confirmed to be enabled if it’s purple.
- Frequently Asked Question about Twitch VOD
These are some questions frequently asked by Twitch users.
1. How long will Twitch store my VOD
Your Twitch can either be stored for 14 or 60 days, depending on your level. For Twitch Prime, Twitch Partner or a Twitch Turbo user has their past broadcasts automatically saved for 60 days before deletion. But if you are not connected to these three options, your past broadcasts will be saved for only 14 days before deletion.
Since your past broadcasts cannot be live for more than 60 days, you have the option to download the video to your computer before the validity days expire and Twitch deletes it. You can use an External Hard drive to save the past broadcast content. Likewise, it is possible to turn your past broadcast content into Highlight and, in turn, permanently store them on Twitch.
2. What is the difference between Twitch VOD, Highlights, and Clips
Twitch VOD is a previously saved video of your live stream content. You choose to save either part or the entire content of your previously streamed content. More so, you don’t need any additional requirements to use VOD.
Highlights are short videos that have been edited from your past broadcast content. You can save them on Twitch permanently. Streamers majorly use highlights to save video game achievements. Unlike VOD Twitch that can be saved up to 60 days, Highlights usually lasts no more than 3 minutes.
- To make Highlights on Twitch, first, navigate to your Dashboard.
- Then scroll down and click on “Content” > “Video Producer.
- Next, press on “All Videos” to change them to “Past Broadcasts.”
- Now press the “Highlight” button, and Twitch will immediately open a new tab for “Twitch Highlighter Tool.”
- Then select the video part to include as “Highlight” and press the “Create Highlights” button.
- Wait a while for the process to be completed, and Voila! You have your Highlights created.
When it comes to Twitch Clip, you can capture special moments in a stream you are currently watching. On the same note, you can share clips with friends and other users on social media platforms. Such shared clips contain a link where others view the source or video from.
The clips you create will automatically be saved on the streamer’s channel on the “Clips” page, where other viewers can see them too. Nonetheless, you can download “clips” to your computer and, in turn, upload them whenever you want to. And note that you can help your stream grow via “Clips” by letting your viewers clip and share your stream moments.
- To create “Clips” on Twitch, identify which Streamers channel you wish to create a clip from.
- Then click on the “Clapper board” icon. Next, edit your clip between 5 and 60 seconds long.
- Finally, create a title and publish your Clip. You’ll also enjoy the privilege to share your clip’s link to other social media networks.
What is the benefit of uploading your Twitch Streams to YouTube
You stand to gain a lot when you upload your Twitch Streams to YouTube.
1) To enlighten your followers
Your followers will see your streams and make the best decisions. Viewers can check out your recordings and other highlights from past streams. It will help them decide whether they like what they see and probably join your live streams.
2) Twitch provides content for you to share and monetize on YouTube
Since Twitch streaming is more popular nowadays, many people throng it for content. It is not wise to rely entirely on Twitch to discover as a Twitch Streamer. Posting to YouTube will make it known within a short time. You would have announced your streams most nobly and kept your followers up to date, attracting new ones as well.
3) To keep your followers engaged even when you are offline
Even though live streaming is important, some viewers may not attend the live sessions due to different time zones or other commitments. In this regard, when uploaded to YouTube, Twitch will give them a chance to watch your content just whenever they log in. They, therefore, have the option to watch a Twitch VOD of the live stream they missed.
How to upload your Twitch Streams to YouTube
Check how to upload Twitch streams to YouTube from the Twitch website.
Step 1. Identify the little arrow next to your name on the Twitch website and click on it. Then click on the “Video Producer” to take you to a list of your Twitch videos.
Step 2. Check out and click on the “three-dots” on the video you wish to upload to YouTube. Click on the “Export” tab.
Step 3. A menu will then pop up. Here, you can fill in the description, title, and tags that you would like to appear on the YouTube video. There is an option for Twitch to split your video automatically. If you wish so, then tick the “Checkbox” to enable it. Then click on the “Start Export” option to export your Twitch streams to YouTube.
Bouns! Edit Your Twitch Video with Filmora
The quality of your video matters when it comes to uploading Twitch Streams to YouTube. Using a third-party tool to edit your video is the first step in ensuring your videos communicate meaningful content. Filmora comes in handy to bring your imaginations to life. Use it for simple creation without limits, even for beginners.
- Use it to track moving objects in video clips
- Easily match any image of the selected clip
- Its powerful tools let you edit your video by cropping, splitting, adjusting speed, etc
- The video keyframe easily indicates the beginning and end of the parameters
For Win 7 or later (64-bit)
For macOS 10.12 or later
Conclusion
● Don’t just focus on how to upload Twitch streams to YouTube but also consider the quality of video you are posting to YouTube. Remember, your video quality will speak much more of you than any other description. So, strive to produce quality videos using the best tool, Filmora. The app is easy to use and will elevate your views and imaginations through your video in the most impactful way.
Unlocking YouTube Success: Top 10 Keyword Research Utilities Listed
10 Best YouTube Keyword Tools to Get More Views

Richard Bennett
Mar 27, 2024• Proven solutions
If we asked you to name the world’s biggest search engines, undoubtedly you’d come up with Google, but what would be number two? Bing? Yahoo? The truth might surprise you.
According to figures, the world’s second biggest search engine is actually YouTube. Millions of people are using it everyday to search for videos about fitness, hair, marketing and more. With such a large audience already searching directly on the platform, doesn’t it make sense that when we use YouTube keyword research and SEO should be as important as it is on our website?
Luckily, we can use YouTube keyword tools to analyze YouTube keywords. Here we’re going to take a look at 10 best YouTube keyword tools out there, which can help you identify and optimize for the highest traffic keywords for your videos. By optimizing your videos, you can rank higher, get more views and enjoy a larger audience on YouTube.
- Part 1: 10 Best YouTube Keyword Tools Recommendation
- Part 2: Bonues Tips - Google video result keywords
You May Also Like:
YouTube SEO Complete Guide >>
How to Edit and Optimize YouTube Title, Description, and Tags >>
Do you want to edit YouTube video easily? Filmora is a YouTube editor that you should have a try. As a YouTube video editing tool, it is simple to use with dragging and dropping. You can add various video effects, filters and transition to make your video better. Besides, titles and texts are also available to use. After editing, you can directly upload video to YouTube plactform. Now, download it to have a try!
 Download Mac Version ](https://tools.techidaily.com/wondershare/filmora/download/ )
Part 1: 10 Best YouTube Keyword Tools Recommendation
Before you can get into using any YouTube SEO tool, you’ll need to identify what the best keywords for your videos are. Let’s start by taking a look at the best YouTube keyword tools available.
1. YouTube autocomplete
When you start to search for something on YouTube, you’ll probably notice that YouTube suggests some keywords to finish your search. This is called autocomplete, and it works by suggesting the most popular keywords that start with the letters you’ve typed so far. What it is essentially saying is that those are the most frequently searched for terms that use the words you’ve already typed.
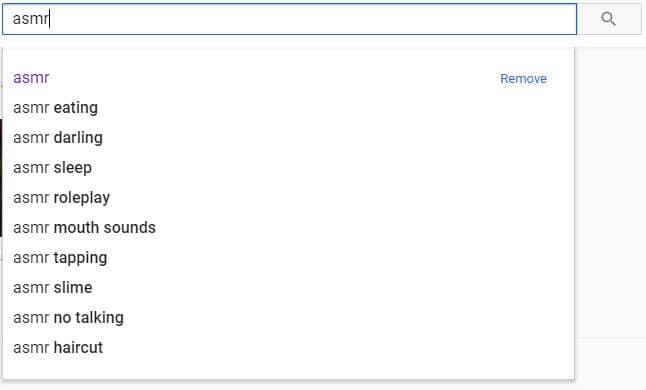
This means it’s a great place to start building your keywords, and a fantastic YouTube keyword tool for your videos. Just start your search for your video (e.g. shoes for…) and see what comes up. In this case, we can see that the most popular keywords are ‘girls’, ‘men’, ‘kids’, ‘summer’ and ‘boys’.
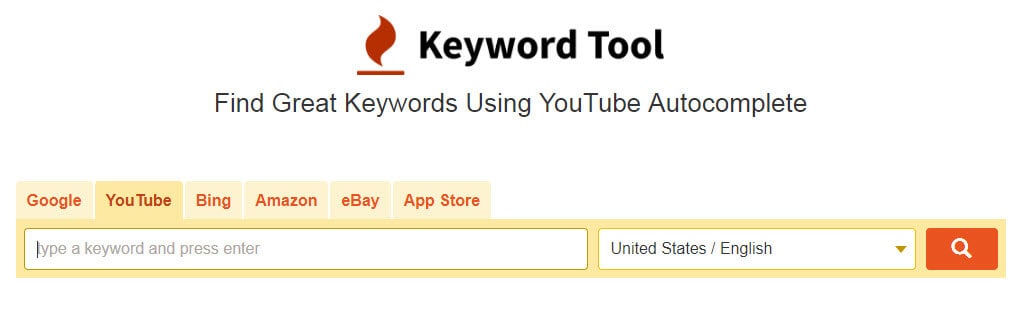
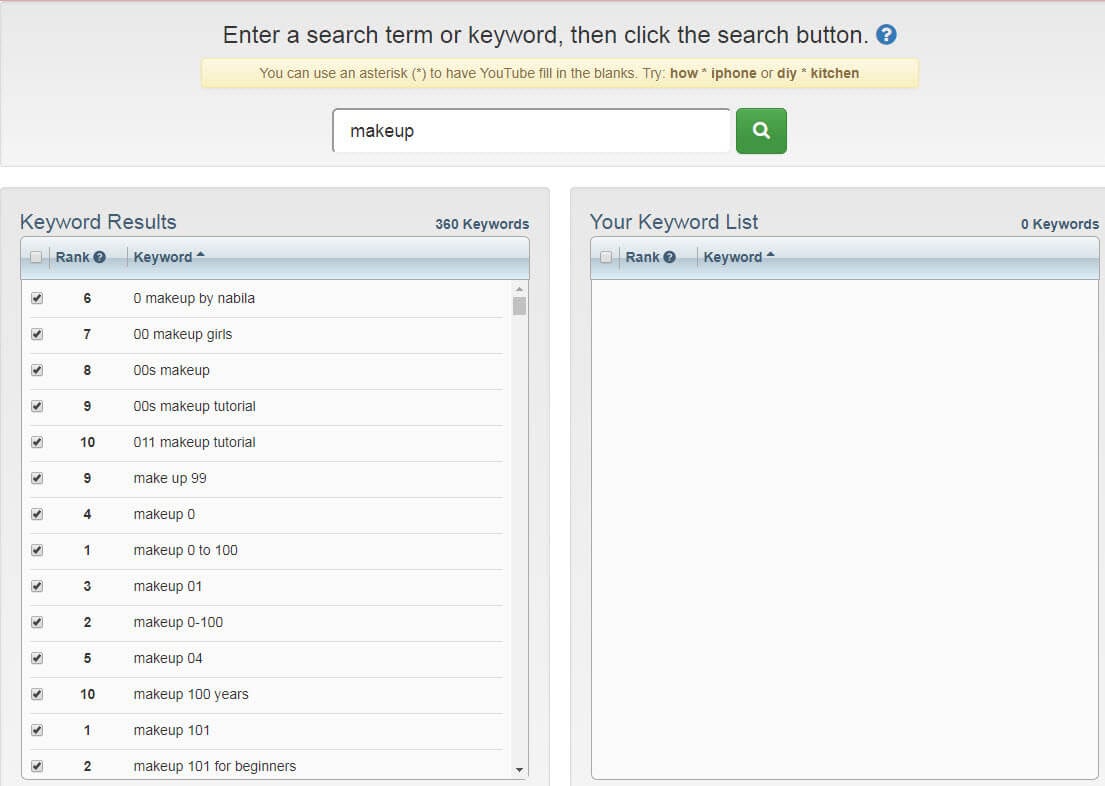
2. Keywordtool.io
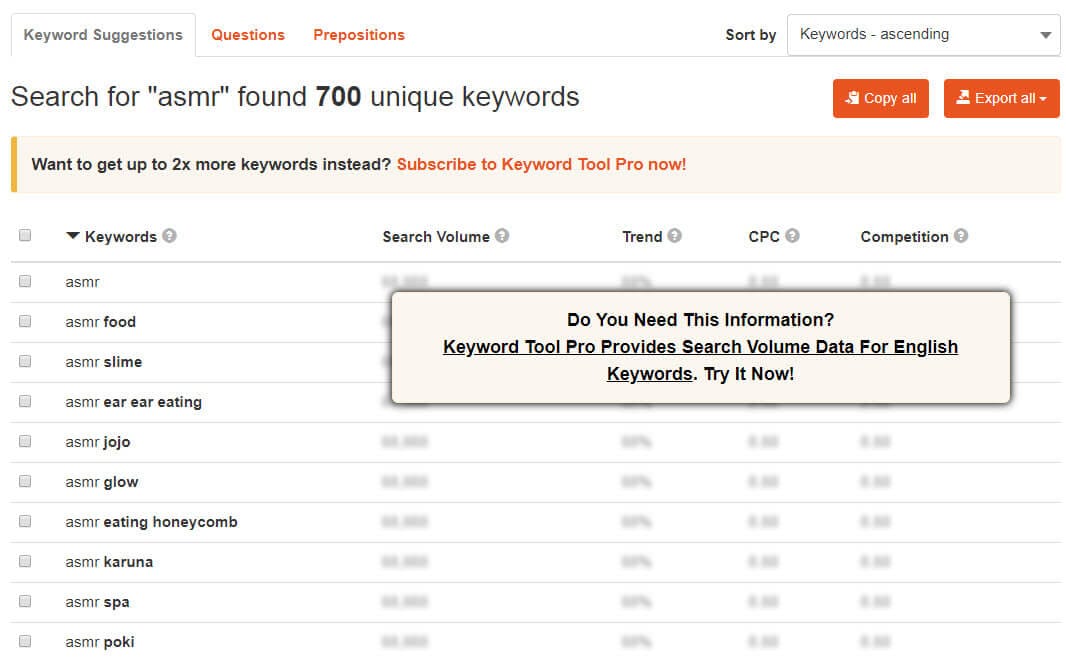
Without doubt, this is one of the most powerful YouTube keyword tools out there, ranking hundreds of keywords by popularity. It captures data from YouTube autocomplete and allows you to create lists of keywords from that data. As well as autocompete data, you can also search for questions people are asking, which makes it highly beneficial as a YouTube SEO tool.
The downside to this particular tool is that it’s fairly limited on the free version. Upgrading to Pro Basic will give you almost double the keyword results and will let you compare the volume of searches made for those terms too. However, this will set you back around $68 a year, so it’s going to be something of an investment if you go for it.
3. SEOChat
SEO Chat is an amazing free tool that can generate keyword ideas from Google, Amazon, Bing and YouTube. You can search for keywords from all of those sources or can just search YouTube alone to find your keyword lists. You’ll need a ‘seed’ keyword, such as ‘shoes’, ‘make up’ or ‘marketing’, and then organizes results alphabetically with other letters following your seed keyword.

Simply scrolling through the results is going to give you loads of ideas for keywords and possibly content too. The tool also allows you to further expand your results by selecting a keyword and running ‘part two’ of the process, which expands those phrases even further. Your chosen keywords can be exported from the software, ready for use in your YouTube SEO tool.
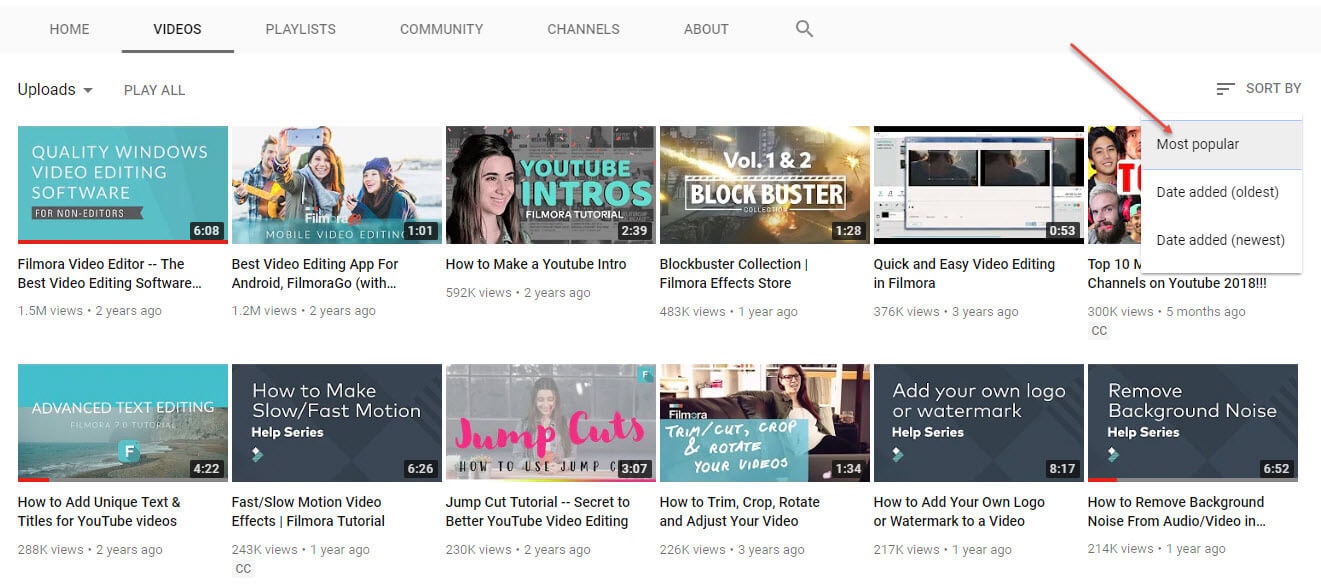
4. Gather keywords from your competitor
Why not learn from the best and see what’s already working for your competitors? Finding their high traffic keywords is easy and can save a lot of time and energy. To do this, pick a channel that is around your size, as they’re your nearest competitors. Steer clear of the huge channels, as you’ll find it hard to rank next to them.
Click the videos tab to see their content, and sort them by ‘most popular’ to see the ones which got the most views. Take a look at the title and the description of those videos, and you’ll find a good fistful of proven keywords that you can start using yourself.
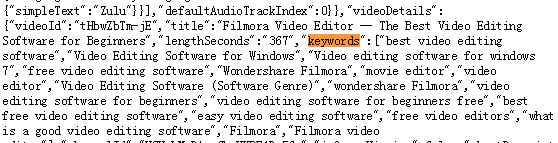
That’s not all though. To maximize your competitor research, let’s dig a little deeper into the tags they have used for their videos too. Unfortunately, these are hidden on YouTube, but are easily seen using the page’s HTML. Simply right click on the page and select ‘view source’. Don’t be alarmed at the great stream of HTML that pops up, it’s easy to search using your search function (press ctrl + f on Windows or ⌘ + f on iOS) by typing in ‘keywords’ to the search box. The following terms are the tags used in the video.
If ploughing through HTML sounds somewhat taxing, there is a handy YouTube SEO tool you can use to display the tags on page. It’s called TubeBuddy and is a Chrome extension which you’ll find in the Chrome store for free.
5. Keyword Tool Dominator
It’s got a grand name, but it’s actually really easy to use and a great place to start if you’re new to YouTube keyword research. Pop in your seed keywords and the Dominator will produce a list of relevant keywords related to those terms. You can then select the most useful and download them to your device.
The drawback with this is that you can only perform three searches a day on the free version. Perhaps that’s enough for you to begin with, but if you want to upgrade to the unlimited version, which will also give you search volumes, it’s a one-off fee of $39.99.
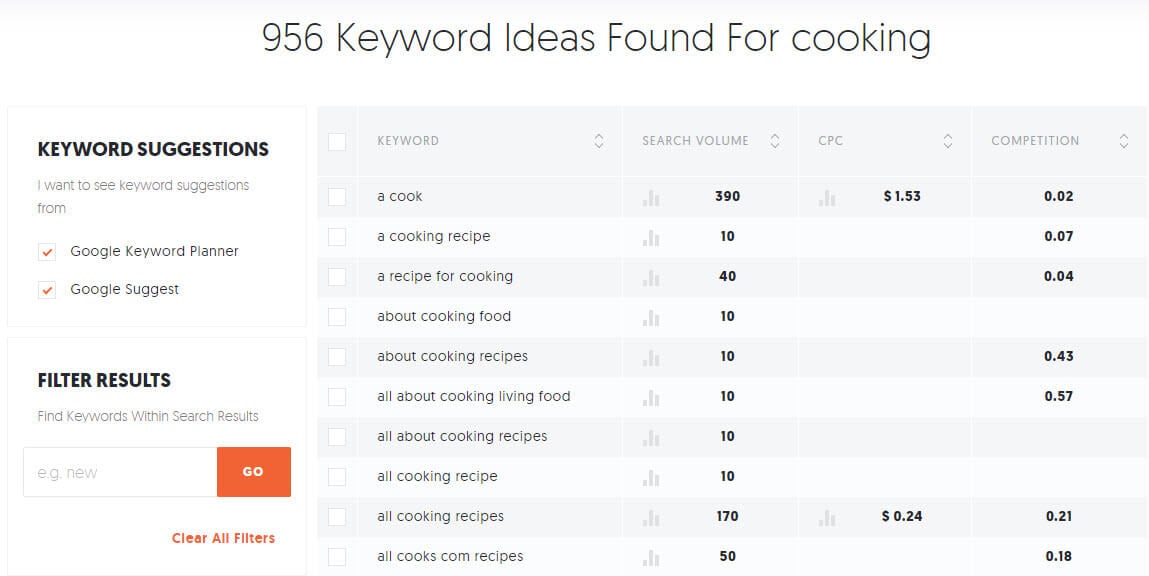
6. Ubersuggest
For getting more data on specific keywords, Ubersuggest from the SEO guru that is Neil Patel is one of the best tools out there. As well as showing search volume and competition, you can see other information such as cost per click and the seasonality of the keyword. It’s free to use with no limitations at all, so is well worth checking out.
7. Google trends
We would highly recommend investigating Google Trends as part of your YouTube keyword research, as it is powerful, accurate and, best of all, free! The options let you narrow down the trend results to just YouTube searches, which is great for gaining insights to your search terms. You can narrow down the results to a specific country too, helping you to gain insight into what your target demographic is currently interested in.
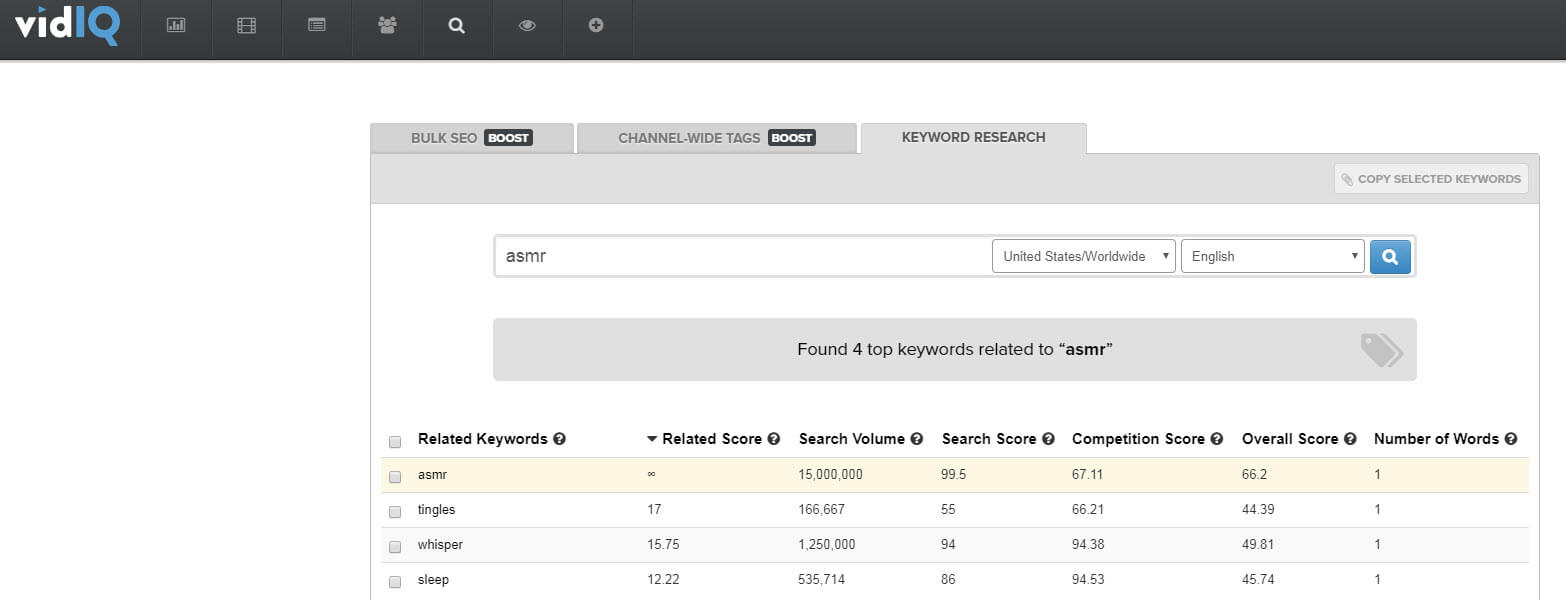
8. VidIQ
The keyword tool in VidIQ is one of very few research tools that has a function for just YouTube built in. You can paste in the keywords you want to research, choose the country you wish to target, and it will return all the search volumes and amount of competition, and will score your keywords based on these figures.
On the downside, there is a fairly complicated subscription process to go through if you want to upgrade from the free version. To be honest, the free version is OK for new users, but for in depth analytics you’re going to want to upgrade eventually.
9. Keyword Keg
Keyword Keg is definitely one of the most powerful YouTube keyword research tools out there. It offers lots of data, drawn from a variety of data sources including Wikipedia, Alibaba, Playstore and more. There are filters for country and language and you can drill down into issues like buyer intent and product info. However, as with most free YouTube keyword tools, there is a strict limit on what you can do before you pay. In this case, you only get to see the first five results unless you want to upgrade.

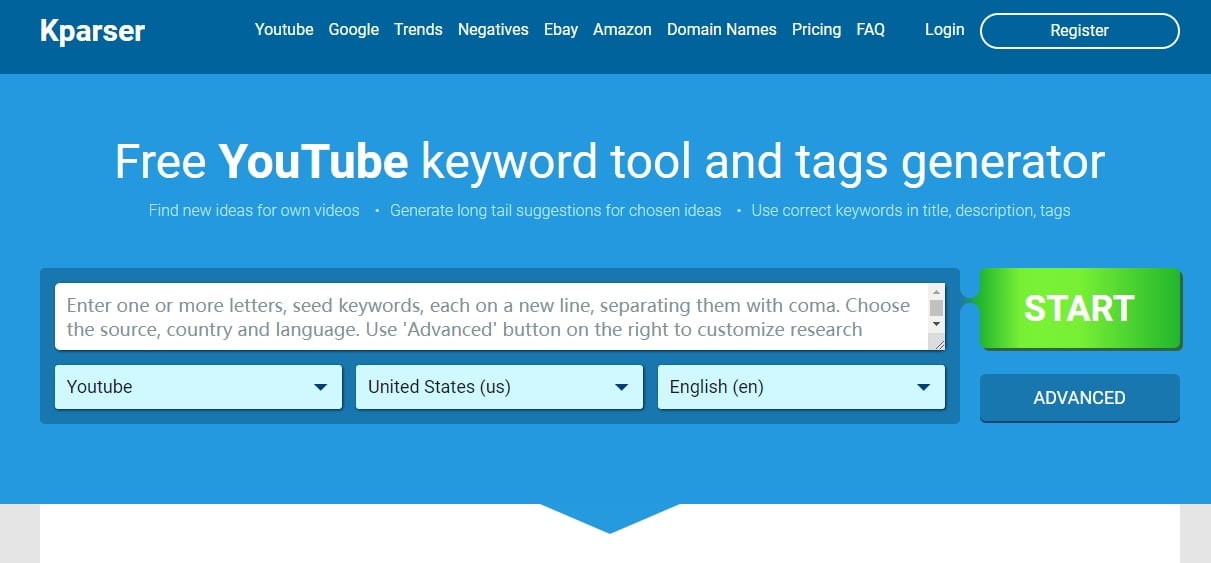
10. Kparser
Kparser is a YouTube keyword tool that you should notice. You can use it to find YouTube keywords free to use. More than finding the best core keywords, this tool can also give you suggestions on long tail keywords in every field. By use this, you don’t need to worry that you can’t the right keywords to use in title, description and tags. You also can selcet country and language when searching a YouTube keyword. For searching more than one keyword, remember to seperate them with coma.
Part 2: Bonus Tips - Google Video Result Keywords
Getting your video ranking highly on YouTube is excellent and will certainly bring you more traffic. But, do you know what would be even better than that? Getting your video ranking on Google as well.
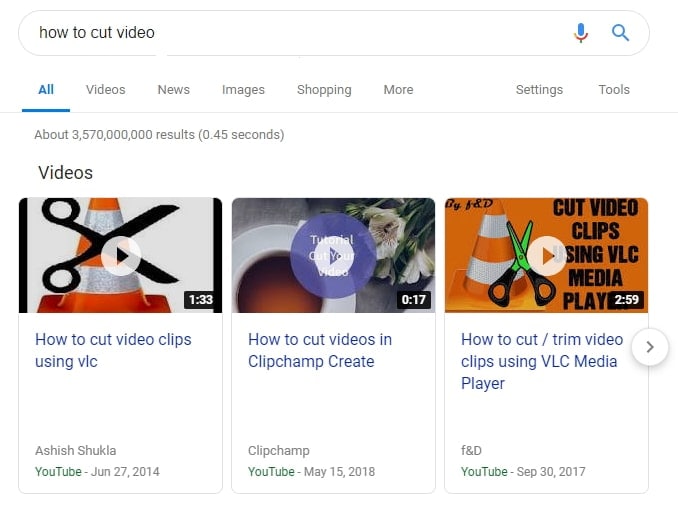
To do this you’ll need to find ‘video result keywords’ in Google, so that yours can be one of the selected videos that sometimes show up in search. Google decides what should and shouldn’t trigger a video result, and usually shows them when a video would make sense, for example when someone asks ‘how to’ or searches for ‘cute’ or ‘funny’ things.
There’s a bit of trial and error involved as there is no YouTube keyword tool to find video result keywords… yet. But you can use Google to search your keywords and see if they are video result keywords. Just type them in, and if a video appears in the listings below, you’ve discovered a video result keyword that is well worth optimizing for.
Richard Bennett
Richard Bennett is a writer and a lover of all things video.
Follow @Richard Bennett
Richard Bennett
Mar 27, 2024• Proven solutions
If we asked you to name the world’s biggest search engines, undoubtedly you’d come up with Google, but what would be number two? Bing? Yahoo? The truth might surprise you.
According to figures, the world’s second biggest search engine is actually YouTube. Millions of people are using it everyday to search for videos about fitness, hair, marketing and more. With such a large audience already searching directly on the platform, doesn’t it make sense that when we use YouTube keyword research and SEO should be as important as it is on our website?
Luckily, we can use YouTube keyword tools to analyze YouTube keywords. Here we’re going to take a look at 10 best YouTube keyword tools out there, which can help you identify and optimize for the highest traffic keywords for your videos. By optimizing your videos, you can rank higher, get more views and enjoy a larger audience on YouTube.
- Part 1: 10 Best YouTube Keyword Tools Recommendation
- Part 2: Bonues Tips - Google video result keywords
You May Also Like:
YouTube SEO Complete Guide >>
How to Edit and Optimize YouTube Title, Description, and Tags >>
Do you want to edit YouTube video easily? Filmora is a YouTube editor that you should have a try. As a YouTube video editing tool, it is simple to use with dragging and dropping. You can add various video effects, filters and transition to make your video better. Besides, titles and texts are also available to use. After editing, you can directly upload video to YouTube plactform. Now, download it to have a try!
Download Mac Version ](https://tools.techidaily.com/wondershare/filmora/download/ )
Part 1: 10 Best YouTube Keyword Tools Recommendation
Before you can get into using any YouTube SEO tool, you’ll need to identify what the best keywords for your videos are. Let’s start by taking a look at the best YouTube keyword tools available.
1. YouTube autocomplete
When you start to search for something on YouTube, you’ll probably notice that YouTube suggests some keywords to finish your search. This is called autocomplete, and it works by suggesting the most popular keywords that start with the letters you’ve typed so far. What it is essentially saying is that those are the most frequently searched for terms that use the words you’ve already typed.
This means it’s a great place to start building your keywords, and a fantastic YouTube keyword tool for your videos. Just start your search for your video (e.g. shoes for…) and see what comes up. In this case, we can see that the most popular keywords are ‘girls’, ‘men’, ‘kids’, ‘summer’ and ‘boys’.
2. Keywordtool.io
Without doubt, this is one of the most powerful YouTube keyword tools out there, ranking hundreds of keywords by popularity. It captures data from YouTube autocomplete and allows you to create lists of keywords from that data. As well as autocompete data, you can also search for questions people are asking, which makes it highly beneficial as a YouTube SEO tool.
The downside to this particular tool is that it’s fairly limited on the free version. Upgrading to Pro Basic will give you almost double the keyword results and will let you compare the volume of searches made for those terms too. However, this will set you back around $68 a year, so it’s going to be something of an investment if you go for it.
3. SEOChat
SEO Chat is an amazing free tool that can generate keyword ideas from Google, Amazon, Bing and YouTube. You can search for keywords from all of those sources or can just search YouTube alone to find your keyword lists. You’ll need a ‘seed’ keyword, such as ‘shoes’, ‘make up’ or ‘marketing’, and then organizes results alphabetically with other letters following your seed keyword.
Simply scrolling through the results is going to give you loads of ideas for keywords and possibly content too. The tool also allows you to further expand your results by selecting a keyword and running ‘part two’ of the process, which expands those phrases even further. Your chosen keywords can be exported from the software, ready for use in your YouTube SEO tool.
4. Gather keywords from your competitor
Why not learn from the best and see what’s already working for your competitors? Finding their high traffic keywords is easy and can save a lot of time and energy. To do this, pick a channel that is around your size, as they’re your nearest competitors. Steer clear of the huge channels, as you’ll find it hard to rank next to them.
Click the videos tab to see their content, and sort them by ‘most popular’ to see the ones which got the most views. Take a look at the title and the description of those videos, and you’ll find a good fistful of proven keywords that you can start using yourself.
That’s not all though. To maximize your competitor research, let’s dig a little deeper into the tags they have used for their videos too. Unfortunately, these are hidden on YouTube, but are easily seen using the page’s HTML. Simply right click on the page and select ‘view source’. Don’t be alarmed at the great stream of HTML that pops up, it’s easy to search using your search function (press ctrl + f on Windows or ⌘ + f on iOS) by typing in ‘keywords’ to the search box. The following terms are the tags used in the video.
If ploughing through HTML sounds somewhat taxing, there is a handy YouTube SEO tool you can use to display the tags on page. It’s called TubeBuddy and is a Chrome extension which you’ll find in the Chrome store for free.
5. Keyword Tool Dominator
It’s got a grand name, but it’s actually really easy to use and a great place to start if you’re new to YouTube keyword research. Pop in your seed keywords and the Dominator will produce a list of relevant keywords related to those terms. You can then select the most useful and download them to your device.
The drawback with this is that you can only perform three searches a day on the free version. Perhaps that’s enough for you to begin with, but if you want to upgrade to the unlimited version, which will also give you search volumes, it’s a one-off fee of $39.99.
6. Ubersuggest
For getting more data on specific keywords, Ubersuggest from the SEO guru that is Neil Patel is one of the best tools out there. As well as showing search volume and competition, you can see other information such as cost per click and the seasonality of the keyword. It’s free to use with no limitations at all, so is well worth checking out.
7. Google trends
We would highly recommend investigating Google Trends as part of your YouTube keyword research, as it is powerful, accurate and, best of all, free! The options let you narrow down the trend results to just YouTube searches, which is great for gaining insights to your search terms. You can narrow down the results to a specific country too, helping you to gain insight into what your target demographic is currently interested in.
8. VidIQ
The keyword tool in VidIQ is one of very few research tools that has a function for just YouTube built in. You can paste in the keywords you want to research, choose the country you wish to target, and it will return all the search volumes and amount of competition, and will score your keywords based on these figures.
On the downside, there is a fairly complicated subscription process to go through if you want to upgrade from the free version. To be honest, the free version is OK for new users, but for in depth analytics you’re going to want to upgrade eventually.
9. Keyword Keg
Keyword Keg is definitely one of the most powerful YouTube keyword research tools out there. It offers lots of data, drawn from a variety of data sources including Wikipedia, Alibaba, Playstore and more. There are filters for country and language and you can drill down into issues like buyer intent and product info. However, as with most free YouTube keyword tools, there is a strict limit on what you can do before you pay. In this case, you only get to see the first five results unless you want to upgrade.
10. Kparser
Kparser is a YouTube keyword tool that you should notice. You can use it to find YouTube keywords free to use. More than finding the best core keywords, this tool can also give you suggestions on long tail keywords in every field. By use this, you don’t need to worry that you can’t the right keywords to use in title, description and tags. You also can selcet country and language when searching a YouTube keyword. For searching more than one keyword, remember to seperate them with coma.
Part 2: Bonus Tips - Google Video Result Keywords
Getting your video ranking highly on YouTube is excellent and will certainly bring you more traffic. But, do you know what would be even better than that? Getting your video ranking on Google as well.
To do this you’ll need to find ‘video result keywords’ in Google, so that yours can be one of the selected videos that sometimes show up in search. Google decides what should and shouldn’t trigger a video result, and usually shows them when a video would make sense, for example when someone asks ‘how to’ or searches for ‘cute’ or ‘funny’ things.
There’s a bit of trial and error involved as there is no YouTube keyword tool to find video result keywords… yet. But you can use Google to search your keywords and see if they are video result keywords. Just type them in, and if a video appears in the listings below, you’ve discovered a video result keyword that is well worth optimizing for.
Richard Bennett
Richard Bennett is a writer and a lover of all things video.
Follow @Richard Bennett
Also read:
- Perfecting Your YT Earning Monetization Verification Steps
- The Opposite View Creative Ways to Watch YouTube Backwards
- [New] Decoding YouTube’s Operations Following Uploads
- In 2024, Android Audio Alchemy Selecting the Top Free Downloader Apps From YouTube
- In 2024, Boosting Channels' Growth Strategies for Effective Trailers
- [Updated] How to Easily Disable/Remove YouTube Shorts Permanently?
- Essential GIF Tool Guide Tips From the Experts
- Navigating Video Aspect Ratios in YouTube Platform
- [New] Channel Connectivity Made Simple Easy-to-Use YouTube Buttons
- Optimal Video-Sharing Experience Decide Between TikTok & YouTubes' Shorts
- In 2024, 7 Insider Tips to Make Money Quickly on YouTube Shorts
- Boosting Your Online Presence A Step-by-Step Guide to Viral YouTube Shorts
- DIY Delights in Motion Personalized Animation Artistry
- 2024 Approved 6 Easy, Free YouTube Closers for Your Videos (Top Picks)
- [Updated] Direct Transfer Solution YouTube Content on Dailymotion Now
- ASMR Knowledge Beyond What You See for 2024
- Deciphering How To Find My YouTube Comments Posts
- [Updated] Build a Thriving Biz Channel Proven Strategies and Examples
- 2024 Approved Best Practices Boosting Your Game Videos with Tags
- 2024 Approved Discover 5 Exceptional Non-YouTube Video Platforms Today
- Dissecting the Hidden Mechanics Behind YouTube's Popularity Index
- Top 10 YouTubers by Massive Subscriber Base
- Engage Audiences Best Hashtags for Going Viral on YT for 2024
- Advanced Techniques in Post-Uploaded YouTube Content Enhancement for 2024
- In 2024, Elevating Your YouTube Experience Tips on Channel Art and Sizes
- Crafting a Journalistic Closing Statement
- 2024 Approved Discovering the Secrets of ASMR Media
- Pioneering Your Virtual Identity in Entertainment Industry
- 2024 Approved Efficiently Uploading YouTube Vids to Insta Profile
- Elevating Video Previews A Compreayer Approach for YouTube
- Guaranteed Method to Keep YouTube Shorts Out of Sight
- Crafting Content that Captivates YouTube Keyword Mastery for 2024
- Simply Saver Top Mobile Apps for Downloading YouTube Series & Songs
- 15 Online Audio Haven Sites for Video Content Makers for 2024
- [New] Are You Violating Copyright by ScreenRecording YouTube?
- [New] Creating Engaging Haul Videos Techniques & Tips
- The Top 20 Gags & Laughter on YouTube for Downtime Delight
- Top Viewership Archive YouTube Visionaries
- In 2024, Analyzing FFmpeg's Compatibility with Original Soundscape
- [Updated] Comparing Nikon D7500 and Mirrorless Rivals
- [New] How to Maintain Consistency in Voice Posts on Instagram for 2024
- [Updated] OBS Studio Explained Capturing PS4 Playthroughs for 2024
- Mastering Android Screenshots in 4 Steps
- [Updated] In 2024, Capturing Clarity PowerPoint and Webcam Synergy
- [Updated] 2024 Approved Capturing Your Lenovo Display in Slow Motion
- The Insider's Guide to Recording on iTunes for 2024
- The Best Android Unlock Software For Huawei Device Top 5 Picks to Remove Android Locks
- The Smart Approach for Posting IGTV on Your Story for 2024
- Best Pokemons for PVP Matches in Pokemon Go For Tecno Phantom V Flip | Dr.fone
- How to Reset a Vivo Y27 5G Phone that is Locked?
- Advanced Steps to Record Silent Videos for 2024
- 2024 Approved Top 5 iOS Downloader Tools Seamless Access to FB Videos & Events
- The Mac User’ Writers Guide to Dynamic SRT Adjustment
- New Prime Budget-Optimized Mac Audio Adjustment Software
- How to Downgrade iPhone XS to an Older iOS System Version? | Dr.fone
- In 2024, How To Unlock The Apple iPhone SE (2020) SIM Lock 4 Easy Methods
- In 2024, Snapchat Audio Ensuring Whole Video Playback Every Time
- New 2024 Approved Compress WebM Videos with Ease Top Online Tools
- Ways to trade pokemon go from far away On Samsung Galaxy S23 Ultra? | Dr.fone
- New Mastering Video Speed in Camtasia Tips and Tricks for 2024
- Demystify Video Editing with Free Vimeo Resources for 2024
- Updated Transforming a Slow-Motion Video to Normal Mastering the Skill
- Disable screen lock on Honor X50
- 2024 Approved Are You Looking to Vlog Across Your Next Stop at the Café? Get Aware of the Significant Elements that Make up the Café Vlog
- [New] Revolutionary Recording Techniques for iPads for 2024
- [New] In 2024, Navigating the Decision to Adopt ITop Recording
- 2024 Approved Classroom Captures Unveiling the Ultimate 10 Video Recorders for Education
- Title: "Optimizing Your Live Content From Twitch to YouTube Platform"
- Author: Brian
- Created at : 2024-05-25 12:43:42
- Updated at : 2024-05-26 12:43:42
- Link: https://youtube-video-recordings.techidaily.com/optimizing-your-live-content-from-twitch-to-youtube-platform/
- License: This work is licensed under CC BY-NC-SA 4.0.
