
![[New] Enhancing Social Media Reach by Uploading to YouTube via Twitch](https://thmb.techidaily.com/402a192fa8f9a76c25001597879db6a11d907dc8fe3db6a194aec02ff3403057.jpg)
[New] Enhancing Social Media Reach by Uploading to YouTube via Twitch
Enhancing Social Media Reach by Uploading to YouTube via Twitch
Create High-Quality Video - Wondershare Filmora
An easy and powerful YouTube video editor
Numerous video and audio effects to choose from
Detailed tutorials provided by the official channel
Amidst many online applications is Twitch. This live streaming platform takes your experience to another level. You can use it to make crafts, play games, attract broadcasters, and many more. Twitch was launched in 2011, and since then, it has attracted millions of users, managing a database of about 4 million broadcasters by early 2020. With it, users can stream their activities as others watch in real-time. Just browse a category to find a stream.
You can also follow streamers that you like on the platform and get updates and notifications immediately after they are posted. But how do you start a career on a platform like Twitch? You need to broadcast and gather a large following. You can use built-in audiences from other platforms like Facebook. Let’s dive into the core of the matter and look at how to upload Twitch streams to YouTube and build your platform.

In this article
02 What is the benefit of uploading your Twitch Streams to YouTube
03 How to upload your Twitch Streams to YouTube
What is Twitch VOD?
Twitch Video on Demand (VOD) is a recording of previously streamed content. It provides briefings if you missed catching the Twitch live stream. Just watch the VOD from your favorite streamer and be engaged the best way possible. However, VODs don’t last forever. They are removed after two weeks of broadcast. But streamers with Partner Status can have their VODs last up to 60 days.
- How to enable Twitch VOD?
VODs are the best form to archive streams that your fans missed. Even though they are not enabled by default, you can manually enable them and not let your fans miss any important event from your channel. They’ll find it under the “Videos” tab on any Twitch channel. Follow these steps to enable VOD on your channel.
Step 1. Go to your profile icon in the top right corner of Twitch
Check in the “Channel & Video” section and locate the “Stream Key & Preferences” menu.

Step 2. Click on “Creator Dashboard”
Remember, you can enable VODs from your creator dashboard. Just go under the “Settings” tab and click on the “Stream section” of the creator dashboard. Check under the subtitle “VOD Settings” and get the option to store past broadcasts. You can also toggle the slider to store your past broadcasts.

Step 3 Click on the “Settings” tab on the left-hand side and go to Stream
You’ll get various drop-down menu options. Click on the “Settings” tab and choose the “Stream” option. The system will navigate to a new page, thus setting your preferences for VODs and clips.
Step 4. Go to “VOD Settings” and toggle on the “Store Past Broadcast.”
Ensure you have the toggle option turned ON under the “VOD Settings.” If it’s “ON,” you’ll realize the toggle will be purple, with a checkmark in it. Twitch will be confirmed to be enabled if it’s purple.

- Frequently Asked Question about Twitch VOD
These are some questions frequently asked by Twitch users.
1. How long will Twitch store my VOD
Your Twitch can either be stored for 14 or 60 days, depending on your level. For Twitch Prime, Twitch Partner or a Twitch Turbo user has their past broadcasts automatically saved for 60 days before deletion. But if you are not connected to these three options, your past broadcasts will be saved for only 14 days before deletion.
Since your past broadcasts cannot be live for more than 60 days, you have the option to download the video to your computer before the validity days expire and Twitch deletes it. You can use an External Hard drive to save the past broadcast content. Likewise, it is possible to turn your past broadcast content into Highlight and, in turn, permanently store them on Twitch.
2. What is the difference between Twitch VOD, Highlights, and Clips
Twitch VOD is a previously saved video of your live stream content. You choose to save either part or the entire content of your previously streamed content. More so, you don’t need any additional requirements to use VOD.
Highlights are short videos that have been edited from your past broadcast content. You can save them on Twitch permanently. Streamers majorly use highlights to save video game achievements. Unlike VOD Twitch that can be saved up to 60 days, Highlights usually lasts no more than 3 minutes.
- To make Highlights on Twitch, first, navigate to your Dashboard.
- Then scroll down and click on “Content” > “Video Producer.
- Next, press on “All Videos” to change them to “Past Broadcasts.”
- Now press the “Highlight” button, and Twitch will immediately open a new tab for “Twitch Highlighter Tool.”
- Then select the video part to include as “Highlight” and press the “Create Highlights” button.
- Wait a while for the process to be completed, and Voila! You have your Highlights created.
When it comes to Twitch Clip, you can capture special moments in a stream you are currently watching. On the same note, you can share clips with friends and other users on social media platforms. Such shared clips contain a link where others view the source or video from.
The clips you create will automatically be saved on the streamer’s channel on the “Clips” page, where other viewers can see them too. Nonetheless, you can download “clips” to your computer and, in turn, upload them whenever you want to. And note that you can help your stream grow via “Clips” by letting your viewers clip and share your stream moments.
- To create “Clips” on Twitch, identify which Streamers channel you wish to create a clip from.
- Then click on the “Clapper board” icon. Next, edit your clip between 5 and 60 seconds long.
- Finally, create a title and publish your Clip. You’ll also enjoy the privilege to share your clip’s link to other social media networks.
What is the benefit of uploading your Twitch Streams to YouTube
You stand to gain a lot when you upload your Twitch Streams to YouTube.
1) To enlighten your followers
Your followers will see your streams and make the best decisions. Viewers can check out your recordings and other highlights from past streams. It will help them decide whether they like what they see and probably join your live streams.
2) Twitch provides content for you to share and monetize on YouTube
Since Twitch streaming is more popular nowadays, many people throng it for content. It is not wise to rely entirely on Twitch to discover as a Twitch Streamer. Posting to YouTube will make it known within a short time. You would have announced your streams most nobly and kept your followers up to date, attracting new ones as well.
3) To keep your followers engaged even when you are offline
Even though live streaming is important, some viewers may not attend the live sessions due to different time zones or other commitments. In this regard, when uploaded to YouTube, Twitch will give them a chance to watch your content just whenever they log in. They, therefore, have the option to watch a Twitch VOD of the live stream they missed.
How to upload your Twitch Streams to YouTube
Check how to upload Twitch streams to YouTube from the Twitch website.
Step 1. Identify the little arrow next to your name on the Twitch website and click on it. Then click on the “Video Producer” to take you to a list of your Twitch videos.

Step 2. Check out and click on the “three-dots” on the video you wish to upload to YouTube. Click on the “Export” tab.
Step 3. A menu will then pop up. Here, you can fill in the description, title, and tags that you would like to appear on the YouTube video. There is an option for Twitch to split your video automatically. If you wish so, then tick the “Checkbox” to enable it. Then click on the “Start Export” option to export your Twitch streams to YouTube.

Bouns! Edit Your Twitch Video with Filmora
The quality of your video matters when it comes to uploading Twitch Streams to YouTube. Using a third-party tool to edit your video is the first step in ensuring your videos communicate meaningful content. Filmora comes in handy to bring your imaginations to life. Use it for simple creation without limits, even for beginners.
- Use it to track moving objects in video clips
- Easily match any image of the selected clip
- Its powerful tools let you edit your video by cropping, splitting, adjusting speed, etc
- The video keyframe easily indicates the beginning and end of the parameters
For Win 7 or later (64-bit)
For macOS 10.12 or later
Conclusion
● Don’t just focus on how to upload Twitch streams to YouTube but also consider the quality of video you are posting to YouTube. Remember, your video quality will speak much more of you than any other description. So, strive to produce quality videos using the best tool, Filmora. The app is easy to use and will elevate your views and imaginations through your video in the most impactful way.
Amidst many online applications is Twitch. This live streaming platform takes your experience to another level. You can use it to make crafts, play games, attract broadcasters, and many more. Twitch was launched in 2011, and since then, it has attracted millions of users, managing a database of about 4 million broadcasters by early 2020. With it, users can stream their activities as others watch in real-time. Just browse a category to find a stream.
You can also follow streamers that you like on the platform and get updates and notifications immediately after they are posted. But how do you start a career on a platform like Twitch? You need to broadcast and gather a large following. You can use built-in audiences from other platforms like Facebook. Let’s dive into the core of the matter and look at how to upload Twitch streams to YouTube and build your platform.
In this article
02 What is the benefit of uploading your Twitch Streams to YouTube
03 How to upload your Twitch Streams to YouTube
What is Twitch VOD?
Twitch Video on Demand (VOD) is a recording of previously streamed content. It provides briefings if you missed catching the Twitch live stream. Just watch the VOD from your favorite streamer and be engaged the best way possible. However, VODs don’t last forever. They are removed after two weeks of broadcast. But streamers with Partner Status can have their VODs last up to 60 days.
- How to enable Twitch VOD?
VODs are the best form to archive streams that your fans missed. Even though they are not enabled by default, you can manually enable them and not let your fans miss any important event from your channel. They’ll find it under the “Videos” tab on any Twitch channel. Follow these steps to enable VOD on your channel.
Step 1. Go to your profile icon in the top right corner of Twitch
Check in the “Channel & Video” section and locate the “Stream Key & Preferences” menu.
Step 2. Click on “Creator Dashboard”
Remember, you can enable VODs from your creator dashboard. Just go under the “Settings” tab and click on the “Stream section” of the creator dashboard. Check under the subtitle “VOD Settings” and get the option to store past broadcasts. You can also toggle the slider to store your past broadcasts.
Step 3 Click on the “Settings” tab on the left-hand side and go to Stream
You’ll get various drop-down menu options. Click on the “Settings” tab and choose the “Stream” option. The system will navigate to a new page, thus setting your preferences for VODs and clips.
Step 4. Go to “VOD Settings” and toggle on the “Store Past Broadcast.”
Ensure you have the toggle option turned ON under the “VOD Settings.” If it’s “ON,” you’ll realize the toggle will be purple, with a checkmark in it. Twitch will be confirmed to be enabled if it’s purple.
- Frequently Asked Question about Twitch VOD
These are some questions frequently asked by Twitch users.
1. How long will Twitch store my VOD
Your Twitch can either be stored for 14 or 60 days, depending on your level. For Twitch Prime, Twitch Partner or a Twitch Turbo user has their past broadcasts automatically saved for 60 days before deletion. But if you are not connected to these three options, your past broadcasts will be saved for only 14 days before deletion.
Since your past broadcasts cannot be live for more than 60 days, you have the option to download the video to your computer before the validity days expire and Twitch deletes it. You can use an External Hard drive to save the past broadcast content. Likewise, it is possible to turn your past broadcast content into Highlight and, in turn, permanently store them on Twitch.
2. What is the difference between Twitch VOD, Highlights, and Clips
Twitch VOD is a previously saved video of your live stream content. You choose to save either part or the entire content of your previously streamed content. More so, you don’t need any additional requirements to use VOD.
Highlights are short videos that have been edited from your past broadcast content. You can save them on Twitch permanently. Streamers majorly use highlights to save video game achievements. Unlike VOD Twitch that can be saved up to 60 days, Highlights usually lasts no more than 3 minutes.
- To make Highlights on Twitch, first, navigate to your Dashboard.
- Then scroll down and click on “Content” > “Video Producer.
- Next, press on “All Videos” to change them to “Past Broadcasts.”
- Now press the “Highlight” button, and Twitch will immediately open a new tab for “Twitch Highlighter Tool.”
- Then select the video part to include as “Highlight” and press the “Create Highlights” button.
- Wait a while for the process to be completed, and Voila! You have your Highlights created.
When it comes to Twitch Clip, you can capture special moments in a stream you are currently watching. On the same note, you can share clips with friends and other users on social media platforms. Such shared clips contain a link where others view the source or video from.
The clips you create will automatically be saved on the streamer’s channel on the “Clips” page, where other viewers can see them too. Nonetheless, you can download “clips” to your computer and, in turn, upload them whenever you want to. And note that you can help your stream grow via “Clips” by letting your viewers clip and share your stream moments.
- To create “Clips” on Twitch, identify which Streamers channel you wish to create a clip from.
- Then click on the “Clapper board” icon. Next, edit your clip between 5 and 60 seconds long.
- Finally, create a title and publish your Clip. You’ll also enjoy the privilege to share your clip’s link to other social media networks.
What is the benefit of uploading your Twitch Streams to YouTube
You stand to gain a lot when you upload your Twitch Streams to YouTube.
1) To enlighten your followers
Your followers will see your streams and make the best decisions. Viewers can check out your recordings and other highlights from past streams. It will help them decide whether they like what they see and probably join your live streams.
2) Twitch provides content for you to share and monetize on YouTube
Since Twitch streaming is more popular nowadays, many people throng it for content. It is not wise to rely entirely on Twitch to discover as a Twitch Streamer. Posting to YouTube will make it known within a short time. You would have announced your streams most nobly and kept your followers up to date, attracting new ones as well.
3) To keep your followers engaged even when you are offline
Even though live streaming is important, some viewers may not attend the live sessions due to different time zones or other commitments. In this regard, when uploaded to YouTube, Twitch will give them a chance to watch your content just whenever they log in. They, therefore, have the option to watch a Twitch VOD of the live stream they missed.
How to upload your Twitch Streams to YouTube
Check how to upload Twitch streams to YouTube from the Twitch website.
Step 1. Identify the little arrow next to your name on the Twitch website and click on it. Then click on the “Video Producer” to take you to a list of your Twitch videos.
Step 2. Check out and click on the “three-dots” on the video you wish to upload to YouTube. Click on the “Export” tab.
Step 3. A menu will then pop up. Here, you can fill in the description, title, and tags that you would like to appear on the YouTube video. There is an option for Twitch to split your video automatically. If you wish so, then tick the “Checkbox” to enable it. Then click on the “Start Export” option to export your Twitch streams to YouTube.
Bouns! Edit Your Twitch Video with Filmora
The quality of your video matters when it comes to uploading Twitch Streams to YouTube. Using a third-party tool to edit your video is the first step in ensuring your videos communicate meaningful content. Filmora comes in handy to bring your imaginations to life. Use it for simple creation without limits, even for beginners.
- Use it to track moving objects in video clips
- Easily match any image of the selected clip
- Its powerful tools let you edit your video by cropping, splitting, adjusting speed, etc
- The video keyframe easily indicates the beginning and end of the parameters
For Win 7 or later (64-bit)
For macOS 10.12 or later
Conclusion
● Don’t just focus on how to upload Twitch streams to YouTube but also consider the quality of video you are posting to YouTube. Remember, your video quality will speak much more of you than any other description. So, strive to produce quality videos using the best tool, Filmora. The app is easy to use and will elevate your views and imaginations through your video in the most impactful way.
Conquering the Fan Base: YouTube’s Pathway to More Followers
How to Get More Subscribers on YouTube

Richard Bennett
Mar 27, 2024• Proven solutions
Working hard to produce exciting, informative and beautiful YouTube videos only to miss out on the exposure you’re hoping for can be very demoralizing, and many people give up the practice of video production after failing to generate interest in their work.
However, don’t accept defeat just yet if you’re not quite getting the numbers you’ve been aiming for. Take these steps to if you need to get subscribers for YouTube videos. Read on to find out more about the best ways to attract new YouTube subscribers for your online video channel.
- Part 1: How to Get More Subscribers on YouTube for Beginners
- Part 2: How to Get More Subscribers on YouTube for Pros
- Part 3: How to Get Free YouTube Subscribers [With Proven Methods]
Part 1: How to Get More Subscribers on YouTube for Beginners
1. Be Real and Approachable
You should always be yourself when you vlog. People will subscribe when they feel invested in you as a person, and that happens when they feel like you are being sincere. You do not need to share all of your innermost secrets on your vlog, but you should let your viewers feel like they know you.
2. Don’t forget to add a call to action
Some people need to be prompted to subscribe to your channel, no matter how much they enjoy your content. At the end of all your videos, ask your viewers to subscribe to your channel and like your social media page.
Don’t forget to explain the benefits of subscribing to them, such as to benefit from your informative tips and gain a deeper insight into your projects. If you have any interesting videos in the pipeline, let them know about them.
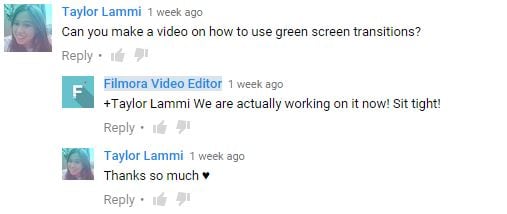
3. Listen To Your Subscribers
It feels nice to get positive comments on your videos. If people feel comfortable enough to leave you suggestions and requests then that is even better. It means that you have succeeded in making them feel like they are part of your community.
If you get a video request, try to do it. People like to feel that you are open to trying the things they want to see. However, there are also times when you should just ignore requests and suggestions. If the majority of your subscribers enjoy your jokes and you get one comment telling you to stop trying to be funny then it is fairly obvious that that ‘suggestion’ does not really reflect the wishes of your community.
4. Optimize your title
Try not to underestimate the importance of a great eye-catching title. Include relevant words and phrases that you think people will search for and don’t just hastily add the first title that comes into your head. The better your title is, the more viewers and subscribers you are likely to amass.
5. Be Patient
Almost all vlogs grow slowly at first; the first 1000 subscribers take the longest to get. It takes a lot of patience to keep producing content on a regular schedule when it seems like not many people are watching, but you need to stick with it in order to grow.
Part 2: How to Get more Subscribers on YouTube for Pros
1. Set goals
You can gain extra drive and momentum by setting yourself attainable goals and encouraging your followers to help you achieve them. These goals can include milestones such as reaching 500 followers, 1,000 followers and so on. Don’t hesitate to tell your viewers about these goals – if they think your content is of real value, chances are they will be only too happy to assist you.
2. Contests can be funny – why not enter one?
One way to increase subscribers is to take part in a contest. A site called Gleam can oversee a contest for you. It’s up to you to choose how you want the contest to work, and you can gain an edge over your competitors by getting people to leave comments, follow you on Instagram, subscribe to your channel and more.
You will be provided with a landing page for promoting your channel, and you can share this in a variety of places, including on your Facebook, Twitter and blog. The best way to heighten your chances of success is to have a clear goal in mind.

3. Make a trailer
YouTube’s channel interface allows you to add a trailer to entice viewers into watching your videos and following you on the platform. Your trailer gives you a valuable opportunity to quickly explain what your channel is all about and what the benefits of following you are.
Don’t waffle on – try to get your clip down to 90 seconds maximum. Include clips from your videos and don’t forget to add a strong call to action at the end. The more effort you put into your videos, the bigger the rewards are likely to become. And here are some of the best trailer makers that you can use on both Windows and Mac .

4. Make a Schedule and Stick To It
You want to vlog at least once a week, and making a schedule will help you keep on top of that. It will also give your subscribers a chance to anticipate your videos and get excited. They are more likely to watch an update they have been expecting than one that was not already on their minds.
Sticking to your schedule is a good wait to build up credibility with your audience, but late or skipped updates will cause you to lose that credibility. If you do not post for a month then people who already subscribed to you might still ignore your update because it has been too long and they forgot about you.
5. Collaborate With Other Vloggers
Collaboration videos are always big hits. When you collaborate with another vlogger you are essentially introducing each other to your subscribers. This is a great way to grow your community quickly: by connecting it to another community.
Collaborations work best when the other vlogger is located close enough to you that you can actually meet up, but you can do distance collaborations too. When you collaborate you and the other vlogger should have close to the same number of subscribers, so the video will benefit you both equally.

Bonus: How to Get Free YouTube Subscribers [6 Proven Methods]
There are lots of ways to get free YouTube subscribers. This proven method involves networking with other creators! Making your presence felt on YouTube is an important part of creating your network of subscribers that watch, share and talk about your videos. Interaction with your subscribers, reaching new audiences every day, and a plethora of other factors influence how well your YouTube channel is doing.
In this part, we will show you how you can build your own network of loyal YouTube supporters and prove that you don’t need the services of paid providers who promise better reach for your channel.
1. Find YouTubers in your niche
The first step to building an enviable army of YouTube subscribers starts with the realization that you are not alone. Regardless of the niche, your videos are covering, there are probably thousands of people who are just starting out or that have as many subscribers as your YouTube channel. Focus on finding them. You may even want to make a list.
2. Subscribe to YouTube channels you really like
Of the channels you found in Step 1, choose the ones you genuinely like and subscribe to them.
It goes without saying that everyone enjoys support, especially if you are not asking for anything in return. By subscribing to YouTube channels in your genre you appreciate, you will make yourself known to the channel’s owner, and there is a chance they will check out and subscribe to your channel.
3. Spend time watching videos each day
Knowledge is power and, if you want to attract real people to your channel, you should learn how to use your knowledge to your advantage. By paying attention to other new videos in your genre you’ll gain insight into what is going over well with audiences like yours, and what isn’t.
Also, be especially sure to watch videos from those channels you found in Step 1 and subscribed to in Step 2. Try to watch at least two minutes of content from those channels whenever they upload.
4. Comment thoughtfully. Don’t ask for anything in return
Most YouTubers are delighted to hear someone else’s positive opinion or constructive criticism regarding their work. The reason you are watching 2 minutes of content per video in Step 3 is so that you will really have something to say in this step.
If you do make a thoughtful comment, and especially if you use the time stamp of the part of the video you’re referring to, the video creator will know you have watched the video and that you are not just another spammer. Avoid the sub-4-sub strategy, and don’t be the person who’s always saying ‘Subscribe to my channel’. You will be ignored by both the creator and other viewers, and the creator will find you annoying. However, if you comment regularly without asking for anything, the creator and some of their viewers will naturally decide to check out your channel.
5. Reach out on social media
YouTube is just one out of many channels through which you can reach like-minded people. Facebook, Instagram, Pinterest or any other social network can help you network with other creators and potential subscribers. Create accounts on social networks you find the most suitable for your video category and share links to your videos on these accounts as often as you can. Furthermore, if you try to foster real discussions about topics that are relevant, people who get to know you through these other platforms will probably decide to check out your YouTube channel.
Social media is also a great place to reach out to other creators, whether it’s for collabs or just to chat about doing YouTube.
6. Do it all again. And again. And again
You aren’t going to see great results overnight. You have to spend time almost every day repeating the steps we just described. This might seem intimidating, but as time passes it will become routine.
When you build your presence on YouTube in this way, other creators and their subscribers will naturally start becoming your subscribers. What’s your best tip for free YouTube subscribers?
Conclusion
Some people might need to watch multiple videos by you before they decide they want to subscribe. If you stop making videos because you did not get any subscribers or comments on your first few then chances are there were people who were paying attention who may have subscribed if you had kept at it.


Richard Bennett
Richard Bennett is a writer and a lover of all things video.
Follow @Richard Bennett
Richard Bennett
Mar 27, 2024• Proven solutions
Working hard to produce exciting, informative and beautiful YouTube videos only to miss out on the exposure you’re hoping for can be very demoralizing, and many people give up the practice of video production after failing to generate interest in their work.
However, don’t accept defeat just yet if you’re not quite getting the numbers you’ve been aiming for. Take these steps to if you need to get subscribers for YouTube videos. Read on to find out more about the best ways to attract new YouTube subscribers for your online video channel.
- Part 1: How to Get More Subscribers on YouTube for Beginners
- Part 2: How to Get More Subscribers on YouTube for Pros
- Part 3: How to Get Free YouTube Subscribers [With Proven Methods]
Part 1: How to Get More Subscribers on YouTube for Beginners
1. Be Real and Approachable
You should always be yourself when you vlog. People will subscribe when they feel invested in you as a person, and that happens when they feel like you are being sincere. You do not need to share all of your innermost secrets on your vlog, but you should let your viewers feel like they know you.
2. Don’t forget to add a call to action
Some people need to be prompted to subscribe to your channel, no matter how much they enjoy your content. At the end of all your videos, ask your viewers to subscribe to your channel and like your social media page.
Don’t forget to explain the benefits of subscribing to them, such as to benefit from your informative tips and gain a deeper insight into your projects. If you have any interesting videos in the pipeline, let them know about them.
3. Listen To Your Subscribers
It feels nice to get positive comments on your videos. If people feel comfortable enough to leave you suggestions and requests then that is even better. It means that you have succeeded in making them feel like they are part of your community.
If you get a video request, try to do it. People like to feel that you are open to trying the things they want to see. However, there are also times when you should just ignore requests and suggestions. If the majority of your subscribers enjoy your jokes and you get one comment telling you to stop trying to be funny then it is fairly obvious that that ‘suggestion’ does not really reflect the wishes of your community.
4. Optimize your title
Try not to underestimate the importance of a great eye-catching title. Include relevant words and phrases that you think people will search for and don’t just hastily add the first title that comes into your head. The better your title is, the more viewers and subscribers you are likely to amass.
5. Be Patient
Almost all vlogs grow slowly at first; the first 1000 subscribers take the longest to get. It takes a lot of patience to keep producing content on a regular schedule when it seems like not many people are watching, but you need to stick with it in order to grow.
Part 2: How to Get more Subscribers on YouTube for Pros
1. Set goals
You can gain extra drive and momentum by setting yourself attainable goals and encouraging your followers to help you achieve them. These goals can include milestones such as reaching 500 followers, 1,000 followers and so on. Don’t hesitate to tell your viewers about these goals – if they think your content is of real value, chances are they will be only too happy to assist you.
2. Contests can be funny – why not enter one?
One way to increase subscribers is to take part in a contest. A site called Gleam can oversee a contest for you. It’s up to you to choose how you want the contest to work, and you can gain an edge over your competitors by getting people to leave comments, follow you on Instagram, subscribe to your channel and more.
You will be provided with a landing page for promoting your channel, and you can share this in a variety of places, including on your Facebook, Twitter and blog. The best way to heighten your chances of success is to have a clear goal in mind.
3. Make a trailer
YouTube’s channel interface allows you to add a trailer to entice viewers into watching your videos and following you on the platform. Your trailer gives you a valuable opportunity to quickly explain what your channel is all about and what the benefits of following you are.
Don’t waffle on – try to get your clip down to 90 seconds maximum. Include clips from your videos and don’t forget to add a strong call to action at the end. The more effort you put into your videos, the bigger the rewards are likely to become. And here are some of the best trailer makers that you can use on both Windows and Mac .
4. Make a Schedule and Stick To It
You want to vlog at least once a week, and making a schedule will help you keep on top of that. It will also give your subscribers a chance to anticipate your videos and get excited. They are more likely to watch an update they have been expecting than one that was not already on their minds.
Sticking to your schedule is a good wait to build up credibility with your audience, but late or skipped updates will cause you to lose that credibility. If you do not post for a month then people who already subscribed to you might still ignore your update because it has been too long and they forgot about you.
5. Collaborate With Other Vloggers
Collaboration videos are always big hits. When you collaborate with another vlogger you are essentially introducing each other to your subscribers. This is a great way to grow your community quickly: by connecting it to another community.
Collaborations work best when the other vlogger is located close enough to you that you can actually meet up, but you can do distance collaborations too. When you collaborate you and the other vlogger should have close to the same number of subscribers, so the video will benefit you both equally.
Bonus: How to Get Free YouTube Subscribers [6 Proven Methods]
There are lots of ways to get free YouTube subscribers. This proven method involves networking with other creators! Making your presence felt on YouTube is an important part of creating your network of subscribers that watch, share and talk about your videos. Interaction with your subscribers, reaching new audiences every day, and a plethora of other factors influence how well your YouTube channel is doing.
In this part, we will show you how you can build your own network of loyal YouTube supporters and prove that you don’t need the services of paid providers who promise better reach for your channel.
1. Find YouTubers in your niche
The first step to building an enviable army of YouTube subscribers starts with the realization that you are not alone. Regardless of the niche, your videos are covering, there are probably thousands of people who are just starting out or that have as many subscribers as your YouTube channel. Focus on finding them. You may even want to make a list.
2. Subscribe to YouTube channels you really like
Of the channels you found in Step 1, choose the ones you genuinely like and subscribe to them.
It goes without saying that everyone enjoys support, especially if you are not asking for anything in return. By subscribing to YouTube channels in your genre you appreciate, you will make yourself known to the channel’s owner, and there is a chance they will check out and subscribe to your channel.
3. Spend time watching videos each day
Knowledge is power and, if you want to attract real people to your channel, you should learn how to use your knowledge to your advantage. By paying attention to other new videos in your genre you’ll gain insight into what is going over well with audiences like yours, and what isn’t.
Also, be especially sure to watch videos from those channels you found in Step 1 and subscribed to in Step 2. Try to watch at least two minutes of content from those channels whenever they upload.
4. Comment thoughtfully. Don’t ask for anything in return
Most YouTubers are delighted to hear someone else’s positive opinion or constructive criticism regarding their work. The reason you are watching 2 minutes of content per video in Step 3 is so that you will really have something to say in this step.
If you do make a thoughtful comment, and especially if you use the time stamp of the part of the video you’re referring to, the video creator will know you have watched the video and that you are not just another spammer. Avoid the sub-4-sub strategy, and don’t be the person who’s always saying ‘Subscribe to my channel’. You will be ignored by both the creator and other viewers, and the creator will find you annoying. However, if you comment regularly without asking for anything, the creator and some of their viewers will naturally decide to check out your channel.
5. Reach out on social media
YouTube is just one out of many channels through which you can reach like-minded people. Facebook, Instagram, Pinterest or any other social network can help you network with other creators and potential subscribers. Create accounts on social networks you find the most suitable for your video category and share links to your videos on these accounts as often as you can. Furthermore, if you try to foster real discussions about topics that are relevant, people who get to know you through these other platforms will probably decide to check out your YouTube channel.
Social media is also a great place to reach out to other creators, whether it’s for collabs or just to chat about doing YouTube.
6. Do it all again. And again. And again
You aren’t going to see great results overnight. You have to spend time almost every day repeating the steps we just described. This might seem intimidating, but as time passes it will become routine.
When you build your presence on YouTube in this way, other creators and their subscribers will naturally start becoming your subscribers. What’s your best tip for free YouTube subscribers?
Conclusion
Some people might need to watch multiple videos by you before they decide they want to subscribe. If you stop making videos because you did not get any subscribers or comments on your first few then chances are there were people who were paying attention who may have subscribed if you had kept at it.
Richard Bennett
Richard Bennett is a writer and a lover of all things video.
Follow @Richard Bennett
Also read:
- Direct Conversion Convert & Upload MP3 Songs on YouTube
- [Updated] Epic Battle Royale Thumbnails, Done Fast
- In 2024, Boost Engagement Discover the Top 5 YouTube Promotion Tactics
- [New] A Deep Dive Into Creating Compelling Unboxing Sequences
- The Full-Time Employee's Guide to Video Content Success
- Shedding Light on Videography Excellence
- Echoing Ethos with Closing Credits
- Charting the Course for Profitable Youtube Videos for 2024
- The Frequency of Monetization on YouTube
- The Formula for Fast-Tracking to a Thousand Subscribers
- [Updated] Captivating Your Audience YouTube Intro Excellence with iMovie
- [Updated] Enhancing Your YouTube Content Basic Premiere Pro Edits
- [Updated] Dive Into Video Production Mastering Green Screens on YT
- [New] Essential Knowledge for Engaging with ASMR Videos
- Steer Clear of Obscurity Secure a Top Spot with YouTube SEO Tips
- [Updated] Elevate Your Channel's Popularity with 12 Key Growth Techniques
- Revamping YouTube Videos with Smart Post-Upload Techniques
- Identifying and Accessing Your Music Picks on Youtube
- Best 10 Volume Elevators for Windows, iOS & Android for 2024
- [Updated] 8 Best YouTube Video Promotion Services (Real)
- [Updated] 3-Step Financial Forecasting Assessing Revenue From Google's Platform, YouTube
- Unlocking the Mysteries of Proper YouTube Channel Monetization
- Snappy Vids Guide Essential Info
- Your Guide to Premium YouTube Music Groups
- 2024 Approved Demystifying Creator Studio A Practical Handbook
- 2024 Approved Elevating Creative Content Vimeo vs YouTube's Approach
- [Updated] Become a Trending Sensation with These Effective YouTube SEO Strategies
- In 2024, Discover Powerful Tagging Tactics A Guide to Amplifying FreeGame Content
- Pro Stream Picks Expertly Chosen Hardware & Software Combo
- Discover 8 YouTube Thumbnail Generators Online
- 2024 Approved Digital Dominion for Techno Gamers
- [Updated] Building a Strong Foundation for Advertising Deals Using FameBit Methods
- In 2024, Boosting Channel Earnings The Step-by-Step FameBit Guide to Affiliates
- Avoiding the Common Path The Route to Unique Streamer Identities for 2024
- [New] Artistic Additions Free Designs for YouTube Crafting
- A New Take on Favorite Movies - #7 Alternatives for 2024
- [New] A Compreenas Guide to Choosing Ideal Lenses for Filmmaking
- How to Upload Your Music to YouTube
- Revenue Realms of YouTube From Virtual Viewership to Banknotes
- Defeating Dissidence A Guide for Content Makers
- Channel Exploration Guide The Best Historical YouTube Selections for Students for 2024
- Efficiently Shortening YouTube Content
- 2024 Approved Cutting-Edge Techniques Elevating Your YouTube Edits Using iMovie
- In 2024, Behind the Scenes Changing Video Pace in Social Media
- How to Unlock a Network Locked Realme GT 5 Pro Phone?
- [Updated] In 2024, Step-Into Style with Snapchat's GIF Features – A User’s Guide
- iSpoofer is not working On Realme Narzo 60 5G? Fixed | Dr.fone
- QuickTakes Why Videos Thrive on Twitter' Writes for 2024
- How Do You Remove Restricted Mode on iPhone SE (2020)
- In 2024, Meizu 21 ADB Format Tool for PC vs. Other Unlocking Tools Which One is the Best?
- How To Fix Apple ID Verification Code Not Working From iPhone 14
- [Updated] In 2024, Chuckle & Cry The Top Instagram Memes that Make You Giggle
- How To Change Motorola Edge 2023 Lock Screen Clock in Seconds
- Identify some outdated hardware drivers with Windows Device Manager in Windows 10
- Prime Chrome Enhancements Accelerated Vimeo Access
- [Updated] In 2024, Win10's Elite Screen Capture Selection
- In 2024, For People Wanting to Mock GPS on Poco F5 5G Devices | Dr.fone
- Mobile Video Editing Best Apps to Blur Unwanted Parts
- Forgot Pattern Lock? Heres How You Can Unlock Honor X8b Pattern Lock Screen
- What are Location Permissions Life360 On ZTE Nubia Flip 5G? | Dr.fone
- In 2024, Perfect Your Sound Game with These Step-by-Step TikTok Tips
- In 2024, How to Share Screen on Discord?
- Updated Top 40 Keyboard Shortcuts for Final Cut Pro X
- How to Unlock Xiaomi Redmi Note 13 5G Phone without Google Account?
- Updated In 2024, VN Video Editor For PC - A Brief Review
- In 2024, 5 Easy Ways to Change Location on YouTube TV On Honor Magic Vs 2 | Dr.fone
- [New] A Closer Look at Twitter's Most Shared Videos of 2023
- How to Adjust Audio Volume in Videos 4 Ways
- 2024 Approved Remedying No Audio in OBS Sessions
- Updated Best 7 Practical, Cost-Free Ways to Improve Your Digital Vocal Effects for 2024
- How to Curate Christian Chimes for Devotion
- [Updated] 2024 Approved A Step-by-Step Process for Twitch Streamers
- [Updated] 2024 Approved Instagram Videography Size Guide - Ready
- [Updated] Enhancing Your Digital Presence FB Video Creation Basics for 2024
- 2024 Approved OBS Studio Guide 5 Key Edits for Flawless Results
- [Updated] Twitter Marketing 101 Step-by-Step Guide
- In 2024, How to Transfer from Apple iPhone SE to iPhone 8/X/11 | Dr.fone
- In 2024, Strategizing the Use of Silence and Sound for Heightened Emotional Engagement in Films
- Updated Transforming Music Production in Logic Pro X with These Essential Plugin Tools (Free/Paid)
- New MP3 Speech-to-Text Conversion Explained 3 Streamlined Online Approaches for 2024
- New 2024 Approved The Puzzle of Production Piecing Together Roles for an Immersive Filming Experience
- [Updated] In 2024, Exploring the Essence of Vimeo A Leader in Video Platforms
- [Updated] 2024 Approved Personalizing Call Screens The Pre/Post-Meeting Edge
- The Ultimate Pixel Prospects - Top 7 Monitors For Photoshop, 2024
- [Updated] In 2024, Key Points to Understand TikTok Web (macOS)
- Title: [New] Enhancing Social Media Reach by Uploading to YouTube via Twitch
- Author: Brian
- Created at : 2024-06-18 11:31:43
- Updated at : 2024-06-19 11:31:43
- Link: https://youtube-video-recordings.techidaily.com/new-enhancing-social-media-reach-by-uploading-to-youtube-via-twitch/
- License: This work is licensed under CC BY-NC-SA 4.0.
