![[New] Efficiently Implementing Youtube End Screens](https://thmb.techidaily.com/e8b3883133d6f512c5920076f733b9da53c8a6ea2a98528d0cbb835531035bed.jpg)
[New] Efficiently Implementing Youtube End Screens
Efficiently Implementing Youtube End Screens
How to Add YouTube End Screen and Cards Effectively

Richard Bennett
Mar 27, 2024• Proven solutions
The traditional annotation’s features are replaced by its successor YouTube Cards and End Screen. The annotations performed poorly on mobile and thus, the new changes are for good. The annotations had become outdated and were completely unbefitting. On the contrary, the YouTube cards and end screen offers great access to both desktop and mobiles with easier and faster implementation. Are you still looking for Annotations? Stop your search and try considering YouTube end screen. In this article, learn how to use Youtube end screen and cards.
- Part1: Why You Need to Add End Screens To Videos
- Part2: How To Use Youtube End Screen
- Part3: How To Use Youtube Cards
Wondershare Filmstock Gaming Video Editing Skils ](https://filmstock.wondershare.com/creative-theme-game?source%5Fchannel=seo%5Farticle&spm=rs.filmora%5Fweb )
Part 1: Why You Need to Add End Screens and Cards to Videos
There are several reasons that make the YouTube end screen and cards a great tool when added to the videos. The new channel builtin features, donation choices, embedded polls and more are some of the best interactive and powerful features of YouTube end screen that’s when added to the video can drive in users to your channel. It is a strong tool to build viewership of your channel. When you use YouTube end screen at the end of the video, it helps in directing the users to other channels, playlists, and videos and also helps in promoting crowdfunding campaigns, merchandise and website. The YouTube end screen is a part of the video and to have an end screen on your video, it must be around 25seconds long.
Part 2: How To Use Youtube End Screen
Do you wish to add YouTube end screen to your video? Just follow the steps and get going.
- Go to Creator Studio and check the left side to find the Video Manager, click on it.
- Wherever you wish to add the end screen on the video, click on it.
- Click End Screen & Annotations at the top.
- From end screen and annotations, you can add or configure elements.
- Check how the end screen will appear to the visitors.
- Click on blue color add element’s button to find four options available there:
Playlist or Videos- This element allows to play the suggested video on the same tab when the user clicks on it.
Subscribe- This allows the users to quickly subscribe to the channel. You may change the appearance of the icon and how your brand name looks.
Channel- Click on this element to promote other YouTube Channel. You may also customize it with a message.
Link- This element helps in sending the users directly to your website. Although, Google has restricted other link addition in the video. In order to add, you must have an Adsense account and permit monetization.
Part 3: How To Use Youtube Cards
YouTube Cards is more interactive. Users can add images and other linkes. Here are the steps.
- Click on the “Video Manager” tab.
- If you want to add cards, Click “Edit” tab under it. Then click “cards”.
- Choose the cards type you want to make on “Add Card” drop down menu.
- Click “create” button. Select the timeline. In the end, apply.
The types of YouTube cards
- Video or playlist: links to other videos/the complete palylist on YouTube related or non-related to that specific videolinks to further purchase websites or specific product.
- Channel: promote another YouTube channel, one of the most common methods to collaborate with other YouTubers
- Poll: Encourage viewers to participate in a poll (vote)
- Link: links to a website which compliments whatever content is in the video.
4 Tips for Using YouTube Cards
1. You might be used to pointing to the part of your screen where you intend to put an annotation, but when you use YouTube Cards they might switch locations depending on what device a viewer is watching on.
2. Use three or less cards per video. Viewers are more likely to click your cards if there are fewer of them, and more likely to start ignoring them if it seems like they’re always popping up. Also, do not have all three of these cards appear at once and make people choose between them. Stagger them throughout your video.
3. Your cards should be related to what you are saying in your vlog. Avoid posting completely random links in the middle of your video because a viewer who clicks on them will get confused. You can post any type of link you want at the very end of your video, though.
4. The end of your video is always a great place to link viewers to another of your videos, whether you use a card or an end screen. If somebody liked your video enough to watch until the end they’ll probably welcome a chance to consume similar content.
Conclusion
Now, that you are aware how to add YouTube end screen to your video, make use of the amazing features of YouTube end screen and cards and let driving in traffic to your site be easy and fruitful.
Richard Bennett
Richard Bennett is a writer and a lover of all things video.
Follow @Richard Bennett
Richard Bennett
Mar 27, 2024• Proven solutions
The traditional annotation’s features are replaced by its successor YouTube Cards and End Screen. The annotations performed poorly on mobile and thus, the new changes are for good. The annotations had become outdated and were completely unbefitting. On the contrary, the YouTube cards and end screen offers great access to both desktop and mobiles with easier and faster implementation. Are you still looking for Annotations? Stop your search and try considering YouTube end screen. In this article, learn how to use Youtube end screen and cards.
- Part1: Why You Need to Add End Screens To Videos
- Part2: How To Use Youtube End Screen
- Part3: How To Use Youtube Cards
Wondershare Filmstock Gaming Video Editing Skils ](https://filmstock.wondershare.com/creative-theme-game?source%5Fchannel=seo%5Farticle&spm=rs.filmora%5Fweb )
Part 1: Why You Need to Add End Screens and Cards to Videos
There are several reasons that make the YouTube end screen and cards a great tool when added to the videos. The new channel builtin features, donation choices, embedded polls and more are some of the best interactive and powerful features of YouTube end screen that’s when added to the video can drive in users to your channel. It is a strong tool to build viewership of your channel. When you use YouTube end screen at the end of the video, it helps in directing the users to other channels, playlists, and videos and also helps in promoting crowdfunding campaigns, merchandise and website. The YouTube end screen is a part of the video and to have an end screen on your video, it must be around 25seconds long.
Part 2: How To Use Youtube End Screen
Do you wish to add YouTube end screen to your video? Just follow the steps and get going.
- Go to Creator Studio and check the left side to find the Video Manager, click on it.
- Wherever you wish to add the end screen on the video, click on it.
- Click End Screen & Annotations at the top.
- From end screen and annotations, you can add or configure elements.
- Check how the end screen will appear to the visitors.
- Click on blue color add element’s button to find four options available there:
Playlist or Videos- This element allows to play the suggested video on the same tab when the user clicks on it.
Subscribe- This allows the users to quickly subscribe to the channel. You may change the appearance of the icon and how your brand name looks.
Channel- Click on this element to promote other YouTube Channel. You may also customize it with a message.
Link- This element helps in sending the users directly to your website. Although, Google has restricted other link addition in the video. In order to add, you must have an Adsense account and permit monetization.
Part 3: How To Use Youtube Cards
YouTube Cards is more interactive. Users can add images and other linkes. Here are the steps.
- Click on the “Video Manager” tab.
- If you want to add cards, Click “Edit” tab under it. Then click “cards”.
- Choose the cards type you want to make on “Add Card” drop down menu.
- Click “create” button. Select the timeline. In the end, apply.
The types of YouTube cards
- Video or playlist: links to other videos/the complete palylist on YouTube related or non-related to that specific videolinks to further purchase websites or specific product.
- Channel: promote another YouTube channel, one of the most common methods to collaborate with other YouTubers
- Poll: Encourage viewers to participate in a poll (vote)
- Link: links to a website which compliments whatever content is in the video.

4 Tips for Using YouTube Cards
1. You might be used to pointing to the part of your screen where you intend to put an annotation, but when you use YouTube Cards they might switch locations depending on what device a viewer is watching on.
2. Use three or less cards per video. Viewers are more likely to click your cards if there are fewer of them, and more likely to start ignoring them if it seems like they’re always popping up. Also, do not have all three of these cards appear at once and make people choose between them. Stagger them throughout your video.
3. Your cards should be related to what you are saying in your vlog. Avoid posting completely random links in the middle of your video because a viewer who clicks on them will get confused. You can post any type of link you want at the very end of your video, though.
4. The end of your video is always a great place to link viewers to another of your videos, whether you use a card or an end screen. If somebody liked your video enough to watch until the end they’ll probably welcome a chance to consume similar content.
Conclusion
Now, that you are aware how to add YouTube end screen to your video, make use of the amazing features of YouTube end screen and cards and let driving in traffic to your site be easy and fruitful.
Richard Bennett
Richard Bennett is a writer and a lover of all things video.
Follow @Richard Bennett
The Editor’s Guide to Powerful Notebooks and More
The Best Laptops for Video Editing
Richard Bennett
Oct 26, 2023• Proven solutions
This article lists the 3 best laptops for video editing in 2018.
Whether you’re an industry professional or an avid YouTuber, you know how important it is to produce quality videos consistently.
The quality of the videos you create will depend on your creativity, the editing software you use, and the hardware that software is installed on. And as you probably know, it can be tough to work fast and get good results when your hardware or laptop isn’t strong enough to power your software properly and allow you to work at the pace you want.
The best laptops for video editing in 2018 have three things in common. First, they have top-of-the-line display technology for color accuracy, color depth, and clarity. Next, they have discrete (dedicated) Graphic Processing Units (GPUs) with accompanying RAM to enable them to handle video processing fast without compromising other system functions. And finally, they have Intel core i7 CPU processors and Solid-State Drives (SSD) for faster overall performance.
THE TOP 3 LAPTOPS FOR EDITING VIDEO IN 2018
The top 3 laptops below are quite impressive. They have the right mix of power and function that video editing requires.
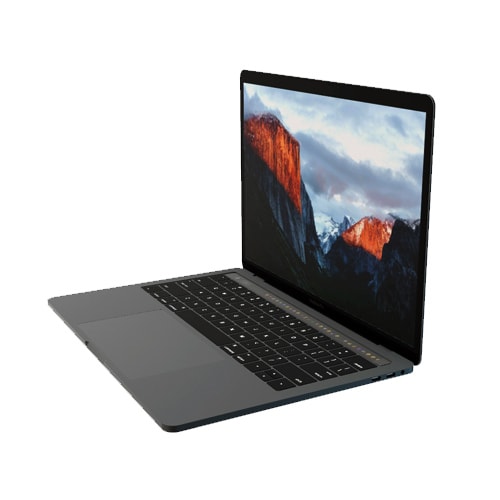
1.MACBOOK PRO WITH TOUCH BAR
PRICE: $1500 - $1800
SYSTEM SPECS:
CPU: Intel Core i7 Processor
GRAPHICS: Radeon Pro 555 with 2GB memory – 560 with 4GB memory
RAM: 16GB
SCREEN: 15.4” Retina Display
RES: 2880 x 1800px
STORAGE: 128 – 256GB SSD
PROS
- OLED Touch Bar
- Thunderbolt 3 ports
- Large Trackpad
CONS:
- No other input ports available besides Thunderbolt 3
- Expensive
The MacBook Pro with Touch Bar is the best video editing laptop produced by Apple. It has a wide 15.4” screen with thin bezels, and its proprietary OLED Touch bar amps up its flexibility and functionality considerably. The Touch Bar is set-up to show different shortcuts for different apps. It works quite well with Photoshop and will show thumbnails, filter options, a color picker, and more while you’re editing videos or stills.
Working with large 4K video files is much easier with the MacBook Pro. It’s fitted with Thunderbolt 3 Ports which have the highest data and video bandwidth available for USB-C connections. With these Thunderbolt ports, you can also use high-speed and high-power peripherals without a hitch. This laptop also has an extra-wide touchpad or Trackpad (as Apple calls it) which expands your physical working surface while also making it easier to do detailed video editing.
Unfortunately, if you need a variety of ports like most videographers, working with the MacBook Pro could be a challenge as it only has Thunderbolt 3 ports. If this is the laptop you prefer, you’ll need to buy additional connection hardware to work with different input devices. And while this laptop impresses in many ways, it’s also quite expensive. There are certainly other laptops on the market which can give you similar performance at a lower cost.
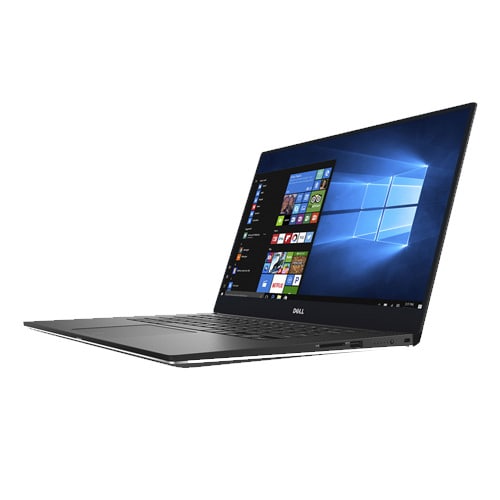
2. DELL XPS 15
PRICE: $999 - $1300
SYSTEM SPECS:
CPU: Intel Core i7 Processor
GRAPHICS: NVIDIA GeForce GTX 1050
RAM: 8 - 16GB
SCREEN: 15.6”
RES: FHD - 4k UHD 3840 x 2160px
STORAGE: 256GB – 1TB SSD
PROS
- 4k InfinityEdge display
- Good battery life
- Has multiple input ports
CONS:
- Webcam is oddly positioned
The Dell XPS 15 is one laptop that hits the sweet spot for many videographers. It’s considered the closest competitor to the MacBook Pro reviewed above. In fact, many would argue that it tops the MacBook Pro when it comes to speed, color accuracy, and color depth. Its 15.6” screen has very thin bezels for minimal distraction and immersive work experience. At 4K resolution and displaying a wide range of the sRGB gamut, video editing with the Dell XPS 15 promises to be both smooth and enjoyable.
The Dell XPS 15 is certainly more affordable, while still delivering excellent graphics performance. It features an Intel i7 processor and the NVIDIA GeForce GTX 1050 graphics processor. This makes it remarkably fast for video editing, as well as energy-efficient. People who work with different input devices will also like that this laptop has legacy adapters (USB, HDMI, ethernet) alongside a USB type C port.
The biggest downside to the Dell XPS 15 laptop is its oddly positioned webcam. It feels awkward and can be an inconvenience to use since you’ll have to adjust your position significantly while making video calls or recording for your YouTube channel.
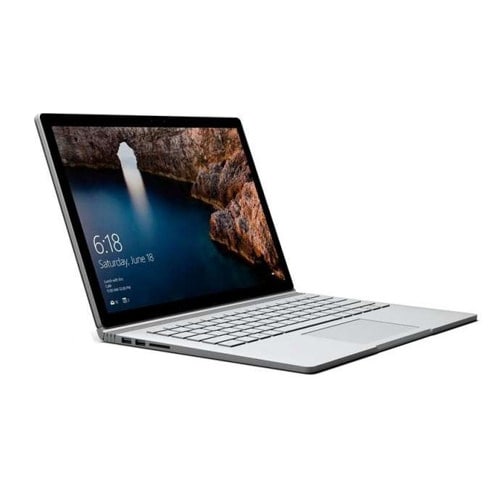
3. MICROSOFT SURFACE BOOK 2
PRICE: $1499 - $2499
SYSTEM SPECS:
CPU: Intel Core i7 Processor
GRAPHICS: Intel HD 620 or Nvidia GTX 1050 / GTX 1060
RAM: 16GB
SCREEN: 15.0”
RES: 3240 x 2160px
STORAGE: 256GB, 512GB – 1TB SSD
PROS
- Detachable screen
- Has multiple input ports (USB Type-A, USB Type-C, SD card reader)
- Works with a Stylus
CONS:
- Expensive
- Fulcrum hinge
The Microsoft Surface Book 2 is a laptop and a tablet thanks to its detachable screen. At a resolution of 3240 x 2160px, its screen is nearly 4k and can handle Full HD and HD footage with ease. Add to this its capacity to show a considerable portion of the sRGB gamut and its easy-to-use stylus and you can see why this 2-in-1 combo from Microsoft is one of the top 3 laptops for video editing in 2018.
Surface Book 2 also has the right combination of power and storage capacity that video editing requires. It boasts a state-of-the-art NVIDIA graphics processor and an Intel i7 processor for a smooth workflow no matter the size or level of detail involved in your video editing project.
On the downside, this laptop is undoubtedly very expensive. Compared to the function and power you can get from the DELL XPS 15, it’s hard to justify paying nearly $2500 for the Surface Book 2. Its detachable screen, supported by a fulcrum hinge, also comes at a price. It makes the laptop a bit bulky at one end when it’s folded. This in turn can make day-to-day handling a bit more tricky than it has to be.
CONCLUSION
If you’re searching for a good laptop to help you improve the quality of your videos in 2018, look no further than these 3. They have all the power, function, and storage capacity you need to handle any project with ease. Just be mindful of your budget and consider which extras are worth the expense. Go for the MacBook Pro with Touch Bar if customizing your workflow is a priority. Opt for the Dell XPS 15 if you want the best combination of display quality and graphics processing. Finally, consider the Surface Book 2 if you need the flexibility of a 2-in-1 device.
What do you think is the best laptop for video editing?
Equip Your Laptop with the Best Video Editing Software


Richard Bennett
Richard Bennett is a writer and a lover of all things video.
Follow @Richard Bennett
Richard Bennett
Oct 26, 2023• Proven solutions
This article lists the 3 best laptops for video editing in 2018.
Whether you’re an industry professional or an avid YouTuber, you know how important it is to produce quality videos consistently.
The quality of the videos you create will depend on your creativity, the editing software you use, and the hardware that software is installed on. And as you probably know, it can be tough to work fast and get good results when your hardware or laptop isn’t strong enough to power your software properly and allow you to work at the pace you want.
The best laptops for video editing in 2018 have three things in common. First, they have top-of-the-line display technology for color accuracy, color depth, and clarity. Next, they have discrete (dedicated) Graphic Processing Units (GPUs) with accompanying RAM to enable them to handle video processing fast without compromising other system functions. And finally, they have Intel core i7 CPU processors and Solid-State Drives (SSD) for faster overall performance.
THE TOP 3 LAPTOPS FOR EDITING VIDEO IN 2018
The top 3 laptops below are quite impressive. They have the right mix of power and function that video editing requires.
1.MACBOOK PRO WITH TOUCH BAR
PRICE: $1500 - $1800
SYSTEM SPECS:
CPU: Intel Core i7 Processor
GRAPHICS: Radeon Pro 555 with 2GB memory – 560 with 4GB memory
RAM: 16GB
SCREEN: 15.4” Retina Display
RES: 2880 x 1800px
STORAGE: 128 – 256GB SSD
PROS
- OLED Touch Bar
- Thunderbolt 3 ports
- Large Trackpad
CONS:
- No other input ports available besides Thunderbolt 3
- Expensive
The MacBook Pro with Touch Bar is the best video editing laptop produced by Apple. It has a wide 15.4” screen with thin bezels, and its proprietary OLED Touch bar amps up its flexibility and functionality considerably. The Touch Bar is set-up to show different shortcuts for different apps. It works quite well with Photoshop and will show thumbnails, filter options, a color picker, and more while you’re editing videos or stills.
Working with large 4K video files is much easier with the MacBook Pro. It’s fitted with Thunderbolt 3 Ports which have the highest data and video bandwidth available for USB-C connections. With these Thunderbolt ports, you can also use high-speed and high-power peripherals without a hitch. This laptop also has an extra-wide touchpad or Trackpad (as Apple calls it) which expands your physical working surface while also making it easier to do detailed video editing.
Unfortunately, if you need a variety of ports like most videographers, working with the MacBook Pro could be a challenge as it only has Thunderbolt 3 ports. If this is the laptop you prefer, you’ll need to buy additional connection hardware to work with different input devices. And while this laptop impresses in many ways, it’s also quite expensive. There are certainly other laptops on the market which can give you similar performance at a lower cost.
2. DELL XPS 15
PRICE: $999 - $1300
SYSTEM SPECS:
CPU: Intel Core i7 Processor
GRAPHICS: NVIDIA GeForce GTX 1050
RAM: 8 - 16GB
SCREEN: 15.6”
RES: FHD - 4k UHD 3840 x 2160px
STORAGE: 256GB – 1TB SSD
PROS
- 4k InfinityEdge display
- Good battery life
- Has multiple input ports
CONS:
- Webcam is oddly positioned
The Dell XPS 15 is one laptop that hits the sweet spot for many videographers. It’s considered the closest competitor to the MacBook Pro reviewed above. In fact, many would argue that it tops the MacBook Pro when it comes to speed, color accuracy, and color depth. Its 15.6” screen has very thin bezels for minimal distraction and immersive work experience. At 4K resolution and displaying a wide range of the sRGB gamut, video editing with the Dell XPS 15 promises to be both smooth and enjoyable.
The Dell XPS 15 is certainly more affordable, while still delivering excellent graphics performance. It features an Intel i7 processor and the NVIDIA GeForce GTX 1050 graphics processor. This makes it remarkably fast for video editing, as well as energy-efficient. People who work with different input devices will also like that this laptop has legacy adapters (USB, HDMI, ethernet) alongside a USB type C port.
The biggest downside to the Dell XPS 15 laptop is its oddly positioned webcam. It feels awkward and can be an inconvenience to use since you’ll have to adjust your position significantly while making video calls or recording for your YouTube channel.
3. MICROSOFT SURFACE BOOK 2
PRICE: $1499 - $2499
SYSTEM SPECS:
CPU: Intel Core i7 Processor
GRAPHICS: Intel HD 620 or Nvidia GTX 1050 / GTX 1060
RAM: 16GB
SCREEN: 15.0”
RES: 3240 x 2160px
STORAGE: 256GB, 512GB – 1TB SSD
PROS
- Detachable screen
- Has multiple input ports (USB Type-A, USB Type-C, SD card reader)
- Works with a Stylus
CONS:
- Expensive
- Fulcrum hinge
The Microsoft Surface Book 2 is a laptop and a tablet thanks to its detachable screen. At a resolution of 3240 x 2160px, its screen is nearly 4k and can handle Full HD and HD footage with ease. Add to this its capacity to show a considerable portion of the sRGB gamut and its easy-to-use stylus and you can see why this 2-in-1 combo from Microsoft is one of the top 3 laptops for video editing in 2018.
Surface Book 2 also has the right combination of power and storage capacity that video editing requires. It boasts a state-of-the-art NVIDIA graphics processor and an Intel i7 processor for a smooth workflow no matter the size or level of detail involved in your video editing project.
On the downside, this laptop is undoubtedly very expensive. Compared to the function and power you can get from the DELL XPS 15, it’s hard to justify paying nearly $2500 for the Surface Book 2. Its detachable screen, supported by a fulcrum hinge, also comes at a price. It makes the laptop a bit bulky at one end when it’s folded. This in turn can make day-to-day handling a bit more tricky than it has to be.
CONCLUSION
If you’re searching for a good laptop to help you improve the quality of your videos in 2018, look no further than these 3. They have all the power, function, and storage capacity you need to handle any project with ease. Just be mindful of your budget and consider which extras are worth the expense. Go for the MacBook Pro with Touch Bar if customizing your workflow is a priority. Opt for the Dell XPS 15 if you want the best combination of display quality and graphics processing. Finally, consider the Surface Book 2 if you need the flexibility of a 2-in-1 device.
What do you think is the best laptop for video editing?
Equip Your Laptop with the Best Video Editing Software
Richard Bennett
Richard Bennett is a writer and a lover of all things video.
Follow @Richard Bennett
Also read:
- [New] 2024 Approved From Watcher to Writer How to Set Up a Sports Channel on macOS
- [New] In 2024, Pro-Stream Wars Choosing Between VMix and Wirecast
- [Updated] 2024 Approved Top 6 Minecraft Oriental House Ideas
- [Updated] Earnings Spectrum Unveiling the Financial Power of DailyMovement and YouTube
- [Updated] Efficiently Engaging with Numerous YouTube Lectures
- 2024 Approved Professional Portals 15 YouTube Economic Insights
- A Step-by-Step Aspect Ratio Guide for YouTube Creators for 2024
- Best On-the-Move DVD Player Selections for You for 2024
- Boost Your Writing Process with These 8 Powerful AI Assistants
- Complete Unpacking of Ricoh's Theta VR Solution for 2024
- Convert YouTube to MP3 Safely Top 3 Guided Approaches for 2024
- Cutting-Edge Tools for Unique YouTube Channel Names
- Discover the Best Movies on YouTube - No Pay Required
- Esports News and Analysis From Top Vloggers for 2024
- Flavorful Funnels Catchy Recipe Channels That Work
- Get the Newest Updates for Your NVIDIA Quadro RTX Ebox – Easy Installation Guide
- In 2024, Essential Steps for Filming Using Logitech Webcam
- Perfect Binge-Watching Strategy for Fans of Dragon Ball
- Unbox the Joy of 9 Premium, Complete Christmas Movies for Free
- Title: [New] Efficiently Implementing Youtube End Screens
- Author: Brian
- Created at : 2024-10-13 18:13:24
- Updated at : 2024-10-18 18:15:53
- Link: https://youtube-video-recordings.techidaily.com/new-efficiently-implementing-youtube-end-screens/
- License: This work is licensed under CC BY-NC-SA 4.0.