
![[New] Discover 8 Trustworthy Online Content Promoters](https://www.lifewire.com/thmb/hIHuLANY2uss1gdB6366Yx2lI1U=/400x300/filters:no_upscale():max_bytes(150000):strip_icc()/GettyImages-494832445-7880b4d106654e1297f2f47e9ff4bd90.jpg)
[New] Discover 8 Trustworthy Online Content Promoters
Discover 8 Trustworthy Online Content Promoters
Best YouTube Video Promotion Services (Real)

Liza Brown
Apr 28, 2024• Proven solutions
You don’t want to create a YouTube channel to post pointless and weird videos. It takes a lot of time and energy to create YouTube videos and to bring it to the forefront, so it is important to use a YouTube video promotion service. You would definitely want your videos to reach millions of people and not just get stuck within a few 100 views.
The YouTube promotion services are a highly effective tool for demonstrating your proficiency, creating your brand awareness, sharing information and facts, promoting events, engaging with the customers, and for building trustworthiness. With several benefits of promotional services, have you ever thought of promoting your YouTube videos? For real YouTube promotion of videos, here are the 8 best YouTube video promotion services that you may consider.
Best YouTube video maker - Filmora
If your budget is limited, here you can use Filmora to make amazing videos with free-to-use effects/audio/images. Download it now to have a try!
 Download Mac Version ](https://tools.techidaily.com/wondershare/filmora/download/ )
Best YouTube Video Promotion Service
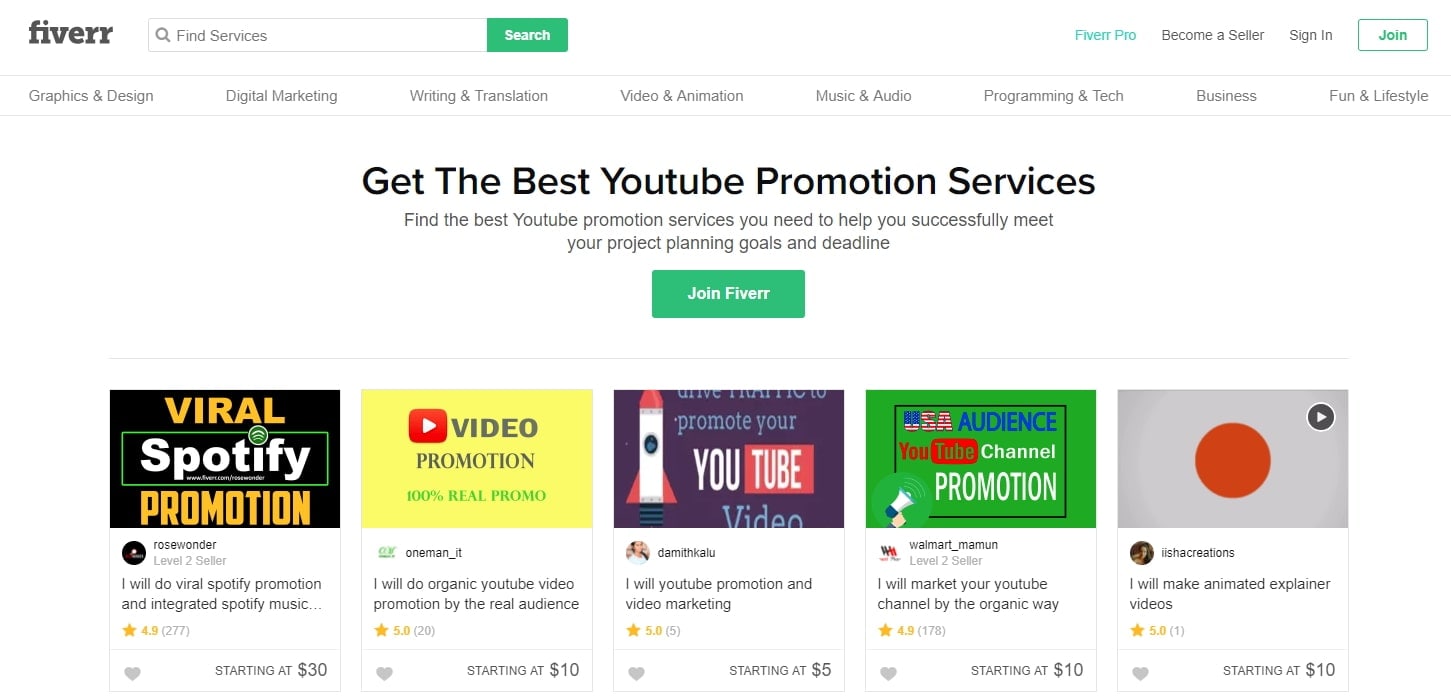
1. Fiverr
If you wish to successfully complete your project’s goals and deadlines, turn to the best YouTube promotional service, Fiverr. For real YouTube promotion of videos, you may choose from the premiere, standard and basic plans priced at $50 for 13 days, $25 for 10 days, and $5 for 9 days respectively.
You just need to describe your gig, compare and select packages, check out the recommendations and reviews and start the YouTube video promotion service. There are various categories like digital marketing, graphic designs, video animation, writing translation, etc. under which you can tag your video.
2. Push Views
If you wish to garner traffic or increase the fan following, opt for the Push views real YouTube promotion services. It is a simple yet effective tool that works on a fair pricing subscription. Push Views never dig a hole in your pocket as you may keep changing your promotional budget each week. The best part is you are not fooled by the gimmicks to overspend when you are using Push Views YouTube video promotion service.

3. SEO Task
Are you disheartened to find no views in your YouTube video? SEO Task is one of the best YouTube promotion services that offer focused solutions for the professionals targeting success in the world of the Internet. SEO Task is rapidly growing and keeps you in advance curve of the business with endless updates and releases. It helps with incredible reach, high engagement, increased traffic, improved SEO, trust building, and affordability.

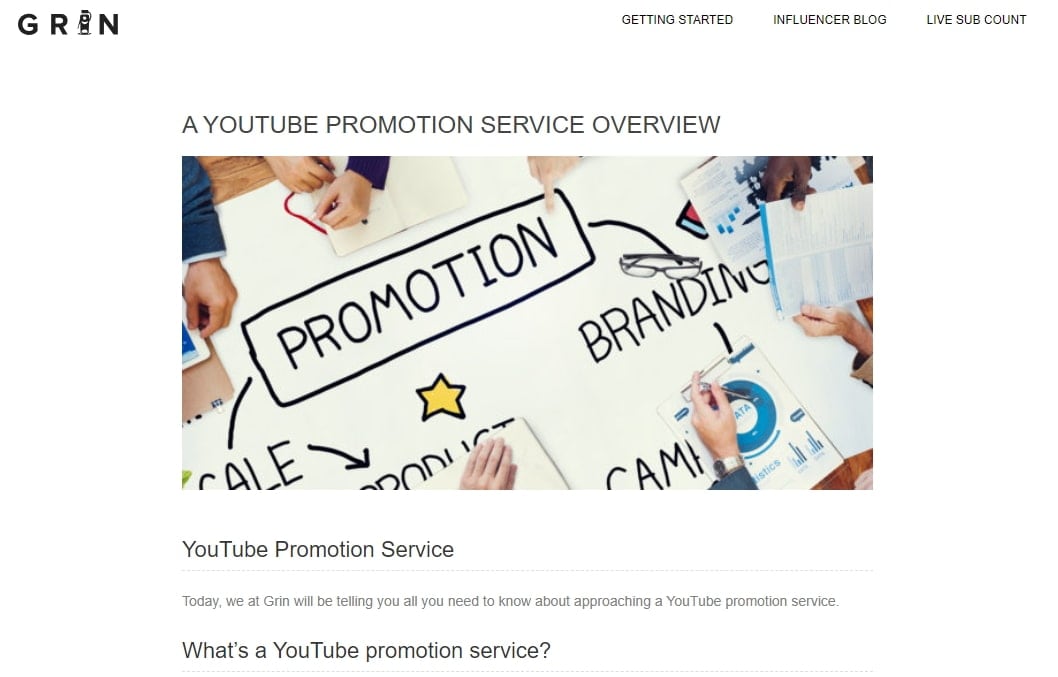
4. Grin
Grin is a real YouTube promotion service that helps you with shoutouts from superior YouTubers, criticism, and opinion from your counterparts and other YouTubers, partnerships with superior YouTubers and experts for a range of video editing/production. Shoutouts and collaborations can easily help new individual video creators to grow. If you want your YouTube video channel to look professional, you may hire designers, artists, motion editors, and audio technicians on our Marketplace and pay them.
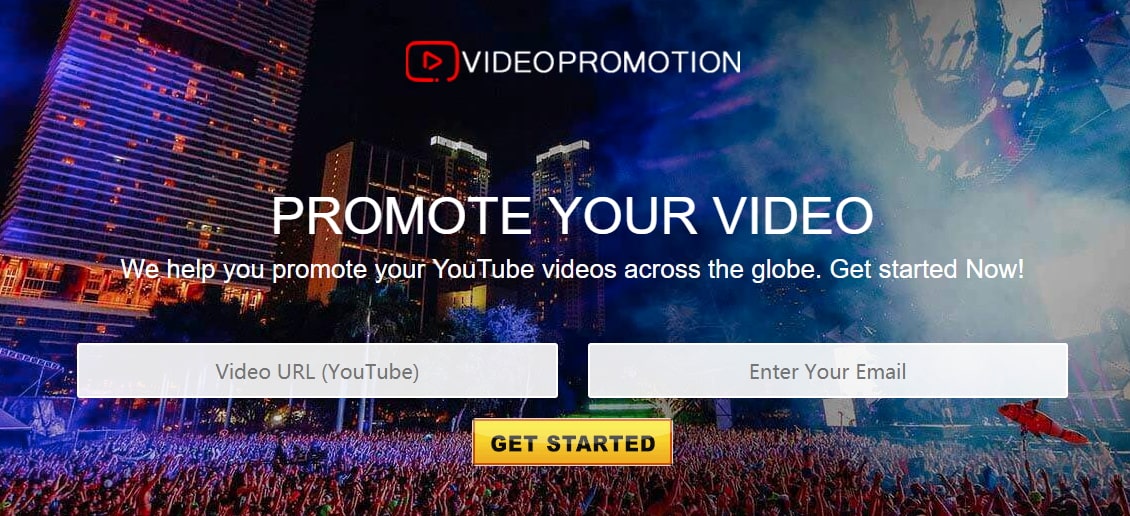
5. Video Promotion
One of the best and most reliable YouTube video promotion services, Video Promotion helps to bring in online engagement, target the viewers and creates exposure for your video to help it in becoming viral. Video Promotion helps to promote your videos on YouTube as well as other display networks and partners.
You can promote your video in just 3 easy steps. Enter the video URL you wish to promote, select the number of views you want and the country you want your video to be played. Then, use PayPal or the other available options to pay for the views and finally submit your order and wait for the representative to call you. The video is live for the viewers until it does not reach the number of views you have paid for.
6. RNS Agency
RNS Agency is one of the easiest YouTube promotion services providers as in just 4 easy steps you can promote your YouTube video with this real YouTube promotion tool. Just sign up on the RNS website to promote your video.
You need to point the video that you wish to run the ad campaign on and select the number of audiences you are targeting. Your video is promoted across the globe to the relevant set of viewers who engage with your video and make you a successful and popular YouTuber. There are 6 packages with several payment options for you to choose from.

7. Juss Russ
Juss Russ offers two packages for real YouTube promotion. The basic package is priced at $49.99 and includes 1000 new views. Your videos get featured on their Twitter handle and also on Juss Russ radio. The video blast is for around 500 subscribers.
The premium package is priced at $149.99 and includes 5000 views. Apart from the views, you receive comments and likes, your video is featured on Juss Russ Twitter handle, Radio, and on Artists sounds. Juss Russ places your content in strategic places to locate your target audience.
8. Sparxit Solutions
With Sparxit Solutions YouTube promotion services, your video searchability on this most popular platform is effectively enhanced. The YouTube video promotion service offered by Sparxit Solutions allows you to boost your YouTube video and make it a brand amongst the users. The effective and powerful services help you out to appear more prominently in the YouTube search results.
Conclusion
Now, that you know how important YouTube video promotion services are, you may opt for anyone from the above list of real YouTube video promotion providers to enhance your video and garner relevant viewers, likes and comments. Increase the awareness of your brand and/or product among the masses by opting for the right YouTube video promotion service.
Liza Brown
Liza Brown is a writer and a lover of all things video.
Follow @Liza Brown
Liza Brown
Apr 28, 2024• Proven solutions
You don’t want to create a YouTube channel to post pointless and weird videos. It takes a lot of time and energy to create YouTube videos and to bring it to the forefront, so it is important to use a YouTube video promotion service. You would definitely want your videos to reach millions of people and not just get stuck within a few 100 views.
The YouTube promotion services are a highly effective tool for demonstrating your proficiency, creating your brand awareness, sharing information and facts, promoting events, engaging with the customers, and for building trustworthiness. With several benefits of promotional services, have you ever thought of promoting your YouTube videos? For real YouTube promotion of videos, here are the 8 best YouTube video promotion services that you may consider.
Best YouTube video maker - Filmora
If your budget is limited, here you can use Filmora to make amazing videos with free-to-use effects/audio/images. Download it now to have a try!
Download Mac Version ](https://tools.techidaily.com/wondershare/filmora/download/ )
Best YouTube Video Promotion Service
1. Fiverr
If you wish to successfully complete your project’s goals and deadlines, turn to the best YouTube promotional service, Fiverr. For real YouTube promotion of videos, you may choose from the premiere, standard and basic plans priced at $50 for 13 days, $25 for 10 days, and $5 for 9 days respectively.
You just need to describe your gig, compare and select packages, check out the recommendations and reviews and start the YouTube video promotion service. There are various categories like digital marketing, graphic designs, video animation, writing translation, etc. under which you can tag your video.
2. Push Views
If you wish to garner traffic or increase the fan following, opt for the Push views real YouTube promotion services. It is a simple yet effective tool that works on a fair pricing subscription. Push Views never dig a hole in your pocket as you may keep changing your promotional budget each week. The best part is you are not fooled by the gimmicks to overspend when you are using Push Views YouTube video promotion service.
3. SEO Task
Are you disheartened to find no views in your YouTube video? SEO Task is one of the best YouTube promotion services that offer focused solutions for the professionals targeting success in the world of the Internet. SEO Task is rapidly growing and keeps you in advance curve of the business with endless updates and releases. It helps with incredible reach, high engagement, increased traffic, improved SEO, trust building, and affordability.
4. Grin
Grin is a real YouTube promotion service that helps you with shoutouts from superior YouTubers, criticism, and opinion from your counterparts and other YouTubers, partnerships with superior YouTubers and experts for a range of video editing/production. Shoutouts and collaborations can easily help new individual video creators to grow. If you want your YouTube video channel to look professional, you may hire designers, artists, motion editors, and audio technicians on our Marketplace and pay them.
5. Video Promotion
One of the best and most reliable YouTube video promotion services, Video Promotion helps to bring in online engagement, target the viewers and creates exposure for your video to help it in becoming viral. Video Promotion helps to promote your videos on YouTube as well as other display networks and partners.
You can promote your video in just 3 easy steps. Enter the video URL you wish to promote, select the number of views you want and the country you want your video to be played. Then, use PayPal or the other available options to pay for the views and finally submit your order and wait for the representative to call you. The video is live for the viewers until it does not reach the number of views you have paid for.
6. RNS Agency
RNS Agency is one of the easiest YouTube promotion services providers as in just 4 easy steps you can promote your YouTube video with this real YouTube promotion tool. Just sign up on the RNS website to promote your video.
You need to point the video that you wish to run the ad campaign on and select the number of audiences you are targeting. Your video is promoted across the globe to the relevant set of viewers who engage with your video and make you a successful and popular YouTuber. There are 6 packages with several payment options for you to choose from.
7. Juss Russ
Juss Russ offers two packages for real YouTube promotion. The basic package is priced at $49.99 and includes 1000 new views. Your videos get featured on their Twitter handle and also on Juss Russ radio. The video blast is for around 500 subscribers.
The premium package is priced at $149.99 and includes 5000 views. Apart from the views, you receive comments and likes, your video is featured on Juss Russ Twitter handle, Radio, and on Artists sounds. Juss Russ places your content in strategic places to locate your target audience.
8. Sparxit Solutions
With Sparxit Solutions YouTube promotion services, your video searchability on this most popular platform is effectively enhanced. The YouTube video promotion service offered by Sparxit Solutions allows you to boost your YouTube video and make it a brand amongst the users. The effective and powerful services help you out to appear more prominently in the YouTube search results.
Conclusion
Now, that you know how important YouTube video promotion services are, you may opt for anyone from the above list of real YouTube video promotion providers to enhance your video and garner relevant viewers, likes and comments. Increase the awareness of your brand and/or product among the masses by opting for the right YouTube video promotion service.
Liza Brown
Liza Brown is a writer and a lover of all things video.
Follow @Liza Brown
Pre-Production Meets Post-Production: Premiere and YouTube
How Do I Use Adobe Premiere To Upload YouTube Videos?

Benjamin Arango
Mar 27, 2024• Proven solutions
Whilst getting the editing and post work just right on any project is what we all aim for, the ultimate aim is for other people to see our creations, and the most popular way to achieve that is YouTube . Chances are, if you are producing video, you will be putting some of it on YouTube at some point, so let’s have a look at the most efficient way to get your work from Premiere to YouTube.
Check if your computer meet the Premiere System Requirements >>
This is a basic tutorial about Adobe Premiere, professional video editing software. However, if video editing is new to you, consider Wondershare Filmora , which is a powerful but easy-to-use tool for users just starting out. Download the free trial version below.
Download Mac Version ](https://tools.techidaily.com/wondershare/filmora/download/ )
How Do I Use Adobe Premiere To Upload YouTube Videos
1. Master Copy
Before exporting your work, it is important to first create a master copy of your project that is ‘as is’, in that it reflects the settings and codecs used in the original footage.
To do this you simply select the sequence within the Timeline or in the Project Panel, and go through the menu tree via File > Export > Media to bring up the export dialogue.

To create your Master Copy, simply select the first option of ‘Match Sequence Settings’, this exports a file that is of the same quality as your original footage, essentially producing a digital copy of the work for archiving before anything else is done.
With you work safe and secure it is now time to look at ensuring the project is suitable for YouTube. With our sequence selected in the Timeline or Project Panel again, we go through the same File > Export > Media path to bring up the media export dialogue as before.
2. Container
The first option we have to consider is the file format that our finished video needs to be in. Here you should refer to YouTube for its guidelines, whilst they do accept a number of file formats, digging through the YouTube help system to find the settings for highest quality we find that they recommend MPEG4 as the container, using the codec.

We can also see further recommended settings in this screenshot that will be covered later.
The good news is that Premiere automatically selects the appropriate container for us when we select our codec, however it is worth knowing the file type YouTube is expecting just to check yourself.
3. Video Codec
So having established that YouTube recommends the MPEG4 container using the codec, the first option we need to look for in the media export dialogue is to select the appropriate Format.
This is the first drop down in the dialogue box, and in this case we simply select from the list.

Once you select you can check the ‘output name’ field and see that premiere is automatically set the output file to .mp4 which is exactly what we need.
4. Preset
The next field we come to is the ‘Preset’ dropdown menu. This is a major help to most people, as Adobe have very kindly included large numbers of presets to quickly adapt video settings to suit specific uses. They vary depending on the exact version of Premiere you are using, and each format type does have its own list of presets, as we can see has a large number for YouTube, but also has many presets for specific devices (presets for iPad, Kindle, Nook, various other tablets and phones, Vimeo and a host of others) to make getting the right settings that bit easier for us.

It is important here to select the correct preset from the various YouTube options. You want to select the resolution and frame rate that match your source file, for the best results. So, if your source file is 1080p with a frame rate of 29.97 fps then that is the YouTube setting you would select.
Once a preset is selected a summary of the settings is displayed below, normally these will be well suited to your project, however you can fine tune anything you wish by selecting the video or audio tabs at the bottom which give you the chance to adjust each parameter individually. If you do this, you can save these changes as a custom preset by clicking the button at the side of the Preset dropdown menu and simply use it on later projects by selecting it from the list the same as any other, a great time saving tool.

5. Rendering
Once you are satisfied with the settings, either from the Preset alone or if you have adjusted anything yourself, you are nearly ready to render the file and export it.
For YouTube it is recommended you select the ‘Use Maximum Render Quality’ option to maintain the best output you can, it does add time to the render process but if you value the quality of your work it is worthwhile.
Finally you can choose a suitable filename and the destination of the file by clicking on the ‘Output Name’ field.
I normally use a filename that includes the destination medium so I can differentiate between different versions of a project and know which one to upload where, in this case I include ‘youtube’, but if I were planning on uploading clips of the project to vimeo as well for instance there may be a cut of the project with ‘vimeo’ in the name too. The destination is personal preference, because I do use filenames to differentiate versions I can put the various iterations into a single project file, others have folder structures for each type of file , so all YouTube output goes into a single folder and so on, how you organize is entirely dependent on how you work.

Once those are selected clicking ‘Export’ starts the rendering process, and eventually (how long depends on the speed of your computer and the size and type of file involved), you will end up with your YouTube optimized video in the location you chose.
Here I created 4 key frames that let the ‘Animation’ object move around the ‘Demo Text’ Object and finally come to rest below it. Whilst this type of effect does look very effective on screen, such is the ease of use of After Effects it really is just a few minutes work to achieve.
Learn more details about How to add text in Premiere >>
6. Uploading
Now you have your file, the next step is to go to your YouTube account and log in if you need to.
On the top of your homepage on the right is the upload button, selecting that brings up the select file menu as below.

You can either drag your file into the window or click on it to open a standard file browser to locate the desired file, click and the upload will begin. The dropdown underneath allows you to set the video as Public, Unlisted or Private. You can change this at any time once the video is uploaded as well.
This opens the upload progress window, where you can add in a name, description and tags as well as add the video to a playlist or adjust the privacy settings as the video is uploading.

Once the upload as finished, you can do final adjustments to settings and choose a thumbnail for the video. The final step is to click the ‘Publish’ button and your video will be processed and go live.

Benjamin Arango
Benjamin Arango is a writer and a lover of all things video.
Follow @Benjamin Arango
Benjamin Arango
Mar 27, 2024• Proven solutions
Whilst getting the editing and post work just right on any project is what we all aim for, the ultimate aim is for other people to see our creations, and the most popular way to achieve that is YouTube . Chances are, if you are producing video, you will be putting some of it on YouTube at some point, so let’s have a look at the most efficient way to get your work from Premiere to YouTube.
Check if your computer meet the Premiere System Requirements >>
This is a basic tutorial about Adobe Premiere, professional video editing software. However, if video editing is new to you, consider Wondershare Filmora , which is a powerful but easy-to-use tool for users just starting out. Download the free trial version below.
Download Mac Version ](https://tools.techidaily.com/wondershare/filmora/download/ )
How Do I Use Adobe Premiere To Upload YouTube Videos
1. Master Copy
Before exporting your work, it is important to first create a master copy of your project that is ‘as is’, in that it reflects the settings and codecs used in the original footage.
To do this you simply select the sequence within the Timeline or in the Project Panel, and go through the menu tree via File > Export > Media to bring up the export dialogue.
To create your Master Copy, simply select the first option of ‘Match Sequence Settings’, this exports a file that is of the same quality as your original footage, essentially producing a digital copy of the work for archiving before anything else is done.
With you work safe and secure it is now time to look at ensuring the project is suitable for YouTube. With our sequence selected in the Timeline or Project Panel again, we go through the same File > Export > Media path to bring up the media export dialogue as before.
2. Container
The first option we have to consider is the file format that our finished video needs to be in. Here you should refer to YouTube for its guidelines, whilst they do accept a number of file formats, digging through the YouTube help system to find the settings for highest quality we find that they recommend MPEG4 as the container, using the codec.
We can also see further recommended settings in this screenshot that will be covered later.
The good news is that Premiere automatically selects the appropriate container for us when we select our codec, however it is worth knowing the file type YouTube is expecting just to check yourself.
3. Video Codec
So having established that YouTube recommends the MPEG4 container using the codec, the first option we need to look for in the media export dialogue is to select the appropriate Format.
This is the first drop down in the dialogue box, and in this case we simply select from the list.
Once you select you can check the ‘output name’ field and see that premiere is automatically set the output file to .mp4 which is exactly what we need.
4. Preset
The next field we come to is the ‘Preset’ dropdown menu. This is a major help to most people, as Adobe have very kindly included large numbers of presets to quickly adapt video settings to suit specific uses. They vary depending on the exact version of Premiere you are using, and each format type does have its own list of presets, as we can see has a large number for YouTube, but also has many presets for specific devices (presets for iPad, Kindle, Nook, various other tablets and phones, Vimeo and a host of others) to make getting the right settings that bit easier for us.
It is important here to select the correct preset from the various YouTube options. You want to select the resolution and frame rate that match your source file, for the best results. So, if your source file is 1080p with a frame rate of 29.97 fps then that is the YouTube setting you would select.
Once a preset is selected a summary of the settings is displayed below, normally these will be well suited to your project, however you can fine tune anything you wish by selecting the video or audio tabs at the bottom which give you the chance to adjust each parameter individually. If you do this, you can save these changes as a custom preset by clicking the button at the side of the Preset dropdown menu and simply use it on later projects by selecting it from the list the same as any other, a great time saving tool.
5. Rendering
Once you are satisfied with the settings, either from the Preset alone or if you have adjusted anything yourself, you are nearly ready to render the file and export it.
For YouTube it is recommended you select the ‘Use Maximum Render Quality’ option to maintain the best output you can, it does add time to the render process but if you value the quality of your work it is worthwhile.
Finally you can choose a suitable filename and the destination of the file by clicking on the ‘Output Name’ field.
I normally use a filename that includes the destination medium so I can differentiate between different versions of a project and know which one to upload where, in this case I include ‘youtube’, but if I were planning on uploading clips of the project to vimeo as well for instance there may be a cut of the project with ‘vimeo’ in the name too. The destination is personal preference, because I do use filenames to differentiate versions I can put the various iterations into a single project file, others have folder structures for each type of file , so all YouTube output goes into a single folder and so on, how you organize is entirely dependent on how you work.
Once those are selected clicking ‘Export’ starts the rendering process, and eventually (how long depends on the speed of your computer and the size and type of file involved), you will end up with your YouTube optimized video in the location you chose.
Here I created 4 key frames that let the ‘Animation’ object move around the ‘Demo Text’ Object and finally come to rest below it. Whilst this type of effect does look very effective on screen, such is the ease of use of After Effects it really is just a few minutes work to achieve.
Learn more details about How to add text in Premiere >>
6. Uploading
Now you have your file, the next step is to go to your YouTube account and log in if you need to.
On the top of your homepage on the right is the upload button, selecting that brings up the select file menu as below.
You can either drag your file into the window or click on it to open a standard file browser to locate the desired file, click and the upload will begin. The dropdown underneath allows you to set the video as Public, Unlisted or Private. You can change this at any time once the video is uploaded as well.
This opens the upload progress window, where you can add in a name, description and tags as well as add the video to a playlist or adjust the privacy settings as the video is uploading.
Once the upload as finished, you can do final adjustments to settings and choose a thumbnail for the video. The final step is to click the ‘Publish’ button and your video will be processed and go live.
Benjamin Arango
Benjamin Arango is a writer and a lover of all things video.
Follow @Benjamin Arango
Also read:
- [Updated] Artisans Crafting Marvel Fantasy Landscapes
- Enhance Your Shorts Fresh and Original Thumbnails with Minimal Effort
- Invest in Your Health - These 10 Best Yoga Streams Exist
- Mastering YouTube Shorts A Step-by-Step Creation Guide
- The Ultimate Guide to Creating Engaging Youtube Channel Names (Limit It to 156 Characters)
- Behind the Scenes Expert Video Editing Techniques for YouTubers
- Which Is More Fitting for You TikTok or YouTube's Micro-Video Channels?
- Teen Riches Skyrocket with Viral Video Empire
- [Updated] Epic Battle Royale Thumbnails, Done Fast
- [New] Boost Engagement Through Anime-Style Subscribe Buttons (Filmora Tutorial)
- Charting a Course Through YouTube's Copyright Maze
- Average Gain for YouTubers per Ad Exposure, In 2024
- [Updated] Cinematic Delights for a Low Price - Top 10 Free Movies on YouTube
- 2024 Approved Essential Compliance Rules for Thriving on YouTube
- Elevate Small Screen Experience with These Leading & Affordable Tools to Download YouTubes' Tiny Videos for 2024
- Virality Hacks Leveraging Key Hashtags on YouTube
- In 2024, Enhancing YouTube Visibility with Featured Channels Techniques
- EditMaster Suite
- How to Cast Poco C55 Screen to PC Using WiFi | Dr.fone
- [New] Cooking Trends to Try Exciting Recipes From TikTok
- [New] In 2024, Revolutionizing PS2 Playtime on iOS with Top Emulators
- Ace Your Photo Collection – Best Android Collage Hacks for 2024
- Textual Transformation in Adobe After Effects
- Innovation Showcase Leading 4K Recorders of the Year for 2024
- Innovative 10 Plugin Upgrades for FCP Users
- New In 2024, Audiophiles Choice Discovering the 10 Best Software For Advanced Audio Editing
- In 2024, The Most Useful Tips for Pokemon Go Ultra League On Honor Magic V2 | Dr.fone
- [New] The Complete Blueprint to Designed Chat Spaces
- [New] In 2024, The Ultimate Guide to Replacing Bandicam on Mac Systems
- In 2024, From Watching to Archiving A Comprehensive Screencast of Streamed Video
- 2024 Approved 86 Cracking the Code TikTok Riddles & Jokes
- Rotation Producer Series
- 7 Top Ways To Resolve Apple ID Not Active Issue For Apple iPhone 15 Plus | Dr.fone
- Title: [New] Discover 8 Trustworthy Online Content Promoters
- Author: Brian
- Created at : 2024-05-25 12:36:36
- Updated at : 2024-05-26 12:36:36
- Link: https://youtube-video-recordings.techidaily.com/new-discover-8-trustworthy-online-content-promoters/
- License: This work is licensed under CC BY-NC-SA 4.0.
