![[New] Cutting-Edge Strategies for YouTube Split-Screen Videos](https://thmb.techidaily.com/0fdf2fa9392d7802826e32aaa7c1f7d7a9d236164e77dff001f4eb865ae62af5.jpg)
"[New] Cutting-Edge Strategies for YouTube Split-Screen Videos"
Cutting-Edge Strategies for YouTube Split-Screen Videos
How to Make a Creative Split-screen Video for YouTube?

Liza Brown
Oct 26, 2023• Proven solutions
If we talk about post-production techniques and visual effects, then Split Screen has to be one of the smartest picks. After all, it lets us narrate our story via two (or more) screens and gives our audience a superior viewing experience. Though, a lot of users find it hard to implement the split-screen effect on YouTube videos. Here, I will let you know how to come up with all kinds of YouTube split-screen videos by using a professional video editor.
Part 1: The Diverse Applications of Split-screen Videos
Before we discuss how to work on YouTube split-screen videos, let’s quickly consider some major applications of this video effect.
One of the most popular applications of split-screen videos is for comparing two or more instances or perspectives in the same frame. For example, you might wish to depict the lifestyle of two people from different parts of the world or simply compare the effect of various seasons in a single video.

Videos are the best visual storytelling tools and just like any story, they can also have different perspectives. Ideally, the split-screen effect would be one of the best ways to show your audience all kinds of perspectives that can take place in your story.
One of the best examples was depicted in the movie “500 Days of Summer” in which we got several Expectations vs. Reality shots. These split-screen shots depicted the two major perspectives of the story in a single frame.

Have you ever wondered how filmmakers create a clone of a person in movies? To do that, we make the protagonist record both the scenes in front of the same background. Later, we implement a split-screen effect in which both the clips are combined in such a way that it makes the audience believe as if the scene has both, the character and their clone placed flawlessly.

Watch Video! Use Split-Screen for Your YouTube Videos
Part 2: How to Make Creative YouTube Split-screen Videos with Wondershare Filmora ?
If you want to come up with professional YouTube split-screen videos, then consider using a resourceful tool like Wondershare Filmora. Recently, the company has launched Wondershare Filmora for Mac V10.2 with an upgraded set of newly-added split-screen templates . Therefore, you can simply use the wide range of split-screen templates in Filmora and drag-and-drop your videos to implement the effect.
- Wondershare Filmora has recently added an extensive range of split-screen templates that you can instantly use and customize to meet your requirements.
- Apart from YouTube split-screen templates, you can also find options for other social platforms such as Instagram, Facebook, TikTok, etc.
- Without undergoing any technical hassle, you can just drag and drop your videos to the split-screen template and further make the needed changes.
- There are also dedicated options to edit the split-screen video, apply color correction, and even implement different stunning animated effects.
- Besides that, you can use Filmora to access numerous other editing options like motion tracking, keyframing, audio ducking, auto reframing, action cam editing, and more.


Creating or editing YouTube split-screen videos in Wondershare Filmora is extremely easy and can be done in the following way:

Step 1: Import the Videos You Want to Edit to Wondershare Filmora
Before you edit your YouTube split-screen video, you need to import clips to the application. To do this, just launch Wondershare Filmora on your system and click on the “Import” button to load your videos. You can also go to its Menu > File > Import Media to do the same.

Step 2: Select the Split-screen Template and Add Your Videos
Great! Once you have loaded the interface of Filmora, you can locate a “Split Screen” section from the top. Just click on it to browse a wide range of split-screen video templates for YouTube to include two, three, or more clips. You can just double-click any template to get its preview and drag-and-drop it to the timeline to start working on it.

If you want, you can take the playhead and drag the pointer to adjust the length of the split-screen template on the timeline. To add your clips, just double-click on the split-screen template and click on the drop icon from the preview window. Now, click on the source clip to add it to the template and adjust its position to get the desired effects.

Step 3: Edit Your YouTube Split-screen Video
Following the same drill, you can include multiple clips to the YouTube split-screen template. You can further go to its editing features and explore the “Video” tab to scale, reposition, or rotate your clips. There are also options to add borders in the split-screen effect to separate the clips distinctively in the video.

Apart from that, you can also go to the “Color” section to access various color correction features. From here, you can adjust the brightness, temperature, saturation, tint, and other effects in the video.

If you want to make your YouTube split-screen video more appealing, then go to the “Motion” feature. Here, you can easily implement any existing animated template for transitions and other effects.

Besides that, you can also click on the edit icon from the bottom panel of the Preview section to edit your videos separately.

Step 4: Export the YouTube Split-screen Video
That’s it! Once you are done editing the split-screen video, you can export it from Filmora and save it on your Mac. Just click on the Export option and select a location to save the YouTube split-screen video. There are also additional features to save the video in different formats, video resolutions, and frame rates here that you can explore.

There you go! After following this guide, you would be able to come up with all kinds of YouTube split-screen videos on your Mac. Ideally, with the help of a resourceful tool like Wondershare Filmora, working on a split-screen video is an effortless task. Since the tool has numerous split-screen templates for YouTube, you can just select any template, and customize it to create a stunning YouTube split-screen video in minutes.
Liza Brown
Liza Brown is a writer and a lover of all things video.
Follow @Liza Brown
Liza Brown
Oct 26, 2023• Proven solutions
If we talk about post-production techniques and visual effects, then Split Screen has to be one of the smartest picks. After all, it lets us narrate our story via two (or more) screens and gives our audience a superior viewing experience. Though, a lot of users find it hard to implement the split-screen effect on YouTube videos. Here, I will let you know how to come up with all kinds of YouTube split-screen videos by using a professional video editor.
Part 1: The Diverse Applications of Split-screen Videos
Before we discuss how to work on YouTube split-screen videos, let’s quickly consider some major applications of this video effect.
One of the most popular applications of split-screen videos is for comparing two or more instances or perspectives in the same frame. For example, you might wish to depict the lifestyle of two people from different parts of the world or simply compare the effect of various seasons in a single video.
Videos are the best visual storytelling tools and just like any story, they can also have different perspectives. Ideally, the split-screen effect would be one of the best ways to show your audience all kinds of perspectives that can take place in your story.
One of the best examples was depicted in the movie “500 Days of Summer” in which we got several Expectations vs. Reality shots. These split-screen shots depicted the two major perspectives of the story in a single frame.
Have you ever wondered how filmmakers create a clone of a person in movies? To do that, we make the protagonist record both the scenes in front of the same background. Later, we implement a split-screen effect in which both the clips are combined in such a way that it makes the audience believe as if the scene has both, the character and their clone placed flawlessly.
Watch Video! Use Split-Screen for Your YouTube Videos
Part 2: How to Make Creative YouTube Split-screen Videos with Wondershare Filmora ?
If you want to come up with professional YouTube split-screen videos, then consider using a resourceful tool like Wondershare Filmora. Recently, the company has launched Wondershare Filmora for Mac V10.2 with an upgraded set of newly-added split-screen templates . Therefore, you can simply use the wide range of split-screen templates in Filmora and drag-and-drop your videos to implement the effect.
- Wondershare Filmora has recently added an extensive range of split-screen templates that you can instantly use and customize to meet your requirements.
- Apart from YouTube split-screen templates, you can also find options for other social platforms such as Instagram, Facebook, TikTok, etc.
- Without undergoing any technical hassle, you can just drag and drop your videos to the split-screen template and further make the needed changes.
- There are also dedicated options to edit the split-screen video, apply color correction, and even implement different stunning animated effects.
- Besides that, you can use Filmora to access numerous other editing options like motion tracking, keyframing, audio ducking, auto reframing, action cam editing, and more.
Creating or editing YouTube split-screen videos in Wondershare Filmora is extremely easy and can be done in the following way:
Step 1: Import the Videos You Want to Edit to Wondershare Filmora
Before you edit your YouTube split-screen video, you need to import clips to the application. To do this, just launch Wondershare Filmora on your system and click on the “Import” button to load your videos. You can also go to its Menu > File > Import Media to do the same.
Step 2: Select the Split-screen Template and Add Your Videos
Great! Once you have loaded the interface of Filmora, you can locate a “Split Screen” section from the top. Just click on it to browse a wide range of split-screen video templates for YouTube to include two, three, or more clips. You can just double-click any template to get its preview and drag-and-drop it to the timeline to start working on it.
If you want, you can take the playhead and drag the pointer to adjust the length of the split-screen template on the timeline. To add your clips, just double-click on the split-screen template and click on the drop icon from the preview window. Now, click on the source clip to add it to the template and adjust its position to get the desired effects.
Step 3: Edit Your YouTube Split-screen Video
Following the same drill, you can include multiple clips to the YouTube split-screen template. You can further go to its editing features and explore the “Video” tab to scale, reposition, or rotate your clips. There are also options to add borders in the split-screen effect to separate the clips distinctively in the video.
Apart from that, you can also go to the “Color” section to access various color correction features. From here, you can adjust the brightness, temperature, saturation, tint, and other effects in the video.
If you want to make your YouTube split-screen video more appealing, then go to the “Motion” feature. Here, you can easily implement any existing animated template for transitions and other effects.
Besides that, you can also click on the edit icon from the bottom panel of the Preview section to edit your videos separately.
Step 4: Export the YouTube Split-screen Video
That’s it! Once you are done editing the split-screen video, you can export it from Filmora and save it on your Mac. Just click on the Export option and select a location to save the YouTube split-screen video. There are also additional features to save the video in different formats, video resolutions, and frame rates here that you can explore.
There you go! After following this guide, you would be able to come up with all kinds of YouTube split-screen videos on your Mac. Ideally, with the help of a resourceful tool like Wondershare Filmora, working on a split-screen video is an effortless task. Since the tool has numerous split-screen templates for YouTube, you can just select any template, and customize it to create a stunning YouTube split-screen video in minutes.
Liza Brown
Liza Brown is a writer and a lover of all things video.
Follow @Liza Brown
Mapping Media Memorable Ends
Nowadays, having a strong online presence is more important than ever. One of the best ways to do that is to create engaging content for your YouTube channel, and you can achieve this by adding a solid intro and outro to your videos.
To keep viewers engaged, the outros on your videos must be strong and captivating to make a positive impression and leave viewers wanting more.
In this article, we’ll discuss how to create news outro templates for your videos or get an editable or non-editable template online.
Part 1. Before Starting, Learn What Is a Good YouTube Outro?
Before we investigate where to find an appropriate News Style Outro for your video in Part 2, let’s figure out what elements a good outro should include firstly.
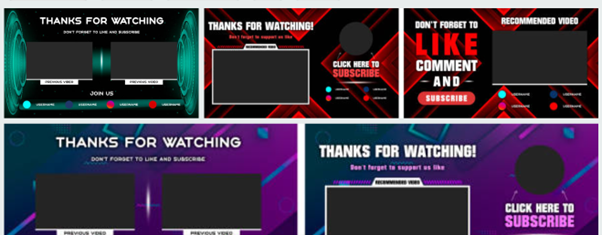
A good outro will typically include a call to action, such as subscribing to a channel, checking out a website, or following on social media. You can also use engaging music or make your outros visually appealing with graphics, animations, or both to keep your viewers hooked.
Furthermore, it should include a brief summary of the video, and what viewers can expect for the things to come. You can find outros templates online or make your own outstanding YouTube outros in just a few clicks.
Part 2. Recommendation: Where Can You Find News Style Outro?
Now that you’ve understood what a good YouTube outro is, you might wonder where you can find News Style outros for your videos/presentations to add a bit of flair.
Multiple platforms offer editable or non-editable news styles outros to content creators. Below we’ve recommended top websites/platforms where you can get your required templates without any issues. Some even offer non-copyright content to their users.
Editable News Outro Template Websites
An editable news outro template can provide a quick and easy way to create or customize an outro that is both professional and engaging. Here are four websites we have chosen for you to find editable news outro templates.
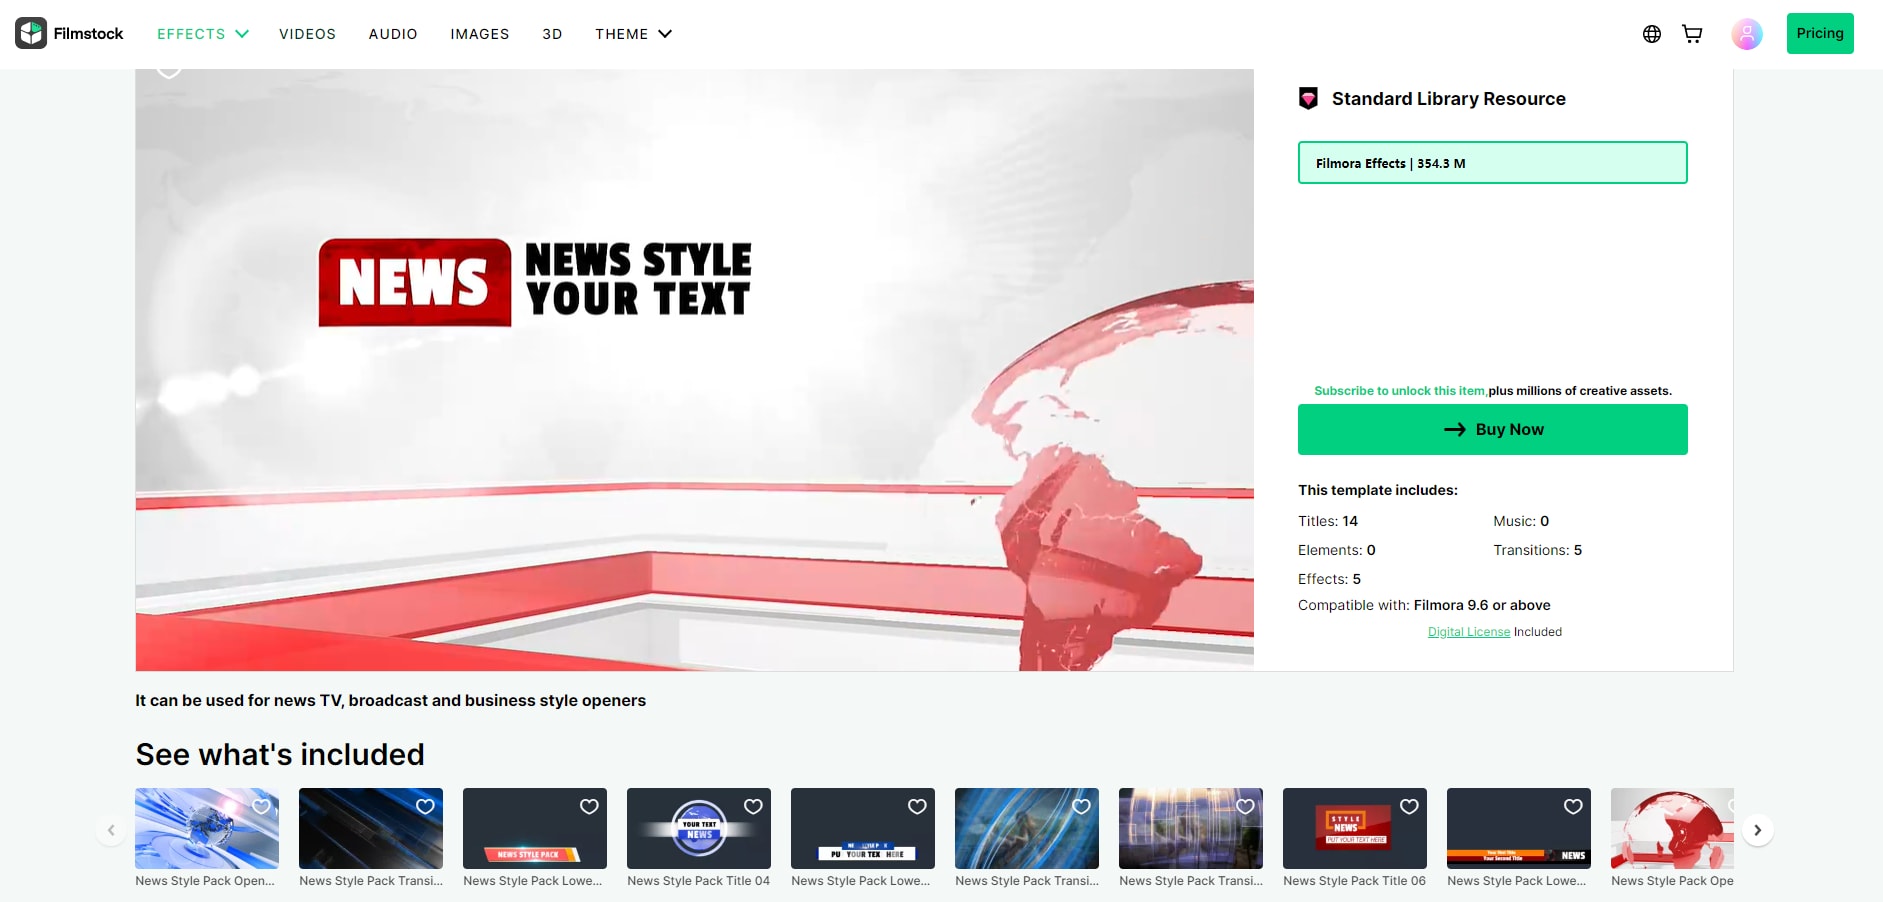
Filmstock
Filmstock is a platform offering free and paid editable templates for content creators. With dozens of editable templates to choose from on Filmstock , you can find the perfect news style outro for your videos in just a few clicks. First, however, you need to install Filmora on your PC to use the platform.
Filmora is a popular video editor with a built-in filmstock library offering hundreds of non-copyright editable templates for every occasion. With the software, you can find and add your news style outros to your videos with just a few clicks. The only disadvantage is that it isn’t completely free. The paid version offers two options: A standard plan that costs $9.99 per month and a Premium plan that will cost you $49.99 per month.
You can also find detailed video tutorials to facilitate your video creation through Filmora and Filmstock’s official YouTube Channels, as well as video sources set presentation on the two channels. Here is an example of News Set video on Filmora’s YouTube Channel. Go to watch it and check are there any ideal news outro!
Video of News Set in Filmora Effects Store
Canva
Canva is a user-friendly graphic design free and paid tool that is quickly becoming a popular choice for businesses of all sizes. Canva offers a range of templates for creating professional-looking designs.
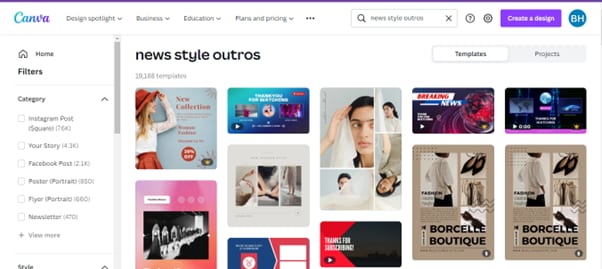
With a wide range of templates to choose from, you can easily find one that fits your needs and style. Best of all, you can create your outro template in minutes without hiring a designer or spending hours learning complex design software.
The software is easy-to-use and does not require any editor to customize and use the templates. The paid version is divided into 2 tiers: Canva Pro ($54.99 per year) and Canva for team ($84. 90/year). One disadvantage of the Canva free version is that it is limited resolution options when exporting your file.
Flexclip
Flexclip is a free, powerful, and easy-to-use online video maker that helps you create beautiful and engaging content for your business. With Flexclip, you can easily create editable news style outros for your videos from scratch or choose a template and edit it according to your requirements.
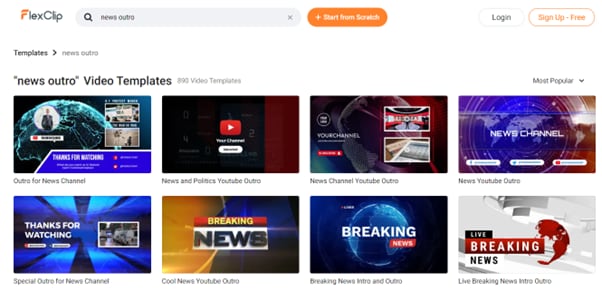
You can add text, music, elements, overlays, and branding to your templates to make them more stunning and captivating.
The platform offers 3 paid plans starting at $8.99/month. The con here is that the free version is only limited to the export quality of 480p, single royalty-free stock use, and 12 projects limit.
Placeit
Placeit is an online editor giving you the ability to create and customize your video content in no time. The editor also includes a stock image library, giving you access to several customizable templates.
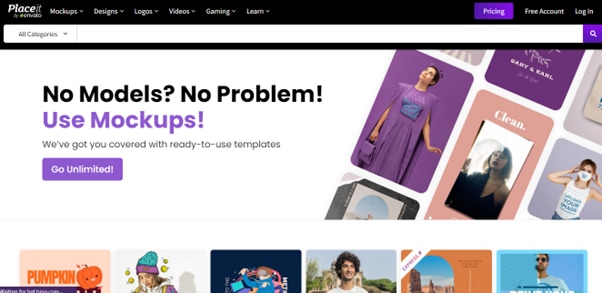
Placeit is easy to use and offers a variety of templates for different purposes, including outros for news stories, video blogs, and even gaming videos. The platform offers an unlimited subscription plan starting from $7.47 /month.
However, the design rendering process of the editor is slow, there is no AI tool, and you even cannot import fonts that are not available on the platform.
Non-Editable News Outro Template Websites
Some platforms offer non-editable high-resolution news outros that you can integrate into your videos using software programs like Filmora (guidance in Part 3), After Effects, etc.
Storyblock
Searching for high-quality templates for your next project?Storyblock is a website that comes with royalty-free, non-customizable news style outros.
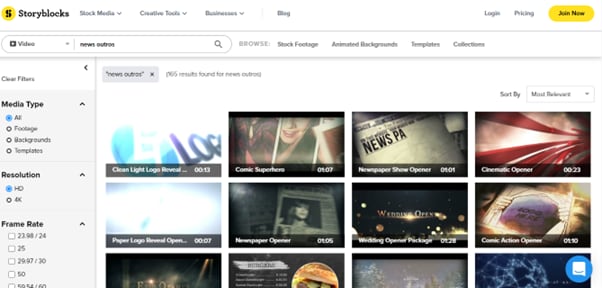
You can use these templates to create high-quality news intros and outros for your podcast or videos. The platform offers two pricing plans for individual content creators, starting at $15 per month. While businesses can customize their plans as per their requirements.
Limitations of the Storyblock are that the footage quality is very poor in the free version, and the paid versions might be tricky to avail sometimes.
Videvo
Videvo is a great resource for anyone looking for royalty-free video templates. They have over 300,000 free and premium videos, which you can download in clips or full with 4K resolution. However, their stock library is not much vast. The platform comes with a two-tier subscription plan starting from $14.99/month or $144/year.
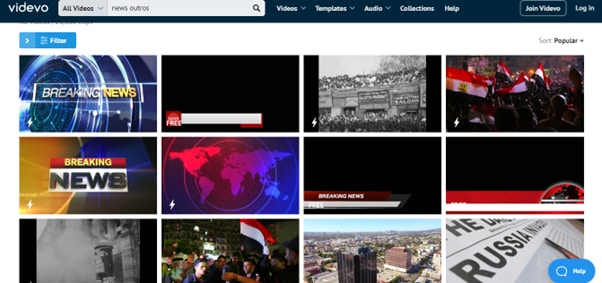
You can find templates for both commercial and non-commercial use, so whatever your needs are, Videvo is likely to have a template that will work for you, i.e., news style. Some features of the platform include high-resolution download options, numerous music, sound effects, images and videos library, and a video compression option.
Videezy
Videezy is a royalty-free video site that offers free and premium video templates. The website has a variety of options to choose from, including news style outros, all of which are geared towards creating engaging content.
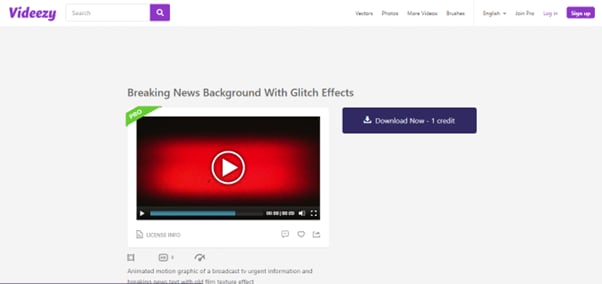
The templates are all ready-made and royalty-free. You can download them for use in your own projects and attach them to your video using any video editing app/software.
The pricing of the platform starts at $19/file, which might be expensive for some users. Moreover, in the free version, too many ads are displayed.
Shutterstock
Shutterstock has various affordable, royalty-free outro templates that you can use for your video/podcast. With a wide selection of styles and price points, this platform has the perfect content for your needs.
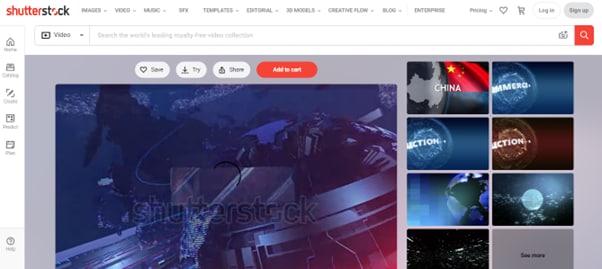
On Shutterstock, the free trial only offers 10 images, and you will be charged $0.22-$14.50/image once the trial limit is over. On the other hand, the Extended license will cost you $67.96-$99.50. The downside is that you have to purchase the content pack separately.
iStock
iStock is a premium website offering royalty-free stock photos, illustrations, and videos divided into numerous categories for easy access. The platform also offers a variety of non-editable news outro templates that you can add to your videos or podcasts.
The free trial on the platform is limited to 10 images, and after that, you will be charged $0.22-$9.90/image, while the Extended license will cost you $144-$216. The support system on the platform is slow and doesn’t respond on time.
Part 3. A Bonus Tip: How To Edit Your News Outro For Your YouTube Video?
After knowing the websites providing News Style Outro, we hope you can find an ideal outro successfully. However, how to use the material you have found, integrate it into your YouTube video, and improve the quality of it?
Like mentioned before, we highly recommend Filmora to fulfill all your editing needs and even provide royalty-free templates to use. Below are the steps to edit your news outros and make your content more appealing. Let’s start it without any hassle:
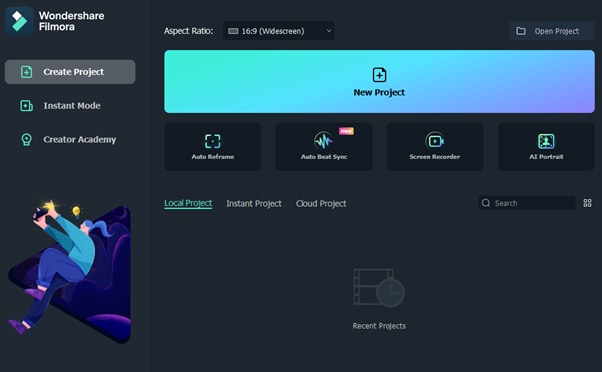
Step1 Download Filmora software from the official website and install it on your PC. Launch the software and click “New Project.”
Step2 Drag and drop your media file or import it using the “Click Here to Import Media File” option. Now, drag your file and drop it in the Timeline.
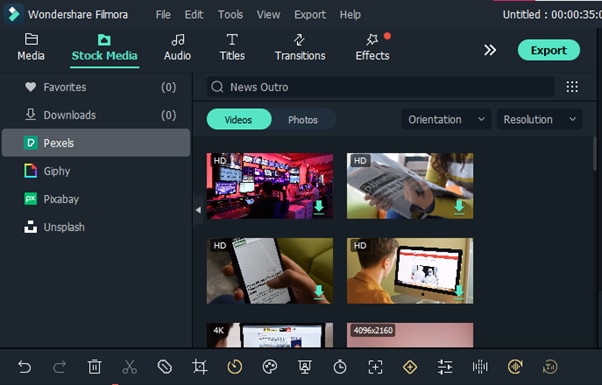
Step3 Adjust your clip in the Timeline and click the “Stock Media” option. Search for “News Outros,” select the one you like, and add it to the Timeline.
Step4 Next, adjust the template on your video, and once you are satisfied, click the “Export” option. Finally, do the necessary settings and click “Export” again or share your video directly to YouTube.
Free Download For Win 7 or later(64-bit)
Free Download For macOS 10.14 or later
Conclusion
In this article, we’ve provided a detailed guide on how to create news outro templates with simple and easy-to-follow instructions. We also discussed various platforms/editors where you can find customizable and non-customizable templates.
Hopefully, you find this guide informative and can now create strong news style outros for your videos.
Canva
Canva is a user-friendly graphic design free and paid tool that is quickly becoming a popular choice for businesses of all sizes. Canva offers a range of templates for creating professional-looking designs.
With a wide range of templates to choose from, you can easily find one that fits your needs and style. Best of all, you can create your outro template in minutes without hiring a designer or spending hours learning complex design software.
The software is easy-to-use and does not require any editor to customize and use the templates. The paid version is divided into 2 tiers: Canva Pro ($54.99 per year) and Canva for team ($84. 90/year). One disadvantage of the Canva free version is that it is limited resolution options when exporting your file.
Flexclip
Flexclip is a free, powerful, and easy-to-use online video maker that helps you create beautiful and engaging content for your business. With Flexclip, you can easily create editable news style outros for your videos from scratch or choose a template and edit it according to your requirements.
You can add text, music, elements, overlays, and branding to your templates to make them more stunning and captivating.
The platform offers 3 paid plans starting at $8.99/month. The con here is that the free version is only limited to the export quality of 480p, single royalty-free stock use, and 12 projects limit.
Placeit
Placeit is an online editor giving you the ability to create and customize your video content in no time. The editor also includes a stock image library, giving you access to several customizable templates.
Placeit is easy to use and offers a variety of templates for different purposes, including outros for news stories, video blogs, and even gaming videos. The platform offers an unlimited subscription plan starting from $7.47 /month.
However, the design rendering process of the editor is slow, there is no AI tool, and you even cannot import fonts that are not available on the platform.
Non-Editable News Outro Template Websites
Some platforms offer non-editable high-resolution news outros that you can integrate into your videos using software programs like Filmora (guidance in Part 3), After Effects, etc.
Storyblock
Searching for high-quality templates for your next project?Storyblock is a website that comes with royalty-free, non-customizable news style outros.
You can use these templates to create high-quality news intros and outros for your podcast or videos. The platform offers two pricing plans for individual content creators, starting at $15 per month. While businesses can customize their plans as per their requirements.
Limitations of the Storyblock are that the footage quality is very poor in the free version, and the paid versions might be tricky to avail sometimes.
Videvo
Videvo is a great resource for anyone looking for royalty-free video templates. They have over 300,000 free and premium videos, which you can download in clips or full with 4K resolution. However, their stock library is not much vast. The platform comes with a two-tier subscription plan starting from $14.99/month or $144/year.
You can find templates for both commercial and non-commercial use, so whatever your needs are, Videvo is likely to have a template that will work for you, i.e., news style. Some features of the platform include high-resolution download options, numerous music, sound effects, images and videos library, and a video compression option.
Videezy
Videezy is a royalty-free video site that offers free and premium video templates. The website has a variety of options to choose from, including news style outros, all of which are geared towards creating engaging content.
The templates are all ready-made and royalty-free. You can download them for use in your own projects and attach them to your video using any video editing app/software.
The pricing of the platform starts at $19/file, which might be expensive for some users. Moreover, in the free version, too many ads are displayed.
Shutterstock
Shutterstock has various affordable, royalty-free outro templates that you can use for your video/podcast. With a wide selection of styles and price points, this platform has the perfect content for your needs.
On Shutterstock, the free trial only offers 10 images, and you will be charged $0.22-$14.50/image once the trial limit is over. On the other hand, the Extended license will cost you $67.96-$99.50. The downside is that you have to purchase the content pack separately.
iStock
iStock is a premium website offering royalty-free stock photos, illustrations, and videos divided into numerous categories for easy access. The platform also offers a variety of non-editable news outro templates that you can add to your videos or podcasts.
The free trial on the platform is limited to 10 images, and after that, you will be charged $0.22-$9.90/image, while the Extended license will cost you $144-$216. The support system on the platform is slow and doesn’t respond on time.
Part 3. A Bonus Tip: How To Edit Your News Outro For Your YouTube Video?
After knowing the websites providing News Style Outro, we hope you can find an ideal outro successfully. However, how to use the material you have found, integrate it into your YouTube video, and improve the quality of it?
Like mentioned before, we highly recommend Filmora to fulfill all your editing needs and even provide royalty-free templates to use. Below are the steps to edit your news outros and make your content more appealing. Let’s start it without any hassle:
Step1 Download Filmora software from the official website and install it on your PC. Launch the software and click “New Project.”
Step2 Drag and drop your media file or import it using the “Click Here to Import Media File” option. Now, drag your file and drop it in the Timeline.
Step3 Adjust your clip in the Timeline and click the “Stock Media” option. Search for “News Outros,” select the one you like, and add it to the Timeline.
Step4 Next, adjust the template on your video, and once you are satisfied, click the “Export” option. Finally, do the necessary settings and click “Export” again or share your video directly to YouTube.
Free Download For Win 7 or later(64-bit)
Free Download For macOS 10.14 or later
Conclusion
In this article, we’ve provided a detailed guide on how to create news outro templates with simple and easy-to-follow instructions. We also discussed various platforms/editors where you can find customizable and non-customizable templates.
Hopefully, you find this guide informative and can now create strong news style outros for your videos.
Also read:
- [New] Channel Growth Blueprint Selecting Between Studio and Latest Beta
- [New] Explore Revolutionary Meeting Platforms That Cost Nothing
- [Updated] 2024 Approved From Editing to Sharing YouTube Mastery with Adobe Premiere
- [Updated] The Comprehensive Guide to Enhancing Your Video Gaming Channels
- 2024 Approved Masterclass Guide 15 Tripods Perfect for GoPro
- 2024 Approved Streamlined Selection Top 10 Efficient Vimeo Downloaders
- Decoding the Economic Riches of Mr. Beast for 2024
- Enhancing Visual Impact A Guide to Jump Cut Techniques for 2024
- In 2024, 6 Proven Ways to Unlock Motorola Edge 40 Pro Phone When You Forget the Password
- In 2024, Inside Americas Favorite Non-Omegle Video Chat Websites A Current Ranking Guide
- Live Stream to Youtube with OBS Step by Step Guide for Beginners
- Prime Vocal Changer Tools for Digital Personalities
- Stop Motion Mastery on Instagram From Basics to Pro for 2024
- Top Digital Picks Free Alarm Ringtones Download
- YouTube Creator Studio Vs. YouTube Studio (Beta) Which One Is Better?
- Title: [New] Cutting-Edge Strategies for YouTube Split-Screen Videos
- Author: Brian
- Created at : 2024-10-22 03:49:15
- Updated at : 2024-10-23 21:19:14
- Link: https://youtube-video-recordings.techidaily.com/new-cutting-edge-strategies-for-youtube-split-screen-videos/
- License: This work is licensed under CC BY-NC-SA 4.0.