
!["[New] Aural Ascent Step-by-Step Guide to Audio Submission"](https://www.lifewire.com/thmb/XA451cx1FYvpcmr9v67cHXy-zDg=/400x300/filters:no_upscale():max_bytes(150000):strip_icc()/PortableCarHeater_534759-b31dbf8ec1a2491ea8ee248280de9f55.png)
"[New] Aural Ascent Step-by-Step Guide to Audio Submission"
Aural Ascent: Step-by-Step Guide to Audio Submission
Create High-Quality Video - Wondershare Filmora
An easy and powerful YouTube video editor
Numerous video and audio effects to choose from
Detailed tutorials provided by the official channel
YouTube is a music lover’s paradise. With such a large community of music listeners on YouTube, many well-known and lesser-known musicians continue to upload their songs regularly. If you’re a music producer, you’ll probably want to do this as well. However, understanding how to upload music to YouTube might be difficult, so this article is created to assist you.
When you upload a song to YouTube, it becomes available to the entire globe. Unlike other streaming services, anyone can use YouTube for free. This is a one-of-a-kind platform for sharing music. This is an opportunity that every artist should take advantage of, with a potential audience of billions.
So, how do you go about uploading songs to YouTube? Regular file formats aren’t applicable; therefore, this is the only challenging component. YouTube does not recognize.mp3 or.mp4 files, which makes things a little more difficult for the average producer. It’s simple to get around this.
In this article
02 Why Is It Necessary To Upload Longer Videos And Music To Youtube?
03 How to upload your music to YouTube using Filmora?
Details On Youtube Music
YouTube recently added ‘YouTube Music’ to assist advertise the website as a music-focused destination. You don’t have to stay on the page for the music to keep playing, and there are no adverts if you pay for this service. Despite this, YouTube is still working to make its website more musical. The beauty of this is that even if you don’t want to pay, you still have access to all of YouTube’s music.
Using platforms like Spotify and Apple Music to distribute your music is a terrific way to get it out there. However, when compared to YouTube, there are several drawbacks. For starters, they are both expensive.
Even though this is critical for compensating artists, it already restricts the audience’s reach. Second, because there are so many music platforms to choose from, audiences are likely to have a favorite, which could mean they don’t have access to the platform you use to release your music. On the other hand, YouTube doesn’t have any of these problems.
YouTube’s other services are also free, making them accessible to everybody regardless of their financial position. This implies that you can access the site as long as you have a phone or a laptop. Many well-known musicians began their careers on YouTube. It provides a free platform for you to advertise yourself, regardless of your present level of popularity. Even some of the most popular profiles are musician accounts, demonstrating the site’s potential for musical promotion.
Why Is It Necessary To Upload Longer Videos And Music To Youtube?
YouTube enables video uploads of up to 15 minutes in length by default. If you try to upload a video that is more than 15 minutes long, it will fail. This is a YouTube restriction, not a Brightcove restriction. YouTube will notify you when your YouTube account has been activated for lengthier uploads. YouTube playlists are limited to 5,000 videos, and YouTube Music playlists should be similarly restricted.
Standard Accounts Have A Time Limit
The 2 GB, file size limit is backed by a 15-minute maximum runtime restriction in YouTube’s blog and Google’s 2011 upload rules. All YouTube videos had to be under 10 minutes long until 2010, but on July 29, 2010, YouTube announced that the maximum video duration had been expanded to 15 minutes. According to the company, this was the most requested modification by YouTube viewers, and it’s a natural move that takes full advantage of YouTube’s new 2 GB size restriction.
What Are The Benefits Of Uploading Music Or A Song On Youtube?
- YouTube Music is a music-specific YouTube that allows users to watch and listen to a nearly infinite archive in a music discovery app. It will enable fans to find and engage with artists by making it easier for them to discover the range and diversity of music material on YouTube.
- Adding music to your video makes it more engaging and gives it a professional look.
- Background music is intended to fill quiet and create an atmosphere rather than to be carefully listened to. It also allows for the creation of a unique ambiance with a more or less subtle background to elicit distinct emotions in the mind of an audiovisual production’s audience.
- Music can play a vital influence in the success of a video. The soundtrack can keep the viewer interested in the clip if the video itself is not entertaining.
How Can I Utilise Music Lawfully In My Youtube Videos?
If you want to use copyrighted music on YouTube lawfully, you’ll need to go out and seek permission from the original creator. The second side of music licensing is this. Copyright law ensures that creators are compensated when their work is used, and this is where YouTube’s music policy comes into play.
How to upload your music to YouTube using Filmora?
At the end of the day, YouTube is a video-sharing site. Even if listening to music with static backgrounds isn’t commonplace, including a video can’t hurt. Everything will be determined by your editing and design abilities. If you’re working on a simple project, adding some effects can help it stand out. To achieve this, there are a variety of software options available; pick one that best suits your needs. Today, we would like to recommend Filmora to you.
The songs in YouTube’s library can be used for both personal and commercial purposes. Any of the songs in Filmora’s library can be used in any way you like. There is no need for acknowledgment of non-commercial use, but you should aware that commercial use may not be permitted.
Moreover, Filmora is far more sophisticated than Windows Movie Maker and iMovie on Mac. It also allows you to create a professional-looking YouTube video with hundreds of presets such as filters, overlays, components, transitions, and blending several layers of effects and audio to enhance your YouTube tale.
Adding music to your video might help it go from excellent to extraordinary. Here’s a step-by-step guide on adding music to your YouTube videos. Knowing how to incorporate music into your YouTube videos can significantly improve the quality of your content. The majority of videos uploaded to YouTube have never been edited in any way.
This is due in part to a lack of experience, but it is also related to a lack of awareness. Including music in your films is an easy method to boost productivity, attract more viewers, and keep them watching for longer. It’s also simple to do straight within YouTube, albeit this isn’t the ideal option in the long run. So, here are a few options for adding music to YouTube videos by Filmora.
Step 1: The first step is to figure out where you want to put the audio
Download Wondershare Filmora from the official website and run it on your computer. After the software has been launched, go to ‘MEDIA’ and then to the ‘IMPORT’ option, which is located directly below the navigation bar. Now, select ‘Import Media Files’ from the drop-down menu to choose the video file, and then repeat the process to select the desired background music file.
Step 2: Adding music to a timeline
Hover your mouse over the audio and video files you just imported into Filmora, and then hit the ‘+’ sign (‘Add to Project’ will appear). You may also move the media files to the timeline by dragging them down.
Step 3: Make changes to the music file
By double-tapping the audio from the timeline, you can edit the music. The audio panel will appear at the top of the screen. You may fade in or out the audio, adjust the volume, pitch, and speed, and select suitable equalization.
Step 4: Export your work
After you’ve made the adjustments you want to your movie, click the ‘EXPORT’ tab on the toolbar to export it. The produced file can be renamed, saved in.MP4 and.WMV formats, and set the resolution.
For Win 7 or later (64-bit)
For macOS 10.12 or later
Bouns! Where Can I Find Music For Youtube Videos?
YouTube’s music library is relatively small. The songs include both traditional public domain and generic royalty-free music. Your selections will be limited if you’re adding (or replacing) music directly from YouTube. This is why pre-editing your videos is the most pleasing thing you can do for them. This will enable you to add bespoke music from services.
Conclusion
● We hope you now have a better concept of how to post your song to YouTube if you’ve ever wondered. On the surface, posting songs to YouTube may appear complicated, but once you get the hang of it, it’ll be a snap. When considering how to promote your music, YouTube should not be disregarded. It’s rare to have a free platform to distribute music on, so make use of it. With such a massive YouTube user base, your potential audience is enormous. Get your song on the platform and promote it as much as possible. You never know who might come upon your tunes until you’ve made them public. This concluded the tutorial on how to upload music to YouTube.
The Top 10 Capture Cards for YouTube You Should Know
The Top 10 Capture Cards for YouTube

Richard Bennett
Nov 04, 2022• Proven solutions
If you are like to share gameplay videos, it’s very important that you have a high-quality capture card. With the help of a capture card, you can easily get all of the in-game footage that you need to make amazing videos and grow a healthy YouTube channel . In this article we will break down the top 10 capture cards for gaming YouTubers in 2018:
- Elgato Game Capture HD 60 Pro
- Elgato Game Capture HD 60 S
- Star Tech 4 Port PCI Firewire Adaptor Card with Digital Video Editing
- Hauppage Colossus 2 PCI Express Internal 1080P HD-PVR
- Elgato Game Capture HD
- Imillet HDMI Video Capture with USB 3.0/2.0 Dongle
- HDML Cloner Box Pro
- Pyle PVRC43 Standalone Digital Video Recorder
- HDML Cloner Box Evolve
- AVerMedia AVerCapture HD
Click here for more tips on being a YouTube gamer .
1. Elgato Game Capture HD 60 Pro
Price: $204
Compatibility: Windows, Switch, 360, Xbox One, PS4
Specs: Internal PCI 4k 30fps
Highlights: Made for streaming. Improved benchmark speeds.
This capture card works with an HDMI interface as well as the ability to be plugged into any type of PC game device. The process for setting it up and recording is extremely simple and the casing has been designed for improving the performance of the system and making it easier to integrate with many different devices. With an up to 16 MB per second capture bitrate, this is a pro tool.
2. Elgato Game Capture HD 60 S
Price: $160
Compatibility: Xbox one, switch, ps4
Specs: This device does 1080p at 60 fps
Highlights: This is one of very few game capture devices that come with USB 3.0 compatibility for easy access to almost any type of gaming device.
The card itself is mind-blowingly easy to set up with its external USB. It’s made for live streaming to YouTube, Twitch, and other platforms. There’s very low latency available on this card and it is one of the highest quality tools for console players.
3. Star Tech 4 Port PCI Firewire Adaptor Card with Digital Video Editing
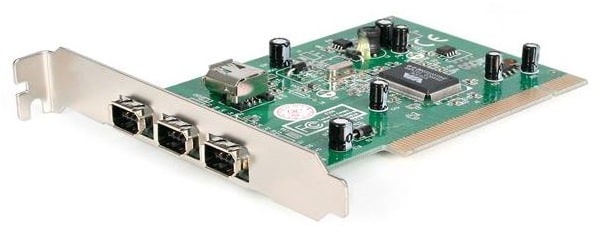
Price: $80
Compatibility: PC, Xbox, PS4
Specs: 1080p, 60 fps
Highlights: This USB 3.0 capture card can be quite easily installed almost anywhere and captures up to 60 frames per second for live streams.
This card comes with a wide range of ports including DVI, Component, HDMI, VGA, and USB. It’s tough to find a capture card that has so many different ports available and this can ensure that it’s possible to capture on almost any type of gaming system or device. A helpful tutorial is also included with this capture card to ensure that you can get the best video format from every console.
4. Hauppauge Colossus 2 PCI Express Internal Card
Price: $135
Compatibility: TV, DVR, Satellite, Xbox, PC, PlayStation
Specs: 1080p, 60 fps
Highlights: This card is an internal PCI card allowing it to remain as a consistent capture device inside a PC.
This card is perfect for recording live programs from a TV to your computer, offloading programs off of your DVR, as well as recording live game footage from PlayStation, Xbox, or your PC. Included alongside this card is the chance to use Stream EEZ for live streaming directly to platforms like Upstream, Twitch, and YouTube.
5. Elgato Game Capture HD
Price: $159
Compatibility: Xbox, PlayStation, Nintendo, PC, Mac
Specs: 1080p at 60fps
Highlights: The game capture HD offers a one-click sharing system to YouTube as well as flashback recording where you can turn back 10 or 15 minutes to record content that just happened.
Overall this is one of the easiest capture cards to set up because it comes with USB 3.0 and HDMI connections. For most modern gaming consoles, it offers the same type of features including the flashback recording solution to record retroactively. The device includes unlimited game capture at a fairly reasonable price and a creation suite so that you can do multitrack recording from your webcam. Editing footage from the card makes it very easy to quickly export clips for all of your content and publish them on social media. This game capture device is also known for its extremely compact design. It is only around the size of a mobile phone, meaning it can be quite easily carried in your pocket.
6. Imillet HDMI Capture Card with USB 3.0 Dongle
Price: $148
Compatibility: Plug and play with no drivers needed. PC, Mac, Linux, any iOS
Specs: 1080p 60 fps
Highlights: Doesn’t require any type of driver installation. This will work on any operating system or computer for quick recording.
The card itself is known for its USB 3.0 support as well as USB 2.0, and for not needing drivers. There is no more compatible card on the market right now. If you have had issues with other cards in the past or you regularly run Linux, you should consider this device to be prepared for all your recording needs. The device will detect the input and adjust output automatically to ensure a crystal-clear picture based on the type of device that you’re recording from. Imillet also offers a great warranty of six months free replacement as well as 12 months free repair on the card for anyone that is ordering it. The software that comes with the card is extremely simple but it does the job quite effectively, allowing for quick recording from multiple devices and simple detection for a video signal and output. Input formats can range from 480p to 1080p and frame rates can go as high as 60 frames per second. The device has great stats for its live capture but many people have experienced problems when trying to record from DVR specifically.
7. HDML Cloner Box Pro
Price: $135
Compatibility: Compatible with game consoles, windows, mac.
Specs: 1080p video at 60fps max
Highlights: The HDML Cloner Box comes with its own remote and the option to record using VGA, AV, YPbPr, and HDMI.
With so many different inputs available on this card it’s possible to record from almost any type of gaming device. With the hardware encoder which is on board, you can save videos as MP4 files and then instantly transfer them over to a flash drive on the device. You can get all of your saved files available without even having access to a PC. The box works as a standalone and it doesn’t have to be plugged into a computer to work. Free editing and converter software are included but with a storage memory card placed in the device and you can record a huge amount of footage and then edit it on your PC later on. With the quick connect feature, it is easy to set up recording and then perform all the functions you need for recording, stopping, and pausing on the remote as you use it. This remains one of the only cards available where it works as a standalone and allows for the chance to save videos to a flash drive or storage device without having to have a computer plugged in. The free converter software and video editing that comes with this device add extra value as well. An optional two-year warranty can make sure that you are ready for anything concerning this card.
8. Pyle PVRC43 Standalone Digital Video Recorder
Price: $80
Compatibility: TV, VCR, DVD, Digital camcorder, Laptop, PC, Mac, Game console
Specs: 480p
Highlights: This works as a standalone recorder with up to 32 GB of onboard memory. There’s no need to plug it into a computer for it to work and with the help of the memory card, you can record a wide range of output videos in AVI.
This card is designed as a standalone option and it’s extremely small with a USB 2.0 interface. Overall the quality of this card is not quite as technically advanced as some of the others on our list but it can record a video that is perfectly appropriate for the web or sharing over platforms like YouTube. The device can be set up quite easily with the help of an RCA connection cable, USB power cable, or other options. Generally, you may need access to an RCA to HDMI adapter if you want to record video off of a more modern laptop or camera. Where this device takes over on its competitors is the idea of just how simple it is to use. It weighs less than a pound and has a ‘one-button operation’ to start and pause recording. As of the completely standalone option, it doesn’t require any type of connection to a computer to record video. If you are looking for one of the simplest capture cards on the market that outputs to AVI in web quality, this is it.
9. HDML Cloner Box Evolve
Price: $121
Compatibility: HDMI input standalone mass compatibility
Specs: 4k video input, 1080p 60fps output
Highlights: This is a standalone USB capture device that comes with its remote. It also features dual HDMI slots allowing for up to two sources of video during recording (so you can also record from a facecam).
The card itself features a stream and capture function so that you can stream gameplay to any type of USB storage device. By plugging in a hard drive you can just press one button to record gaming videos and then handle the process of live streaming, editing, and more. Through two HDMI inputs supported and a very powerful remote control, you record on any device with fantastic image quality and without even having to plug it into any type of computer. While many of these standalone style capture boxes only support the use of minimal storage, this is a device that is capable of getting hooked up to any type of USB external hard drive for a chance to capture nearly unlimited video on your Cloner Box. As a bonus, the MP4 video editing software that is included will make the process of trimming, copying, and converting easier than ever. This has incredible value to the overall product. As an additional bonus, this Cloner Box also features a quick heat dissipation capability which can help to prevent lagging and other common problems that occur with many types of capture boxes when they overheat. A free microphone slot in addition to the HDMI slots makes recording professional voiceovers for any gameplay videos as easy as possible!
10. Avermedia Avercapture HD
Price: $99
Compatibility: Any console, PC, Mac
Specs: This device is capable of capture in full 1080p/60fps as well as the style encoding for quick streaming and easy video capture.
Highlights: The timeshift feature available on this device makes it simple to record retroactively as well as offer ultralow streaming and recording over time. The device makes it easy to capture and stream and it comes with a competitive two-year warranty.
This card works as a USB capture card from most any type of device, it captures through a component input or HDMI input and it has some of the lowest latency for any type of team capture. With one slot for video input as well as an audio input slot, it’s possible to record quick gameplay and voiceovers at any time with very minimal setup. Streaming and recording in full 1080p are done quite easily on this device and it’s designed to use less processing power than some of the competitors to ensure minimal game lag. RECental is included as part of this device so that you can set up live streaming to many of the top platforms available online. The timeshift function comes with a one-hour buffer ensuring if a great gameplay moment happens, you can shift back and begin recording from that time. Commentary and sharing are made easy with the software that’s included with this device. It makes sharing and recording an easy process for any avid video recorder.
Let us know what capture card you use and if you’re happy with it!
Richard Bennett
Richard Bennett is a writer and a lover of all things video.
Follow @Richard Bennett
Richard Bennett
Nov 04, 2022• Proven solutions
If you are like to share gameplay videos, it’s very important that you have a high-quality capture card. With the help of a capture card, you can easily get all of the in-game footage that you need to make amazing videos and grow a healthy YouTube channel . In this article we will break down the top 10 capture cards for gaming YouTubers in 2018:
- Elgato Game Capture HD 60 Pro
- Elgato Game Capture HD 60 S
- Star Tech 4 Port PCI Firewire Adaptor Card with Digital Video Editing
- Hauppage Colossus 2 PCI Express Internal 1080P HD-PVR
- Elgato Game Capture HD
- Imillet HDMI Video Capture with USB 3.0/2.0 Dongle
- HDML Cloner Box Pro
- Pyle PVRC43 Standalone Digital Video Recorder
- HDML Cloner Box Evolve
- AVerMedia AVerCapture HD
Click here for more tips on being a YouTube gamer .
1. Elgato Game Capture HD 60 Pro
Price: $204
Compatibility: Windows, Switch, 360, Xbox One, PS4
Specs: Internal PCI 4k 30fps
Highlights: Made for streaming. Improved benchmark speeds.
This capture card works with an HDMI interface as well as the ability to be plugged into any type of PC game device. The process for setting it up and recording is extremely simple and the casing has been designed for improving the performance of the system and making it easier to integrate with many different devices. With an up to 16 MB per second capture bitrate, this is a pro tool.
2. Elgato Game Capture HD 60 S
Price: $160
Compatibility: Xbox one, switch, ps4
Specs: This device does 1080p at 60 fps
Highlights: This is one of very few game capture devices that come with USB 3.0 compatibility for easy access to almost any type of gaming device.
The card itself is mind-blowingly easy to set up with its external USB. It’s made for live streaming to YouTube, Twitch, and other platforms. There’s very low latency available on this card and it is one of the highest quality tools for console players.
3. Star Tech 4 Port PCI Firewire Adaptor Card with Digital Video Editing
Price: $80
Compatibility: PC, Xbox, PS4
Specs: 1080p, 60 fps
Highlights: This USB 3.0 capture card can be quite easily installed almost anywhere and captures up to 60 frames per second for live streams.
This card comes with a wide range of ports including DVI, Component, HDMI, VGA, and USB. It’s tough to find a capture card that has so many different ports available and this can ensure that it’s possible to capture on almost any type of gaming system or device. A helpful tutorial is also included with this capture card to ensure that you can get the best video format from every console.
4. Hauppauge Colossus 2 PCI Express Internal Card
Price: $135
Compatibility: TV, DVR, Satellite, Xbox, PC, PlayStation
Specs: 1080p, 60 fps
Highlights: This card is an internal PCI card allowing it to remain as a consistent capture device inside a PC.
This card is perfect for recording live programs from a TV to your computer, offloading programs off of your DVR, as well as recording live game footage from PlayStation, Xbox, or your PC. Included alongside this card is the chance to use Stream EEZ for live streaming directly to platforms like Upstream, Twitch, and YouTube.
5. Elgato Game Capture HD
Price: $159
Compatibility: Xbox, PlayStation, Nintendo, PC, Mac
Specs: 1080p at 60fps
Highlights: The game capture HD offers a one-click sharing system to YouTube as well as flashback recording where you can turn back 10 or 15 minutes to record content that just happened.
Overall this is one of the easiest capture cards to set up because it comes with USB 3.0 and HDMI connections. For most modern gaming consoles, it offers the same type of features including the flashback recording solution to record retroactively. The device includes unlimited game capture at a fairly reasonable price and a creation suite so that you can do multitrack recording from your webcam. Editing footage from the card makes it very easy to quickly export clips for all of your content and publish them on social media. This game capture device is also known for its extremely compact design. It is only around the size of a mobile phone, meaning it can be quite easily carried in your pocket.
6. Imillet HDMI Capture Card with USB 3.0 Dongle
Price: $148
Compatibility: Plug and play with no drivers needed. PC, Mac, Linux, any iOS
Specs: 1080p 60 fps
Highlights: Doesn’t require any type of driver installation. This will work on any operating system or computer for quick recording.
The card itself is known for its USB 3.0 support as well as USB 2.0, and for not needing drivers. There is no more compatible card on the market right now. If you have had issues with other cards in the past or you regularly run Linux, you should consider this device to be prepared for all your recording needs. The device will detect the input and adjust output automatically to ensure a crystal-clear picture based on the type of device that you’re recording from. Imillet also offers a great warranty of six months free replacement as well as 12 months free repair on the card for anyone that is ordering it. The software that comes with the card is extremely simple but it does the job quite effectively, allowing for quick recording from multiple devices and simple detection for a video signal and output. Input formats can range from 480p to 1080p and frame rates can go as high as 60 frames per second. The device has great stats for its live capture but many people have experienced problems when trying to record from DVR specifically.
7. HDML Cloner Box Pro
Price: $135
Compatibility: Compatible with game consoles, windows, mac.
Specs: 1080p video at 60fps max
Highlights: The HDML Cloner Box comes with its own remote and the option to record using VGA, AV, YPbPr, and HDMI.
With so many different inputs available on this card it’s possible to record from almost any type of gaming device. With the hardware encoder which is on board, you can save videos as MP4 files and then instantly transfer them over to a flash drive on the device. You can get all of your saved files available without even having access to a PC. The box works as a standalone and it doesn’t have to be plugged into a computer to work. Free editing and converter software are included but with a storage memory card placed in the device and you can record a huge amount of footage and then edit it on your PC later on. With the quick connect feature, it is easy to set up recording and then perform all the functions you need for recording, stopping, and pausing on the remote as you use it. This remains one of the only cards available where it works as a standalone and allows for the chance to save videos to a flash drive or storage device without having to have a computer plugged in. The free converter software and video editing that comes with this device add extra value as well. An optional two-year warranty can make sure that you are ready for anything concerning this card.
8. Pyle PVRC43 Standalone Digital Video Recorder
Price: $80
Compatibility: TV, VCR, DVD, Digital camcorder, Laptop, PC, Mac, Game console
Specs: 480p
Highlights: This works as a standalone recorder with up to 32 GB of onboard memory. There’s no need to plug it into a computer for it to work and with the help of the memory card, you can record a wide range of output videos in AVI.
This card is designed as a standalone option and it’s extremely small with a USB 2.0 interface. Overall the quality of this card is not quite as technically advanced as some of the others on our list but it can record a video that is perfectly appropriate for the web or sharing over platforms like YouTube. The device can be set up quite easily with the help of an RCA connection cable, USB power cable, or other options. Generally, you may need access to an RCA to HDMI adapter if you want to record video off of a more modern laptop or camera. Where this device takes over on its competitors is the idea of just how simple it is to use. It weighs less than a pound and has a ‘one-button operation’ to start and pause recording. As of the completely standalone option, it doesn’t require any type of connection to a computer to record video. If you are looking for one of the simplest capture cards on the market that outputs to AVI in web quality, this is it.
9. HDML Cloner Box Evolve
Price: $121
Compatibility: HDMI input standalone mass compatibility
Specs: 4k video input, 1080p 60fps output
Highlights: This is a standalone USB capture device that comes with its remote. It also features dual HDMI slots allowing for up to two sources of video during recording (so you can also record from a facecam).
The card itself features a stream and capture function so that you can stream gameplay to any type of USB storage device. By plugging in a hard drive you can just press one button to record gaming videos and then handle the process of live streaming, editing, and more. Through two HDMI inputs supported and a very powerful remote control, you record on any device with fantastic image quality and without even having to plug it into any type of computer. While many of these standalone style capture boxes only support the use of minimal storage, this is a device that is capable of getting hooked up to any type of USB external hard drive for a chance to capture nearly unlimited video on your Cloner Box. As a bonus, the MP4 video editing software that is included will make the process of trimming, copying, and converting easier than ever. This has incredible value to the overall product. As an additional bonus, this Cloner Box also features a quick heat dissipation capability which can help to prevent lagging and other common problems that occur with many types of capture boxes when they overheat. A free microphone slot in addition to the HDMI slots makes recording professional voiceovers for any gameplay videos as easy as possible!
10. Avermedia Avercapture HD
Price: $99
Compatibility: Any console, PC, Mac
Specs: This device is capable of capture in full 1080p/60fps as well as the style encoding for quick streaming and easy video capture.
Highlights: The timeshift feature available on this device makes it simple to record retroactively as well as offer ultralow streaming and recording over time. The device makes it easy to capture and stream and it comes with a competitive two-year warranty.
This card works as a USB capture card from most any type of device, it captures through a component input or HDMI input and it has some of the lowest latency for any type of team capture. With one slot for video input as well as an audio input slot, it’s possible to record quick gameplay and voiceovers at any time with very minimal setup. Streaming and recording in full 1080p are done quite easily on this device and it’s designed to use less processing power than some of the competitors to ensure minimal game lag. RECental is included as part of this device so that you can set up live streaming to many of the top platforms available online. The timeshift function comes with a one-hour buffer ensuring if a great gameplay moment happens, you can shift back and begin recording from that time. Commentary and sharing are made easy with the software that’s included with this device. It makes sharing and recording an easy process for any avid video recorder.
Let us know what capture card you use and if you’re happy with it!
Richard Bennett
Richard Bennett is a writer and a lover of all things video.
Follow @Richard Bennett
Also read:
- In 2024, Decoding the Algorithm Behind YouTube Shorts
- Brighter Days with Five Winter-Themed Backgrounds
- Layered Comfort Selecting Snug Winter Themes for Filming
- Essential Links for Acquiring YouTube Preview Templates Online for 2024
- Mastering YouTube Live Top Webcam Selection Tips
- 2024 Approved Cutting-Edge Computers Optimal Machines for Media Creation
- 2024 Approved Elevate Video Content with Proven Strategies for YouTube Shorts Growth
- Become a Visionary Creator Optimal Camera Lens Selection for 2024
- [New] Capture and Relive Your Favorite Moments Anywhere, Anytime The Best in Free Video Downloaders for YouTubes
- Behind the Scenes The Genesis of a Mukbang Video for 2024
- Elevate Your Content Strategy Prime Video Rank Monitors
- Navigating YouTube's Rules The Safe Way
- The Art of Viewing Several Youtube Videos Concurrently
- [Updated] Crafting Content Dimensions for App Aggregates
- Tips for YouTube Thumbnail Size
- 2024 Approved Easy-to-Navigate Top 10 YouTube Downloader Tools
- Mastering YouTube Audio Recordings
- In 2024, Beyond Blockbuster Horizons Favorite Films
- Digital Dominance Who Has the Largest Fanbase?
- In 2024, Breathtaking Lyric Videos Made Easy by Lyric Video Maker
- Easy YouTube File Transfer Techniques for 2024
- Launching a YouTube Channel Key Pieces of Equipment
- Best Gamers' Streaming Tools
- Top 3 Beyond Youtube Innovative Videostreaming Communities
- Step-by-Step Process for FREE YouTube Video Texting
- Essential Insights on YouTube TV's Unique Features for 2024
- Endless Entertainment Escapade Top-Tier Free Films on YouTube
- 2024 Approved Essential Knowledge for Aspiring YouTube Subscribers
- In 2024, Breaking Speed Limit – Top Vids Reaching 100 Million Fast in '24
- Digestible Vid Info Quick Start for 2024
- [New] Crafting Spectacular Unboxing Content Step-by-Step
- In 2024, Elevate Streams Using YouTube's AV1 Settings
- Elevate Your Online Presence Choosing the Right Webcam for 2024
- [Updated] Ahead of the Curve in Sub4sub Land This Is Your Guide First
- [New] Discerning T-Series' Profit Mechanisms From Youtube Views
- Simply Saver Top Mobile Apps for Downloading YouTube Series & Songs
- In 2024, Capture the Best Moments Select 6 Top-Ranked Short Video Download Tools
- Reviewing Efectum App and The Best Alternatives for Smartphone Users
- In 2024, About Vivo T2 Pro 5G FRP Bypass
- [Updated] 2024 Approved Screenshot Mastery Using Ezvid Video Maker's Pro Tips and Tricks
- In 2024, The Easy Way to Remove an Apple ID from Your MacBook For your iPhone 7
- In 2024, How to Transfer Contacts from OnePlus Ace 2 Pro to Other Android Devices Using Bluetooth? | Dr.fone
- Pokémon Go Cooldown Chart On Samsung Galaxy A25 5G | Dr.fone
- [New] From Twitter to Gifs A Cost-Saving How-To Guide
- 2024 Approved Glitch Video Editing Made Easy Best Tools for Windows, Mac, and Online
- Leveraging Facebook Best Practices for 360 Videos for 2024
- In 2024, 2 Ways to Monitor Vivo Y77t Activity | Dr.fone
- Title: "[New] Aural Ascent Step-by-Step Guide to Audio Submission"
- Author: Brian
- Created at : 2024-05-25 12:27:49
- Updated at : 2024-05-26 12:27:49
- Link: https://youtube-video-recordings.techidaily.com/new-aural-ascent-step-by-step-guide-to-audio-submission/
- License: This work is licensed under CC BY-NC-SA 4.0.
