
![[New] AudioHarmony Editor for Professional PC Users](https://www.lifewire.com/thmb/aqzoJvuc7HUCTQdUzpa5GXlHCac=/400x300/filters:no_upscale():max_bytes(150000):strip_icc():format(webp)/iPad-Mini-Splash-ef002ffe8db643d2a2b4de772ff46790.jpg)
[New] AudioHarmony Editor for Professional PC Users
AudioHarmony Editor for Professional PC Users
The online world is steadily shifting from static photos to videos and it is quite evident from the social media users. Everyone prefers uploading short videos with music to get more attention rather than uploading a collection of photos. You can join multiple video clips and add background music as well as make a slideshow video with audio. You will require a video editor with music to get the job done.
There are different types of video editors available where you can upload photos and video clips along with songs and music. You turn them into an eye-catching music video instantly with different video effects and animations. Starting from online video editors with music to standalone video editing software, here is the list of the top 10 best video editors for creating and editing videos with music like a professional.
Part 1. Best music video editors for PC
1. Filmora
System compatibility: Windows 11/10/8/7 and Mac
Rating: 4.7/5
Wondershare Filmora is the best video editor with music. It is a premium software where you get all the features and functionalities you need to make and edit music videos like a pro. The software lets you capture screen video, webcam video, external audio as well as voiceover. Therefore, you can use your own music or song in the background of your video.
When it comes to video editing, all the standard tools are available for music video creation. There are loads of transitions, effects, elements, audio and titles available. Besides, there is a dedicated stock media library available. You can import and export different file formats and publish 4K videos as well. Here are the top features of Wondershare Filmora.
For Win 7 or later (64-bit)
For macOS 10.12 or later
- Drag and drop all media files for video creation.
- Easy timeline for organizing media files and editing them quickly.
- Crop, trim, split, cut, and combine media files.
- Wide range of video transitions and audio effects.
- Different motion elements, titles, and stock media files.
- Keyframing, noise removal, video stabilization options.
- Super intuitive user interface for all users.

2. Windows Movie Maker
System compatibility: Windows 11, 10
Rating: 4.0/5
If you are Windows user and you are looking for a free video editor with song, Windows Movie Maker is the perfect app you can get from Microsoft Store. Even though it comes free, the video editor is quite powerful. You can crop, trim, join video clips and add text and music to your video. There are image filters available for photo enhancement as well as transitions to apply in the video.
There are in-built music tracks available and it supports importing a wide range of media files. You can avail animated pan and zoom feature for photos and adjust volume and speed. There is also a Pro version available that supports 4K video and better project management as well as advanced tools. Here are the top features of Windows Movie Maker.
- Rotate, trim, flip, and join video clips to make music video.
- Make video from photos and add in-built or external music files.
- Add titles, credits, texts, stickers, as well as pan-zoom animation.
- Wide range of transition effects and photo filters available.
- Supports importing and exporting different file formats.
- Pro version supports 4K resolution and offers exclusive quick tools.

3. Blender
System compatibility: Windows 11, 10, 8.1 macOS 10.13+, Linux.
Rating: 4.5/5
If you are looking for an open-source video editor, Blender is the best choice. It is completely free to use and it comes with all the standard features for creating and editing music videos. The software is particularly popular for modelling, sculpting, rendering and creating animation-based videos. The video editor contains 32 slots where you can add your media files to create the video.
Blender allows you to change video speed, adjust different layers in the videos and add preferred transitions. Moreover, there are masks and filters available to enhance video content. The advance options of audio mixing and keyframing will surely come handy for advanced users. Here are the top features of Blender video editor.
- Cut, split, trim, and join videos clips.
- Color grading, photo filters and custom text options.
- Add effects, transitions, and animations to your video.
- Live visualization options for advanced users.
- Motion tracking, scene stabilization and compositing options.

4. Adobe Premiere Pro
System compatibility: Windows 10 and 11.
Rating: 4.5/5
Adobe Premiere Pro is the best video editor for professionals. The software has a slightly steep learning curve and it requires a high-end computer. Therefore, it is useful for you when you are serious about making professional-quality music video. In fact, Adobe Premiere Pro is widely used in the music video and video creation industry.
Adobe Premiere Pro is the perfect combination of standard and advanced video editing options. You can edit various video files at the same time. In fact, it is perfect for a team to work on your music video files. You can edit VR videos, multi-cam videos as well 3D videos. You can edit your photos, video clips and audio files perfectly as per your requirements. Here are the top features of Adobe Premiere Pro.
- Trim, split, crop, merge, adjust speed, color correction options.
- Edit video clips and audio files minutely with comparison view.
- Auto color correction, auto reframe, and configurable user interface.
- Editing advanced videos like VR and 3D as well as advance audio editor.
- Supports importing and exporting different media file formats.

5. Final Cut Pro
System compatibility: macOS 10.14 or higher
Rating: 4.4/5
Final Cut Pro for Mac users is equivalent to Adobe Premium Pro for Windows users. It is widely used by video creators to edit your videos and add effects and audio to get the desired result. You get the standard as well as the advanced video editing options and features. You can publish your music video at high resolution, and the software takes minimum time for rendering.
Final Cut Pro allows editing 3D, VR, multi-cam, and 360-degree videos. There are loads of effects, filters, and presets available to apply to your video clips and photos to create a music video. The presence of cinematic mode and object tracker could be useful for creating out-of-the-box videos. Here are the top features of Final Cut Pro.
- Trim, split, crop, change speed, color correction, and multi-cam video editing.
- Amazing cinematic mode to enhance music video content and quality.
- Add external music file and edit the music file as required.
- Proper organization tool for team to work collaboratively.
- Background rendering feature saves a lot of time in video processing.
- Publish your music video in high resolution without long processing time.

7. Clido
System compatibility: Windows, Mac, Linux, Android and iOS.
Rating: 4.5/5
Clido is an online platform where you get different tools for video editing. It is a premium online video editor with music and hence, it is suitable for all those who want to edit video with music on the go. There is no need to download any software and you can merge, compress, resize, cut and crop video as per your requirements.
You can even rotate and adjust speed to create slow-motion videos. To create your music video, you have to opt for its video maker where you can use photos, video clips, GIFs, and music. You can edit the duration for photos and video clips as per your preference. There is also a slideshow maker available for instant video creation with your photos. Here are the top features of Clido that you should be aware of.
- Flip, loop, reverse, crop, resize, and merge video clips.
- Create slideshow videos and add music of your choice instantly.
- Wide range of presets and video filters.
- Change aspect ratios to make videos for different platforms.
- Super intuitive user interface and secure platform.
- Compatible with popular browsers and suitable for PC and phone users

8. Adobe Express
System compatibility: Windows, Mac, Linux, Android, and iOS.
Rating: 4.5/5
Adobe Express is an online video editor with song that is compatible with popular browsers and all devices. You can create stunning music videos in a few minutes. There are various templates available to get started and finish your stunning music video in a few steps. There is a wide range of stock images available from Adobe. You get access to effects, textures, overlays, and filters to enhance video quality.
You can also remove background from your photos to improve video content. There are various graphical elements available to add to your video. You can resize your video to be compatible with online platforms and different devices. The software allows you to play with texts and titles by offering various customization options. Here are the top features of Adobe Express.
- Loads of video templates for quick video creation.
- Resize photos, convert to different formats, and remove background.
- Trim and crop video clips, convert to GIFs, resize as required.
- Access to stock media library of Adobe and experiment with text.
- Make video for different online platforms and different devices.

9. VideoPad
System compatibility: Windows 11, 10, 8, 7, Vista and XP & Mac OS X 10.5 or above.
Rating: 4.1/5
VideoPad from NCH Software is a simple but powerful video editor. You can create stunning music videos and edit them as per your requirements. The user interface is suitable for beginners and you can avail different video effects and transitions to apply to your video. There are also dedicated audio tools available to edit audio and music files.
The software supports editing 360-degree and 3D videos. In fact, it supports over 60 video file formats for importing them. The software is equally useful in video optimization and you can share the edited video on different online platforms as per your preference. Here are the top features of VideoPad.
- Standard video and audio editing options available.
- Mix music track, add audio effects, and record your narration.
- Wide range of templates for intro, outro and others for branding.
- Supports up to 4K resolution and lossless export.
- Video optimization, stabilization, color correction, and change speed.
- Upload videos directly to YouTube, Vimeo, and Flickr and cloud platforms.

Part 2. How to make a music video on my own?
In order to make a music video file, you will need a video editor, video clips or photos, and background music. We recommend Wondershare Filmora as the best video editor for music videos. Transfer the video clips or photos with which you want to make the music video from your phone to your computer. Choose and download the music file that you would want to add to the background of your video. You can also record your own song or music and use the same for background music. Here are the steps to make a music video on your own.
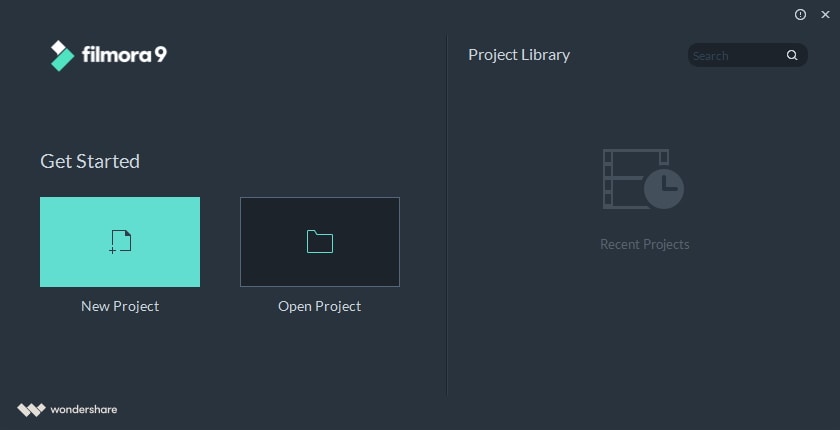
Step 1: Download and install Filmora as per your operating system. Launch the software and click on New Project.
Step 2: Drag and drop the video clips, photos, music and audio files on Project Media folder.
Step 3: Drag and drop the video clips or photos on Timeline and arrange them in order as you want in your video. You can stretch the duration of the photos and videos as per your requirements.

Step 4: Go to Transition option at the top bar and drag and drop the transition of your choice on the photos or video clips so that the transition is eye-catching and eye-soothing.

Step 5: Drag and drop the music file from Project Media folder on the Timeline below the photos or video clips. You can stretch or trim the music track to suit the video length. Check out Audio, Effects, Elements and Titles section at the top bar so that you can incorporate them in your music video to be more appealing and engaging.

Step 6: Preview the music video on Filmora and click on Export button to save it on your hard drive as per your selected file format.

Part 3. Related FAQs
1. How do I add music to video editor on PC?
Different video editor offers different options to add music. Some allow you to drag and drop music file from your hard drive to video editor directly. Otherwise, you have to browse and go to the location and select the music file. Online video editor also allows uploading music file from cloud storage.
2. What software is best for editing music videos?
Wondershare Filmora is the best video editor for editing music videos. This is because it is a premium software with all the features and functionalities that you need to edit your music video. The user interface is intuitive for everyone to enhance video content and quality.
3. What is the best app to put music to videos?
InShot is the best app to put music to videos for Android users. For iOS users, Video Maker with Music Editor is the best app to use where all the required features are readily available.
For macOS 10.12 or later
- Drag and drop all media files for video creation.
- Easy timeline for organizing media files and editing them quickly.
- Crop, trim, split, cut, and combine media files.
- Wide range of video transitions and audio effects.
- Different motion elements, titles, and stock media files.
- Keyframing, noise removal, video stabilization options.
- Super intuitive user interface for all users.
2. Windows Movie Maker
System compatibility: Windows 11, 10
Rating: 4.0/5
If you are Windows user and you are looking for a free video editor with song, Windows Movie Maker is the perfect app you can get from Microsoft Store. Even though it comes free, the video editor is quite powerful. You can crop, trim, join video clips and add text and music to your video. There are image filters available for photo enhancement as well as transitions to apply in the video.
There are in-built music tracks available and it supports importing a wide range of media files. You can avail animated pan and zoom feature for photos and adjust volume and speed. There is also a Pro version available that supports 4K video and better project management as well as advanced tools. Here are the top features of Windows Movie Maker.
- Rotate, trim, flip, and join video clips to make music video.
- Make video from photos and add in-built or external music files.
- Add titles, credits, texts, stickers, as well as pan-zoom animation.
- Wide range of transition effects and photo filters available.
- Supports importing and exporting different file formats.
- Pro version supports 4K resolution and offers exclusive quick tools.
3. Blender
System compatibility: Windows 11, 10, 8.1 macOS 10.13+, Linux.
Rating: 4.5/5
If you are looking for an open-source video editor, Blender is the best choice. It is completely free to use and it comes with all the standard features for creating and editing music videos. The software is particularly popular for modelling, sculpting, rendering and creating animation-based videos. The video editor contains 32 slots where you can add your media files to create the video.
Blender allows you to change video speed, adjust different layers in the videos and add preferred transitions. Moreover, there are masks and filters available to enhance video content. The advance options of audio mixing and keyframing will surely come handy for advanced users. Here are the top features of Blender video editor.
- Cut, split, trim, and join videos clips.
- Color grading, photo filters and custom text options.
- Add effects, transitions, and animations to your video.
- Live visualization options for advanced users.
- Motion tracking, scene stabilization and compositing options.
4. Adobe Premiere Pro
System compatibility: Windows 10 and 11.
Rating: 4.5/5
Adobe Premiere Pro is the best video editor for professionals. The software has a slightly steep learning curve and it requires a high-end computer. Therefore, it is useful for you when you are serious about making professional-quality music video. In fact, Adobe Premiere Pro is widely used in the music video and video creation industry.
Adobe Premiere Pro is the perfect combination of standard and advanced video editing options. You can edit various video files at the same time. In fact, it is perfect for a team to work on your music video files. You can edit VR videos, multi-cam videos as well 3D videos. You can edit your photos, video clips and audio files perfectly as per your requirements. Here are the top features of Adobe Premiere Pro.
- Trim, split, crop, merge, adjust speed, color correction options.
- Edit video clips and audio files minutely with comparison view.
- Auto color correction, auto reframe, and configurable user interface.
- Editing advanced videos like VR and 3D as well as advance audio editor.
- Supports importing and exporting different media file formats.
5. Final Cut Pro
System compatibility: macOS 10.14 or higher
Rating: 4.4/5
Final Cut Pro for Mac users is equivalent to Adobe Premium Pro for Windows users. It is widely used by video creators to edit your videos and add effects and audio to get the desired result. You get the standard as well as the advanced video editing options and features. You can publish your music video at high resolution, and the software takes minimum time for rendering.
Final Cut Pro allows editing 3D, VR, multi-cam, and 360-degree videos. There are loads of effects, filters, and presets available to apply to your video clips and photos to create a music video. The presence of cinematic mode and object tracker could be useful for creating out-of-the-box videos. Here are the top features of Final Cut Pro.
- Trim, split, crop, change speed, color correction, and multi-cam video editing.
- Amazing cinematic mode to enhance music video content and quality.
- Add external music file and edit the music file as required.
- Proper organization tool for team to work collaboratively.
- Background rendering feature saves a lot of time in video processing.
- Publish your music video in high resolution without long processing time.
7. Clido
System compatibility: Windows, Mac, Linux, Android and iOS.
Rating: 4.5/5
Clido is an online platform where you get different tools for video editing. It is a premium online video editor with music and hence, it is suitable for all those who want to edit video with music on the go. There is no need to download any software and you can merge, compress, resize, cut and crop video as per your requirements.
You can even rotate and adjust speed to create slow-motion videos. To create your music video, you have to opt for its video maker where you can use photos, video clips, GIFs, and music. You can edit the duration for photos and video clips as per your preference. There is also a slideshow maker available for instant video creation with your photos. Here are the top features of Clido that you should be aware of.
- Flip, loop, reverse, crop, resize, and merge video clips.
- Create slideshow videos and add music of your choice instantly.
- Wide range of presets and video filters.
- Change aspect ratios to make videos for different platforms.
- Super intuitive user interface and secure platform.
- Compatible with popular browsers and suitable for PC and phone users
8. Adobe Express
System compatibility: Windows, Mac, Linux, Android, and iOS.
Rating: 4.5/5
Adobe Express is an online video editor with song that is compatible with popular browsers and all devices. You can create stunning music videos in a few minutes. There are various templates available to get started and finish your stunning music video in a few steps. There is a wide range of stock images available from Adobe. You get access to effects, textures, overlays, and filters to enhance video quality.
You can also remove background from your photos to improve video content. There are various graphical elements available to add to your video. You can resize your video to be compatible with online platforms and different devices. The software allows you to play with texts and titles by offering various customization options. Here are the top features of Adobe Express.
- Loads of video templates for quick video creation.
- Resize photos, convert to different formats, and remove background.
- Trim and crop video clips, convert to GIFs, resize as required.
- Access to stock media library of Adobe and experiment with text.
- Make video for different online platforms and different devices.
9. VideoPad
System compatibility: Windows 11, 10, 8, 7, Vista and XP & Mac OS X 10.5 or above.
Rating: 4.1/5
VideoPad from NCH Software is a simple but powerful video editor. You can create stunning music videos and edit them as per your requirements. The user interface is suitable for beginners and you can avail different video effects and transitions to apply to your video. There are also dedicated audio tools available to edit audio and music files.
The software supports editing 360-degree and 3D videos. In fact, it supports over 60 video file formats for importing them. The software is equally useful in video optimization and you can share the edited video on different online platforms as per your preference. Here are the top features of VideoPad.
- Standard video and audio editing options available.
- Mix music track, add audio effects, and record your narration.
- Wide range of templates for intro, outro and others for branding.
- Supports up to 4K resolution and lossless export.
- Video optimization, stabilization, color correction, and change speed.
- Upload videos directly to YouTube, Vimeo, and Flickr and cloud platforms.
Part 2. How to make a music video on my own?
In order to make a music video file, you will need a video editor, video clips or photos, and background music. We recommend Wondershare Filmora as the best video editor for music videos. Transfer the video clips or photos with which you want to make the music video from your phone to your computer. Choose and download the music file that you would want to add to the background of your video. You can also record your own song or music and use the same for background music. Here are the steps to make a music video on your own.
Step 1: Download and install Filmora as per your operating system. Launch the software and click on New Project.
Step 2: Drag and drop the video clips, photos, music and audio files on Project Media folder.
Step 3: Drag and drop the video clips or photos on Timeline and arrange them in order as you want in your video. You can stretch the duration of the photos and videos as per your requirements.
Step 4: Go to Transition option at the top bar and drag and drop the transition of your choice on the photos or video clips so that the transition is eye-catching and eye-soothing.
Step 5: Drag and drop the music file from Project Media folder on the Timeline below the photos or video clips. You can stretch or trim the music track to suit the video length. Check out Audio, Effects, Elements and Titles section at the top bar so that you can incorporate them in your music video to be more appealing and engaging.
Step 6: Preview the music video on Filmora and click on Export button to save it on your hard drive as per your selected file format.
Part 3. Related FAQs
1. How do I add music to video editor on PC?
Different video editor offers different options to add music. Some allow you to drag and drop music file from your hard drive to video editor directly. Otherwise, you have to browse and go to the location and select the music file. Online video editor also allows uploading music file from cloud storage.
2. What software is best for editing music videos?
Wondershare Filmora is the best video editor for editing music videos. This is because it is a premium software with all the features and functionalities that you need to edit your music video. The user interface is intuitive for everyone to enhance video content and quality.
3. What is the best app to put music to videos?
InShot is the best app to put music to videos for Android users. For iOS users, Video Maker with Music Editor is the best app to use where all the required features are readily available.
Achieving Peak Performance in Video Submissions on YouTube
How To Upload Videos to YouTube [a Step-by-Step Guide]

Richard Bennett
Mar 27, 2024• Proven solutions
Want to learn how to upload videos to YouTube? Millions of people watch YouTube every day. Creating and posting YouTube videos can be a lot of fun, and if you get a lot of views and become popular you can also make money. YouTube videos are a creative way to connect with people all around the world.
These simple steps can assist you in learning how to upload YouTube videos from a desktop computer. You are going to Learn:
Edit YouTube with Powerful Video Editor
As a YouTuber, it is necessary to have an easy-to-use video editor, especially for beginners. Download Filmora for free and start your editing journey happily.


Part 1: Basic Rules You Need to Know Before Uploading
Clicking the ‘upload’ button is easy, but during the upload process, there are things you can do to help your video get views and maintain its quality. You should also keep an eye on the length and file size limits. The more basic things you need to consider carefully when you upload are the title, description, and tags of your video. These are part of what determines if and where your video comes up in people’s search results. There are also slightly more advanced video specs, like your video’s resolution, which will be helpful for you to understand as somebody who will be producing video content frequently. These sorts of specs will affect how long it takes your videos to upload and how much of the quality they maintain.
1. How Long Can my Video Be?
By default, your YouTube videos can only be 15 minutes long. You can post longer videos by going to the upload page and clicking on ‘Increase your Limit’ at the bottom. After you have followed the steps to verify your account you will be able to post videos that are a maximum of 11 hours long.
2. How Big a File Can I Upload?
Your file size was capped at 20GB, initially. If you follow the same steps for posting videos longer than 15 minutes then you can also increase your maximum file size to 128GB.
3. Other Basics
After you click the ‘upload’ button on YouTube you are taken to a page where you choose a category for your video and add a title, description, and tags. These are all important for getting hits so you should put some thought into them.
Title: Keep your title under 70 characters so none of it disappears into a ‘…’. The best titles make people curious or elicit an emotional response. Terms like ‘video’, ‘how-to’, and ‘tutorial’ are often typed into people’s searches so if they apply to your video it can help to put them in the title.
Description: A short synopsis of your video which includes your most important keyword. You have about three lines before your text is hidden by a ‘show more’ tab. If you are including the URL of your channel or other videos then you should make sure they are above the ‘show more’.
Tags: Use a lot of them. These are the keywords and terms people will be searching for when they find your video. YouTube will suggest some after you start adding. A quick way to find good keywords to use is to search for videos similar to yours and check out their tags. A while ago YouTube started hiding video tags by default but you can download a free, YouTube-certified, extension for Google Chrome which will allow you to see them from vidIQ.com.
4. Digging Deeper
To get your viewers to subscribe to your channel you will need to make sure your videos are not losing quality when you upload them. Here are some things to be aware of if you want your videos to look great on YouTube.
Resolution: the number of pixels in your image. For example when a video has a resolution of 1080p that means it has a grid of pixels that is 1920 x 1080. The more pixels you have the sharper your image.
Bitrate: Bitrate is a measurement of how compressed your file is, and the less compressed it is the more information there is per frame. Higher bitrates mean larger file sizes.
Your resolution and bitrate should complement each other. If you have a higher bitrate than is needed for your video’s resolution your file will be unnecessarily large. If your bitrate is too low for your resolution then you will not see the quality you expect.
YouTube has a list of recommended resolutions and bitrates at support.google.com/youtube/answer/1722171.
Aspect Ratio: the dimensions of your video, in terms of width and height. YouTube’s aspect ratio is 16:9, so your videos should also be 16:9. If they are not then you will get black bars on either side of your video after you upload it. The most common way that people end up with the wrong aspect ratio is by creating videos on their smartphones and holding them up and down instead of sideways.
Part 2: Steps to Upload Videos to YouTube
Uploading YouTube Video on Desktop:
1. Sign in to your YouTube account
2. Hit the upload button
3. Select your video type (Public, Private, Unlisted)
4. Manage the upload
5. Choose your thumbnail
Step 1: Sign in to your YouTube account
In order to upload videos to YouTube, the very first thing you need to do is sign in. The sign-in button is located at the top right corner of the YouTube homepage. If you have multiple accounts registered to one device, you will be asked to choose one to log in to.

Step 2: Hit the upload button
It is a simple step that you will have to follow right after you log in to YouTube. As soon as you enter YouTube, after using your Google account and password for login, you will find the upload button in the top right corner of the screen. Click on this button and it will take you to the dedicated upload page.
Step 3: Select your video type (Public, Private, Unlisted)
Choose your audience. If you wish to make your video available to everyone on YouTube, simply go to the privacy settings and choose the “Public” option from the drop-down menu.
If you do not want your video to be searchable, but still want to be able to easily share a link to it with your friends and family, choose the “Unlisted” option.
Those who wish to keep their video personal can choose the “Private” option from the drop-down menu. You can still share a private video with a limited number of people (as long as they have Google accounts).
The “Scheduled” option is available for choosing a future date and time to make the video available to viewers. Once you have selected your privacy level, simply upload your video from your device storage.

Step 4: Manage the upload
As soon as you have confirmed your video upload, you will find a progress bar on the screen. It will take some time depending on factors such as the resolution of the video and how long it is. In the meanwhile, you can write a title, description and add relevant tags for your video so that YouTube knows what search results to include it in and viewers can find it. Remember that YouTube is the second biggest search engine on the Internet, so take some time to optimize your keywords .
Step 5: Choose your thumbnail
Once your video uploading is complete, it is time to choose a creative thumbnail for your video. The system provides you with three options to choose from automatically, all of which will be screenshots from your video. It is usually better toupload your own custom thumbnail , as thumbnails are a very important factor in attracting viewers. Hit the “Done” button or use the “Publish” button to finalize your upload.
That’s how to upload a video on YouTube! Any questions?
Richard Bennett
Richard Bennett is a writer and a lover of all things video.
Follow @Richard Bennett
Richard Bennett
Mar 27, 2024• Proven solutions
Want to learn how to upload videos to YouTube? Millions of people watch YouTube every day. Creating and posting YouTube videos can be a lot of fun, and if you get a lot of views and become popular you can also make money. YouTube videos are a creative way to connect with people all around the world.
These simple steps can assist you in learning how to upload YouTube videos from a desktop computer. You are going to Learn:
Edit YouTube with Powerful Video Editor
As a YouTuber, it is necessary to have an easy-to-use video editor, especially for beginners. Download Filmora for free and start your editing journey happily.
Part 1: Basic Rules You Need to Know Before Uploading
Clicking the ‘upload’ button is easy, but during the upload process, there are things you can do to help your video get views and maintain its quality. You should also keep an eye on the length and file size limits. The more basic things you need to consider carefully when you upload are the title, description, and tags of your video. These are part of what determines if and where your video comes up in people’s search results. There are also slightly more advanced video specs, like your video’s resolution, which will be helpful for you to understand as somebody who will be producing video content frequently. These sorts of specs will affect how long it takes your videos to upload and how much of the quality they maintain.
1. How Long Can my Video Be?
By default, your YouTube videos can only be 15 minutes long. You can post longer videos by going to the upload page and clicking on ‘Increase your Limit’ at the bottom. After you have followed the steps to verify your account you will be able to post videos that are a maximum of 11 hours long.
2. How Big a File Can I Upload?
Your file size was capped at 20GB, initially. If you follow the same steps for posting videos longer than 15 minutes then you can also increase your maximum file size to 128GB.
3. Other Basics
After you click the ‘upload’ button on YouTube you are taken to a page where you choose a category for your video and add a title, description, and tags. These are all important for getting hits so you should put some thought into them.
Title: Keep your title under 70 characters so none of it disappears into a ‘…’. The best titles make people curious or elicit an emotional response. Terms like ‘video’, ‘how-to’, and ‘tutorial’ are often typed into people’s searches so if they apply to your video it can help to put them in the title.
Description: A short synopsis of your video which includes your most important keyword. You have about three lines before your text is hidden by a ‘show more’ tab. If you are including the URL of your channel or other videos then you should make sure they are above the ‘show more’.
Tags: Use a lot of them. These are the keywords and terms people will be searching for when they find your video. YouTube will suggest some after you start adding. A quick way to find good keywords to use is to search for videos similar to yours and check out their tags. A while ago YouTube started hiding video tags by default but you can download a free, YouTube-certified, extension for Google Chrome which will allow you to see them from vidIQ.com.
4. Digging Deeper
To get your viewers to subscribe to your channel you will need to make sure your videos are not losing quality when you upload them. Here are some things to be aware of if you want your videos to look great on YouTube.
Resolution: the number of pixels in your image. For example when a video has a resolution of 1080p that means it has a grid of pixels that is 1920 x 1080. The more pixels you have the sharper your image.
Bitrate: Bitrate is a measurement of how compressed your file is, and the less compressed it is the more information there is per frame. Higher bitrates mean larger file sizes.
Your resolution and bitrate should complement each other. If you have a higher bitrate than is needed for your video’s resolution your file will be unnecessarily large. If your bitrate is too low for your resolution then you will not see the quality you expect.
YouTube has a list of recommended resolutions and bitrates at support.google.com/youtube/answer/1722171.
Aspect Ratio: the dimensions of your video, in terms of width and height. YouTube’s aspect ratio is 16:9, so your videos should also be 16:9. If they are not then you will get black bars on either side of your video after you upload it. The most common way that people end up with the wrong aspect ratio is by creating videos on their smartphones and holding them up and down instead of sideways.
Part 2: Steps to Upload Videos to YouTube
Uploading YouTube Video on Desktop:
1. Sign in to your YouTube account
2. Hit the upload button
3. Select your video type (Public, Private, Unlisted)
4. Manage the upload
5. Choose your thumbnail
Step 1: Sign in to your YouTube account
In order to upload videos to YouTube, the very first thing you need to do is sign in. The sign-in button is located at the top right corner of the YouTube homepage. If you have multiple accounts registered to one device, you will be asked to choose one to log in to.
Step 2: Hit the upload button
It is a simple step that you will have to follow right after you log in to YouTube. As soon as you enter YouTube, after using your Google account and password for login, you will find the upload button in the top right corner of the screen. Click on this button and it will take you to the dedicated upload page.
Step 3: Select your video type (Public, Private, Unlisted)
Choose your audience. If you wish to make your video available to everyone on YouTube, simply go to the privacy settings and choose the “Public” option from the drop-down menu.
If you do not want your video to be searchable, but still want to be able to easily share a link to it with your friends and family, choose the “Unlisted” option.
Those who wish to keep their video personal can choose the “Private” option from the drop-down menu. You can still share a private video with a limited number of people (as long as they have Google accounts).
The “Scheduled” option is available for choosing a future date and time to make the video available to viewers. Once you have selected your privacy level, simply upload your video from your device storage.
Step 4: Manage the upload
As soon as you have confirmed your video upload, you will find a progress bar on the screen. It will take some time depending on factors such as the resolution of the video and how long it is. In the meanwhile, you can write a title, description and add relevant tags for your video so that YouTube knows what search results to include it in and viewers can find it. Remember that YouTube is the second biggest search engine on the Internet, so take some time to optimize your keywords .
Step 5: Choose your thumbnail
Once your video uploading is complete, it is time to choose a creative thumbnail for your video. The system provides you with three options to choose from automatically, all of which will be screenshots from your video. It is usually better toupload your own custom thumbnail , as thumbnails are a very important factor in attracting viewers. Hit the “Done” button or use the “Publish” button to finalize your upload.
That’s how to upload a video on YouTube! Any questions?
Richard Bennett
Richard Bennett is a writer and a lover of all things video.
Follow @Richard Bennett
Also read:
- [Updated] Boosting Your YouTube with Partner Videos
- 2024 Approved Channel Dominance Plan Studio Protocol Vs. Beta Update
- Can a Brief Subscribe Boost Your Content Viewing?
- [Updated] Everyday Epics in a Lens Tips to Avoid Common Mistakes
- [Updated] Capturing Life in Motion Top 9 Smartphone Props for Dynamic Cinematography
- Virtual Diary Dos & Don'ts for Consistent Content
- Transform Your Channels With Any of the Top 11 Budget-Friendly Naming Solutions
- Top 5 Best 3D Intro Makers for YouTube
- In 2024, 7 Uncomplicated Steps for Skyrocketing Subscribers
- [Updated] Charting the Course A Comprehensive Guide to YouTube Teaser Vids
- [New] Epic Soundscape Trending Audio for Cutting-Edge YouTube Short Videos
- In 2024, Channel Transformation Through Strategic Use of YouTube Outros
- 2024 Approved Channel Flair Free Download Templates
- Blitz Broadcasting Channel Your Playlist Swiftly for 2024
- 2024 Approved 8 Best YouTube Video Promotion Services (Real)
- Step-by-Step to Creating an Unbeatable Biz YouTube Channel
- New 2024 Approved Mastering FCP Audio A Step-by-Step Guide for Video Editors
- [Updated] Apple Device Exclusive Reviews Top Voice Recorders Unveiled
- [Updated] In 2024, Digital Collection Mastery Extracting Twitter's Animated Tweets
- New Essential Audio Frequency Templates The Top 8 Selection for Video Editors
- New The Ultimate Compilation of Free Sound Amplitude Balancers
- 2024 Approved The Art of Auditory Alignment Fusing Audio to Video in Adobe Premiere Pro
- In 2024, 5 Ways To Teach You To Transfer Files from Tecno Pop 7 Pro to Other Android Devices Easily | Dr.fone
- [New] Terrarium Tales The Top Five Gold Quests for 2024
- Reasons why Pokémon GPS does not Work On Google Pixel 7a? | Dr.fone
- In 2024, How to use Snapchat Location Spoofer to Protect Your Privacy On Apple iPhone 15 Pro Max? | Dr.fone
- A Perfect Guide To Remove or Disable Google Smart Lock On Infinix Zero 5G 2023 Turbo
- New In 2024, Beyond Quik Exploring the Best PC Video Editing Software for GoPro Footage
- [Updated] 2024 Approved 2023'S Elite FB Content Collectors Ranked 8
- Serene Strums and Steps TikTok's Best Country Melodies for 2024
- All Must-Knows to Use Fake GPS GO Location Spoofer On Google Pixel 8 | Dr.fone
- [New] In-Depth Guide to Mobile/PC/Mac Movie Capture
- Title: [New] AudioHarmony Editor for Professional PC Users
- Author: Brian
- Created at : 2024-05-25 12:27:44
- Updated at : 2024-05-26 12:27:44
- Link: https://youtube-video-recordings.techidaily.com/new-audioharmony-editor-for-professional-pc-users/
- License: This work is licensed under CC BY-NC-SA 4.0.
