
![[New] Affordable Strategies for Engaging YouTube Opening & End Titles](https://www.lifewire.com/thmb/dDS1dpRsYd-e6LEYR10Kqw81GEQ=/300x200/filters:no_upscale():max_bytes(150000):strip_icc()/Navepoint12U-593077095f9b589eb4760ed7.jpg)
[New] Affordable Strategies for Engaging YouTube Opening & End Titles
Affordable Strategies for Engaging YouTube Opening & End Titles
How to Create YouTube Intros & End Cards - Free and Easy

Shanoon Cox
Oct 26, 2023• Proven solutions
Part1: Intros
Elements of an Intro
Intros should only last about five seconds, and that can be cut down to two or three if you have a larger following.
When your intro video is longer than five seconds viewers are more likely to click away. The first 15 seconds of a video is when viewers are most likely to decide to click on one of the recommended videos, or go back to their search results and choose something else. The odds of them leaving within these first 15 seconds are greater if you do not get right to the main point of your video. That is why long intro sequences are bad for your watch time.
Whether it is better to put your intro at the very beginning of your video, or after you introduce your topic, will depend on your viewers. You may want to try it both ways and then look at your retention report (found in your YouTube Creator Studio under Analytics) to see which works best for you.
Top Intro Sites
There are a few different sites where you can download animated intros, customized to include your username or logo. Here are two of the best:
FlixPress.com
This is probably the most popular intro site. There are a lot of great animated intros available for under $5, or even for free.
IntroMaker.net
This is another site with really professional looking intros for $5. They only have two free options, though.
Creating an Intro in Filmora
You can create a simple intro card in Filmora.


- Choose your background. You may want to use a short clip as your intro, or you may just want a colored background.
- Drag your clip or background into the video track of your timeline and trim it down to five seconds.
- If you have a logo, import it into Filmora and drag it into your picture-in-picture track.
- With your logo selected, click on the Green Screen icon. In the pop-up, select the background of your logo to make it transparent. For this to work your logo cannot be the same color as its background.
- Click on the editing icon with your logo selected and choose an animation.
- Go to the Text/Titles menu and choose an animated title that suits your channel. Drag it into your text track and edit it to include your name.
- The last piece of your intro is sound. You can choose a song from Filmora’s library and cut it down to five seconds, or import your sound effect.
- Export your video and save it for use in all of your other videos.
Part 2: End Cards
When your video ends, YouTube will recommend a selection of videos users may want to watch next. Often, these recommendations will not include more of your videos.
To keep viewers on your channel, you can create your End Card which recommends other content you have created.
Elements of an End Card
An end card includes clips from two or three of your videos, muted, and shrunk down to thumbnail-size. Using spotlight annotations you can make these thumbnails click-able.
It is also important that your end card includes multiple calls to action. A call to action is meant to spur a viewer to some kind of action. Writing ‘Check out this video’ above one of your thumbnails is a call to action.
You should also have a subscribe link somewhere in your end card, ideally a very noticeable button with a proven call to action like ‘Subscribe Now!’.
Some creators will leave their end cards at that and play music overtop, but it can be even more effective to include a voiceover where you ask viewers to subscribe and watch your other videos.
How To Make an End Card
- Choose a static background. You may want to download an end card template or create one in a drawing program. If you do, make sure to include calls to action like ‘Watch more!’ and ‘Subscribe’.
- Drag your background into your timeline at the end of your video.
- Import two or three of your previous videos and drag them into your picture in picture tracks. Each clip should be on its track.
- Trim the clips in your picture in picture track down to the same length as your end card.
- Shrink your clips down to thumbnail-size by dragging their corners in the preview window.
- Position your clips so they are spaced evenly by dragging them in the preview screen.
- Mute your clips.
- If your background does not include any calls to action, choose a title from the Text/Titles menu in Filmora and create at least two – one asking viewers to subscribe, and one asking them to watch your suggested videos.
- Export your video from Filmora and upload it to YouTube.
- Go to your Video Manager and select Annotations in the drop-down menu next to your video.
- Go to your end card in the previewer, as that is where you want to add your annotations.
- Click Add Annotation and add a spotlight annotation to your video. Stretch it over one of your thumbnails and then check the Link box under your Annotation’s timing. Insert a link to the video you are previewing.
- Repeat for any other thumbnails. For your subscribe button, change where it said ‘Video’ to ‘Subscribe’ and enter your channel URL.
- Click Apply Changes.
Shanoon Cox
Shanoon Cox is a writer and a lover of all things video.
Follow @Shanoon Cox
Shanoon Cox
Oct 26, 2023• Proven solutions
Part1: Intros
Elements of an Intro
Intros should only last about five seconds, and that can be cut down to two or three if you have a larger following.
When your intro video is longer than five seconds viewers are more likely to click away. The first 15 seconds of a video is when viewers are most likely to decide to click on one of the recommended videos, or go back to their search results and choose something else. The odds of them leaving within these first 15 seconds are greater if you do not get right to the main point of your video. That is why long intro sequences are bad for your watch time.
Whether it is better to put your intro at the very beginning of your video, or after you introduce your topic, will depend on your viewers. You may want to try it both ways and then look at your retention report (found in your YouTube Creator Studio under Analytics) to see which works best for you.
Top Intro Sites
There are a few different sites where you can download animated intros, customized to include your username or logo. Here are two of the best:
FlixPress.com
This is probably the most popular intro site. There are a lot of great animated intros available for under $5, or even for free.
IntroMaker.net
This is another site with really professional looking intros for $5. They only have two free options, though.
Creating an Intro in Filmora
You can create a simple intro card in Filmora.
- Choose your background. You may want to use a short clip as your intro, or you may just want a colored background.
- Drag your clip or background into the video track of your timeline and trim it down to five seconds.
- If you have a logo, import it into Filmora and drag it into your picture-in-picture track.
- With your logo selected, click on the Green Screen icon. In the pop-up, select the background of your logo to make it transparent. For this to work your logo cannot be the same color as its background.
- Click on the editing icon with your logo selected and choose an animation.
- Go to the Text/Titles menu and choose an animated title that suits your channel. Drag it into your text track and edit it to include your name.
- The last piece of your intro is sound. You can choose a song from Filmora’s library and cut it down to five seconds, or import your sound effect.
- Export your video and save it for use in all of your other videos.
Part 2: End Cards
When your video ends, YouTube will recommend a selection of videos users may want to watch next. Often, these recommendations will not include more of your videos.
To keep viewers on your channel, you can create your End Card which recommends other content you have created.
Elements of an End Card
An end card includes clips from two or three of your videos, muted, and shrunk down to thumbnail-size. Using spotlight annotations you can make these thumbnails click-able.
It is also important that your end card includes multiple calls to action. A call to action is meant to spur a viewer to some kind of action. Writing ‘Check out this video’ above one of your thumbnails is a call to action.
You should also have a subscribe link somewhere in your end card, ideally a very noticeable button with a proven call to action like ‘Subscribe Now!’.
Some creators will leave their end cards at that and play music overtop, but it can be even more effective to include a voiceover where you ask viewers to subscribe and watch your other videos.
How To Make an End Card
- Choose a static background. You may want to download an end card template or create one in a drawing program. If you do, make sure to include calls to action like ‘Watch more!’ and ‘Subscribe’.
- Drag your background into your timeline at the end of your video.
- Import two or three of your previous videos and drag them into your picture in picture tracks. Each clip should be on its track.
- Trim the clips in your picture in picture track down to the same length as your end card.
- Shrink your clips down to thumbnail-size by dragging their corners in the preview window.
- Position your clips so they are spaced evenly by dragging them in the preview screen.
- Mute your clips.
- If your background does not include any calls to action, choose a title from the Text/Titles menu in Filmora and create at least two – one asking viewers to subscribe, and one asking them to watch your suggested videos.
- Export your video from Filmora and upload it to YouTube.
- Go to your Video Manager and select Annotations in the drop-down menu next to your video.
- Go to your end card in the previewer, as that is where you want to add your annotations.
- Click Add Annotation and add a spotlight annotation to your video. Stretch it over one of your thumbnails and then check the Link box under your Annotation’s timing. Insert a link to the video you are previewing.
- Repeat for any other thumbnails. For your subscribe button, change where it said ‘Video’ to ‘Subscribe’ and enter your channel URL.
- Click Apply Changes.
Shanoon Cox
Shanoon Cox is a writer and a lover of all things video.
Follow @Shanoon Cox
Expert Guide to Instantaneous Deletion of Youtube Posts
Deleting YouTube Comments

Richard Bennett
Mar 27, 2024• Proven solutions
YouTube is a video platform where people share informative and entertaining content. It works in the form of channels belonging to individuals or companies. People can subscribe to these channels to show support, and YouTubers create a strong sense of community with these subscribers.
But some people comment inappropriate comments that can cause the community harm and spread hatred. Many YouTubers may want to delete such remarks. There are also times when you accidentally comment on a channel’s comment section and may wish to delete it.
So how do you delete all YouTube comments? In this how-to blog, we will show you.
- Part 1: Deleting YouTube Comments from Desktop
- Part 2: Deleting All YouTube Comments from Mobile
- Part 3: How to Delete Your Comments from YouTube?
- part 4: Delete Other People’s Comments on Others’ Channels
- Part 5: Delete All Your Posted YouTube Comments
How to Delete YouTube Comments from Desktop?
In this section, we will tell you how you can do it from your desktop.
- Go tohttps://www.youtube.com/ from your desktop browser and log in.
- Once you log in, you need to go to your channel. For this, you can select the My Channel option from the upper-left side of your YouTube home page.
- From the list of your videos, select the one you need and scroll down to reach the comment you want to delete.
- When you locate the comment, click on the three vertical dots on the right-hand side of the comment. From the drop-down list, click on Remove. The process is complete, and YouTube will remove your comment.
You also have the option to report the comment or hide the user from your channel .
How to Delete All YouTube Comments from Mobile?
The steps to deleting someone else’s YouTube comments from your mobile are similar to those from your desktop.
- Log in to your account from the YouTube app on your phone.
- On the right-hand side of your YouTube homepage, there will be a profile icon. Tap on that, and from the list, select My Channel. This will direct you to all videos on your channel.
- Select the video from where you want to delete a comment. Scroll down to reach the desired comment.
- Once you reach the target comment, click on the three vertical dots at the bottom corner. There should be an option called Remove. Tap on it.
- This will create another dialog box on the mobile app where you have to click on Remove again to delete the comment.
How Do You Delete Your Comments from YouTube?
Have you accidentally posted something on a YouTuber’s channel? Are you anxious because you cannot find the comment and delete it?
Fear not. Read on to know how to delete all comments you posted on someone else’s YouTube channel from your desktop.
- Visithttps://www.youtube.com/ from your desktop and then sign in YouTube channel.
- If your YouTube account is not open, tap on Sign in and enter your email and password to log in to your account.
- Once there, you need to access your Comment History page. To do this, you can click on the three horizontal lines at the top left corner of your YouTube homepage. Click on History. On the page that opens, click Comments from the panel on the right. It will direct you to your Comment History page. You can also access the YouTube comment history fromhere .
- When you reach the Comment History page, you will be able to find all comments you have ever posted. Scroll down to the comment you want to delete.
- Click on the three vertical dots that you see beside the target comment. You will find a Delete option. Tap on it, and confirm that you want to delete the comment. That completes the process. No more embarrassing comments!
How Do You Delete Your Comments from Your Phone?
Don’t have a desktop handy? This section will tell you how you can delete your comments you posted on your or someone else’s YouTube video from your mobile.
- Go to the YouTube app on your phone. You will need to log in to your account to delete any comment you posted.
- When the login process is complete, you need to find the video where your target comment is.
If it is someone else’s video, you can search for it by clicking on the magnifying glass at the top of the homepage or check your YouTube History to find it. To access your History, you need to click on an option called Library at the bottom of the homepage. From there, you can find the History option.
If it is your video where the comment to be removed is, you can go to My Channel from the profile icon on the right-hand side of the YouTube app’s homepage.
- Once you locate the video, you need to find the comment you want to delete. On the YouTube app, you may need to scroll down for a while to do this.
- When you reach it, click on the three vertical dots at the bottom corner of your comment. You should see an option called Delete. Click on that. You need to confirm once more that you want to delete it, and the process will be complete.
Delete Other People’s Comments on Others’ Channels
Did you see a hate comment on your favorite creator’s video? Sadly, you cannot delete the comment. But, you can report it, and YouTube will hide or take it down.
You can do this both from your desktop or your phone with some easy steps.
How to report people’s comments on YouTube?
Go to https://www.youtube.com/ from your desktop or open the YouTube app from your phone. Log in to your account if it is not open.
- The next step is to find the video where the comment is. You can search for it by tapping on the search button at the top of the YouTube homepage. Or you can locate it from your YouTube History.
To find your History from your desktop, you need to click on the three horizontal lines at the top left corner of the homepage. You will find the History option from the list. To access it from your phone, click on the Library option at the bottom of your homepage, and it will open a list where you will find the History option.
- Open the video, and scroll down to locate the comment you want to report.
- Once you find your target comment, click on the three vertical dots that appear on its right side. You will find the Report option from the pop-up menu. Click on that.
- When you tap Report, another dialogue box will appear. From the list of options, choose the most appropriate option, tap on Report at the lower right corner of the pop-up, and complete the process. YouTube will do the rest.

How to Delete All Your Posted YouTube Comments?
You can also delete all comments you ever posted on any YouTube video by hiding your channel. When you do this, you can hide your video content temporarily. But it will irreversibly erase all your comments throughout YouTube. If you are curious, read on to know how you can do it.
- You need to go to YouTube from your desktop and sign in to your account.
- Next, you can either click on the profile icon at the top right corner or the three horizontal lines beside the YouTube logo on your homepage. From the list of options, click Settings.
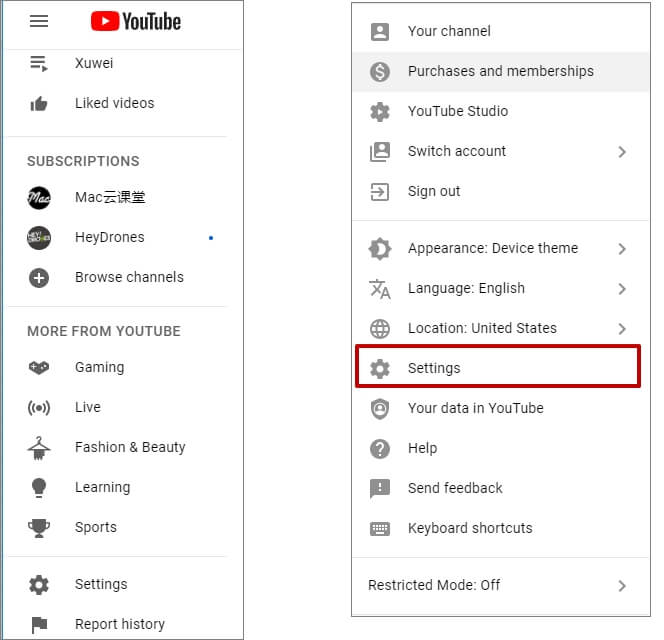
- YouTube will direct you to the Settings page of your account. Choose Advanced Settings from the list on your left. You can also access it fromhere .

- Scroll down and select Delete Channel. Clicking it will not delete your account. When you click on Delete Channel, you will get two choices – ‘I want to hide my channel’ and ‘I want to permanently delete my content’. Select the first.

- YouTube will now show you what will happen when you hide your channel. Check all the boxes to confirm that you understand, and then tap on Hide My Channel. YouTube will now delete all comments made by your account.
Final Thoughts
YouTube can be an unsafe place with unwanted comments everywhere. In this blog, we tried to show how you can get rid of comments on your and on others’ YouTube accounts. The next time you see an offensive comment or post something mistakenly, don’t forget to try our tips and make YouTube a safe platform again.
Richard Bennett
Richard Bennett is a writer and a lover of all things video.
Follow @Richard Bennett
Richard Bennett
Mar 27, 2024• Proven solutions
YouTube is a video platform where people share informative and entertaining content. It works in the form of channels belonging to individuals or companies. People can subscribe to these channels to show support, and YouTubers create a strong sense of community with these subscribers.
But some people comment inappropriate comments that can cause the community harm and spread hatred. Many YouTubers may want to delete such remarks. There are also times when you accidentally comment on a channel’s comment section and may wish to delete it.
So how do you delete all YouTube comments? In this how-to blog, we will show you.
- Part 1: Deleting YouTube Comments from Desktop
- Part 2: Deleting All YouTube Comments from Mobile
- Part 3: How to Delete Your Comments from YouTube?
- part 4: Delete Other People’s Comments on Others’ Channels
- Part 5: Delete All Your Posted YouTube Comments
How to Delete YouTube Comments from Desktop?
In this section, we will tell you how you can do it from your desktop.
- Go tohttps://www.youtube.com/ from your desktop browser and log in.
- Once you log in, you need to go to your channel. For this, you can select the My Channel option from the upper-left side of your YouTube home page.
- From the list of your videos, select the one you need and scroll down to reach the comment you want to delete.
- When you locate the comment, click on the three vertical dots on the right-hand side of the comment. From the drop-down list, click on Remove. The process is complete, and YouTube will remove your comment.
You also have the option to report the comment or hide the user from your channel .
How to Delete All YouTube Comments from Mobile?
The steps to deleting someone else’s YouTube comments from your mobile are similar to those from your desktop.
- Log in to your account from the YouTube app on your phone.
- On the right-hand side of your YouTube homepage, there will be a profile icon. Tap on that, and from the list, select My Channel. This will direct you to all videos on your channel.
- Select the video from where you want to delete a comment. Scroll down to reach the desired comment.
- Once you reach the target comment, click on the three vertical dots at the bottom corner. There should be an option called Remove. Tap on it.
- This will create another dialog box on the mobile app where you have to click on Remove again to delete the comment.
How Do You Delete Your Comments from YouTube?
Have you accidentally posted something on a YouTuber’s channel? Are you anxious because you cannot find the comment and delete it?
Fear not. Read on to know how to delete all comments you posted on someone else’s YouTube channel from your desktop.
- Visithttps://www.youtube.com/ from your desktop and then sign in YouTube channel.
- If your YouTube account is not open, tap on Sign in and enter your email and password to log in to your account.
- Once there, you need to access your Comment History page. To do this, you can click on the three horizontal lines at the top left corner of your YouTube homepage. Click on History. On the page that opens, click Comments from the panel on the right. It will direct you to your Comment History page. You can also access the YouTube comment history fromhere .
- When you reach the Comment History page, you will be able to find all comments you have ever posted. Scroll down to the comment you want to delete.
- Click on the three vertical dots that you see beside the target comment. You will find a Delete option. Tap on it, and confirm that you want to delete the comment. That completes the process. No more embarrassing comments!
How Do You Delete Your Comments from Your Phone?
Don’t have a desktop handy? This section will tell you how you can delete your comments you posted on your or someone else’s YouTube video from your mobile.
- Go to the YouTube app on your phone. You will need to log in to your account to delete any comment you posted.
- When the login process is complete, you need to find the video where your target comment is.
If it is someone else’s video, you can search for it by clicking on the magnifying glass at the top of the homepage or check your YouTube History to find it. To access your History, you need to click on an option called Library at the bottom of the homepage. From there, you can find the History option.
If it is your video where the comment to be removed is, you can go to My Channel from the profile icon on the right-hand side of the YouTube app’s homepage.
- Once you locate the video, you need to find the comment you want to delete. On the YouTube app, you may need to scroll down for a while to do this.
- When you reach it, click on the three vertical dots at the bottom corner of your comment. You should see an option called Delete. Click on that. You need to confirm once more that you want to delete it, and the process will be complete.
Delete Other People’s Comments on Others’ Channels
Did you see a hate comment on your favorite creator’s video? Sadly, you cannot delete the comment. But, you can report it, and YouTube will hide or take it down.
You can do this both from your desktop or your phone with some easy steps.
How to report people’s comments on YouTube?
Go to https://www.youtube.com/ from your desktop or open the YouTube app from your phone. Log in to your account if it is not open.
- The next step is to find the video where the comment is. You can search for it by tapping on the search button at the top of the YouTube homepage. Or you can locate it from your YouTube History.
To find your History from your desktop, you need to click on the three horizontal lines at the top left corner of the homepage. You will find the History option from the list. To access it from your phone, click on the Library option at the bottom of your homepage, and it will open a list where you will find the History option.
- Open the video, and scroll down to locate the comment you want to report.
- Once you find your target comment, click on the three vertical dots that appear on its right side. You will find the Report option from the pop-up menu. Click on that.
- When you tap Report, another dialogue box will appear. From the list of options, choose the most appropriate option, tap on Report at the lower right corner of the pop-up, and complete the process. YouTube will do the rest.
How to Delete All Your Posted YouTube Comments?
You can also delete all comments you ever posted on any YouTube video by hiding your channel. When you do this, you can hide your video content temporarily. But it will irreversibly erase all your comments throughout YouTube. If you are curious, read on to know how you can do it.
- You need to go to YouTube from your desktop and sign in to your account.
- Next, you can either click on the profile icon at the top right corner or the three horizontal lines beside the YouTube logo on your homepage. From the list of options, click Settings.
- YouTube will direct you to the Settings page of your account. Choose Advanced Settings from the list on your left. You can also access it fromhere .
- Scroll down and select Delete Channel. Clicking it will not delete your account. When you click on Delete Channel, you will get two choices – ‘I want to hide my channel’ and ‘I want to permanently delete my content’. Select the first.
- YouTube will now show you what will happen when you hide your channel. Check all the boxes to confirm that you understand, and then tap on Hide My Channel. YouTube will now delete all comments made by your account.
Final Thoughts
YouTube can be an unsafe place with unwanted comments everywhere. In this blog, we tried to show how you can get rid of comments on your and on others’ YouTube accounts. The next time you see an offensive comment or post something mistakenly, don’t forget to try our tips and make YouTube a safe platform again.
Richard Bennett
Richard Bennett is a writer and a lover of all things video.
Follow @Richard Bennett
Also read:
- Mac Innovators' Handbook Crafting Cool Youtube Videos
- Excelling at Content Creation A Guide to Gamers' Success
- [Updated] Decoding the Mystery of Where Are My YouTube Comments?
- [Updated] Cutting Edge Screen Time YouTube's Top Movies List
- Charting a Path to Profit Calculating Video View Requirements for 2024
- In 2024, Boost Engagement and Growth - Unlocking YouTube Analytics via Social Blade
- 2024 Approved Awe-Inspiring Allure Top YouTube Magic Editing Wonders
- Essential Insights on ASMR Videos Unveiled for 2024
- In 2024, Conquer & Cease The Unremovable Guide to Youtube Shorts
- In 2024, Enhancing Your YouTube Reach with FameBit Ad Sponsorships
- 2024 Approved Channeling Success Navigating the New YouTube Membership Model
- The Ultimate Guide Achieving Professional Sound without a Mic
- [Updated] Boosting Views with Captivating Intros Filmed in iMovie
- Enhance Video Reach Strategic Insights Into YouTube's Tag System
- Superrich Streamers of the World
- 2024 Approved Breakdown of Mr. Beast's Financial Powerhouse
- 2024 Approved Elevate Your YouTube Creation by Merging Media and Music
- Exercise Innovations 6 YouTube Ideas for Movement-Focused Viewers
- Boosting Engagement Joint Video Strategies for Growth
- 5 Easy Ways to Multiply Your YouTube Follower Base for 2024
- [Updated] How to Embed A YouTube Playlist On a Website
- 2024 Approved Discover the Best in Class Our List of 12 High-Performing Flip Cameras
- The Dynamics of YouTube's Creator Payments
- 2024 Approved Best Free Tools for Converting YouTube Videos
- In 2024, Echoes of Chuckles Parody Playlists
- Imitation Ingenuity Generating Parodies of Films
- Discover the Best 12 Free and Paid Video Game Openings for YT
- 2024 Approved Decode YouTube Shorts A Complete Breakdown
- [New] Channel Transformation via Musical Additions
- [Updated] Design Best Practices for Engaging YouTube Thumbnails
- 2024 Approved Elevating Your YouTube Presence with Ideal Video Formats
- In 2024, Cutting-Edge Techniques Mastering YouTube Subtitle/CC Additions
- Elevate Video Appeal Crafting Unforgettable Thumbnail Images
- In 2024, Beware the Web of Counterfeit Subscriber Networks Online
- Crafting Professional Content on YouTube via Enhancements for 2024
- [New] Elevate Your Channel's Reach Proven Techniques for Multistreaming on YouTube and Twitch
- [Updated] Enhance Videos at No Extra Cost Best Editors Ranked (Top 9)
- [Updated] Easy Steps to Extract and Save Your YouTube Watch Lists
- [Updated] Elevating Your Watch Experience YouTube List Shuffle
- Unpacking YouTube’s Financial Framework Shifts
- [Updated] Employing Google Trends to Discover Compelling Video Themes
- Step-by-Step Method for Extracting Video Portions From YouTube
- 2024 Approved Craft a Powerhouse Channel with Studio Expertise
- [New] Demystifying The Process of Checking Subs
- Bite-Sized Broadcasting Maintaining Quality in Quick Posts
- Achieve Striking Visuals Your Guide to Uploading at Correct Dimensions
- In 2024, EpicEditor Hub Innovative PC Cutting with Tunes
- Demystifying Twitter Archives for Users & Analysts for 2024
- Dynamic Text Designs Ready to Go in After Effects
- In 2024, Full Guide to Catch 100 IV Pokémon Using a Map On Apple iPhone 12 | Dr.fone
- New FLAC Converter Reviews Find Your Perfect Match
- 5 Quick Hacks to Sharpen Your Indie Filmmaking Skills for 2024
- In 2024, Twitter Takes the Lead The Most Shared Content of the Day
- [Updated] Extract Soundtrack of FB Events
- In 2024, 3 Things You Must Know about Fake Snapchat Location On Samsung Galaxy A54 5G | Dr.fone
- Master Screen Grabber List #1-8
- New In 2024, AVS Video Editor Test Drive What to Expect From This Video Editing Tool
- Best Methods for Samsung Galaxy S24 Ultra Wont Turn On | Dr.fone
- New Secure Your Space Top 10 Free Security Camera Programs for 2024
- Title: [New] Affordable Strategies for Engaging YouTube Opening & End Titles
- Author: Brian
- Created at : 2024-05-25 12:26:47
- Updated at : 2024-05-26 12:26:47
- Link: https://youtube-video-recordings.techidaily.com/new-affordable-strategies-for-engaging-youtube-opening-and-end-titles/
- License: This work is licensed under CC BY-NC-SA 4.0.
