
![[New] 8 Premium Complimentary Streaming Media Processors](https://www.lifewire.com/thmb/vQYVU40X1u_KDh2EhtQTxACNEhI=/400x300/filters:no_upscale():max_bytes(150000):strip_icc()/chatgptlogin-d176b679eef94d49ab45a5b3ec340b5e.jpg)
[New] 8 Premium Complimentary Streaming Media Processors
8 Premium Complimentary Streaming Media Processors
Free Online Video Editors for YouTube

Richard Bennett
Mar 27, 2024• Proven solutions
Most of you might be addicted to YouTube videos because those uploads are outstanding with content that contains information, entertainment stuff and many more. But some of you might be also thinking to get a solution for editing some of your favourite YouTube videos in order to create some customized results. There are so many options available online as well as with downloadable versions. Below are some of the basic details about top seven highly rated online YouTube video editors:
If you need more advanced features like PIP, Green Screen, or audio mixing, check this easy to use and powerful video editor-Wondershare Filmora , and ignite your video by clicks.
 Download Mac Version ](https://tools.techidaily.com/wondershare/filmora/download/ )
8 Free YouTube Video Editor Online
Here is a comparison table. You will learn more information about 4K and price. Each of them has noticable features, so have a look.
| Price | Share to YouTube | Support 4K | Include templates | |
|---|---|---|---|---|
| video editor | Free | N | Y | Y |
| Wevideo | Free | Y | Y | Y |
| Loopster | Free | Y | N | N |
| Kizoa | Free | Y | Y | Y |
| Tubechop | Free | N | N | Y |
| Magisto | Free | Y | N | Y |
| Wideo | Free | Y | N | Y |
| Renderforest | Free | Y | N | Y |
| Powtoon | Free | Y | N | Y |
| YouTube Studio | Free | Y | Y | N |
2. Wevideo
This software tool makes online editing task much easier and fun oriented where you can easily make connections with other cloud services for exporting data. Users can access its paid as well as free version where later comes with watermarked editing feature. The editing experience with Wevideo is really outstanding and simple where interactive tools can be used for drag and drop, trimming and transitioning of files.
Pros:
Collaborative software feature where it is possible to call friends for uploading any footage to project created by you.
Cons:
Free version comes with a limitation of watermarked video type.
3.Loopster
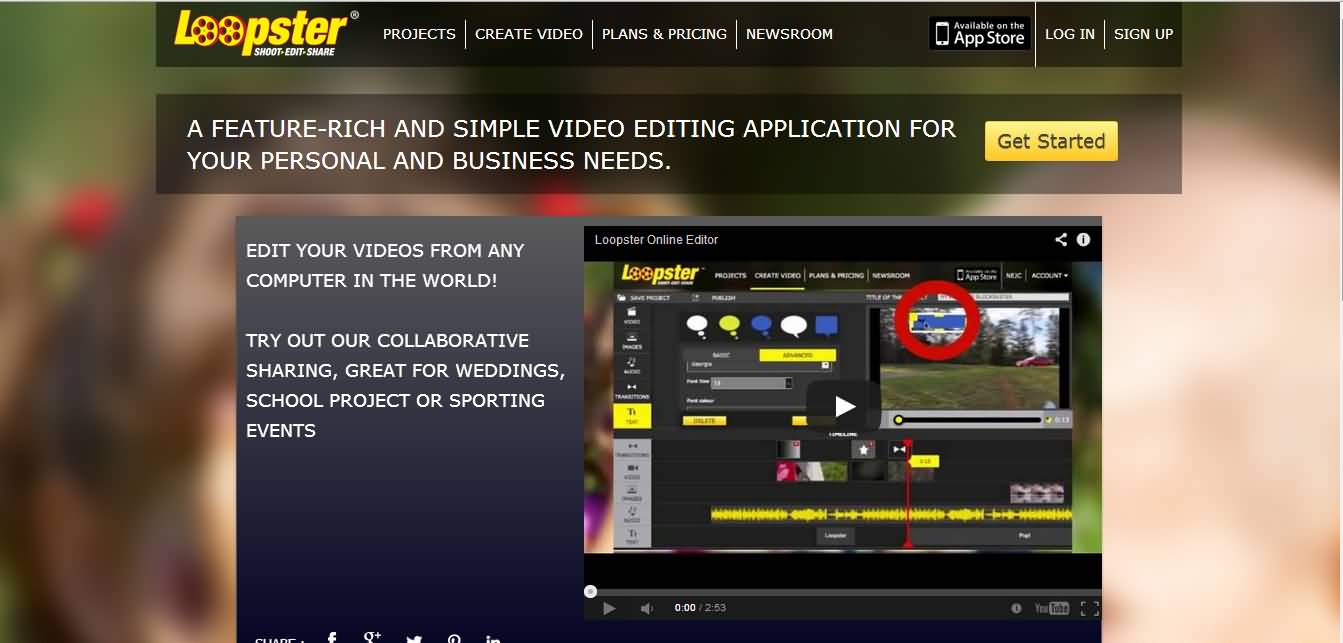
Loopster is one of the best options for educators, film makers, professionals as well as beginners due to its interactive interface. You can avail its free version along with other affordable packages as per need. The special features include splicing of features, adjustment of video angles, sound effect creations and addition of music from external sources.
Pros:
Easy to use interface with fast access to photo and video transfers; allows fast uploading to YouTube account along with other simple functions.
Cons:
Comes with very basic functions and transition feature is not that interactive; is not useful for animation needs.
4.Kizoa

Kizoa is a popular cloud based video editor that comes with user friendly interface where users can edit, share and store photos as per requirement as its storage capacity goes up to 1GB even with free account. It comes with cloud base and web base where you can also upload music from your personal computer.
Pros:
It comes with numerous templates and effects.
Cons:
Free account allows users to work only on a 10 second clip; and resolution is not much appreciable.
5.Tubechop
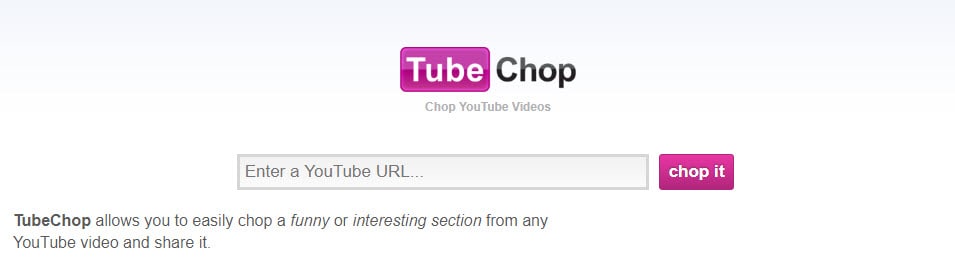
It is actually a website that allows easy chopping of YouTube videos; users need to copy and paste the URL of videos and select the desired part of video for chopping. This tool provides lots of options to for sharing chopped videos to other platforms.
Pros:
Trimming and sharing of videos is much easier as easy to use interface makes everything much easier.
Cons:
Not suitable for those who want to add background music to their video files.
6.Magisto
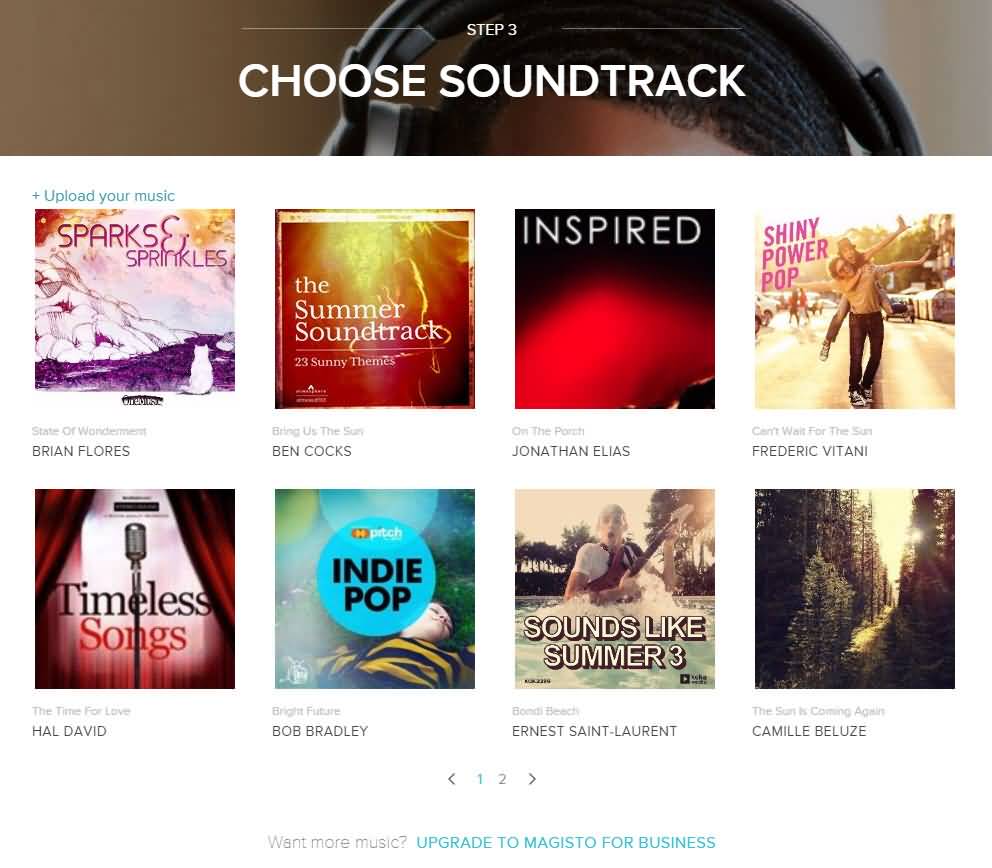
Magisto is a great app that is really popular for automatically turning what would otherwise be an everyday type video into a beautiful poignant movie. . Magisto allows users to derive a funny video from any random footage and the results are worth watching.
Pros:
This online video editing tool is well designed, engaging and offers highly automated video production feature.
Cons:
Less control over edits, restricted length of productions and pricey subscriptions.
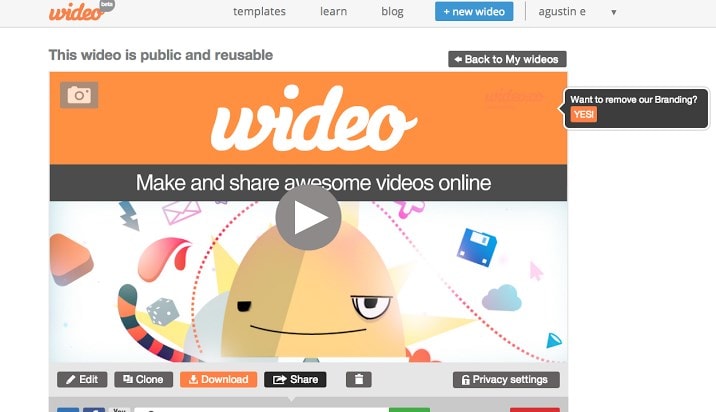
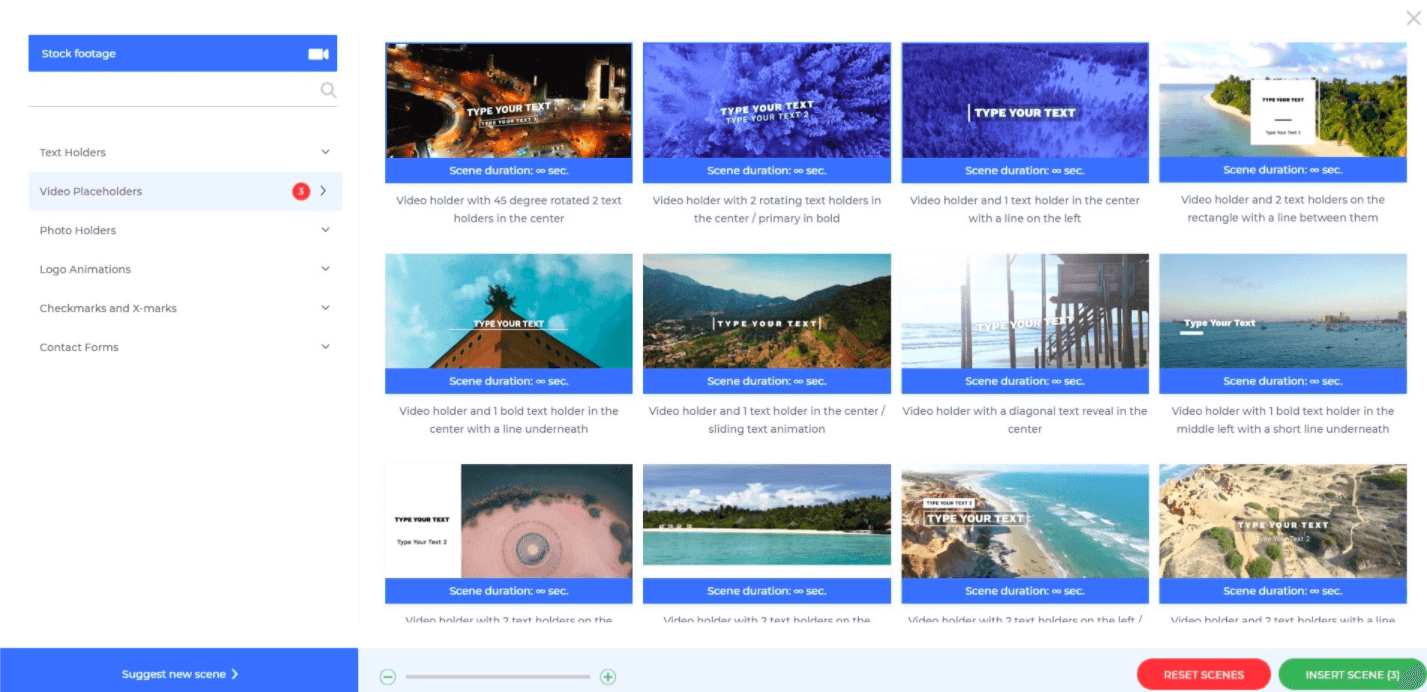
7.Wideo
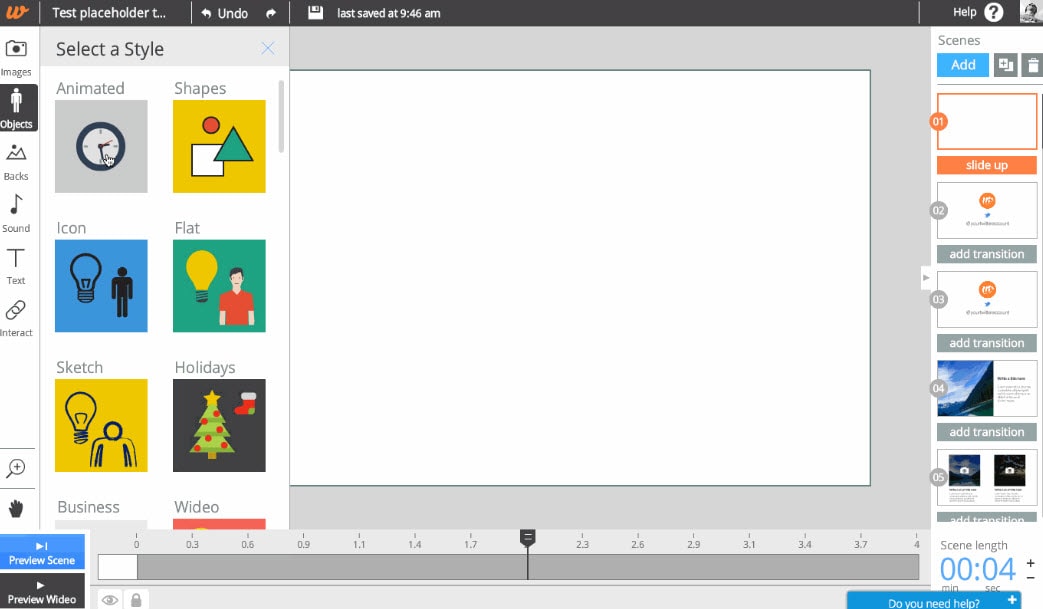
It is one of the latest web based application tool that allows easy to use interface for creation of presentations and animations. This software window contains lots of stylish templates, objects, editing tools, and other interactive elements.
Pros:
Comes with free unbranded player and video hosting service, outstanding customer support, special discounts are added for educators and students.
Cons:
Possess limited editing tools for audios; users need faster internet connection for proper connectivity.
8.Renderforest
Renderforest is a cloud-based video maker platform. It offers a wide variety of branding and editing tools for YouTubers, including advanced video trimmer and voice-over options, logo animations, intros, and promotional video templates. Creators can share their videos on social media, publish them on Facebook or Youtube directly from the preview page.
Pros:
Intuitive and user-friendly interface, easy editing tools, and more than 800+ video templates available for free. The subscription plans come with other tools, including a website builder, logo maker, and mockup editor.
Cons:
With the free plan, users can create an unlimited number of 3-minute videos in 360p with watermarks.
9.Powtoon

Powtoon is an amazing online application that you don’t need to download on your system as it provides all facilities on your premium account. This tool contains so many tools for animation creation and acts like a professional studio for all users. Premium users can easily download their finished videos with high resolution here.
Pros:
Powtoon possesses numerous editing tools and supports many file types; this platform is more famous for animations and professional video editing needs.
Cons:
It is little difficult to use this software for beginners and demands very high speed internet connection.
10.YouTube Studio (Beta)
YouTube video editor was one of the most widely used free online video editing tool over the internet until 20th September, 2017, because after that time, users will no longer be able to use the complimentary editing suite. Check the best YouTube video editor alternatives from this complete guide.

However, the new YouTube Studio now allows you to trim, split video uploaded YouTube videos and add blur effects to faces or objects. Though this easy to use free online video editor doesn’t feature tools like combine several video clips, photos into one longer video, nor add Pan and Zoom effects like the previous version, you can still add audio tracks from its Audio Library to Video. Yeah, this is a video maker online with music and effects. So, it is in our best free online video editor list. Remember, if you’re looking for a free online video editor for YouTube for these simple editing features, then you can try the Editor under YouTube Studio.
Richard Bennett
Richard Bennett is a writer and a lover of all things video.
Follow @Richard Bennett
Richard Bennett
Mar 27, 2024• Proven solutions
Most of you might be addicted to YouTube videos because those uploads are outstanding with content that contains information, entertainment stuff and many more. But some of you might be also thinking to get a solution for editing some of your favourite YouTube videos in order to create some customized results. There are so many options available online as well as with downloadable versions. Below are some of the basic details about top seven highly rated online YouTube video editors:
If you need more advanced features like PIP, Green Screen, or audio mixing, check this easy to use and powerful video editor-Wondershare Filmora , and ignite your video by clicks.
Download Mac Version ](https://tools.techidaily.com/wondershare/filmora/download/ )
8 Free YouTube Video Editor Online
Here is a comparison table. You will learn more information about 4K and price. Each of them has noticable features, so have a look.
| Price | Share to YouTube | Support 4K | Include templates | |
|---|---|---|---|---|
| video editor | Free | N | Y | Y |
| Wevideo | Free | Y | Y | Y |
| Loopster | Free | Y | N | N |
| Kizoa | Free | Y | Y | Y |
| Tubechop | Free | N | N | Y |
| Magisto | Free | Y | N | Y |
| Wideo | Free | Y | N | Y |
| Renderforest | Free | Y | N | Y |
| Powtoon | Free | Y | N | Y |
| YouTube Studio | Free | Y | Y | N |
2. Wevideo
This software tool makes online editing task much easier and fun oriented where you can easily make connections with other cloud services for exporting data. Users can access its paid as well as free version where later comes with watermarked editing feature. The editing experience with Wevideo is really outstanding and simple where interactive tools can be used for drag and drop, trimming and transitioning of files.
Pros:
Collaborative software feature where it is possible to call friends for uploading any footage to project created by you.
Cons:
Free version comes with a limitation of watermarked video type.
3.Loopster
Loopster is one of the best options for educators, film makers, professionals as well as beginners due to its interactive interface. You can avail its free version along with other affordable packages as per need. The special features include splicing of features, adjustment of video angles, sound effect creations and addition of music from external sources.
Pros:
Easy to use interface with fast access to photo and video transfers; allows fast uploading to YouTube account along with other simple functions.
Cons:
Comes with very basic functions and transition feature is not that interactive; is not useful for animation needs.
4.Kizoa
Kizoa is a popular cloud based video editor that comes with user friendly interface where users can edit, share and store photos as per requirement as its storage capacity goes up to 1GB even with free account. It comes with cloud base and web base where you can also upload music from your personal computer.
Pros:
It comes with numerous templates and effects.
Cons:
Free account allows users to work only on a 10 second clip; and resolution is not much appreciable.
5.Tubechop
It is actually a website that allows easy chopping of YouTube videos; users need to copy and paste the URL of videos and select the desired part of video for chopping. This tool provides lots of options to for sharing chopped videos to other platforms.
Pros:
Trimming and sharing of videos is much easier as easy to use interface makes everything much easier.
Cons:
Not suitable for those who want to add background music to their video files.
6.Magisto
Magisto is a great app that is really popular for automatically turning what would otherwise be an everyday type video into a beautiful poignant movie. . Magisto allows users to derive a funny video from any random footage and the results are worth watching.
Pros:
This online video editing tool is well designed, engaging and offers highly automated video production feature.
Cons:
Less control over edits, restricted length of productions and pricey subscriptions.
7.Wideo
It is one of the latest web based application tool that allows easy to use interface for creation of presentations and animations. This software window contains lots of stylish templates, objects, editing tools, and other interactive elements.
Pros:
Comes with free unbranded player and video hosting service, outstanding customer support, special discounts are added for educators and students.
Cons:
Possess limited editing tools for audios; users need faster internet connection for proper connectivity.
8.Renderforest
Renderforest is a cloud-based video maker platform. It offers a wide variety of branding and editing tools for YouTubers, including advanced video trimmer and voice-over options, logo animations, intros, and promotional video templates. Creators can share their videos on social media, publish them on Facebook or Youtube directly from the preview page.
Pros:
Intuitive and user-friendly interface, easy editing tools, and more than 800+ video templates available for free. The subscription plans come with other tools, including a website builder, logo maker, and mockup editor.
Cons:
With the free plan, users can create an unlimited number of 3-minute videos in 360p with watermarks.
9.Powtoon
Powtoon is an amazing online application that you don’t need to download on your system as it provides all facilities on your premium account. This tool contains so many tools for animation creation and acts like a professional studio for all users. Premium users can easily download their finished videos with high resolution here.
Pros:
Powtoon possesses numerous editing tools and supports many file types; this platform is more famous for animations and professional video editing needs.
Cons:
It is little difficult to use this software for beginners and demands very high speed internet connection.
10.YouTube Studio (Beta)
YouTube video editor was one of the most widely used free online video editing tool over the internet until 20th September, 2017, because after that time, users will no longer be able to use the complimentary editing suite. Check the best YouTube video editor alternatives from this complete guide.
However, the new YouTube Studio now allows you to trim, split video uploaded YouTube videos and add blur effects to faces or objects. Though this easy to use free online video editor doesn’t feature tools like combine several video clips, photos into one longer video, nor add Pan and Zoom effects like the previous version, you can still add audio tracks from its Audio Library to Video. Yeah, this is a video maker online with music and effects. So, it is in our best free online video editor list. Remember, if you’re looking for a free online video editor for YouTube for these simple editing features, then you can try the Editor under YouTube Studio.
Richard Bennett
Richard Bennett is a writer and a lover of all things video.
Follow @Richard Bennett
Mastering Online Income: From YouTube’s AdSense to Direct Payments
How To Get Paid on YouTube - From AdSense to your Bank Account
Richard Bennett
Oct 26, 2023• Proven solutions
YouTube is more than a video sharing social network; here’s how to get paid on YouTube. Having an active YouTube channel with decent monthly views can earn you income through advertising. If your channel is set up properly, Google can place ads over your YouTube videos and you can earn money based on how many people see or click on (depends on the ad) those ads while watching your videos.
- The Requirements for YouTube Monetization
- How to Enable Monetization for Your YouTube Channel
- Linking Your Bank Account to Your AdSense Account
- Receiving Payments
Many vloggers receive direct bank deposits of their ad-based revenues every month. In this article, we’ll show you how to monetize your YouTube Channel and how to receive payments to your bank account.
Making Your YouTube Videos Better with Filmora
If you want to earn more money with YouTube videos, your video should be stand out. To achieve that, you should use a powerful video editing software as well. Here, I recommend Wondershare Filmora video editor . As one of the most widely used video editing software among YouTubers, Filmora provides lots of templates and effects which allows you to edit faster and better.

Part 1: The Requirements for YouTube Monetization
Meeting the minimum requirement for YouTube monetization is probably the hardest part of this whole process. About a month ago, you had to have 10,000 lifetime views on your YouTube channel to qualify for monetization. However, earlier this year, Google changed their eligibility requirements and made them even tougher.
As of February 20, 2018, YouTube channels need to have accumulated 4000 hours of ‘watch time’ over the past 12 months and no less than 1000 subscribers to qualify for monetization. If you do not meet these requirements you cannot join the YouTube Partner Program and monetize your YouTube channel.
So, the first step to successful monetization on YouTube is to actually grow your channel. You need to create videos that will attract viewers and engage your audience. You also need to get people to subscribe because this is really what will grow your YouTube channel over time.
Part 2: How To Enable Monetization for Your YouTube Channel
Here’s the step-by-step process for monetizing your YouTube Channel, for those who are qualified.
- Log in to your YouTube account.
- Find your account icon in the top right corner. Click it to find the ‘Creator Studio’ button.
- Click the ‘Creator Studio’ button.
- Click the ‘Channel’ option in the left side menu.
- You’ll see a drop-down menu under ‘Channel’. Click on ‘Status and Features’. This is actually the first option on the menu. It should open by default once you click the ‘Channel’ button.
- Look through the ‘Status and Features’ page and click the ‘Enable’ button beside monetization.

- Clicking the ‘Enable’ button should lead you to another page where the guidelines for monetization are explained. Take the time to read through the guidelines and understand the dos and don’ts of YouTube monetization.
- Once you’ve looked through the guidelines, click the ‘Enable my account’ button to proceed. This will lead you to a page where you’ll be prompted to join the YouTube Partner Program.
- Read through the YouTube Partner Program terms, check the appropriate boxes, and click the ‘accept’ button.
- You’ll be prompted to link an AdSense account.
- Connect an existing AdSense account if you have one or create a new one.
- Once you’re done linking an AdSense account, you’ll be redirected to YouTube. There, select the type of ads you want to run under ‘Monetization Preferences’.
- Click the submit button and wait to find out if your account is approved for monetization.
According to YouTube, it can take up to a week for a decision to be reached on your application.
YouTube will not review your monetization application until you’ve met their eligibility criteria. Even then, your application may be declined if your videos do not follow the community guidelines (i.e. channels which simply repost content from other channels will not be monetized).
Not all videos can be monetized. While there are legal ways to create videos consisting of imagery and footage belonging to others, be aware that such videos are not always eligible for monetization. YouTube will only monetize videos that you own. So, posting videos which do not belong to you or which include copyrighted content can cause your monetization application to be declined.
Part 3: Linking Your Bank Account To Your AdSense Account
AdSense offers a variety of payment options including mailed checks and Western Union transfers. However, these options may not be available to you depending on where you’re based. AdSense does make payments through electronic wire transfer (EFT – Electronic funds transfer) to virtually every country in the world, and this is the preferred payment option for most people.
To have your earnings deposited directly into your account through EFT, you’ll need to link your bank account to your AdSense account.
Here’s a step-by-step guide for linking your bank account to your AdSense account.
- Log in to AdSense via: www.google.com/adsense/start
- Click the ‘Settings’ button in the left panel menu
- Under ‘Settings’, click ‘Payments’.
- On the ‘Payments’ page, click ‘Manage payment options’.
- Click ‘Add payment method’.
- Next, you’ll be prompted to add your bank account details. In general, you will be asked to provide the following:
- Name on the account / account holder’s name
- Bank account number
- Bank name
- Bank SWIFT code
- Depending on where you are based, additional information may be required.
- Ensure that the name on your AdSense account matches the name on the bank account you provide. To edit your AdSense name, click the ‘Manage settings’ button also on the Payments page.
Part 4: Receiving Payments
To get paid by AdSense, you need to reach the $100 threshold. You may wish to set a higher threshold but as a rule, earnings below the $100 will not be processed for payment (you will still receive the money, it will just keep adding up until it gets to $100 and then you’ll be paid).
Also, bear in mind that AdSense follows a monthly payment cycle. This means that a month’s earnings (assuming they meet the threshold requirement) will be paid next month. Usually, direct deposit payments will be processed between the 21st and 26th of every month. That said, it can take up to 10 days for electronic wire payments to be received.
In addition to reaching the payment threshold, be sure that you have no payment hold on your AdSense account. A payment hold can cause your earnings to be withheld even if it has reached the payment threshold.
To avoid a payment hold, be sure to provide the necessary tax information, verify your identity and your address, make sure the bank account linked to your AdSense is verified, and make sure you have not violated any of YouTube’s guidelines and community rules.
Conclusion
Depending on your vlogging skills and the nature of your content (some types of videos get more attention than others), it can take a while for you to be eligible for monetization. And even when you’ve successfully monetized your channel, getting enough views to reach the payment threshold can be tough.
Don’t let this discourage you from working towards earning income from your YouTube channel. Just focus on creating a YouTube channel people will want to watch. That’s how to get paid on YouTube - be sticking with your channel long enough for it to grow.
Richard Bennett
Richard Bennett is a writer and a lover of all things video.
Follow @Richard Bennett
Richard Bennett
Oct 26, 2023• Proven solutions
YouTube is more than a video sharing social network; here’s how to get paid on YouTube. Having an active YouTube channel with decent monthly views can earn you income through advertising. If your channel is set up properly, Google can place ads over your YouTube videos and you can earn money based on how many people see or click on (depends on the ad) those ads while watching your videos.
- The Requirements for YouTube Monetization
- How to Enable Monetization for Your YouTube Channel
- Linking Your Bank Account to Your AdSense Account
- Receiving Payments
Many vloggers receive direct bank deposits of their ad-based revenues every month. In this article, we’ll show you how to monetize your YouTube Channel and how to receive payments to your bank account.
Making Your YouTube Videos Better with Filmora
If you want to earn more money with YouTube videos, your video should be stand out. To achieve that, you should use a powerful video editing software as well. Here, I recommend Wondershare Filmora video editor . As one of the most widely used video editing software among YouTubers, Filmora provides lots of templates and effects which allows you to edit faster and better.
Part 1: The Requirements for YouTube Monetization
Meeting the minimum requirement for YouTube monetization is probably the hardest part of this whole process. About a month ago, you had to have 10,000 lifetime views on your YouTube channel to qualify for monetization. However, earlier this year, Google changed their eligibility requirements and made them even tougher.
As of February 20, 2018, YouTube channels need to have accumulated 4000 hours of ‘watch time’ over the past 12 months and no less than 1000 subscribers to qualify for monetization. If you do not meet these requirements you cannot join the YouTube Partner Program and monetize your YouTube channel.
So, the first step to successful monetization on YouTube is to actually grow your channel. You need to create videos that will attract viewers and engage your audience. You also need to get people to subscribe because this is really what will grow your YouTube channel over time.
Part 2: How To Enable Monetization for Your YouTube Channel
Here’s the step-by-step process for monetizing your YouTube Channel, for those who are qualified.
- Log in to your YouTube account.
- Find your account icon in the top right corner. Click it to find the ‘Creator Studio’ button.
- Click the ‘Creator Studio’ button.
- Click the ‘Channel’ option in the left side menu.
- You’ll see a drop-down menu under ‘Channel’. Click on ‘Status and Features’. This is actually the first option on the menu. It should open by default once you click the ‘Channel’ button.
- Look through the ‘Status and Features’ page and click the ‘Enable’ button beside monetization.
- Clicking the ‘Enable’ button should lead you to another page where the guidelines for monetization are explained. Take the time to read through the guidelines and understand the dos and don’ts of YouTube monetization.
- Once you’ve looked through the guidelines, click the ‘Enable my account’ button to proceed. This will lead you to a page where you’ll be prompted to join the YouTube Partner Program.
- Read through the YouTube Partner Program terms, check the appropriate boxes, and click the ‘accept’ button.
- You’ll be prompted to link an AdSense account.
- Connect an existing AdSense account if you have one or create a new one.
- Once you’re done linking an AdSense account, you’ll be redirected to YouTube. There, select the type of ads you want to run under ‘Monetization Preferences’.
- Click the submit button and wait to find out if your account is approved for monetization.
According to YouTube, it can take up to a week for a decision to be reached on your application.
YouTube will not review your monetization application until you’ve met their eligibility criteria. Even then, your application may be declined if your videos do not follow the community guidelines (i.e. channels which simply repost content from other channels will not be monetized).
Not all videos can be monetized. While there are legal ways to create videos consisting of imagery and footage belonging to others, be aware that such videos are not always eligible for monetization. YouTube will only monetize videos that you own. So, posting videos which do not belong to you or which include copyrighted content can cause your monetization application to be declined.
Part 3: Linking Your Bank Account To Your AdSense Account
AdSense offers a variety of payment options including mailed checks and Western Union transfers. However, these options may not be available to you depending on where you’re based. AdSense does make payments through electronic wire transfer (EFT – Electronic funds transfer) to virtually every country in the world, and this is the preferred payment option for most people.
To have your earnings deposited directly into your account through EFT, you’ll need to link your bank account to your AdSense account.
Here’s a step-by-step guide for linking your bank account to your AdSense account.
- Log in to AdSense via: www.google.com/adsense/start
- Click the ‘Settings’ button in the left panel menu
- Under ‘Settings’, click ‘Payments’.
- On the ‘Payments’ page, click ‘Manage payment options’.
- Click ‘Add payment method’.
- Next, you’ll be prompted to add your bank account details. In general, you will be asked to provide the following:
- Name on the account / account holder’s name
- Bank account number
- Bank name
- Bank SWIFT code
- Depending on where you are based, additional information may be required.
- Ensure that the name on your AdSense account matches the name on the bank account you provide. To edit your AdSense name, click the ‘Manage settings’ button also on the Payments page.
Part 4: Receiving Payments
To get paid by AdSense, you need to reach the $100 threshold. You may wish to set a higher threshold but as a rule, earnings below the $100 will not be processed for payment (you will still receive the money, it will just keep adding up until it gets to $100 and then you’ll be paid).
Also, bear in mind that AdSense follows a monthly payment cycle. This means that a month’s earnings (assuming they meet the threshold requirement) will be paid next month. Usually, direct deposit payments will be processed between the 21st and 26th of every month. That said, it can take up to 10 days for electronic wire payments to be received.
In addition to reaching the payment threshold, be sure that you have no payment hold on your AdSense account. A payment hold can cause your earnings to be withheld even if it has reached the payment threshold.
To avoid a payment hold, be sure to provide the necessary tax information, verify your identity and your address, make sure the bank account linked to your AdSense is verified, and make sure you have not violated any of YouTube’s guidelines and community rules.
Conclusion
Depending on your vlogging skills and the nature of your content (some types of videos get more attention than others), it can take a while for you to be eligible for monetization. And even when you’ve successfully monetized your channel, getting enough views to reach the payment threshold can be tough.
Don’t let this discourage you from working towards earning income from your YouTube channel. Just focus on creating a YouTube channel people will want to watch. That’s how to get paid on YouTube - be sticking with your channel long enough for it to grow.
Richard Bennett
Richard Bennett is a writer and a lover of all things video.
Follow @Richard Bennett
Also read:
- 2024 Approved Behind-the-Scenes Insights Deciphering What 'Unlisted' Means for YouTube Users
- Cutting-Edge Openings at No Cost The Best YouTube Intro Makers
- Unlock the Full Potential of Your Video with Studio Editor
- 2024 Approved Creative Music Videos A List of 15 YouTube Projects
- 30 Tips & Tricks to Take Your YouTube Shorts Templates to the Next Level for 2024
- Optimize YouTube Traffic Select Best Rankers Explained
- YouTube Music Blend Fundamentals
- In 2024, Convenient Viewing Setting Up YouTube on Large TV Panels
- 2024 Approved Captivating First Impressions How to Choose Impactful Backgrounds for Thumbnails
- Crafting Cool YouTube Previews in iMovie Easily
- [New] Elevate Your Video Entrance with These Tools
- [New] Addressing Missing Thumbnails in YouTube Shorts
- Trim, Transform, and Triumph Advanced Techniques in Youtube Edits
- Maximizing Your YouTube Clicks with Optimal Dimensions
- Leveraging Video Features Annotations & Cards
- Unveiling 8 Best Tools for YouTube to AVI Conversion
- In 2024, Audio Integration Your YouTube Playlist
- Navigating the Maze of YouTube Short Mistakes
- In 2024, Earnings Escalation via YouTube Channel Initiatives
- [New] A Look at Earnings Understanding Your Monthly Income From YouTube's AdSense
- Achieve Balance & Vitality - Top 10 Premium Yoga Streams for 2024
- Speedy Screen Grab Creation Techniques
- 2024 Approved Crafting a Winning Strategy YouTube Keyword Mastery Explained
- Cut the Cord with YouTube-MP3 Conversion Tools
- In 2024, Elite Stabilization Solutions for Video Creators
- 2024 Approved Channel Your Creativity Convert YouTube Clips Into Dynamic Gifs
- In 2024, Driving View Counts Upward on YouTube 6 Proven Techniques
- The Premier 10 Online Yoga Streams to Enhance Fitness
- Broadcast Perfection Recommended Tech and Apps for YouTubers for 2024
- Next-Level Cinema Selection - YouTube Edition
- Download Free MCB Skin Designs for 2024
- The Art of Viewing Several Youtube Videos Concurrently
- [Updated] Cultivating Confidence for Captivating Your YouTube Audience
- Youtube Shorts Money-Making Guide Key Requirements & Potential Income
- [Updated] Curated Cinematic Journeys The Best YT Film Selections
- [New] Best Choices 8 Edits Suites for Linux Users
- [Updated] Astonishing Artistry YouTube's Top Magic Video Cuts
- 2024 Approved Mellow Moves Discover Top 20 Serene Country Songs for Groovy Dancing (TikTok)
- [Updated] In 2024, Essential Insights on Recording Google Video Conferences
- [New] The Verdict on SplitCam - Premium Recording Experience?
- In 2024, 5 Most Effective Methods to Unlock iPhone SE (2022) in Lost Mode
- In 2024, 3 Effective Ways to Unlock iCloud Account Without Password On iPhone 8 Plus
- [New] In 2024, Expanding Your Instagram Audience Step-by-Step
- In 2024, Scrutinizing VSDC Screen Recording Capabilities
- An In-Depth Exploration of Discord Features
- [New] Prime Tech for Quick, Clear Video Reports
- Step-by-Step Process for Capturing Top-Tier Presentations
- [New] Essential Top 5 Xbox HDDs for Gamers for 2024
- Audience Captivation for Personal Podcasts for 2024
- [Updated] Unveiling Android's Screen Recording Capabilities for 2024
- [New] 2024 Approved First Captured Visual Saga Critique with Alternate Views
- [Updated] In 2024, Master Plan Top 6 Modernist Minecraft Villas
- Scripter's Toolbox for 2024
- Does find my friends work on Oppo A56s 5G | Dr.fone
- Updated YouTube Thumbnail Design Blueprint Size, Style, and Success
- The Art of Film Capturing Essential Camera Movements for Novices
- New 2024 Approved Free Video Editing for Dummies Top Picks for Beginners
- [Updated] Expert Insights Into IPTV Stream Logging for 2024
- 2024 Approved Guide on VHS Technology and Its Influence on Video Editing
- Xiaomi Redmi Note 12 Pro 4G Not Receiving Texts? 10 Hassle-Free Solutions Here | Dr.fone
- [Updated] MC Homestead Plans The Top 6 for 2024
- [New] Techniques for Downloading Vimeo Media as MP3
- Windows Media Player Alternative
- Harnessing the Power of Instagram's Video Connectivity for 2024
- 4 Most-Known Ways to Find Someone on Tinder For Meizu 21 Pro by Name | Dr.fone
- 2024 Approved Alternatives Spotlighted by AZ Screen Recorder
- Mastering Mic Levels on a Mac for 2024
- In 2024, Amplify Audience Response with Innovative Instagram Questions
- Highest-Watched Online Clips List for 2024
- New 2024 Approved Top Picks Slow Motion Video Editing Tools for Creators
- Title: [New] 8 Premium Complimentary Streaming Media Processors
- Author: Brian
- Created at : 2024-05-25 12:25:20
- Updated at : 2024-05-26 12:25:20
- Link: https://youtube-video-recordings.techidaily.com/new-8-premium-complimentary-streaming-media-processors/
- License: This work is licensed under CC BY-NC-SA 4.0.
