:max_bytes(150000):strip_icc()/how-to-check-your-vram-5235783-628ab89069614d9faf9e129844a91fcd.jpg)
Maximizing YouTube Exposure with Ongoing Creative Commons Compliance
Maximizing YouTube Exposure with Ongoing Creative Commons Compliance
How to Force YouTube CC to Stay On and Get More Views

Richard Bennett
Oct 26, 2023• Proven solutions
Table of Content:
How YouTube CC Helps You Get More Views?
Benefits of Having YouTube CC Always On
How to Force YouTube CC to Always Turn On?
How to Embed Your Videos with Closed Captions on Your Website
Bonus Tip-Add Subtitles to YouTube Video with Wondershare Filmora
Wondershare Filmora serves as an inevitable video editing software for video lovers. It has a variety of subtitle templates for you to make great creations. Let’s see how to add subtitles to a YouTube video with Wondershare Filmora!


How YouTube CC Helps You to Get More Views?
YouTube CC (Closed Captions) is much capable of bringing more views to your videos.
Why? Because YouTube algorithms prefer to highlight YouTube videos that contain closed captions because such content appears universally acceptable and it helps to boost the experience for viewers. So when your YouTube video has some kind of relevant audio or speech information then it is essential to add closed captions (YouTube CC) to it.
Benefits of Having YouTube CC Always On
YouTube CC can easily bring more viewers to your terminal. But not all users know how to turn it on or bother to turn it on when it can actually help improve the watching experience. So there are few benefits that you can enjoy by having CCs ALWAYS on your videos.
- Closed captions play an important role when you have poor audio quality in your videos. For instance, if your videos did not follow the best audio recording practices , and are affected by background noise or bad audio equipment. In such cases, YouTube subtitles help viewers to understand what is going on videos even if they cannot hear it.
- For those who make videos with a unique accent, discuss something complex, or speaks too fast, turning on the closed captions help your viewers understand explanations and maintain their attention.
- This feature makes videos more accessible and can also appear useful for viewers that are hearing impaired.
How to Force YouTube CC to Always Turn On?
So, as you have gone through several benefits associated with YouTube video closed captions, now it is time to learn the technique to keep them always On.
Go through the steps below to force CCs always on your YouTube videos:
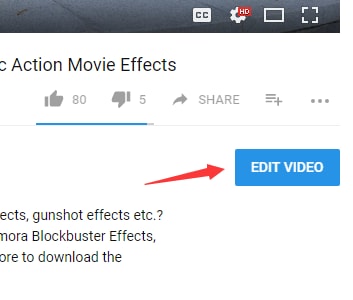
Step 1: Login and click the video in which you wish to add your captions.
Step 2: Click Edit underneath the video
Step 3: Add a specific tag to your content: “yt:cc=on”

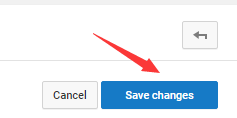
Step 4: Click Save Edit
There you go!

How to Embed your Videos with Closed Captions on your website
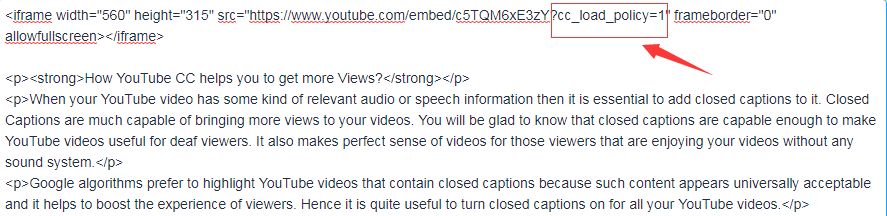
Some of you might also want to embed YouTube videos on your website. In this case, also you will need to use closed captions during display.
To do this, write “?cc_load_policy=1” at the end of your video source URL; it will be inside the iframe.
These simple steps will help you to create videos with the most impactful content and this collection will be enjoyed by all viewers on your channel. The Closed Captioned videos are valued higher by Google because they are capable enough to please the viewers throughout the world.
Even though CCs can be a powerful addition to your videos, it’s always important to prioritize audio, and it all starts with a good microphone. Find out what the best microphones are in this blog post: The Best Microphone for All Types of Creators

Richard Bennett
Richard Bennett is a writer and a lover of all things video.
Follow @Richard Bennett
Richard Bennett
Oct 26, 2023• Proven solutions
Table of Content:
How YouTube CC Helps You Get More Views?
Benefits of Having YouTube CC Always On
How to Force YouTube CC to Always Turn On?
How to Embed Your Videos with Closed Captions on Your Website
Bonus Tip-Add Subtitles to YouTube Video with Wondershare Filmora
Wondershare Filmora serves as an inevitable video editing software for video lovers. It has a variety of subtitle templates for you to make great creations. Let’s see how to add subtitles to a YouTube video with Wondershare Filmora!
How YouTube CC Helps You to Get More Views?
YouTube CC (Closed Captions) is much capable of bringing more views to your videos.
Why? Because YouTube algorithms prefer to highlight YouTube videos that contain closed captions because such content appears universally acceptable and it helps to boost the experience for viewers. So when your YouTube video has some kind of relevant audio or speech information then it is essential to add closed captions (YouTube CC) to it.
Benefits of Having YouTube CC Always On
YouTube CC can easily bring more viewers to your terminal. But not all users know how to turn it on or bother to turn it on when it can actually help improve the watching experience. So there are few benefits that you can enjoy by having CCs ALWAYS on your videos.
- Closed captions play an important role when you have poor audio quality in your videos. For instance, if your videos did not follow the best audio recording practices , and are affected by background noise or bad audio equipment. In such cases, YouTube subtitles help viewers to understand what is going on videos even if they cannot hear it.
- For those who make videos with a unique accent, discuss something complex, or speaks too fast, turning on the closed captions help your viewers understand explanations and maintain their attention.
- This feature makes videos more accessible and can also appear useful for viewers that are hearing impaired.
How to Force YouTube CC to Always Turn On?
So, as you have gone through several benefits associated with YouTube video closed captions, now it is time to learn the technique to keep them always On.
Go through the steps below to force CCs always on your YouTube videos:
Step 1: Login and click the video in which you wish to add your captions.
Step 2: Click Edit underneath the video
Step 3: Add a specific tag to your content: “yt:cc=on”
Step 4: Click Save Edit
There you go!
How to Embed your Videos with Closed Captions on your website
Some of you might also want to embed YouTube videos on your website. In this case, also you will need to use closed captions during display.
To do this, write “?cc_load_policy=1” at the end of your video source URL; it will be inside the iframe.
These simple steps will help you to create videos with the most impactful content and this collection will be enjoyed by all viewers on your channel. The Closed Captioned videos are valued higher by Google because they are capable enough to please the viewers throughout the world.
Even though CCs can be a powerful addition to your videos, it’s always important to prioritize audio, and it all starts with a good microphone. Find out what the best microphones are in this blog post: The Best Microphone for All Types of Creators
Richard Bennett
Richard Bennett is a writer and a lover of all things video.
Follow @Richard Bennett
Securely Sharing Video on YouTube with Settings
How to Change the Privacy Setting on Your YouTube Videos
Richard Bennett
Mar 27, 2024• Proven solutions
Privacy settings on YouTube allow you to control who can see your videos. There are three settings — Public, unlisted, and private. This article will give you a brief introduction of what those three settings mean, and how to use them.
- Part1: Public VS Unlisted VS Private
- Part2: How to Change Privacy Settings
- Part2: Sharing Private Videos
Want to make your YouTube videos more beautiful within minutes? Here we recommend an easy-to-use video editing software for beginner for your reference - Wondershare Filmora .
Download Mac Version ](https://tools.techidaily.com/wondershare/filmora/download/ )
Part 1: Public VS Unlisted VS Private
Let’s figure out some terms before runing into the how-to part.
Public Videos
These are videos that everyone can view. This is the majority of YouTube videos, and just about every one you’ve ever watched will have been public. You’ll want this if you want lots of people to watch your video.
Unlisted
Unlisted videos are ones that anybody can view so long as they have the link. The video won’t show up on search results or in “related” or “suggested” videos.
This is a great setting for sharing a video amongst small groups. You might have a rough edit you want to show a few people, or you might have a show reel that you only want certain people to see.
Private
Completely private videos cannot be watched by anyone who doesn’t have permission. You grant people permission by allowing their Google accounts to access the video. Nobody else can see the video, regardless of whether they have the link.
It won’t show up on searches, as related or suggested videos, or even when imbedded in other sites. This is the best setting for a video you need to share with only very specific people, if anyone. Below is a comparison table to know more about privacy settings .

Part 2: How to Change Privacy Settings
There are two ways to change the privacy settings: firstly, when you upload the video, and secondly through Creator Studio.
Method 1:
When you upload a video to YouTube you’ll see on the right hand side an option that says “privacy”. This is defaulted to “public”, but you can use the drop-down menu on the button to change the setting. This will apply your privacy setting the second the video finishes uploading and processing.

Method 2:
To change the privacy setting later, go to Creator Studio, then Video Manager. On the right-hand side you’ll see one of three icons: a world, a chain, and a lock. The world means “public”, the chain means “unlisted”, and the lock is for “private”.

To change the privacy, click the icon. You’ll be taken to the video’s info and settings page. Down below where you see the thumbnails you’ll see the selected privacy setting. Click this to open a drop down menu, and select your desired privacy level.
Part 3: Sharing Private Videos
If a video is set to “private’, you’ll have the option to share it with specific people. Below where it says “private” on the info and settings page you’ll see a button labeled “share”. Click this and type in the email addresses of the people you want to be able to watch the video. You’ll also have the option of notifying the people via email that you’ve shared the video with them.

Conclusion
And that’s all there is to it! Changing the privacy setting on YouTube videos is a simple, helpful tool to allow you to control the audience of you work. Enjoy!
Richard Bennett
Richard Bennett is a writer and a lover of all things video.
Follow @Richard Bennett
Richard Bennett
Mar 27, 2024• Proven solutions
Privacy settings on YouTube allow you to control who can see your videos. There are three settings — Public, unlisted, and private. This article will give you a brief introduction of what those three settings mean, and how to use them.
- Part1: Public VS Unlisted VS Private
- Part2: How to Change Privacy Settings
- Part2: Sharing Private Videos
Want to make your YouTube videos more beautiful within minutes? Here we recommend an easy-to-use video editing software for beginner for your reference - Wondershare Filmora .
Download Mac Version ](https://tools.techidaily.com/wondershare/filmora/download/ )
Part 1: Public VS Unlisted VS Private
Let’s figure out some terms before runing into the how-to part.
Public Videos
These are videos that everyone can view. This is the majority of YouTube videos, and just about every one you’ve ever watched will have been public. You’ll want this if you want lots of people to watch your video.
Unlisted
Unlisted videos are ones that anybody can view so long as they have the link. The video won’t show up on search results or in “related” or “suggested” videos.
This is a great setting for sharing a video amongst small groups. You might have a rough edit you want to show a few people, or you might have a show reel that you only want certain people to see.
Private
Completely private videos cannot be watched by anyone who doesn’t have permission. You grant people permission by allowing their Google accounts to access the video. Nobody else can see the video, regardless of whether they have the link.
It won’t show up on searches, as related or suggested videos, or even when imbedded in other sites. This is the best setting for a video you need to share with only very specific people, if anyone. Below is a comparison table to know more about privacy settings .
Part 2: How to Change Privacy Settings
There are two ways to change the privacy settings: firstly, when you upload the video, and secondly through Creator Studio.
Method 1:
When you upload a video to YouTube you’ll see on the right hand side an option that says “privacy”. This is defaulted to “public”, but you can use the drop-down menu on the button to change the setting. This will apply your privacy setting the second the video finishes uploading and processing.
Method 2:
To change the privacy setting later, go to Creator Studio, then Video Manager. On the right-hand side you’ll see one of three icons: a world, a chain, and a lock. The world means “public”, the chain means “unlisted”, and the lock is for “private”.
To change the privacy, click the icon. You’ll be taken to the video’s info and settings page. Down below where you see the thumbnails you’ll see the selected privacy setting. Click this to open a drop down menu, and select your desired privacy level.
Part 3: Sharing Private Videos
If a video is set to “private’, you’ll have the option to share it with specific people. Below where it says “private” on the info and settings page you’ll see a button labeled “share”. Click this and type in the email addresses of the people you want to be able to watch the video. You’ll also have the option of notifying the people via email that you’ve shared the video with them.
Conclusion
And that’s all there is to it! Changing the privacy setting on YouTube videos is a simple, helpful tool to allow you to control the audience of you work. Enjoy!
Richard Bennett
Richard Bennett is a writer and a lover of all things video.
Follow @Richard Bennett
Also read:
- [Updated] 2024 Approved Aesthetic Alchemy Best Tools for Your Feed
- 1. Seamlessly Secure Your Favorite Tumblr Music Videos: A Simple, Cost-Free Guide
- Best Top 3 Free Tools: Comparing Ultra HD 4K Video Downloaders on Windows and macOS
- Detailed Guide on Removing Apple iPhone 13 mini Activation Lock without Previous Owner?
- DIY Gaming: Repair and Customize Your Xbox Controls
- Download Top Rated Free MKV to MP3 Converter - Easy and Fast Transcoding Tool
- Dynamic Discussions for Regular Streaming for 2024
- Enjoy Immersive Movie Experiences: Watch VR Content on Netflix via iOS Device App
- How to Hide/Fake Snapchat Location on Your Xiaomi Redmi 13C | Dr.fone
- In 2024, 7 Ways to Lock Apps on iPhone XR and iPad Securely | Dr.fone
- In 2024, Editing Excellence Archive Your Q&A
- In 2024, Turn Up the Volume Enabling Sound on Tweeted Videos
- Mastering Windows CAB Files: Usage and Installation Insights
- Resolve YouTube's Error 503 Issue on Your Desktop or Mobile Device
- Streamlining Your iTunes Video Recordings for 2024
- The Best Romantic and Sensual Love Tunes in MP3 Format for Your Perfect Valentine’s Day Experience - Top Picks of 2023
- Ultimate List of Free Tools for Instantly Saving Streaming Videos From the Internet!
- Ultimate Selection: Greatest World Cup Inspired Cinema Masterpieces Ever Made
- Ultimate Tips for Safely Acquiring & Enjoying Cutting-Edge 3D Movies on Your 3D TV Platforms
- Title: Maximizing YouTube Exposure with Ongoing Creative Commons Compliance
- Author: Brian
- Created at : 2024-10-23 03:58:50
- Updated at : 2024-10-29 18:41:55
- Link: https://youtube-video-recordings.techidaily.com/maximizing-youtube-exposure-with-ongoing-creative-commons-compliance/
- License: This work is licensed under CC BY-NC-SA 4.0.