
:max_bytes(150000):strip_icc()/Neo-QLED-vs-OLED-8eb18283c4fe49f3a8c583443f2b89b6.jpg)
Mastering YouTube Video Transformation Into Animated GIFs (No Save)
Mastering YouTube Video Transformation Into Animated GIFs (No Save)
How to Convert YouTube Videos to GIFs

Shanoon Cox
Mar 27, 2024• Proven solutions
A GIF adds an extra element to any conversation and makes the reader feel connected to the post. Using GIF can turn useful if done rightly. It narrates a story in a single animated image for social media conversation. In this article, we will brief you about how to convert YouTube to gif, various GIF converters, their uses, and the pros and cons of each converter.
Let’s get started!
How to Convert a YouTube Video into GIFs?
1. YouTube to GIF Directly
Here is a quick way to convert the YouTube video to GIFs without typing a YouTube to GIF website.
Gif.com is a free and easy-to-use video editor available with multiple effects. This converter was created keeping in mind how people spend hours and money on paid platforms.
Follow the below steps to convert a YouTube video into gifs.
- In the YouTube video page, add gif before youtube.com. For example, I want to convert the YouTube video https://www.youtube.com/watch?v=40fuGLmwHwk to GIFs, here is how it looks like after adding gif at the beginning: https://www.gifyoutube.com/watch?v=40fuGLmwHwk . Press the enter button on your keyboard and you will enter the gifs.com directly.

- In gifs.com, you can play and pause the YouTube video and drag the bar to select a desired moment for gif. Press the “Create Gif” button on the top right side to convert the specific part of the YouTube video to gif.
- You will then be directed to the result page to see your GIF created using the YouTube video, and you can change the GIF title and the tag.
- Lastly, you need to copy the link and share it!
Pros of converting YouTube to GIFs with Gifs.com:
- The interface is easy to use and it provides lots of tools to adjust.
- Simple functionality.
Cons:
- The watermark on your created GIF can be removed only after purchasing the premium version.
- GIFs can be downloaded only by registered users.
2. FreeGifMaker.me
FreeGifMaker is one simple online tool that allows the creation of animated Gifs for free. A minimum of two pictures has to be uploaded out of ten. It takes few seconds and is super easy to make a GIF from a YouTube video. You can use FreeGifMaker.me in some easy steps.
- Open the website http://freegifmaker.me/youtube-to-gif/ on your desktop.
- Go to YouTube and copy the video URL you want to create a GIF of and paste it on the website mentioned above.
- Then click “Load YouTube Video” below the URL and wait for a few seconds while the tool checks the video source.
- Once the YouTube video is loaded, enter the gif duration, start time, and click on the “Make a GIF button.” It will redirect you to the result page.
- Pros:
- Conversion size is unlimited**.**
- There is no usage of ads.
- Easy to make Gifs.
- Cons:
- The upload speed is slow.
- The converter gives limited options for editing.
3. Wondershare Online UniConverter
Online UniConverter converts video into a high-quality animated GIF and allows editing. It is a simple converter with unique features.
If you want to convert your YouTube video into a GIF, follow the steps.
- You need to upload your video through the “Choose Files” option. You can also copy the link from YouTube.
- Wait for some time once you upload the file; you can then set your start time, end time, frame rate according to your needs.
- Lastly, click on “Create GIF” and download your GIF. You can also save it through the dropdown option available besides “Download.”
- Pros:
- Easy to handle.
- A wide range of customization tools is available.
- Zero ads.
- Cons:
- Upload speed is slow.
- Conversion size is limited.
4. GifRun
It is a video maker that started in 2013, and GifRun converts videos from YouTube, Facebook, and other sources to high-quality GIFs. You can create Gifs free of cost from GifRun.
Here is how you can use Gifrun.
- Open the website and paste the URL you want to convert into Gif. Later, press “Get Video” option below the URL box.
- In this step, you can adjust the duration, start time, add text, and also pause and preview the video. Once you’re done altering the video, click “Create GIF.”
- Lastly, click on the “Download” button beside the add text button, or share the link directly.
- Pros:
- Fast conversion and download.
- There is no upload limit.
- The video preview feature is available.
- Cons:
- UI is ad-infested.
- Supports YouTube videos only.
5. Makeagif
This GIF converter creates high-quality GIFs in no time. You need to paste the URL in Makeagif and nothing much. It can make GIFs from Instagram, Facebook, Twitter, and other platforms easily.
The only issue is that it supports one type of conversion with a maximum limit of 25MB.
Here is how you can make your favorite GIF in few steps.
- Open makeagif.com and paste the YouTube URL in the box available.
- Once you paste the URL, the website will automatically take you to the edit page to edit GIF length, start time, speed, and add caption and stickers. The next step is to select the category to which the video belongs available on the left side of the screen.
- After editing, click on “Continue to publishing” then “Create GIF” at the lower right corner of the screen. Voila! Your GIF is ready to use.
- Pros:
- The UI is user-friendly.
- Ads are minimal
- Various GIF conversions are supported.
- Cons:
- The conversion size is small.
- Batch conversions are not available.
6. ImgFlip
It is a creative GIF website supporting various videos from other websites such as Vimeo and YouTube. ImgFlip has innovative customization tools for cropping, reshaping, adding text and, a lot more, but you just need to be aware of the ads.
Want to know how to create GIF? Go through these simple steps.
- You can make GIFs both from Video and Images. To make GIF from a video, paste the YouTube URL in the box at the top, upload the tape from your device’s file.
- After pasting the URL, you will be given lots of customization options. Choose the effect of your choice for your GIF.
- Lastly, click on “Generate GIF” available on the right side of the screen. You can now share the GIF via your device or download it.
- Pros:
- Plenty of customization options.
- Fast conversion.
- Easy to upload and use.
- Cons:
- Ads pop up frequently.
- Offline conversion is unavailable.
7. GIPHY
It is a free GIF converter that helps you download free YouTube GIFs. You can also make GIFs from your photos, videos available on your device along with video URLs and images. The only problem is, to use Giphy you first have to log in to the app.
Follow the below steps to create a GIF from YouTube videos with Giphy:
- Open Giphy on your device and click on “Create” on the top right-side of your screen.
- Paste the URL in the space given below. A pop-up will tell you to log in. Log in to the website to continue.
- The video you choose should be less than 15 seconds and under 100MB. You will be given editing options from which you can select the start time and duration of your GIF along with Captions and Tags.
- In the end, press the “Create GIF” button to make the GIF. When it’s done, you will be redirected to the GIF page. You can then share your GIF on any social media site.
- Pros:
- Ads are absent
- Uploading is fast
- Wide range of free GIFs available
- Cons:
- Not perfect for green hands
8. Imgur
It is one of the best apps that offers tons of images, memes, and GIFs. You can make GIFs of less than 60 seconds with high quality, which you can share anywhere.
Here are three easy steps to make GIFs
- Visit the page “imgur.com/vidgif” and paste your YouTube URL there.
- Set a start time by clicking or dragging on the timeline. The total runtime is also adjustable, with 60 seconds as the maximum time for GIFs.
- Lastly, press on “Create GIF” to see the magic. The GIF is converted from the YouTube video.
- Pros:
- The users can share the post of their choice
- Users can save posts.
- Great collection of short GIFs and videos.
- Cons:
- During loading, the screen flashes.
9 VEED.IO
Veed is a simple YouTube video converter that makes your work super easy. It converts YouTube videos into GIFs with various editing options like crop, trim, text ads, and many more.
Check out how to use VEED in 3 steps.
- Start by pasting the URL of your YouTube video into VEED, Your video will be ready to convert into GIF.
- Now you are all set to edit your video. You have the option to crop and trim the video. You can also include different font styles, colors, and sizes of your choice.
- Lastly, download the GIF you made in VEED.
- Pros:
- Downloading the software is not mandatory.
- UI is simple and easy to navigate.
- The subtitle option is present.
- Cons:
- It takes a lot of time to upload video.
- Many basic tools.
10. Kapwing
Kapwing is a helpful video converter that can easily turn any video into GIFs with a click. It can also convert different files such as 3GP, GIF, WEBM.
To create beautiful GIFs with this video editor, follow these easy steps.
- Open Kapwing video editor and upload your video from YouTube.
- Choose the “Export dropdown” option and choose the format you wish to convert.
You can also preview the GIF and customize it as per your choice.
- In the final step, export the video by clicking the “Export Video” button. Save and download the newly created GIF and share it anywhere with your friends.
- Pros:
- Great editing tools.
- Easy to use.
- Cons:
- Available only on the website.
- Too many tools for the same purpose.
Final Thoughts
With the increased use of GIFs on social media, you can now easily convert your favorite YouTube videos into GIFs on your own. All you have to do is simply choose the tools mentioned above and share it with your friends.
Shanoon Cox
Shanoon Cox is a writer and a lover of all things video.
Follow @Shanoon Cox
Shanoon Cox
Mar 27, 2024• Proven solutions
A GIF adds an extra element to any conversation and makes the reader feel connected to the post. Using GIF can turn useful if done rightly. It narrates a story in a single animated image for social media conversation. In this article, we will brief you about how to convert YouTube to gif, various GIF converters, their uses, and the pros and cons of each converter.
Let’s get started!
How to Convert a YouTube Video into GIFs?
1. YouTube to GIF Directly
Here is a quick way to convert the YouTube video to GIFs without typing a YouTube to GIF website.
Gif.com is a free and easy-to-use video editor available with multiple effects. This converter was created keeping in mind how people spend hours and money on paid platforms.
Follow the below steps to convert a YouTube video into gifs.
- In the YouTube video page, add gif before youtube.com. For example, I want to convert the YouTube video https://www.youtube.com/watch?v=40fuGLmwHwk to GIFs, here is how it looks like after adding gif at the beginning: https://www.gifyoutube.com/watch?v=40fuGLmwHwk . Press the enter button on your keyboard and you will enter the gifs.com directly.
- In gifs.com, you can play and pause the YouTube video and drag the bar to select a desired moment for gif. Press the “Create Gif” button on the top right side to convert the specific part of the YouTube video to gif.
- You will then be directed to the result page to see your GIF created using the YouTube video, and you can change the GIF title and the tag.
- Lastly, you need to copy the link and share it!
Pros of converting YouTube to GIFs with Gifs.com:
- The interface is easy to use and it provides lots of tools to adjust.
- Simple functionality.
Cons:
- The watermark on your created GIF can be removed only after purchasing the premium version.
- GIFs can be downloaded only by registered users.
2. FreeGifMaker.me
FreeGifMaker is one simple online tool that allows the creation of animated Gifs for free. A minimum of two pictures has to be uploaded out of ten. It takes few seconds and is super easy to make a GIF from a YouTube video. You can use FreeGifMaker.me in some easy steps.
- Open the website http://freegifmaker.me/youtube-to-gif/ on your desktop.
- Go to YouTube and copy the video URL you want to create a GIF of and paste it on the website mentioned above.
- Then click “Load YouTube Video” below the URL and wait for a few seconds while the tool checks the video source.
- Once the YouTube video is loaded, enter the gif duration, start time, and click on the “Make a GIF button.” It will redirect you to the result page.
- Pros:
- Conversion size is unlimited**.**
- There is no usage of ads.
- Easy to make Gifs.
- Cons:
- The upload speed is slow.
- The converter gives limited options for editing.
3. Wondershare Online UniConverter
Online UniConverter converts video into a high-quality animated GIF and allows editing. It is a simple converter with unique features.
If you want to convert your YouTube video into a GIF, follow the steps.
- You need to upload your video through the “Choose Files” option. You can also copy the link from YouTube.
- Wait for some time once you upload the file; you can then set your start time, end time, frame rate according to your needs.
- Lastly, click on “Create GIF” and download your GIF. You can also save it through the dropdown option available besides “Download.”
- Pros:
- Easy to handle.
- A wide range of customization tools is available.
- Zero ads.
- Cons:
- Upload speed is slow.
- Conversion size is limited.
4. GifRun
It is a video maker that started in 2013, and GifRun converts videos from YouTube, Facebook, and other sources to high-quality GIFs. You can create Gifs free of cost from GifRun.
Here is how you can use Gifrun.
- Open the website and paste the URL you want to convert into Gif. Later, press “Get Video” option below the URL box.
- In this step, you can adjust the duration, start time, add text, and also pause and preview the video. Once you’re done altering the video, click “Create GIF.”
- Lastly, click on the “Download” button beside the add text button, or share the link directly.
- Pros:
- Fast conversion and download.
- There is no upload limit.
- The video preview feature is available.
- Cons:
- UI is ad-infested.
- Supports YouTube videos only.
5. Makeagif
This GIF converter creates high-quality GIFs in no time. You need to paste the URL in Makeagif and nothing much. It can make GIFs from Instagram, Facebook, Twitter, and other platforms easily.
The only issue is that it supports one type of conversion with a maximum limit of 25MB.
Here is how you can make your favorite GIF in few steps.
- Open makeagif.com and paste the YouTube URL in the box available.
- Once you paste the URL, the website will automatically take you to the edit page to edit GIF length, start time, speed, and add caption and stickers. The next step is to select the category to which the video belongs available on the left side of the screen.
- After editing, click on “Continue to publishing” then “Create GIF” at the lower right corner of the screen. Voila! Your GIF is ready to use.
- Pros:
- The UI is user-friendly.
- Ads are minimal
- Various GIF conversions are supported.
- Cons:
- The conversion size is small.
- Batch conversions are not available.
6. ImgFlip
It is a creative GIF website supporting various videos from other websites such as Vimeo and YouTube. ImgFlip has innovative customization tools for cropping, reshaping, adding text and, a lot more, but you just need to be aware of the ads.
Want to know how to create GIF? Go through these simple steps.
- You can make GIFs both from Video and Images. To make GIF from a video, paste the YouTube URL in the box at the top, upload the tape from your device’s file.
- After pasting the URL, you will be given lots of customization options. Choose the effect of your choice for your GIF.
- Lastly, click on “Generate GIF” available on the right side of the screen. You can now share the GIF via your device or download it.
- Pros:
- Plenty of customization options.
- Fast conversion.
- Easy to upload and use.
- Cons:
- Ads pop up frequently.
- Offline conversion is unavailable.
7. GIPHY
It is a free GIF converter that helps you download free YouTube GIFs. You can also make GIFs from your photos, videos available on your device along with video URLs and images. The only problem is, to use Giphy you first have to log in to the app.
Follow the below steps to create a GIF from YouTube videos with Giphy:
- Open Giphy on your device and click on “Create” on the top right-side of your screen.
- Paste the URL in the space given below. A pop-up will tell you to log in. Log in to the website to continue.
- The video you choose should be less than 15 seconds and under 100MB. You will be given editing options from which you can select the start time and duration of your GIF along with Captions and Tags.
- In the end, press the “Create GIF” button to make the GIF. When it’s done, you will be redirected to the GIF page. You can then share your GIF on any social media site.
- Pros:
- Ads are absent
- Uploading is fast
- Wide range of free GIFs available
- Cons:
- Not perfect for green hands
8. Imgur
It is one of the best apps that offers tons of images, memes, and GIFs. You can make GIFs of less than 60 seconds with high quality, which you can share anywhere.
Here are three easy steps to make GIFs
- Visit the page “imgur.com/vidgif” and paste your YouTube URL there.
- Set a start time by clicking or dragging on the timeline. The total runtime is also adjustable, with 60 seconds as the maximum time for GIFs.
- Lastly, press on “Create GIF” to see the magic. The GIF is converted from the YouTube video.
- Pros:
- The users can share the post of their choice
- Users can save posts.
- Great collection of short GIFs and videos.
- Cons:
- During loading, the screen flashes.
9 VEED.IO
Veed is a simple YouTube video converter that makes your work super easy. It converts YouTube videos into GIFs with various editing options like crop, trim, text ads, and many more.
Check out how to use VEED in 3 steps.
- Start by pasting the URL of your YouTube video into VEED, Your video will be ready to convert into GIF.
- Now you are all set to edit your video. You have the option to crop and trim the video. You can also include different font styles, colors, and sizes of your choice.
- Lastly, download the GIF you made in VEED.
- Pros:
- Downloading the software is not mandatory.
- UI is simple and easy to navigate.
- The subtitle option is present.
- Cons:
- It takes a lot of time to upload video.
- Many basic tools.
10. Kapwing
Kapwing is a helpful video converter that can easily turn any video into GIFs with a click. It can also convert different files such as 3GP, GIF, WEBM.
To create beautiful GIFs with this video editor, follow these easy steps.
- Open Kapwing video editor and upload your video from YouTube.
- Choose the “Export dropdown” option and choose the format you wish to convert.
You can also preview the GIF and customize it as per your choice.
- In the final step, export the video by clicking the “Export Video” button. Save and download the newly created GIF and share it anywhere with your friends.
- Pros:
- Great editing tools.
- Easy to use.
- Cons:
- Available only on the website.
- Too many tools for the same purpose.
Final Thoughts
With the increased use of GIFs on social media, you can now easily convert your favorite YouTube videos into GIFs on your own. All you have to do is simply choose the tools mentioned above and share it with your friends.
Shanoon Cox
Shanoon Cox is a writer and a lover of all things video.
Follow @Shanoon Cox
Gamers’ Signature Look: Essential Template Tips for Channels
Gaming videos have become increasingly popular on YouTube, especially among young people. It is not uncommon for older folk to enjoy this type of content, especially if they want to unwind after a long day. However, the industry is becoming pretty crowded, making it harder for content creators to stand out from the crowd.
An excellent way to get your target audience to notice you would be to design a killer YouTube banner that will immediately cause anyone scrolling past to click on your video. Stick around to learn how to create a great gaming YouTube banner with templates.
Importance of a Banner for Your YouTube Gaming Channel
Imagine a scenario where you want to open a brick-and-mortar store. One of the most important things you need to get out of the way is the business name. Once you have settled on a fitting name, you will then move on to create a sign to place outside your shop.
For example, a banner for your YouTube gaming channel plays a similar role to signage for a brick-and-mortar shop.
- An excellent banner helps you make a solid first impression on your viewers, some of who is viewing your content for the first time.
- Secondly, a well-designed banner reflects positively on your brand and helps you grow your audience at a steady rate.
- Thirdly, you can use your banner to give your viewers a rough idea of what your video is about without them clicking to watch. A suitable banner can cause anticipation to build within your viewers. Once the video is over, they won’t resist visiting your channel to see what else you offer.
Guide to YouTube Gaming Banner Size
We can liken a banner for your YouTube video to a book cover to a novel you have been dying to read. Therefore, it would be wise to get the size right if you want to create an excellent first impression for yourself. Ideally, the best size for a YouTube banner is 2560*1440 pixels or an aspect ratio of 16:9.
We urge you not to upload a banner smaller than 2048*1152 pixels, or else the image will appear cropped. Keep your banner within 1235*338 pixels and centered on the screen to be on the safe side.
This YouTube banner dimension is ideal for viewing on any device since your audience might use their smartphones or laptop to watch your videos on YouTube. Lastly, ensure you keep the file to a maximum of 6MB. We believe this file size is pretty generous.
Tips for Designing an Attractive Gaming YouTube Banner
Below are some tips that will help you create beautiful YouTube banners.
Simplicity is key: Contrary to popular belief, a simple banner looks more polished than a complex one. If your YouTube banner has too many elements, your viewers using their mobile phones might have a challenge viewing the image.
Ensure the graphics are high-quality : Nothing is as frustrating to your viewers as seeing a blurry or pixelated YouTube banner. However, high-quality graphics with a resolution of at least 1920*1080 pixels make your work look polished and attract more viewers to your channel.
Leverage the grid system: Some of your viewers might watch your videos from their smartphones, and others on their laptops or tablets. The grid system allows you to ensure the full banner will be visible no matter what device your audience will use to watch your gaming videos.
Add a CTA: At the end of the day, you are trying to grow your audience on your YouTube channel. You might also have other social media platforms where you post content. Since your banner is one of the first things your audience will see, you could include a short, easy-to-read, and understandable call to action. For instance, you could encourage them to “Subscribe Now!”
Incorporate your unique color scheme: By now, you already have a theme for your YouTube channel that your existing subscribers associate with you. As you design your YouTube banner, ensure you incorporate your theme colors, so new visitors know what colors to look out for as they scroll on the platform.
Why Use Templates To Create Gaming YouTube Banners?
First and foremost, a gaming youtube banner template takes the tedium out of creating a design from scratch. They are also systematized, meaning you can download a template specifically for YouTube that comes in the correct dimensions. Most importantly, templates designed for gaming YouTube banners are optimized to help you generate more organic traffic to your channel.
You probably have other expenses breathing down your neck. No need to add your YouTube banner to the list. A youtube gaming channel banner template a budget-friendly way to create stunning designs for your banner that actually look good. If you are lucky, you might find free programs to help you create gorgeous YouTube banners for your gaming channel.
Make YouTube Gaming Banners With Templates in Filmora
Now that you understand why a gaming channel banner template is essential for your YouTube channel, you might wonder where you can find some good ones to incorporate into your videos. Don’t worry because Filmora is precisely what you need.
Wondershare Filmora has a fantastic template feature that helps you make creative videos effortlessly. You can use the preset templates in the platform, saving you lots of time you would have spent designing your template from scratch. We guarantee you cannot exhaust the 1000+ templates this platform offers, meaning you are spoilt for choice!
If you want to customize your video, you can replace the stock videos that come with the preset templates with footage from your internal storage. In addition, Wondershare Filmora lets you share your favorite templates with other content creators who would also like to try making their own cool videos.
Free Download For Win 7 or later(64-bit)
Free Download For macOS 10.14 or later
Below is a detailed step-by-step guide on how to make a gaming YouTuber banner template with Wondershare Filmora.
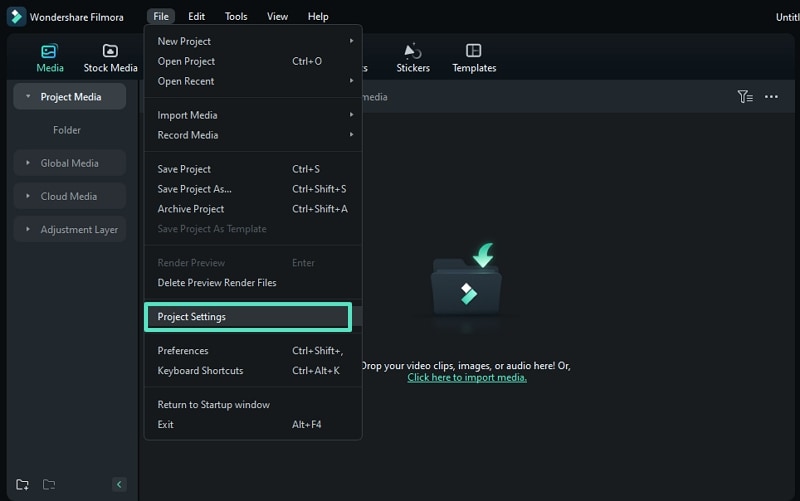
Step 1. After creating a project with Filmora, click on the “File” tab, wait for a drop-down menu to appear, and select “Project Settings.”
Step 2. Once a dialogue box appears, go to the “Resolution” tab and adjust the resolution to 2560*1140.
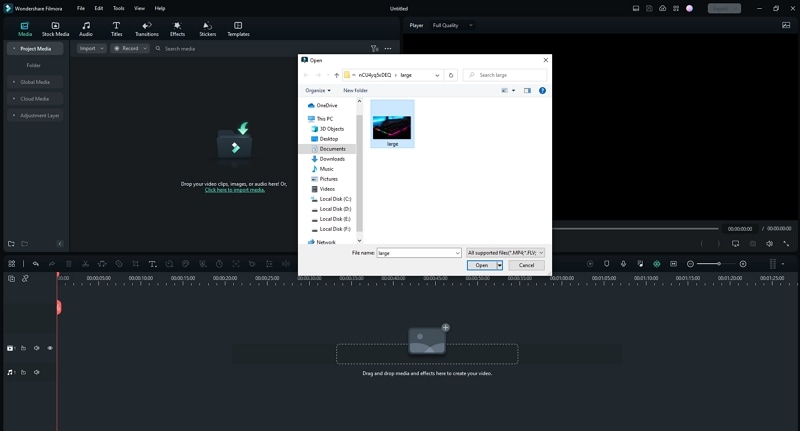
Step 3. Upload your footage or photo from your internal storage by clicking on the logo below.
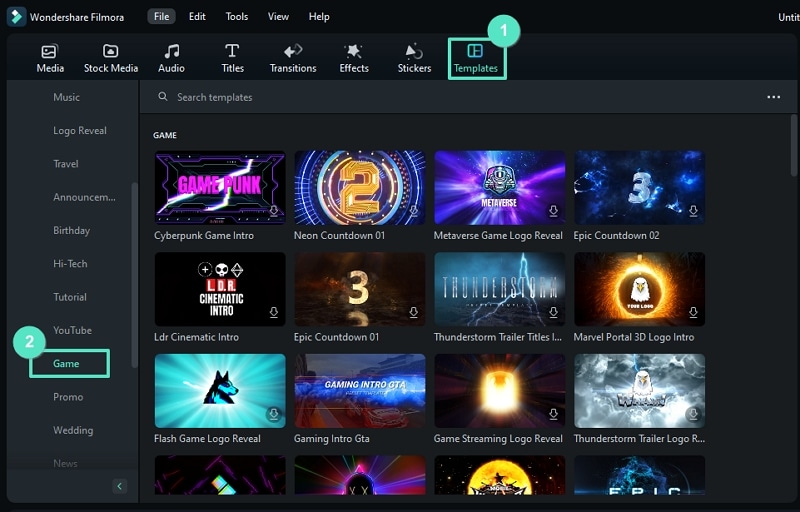
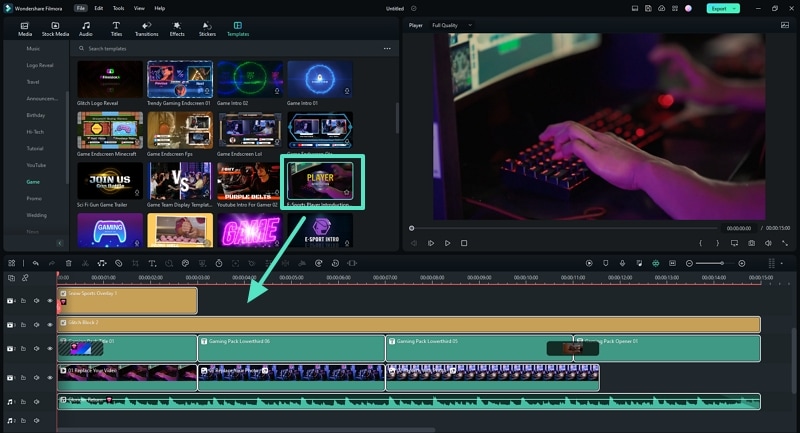
Step 4. Click on the “Template” tab at the top of the page and click “Game.” Browse the available templates till you see one you like.
Step 5. Drag and drop the template you have chosen to the timeline as shown below.
Step 6. Replace the sample footage in the template by dragging and dropping your own footage into the timeline.

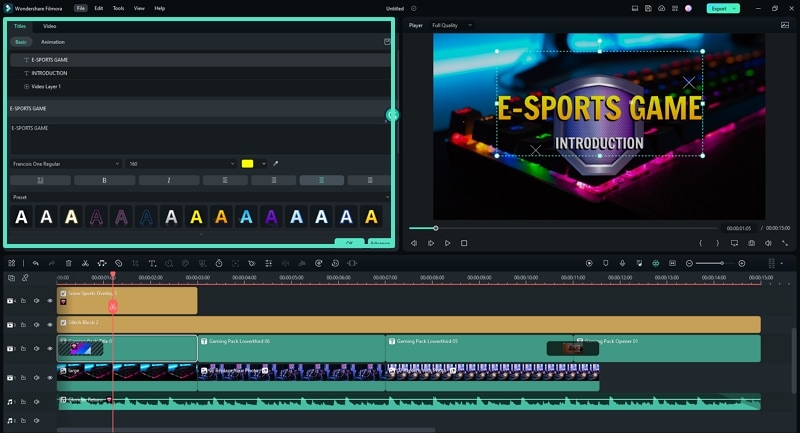
Step 7. Customize the footage and change the settings until you are happy with the outcome. Edit the text using the tools provided in the platform.
Step 8. Take a screenshot of the final result.

Step 9. Specify the snapshot format and choose the storage location before saving a copy to your device.

Step 10. Once the snapshot appears in the Media Panel, right-click on it to open. Select “Reveal in Explorer” to locate the picture in your internal storage. You can now use the photo as your YouTube gaming banner.

5 Websites for Gaming Banner Templates Your YouTube
Wondershare Filmora is not the only platform you can use to create banner templates for your YouTube channel. Here is a list of 5 more websites you can try and a detailed breakdown of the remarkable features you are bound to enjoy.
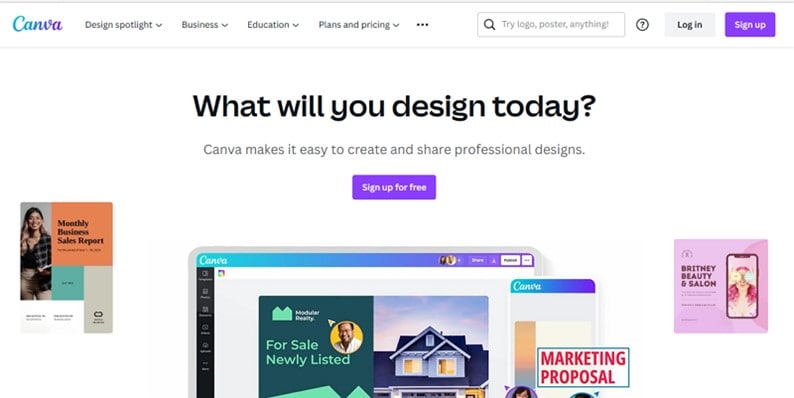
1. Canva
The first alternative to Filmora on our list is Canva, which has thousands of professional, ready-made designs to wow your audience. You can work alone or with a dedicated team to ensure you design only the best banner for your channel to attract the masses to the kind of content you create.
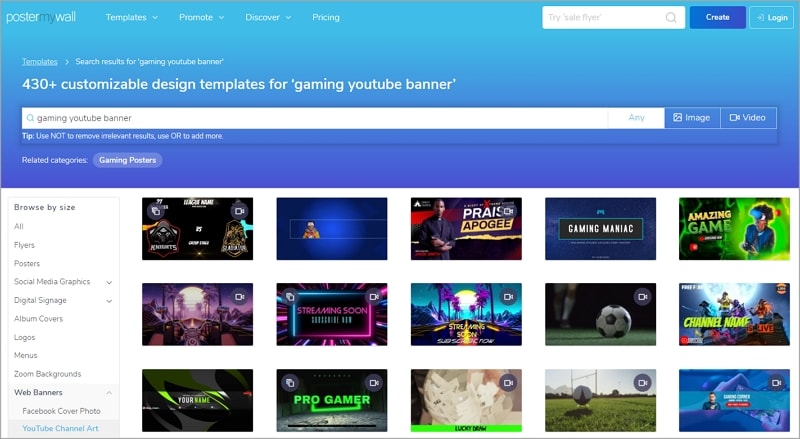
2. PosterMyWall
We couldn’t forget to include PosterMyWall to our list, which has pre-made templates you can customize to suit your needs. With PosterMyWall, you can save the time you could have used to design a banner from scratch to think of more content for your channel. The developers suggest various templates you might like, not to mention that you can sign up for free!
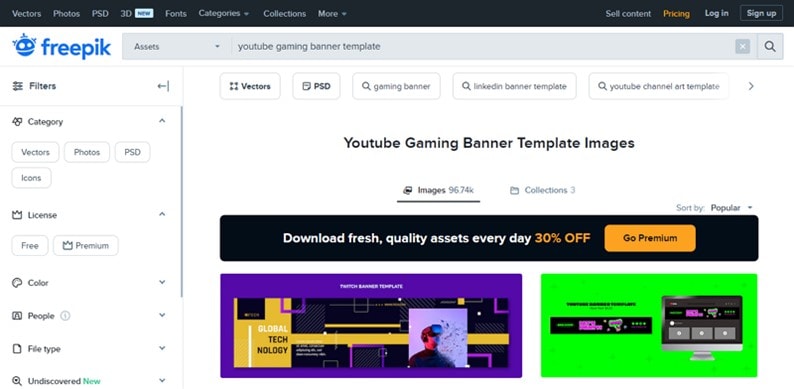
3. Freepik
Another suitable alternative to Filmora is Freepik. We guarantee you cannot exhaust all the numerous templates this platform offers. Each template is unique, with different color combinations and fonts to cater to the theme colors on your YouTube channel. You could opt for the free version or sign up for a Premium account and get 30% off.
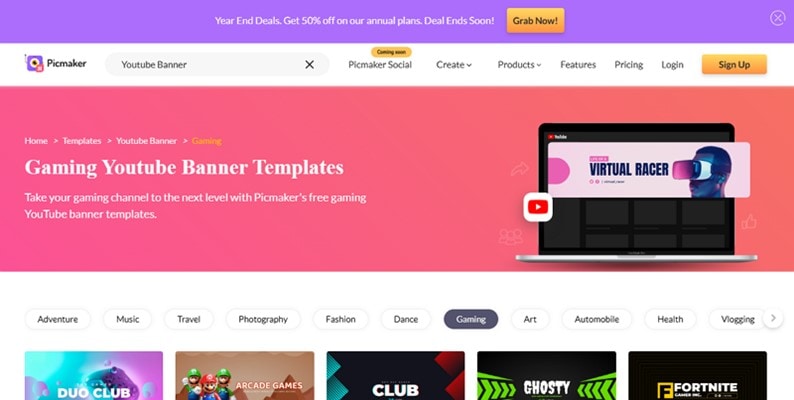
4. Pickmaker
The fourth alternative on our list is Pickmaker, a sure way to take your gaming channel to the next level. The templates are arranged in broad categories to help you pick the best one based on the type of content you post. In addition, you don’t have to part with your precious monies to start designing YouTube banners with Pickmaker.
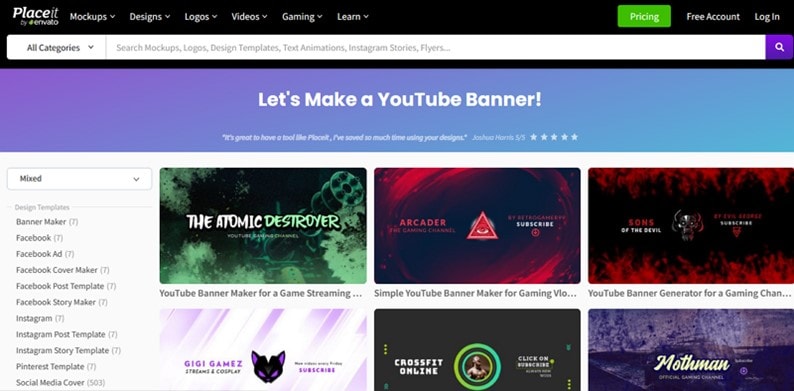
5. Placeit
Last but definitely not least is Placeit, which contains picturesque templates fitting for a gaming YouTube channel. We guarantee your audience won’t resist clicking on your videos once you use any of the templates within this platform. All you need to do is create a free account to enjoy the perks. Placeit makes your work easier by allowing you to indicate your favorite templates for use later.
Conclusion
Gaming content is far from boring, and neither should your banner. Remember, your audience will judge you based on your banner, the first content they interact with before they click to watch your video.
The better you can design your banner, the higher your chances of growing an audience that supports you by watching your content regularly. Once you have created an enticing banner, all that’s left is to ensure you have the content to match.
Free Download For macOS 10.14 or later
Below is a detailed step-by-step guide on how to make a gaming YouTuber banner template with Wondershare Filmora.
Step 1. After creating a project with Filmora, click on the “File” tab, wait for a drop-down menu to appear, and select “Project Settings.”
Step 2. Once a dialogue box appears, go to the “Resolution” tab and adjust the resolution to 2560*1140.
Step 3. Upload your footage or photo from your internal storage by clicking on the logo below.
Step 4. Click on the “Template” tab at the top of the page and click “Game.” Browse the available templates till you see one you like.
Step 5. Drag and drop the template you have chosen to the timeline as shown below.
Step 6. Replace the sample footage in the template by dragging and dropping your own footage into the timeline.
Step 7. Customize the footage and change the settings until you are happy with the outcome. Edit the text using the tools provided in the platform.
Step 8. Take a screenshot of the final result.
Step 9. Specify the snapshot format and choose the storage location before saving a copy to your device.
Step 10. Once the snapshot appears in the Media Panel, right-click on it to open. Select “Reveal in Explorer” to locate the picture in your internal storage. You can now use the photo as your YouTube gaming banner.
5 Websites for Gaming Banner Templates Your YouTube
Wondershare Filmora is not the only platform you can use to create banner templates for your YouTube channel. Here is a list of 5 more websites you can try and a detailed breakdown of the remarkable features you are bound to enjoy.
1. Canva
The first alternative to Filmora on our list is Canva, which has thousands of professional, ready-made designs to wow your audience. You can work alone or with a dedicated team to ensure you design only the best banner for your channel to attract the masses to the kind of content you create.
2. PosterMyWall
We couldn’t forget to include PosterMyWall to our list, which has pre-made templates you can customize to suit your needs. With PosterMyWall, you can save the time you could have used to design a banner from scratch to think of more content for your channel. The developers suggest various templates you might like, not to mention that you can sign up for free!
3. Freepik
Another suitable alternative to Filmora is Freepik. We guarantee you cannot exhaust all the numerous templates this platform offers. Each template is unique, with different color combinations and fonts to cater to the theme colors on your YouTube channel. You could opt for the free version or sign up for a Premium account and get 30% off.
4. Pickmaker
The fourth alternative on our list is Pickmaker, a sure way to take your gaming channel to the next level. The templates are arranged in broad categories to help you pick the best one based on the type of content you post. In addition, you don’t have to part with your precious monies to start designing YouTube banners with Pickmaker.
5. Placeit
Last but definitely not least is Placeit, which contains picturesque templates fitting for a gaming YouTube channel. We guarantee your audience won’t resist clicking on your videos once you use any of the templates within this platform. All you need to do is create a free account to enjoy the perks. Placeit makes your work easier by allowing you to indicate your favorite templates for use later.
Conclusion
Gaming content is far from boring, and neither should your banner. Remember, your audience will judge you based on your banner, the first content they interact with before they click to watch your video.
The better you can design your banner, the higher your chances of growing an audience that supports you by watching your content regularly. Once you have created an enticing banner, all that’s left is to ensure you have the content to match.
Also read:
- 2024 Approved Channel Boost Achieve YouTube Affiliate Milestone with 10K Vistas
- [New] Ceased Shorts Missing on YouTube Screen
- [Updated] Beyond the Leading Films Hidden Cinema Treasures
- Elite 10 Sound Enhancers Across OS Platforms for 2024
- [Updated] Content Curation YouTube Vs. TikTok Showdown
- Crafting Captivating Haul Vlogs for Online Fame for 2024
- Closing with Panache Free YouTube's #1 Six
- [Updated] 10 Best VR Videos on YouTube to Have Immersive Experience
- Elevating YouTube Live with High-Quality Webcam Cameras for 2024
- Dailymotion vs YouTube Who Earns More From Video Content, In 2024
- [New] Chart-Topping Ideas to Invigorate Your YouTube Channel
- [Updated] 10 Power Players YouTube's Ladies in Gaming
- 2024 Approved Angles of Perspective YouTube's Path to Dynamic Video Editing
- [New] Dazzle Viewers with Brightly Outlined YT Snapshots
- Eternal Void A Complete Ban on YouTube Short Video Feature
- [Updated] Creating Dynamic Content with YouTube Playlist Embedding
- 2024 Approved Access a World of Content Anywhere, Anyplace with the Leading 6 Best and Cost-Free Tools to Download YouTubes' Short Videos
- Enhance Visibility With Any Channel Title Through Free Makers
- Understanding How YouTube Manages Post-Upload Content
- Permanent Silence of the Quick Content Platform
- [Updated] Enhance Video Appeal with Filmmaker-Friendly Subscribe Button Tutorials (Filmora)
- Raising the Bar in Online Earnings 500 Subs Achievement
- Channel Aspirations – Reach and Secure 10K Views for YouTube Partner Perks for 2024
- Step-by-Step Strategy for Unearthing Secret YouTube Videos
- Digital Influencers Galore Leading 10 by Subs
- HarmonyCuts Editor The Best Video-Music Blend on PC
- In 2024, Cognitive Conclaves Educational YT Powerhouses
- In 2024, Boosting Profitability in the World of Youtube Shorts
- Hit the Bottom - Finding Your Best Free YouTube Downloader App on Android
- [New] City Planning for Climate Action A Comprehensive Guide
- The Ultimate Method to Dismantle YouTube Shorts
- [Updated] Choosing Channels TikTok vs YouTube Shorts Insights
- Designing Memorable Try-On Videos for Online Audiences
- Tips and Tricks for Creating Engaging Collab Videos on YouTube
- [Updated] Dynamic Arrangement of Your YouTube Selections
- Share Smart Techniques for YouTube Playlist Dispersal
- Clear, Distraction-Free Viewing of Old YouTube Content for 2024
- A Cascade of Curiosity Concurrent Video Watching Made Easy for 2024
- Social Screening Highest View Counts on YouTube
- [Updated] Designing with Dirt Incorporating Natural Elements Into Urban Areas
- [Updated] Crafting the Perfect Strategy Exclusive YouTube to Gmail Connection
- Prime Composer Suite Exceptional PC Media Fabrication
- [Updated] A Step-by-Step Strategy to Design Engaging YouTube Teasers
- 2024 Approved DJ Beats Unleashed High-Fidelity Templates Downloaded Easily
- Maximizing Profits Ensuring Proper YouTube Channel Monetization
- Top 10 Scholarly Channels on Youtube for History Aficionados
- [New] Elevating Your Channel A Gamers' Blueprint for Success
- Go Global Quickly Optimal Tags to Escalate Your YouTube Snippets
- Discovering 8 Honestly-Endorsed Promotional Strategies for 2024
- 2024 Approved Channel Conversion Guide YT to IGTV Strategies
- [New] In 2024, Leaders in Likeability The Best App List on Android/iPhone
- VirtualVicar Video Vetting
- New In 2024, Best 15 2D Animation Software Free That Worth to Try
- Full Guide to Catch 100 IV Pokémon Using a Map On Vivo T2 Pro 5G | Dr.fone
- Mastering the Art of Friend-Finding - Topest 15 Secure Apps on iDevices & Android
- Laughter League Social Media's Best Jokes
- Unraveling the Mystery of Hidden TikTok Penalties for 2024
- Updated Capturing the Sonic Imprint of Pressing a Buttons
- [New] Facebook Streaming Made Simple Your Guide, 2023 Edition for 2024
- [Updated] Fast Snapfinder's Handbook for 2024
- 10 Best Free LUTs Roundup - Download Links Galore
- Updated In 2024, Videopad Video Editor Does It Live Up to the Hype? A Review and Recommendation
- In 2024, How to use Pokemon Go Joystick on Vivo V29e? | Dr.fone
- High-Quality YouTube Recording Techniques
- [New] Chuckle Cluster A Curated Collection of Funny TikTok Jokes and Riddles
- 6 Ways to Change Spotify Location On Your Motorola Razr 40 Ultra | Dr.fone
- [Updated] 2024 Approved The Ultimate PC Workaround for Console Gaming Recordings
- In 2024, How to Use Google Assistant on Your Lock Screen Of Samsung Galaxy S24 Phone
- [New] Adjusting OBS Encoding Settings for 2024
- [Updated] In 2024, Game Changers Discovering Top-Tier Gaming Webcam Technology
- 2024 Approved Capture and Share Online Journeys Browsers' Top Screen Recorders
- In 2024, The Ultimate Guide to Going Viral with TikTok Edits
- Prank Your Friends! Easy Ways to Fake and Share Google Maps Location On Itel A60s | Dr.fone
- Cutting Edge Techniques to Elevate FB Video in Full Screen for 2024
- New 2024 Approved How to Make GIF Stickers for WhatsApp 100 The Simple Way
- The Easiest Methods to Hard Reset Infinix Note 30 | Dr.fone
- How To Pause Life360 Location Sharing For Samsung Galaxy F04 | Dr.fone
- Updated Video Editing Software with Music Top Picks
- Updated 2024 Approved Top 28 Video to GIF Converters You Need
- In 2024, Ultimate Mac Screen Recording Apps Without Bandicam
- How To Update or Downgrade iPhone 15 Plus? | Dr.fone
- New In 2024, Unlock the Power of Slow Motion Free Video Editing Software - Filmora
- 2 Methods to Crop Video in VLC for 2024
- [Updated] An Insider's Look at TikTok Element Hierarchy
- How to Stop Google Chrome from Tracking Your Location On Lava Agni 2 5G? | Dr.fone
- Updated In 2024, Animated Photos Made Easy Top Picks
- A How-To Guide on Bypassing the Apple iPhone 12 Pro iCloud Lock
- In 2024, How Can I Use a Fake GPS Without Mock Location On Xiaomi Redmi Note 12R? | Dr.fone
- Best Pokemons for PVP Matches in Pokemon Go For Honor X50 GT | Dr.fone
- New The Modern Guide to Implementing Decay in Sound Tracks
- How To Change Country on App Store for iPhone XS Max With 7 Methods | Dr.fone
- In 2024, How to Change Your Samsung Galaxy A54 5G Location on life360 Without Anyone Knowing? | Dr.fone
- [Updated] 2024 Approved Increasing ROI Mastering the Art of FB Animation Ads
- How to Track Nokia C210 Location without Installing Software? | Dr.fone
- Title: Mastering YouTube Video Transformation Into Animated GIFs (No Save)
- Author: Brian
- Created at : 2024-05-25 12:21:42
- Updated at : 2024-05-26 12:21:42
- Link: https://youtube-video-recordings.techidaily.com/mastering-youtube-video-transformation-into-animated-gifs-no-save/
- License: This work is licensed under CC BY-NC-SA 4.0.
