
:max_bytes(150000):strip_icc()/ScreenShot2022-01-13at12.25.09PM-aa52f1508d6b489b84df85c774669e89.png)
Mastering the Art of Tripod Utilization for Improved Vlogs
Mastering the Art of Tripod Utilization for Improved Vlogs
How To Use a Tripod for Vlogging

Richard Bennett
Mar 27, 2024• Proven solutions
As you grow into a serious vlogger, a tripod will become an essential piece of equipment. You can get by for a long time setting your camera up on a stack of books, or an upside-down laundry hamper, but not forever. While these setups are great for a beginner, an intermediate vlogger will start to find them limiting. Even if you are an amazingly creative person who can create any camera setup without a tripod there will come a point where you will decide your creative energy is better spent on your video content.
This article will explain how to use a tripod and then introduce you to four different types.
Part 1: How To Set a Tripod for Vlogging
1. Setting Up Your Tripod
Step 1 – Pull out all three legs of your tripod and make sure it is standing stably. There will be tensioners on the legs which you can release in order to adjust your height. Once your legs are extended to the height you want continue adjusting them until your tripod is level. Some tripods have a built in bubble level, but if yours does not you can use a separate bubble level or make a guestimate.
Make sure when you are setting up your tripod that you point one of its legs towards your subject. This will give you room to stand behind your camera, in-between the other two legs. If you have one leg pointed directly behind your camera then you may trip over it. Or, you may knock over and damage your camera.
Step 2 – On the top of your tripod there will be a plate with a small hole and a screw. Remove this plate using either a clip or lever, depending on your tripod. Once your plate is detached screw it into the bottom of your camera. It should be tight, but not too tight or you risk damaging your camera.
Step 3 – Attach your plate, which now has your camera mounted to it, back onto your tripod.
Your tripod comes with a ‘head’. Your tripod’s head is what your camera is mounted on top of. There are several different types of tripod heads and mounts which are all useful for different things.
Ball Heads and Pan/Tilt Heads are the two most common types of tripod heads. Ball Heads allow you to adjust your camera’s position quite a bit before you start shooting. They are not good for adding in camera movements while you are filming, however, because you need to lock them in place. Pan/Tilt heads are great for creating camera movement. Most Pan/Tilt heads have a handle which you can use to make a smooth panning motion.
Part 2: Why Do You Need a Tripod: Benefits of Using Tripod
Why can’t you just hold a camera in your hand while shooting vlog entries for your YouTube channel? Honestly, you can, but the camera may shake a lot and your footage might end up being unusable. Putting a camera on a tripod reduces the probability of camera shake to the minimum and that is just the tip of the iceberg.
A huge amount of vlogs can be described as sit down videos, in which the host of the video sits in front of a camera and talks to the audience. Holding a camera while talking or trying to present a product to the viewers is next to impossible, so in order to avoid having to deal with a camera, you can simply put it on a tripod, find the best angle, and push the record button.
On the go videos, are recorded at exterior locations, and a lot of YouTubers choose to shoot these types of videos handheld, but this approach makes it difficult to maintain the same shot composition for long. A Monopod, Gorillapod or just a simple selfie stick can make your job much easier because they stabilize the camera. In addition, shooting smooth panning shots without a tripod is as difficult as it sounds.
Part 3: A Few Things You’ll Need to Consider Before You Buy a Tripod
There are thousands of different tripod models you can use for vlogging, but which model you’re going to choose depends mostly on the type of vlog you want to make. If you are planning on shooting all of your videos in the studio-like conditions, then portability isn’t such an important feature, while quite the opposite is true if you intend on filming all of your footage on outdoor locations.
However, there are certain traits you have to consider when choosing a tripod you’re going to use while recording your vlog entries.
Sturdiness: There is absolutely no point in spending money on a tripod that breaks easily. Although if your plan is to shoot vlogs at home or in a studio, then buying a cheaper plastic tripod isn’t such a bad option, since the clamps and joints won’t have to endure a lot of wear and tear. Consider buying a more durable tripod if you are going to be traveling a lot while working on your vlogs.
The Type of Camera: A number of factors can contribute to the weight of a camera, including battery grips or lenses, so before you buy a tripod make sure that it can support the weight of the camera you want to use to record your videos.
The Maximum Height: Most vloggers don’t really have to worry about how tall their tripod is, because they are not on their feet in any of the shots featured in the video. Vloggers working on DIY videos, cooking tutorials or any other type of vlog that involves movement and action should pay attention to this trait.
Photo or Video Tripods: Do you want to take beautiful panning shots? If the answer is yes then you should get a video tripod that enables you to move the camera smoothly in any direction. Photo tripods are a great option for static shots that don’t involve a lot of camera movement.
Mobility: The heavier a tripod is, the more stability it can provide, but carrying a tripod that weighs over 10 pounds to shoot sports or adventure vlogs can be a tiring endeavor. Although portability is a factor, it shouldn’t prevent you from buying a high-quality tripod that will ensure your footage is perfectly smooth and stable.
Part 4: 4 Types of Tripods
Full-Sized Tripods: are very sturdy, and as a result can be fairly heavy. Although you can take them a lot of places they are not convenient to carry for extended periods of time. They are the most reliable way to ensure you have absolutely no camera shake.
Compact Tripods: appear to be the same size as Full-Sized tripods, but they are actually much lighter. You can get the same height with a Compact Tripod as a Full-Sized tripod and it will be much easier to travel with. However, Compact Tripods are not as stable. If you are shooting for an extended period of time you may need to weigh your Compact Tripod down with sandbags to keep it steady.
Gorillapods: have flexible legs which can be wrapped around posts, fences, or anything else you may want to mount your camera on. They are also lightweight enough that you can carry them around while you shoot. If you bend it right you can essentially use your Gorillapod as a heavy-duty selfie-stick for your camera.
Table-Top Tripods: are very small and easy to travel with. You can leave one in your camera bag or your glove box. Table-Top Tripods are meant to be set up on top of desks or other stable surfaces and may not be ideal for heavier cameras.
Part 5: The 5 Best Tripods For YouTube Vlogging
Even if you know everything there is to know about tripods, the selection process can be daunting. That’s why we’ve shortlisted the top 5 tripods on the market, in an effort to make finding the right tripod for your vlog videos as quick an easy as it can possibly be. Let’s have a look.
1. CamRah Smartphone Tripod
Price: $24.99

An increasing number of Smartphones features powerful cameras that can record videos at high resolutions. Unfortunately, most iPhones and Android devices are lightweight, which makes it difficult to hold them perfectly still while shooting a video. CamRah Smartphone Tripod offers a perfect solution to this problem because it is easy to pack and you can carry it wherever you go, without needing the extra space.
It weighs just 0.6lbs and it is 10.8 inches tall. The tripod has a maximum load of 11lbs which means that besides Smartphones, you can also mount action cameras, webcams, or even smaller DSLR cameras onto it. The flexible legs made from high-density foam offer stability even when the CamRah Tripod is placed on an uneven surface.
Pros:
- Easily portable
- Affordable
- Jaws technology provides an extra strong grip of the camera
Cons:
- The tripod’s legs can’t be extended
- Can’t be used with professional cameras
2. Manfrotto Mini Travel Tripod
Price: $34.99

Yet another great option for shooting vlogs with a Smartphone. The Manfrotto Mini Travel Tripod kit is also an excellent choice for all vloggers who shoot their videos with compact cameras. The tripod weighs just 0.51lbs and it is 5.31 inches tall, which makes it a perfect travel companion. However, it can’t support cameras heavier than 2.2lbs, so you have to carefully choose the camera you want to put on this tripod.
The tripod’s rotatable head features a lock button that enables you to fix the camera at a certain position and to shoot a video from an angle you selected. You can’t extend the legs on this tripod so shooting high angle shots is not an option.
Pros:
- Small and durable
- Allows you to mount almost any Smartphone model
- Compatible with compact cameras
Cons:
- Limits your shot selection
- Tripod’s legs can’t be extended
3. Joby Gorilla Pod
Price: $22.50

This tripod is a superstar in the vlogging community because it is flexible, easy to set up and it fits into a pocket. Joby Gorilla Pod’s legs are segmented, so you can freely choose an angle from which you want to shoot, without having to worry about the camera’s stability. You can use this tripod on flat and uneven surfaces equally effectively.
Joby Gorilla weighs just 1lbs and its maximum height 11.6 inches, which makes it perfectly suited for talking heads videos. Using this tripod while you are on the go is also an option if you have a camera that weighs less than 3lbs.
Pros:
- Highly adjustable
- Sturdy and Lightweight
- Made from stainless steel
Cons:
- Can’t be used for panning shots
- Legs can be extended for just one inch
4. Manfrotto Compact Action Tripod
Price: $64.49
If you love shooting your vlogs at night or if you simply want a tripod you can use in the studio an outdoor conditions, then Manfrotto’s Compact Action Tripod is one the best options you have at your disposal. The ergonomic head features a mounting plate that is easy to use and which provides a perfect grip of a camera.
This tripod is designed to be used with consumer-level DSLR cameras, but you can use it to shoot videos with almost all types of cameras. The Compact Action Tripod has a maximum height of 51.57 inches, and it can’t hold cameras heavier than 3.30lbs.
Pros:
- Suitable for both photography and video
- Great for outdoor use
- Allows you to take a wide variety of shots
Cons:
- Can’t support a lot of weight
- Not perfectly suited for professional-level cameras
5. Magnus VT-4000 Fluid Head Tripod
Price: $159.95
Experienced vloggers who record their videos with professional cameras, will enjoy using the Magnus VT-4000 Fluid Head Tripod. The 59-inch tall tripod can support as much as 8.8lbs of weight, and it is designed to help you create perfectly stable shots. The superb panning and tilting option enable you to move your camera freely while recording smooth shots, free of camera shakes.
The quick release mounting plate is compatible with a wide range of cameras, so you can experiment and work with several different cameras while using the same tripod. You can hardly make a mistake if you choose to buy this tripod because you’ll be able to use it to record vlogs at interior and exterior locations.
Pros:
- Easily adjustable to any surface
- Perfect for high angle shots
- Heavy-duty locks
Cons:
- Weighs 7.9lbs
- Not the best choice for action and adventure vlogs
Richard Bennett
Richard Bennett is a writer and a lover of all things video.
Follow @Richard Bennett
Richard Bennett
Mar 27, 2024• Proven solutions
As you grow into a serious vlogger, a tripod will become an essential piece of equipment. You can get by for a long time setting your camera up on a stack of books, or an upside-down laundry hamper, but not forever. While these setups are great for a beginner, an intermediate vlogger will start to find them limiting. Even if you are an amazingly creative person who can create any camera setup without a tripod there will come a point where you will decide your creative energy is better spent on your video content.
This article will explain how to use a tripod and then introduce you to four different types.
Part 1: How To Set a Tripod for Vlogging
1. Setting Up Your Tripod
Step 1 – Pull out all three legs of your tripod and make sure it is standing stably. There will be tensioners on the legs which you can release in order to adjust your height. Once your legs are extended to the height you want continue adjusting them until your tripod is level. Some tripods have a built in bubble level, but if yours does not you can use a separate bubble level or make a guestimate.
Make sure when you are setting up your tripod that you point one of its legs towards your subject. This will give you room to stand behind your camera, in-between the other two legs. If you have one leg pointed directly behind your camera then you may trip over it. Or, you may knock over and damage your camera.
Step 2 – On the top of your tripod there will be a plate with a small hole and a screw. Remove this plate using either a clip or lever, depending on your tripod. Once your plate is detached screw it into the bottom of your camera. It should be tight, but not too tight or you risk damaging your camera.
Step 3 – Attach your plate, which now has your camera mounted to it, back onto your tripod.
Your tripod comes with a ‘head’. Your tripod’s head is what your camera is mounted on top of. There are several different types of tripod heads and mounts which are all useful for different things.
Ball Heads and Pan/Tilt Heads are the two most common types of tripod heads. Ball Heads allow you to adjust your camera’s position quite a bit before you start shooting. They are not good for adding in camera movements while you are filming, however, because you need to lock them in place. Pan/Tilt heads are great for creating camera movement. Most Pan/Tilt heads have a handle which you can use to make a smooth panning motion.
Part 2: Why Do You Need a Tripod: Benefits of Using Tripod
Why can’t you just hold a camera in your hand while shooting vlog entries for your YouTube channel? Honestly, you can, but the camera may shake a lot and your footage might end up being unusable. Putting a camera on a tripod reduces the probability of camera shake to the minimum and that is just the tip of the iceberg.
A huge amount of vlogs can be described as sit down videos, in which the host of the video sits in front of a camera and talks to the audience. Holding a camera while talking or trying to present a product to the viewers is next to impossible, so in order to avoid having to deal with a camera, you can simply put it on a tripod, find the best angle, and push the record button.
On the go videos, are recorded at exterior locations, and a lot of YouTubers choose to shoot these types of videos handheld, but this approach makes it difficult to maintain the same shot composition for long. A Monopod, Gorillapod or just a simple selfie stick can make your job much easier because they stabilize the camera. In addition, shooting smooth panning shots without a tripod is as difficult as it sounds.
Part 3: A Few Things You’ll Need to Consider Before You Buy a Tripod
There are thousands of different tripod models you can use for vlogging, but which model you’re going to choose depends mostly on the type of vlog you want to make. If you are planning on shooting all of your videos in the studio-like conditions, then portability isn’t such an important feature, while quite the opposite is true if you intend on filming all of your footage on outdoor locations.
However, there are certain traits you have to consider when choosing a tripod you’re going to use while recording your vlog entries.
Sturdiness: There is absolutely no point in spending money on a tripod that breaks easily. Although if your plan is to shoot vlogs at home or in a studio, then buying a cheaper plastic tripod isn’t such a bad option, since the clamps and joints won’t have to endure a lot of wear and tear. Consider buying a more durable tripod if you are going to be traveling a lot while working on your vlogs.
The Type of Camera: A number of factors can contribute to the weight of a camera, including battery grips or lenses, so before you buy a tripod make sure that it can support the weight of the camera you want to use to record your videos.
The Maximum Height: Most vloggers don’t really have to worry about how tall their tripod is, because they are not on their feet in any of the shots featured in the video. Vloggers working on DIY videos, cooking tutorials or any other type of vlog that involves movement and action should pay attention to this trait.
Photo or Video Tripods: Do you want to take beautiful panning shots? If the answer is yes then you should get a video tripod that enables you to move the camera smoothly in any direction. Photo tripods are a great option for static shots that don’t involve a lot of camera movement.
Mobility: The heavier a tripod is, the more stability it can provide, but carrying a tripod that weighs over 10 pounds to shoot sports or adventure vlogs can be a tiring endeavor. Although portability is a factor, it shouldn’t prevent you from buying a high-quality tripod that will ensure your footage is perfectly smooth and stable.
Part 4: 4 Types of Tripods
Full-Sized Tripods: are very sturdy, and as a result can be fairly heavy. Although you can take them a lot of places they are not convenient to carry for extended periods of time. They are the most reliable way to ensure you have absolutely no camera shake.
Compact Tripods: appear to be the same size as Full-Sized tripods, but they are actually much lighter. You can get the same height with a Compact Tripod as a Full-Sized tripod and it will be much easier to travel with. However, Compact Tripods are not as stable. If you are shooting for an extended period of time you may need to weigh your Compact Tripod down with sandbags to keep it steady.
Gorillapods: have flexible legs which can be wrapped around posts, fences, or anything else you may want to mount your camera on. They are also lightweight enough that you can carry them around while you shoot. If you bend it right you can essentially use your Gorillapod as a heavy-duty selfie-stick for your camera.
Table-Top Tripods: are very small and easy to travel with. You can leave one in your camera bag or your glove box. Table-Top Tripods are meant to be set up on top of desks or other stable surfaces and may not be ideal for heavier cameras.
Part 5: The 5 Best Tripods For YouTube Vlogging
Even if you know everything there is to know about tripods, the selection process can be daunting. That’s why we’ve shortlisted the top 5 tripods on the market, in an effort to make finding the right tripod for your vlog videos as quick an easy as it can possibly be. Let’s have a look.
1. CamRah Smartphone Tripod
Price: $24.99
An increasing number of Smartphones features powerful cameras that can record videos at high resolutions. Unfortunately, most iPhones and Android devices are lightweight, which makes it difficult to hold them perfectly still while shooting a video. CamRah Smartphone Tripod offers a perfect solution to this problem because it is easy to pack and you can carry it wherever you go, without needing the extra space.
It weighs just 0.6lbs and it is 10.8 inches tall. The tripod has a maximum load of 11lbs which means that besides Smartphones, you can also mount action cameras, webcams, or even smaller DSLR cameras onto it. The flexible legs made from high-density foam offer stability even when the CamRah Tripod is placed on an uneven surface.
Pros:
- Easily portable
- Affordable
- Jaws technology provides an extra strong grip of the camera
Cons:
- The tripod’s legs can’t be extended
- Can’t be used with professional cameras
2. Manfrotto Mini Travel Tripod
Price: $34.99
Yet another great option for shooting vlogs with a Smartphone. The Manfrotto Mini Travel Tripod kit is also an excellent choice for all vloggers who shoot their videos with compact cameras. The tripod weighs just 0.51lbs and it is 5.31 inches tall, which makes it a perfect travel companion. However, it can’t support cameras heavier than 2.2lbs, so you have to carefully choose the camera you want to put on this tripod.
The tripod’s rotatable head features a lock button that enables you to fix the camera at a certain position and to shoot a video from an angle you selected. You can’t extend the legs on this tripod so shooting high angle shots is not an option.
Pros:
- Small and durable
- Allows you to mount almost any Smartphone model
- Compatible with compact cameras
Cons:
- Limits your shot selection
- Tripod’s legs can’t be extended
3. Joby Gorilla Pod
Price: $22.50
This tripod is a superstar in the vlogging community because it is flexible, easy to set up and it fits into a pocket. Joby Gorilla Pod’s legs are segmented, so you can freely choose an angle from which you want to shoot, without having to worry about the camera’s stability. You can use this tripod on flat and uneven surfaces equally effectively.
Joby Gorilla weighs just 1lbs and its maximum height 11.6 inches, which makes it perfectly suited for talking heads videos. Using this tripod while you are on the go is also an option if you have a camera that weighs less than 3lbs.
Pros:
- Highly adjustable
- Sturdy and Lightweight
- Made from stainless steel
Cons:
- Can’t be used for panning shots
- Legs can be extended for just one inch
4. Manfrotto Compact Action Tripod
Price: $64.49
If you love shooting your vlogs at night or if you simply want a tripod you can use in the studio an outdoor conditions, then Manfrotto’s Compact Action Tripod is one the best options you have at your disposal. The ergonomic head features a mounting plate that is easy to use and which provides a perfect grip of a camera.
This tripod is designed to be used with consumer-level DSLR cameras, but you can use it to shoot videos with almost all types of cameras. The Compact Action Tripod has a maximum height of 51.57 inches, and it can’t hold cameras heavier than 3.30lbs.
Pros:
- Suitable for both photography and video
- Great for outdoor use
- Allows you to take a wide variety of shots
Cons:
- Can’t support a lot of weight
- Not perfectly suited for professional-level cameras
5. Magnus VT-4000 Fluid Head Tripod
Price: $159.95
Experienced vloggers who record their videos with professional cameras, will enjoy using the Magnus VT-4000 Fluid Head Tripod. The 59-inch tall tripod can support as much as 8.8lbs of weight, and it is designed to help you create perfectly stable shots. The superb panning and tilting option enable you to move your camera freely while recording smooth shots, free of camera shakes.
The quick release mounting plate is compatible with a wide range of cameras, so you can experiment and work with several different cameras while using the same tripod. You can hardly make a mistake if you choose to buy this tripod because you’ll be able to use it to record vlogs at interior and exterior locations.
Pros:
- Easily adjustable to any surface
- Perfect for high angle shots
- Heavy-duty locks
Cons:
- Weighs 7.9lbs
- Not the best choice for action and adventure vlogs
Richard Bennett
Richard Bennett is a writer and a lover of all things video.
Follow @Richard Bennett
7 Best Apps to Go Live on YouTube From iPhone or Android
FREE 7 Best Apps to Go Live on YouTube from iPhone or Android
Richard Bennett
Mar 27, 2024• Proven solutions


1. Emoze: (Android /iOS )
This most awaited Go Live application is now available for Android as well as iOS platform. It assists users in direct live streaming to YouTube channel via portable devices. The one click type installation facility allows users to get connected to heir channel, video, followers and viewers within seconds.
Key Features:
- Emoze offers unlimited broadcast time for live content.
- It supports HD live transmissions.
- Users can enjoy customized video effects.
- It is possible to switch between horizontal and vertical video mode during broadcast.
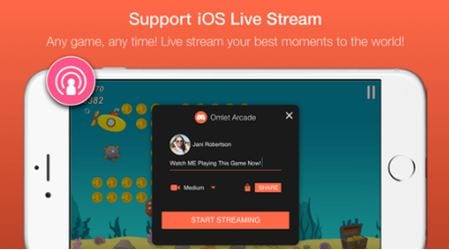
2. Omlet Arcade: (Android /iOS )
Omlet Arcade is well known for its most convenient collection of tools that can assist mobile gamers, the exclusive and highly interactive chat room and easy to share and upload facilities. Users love its intuitive functionality that makes content sharing on social media platforms like YouTube, Facebook and Twitch etc. much easier.
Key Features:
- It offers in game chat feature where users can spend unlimited time. You can prefer to connect via region chat, group chat and SMS options.
- Omlet Arcade hosts an active forum where gamers can easily explore information about all new stuff.
- One can enjoy easy recording, fast uploading of videos and it is also possible to develop personal community files for your favorite games.
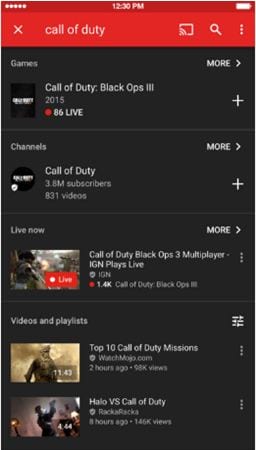
3. YouTube App: (Android /iOS )
It is time to enjoy lots of interesting things on single platform on the go; this YouTube application allow users to stay connected to most popular music videos, entertainment, game hot spots and news etc. It is possible to subscribe to different channels and share impressive content with friends via YouTube.
Key Features:
- Users will be able to browse their personalized recommendations on Home tab.
- The subscription tab assists users to get connected to their favorite channel with ease.
- One can express his thoughts via shares and comments.
- It is possible to develop customized videos using its top quality filters and music editing tools. Everything can be managed directly on YouTube platform.
4. YouTube Gaming: (Android /iOS )
YouTube Gamming application help users to stay connected with their favorite players, games and culture. It features live streams and videos with interactive chats, let’s play option, reviews, trailers and speed runs etc.
Key Features:
- With YouTube gaming application, you will be able to place live streams as well as videos at same place.
- You can enjoy chatting while live streaming your content.
- It is possible to browse specially designed pages for all games, channels as well as publishers.
- YouTube Gaming platform is currently serving the biggest community with more than 100 million active users.
5. Live Now: (iOS )
Live Now application is well recognized for its easy to use interface and simple sign up process. The basic widgets are designed pretty fine with collection of templates; beginners will find it much easier to explore all hot new features of Live Now.
Key Features:
- Users can easily define any number of phrases for quick access in form of tags.
- It offers numbers of integrations to end users along with SugarCRM, Salesforce and Highrise etc.
- You will find awesome mobile support from service professionals and your dream to work in team for development of interesting projects may end here with Live Now.

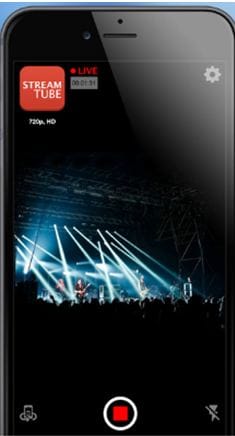
6. Stream Tube: (iOS )
Stream Tube application comes with so many advanced features that can assist users in easy live streaming. It can support HD as well as SD content whereas stream quality can be adjusted as per need. The donation system, ability to surf safari while live streaming and change YouTube server as per need, are some of its latest features.
Key Features:
- Users can enjoy editing with advanced filters, logos and manual as well as auto focus abilities.
- It offers landscape and portrait streaming abilities.
- Users can capture stills while live streaming their content.
- You will love to use its Zoomx15 feature.
- The one tap start type functionality is highly useful.
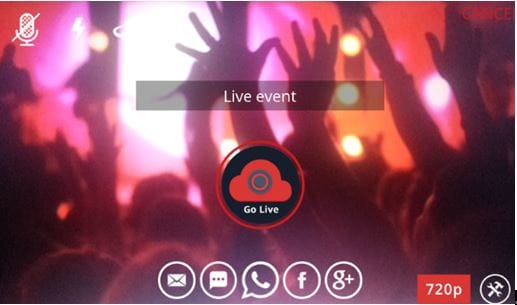
7. CameraFi Live: (Android )
CameraFi Live app is designed for Android devices only and it makes direct connection with Facebook and YouTube for fast sharing abilities. CameraFi Live can be used with smart phone camera as well as can be connected to a USB camera unit. The interactive user platform assists in fast responses.
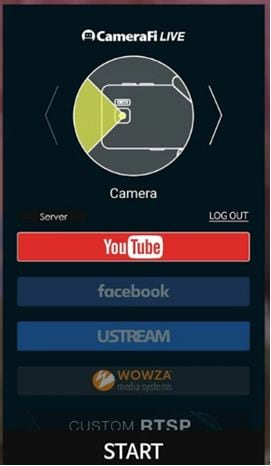
Key Features:
- It is possible to broadcast amazing videos without any restriction over time using CameraFi Live.
- This application is well known for its professional video quality that leads to much higher performance when connected to DSLR and camcorders.
- Users will love to enjoy its ability to broadcast games with much impressive content quality
- Some of the best and most advanced features added to CameraFi Live are live poll voting, 360 degree live streaming with VR camera, picture in picture ability, advanced text and image overlays, video filters and many more.
![]()

Filmora - Best YouTube Video Recorder and Editor
- Record YouTube videos on your computer with audio and webcam.
- Edit videos quickly with a wide range of gaming effects.
- Rich video tempaltes and resources for videos.
- Export to MP4, MOV, MKV, GIF and multiple formats.
For Win 7 or later (64-bit)
For macOS 10.12 or later
 Secure Download
Richard Bennett
Richard Bennett is a writer and a lover of all things video.
Follow @Richard Bennett
Richard Bennett
Mar 27, 2024• Proven solutions
1. Emoze: (Android /iOS )
This most awaited Go Live application is now available for Android as well as iOS platform. It assists users in direct live streaming to YouTube channel via portable devices. The one click type installation facility allows users to get connected to heir channel, video, followers and viewers within seconds.
Key Features:
- Emoze offers unlimited broadcast time for live content.
- It supports HD live transmissions.
- Users can enjoy customized video effects.
- It is possible to switch between horizontal and vertical video mode during broadcast.
2. Omlet Arcade: (Android /iOS )
Omlet Arcade is well known for its most convenient collection of tools that can assist mobile gamers, the exclusive and highly interactive chat room and easy to share and upload facilities. Users love its intuitive functionality that makes content sharing on social media platforms like YouTube, Facebook and Twitch etc. much easier.
Key Features:
- It offers in game chat feature where users can spend unlimited time. You can prefer to connect via region chat, group chat and SMS options.
- Omlet Arcade hosts an active forum where gamers can easily explore information about all new stuff.
- One can enjoy easy recording, fast uploading of videos and it is also possible to develop personal community files for your favorite games.
3. YouTube App: (Android /iOS )
It is time to enjoy lots of interesting things on single platform on the go; this YouTube application allow users to stay connected to most popular music videos, entertainment, game hot spots and news etc. It is possible to subscribe to different channels and share impressive content with friends via YouTube.
Key Features:
- Users will be able to browse their personalized recommendations on Home tab.
- The subscription tab assists users to get connected to their favorite channel with ease.
- One can express his thoughts via shares and comments.
- It is possible to develop customized videos using its top quality filters and music editing tools. Everything can be managed directly on YouTube platform.
4. YouTube Gaming: (Android /iOS )
YouTube Gamming application help users to stay connected with their favorite players, games and culture. It features live streams and videos with interactive chats, let’s play option, reviews, trailers and speed runs etc.
Key Features:
- With YouTube gaming application, you will be able to place live streams as well as videos at same place.
- You can enjoy chatting while live streaming your content.
- It is possible to browse specially designed pages for all games, channels as well as publishers.
- YouTube Gaming platform is currently serving the biggest community with more than 100 million active users.
5. Live Now: (iOS )
Live Now application is well recognized for its easy to use interface and simple sign up process. The basic widgets are designed pretty fine with collection of templates; beginners will find it much easier to explore all hot new features of Live Now.
Key Features:
- Users can easily define any number of phrases for quick access in form of tags.
- It offers numbers of integrations to end users along with SugarCRM, Salesforce and Highrise etc.
- You will find awesome mobile support from service professionals and your dream to work in team for development of interesting projects may end here with Live Now.
6. Stream Tube: (iOS )
Stream Tube application comes with so many advanced features that can assist users in easy live streaming. It can support HD as well as SD content whereas stream quality can be adjusted as per need. The donation system, ability to surf safari while live streaming and change YouTube server as per need, are some of its latest features.
Key Features:
- Users can enjoy editing with advanced filters, logos and manual as well as auto focus abilities.
- It offers landscape and portrait streaming abilities.
- Users can capture stills while live streaming their content.
- You will love to use its Zoomx15 feature.
- The one tap start type functionality is highly useful.
7. CameraFi Live: (Android )
CameraFi Live app is designed for Android devices only and it makes direct connection with Facebook and YouTube for fast sharing abilities. CameraFi Live can be used with smart phone camera as well as can be connected to a USB camera unit. The interactive user platform assists in fast responses.
Key Features:
- It is possible to broadcast amazing videos without any restriction over time using CameraFi Live.
- This application is well known for its professional video quality that leads to much higher performance when connected to DSLR and camcorders.
- Users will love to enjoy its ability to broadcast games with much impressive content quality
- Some of the best and most advanced features added to CameraFi Live are live poll voting, 360 degree live streaming with VR camera, picture in picture ability, advanced text and image overlays, video filters and many more.
![]()
Filmora - Best YouTube Video Recorder and Editor
- Record YouTube videos on your computer with audio and webcam.
- Edit videos quickly with a wide range of gaming effects.
- Rich video tempaltes and resources for videos.
- Export to MP4, MOV, MKV, GIF and multiple formats.
For Win 7 or later (64-bit)
For macOS 10.12 or later
Secure Download
Richard Bennett
Richard Bennett is a writer and a lover of all things video.
Follow @Richard Bennett
Also read:
- Stepwise Guide for Broadcasting Google Meet on YouTube
- Chart-Topping Video Milestones Hitting 100 Million Views in '24 for 2024
- Streamlining Short-Form Content Leading Edits for iOS/Android
- Boosting YouTube Success Mastery with TubeBuddy
- [Updated] Directing Content Flow Uploading IMovie Films to YouTube
- 2024 Approved Channel Owner Uncovering Your Subscribers
- 2024 Approved Building Captivating Online Media Summaries
- Audio Aesthetics High-Quality DJ Template Videos Downloaded
- In 2024, Enhance Movie Length on YouTube Platform
- Direct YouTube File Access Tips
- VisionCutting Software
- 2024 Approved A Step-by-Step Expedition to YouTube's Unseen Layers
- 2024 Approved Average Income for YouTubers per Ad Displayed?
- Elite 7 Cameras Elevating Interactive Learning Vlogs & Tutorials
- In 2024, Elite Gaming Setup Essentials Revealed
- Understanding TSeries' Financial Gain in YouTube Space
- In 2024, Digital Cash Kings Leading YouTube Creators
- Flawless Soundscape Secrets to High-Resolution Audio Recording
- 2024 Approved Decoding the Art of Engaging in YouTube Short Forms
- From Novice to Connoisseur Transform Your Sub4sub Experience Now
- 2024 Approved Channel Upgrade Made Simple - Embrace TubeBuddy Techniques
- [Updated] Easy Peasy Automating the Repetitive View of YouTube Videos
- 2024 Approved Essential GIF Creation Best Tools Reviewed & Compared
- In 2024, 2023'S Must-Watch Alternatives to Top Films
- [New] Ensuring Visual Presentation YouTube Shorts Thumbnails Fix
- Is your Realme 12+ 5G working too slow? Heres how you can hard reset it | Dr.fone
- [Updated] Types of Facebook Video Aspect Ratios & How to Adjust It
- 2024 Approved Viral Video Roundup Top TikTok Reaction Shenanigans
- [Updated] Rhythm & Reels Posting Melodies on Social Media for 2024
- New Audiophiles Choice Identifying the Top 5 Android Audio Editors to Invest In for 2024
- Fixes for Apps Keep Crashing on Samsung Galaxy F54 5G | Dr.fone
- In 2024, How to Screen Mirroring Lava Blaze Curve 5G? | Dr.fone
- Mastering iPhone's Screen Capture Features
- Striking the Perfect Balance in Profile Videos for 2024
- [New] Photosynth Pros A Quick Snapchat Peek
- Title: Mastering the Art of Tripod Utilization for Improved Vlogs
- Author: Brian
- Created at : 2024-05-25 12:21:00
- Updated at : 2024-05-26 12:21:00
- Link: https://youtube-video-recordings.techidaily.com/mastering-the-art-of-tripod-utilization-for-improved-vlogs/
- License: This work is licensed under CC BY-NC-SA 4.0.
