
:max_bytes(150000):strip_icc()/Pikachulita1-87a993aab8d94a93830a26b6bed77df3.jpg)
"MasterChef's Visual Guide Filming Kitchen Escapades"
MasterChef’s Visual Guide: Filming Kitchen Escapades
How to Make a Cooking Video in Steps - an Ultimate Guide

Richard Bennett
Mar 27, 2024• Proven solutions
Cooking and food-oriented videos are among the most outreaching and popular categories of content to publish online, notably, on YouTube, Facebook, or Instagram. So if you are a cooking aficionado, you have excellent potential to gain positive attention and a loyal audience. But to create engaging videos, you’d need a lot more than excellent culinary skills. This article aims to enlighten aspiring food and recipe vloggers about the essentials of video making straight out of the oven, to create enriched content that’s professional, neat, and viral-worthy.
- Part 1: What to Prepare Before Making a Recipe Video?
- Part 2: Make a Cooking Video with Filmora: a Step-by-Step Guide
- Part 3: Tips to Make Your Cooking Videos Stand Out
- Part 4: How to Promote Your Cooking Channel on YouTube?
What to Prepare Before Making a Recipe Video
While you would know best about the prep work needed for the recipes, the prep work for making a video starts with a plan. What goes into the plan?
Brainstorm this equation - Main Content + Duration + Light + Sound + Camera + Camera Angle, Shots & Transition.
The main content is how you picture the finished video. Ask yourself - Do you want an intro gig? Are you going to talk in the video or show only hands and the cooking with a piece of background music? How do you wish to present the ingredients? Would there be additional tips? At what platform are you going to publish your content? How long should be your clippings? Consider all these questions to chalk out a basic framework of your video
The camera is a pivotal element. Whether it is a smartphone or a hi-fidelity digital camera, it is worthwhile to familiarise the best positions and light orientations and the capacity of the device to produce the best quality picture.
How is your sound going to be like? If you are going to talk in the video, it is recommended that you use a microphone. Or else, you can also use background sound. But to mix sound with the video, you’d need an excellent sound editing tool.
Finally, comes the editing and finishing part. Eventually, you’ll need purposive video-editing software to help you work out the video transitions, sound, and visual effects.Choose a toolkit that is easy to learn and that you can get comfortable with so that the job of video editing doesn’t take the focus away from the main task of cooking.

Now, once you have all the essential ingredients to create your video, start practicing. Remember that it is the most natural thing for the first videos to appear amateurish or inept. And that is part of the plan. Don’t be disheartened and keep going.
Make a Cooking Video with Filmora: a Step-by-Step Guide
As one of the easiest-to-use video editing tools, the full-featured Filmora is the right choice considering it can fit most of your needs. Moreover, you’d be delighted to know that the software also has a series of features and functions and even tutorial videos dedicated to cooking videos.


Step 1: Filming the Video
Whether you are going to present a traditional cook-with-me style video or feature the contemporary “jump-cut” style focusing on speedy short videos, you need to prepare all the equipment and ingredients to suit the frame by frame shots. Consider spills, drops, overcooking, etc. as part of the process, so keep adequate substitutes to continue with your project unwaveringly. If you are using a phone, keep it fully charged up. And have a plan beforehand about what you should do when you get an urgent call while shooting. Also, consider doing a site investigation of the shooting spot for any fragile items, pointy corners, slippery areas, curious pets, etc. to avoid trips and falls in the middle of the filming, especially when working with a cameraman who’s following your movement. If you are using a tripod, and floor-standing lights, remember to secure the equipment with plenty of adhesive tapes, lest they bump into an expensive trip or fall.
Step 2: mport Your Video In Filmora
You need to sync the device that you used to film the video with the computer that has Filmora installed. It may be a phone or a camcorder. Once the devices are synced, you should launch the Filmora software and go the “Media” button at the top right toolbar. There you will find the “Import” button. You will get a pop-up message asking you to choose the type of device. Select the right one, and your video will be imported in the Filmora interface.
Step 3: Edit Video Pace: Time-Lapse, Jump Cut, Slow Motion
To create crisp, fast-paced videos, you don’t have to gobble up the content eyeing at the duration. Think smart when you have the resources of a tool like Filmora. Here are the three best features that help you create fast-paced yet well-defined recipes.
Time-Lapse: The time-lapse feature allows you to adjust the speed of the video from slow-motion to 10x faster. To use this, double click on a specific clip in your imported video and open the custom speed settings. Use the adjusting meter beside speed to make your clip as fast or slow as you want. You may use the same feature to introduce the slow-motion effects in certain areas of the video.
Now, when you are using either the fast-forward or slow-motion effects, it is best to have stable video footage with consistent lighting and a static background. There are also the options of Reverse Speed that can play the clip backward, as in flash-back. The Ripple edit feature allows you to cut short a long clip seamlessly.
Jump Cut: The Jump Cut is about snipping unwanted areas in the clip. It may sound like the Ripple edit mentioned above, but the ripple edit is more functional for cutting short a continuous video so that the viewer won’t realize the snip. For the Jump Cut, it doesn’t have to be a constant clip. You can get to the next frame or scene with an abracadabra move.
To use Jump Cut, place the cursor over the starting of the clip that you want to cut, and right-click on it and select “Split” (the “scissors” feature on the toolbar does the same thing). To make this look neat, preview the portion of the clip once again and delete the cuts between two clips with the same right-click.
Step 4: Understanding Transitions on Filmora
Transitions make your video more interactive and help you segregate the video from frame-to-frame with effects like dissolve, fade, flash, etc. there are numerous transition options available within the Filmora suit.
The best way to do this drag and drop the clips on the timeline is to trim parts of the clip to shorten it. Once you have all the clips in place, go to the “Transitions” options at the top toolbar to apply it on the end or start of each clip.
Step 5: Audio, Playback & Sound Edits
There are plenty of options that you can remove background noise, add voiceover, add music, and detach audio from video. Refer to the Audios section from your toolbar.
Step 6: Save to Drive/ Emport/ Publish
Once you are satisfied with your content, then go to Export. Choose the format of the video, MOV, MP4, MPG, etc. and whether you wish to publish directly or save to drive.
Tips to Make Your Cooking Videos Stand Out
- Lighting is your best friend. Invest in some quality spotlights or use the best of daylight.
- Mind your video duration. Short and Simple videos get the most views, but your content should not look incomplete. It is not a fact that long and elaborate videos do not get a place on the table; it is all about the relevance of your content. So don’t stop till you get enough.
- If you appear in the video, keep yourself always look good.
- Keep your video titles relevant and prominent, so that people looking for it can readily find it.
- Have a scrumptious custom thumbnail.
How to Promote Your Cooking Channel on YouTube
- Create an inventory before publishing videos. YouTube vlogging is valued for consistency. If you have a list of 10, 15, 20 videos, then you can have enough time in hand to film your next videos.
- Have a consistent style to create brand recognition. Do you think branding is not for Vlogs? Well, I suppose you might be wrong. Branding is for anyone who uses it.
- Share the link of your YouTube videos on other platforms like Twitter and Facebook.
- Encourage your viewers to comment on the video.
- Explore the different YouTube SEO strategies and use the accurate keywords in your video descriptions with hashtags.
With prior planning and practicing, you are bent on developing more confident moves and camera angles. Once you have that, follow this step by step guide to gain speed and prowess and also enjoy the whole adventure.
Richard Bennett
Richard Bennett is a writer and a lover of all things video.
Follow @Richard Bennett
Richard Bennett
Mar 27, 2024• Proven solutions
Cooking and food-oriented videos are among the most outreaching and popular categories of content to publish online, notably, on YouTube, Facebook, or Instagram. So if you are a cooking aficionado, you have excellent potential to gain positive attention and a loyal audience. But to create engaging videos, you’d need a lot more than excellent culinary skills. This article aims to enlighten aspiring food and recipe vloggers about the essentials of video making straight out of the oven, to create enriched content that’s professional, neat, and viral-worthy.
- Part 1: What to Prepare Before Making a Recipe Video?
- Part 2: Make a Cooking Video with Filmora: a Step-by-Step Guide
- Part 3: Tips to Make Your Cooking Videos Stand Out
- Part 4: How to Promote Your Cooking Channel on YouTube?
What to Prepare Before Making a Recipe Video
While you would know best about the prep work needed for the recipes, the prep work for making a video starts with a plan. What goes into the plan?
Brainstorm this equation - Main Content + Duration + Light + Sound + Camera + Camera Angle, Shots & Transition.
The main content is how you picture the finished video. Ask yourself - Do you want an intro gig? Are you going to talk in the video or show only hands and the cooking with a piece of background music? How do you wish to present the ingredients? Would there be additional tips? At what platform are you going to publish your content? How long should be your clippings? Consider all these questions to chalk out a basic framework of your video
The camera is a pivotal element. Whether it is a smartphone or a hi-fidelity digital camera, it is worthwhile to familiarise the best positions and light orientations and the capacity of the device to produce the best quality picture.
How is your sound going to be like? If you are going to talk in the video, it is recommended that you use a microphone. Or else, you can also use background sound. But to mix sound with the video, you’d need an excellent sound editing tool.
Finally, comes the editing and finishing part. Eventually, you’ll need purposive video-editing software to help you work out the video transitions, sound, and visual effects.Choose a toolkit that is easy to learn and that you can get comfortable with so that the job of video editing doesn’t take the focus away from the main task of cooking.
Now, once you have all the essential ingredients to create your video, start practicing. Remember that it is the most natural thing for the first videos to appear amateurish or inept. And that is part of the plan. Don’t be disheartened and keep going.
Make a Cooking Video with Filmora: a Step-by-Step Guide
As one of the easiest-to-use video editing tools, the full-featured Filmora is the right choice considering it can fit most of your needs. Moreover, you’d be delighted to know that the software also has a series of features and functions and even tutorial videos dedicated to cooking videos.
Step 1: Filming the Video
Whether you are going to present a traditional cook-with-me style video or feature the contemporary “jump-cut” style focusing on speedy short videos, you need to prepare all the equipment and ingredients to suit the frame by frame shots. Consider spills, drops, overcooking, etc. as part of the process, so keep adequate substitutes to continue with your project unwaveringly. If you are using a phone, keep it fully charged up. And have a plan beforehand about what you should do when you get an urgent call while shooting. Also, consider doing a site investigation of the shooting spot for any fragile items, pointy corners, slippery areas, curious pets, etc. to avoid trips and falls in the middle of the filming, especially when working with a cameraman who’s following your movement. If you are using a tripod, and floor-standing lights, remember to secure the equipment with plenty of adhesive tapes, lest they bump into an expensive trip or fall.
Step 2: mport Your Video In Filmora
You need to sync the device that you used to film the video with the computer that has Filmora installed. It may be a phone or a camcorder. Once the devices are synced, you should launch the Filmora software and go the “Media” button at the top right toolbar. There you will find the “Import” button. You will get a pop-up message asking you to choose the type of device. Select the right one, and your video will be imported in the Filmora interface.
Step 3: Edit Video Pace: Time-Lapse, Jump Cut, Slow Motion
To create crisp, fast-paced videos, you don’t have to gobble up the content eyeing at the duration. Think smart when you have the resources of a tool like Filmora. Here are the three best features that help you create fast-paced yet well-defined recipes.
Time-Lapse: The time-lapse feature allows you to adjust the speed of the video from slow-motion to 10x faster. To use this, double click on a specific clip in your imported video and open the custom speed settings. Use the adjusting meter beside speed to make your clip as fast or slow as you want. You may use the same feature to introduce the slow-motion effects in certain areas of the video.
Now, when you are using either the fast-forward or slow-motion effects, it is best to have stable video footage with consistent lighting and a static background. There are also the options of Reverse Speed that can play the clip backward, as in flash-back. The Ripple edit feature allows you to cut short a long clip seamlessly.
Jump Cut: The Jump Cut is about snipping unwanted areas in the clip. It may sound like the Ripple edit mentioned above, but the ripple edit is more functional for cutting short a continuous video so that the viewer won’t realize the snip. For the Jump Cut, it doesn’t have to be a constant clip. You can get to the next frame or scene with an abracadabra move.
To use Jump Cut, place the cursor over the starting of the clip that you want to cut, and right-click on it and select “Split” (the “scissors” feature on the toolbar does the same thing). To make this look neat, preview the portion of the clip once again and delete the cuts between two clips with the same right-click.
Step 4: Understanding Transitions on Filmora
Transitions make your video more interactive and help you segregate the video from frame-to-frame with effects like dissolve, fade, flash, etc. there are numerous transition options available within the Filmora suit.
The best way to do this drag and drop the clips on the timeline is to trim parts of the clip to shorten it. Once you have all the clips in place, go to the “Transitions” options at the top toolbar to apply it on the end or start of each clip.
Step 5: Audio, Playback & Sound Edits
There are plenty of options that you can remove background noise, add voiceover, add music, and detach audio from video. Refer to the Audios section from your toolbar.
Step 6: Save to Drive/ Emport/ Publish
Once you are satisfied with your content, then go to Export. Choose the format of the video, MOV, MP4, MPG, etc. and whether you wish to publish directly or save to drive.
Tips to Make Your Cooking Videos Stand Out
- Lighting is your best friend. Invest in some quality spotlights or use the best of daylight.
- Mind your video duration. Short and Simple videos get the most views, but your content should not look incomplete. It is not a fact that long and elaborate videos do not get a place on the table; it is all about the relevance of your content. So don’t stop till you get enough.
- If you appear in the video, keep yourself always look good.
- Keep your video titles relevant and prominent, so that people looking for it can readily find it.
- Have a scrumptious custom thumbnail.
How to Promote Your Cooking Channel on YouTube
- Create an inventory before publishing videos. YouTube vlogging is valued for consistency. If you have a list of 10, 15, 20 videos, then you can have enough time in hand to film your next videos.
- Have a consistent style to create brand recognition. Do you think branding is not for Vlogs? Well, I suppose you might be wrong. Branding is for anyone who uses it.
- Share the link of your YouTube videos on other platforms like Twitter and Facebook.
- Encourage your viewers to comment on the video.
- Explore the different YouTube SEO strategies and use the accurate keywords in your video descriptions with hashtags.
With prior planning and practicing, you are bent on developing more confident moves and camera angles. Once you have that, follow this step by step guide to gain speed and prowess and also enjoy the whole adventure.
Richard Bennett
Richard Bennett is a writer and a lover of all things video.
Follow @Richard Bennett
Transforming View Counts: Innovative Uses for Short Videos
YouTube Shorts are short, 60-second videos that can be shared across all social media platforms. They’re a great way to quickly and easily share your message with your audience. As a result, many creators are turning to YouTube Shorts Templates to help them create professional-looking videos that stand out.
YouTube Shorts Templates can create a wide variety of videos, from product demos and how-tos to vlogs and comedy skits. They can help you create polished and engaging videos without the need for expensive equipment or a lot of editing experience.

This article will explore everything you need to know about YouTube Shorts Templates, including how to use them, tips for creating great videos, and examples of how other creators use them to boost their views and reach.
Overview of YouTube Shorts
YouTube Shorts is a new feature launched by YouTube in September 2020, which allows users to create short, 15-second videos that can be shared across all social media platforms. According to the statistics of EarthWeb , YouTube Shorts has seen tremendous growth in popularity since its launch, with billions of views every day.
According to YouTube, in the U.S. alone, the watch time for Shorts has grown over 4x since November 2020, and by December 2021, daily active users of Shorts exceeded 200M. As per YouTube’s official blog, In India, Shorts watch time has grown by over 20x since its launch, and by the end of 2021, India had over 150M daily active users.
In addition to the strong growth in views and engagement, YouTube Shorts has also become a powerful tool for creators to reach new audiences and grow their channels.
According to a study by Influencer Marketing Hub, YouTube Shorts have a higher engagement rate than traditional YouTube videos, with Shorts receiving an average of 3x more comments and likes than regular videos. The study also shows that Shorts videos have a higher completion rate of 60% compared to traditional videos with 40%.
As a result of the popularity of YouTube Shorts, many creators are now turning to YouTube Shorts Templates to help them create professional-looking videos that stand out. YouTube Shorts Templates can create a wide variety of videos, from product demos and how-tos to vlogs and comedy skits. They can help you create polished and engaging videos without the need for expensive equipment or a lot of editing experience.
How To Get Profit from Short Videos
There are a few ways to monetize your YouTube Shorts videos and turn them into a source of profit. One way is through YouTube’s built-in monetization options, such as displaying ads on your videos, sponsorships, and affiliate marketing. Another way is to use your Shorts videos’ popularity to promote your products or services.
You can also use YouTube Shorts to drive traffic to your website, where you can sell products or services. Collaborating with brands and promoting their products in your videos can also be a great way to monetize your content. It’s important to remember that building a sizable audience and creating high-quality content is key to monetizing your YouTube Shorts.
Benefits of Using Templates to Create YouTube Shorts
There are several benefits to using templates to create YouTube Shorts, including:

- Time-saving: Templates provide a pre-designed structure for your video, which saves you time and effort in creating a polished and professional-looking video.
- Consistency: Templates can help you maintain a consistent look and feel for your videos, which helps to build your brand and make your videos easily recognizable.
- Cost-effective: Templates can be cost-effective, eliminating the need for expensive equipment or editing software.
- Increased engagement: Templates can help you create engaging videos that capture your audience’s attention and increase the likelihood of them watching and engaging with your content.
- Access to a wider audience: Templates can help increase your views and reach, which can help you grow your channel and reach a wider audience.
- Easy to use: Templates are easy to use, even if you have yet to gain any prior video editing experience.
Using templates allows you to quickly create high-quality, professional-looking videos while also saving money and reaching a wider audience.
How to Make YouTube Shorts Using a Video Editor With Templates
Creating YouTube Shorts using a video editor with templates is a great way to save time and effort while still producing polished, professional-looking videos. One great video editor that can be used for this purpose is Filmora. Filmora has desktop and mobile versions, so you can create YouTube Shorts using any device.
Video Templates Feature of Filmora
With Wondershare Filmora , users can access a variety of templates for YouTube Shorts, which can be easily customized to fit the style and theme of their videos. These templates include various themes such as travel, vlogs, product demos, and more.
Wondershare Filmora also provides a wide range of editing tools, such as text, music, and effects, to help users create engaging and visually appealing videos. Filmora’s templates are an easy and efficient way to create visually appealing and engaging YouTube Shorts that stand out from the rest.
Free Download For Win 7 or later(64-bit)
Free Download For macOS 10.14 or later
Step-by-Step Guide to Create YouTube Shorts With Templates Using Filmora for Desktop
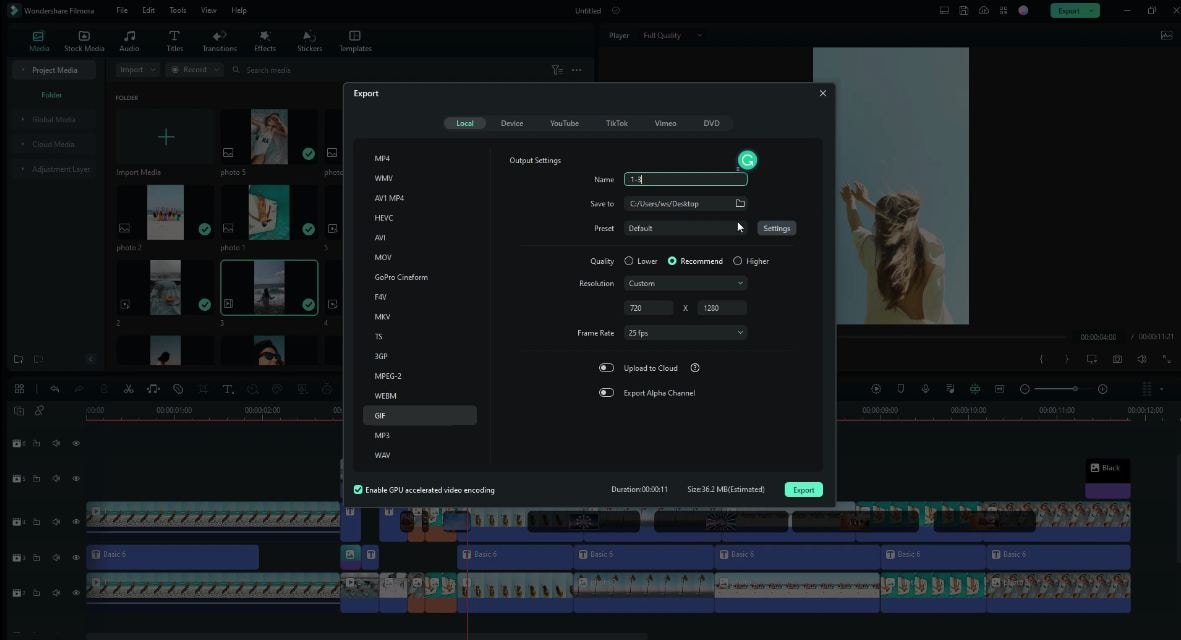
Creating professional-looking YouTube Shorts can be time-consuming and daunting, especially if you have limited experience with video editing. However, using a video editor like Filmora, you can easily create high-quality YouTube Shorts using templates. This step-by-step guide will show you how to use Filmora’s video templates feature to create visually appealing YouTube Shorts on your desktop.
Step 1. Start Wondershare Filmora on your computer. On the “Templates” tab, you will find a variety of component templates to choose from.

Step 2. Select the template you want to use and place it on the timeline point.

Step 3. Add your videos, pictures, and audio files to the designated placeholders in the template to replace the sample ones.

Step 4. Trim, edit the clip or add other effects, texts and stickers as you like.

Step 5. Click the “Export“ button on the upper part to save your clip.
When creating YouTube Shorts, it is important to remember that these videos are vertical. You can easily find vertical video templates in Filmora’s template library. So select the one that best fits your needs and style.
Step-by-Step Guide to Use YouTube Shorts Video Templates With Filmora for Mobile
Creating professional-looking YouTube Shorts on mobile devices is now more accessible than ever. This step-by-step guide will show you how to use Filmora’s video templates feature to create visually appealing YouTube Shorts on your mobile device.
Step 1. Install the Filmora app on your device, then open it.

Step 2. Tap the “Template“ button on the screen’s bottom right.

Step 3. Select the template you wish to use.
Step 4. Press the “Make Video“ button to download the chosen template.

Step 5. Add the necessary footage to edit the template, then tap “Next.”

Step 6. You can preview the video and make any necessary changes.

Step 7. Tap the “Export“ button to save the completed video.

If you want to learn more about using Filmora’s video templates feature to create YouTube Shorts on your mobile device, we recommend watching this video tutorial:
YouTube Shorts Video Template Resources in Filmora
Filmora offers a wide variety of video templates that can be used to create YouTube Shorts. These templates include various themes such as an event, sports, fashion, lifestyle, and more. These templates can be found in Filmora’s library, making it easy for users to find the perfect template for their YouTube Short.
1. Event YouTube Shorts Template

Event YouTube Shorts Templates are an interactive way for creators to showcase their events dynamically and engagingly. These templates come with pre-designed elements such as animations, backgrounds, and text styles that are perfect for highlighting the key moments and creating excitement among the audience. It’s an effective way to make the event more engaging and interactive for the audience.
2. Sports YouTube Shorts Video Template
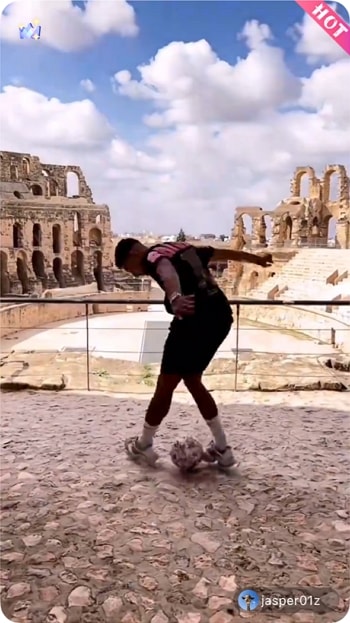
Sports YouTube Shorts video templates are pre-designed, customizable video templates for creating short, engaging sports-related content for YouTube’s Shorts feature. These templates often include scoreboards, team logos, and highlights footage and can be easily customized with your text, images, and videos. They are ideal for sports teams, athletes, and content creators looking to quickly and easily create professional-looking videos.
3. Fashion YouTube Shorts Template
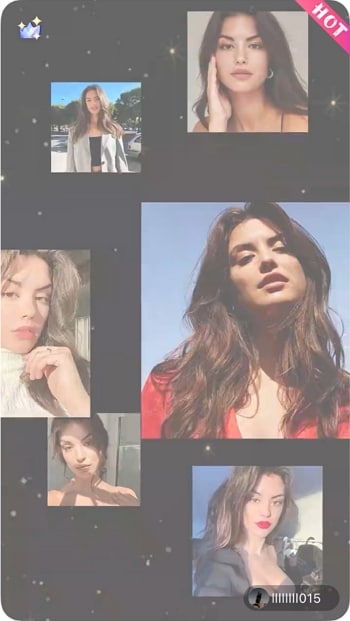
Fashion YouTube Shorts templates are pre-designed video templates that can be used to create visually appealing and engaging content for fashion-related YouTube Shorts. These templates often include elements such as fashion models, clothing and accessory displays, and trendy backgrounds and can be easily customized to suit the creator’s specific needs and aesthetic. They can be used to create various types of videos, including fashion lookbooks, product reviews, and styling tutorials.
4. Life Style Shorts Template

Lifestyle YouTube Shorts templates often include elements such as different lifestyle scenes, like traveling, cooking, home decor, and DIY projects, and can be easily customized to suit the creator’s specific needs and aesthetic. They can create various videos, including travel vlogs, recipe videos, and DIY tutorials.
Conclusion
YouTube Shorts are a great way to connect with your audience and promote your brand. Using a video editor like Filmora, you can easily create high-quality YouTube Shorts using templates. Filmora offers various video templates that can be used to create YouTube Shorts, including templates for events, sports, fashion, and lifestyle.
Filmora templates are fully customizable, meaning you can change the text, images, and colors to match your brand. These templates can be found in Filmora’s library, making it easy for users to find the perfect template for their YouTube Short. With the help of Filmora, you can easily create professional-looking YouTube Shorts that stand out and capture your audience’s attention.
Free Download For macOS 10.14 or later
Step-by-Step Guide to Create YouTube Shorts With Templates Using Filmora for Desktop
Creating professional-looking YouTube Shorts can be time-consuming and daunting, especially if you have limited experience with video editing. However, using a video editor like Filmora, you can easily create high-quality YouTube Shorts using templates. This step-by-step guide will show you how to use Filmora’s video templates feature to create visually appealing YouTube Shorts on your desktop.
Step 1. Start Wondershare Filmora on your computer. On the “Templates” tab, you will find a variety of component templates to choose from.
Step 2. Select the template you want to use and place it on the timeline point.
Step 3. Add your videos, pictures, and audio files to the designated placeholders in the template to replace the sample ones.
Step 4. Trim, edit the clip or add other effects, texts and stickers as you like.
Step 5. Click the “Export“ button on the upper part to save your clip.
When creating YouTube Shorts, it is important to remember that these videos are vertical. You can easily find vertical video templates in Filmora’s template library. So select the one that best fits your needs and style.
Step-by-Step Guide to Use YouTube Shorts Video Templates With Filmora for Mobile
Creating professional-looking YouTube Shorts on mobile devices is now more accessible than ever. This step-by-step guide will show you how to use Filmora’s video templates feature to create visually appealing YouTube Shorts on your mobile device.
Step 1. Install the Filmora app on your device, then open it.
Step 2. Tap the “Template“ button on the screen’s bottom right.
Step 3. Select the template you wish to use.
Step 4. Press the “Make Video“ button to download the chosen template.
Step 5. Add the necessary footage to edit the template, then tap “Next.”
Step 6. You can preview the video and make any necessary changes.
Step 7. Tap the “Export“ button to save the completed video.
If you want to learn more about using Filmora’s video templates feature to create YouTube Shorts on your mobile device, we recommend watching this video tutorial:
YouTube Shorts Video Template Resources in Filmora
Filmora offers a wide variety of video templates that can be used to create YouTube Shorts. These templates include various themes such as an event, sports, fashion, lifestyle, and more. These templates can be found in Filmora’s library, making it easy for users to find the perfect template for their YouTube Short.
1. Event YouTube Shorts Template
Event YouTube Shorts Templates are an interactive way for creators to showcase their events dynamically and engagingly. These templates come with pre-designed elements such as animations, backgrounds, and text styles that are perfect for highlighting the key moments and creating excitement among the audience. It’s an effective way to make the event more engaging and interactive for the audience.
2. Sports YouTube Shorts Video Template
Sports YouTube Shorts video templates are pre-designed, customizable video templates for creating short, engaging sports-related content for YouTube’s Shorts feature. These templates often include scoreboards, team logos, and highlights footage and can be easily customized with your text, images, and videos. They are ideal for sports teams, athletes, and content creators looking to quickly and easily create professional-looking videos.
3. Fashion YouTube Shorts Template
Fashion YouTube Shorts templates are pre-designed video templates that can be used to create visually appealing and engaging content for fashion-related YouTube Shorts. These templates often include elements such as fashion models, clothing and accessory displays, and trendy backgrounds and can be easily customized to suit the creator’s specific needs and aesthetic. They can be used to create various types of videos, including fashion lookbooks, product reviews, and styling tutorials.
4. Life Style Shorts Template
Lifestyle YouTube Shorts templates often include elements such as different lifestyle scenes, like traveling, cooking, home decor, and DIY projects, and can be easily customized to suit the creator’s specific needs and aesthetic. They can create various videos, including travel vlogs, recipe videos, and DIY tutorials.
Conclusion
YouTube Shorts are a great way to connect with your audience and promote your brand. Using a video editor like Filmora, you can easily create high-quality YouTube Shorts using templates. Filmora offers various video templates that can be used to create YouTube Shorts, including templates for events, sports, fashion, and lifestyle.
Filmora templates are fully customizable, meaning you can change the text, images, and colors to match your brand. These templates can be found in Filmora’s library, making it easy for users to find the perfect template for their YouTube Short. With the help of Filmora, you can easily create professional-looking YouTube Shorts that stand out and capture your audience’s attention.
Also read:
- [Updated] Elevating the Cold with Five Cozy Cinematic Elements
- Halt YouTube Suggested Content Now
- [New] Deciphering Digital Domination A Deep Dive Into Directors' Videos
- Initiate Internet Income Low-Cost YouTube Channel Buys
- YouTube-to-IGTV Conversion Pro Tips Revealed
- 2024 Approved Educational History Vlogs - The Ultimate List
- [Updated] Ascending with ASMR Top Strategies for Video Creation
- The Essential Guide to Professional-Level Video Editing
- [New] Android, iOS & PC-Friendly YouTube Downloader Apps Reviewed
- Ultimate Guide 7 Preferred Android Ad Blocking Tools
- PhotoMagic Studio
- Maximize YouTube Savvy Unified Streams for Enthusiasts
- [New] Captivating Audiences with Unique Haul Content Ideas
- Step-by-Step Integrating Comments in YouTube Videos
- [New] Conquer YouTube's Copy-Paste Loop Mastery Essentials
- Acquiring Free Music YouTube Video Edition for 2024
- In 2024, Alternative Film Choices Ranked #7-1
- [New] Creating Memorable Beginnings IMovie Tips for YouTube Videos
- Channel Expansion Techniques for 30+ Online Platforms
- Creating Engaging YouTube Trailers in Filmora for 2024
- 2024 Approved 8 Mistakes People Should Avoid as a New YouTuber
- Maximizing Your Videos' Impact with Perfect Post Times
- IOS-Focused Techniques Downloading and Saving YouTube Video
- The 3-Step Structure for Successful Subscriber Profit Analysis A Guide From Google
- In 2024, Artisans Crafting Marvel Fantasy Landscapes
- [Updated] Elevate Your Soundbites Insights for YouTube Short Tunes
- [Updated] Crafting Standout YouTube Thumbnails with Ease
- Crafting Engaging YouTube Beginnings Two Methods for 2024
- Enhance Privacy & Speed The Best 7 Android AdBlocks for 2024
- Digital Destinations Where to Direct Your Videos
- Maximizing YouTube Shorts Income Strategies
- Chart-Topping Video Content on YouTube
- 2024 Approved Edit with Ease #10 Video-to-Mp3 Tools of the Trade
- YouTube Shorts Revenue Sharing How Much Do Creators Get Paid?
- 2024 Approved Discovering New Horizons in Online Videos The Best 27 Non-YouTube Sites
- 2024 Approved Capture, Create, Curate Mobiles in Action for YouTube Thumbnails
- [New] Amplify Your Videos Enhancing Thumbnails with Captivating, Creative BGs
- Unlock YouTube Monetization with 500 Subscribers
- [Updated] Authentic Audience Growth Practical Advice for Content Creators
- [Updated] Elevating Your YouTube Profile with High-Impact Artwork Guide
- Elevate Creations - Get FREE High-Quality Templates Today for 2024
- Cultivating Connection, Not Compulsion in Subscriptions
- The Essential Guide to Free, Licensed Audio for YT
- [New] Channel King & Queen Academy YouTube Excellence
- In 2024, 15 Must-Have Openers for Maximum YouTube Engagement
- In 2024, 10 Iconic Beauty Personalities to Follow on YouTube
- Captivate and Enchant Explore the Best Creative Reactions on YT
- In 2024, Discovering How YouTube Runs Its Creator Workshop
- Cinematic Evolution The Best YouTube Guides for New Filmmakers for 2024
- Beginner's Guide Adding Text Overlays on YouTube for 2024
- Strategies for Apps That Wont Download From Play Store On Realme Narzo 60x 5G | Dr.fone
- In 2024, 12 Innovative Online Platforms to Elevate Your Facebook Cover Pics
- 2024 Approved The Art of Pan and Zoom How to Achieve the Ken Burns Effect
- New 2024 Approved Blending Motion Picture with Soundtracks A Modern Approach
- [New] 2024 Approved Erase Effortlessly Social Media Live on Desktop & Phone
- Gmail Not Working on Google Pixel 8 7 Common Problems & Fixes | Dr.fone
- In 2024, Simple Voice Changer Features, Guidelines, and Alternatives
- In 2024, How to Transfer Data from Motorola Moto G14 to Any iOS Devices | Dr.fone
- Updated Create Epic Trailers Top Movie Maker Software for Mac and PC for 2024
- Learn About some of the Best Apps for Photo Collage for PC for 2024
- Complete Guide to Hard Reset Your Vivo Y78+ (T1) Edition | Dr.fone
- 2024 Approved How To Secure Continuous Streaming In OBS
- [Updated] In 2024, Precision Settings for OBS Studio on Android
- [New] Guide Downloading Twitters Videos on Android Devices for 2024
- [Updated] In 2024, Engage Audiences Skywards Drone Filming and Facebook Live
- In 2024, The Ultimate Guide to 3D Animation Software Free and Paid Solutions
- Updated 2024 Approved 8 Powerful Photo Management Tools to Replace Windows 10 Photos
- [Updated] In 2024, Top Viewers of the Year 10 Most Engaged Tweets
- 3 Ways to Erase iPhone X When Its Locked Within Seconds | Dr.fone
- In 2024, How to Transfer Music from Itel A05s to iPod | Dr.fone
- Updated How to Adjust Audio Volume in Audacity?
- [New] In 2024, Facebook Cover Video All You Need to Know
- Updated Enhancing Videos with Voiceover Modern Techniques
- Title: "MasterChef's Visual Guide Filming Kitchen Escapades"
- Author: Brian
- Created at : 2024-05-25 12:20:28
- Updated at : 2024-05-26 12:20:28
- Link: https://youtube-video-recordings.techidaily.com/masterchefs-visual-guide-filming-kitchen-escapades/
- License: This work is licensed under CC BY-NC-SA 4.0.
