Leveraging Jump Cuts to Improve Video Flow
Leveraging Jump Cuts to Improve Video Flow
How To Use Jump Cuts in Your Vlog

Richard Bennett
Mar 27, 2024• Proven solutions
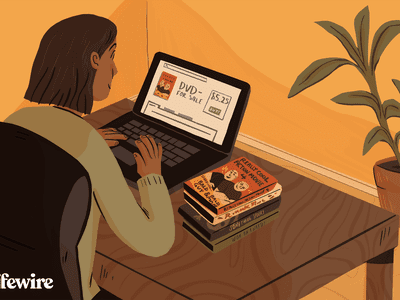
A common problem for new YouTubers and Vlogers is that they cannot get through a recording without feeling like they have messed up and need to restart. It can be extremely discouraging at first. More experienced vloggers know that mistakes happen and they are no reason to stop recording. Instead of trying to record a perfect clip it is common for vloggers to remove errors from their videos in editing using jump cuts.
How To Use Jump Cuts in Your Vlog
1. What is a Jump Cut?
A jump cut is when you jump from one part of your clip to a later part of that same clip, cutting out the section in-between.
In movies or tv shows jump cuts can be distracting. In vlogs it is the exact opposite; jump cuts are used to remove distractions. It is not strange for a YouTube video to contain a lot of jump cuts. If you go and re-watch a video by your favorite vlogger you will probably notice that every once in a while the vlogger is suddenly sitting differently or that something else has suddenly changed. That is a jump cut, and chances are you did not even think twice about it when you first watched the video.
2. When to use Jump Cuts in your Youtube Video
There are a lot of things you might want to take out of your clips using jump cuts. Here are some examples:
Repetition: You may have had to repeat yourself because you misspoke. Or, you might watch your clip back and realize that two sections you intended – perhaps even scripted – are very similar and you only need one.
Off-Topic Tangents: Once you get comfortable talking to the camera it is easy to find yourself getting off-topic while recording. These tangents might be funny or feel important, but you should still cut them out of your final video. Rather than scrapping them completely, though, consider giving your tangent its very own video. Successful vloggers post new videos frequently, after all.
Silence: Use jump cuts to take out any pauses in your video. Every period of silence is an opportunity for viewers to get distracted and decide to click on something else. Adding music to the background of your video can help with shorter pauses, but cutting out any silence is still a good way to go.
In the video tutorial below, we will share with you some practical and creative jump cuts tips that you can try in video editing. And most of the jump cuts are done with the cutting features in Filmora . You can download the free trial version below by clicking the Free Download button based on your system.
 Download Mac Version ](https://tools.techidaily.com/wondershare/filmora/download/ )
3. How to Make Jump Cuts in Vlog & YouTube Videos
You can make jump cuts in almost every editing program, from free software like Windows Movie Maker to professional programs like Adobe Premiere. Remember no matter which video editing software you are using to edit your videos with jump cut, you need to ensure that the software can scroll through your video clips and audio files frame-by-frame. And some video editors may only allow you to scroll video footage frame by frame. This tutorial is for Filmora Video Editor (Now upgraded to Filmora), but many of the same steps will apply to other software.
Download Mac Version ](https://tools.techidaily.com/wondershare/filmora/download/ )
You may also like: How to trim and cut videos in Windows Movie Maker for Free
Open up Filmora Video Editor and add a clip into the timeline. Watch it through, and then revisit sections where you think you might want to make cuts.
Find a place in your clip that has silence and use the scissors icon to cut your clip into two. Then start playing your clip and pause as soon as you hear sound.
Make sure your clip is selected, and then go back frame by frame until you hear nothing.
Use the scissors icon to make another cut. You will now have three clips; one before the silence, the silent pause, and the section where sound starts again. Delete the quiet middle clip.
4. Keep video shorter for more views
The videos that get the most views on YouTube are an average of three minutes long. People will use the length of a video as a reason not to click on it. Viewers are also more likely to get distracted and stop watching longer videos before they are over. That does not mean you should not take as long as you need to properly explain your ideas, just that you should be careful your video is not longer than it needs to be. It is common for youtubers to use only about a third of the clip they record. The rest is removed using jump cuts.
Filmora video editor will help you to be more creative in video editing and saving your time at the same time. Download and leave a comment below about how do you like it.

Richard Bennett
Richard Bennett is a writer and a lover of all things video.
Follow @Richard Bennett
Richard Bennett
Mar 27, 2024• Proven solutions
A common problem for new YouTubers and Vlogers is that they cannot get through a recording without feeling like they have messed up and need to restart. It can be extremely discouraging at first. More experienced vloggers know that mistakes happen and they are no reason to stop recording. Instead of trying to record a perfect clip it is common for vloggers to remove errors from their videos in editing using jump cuts.
How To Use Jump Cuts in Your Vlog
1. What is a Jump Cut?
A jump cut is when you jump from one part of your clip to a later part of that same clip, cutting out the section in-between.
In movies or tv shows jump cuts can be distracting. In vlogs it is the exact opposite; jump cuts are used to remove distractions. It is not strange for a YouTube video to contain a lot of jump cuts. If you go and re-watch a video by your favorite vlogger you will probably notice that every once in a while the vlogger is suddenly sitting differently or that something else has suddenly changed. That is a jump cut, and chances are you did not even think twice about it when you first watched the video.
2. When to use Jump Cuts in your Youtube Video
There are a lot of things you might want to take out of your clips using jump cuts. Here are some examples:
Repetition: You may have had to repeat yourself because you misspoke. Or, you might watch your clip back and realize that two sections you intended – perhaps even scripted – are very similar and you only need one.
Off-Topic Tangents: Once you get comfortable talking to the camera it is easy to find yourself getting off-topic while recording. These tangents might be funny or feel important, but you should still cut them out of your final video. Rather than scrapping them completely, though, consider giving your tangent its very own video. Successful vloggers post new videos frequently, after all.
Silence: Use jump cuts to take out any pauses in your video. Every period of silence is an opportunity for viewers to get distracted and decide to click on something else. Adding music to the background of your video can help with shorter pauses, but cutting out any silence is still a good way to go.
In the video tutorial below, we will share with you some practical and creative jump cuts tips that you can try in video editing. And most of the jump cuts are done with the cutting features in Filmora . You can download the free trial version below by clicking the Free Download button based on your system.
Download Mac Version ](https://tools.techidaily.com/wondershare/filmora/download/ )
3. How to Make Jump Cuts in Vlog & YouTube Videos
You can make jump cuts in almost every editing program, from free software like Windows Movie Maker to professional programs like Adobe Premiere. Remember no matter which video editing software you are using to edit your videos with jump cut, you need to ensure that the software can scroll through your video clips and audio files frame-by-frame. And some video editors may only allow you to scroll video footage frame by frame. This tutorial is for Filmora Video Editor (Now upgraded to Filmora), but many of the same steps will apply to other software.
Download Mac Version ](https://tools.techidaily.com/wondershare/filmora/download/ )
You may also like: How to trim and cut videos in Windows Movie Maker for Free
Open up Filmora Video Editor and add a clip into the timeline. Watch it through, and then revisit sections where you think you might want to make cuts.
Find a place in your clip that has silence and use the scissors icon to cut your clip into two. Then start playing your clip and pause as soon as you hear sound.
Make sure your clip is selected, and then go back frame by frame until you hear nothing.
Use the scissors icon to make another cut. You will now have three clips; one before the silence, the silent pause, and the section where sound starts again. Delete the quiet middle clip.
4. Keep video shorter for more views
The videos that get the most views on YouTube are an average of three minutes long. People will use the length of a video as a reason not to click on it. Viewers are also more likely to get distracted and stop watching longer videos before they are over. That does not mean you should not take as long as you need to properly explain your ideas, just that you should be careful your video is not longer than it needs to be. It is common for youtubers to use only about a third of the clip they record. The rest is removed using jump cuts.
Filmora video editor will help you to be more creative in video editing and saving your time at the same time. Download and leave a comment below about how do you like it.
Richard Bennett
Richard Bennett is a writer and a lover of all things video.
Follow @Richard Bennett
Richard Bennett
Mar 27, 2024• Proven solutions
A common problem for new YouTubers and Vlogers is that they cannot get through a recording without feeling like they have messed up and need to restart. It can be extremely discouraging at first. More experienced vloggers know that mistakes happen and they are no reason to stop recording. Instead of trying to record a perfect clip it is common for vloggers to remove errors from their videos in editing using jump cuts.
How To Use Jump Cuts in Your Vlog
1. What is a Jump Cut?
A jump cut is when you jump from one part of your clip to a later part of that same clip, cutting out the section in-between.
In movies or tv shows jump cuts can be distracting. In vlogs it is the exact opposite; jump cuts are used to remove distractions. It is not strange for a YouTube video to contain a lot of jump cuts. If you go and re-watch a video by your favorite vlogger you will probably notice that every once in a while the vlogger is suddenly sitting differently or that something else has suddenly changed. That is a jump cut, and chances are you did not even think twice about it when you first watched the video.
2. When to use Jump Cuts in your Youtube Video
There are a lot of things you might want to take out of your clips using jump cuts. Here are some examples:
Repetition: You may have had to repeat yourself because you misspoke. Or, you might watch your clip back and realize that two sections you intended – perhaps even scripted – are very similar and you only need one.
Off-Topic Tangents: Once you get comfortable talking to the camera it is easy to find yourself getting off-topic while recording. These tangents might be funny or feel important, but you should still cut them out of your final video. Rather than scrapping them completely, though, consider giving your tangent its very own video. Successful vloggers post new videos frequently, after all.
Silence: Use jump cuts to take out any pauses in your video. Every period of silence is an opportunity for viewers to get distracted and decide to click on something else. Adding music to the background of your video can help with shorter pauses, but cutting out any silence is still a good way to go.
In the video tutorial below, we will share with you some practical and creative jump cuts tips that you can try in video editing. And most of the jump cuts are done with the cutting features in Filmora . You can download the free trial version below by clicking the Free Download button based on your system.
Download Mac Version ](https://tools.techidaily.com/wondershare/filmora/download/ )
3. How to Make Jump Cuts in Vlog & YouTube Videos
You can make jump cuts in almost every editing program, from free software like Windows Movie Maker to professional programs like Adobe Premiere. Remember no matter which video editing software you are using to edit your videos with jump cut, you need to ensure that the software can scroll through your video clips and audio files frame-by-frame. And some video editors may only allow you to scroll video footage frame by frame. This tutorial is for Filmora Video Editor (Now upgraded to Filmora), but many of the same steps will apply to other software.
Download Mac Version ](https://tools.techidaily.com/wondershare/filmora/download/ )
You may also like: How to trim and cut videos in Windows Movie Maker for Free
Open up Filmora Video Editor and add a clip into the timeline. Watch it through, and then revisit sections where you think you might want to make cuts.
Find a place in your clip that has silence and use the scissors icon to cut your clip into two. Then start playing your clip and pause as soon as you hear sound.
Make sure your clip is selected, and then go back frame by frame until you hear nothing.
Use the scissors icon to make another cut. You will now have three clips; one before the silence, the silent pause, and the section where sound starts again. Delete the quiet middle clip.
4. Keep video shorter for more views
The videos that get the most views on YouTube are an average of three minutes long. People will use the length of a video as a reason not to click on it. Viewers are also more likely to get distracted and stop watching longer videos before they are over. That does not mean you should not take as long as you need to properly explain your ideas, just that you should be careful your video is not longer than it needs to be. It is common for youtubers to use only about a third of the clip they record. The rest is removed using jump cuts.
Filmora video editor will help you to be more creative in video editing and saving your time at the same time. Download and leave a comment below about how do you like it.

Richard Bennett
Richard Bennett is a writer and a lover of all things video.
Follow @Richard Bennett
Richard Bennett
Mar 27, 2024• Proven solutions
A common problem for new YouTubers and Vlogers is that they cannot get through a recording without feeling like they have messed up and need to restart. It can be extremely discouraging at first. More experienced vloggers know that mistakes happen and they are no reason to stop recording. Instead of trying to record a perfect clip it is common for vloggers to remove errors from their videos in editing using jump cuts.
How To Use Jump Cuts in Your Vlog
1. What is a Jump Cut?
A jump cut is when you jump from one part of your clip to a later part of that same clip, cutting out the section in-between.
In movies or tv shows jump cuts can be distracting. In vlogs it is the exact opposite; jump cuts are used to remove distractions. It is not strange for a YouTube video to contain a lot of jump cuts. If you go and re-watch a video by your favorite vlogger you will probably notice that every once in a while the vlogger is suddenly sitting differently or that something else has suddenly changed. That is a jump cut, and chances are you did not even think twice about it when you first watched the video.
2. When to use Jump Cuts in your Youtube Video
There are a lot of things you might want to take out of your clips using jump cuts. Here are some examples:
Repetition: You may have had to repeat yourself because you misspoke. Or, you might watch your clip back and realize that two sections you intended – perhaps even scripted – are very similar and you only need one.
Off-Topic Tangents: Once you get comfortable talking to the camera it is easy to find yourself getting off-topic while recording. These tangents might be funny or feel important, but you should still cut them out of your final video. Rather than scrapping them completely, though, consider giving your tangent its very own video. Successful vloggers post new videos frequently, after all.
Silence: Use jump cuts to take out any pauses in your video. Every period of silence is an opportunity for viewers to get distracted and decide to click on something else. Adding music to the background of your video can help with shorter pauses, but cutting out any silence is still a good way to go.
In the video tutorial below, we will share with you some practical and creative jump cuts tips that you can try in video editing. And most of the jump cuts are done with the cutting features in Filmora . You can download the free trial version below by clicking the Free Download button based on your system.
Download Mac Version ](https://tools.techidaily.com/wondershare/filmora/download/ )
3. How to Make Jump Cuts in Vlog & YouTube Videos
You can make jump cuts in almost every editing program, from free software like Windows Movie Maker to professional programs like Adobe Premiere. Remember no matter which video editing software you are using to edit your videos with jump cut, you need to ensure that the software can scroll through your video clips and audio files frame-by-frame. And some video editors may only allow you to scroll video footage frame by frame. This tutorial is for Filmora Video Editor (Now upgraded to Filmora), but many of the same steps will apply to other software.
Download Mac Version ](https://tools.techidaily.com/wondershare/filmora/download/ )
You may also like: How to trim and cut videos in Windows Movie Maker for Free
Open up Filmora Video Editor and add a clip into the timeline. Watch it through, and then revisit sections where you think you might want to make cuts.
Find a place in your clip that has silence and use the scissors icon to cut your clip into two. Then start playing your clip and pause as soon as you hear sound.
Make sure your clip is selected, and then go back frame by frame until you hear nothing.
Use the scissors icon to make another cut. You will now have three clips; one before the silence, the silent pause, and the section where sound starts again. Delete the quiet middle clip.
4. Keep video shorter for more views
The videos that get the most views on YouTube are an average of three minutes long. People will use the length of a video as a reason not to click on it. Viewers are also more likely to get distracted and stop watching longer videos before they are over. That does not mean you should not take as long as you need to properly explain your ideas, just that you should be careful your video is not longer than it needs to be. It is common for youtubers to use only about a third of the clip they record. The rest is removed using jump cuts.
Filmora video editor will help you to be more creative in video editing and saving your time at the same time. Download and leave a comment below about how do you like it.
Richard Bennett
Richard Bennett is a writer and a lover of all things video.
Follow @Richard Bennett
Crafting Winning Titles & Tags for Your YouTube Videos
How to Use Video Titles and YouTube Tags for More Views?
Richard Bennett
Nov 01, 2022• Proven solutions
In order to make sure that your videos get the appreciation they deserve, you will need to optimize your titles and YouTube tags for more views. By optimizing your titles and tags, I mean using the right keywords so that YouTube knows how to sort your videos and the viewers who are interested in your content can find it.
YouTube videos rank on Google just like any other piece of content, and YouTube itself is a lot of people’s go-to search engine. The success of your YouTube videos will largely depend on your ability to optimize your videos so they are ranked in people’s search results. People can’t fall in love with your videos they never stumble across them.
If you optimize your titles, tags, and descriptions to include relevant keywords you will see much better traffic from Google as well as from YouTube’s search results. Here are some tips:
Find the Best Keywords
One of the most important steps to ensuring SEO success is to identify the keywords that you should be using.
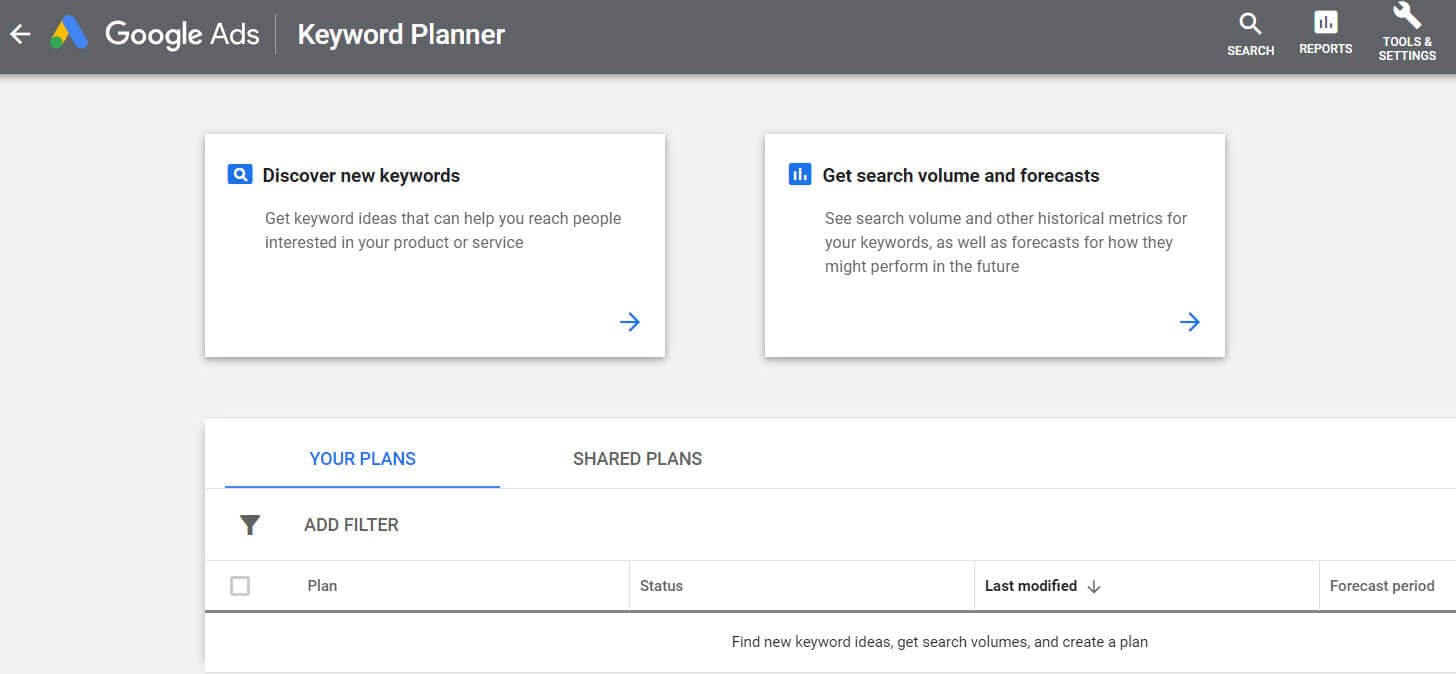
You can use the Google keyword planner to find keywords related to your video’s topic. Input one of your competitors’ video links to detect some of the top searches that were used to find the video. The keyword planner will scan through the top searches for that video link and determine the keywords that are used most often.
The keyword list can be a bit overwhelming the first time. Remember to use keywords that get at least 300 searches per month on Google. Using popular keywords will help you match up against competitors in your niche.
How to Optimize Your Titles, Descriptions, and Tags
Your keyword research will help you craft title, description, and tags of your videos.
How to Optimize YouTube Titles
The ideal YouTube title intrigues the potential viewer, drawing them in and making them want to click the link.
A video title should include your most important keyword. Usually, your most important keyword will be the first word in your title. Great titles are accurate and descriptive, but also exciting and captivating.
You should also consider using general keywords that are popular on Google like “funny video” “Tutorial” “Review” and “Fitness”.
How to Optimize Your Video’s Description
The description of your video is the next big important challenge. The text description of your video is how Google and other search engines determine the subject matter of your video for ranking.
Some tips for success with your description include; using 2-3 important keywords in the first 25 words and making each YouTube description more than 250 words.
Your ideal description will help to index your video without over-utilizing keywords and being flagged as spam.
How to Optimize YouTube Tags
Tags will help decide which videos your video will be displayed beside as similar content and which searches it will appear in.
By using targeted and optimized tags you can gain more traffic and views. Some of the top rules that you should consider with tags are; using 8-12 in every video and making sure the top keyword you used in your title is included as a tag.
Tags on previous videos can also be rearranged and edited as you do keyword research. This will help improve the ranking of some of your older videos. If you all the tags you usually use to a notepad or text edit file and separate them with commas you can paste them all back into YouTube in the new order. This is the simplest way to mass edit tags.
Click here for more tips about YouTube search optimization.
These tips will help you optimize your YouTube tags for more views, as well as your other YouTube metadata.
Richard Bennett
Richard Bennett is a writer and a lover of all things video.
Follow @Richard Bennett
Richard Bennett
Nov 01, 2022• Proven solutions
In order to make sure that your videos get the appreciation they deserve, you will need to optimize your titles and YouTube tags for more views. By optimizing your titles and tags, I mean using the right keywords so that YouTube knows how to sort your videos and the viewers who are interested in your content can find it.
YouTube videos rank on Google just like any other piece of content, and YouTube itself is a lot of people’s go-to search engine. The success of your YouTube videos will largely depend on your ability to optimize your videos so they are ranked in people’s search results. People can’t fall in love with your videos they never stumble across them.
If you optimize your titles, tags, and descriptions to include relevant keywords you will see much better traffic from Google as well as from YouTube’s search results. Here are some tips:
Find the Best Keywords
One of the most important steps to ensuring SEO success is to identify the keywords that you should be using.
You can use the Google keyword planner to find keywords related to your video’s topic. Input one of your competitors’ video links to detect some of the top searches that were used to find the video. The keyword planner will scan through the top searches for that video link and determine the keywords that are used most often.
The keyword list can be a bit overwhelming the first time. Remember to use keywords that get at least 300 searches per month on Google. Using popular keywords will help you match up against competitors in your niche.
How to Optimize Your Titles, Descriptions, and Tags
Your keyword research will help you craft title, description, and tags of your videos.
How to Optimize YouTube Titles
The ideal YouTube title intrigues the potential viewer, drawing them in and making them want to click the link.
A video title should include your most important keyword. Usually, your most important keyword will be the first word in your title. Great titles are accurate and descriptive, but also exciting and captivating.
You should also consider using general keywords that are popular on Google like “funny video” “Tutorial” “Review” and “Fitness”.
How to Optimize Your Video’s Description
The description of your video is the next big important challenge. The text description of your video is how Google and other search engines determine the subject matter of your video for ranking.
Some tips for success with your description include; using 2-3 important keywords in the first 25 words and making each YouTube description more than 250 words.
Your ideal description will help to index your video without over-utilizing keywords and being flagged as spam.
How to Optimize YouTube Tags
Tags will help decide which videos your video will be displayed beside as similar content and which searches it will appear in.
By using targeted and optimized tags you can gain more traffic and views. Some of the top rules that you should consider with tags are; using 8-12 in every video and making sure the top keyword you used in your title is included as a tag.
Tags on previous videos can also be rearranged and edited as you do keyword research. This will help improve the ranking of some of your older videos. If you all the tags you usually use to a notepad or text edit file and separate them with commas you can paste them all back into YouTube in the new order. This is the simplest way to mass edit tags.
Click here for more tips about YouTube search optimization.
These tips will help you optimize your YouTube tags for more views, as well as your other YouTube metadata.
Richard Bennett
Richard Bennett is a writer and a lover of all things video.
Follow @Richard Bennett
Also read:
- [New] In 2024, Engaging Viewers on YouTube Gaming Livestreams
- [New] Master List of Premium 4K YT Converters Ranked by Usage
- [Updated] Enhance Video Popularity with Strategic Timestamps
- 2024 Approved Best Talker Alteration Apps for Video Content Makers
- 2024 Approved Stand Out on YouTube with These 20 Top Font Choices
- 5 Ways To Teach You To Transfer Files from Samsung Galaxy M14 5G to Other Android Devices Easily | Dr.fone
- Directing Twitch Viewers Seamlessly to YouTube Channel
- Galactic Alignment | Free Book
- GPT's Magic Tricks: Unveiling 9 Daily Life Boosters
- In 2024, Dominating Viewers' Spaces Channel Empire Rules
- Leading Caller ID Changers with Magical Features for 2024
- Maximizing Audience Reach Twitch Livest Writes for YouTube
- Prime 7 Apps for Smooth YouTube Live Broadcast From iPhone & Android Devices
- Select From the Leading 7 Android Apps to Eradicate Ads
- Unlocking YouTube’s Monetization Secrets for Successful Crews
- Title: Leveraging Jump Cuts to Improve Video Flow
- Author: Brian
- Created at : 2024-11-02 19:47:15
- Updated at : 2024-11-04 16:13:44
- Link: https://youtube-video-recordings.techidaily.com/leveraging-jump-cuts-to-improve-video-flow/
- License: This work is licensed under CC BY-NC-SA 4.0.