
Jumpstart Your YouTube Channel Growth with Key Editing Skills From Sony Vegas
Jumpstart Your YouTube Channel Growth with Key Editing Skills From Sony Vegas
How to Edit YouTube Videos in Sony Vegas

Richard Bennett
Mar 27, 2024• Proven solutions
Sony Vegas (Vegas Movie Studio) is renowned and particularly popular video editing software which is going to provide you with quite a lot of convenience. It is light, easy to work with and has comprehensive command tools which would provide you with prominent video editing capabilities. You can choose through a variety of exportation presets, including YouTube HD videos. In this article, we’are going to show you how to edit your YouTube Videos with Sony Vegas Pro.
Best Sony Vegas Alternative to Edit YouTube Videos - Even though Sony Vegas is quite comprehensive, it does require knowledge on behalf of the user. Unlike it, Wondershare Filmora is a perfect alternative which would provide you with all the necessary capabilities without presuming any kind of skills on your particular behalf. With this in mind, let’s take a look at some of the benefits:
 Download Mac Version ](https://tools.techidaily.com/wondershare/filmora/download/ )
Amongst these, there are tons of other benefits that you can take advantage of.
- It has over 200 unique styles you can take your pick from
- It has animated captions that you can add conveniently
- It has a wide range of different templates and credits that you can use
How to Edit YouTube Videos in Sony Vegas
Let’s walk through the process of editing.
Step 1: Import Videos
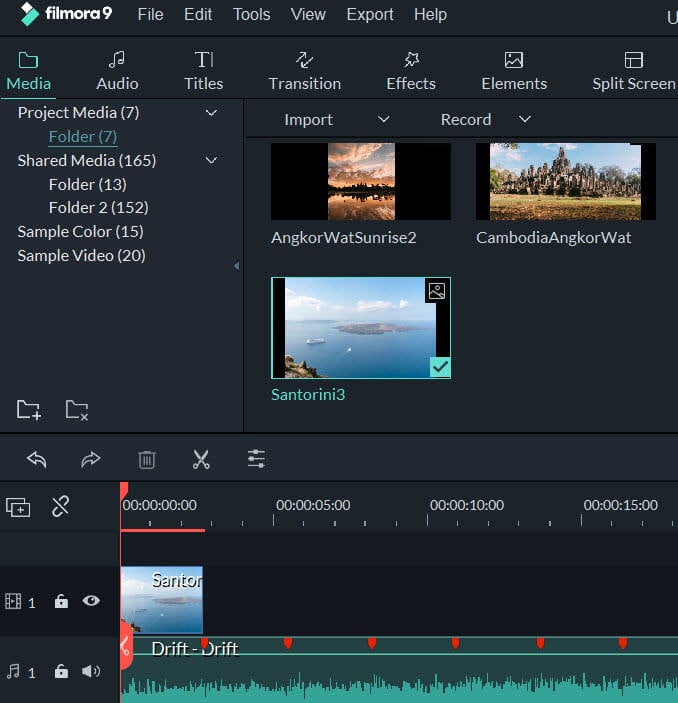
The first thing that you would need to do is import the video clip that you would want to re-shape and edit. In order to do so, you want to click on the File button and then go to Import. You will see a side menu on which you need to click Media and select the file that you want to upload. Keep in mind that you might have to wait for a short period of time while the videos are being uploaded.

Note: You can also import videos which have been published on your channel by downloading them and saving them as MP4 files. On the other hand, if you have the intention of editing videos published on other channels, you might want to use Wondershare Video Converter Ultimate in order to download and convert them to your Mac and get them imported on Sony Vegas.
Step 2: Edit the video and audio files on the Timeline

Sony Vegas introduces a Timeline with Video and Audio tracks. They contain the clips you’ve used in the entire editing process. You can edit them by aligning them as you see fit in order to come up with the best sequence. You can also add additional tracks. In order to do so, all you need to do is right click on the space which is empty and then go Add video track.
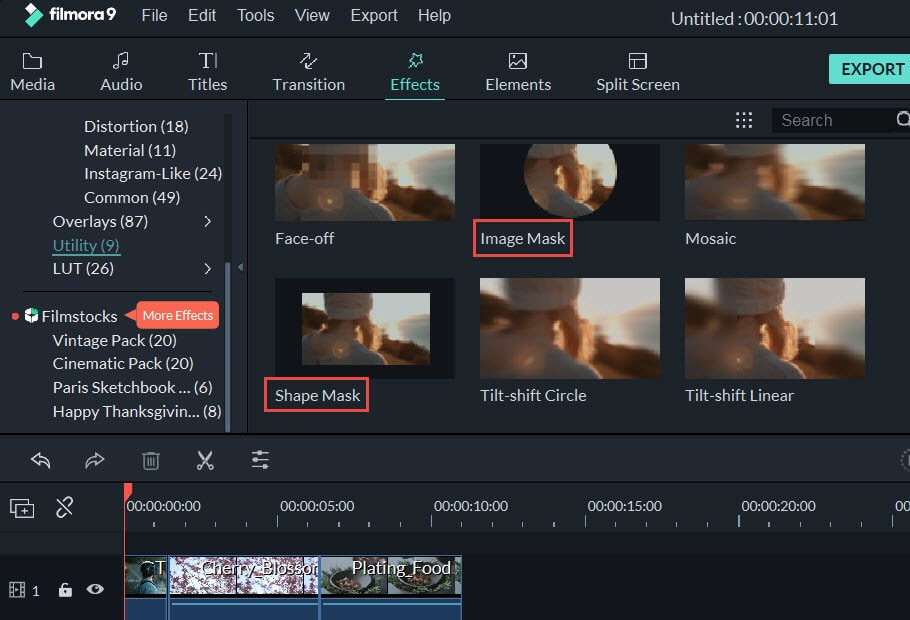
Step 3: Add special effects

Of course, what’s video editing software without powerful special effect capabilities? You will see the special effects tab located on the left side of your screen. You can easily browse throughout all of them in order to get a sense of what you can achieve with your video. There are quite a lot of different special effects that you can incorporate in your YouTube video and make it perfect.
Step 4: Export

This is the thing that you need to do once you are done with the process to edit YouTube videos with Sony Vegas. It’s a very easy task to handle and if you’ve come that far you are already on the finish line. Go to File -> Export and choose the specific extension that you want to use. The clip is going to be saved in the directory that you’ve selected, and it’s ready to watch and upload.
Richard Bennett
Richard Bennett is a writer and a lover of all things video.
Follow @Richard Bennett
Richard Bennett
Mar 27, 2024• Proven solutions
Sony Vegas (Vegas Movie Studio) is renowned and particularly popular video editing software which is going to provide you with quite a lot of convenience. It is light, easy to work with and has comprehensive command tools which would provide you with prominent video editing capabilities. You can choose through a variety of exportation presets, including YouTube HD videos. In this article, we’are going to show you how to edit your YouTube Videos with Sony Vegas Pro.
Best Sony Vegas Alternative to Edit YouTube Videos - Even though Sony Vegas is quite comprehensive, it does require knowledge on behalf of the user. Unlike it, Wondershare Filmora is a perfect alternative which would provide you with all the necessary capabilities without presuming any kind of skills on your particular behalf. With this in mind, let’s take a look at some of the benefits:
Download Mac Version ](https://tools.techidaily.com/wondershare/filmora/download/ )
Amongst these, there are tons of other benefits that you can take advantage of.
- It has over 200 unique styles you can take your pick from
- It has animated captions that you can add conveniently
- It has a wide range of different templates and credits that you can use
How to Edit YouTube Videos in Sony Vegas
Let’s walk through the process of editing.
Step 1: Import Videos
The first thing that you would need to do is import the video clip that you would want to re-shape and edit. In order to do so, you want to click on the File button and then go to Import. You will see a side menu on which you need to click Media and select the file that you want to upload. Keep in mind that you might have to wait for a short period of time while the videos are being uploaded.
Note: You can also import videos which have been published on your channel by downloading them and saving them as MP4 files. On the other hand, if you have the intention of editing videos published on other channels, you might want to use Wondershare Video Converter Ultimate in order to download and convert them to your Mac and get them imported on Sony Vegas.
Step 2: Edit the video and audio files on the Timeline
Sony Vegas introduces a Timeline with Video and Audio tracks. They contain the clips you’ve used in the entire editing process. You can edit them by aligning them as you see fit in order to come up with the best sequence. You can also add additional tracks. In order to do so, all you need to do is right click on the space which is empty and then go Add video track.
Step 3: Add special effects
Of course, what’s video editing software without powerful special effect capabilities? You will see the special effects tab located on the left side of your screen. You can easily browse throughout all of them in order to get a sense of what you can achieve with your video. There are quite a lot of different special effects that you can incorporate in your YouTube video and make it perfect.
Step 4: Export
This is the thing that you need to do once you are done with the process to edit YouTube videos with Sony Vegas. It’s a very easy task to handle and if you’ve come that far you are already on the finish line. Go to File -> Export and choose the specific extension that you want to use. The clip is going to be saved in the directory that you’ve selected, and it’s ready to watch and upload.
Richard Bennett
Richard Bennett is a writer and a lover of all things video.
Follow @Richard Bennett
Richard Bennett
Mar 27, 2024• Proven solutions
Sony Vegas (Vegas Movie Studio) is renowned and particularly popular video editing software which is going to provide you with quite a lot of convenience. It is light, easy to work with and has comprehensive command tools which would provide you with prominent video editing capabilities. You can choose through a variety of exportation presets, including YouTube HD videos. In this article, we’are going to show you how to edit your YouTube Videos with Sony Vegas Pro.
Best Sony Vegas Alternative to Edit YouTube Videos - Even though Sony Vegas is quite comprehensive, it does require knowledge on behalf of the user. Unlike it, Wondershare Filmora is a perfect alternative which would provide you with all the necessary capabilities without presuming any kind of skills on your particular behalf. With this in mind, let’s take a look at some of the benefits:
Download Mac Version ](https://tools.techidaily.com/wondershare/filmora/download/ )
Amongst these, there are tons of other benefits that you can take advantage of.
- It has over 200 unique styles you can take your pick from
- It has animated captions that you can add conveniently
- It has a wide range of different templates and credits that you can use
How to Edit YouTube Videos in Sony Vegas
Let’s walk through the process of editing.
Step 1: Import Videos
The first thing that you would need to do is import the video clip that you would want to re-shape and edit. In order to do so, you want to click on the File button and then go to Import. You will see a side menu on which you need to click Media and select the file that you want to upload. Keep in mind that you might have to wait for a short period of time while the videos are being uploaded.
Note: You can also import videos which have been published on your channel by downloading them and saving them as MP4 files. On the other hand, if you have the intention of editing videos published on other channels, you might want to use Wondershare Video Converter Ultimate in order to download and convert them to your Mac and get them imported on Sony Vegas.
Step 2: Edit the video and audio files on the Timeline
Sony Vegas introduces a Timeline with Video and Audio tracks. They contain the clips you’ve used in the entire editing process. You can edit them by aligning them as you see fit in order to come up with the best sequence. You can also add additional tracks. In order to do so, all you need to do is right click on the space which is empty and then go Add video track.
Step 3: Add special effects
Of course, what’s video editing software without powerful special effect capabilities? You will see the special effects tab located on the left side of your screen. You can easily browse throughout all of them in order to get a sense of what you can achieve with your video. There are quite a lot of different special effects that you can incorporate in your YouTube video and make it perfect.
Step 4: Export
This is the thing that you need to do once you are done with the process to edit YouTube videos with Sony Vegas. It’s a very easy task to handle and if you’ve come that far you are already on the finish line. Go to File -> Export and choose the specific extension that you want to use. The clip is going to be saved in the directory that you’ve selected, and it’s ready to watch and upload.
Richard Bennett
Richard Bennett is a writer and a lover of all things video.
Follow @Richard Bennett
Broadcast Easily: 3 Steps to Post MP3 on YouTube
MP3 to YouTube Converter: Upload MP3 to YouTube
Richard Bennett
Mar 27, 2024• Proven solutions
Latest survey shows that Google’s video streaming site Youtube has surpassed radio, as well as CDs to be the most popular way American adolescents listen to music. Almost 91% of the music fans would listen to the samples before they purchase a song on iTunes. “Watching” music is getting more and more popular with Youtube’s arising popularity among music fans.
However, here comes the dilemma if you are trying to share your favorite music list with your friends on Youtube since Youtube is not designed to host files that are purely audio. Only video files are allowed to be uploaded to its server. Despite all this, is there a safe and easy solution to this issue? The answer if absolutely Yes! Wondershare audio converter let you upload an MP3 to Youtube by converting them to videos files first without losing any of its quality, helping you remove the barrier of uploading audio files to Youtube.
With it, you can not only add pictures to your MP3 files but also retouch them with various fantastic effects. Now follow the steps below to check out how to achieve it.

1 Import Files to Audio Converter
Before upload MP3 to YouTube, you can collect the relevant image, album cover or band picture to your music. Then run this MP3 to YouTube converter and choose 16:9 or 4:3 ratio according to your needs. After that, click “Import” to add the MP3 file and the pictures to the program. Then all the imported files will be displayed as thumbnails in the Media library.
2 Add Pictures to MP3 Files
Drag and drop your MP3 file to the music layer, and the picture to the video layer. These will be located under the timeline bar. Then choose the picture and move your mouse to expand the picture exposure time frame exactly as long as your MP3 file. If less, the remaining part will be blacked out, while too long will create silence in the overextended portions of the video.
If you want to add and show multiple pictures at a time for a single MP3 file, drag-n-drop them to the PIP layers. This MP3 to YouTube converter supports up to 10 pictures for the same MP3 file. Then adjust the position and size of each picture. You can also do more touch up to your creation. For example, you can right click and choose edit to add motion, mask and more effects as you like.
3 Directly Upload MP3s to YouTube
Watch and check the audio quality of your video. When you are satisfied, click “Create” and switch to the YouTube tab. Enter your YouTube Account, Password and related MP3 information to directly upload your works to YouTube.

Tip:
Besides uploading to YouTube, you can also save your creation to various formats and play on different devices or burn to DVD.
See, it’s easy convert MP3 to YouTube using this powerful video editing tool. Download and have a try now!
Richard Bennett
Richard Bennett is a writer and a lover of all things video.
Follow @Richard Bennett
Richard Bennett
Mar 27, 2024• Proven solutions
Latest survey shows that Google’s video streaming site Youtube has surpassed radio, as well as CDs to be the most popular way American adolescents listen to music. Almost 91% of the music fans would listen to the samples before they purchase a song on iTunes. “Watching” music is getting more and more popular with Youtube’s arising popularity among music fans.
However, here comes the dilemma if you are trying to share your favorite music list with your friends on Youtube since Youtube is not designed to host files that are purely audio. Only video files are allowed to be uploaded to its server. Despite all this, is there a safe and easy solution to this issue? The answer if absolutely Yes! Wondershare audio converter let you upload an MP3 to Youtube by converting them to videos files first without losing any of its quality, helping you remove the barrier of uploading audio files to Youtube.
With it, you can not only add pictures to your MP3 files but also retouch them with various fantastic effects. Now follow the steps below to check out how to achieve it.
1 Import Files to Audio Converter
Before upload MP3 to YouTube, you can collect the relevant image, album cover or band picture to your music. Then run this MP3 to YouTube converter and choose 16:9 or 4:3 ratio according to your needs. After that, click “Import” to add the MP3 file and the pictures to the program. Then all the imported files will be displayed as thumbnails in the Media library.
2 Add Pictures to MP3 Files
Drag and drop your MP3 file to the music layer, and the picture to the video layer. These will be located under the timeline bar. Then choose the picture and move your mouse to expand the picture exposure time frame exactly as long as your MP3 file. If less, the remaining part will be blacked out, while too long will create silence in the overextended portions of the video.
If you want to add and show multiple pictures at a time for a single MP3 file, drag-n-drop them to the PIP layers. This MP3 to YouTube converter supports up to 10 pictures for the same MP3 file. Then adjust the position and size of each picture. You can also do more touch up to your creation. For example, you can right click and choose edit to add motion, mask and more effects as you like.
3 Directly Upload MP3s to YouTube
Watch and check the audio quality of your video. When you are satisfied, click “Create” and switch to the YouTube tab. Enter your YouTube Account, Password and related MP3 information to directly upload your works to YouTube.
Tip:
Besides uploading to YouTube, you can also save your creation to various formats and play on different devices or burn to DVD.
See, it’s easy convert MP3 to YouTube using this powerful video editing tool. Download and have a try now!
Richard Bennett
Richard Bennett is a writer and a lover of all things video.
Follow @Richard Bennett
Also read:
- [New] Content Creators' Dilemma Which Site Reigns - Vimeo, YouTube?
- [New] Day Jobs & Digital Passion Striking a Balance for 2024
- [Updated] Elevating Your Content Strategy YouTube Keywords Explained
- [Updated] Finding Your YouTube-Stored Melodies Easily for 2024
- [Updated] In 2024, Battlefront Bastion 100+ Epic Game Battles
- [Updated] Unveiling VRecorder Download & Install Made Simple
- 2024 Approved A Tactical Approach to YouTube Video Enhancement with iMovie
- How Can I Recover Corrupted PDF v2.0 File
- In 2024, Accelerate Your Channel Growth - Affordable Subscribers Available
- In 2024, How to Cast Motorola Moto G84 5G to Computer for iPhone and Android? | Dr.fone
- In 2024, Unlock iPhone 12 Pro Without Passcode Easily
- In 2024, Unova Stone Pokémon Go Evolution List and How Catch Them For Lava Agni 2 5G | Dr.fone
- Step-by-Step Guide for Earning From Every YouTube Short
- Unboxing Kuxiu X36 Pro Max - A Comprehensive Test of the Top No-Cost Floating iPad Support
- Youngest Entrepreneur in Media Lands Fortune Peak
- YouTube Glamour A Guide to Video Color Balance
- YouTube Shorts Fund How to Maximize Your Earnings
- Title: Jumpstart Your YouTube Channel Growth with Key Editing Skills From Sony Vegas
- Author: Brian
- Created at : 2024-11-01 23:02:25
- Updated at : 2024-11-04 21:44:54
- Link: https://youtube-video-recordings.techidaily.com/jumpstart-your-youtube-channel-growth-with-key-editing-skills-from-sony-vegas/
- License: This work is licensed under CC BY-NC-SA 4.0.