
:max_bytes(150000):strip_icc()/lg-screen-share-menu-yellow-819f174e11fa46eb9ab39a80d20a6872.jpg)
Infuse Vibrancy in YT Image Previews with Neon Touches
Infuse Vibrancy in YT Image Previews with Neon Touches
Your YouTube video, or any other clip published on any forum, gets a larger number of hits if it has an attractive thumbnail. And, the fact is, a thumbnail becomes 10x more attractive when the main character that the image has have a neon border around it.
With that said, in the following sections, you will learn a couple of methods on how to add a YouTube thumbnail border around the main characters and/or objects that are significant to the clip.
In this article
01 Add Glowing Neon Border to YouTube Thumbnail with Filmora
02 Add a Glowing Neon Border in YouTube Thumbnail with Canva
03 Outline a Person in a YouTube Thumbnail with Photoshop
Part 1: How to Add Neon Border to YouTube Thumbnail for Free with Filmora
Being one of the most versatile and intuitive post-production tools available in the market today, Wondershare Filmora X allows you to add a neon border to a YouTube thumbnail quite conveniently. You can learn how to get this done on Windows or Mac by following the steps given below.
For Win 7 or later (64-bit)
For macOS 10.12 or later
Step 1: Define Project Settings and Add Image to the Timeline
Launch Wondershare Filmora X on your PC (a MacBook Pro M1 is used here), ensure that the project aspect ratio is set to 16:9 (Widescreen) on the splash screen, and click New Project. On the main interface, click the Preview quality and display settings icon from the upper-right area of the Timeline, click Change Project Aspect Ratio, click to select 1280 x 720 (HD) from the Resolution menu of the Project Settings box, and click OK to save the custom project settings.

Then select My Media from the menu bar if not already selected, click Project Media from the navigation pane, and click Import from the Media box to select and import the image of the main character or object that you want to use in the thumbnail.

Now, drag the image from the Media box to the Timeline at the bottom.

Step 2: Clear Image Background, Add Border, and Add Custom Background
Go to Effects from the menu bar, click to select the Default tab and then AI Portrait from the navigation pane, and click and drag the Human Segmentation preset from the right box, and place it over the image track in the Timeline.

Double-click the image layer, scroll down the upper-left box to the Video Effects section, and use the Edge Thickness and Edge Feather sliders to adjust the character’s edges to make them as realistic as possible. Click OK when done.

Next, click and drag the Human Border preset over the image track in the Timeline, and follow the same procedure to customize the border. This will give the character a neon border effect.

Now, use the method explained earlier to import a custom image for the background, and drag and place it under the previous track in the Timeline.

If you are running the latest version of Filmora, you will find there are some neon light effects available under AI Portrait as well.

Step 3: Add Titles to Thumbnail
Go to Titles from the menu bar, click to select the Default tab and then Lower 3rds from the navigation pane, and click and drag your preferred lower-third preset from the right window to a separate layer in the Timeline. Double-click the lower-third layer, and use the available options in the upper-left window to change the text, its color, etc., and drag the textbox to place it to your preferred position on the image as well. Click OK to save the changes.
Next, click to select Titles from the navigation pane, and drag your preferred title from the right window to the upper-most track in the Timeline. Now use the method explained earlier to edit the text, its color, position, etc. to make it look professional.

For more tips and tricks for creating YouTube thumbnail, you can check this You Tube thumbnail creating guide.
Step 4: Get the Neon Border Thumbnail
Click the Snapshot (Camera) icon from the upper-right area of the Timeline, go to My Media from the menu bar, right-click the thumbnail of the screenshot you captured, and click Reveal in Finder (on Mac) or Reveal in Explorer (on Windows) to get to the folder the YouTube thumbnail border is saved in.

Part 2: How to Add a Glowing Neon Border in Your YouTube Thumbnail with Canva
Canva is another intuitive editing program that works on the web interface rather than having you download and install an app on your PC. You can add a neon border for YouTube thumbnails using Canva by following the instructions given below:
Step 1: Define Project Settings and Add a Background
After signing in to your Canva account, click Create a design from the top-right corner of the page, click Custom size from the bottom, define 1280 and 720 in the Width and Height fields on the box that appears respectively, and click Create new design.

Now, click to select Background from the navigation bar on the left (if the Background tool is not visible, click More and then choose Background from the expanded list), and click to select a background from the images available in the center pane.

Step 2: Upload an Image and Add Effects
Click Uploads from the navigation bar, click the More icon from the right of the Upload media button present at the top of the center pane, choose your preferred method to upload the image (with the transparent background) that you want to use, upload the image, and drag it from the center pane to the Canvas.
Note: You can use any of the tools available online to remove the background from your image for free.

To add a YouTube thumbnail border, make sure that the image that you added to the Canvas is selected, click the Duplicate icon from the upper-right area, and use the scaling handles of the copy of the image to increase its size a bit. Reposition the image back to its original location as well.
Then, click Edit image from the upper-left corner of the Canvas, click Duotone from the Edit image pane at the center, if need be, click See all, choose your preferred duotone effect to apply on the image, choose your preferred highlight and shadow colors from the box that appears next, and click Back from the top of the pane.

Next, click See all next to the Adjust section from the center pane, and drag the Blur slider to the right to increase the blur effect on the image.

Step 3: Position the Layers
While keeping the duplicate image selected, click the Position button from the upper-right area of the Canvas, and click Background to send the second image behind the first one to get the neon border effect for the photo.

Part 3: How to Outline a Person in a YouTube Thumbnail with Photoshop
Because YouTube thumbnails are nothing but static images, creating YouTube thumbnail border with Adobe Photoshop is comparatively easier. The process of doing this is given below:
Step 1: Define Document Preferences and Import an Image
Launch Adobe Photoshop on your PC, click Create new, and on the New Document customization box, define the width and height values to 1280 and 720 pixels respectively. Select Transparent from the Background Contents menu as well if not already selected. Click Create from the bottom to create a new Photoshop document with the specified document settings. Next, open the folder that contains the source image, drag the photo to Photoshop, and press Enter to place the photo.

Step 2: Remove Background from the Image
Make sure that the image layer is selected in the Layers panel on the right, go to Select from the menu bar at the top, and click Subject. From the bottom of the Layers panel, click the Add a mask icon to get rid of the background, leaving only the human on the Canvas.

Step 3: Add a Custom Background and an Outline Around the Subject
Use the method explained earlier to import a background image of your choice to Photoshop. Drag the background image layer to the bottom in the Layers panel. Double-click the masked layer, click to select Stroke from the left pane of the Layer Style box, and use the options available on the right to manage the size, color, position, etc. of the stroke that has been added around the human subject. Click OK when done, and then export the image normally to use it as a YouTube thumbnail border.

Summary
It is important to know that the default resolution of a YouTube thumbnail is 1280 x 720 pixels that is usually written and referred to as 720p. While adding a YouTube thumbnail border, it is also imperative to have a good sense of color combination and fonts. Furthermore, a decent tool like Wondershare Filmora X must be used to add an appealing neon border around the main subject in the thumbnail image easily and quickly.
02 Add a Glowing Neon Border in YouTube Thumbnail with Canva
03 Outline a Person in a YouTube Thumbnail with Photoshop
Part 1: How to Add Neon Border to YouTube Thumbnail for Free with Filmora
Being one of the most versatile and intuitive post-production tools available in the market today, Wondershare Filmora X allows you to add a neon border to a YouTube thumbnail quite conveniently. You can learn how to get this done on Windows or Mac by following the steps given below.
For Win 7 or later (64-bit)
For macOS 10.12 or later
Step 1: Define Project Settings and Add Image to the Timeline
Launch Wondershare Filmora X on your PC (a MacBook Pro M1 is used here), ensure that the project aspect ratio is set to 16:9 (Widescreen) on the splash screen, and click New Project. On the main interface, click the Preview quality and display settings icon from the upper-right area of the Timeline, click Change Project Aspect Ratio, click to select 1280 x 720 (HD) from the Resolution menu of the Project Settings box, and click OK to save the custom project settings.
Then select My Media from the menu bar if not already selected, click Project Media from the navigation pane, and click Import from the Media box to select and import the image of the main character or object that you want to use in the thumbnail.
Now, drag the image from the Media box to the Timeline at the bottom.
Step 2: Clear Image Background, Add Border, and Add Custom Background
Go to Effects from the menu bar, click to select the Default tab and then AI Portrait from the navigation pane, and click and drag the Human Segmentation preset from the right box, and place it over the image track in the Timeline.
Double-click the image layer, scroll down the upper-left box to the Video Effects section, and use the Edge Thickness and Edge Feather sliders to adjust the character’s edges to make them as realistic as possible. Click OK when done.
Next, click and drag the Human Border preset over the image track in the Timeline, and follow the same procedure to customize the border. This will give the character a neon border effect.
Now, use the method explained earlier to import a custom image for the background, and drag and place it under the previous track in the Timeline.
If you are running the latest version of Filmora, you will find there are some neon light effects available under AI Portrait as well.
Step 3: Add Titles to Thumbnail
Go to Titles from the menu bar, click to select the Default tab and then Lower 3rds from the navigation pane, and click and drag your preferred lower-third preset from the right window to a separate layer in the Timeline. Double-click the lower-third layer, and use the available options in the upper-left window to change the text, its color, etc., and drag the textbox to place it to your preferred position on the image as well. Click OK to save the changes.
Next, click to select Titles from the navigation pane, and drag your preferred title from the right window to the upper-most track in the Timeline. Now use the method explained earlier to edit the text, its color, position, etc. to make it look professional.
For more tips and tricks for creating YouTube thumbnail, you can check this You Tube thumbnail creating guide.
Step 4: Get the Neon Border Thumbnail
Click the Snapshot (Camera) icon from the upper-right area of the Timeline, go to My Media from the menu bar, right-click the thumbnail of the screenshot you captured, and click Reveal in Finder (on Mac) or Reveal in Explorer (on Windows) to get to the folder the YouTube thumbnail border is saved in.
Part 2: How to Add a Glowing Neon Border in Your YouTube Thumbnail with Canva
Canva is another intuitive editing program that works on the web interface rather than having you download and install an app on your PC. You can add a neon border for YouTube thumbnails using Canva by following the instructions given below:
Step 1: Define Project Settings and Add a Background
After signing in to your Canva account, click Create a design from the top-right corner of the page, click Custom size from the bottom, define 1280 and 720 in the Width and Height fields on the box that appears respectively, and click Create new design.
Now, click to select Background from the navigation bar on the left (if the Background tool is not visible, click More and then choose Background from the expanded list), and click to select a background from the images available in the center pane.
Step 2: Upload an Image and Add Effects
Click Uploads from the navigation bar, click the More icon from the right of the Upload media button present at the top of the center pane, choose your preferred method to upload the image (with the transparent background) that you want to use, upload the image, and drag it from the center pane to the Canvas.
Note: You can use any of the tools available online to remove the background from your image for free.
To add a YouTube thumbnail border, make sure that the image that you added to the Canvas is selected, click the Duplicate icon from the upper-right area, and use the scaling handles of the copy of the image to increase its size a bit. Reposition the image back to its original location as well.
Then, click Edit image from the upper-left corner of the Canvas, click Duotone from the Edit image pane at the center, if need be, click See all, choose your preferred duotone effect to apply on the image, choose your preferred highlight and shadow colors from the box that appears next, and click Back from the top of the pane.
Next, click See all next to the Adjust section from the center pane, and drag the Blur slider to the right to increase the blur effect on the image.
Step 3: Position the Layers
While keeping the duplicate image selected, click the Position button from the upper-right area of the Canvas, and click Background to send the second image behind the first one to get the neon border effect for the photo.
Part 3: How to Outline a Person in a YouTube Thumbnail with Photoshop
Because YouTube thumbnails are nothing but static images, creating YouTube thumbnail border with Adobe Photoshop is comparatively easier. The process of doing this is given below:
Step 1: Define Document Preferences and Import an Image
Launch Adobe Photoshop on your PC, click Create new, and on the New Document customization box, define the width and height values to 1280 and 720 pixels respectively. Select Transparent from the Background Contents menu as well if not already selected. Click Create from the bottom to create a new Photoshop document with the specified document settings. Next, open the folder that contains the source image, drag the photo to Photoshop, and press Enter to place the photo.
Step 2: Remove Background from the Image
Make sure that the image layer is selected in the Layers panel on the right, go to Select from the menu bar at the top, and click Subject. From the bottom of the Layers panel, click the Add a mask icon to get rid of the background, leaving only the human on the Canvas.
Step 3: Add a Custom Background and an Outline Around the Subject
Use the method explained earlier to import a background image of your choice to Photoshop. Drag the background image layer to the bottom in the Layers panel. Double-click the masked layer, click to select Stroke from the left pane of the Layer Style box, and use the options available on the right to manage the size, color, position, etc. of the stroke that has been added around the human subject. Click OK when done, and then export the image normally to use it as a YouTube thumbnail border.
Summary
It is important to know that the default resolution of a YouTube thumbnail is 1280 x 720 pixels that is usually written and referred to as 720p. While adding a YouTube thumbnail border, it is also imperative to have a good sense of color combination and fonts. Furthermore, a decent tool like Wondershare Filmora X must be used to add an appealing neon border around the main subject in the thumbnail image easily and quickly.
Spotlight on Top 8 Authentic YouTube Growth Tactics
Best YouTube Video Promotion Services (Real)

Liza Brown
Apr 28, 2024• Proven solutions
You don’t want to create a YouTube channel to post pointless and weird videos. It takes a lot of time and energy to create YouTube videos and to bring it to the forefront, so it is important to use a YouTube video promotion service. You would definitely want your videos to reach millions of people and not just get stuck within a few 100 views.
The YouTube promotion services are a highly effective tool for demonstrating your proficiency, creating your brand awareness, sharing information and facts, promoting events, engaging with the customers, and for building trustworthiness. With several benefits of promotional services, have you ever thought of promoting your YouTube videos? For real YouTube promotion of videos, here are the 8 best YouTube video promotion services that you may consider.
Best YouTube video maker - Filmora
If your budget is limited, here you can use Filmora to make amazing videos with free-to-use effects/audio/images. Download it now to have a try!
 Download Mac Version ](https://tools.techidaily.com/wondershare/filmora/download/ )
Best YouTube Video Promotion Service
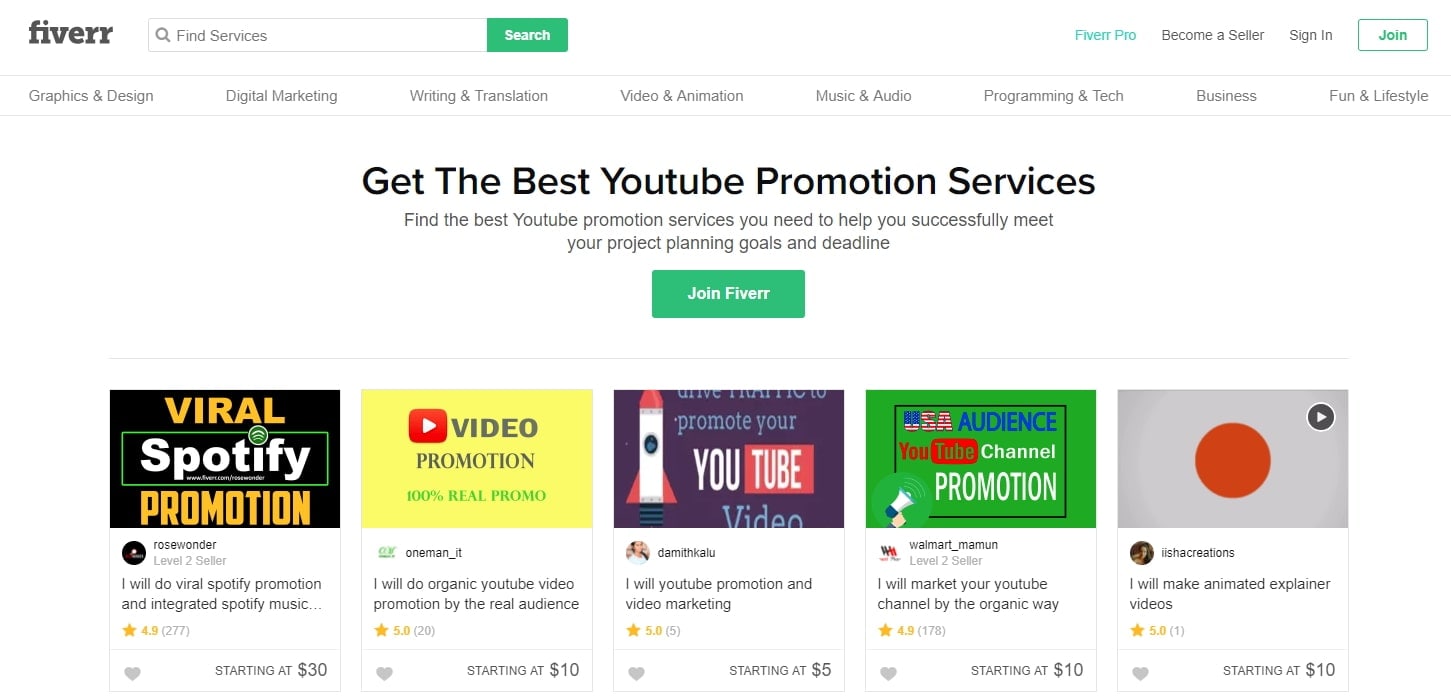
1. Fiverr
If you wish to successfully complete your project’s goals and deadlines, turn to the best YouTube promotional service, Fiverr. For real YouTube promotion of videos, you may choose from the premiere, standard and basic plans priced at $50 for 13 days, $25 for 10 days, and $5 for 9 days respectively.
You just need to describe your gig, compare and select packages, check out the recommendations and reviews and start the YouTube video promotion service. There are various categories like digital marketing, graphic designs, video animation, writing translation, etc. under which you can tag your video.
2. Push Views
If you wish to garner traffic or increase the fan following, opt for the Push views real YouTube promotion services. It is a simple yet effective tool that works on a fair pricing subscription. Push Views never dig a hole in your pocket as you may keep changing your promotional budget each week. The best part is you are not fooled by the gimmicks to overspend when you are using Push Views YouTube video promotion service.

3. SEO Task
Are you disheartened to find no views in your YouTube video? SEO Task is one of the best YouTube promotion services that offer focused solutions for the professionals targeting success in the world of the Internet. SEO Task is rapidly growing and keeps you in advance curve of the business with endless updates and releases. It helps with incredible reach, high engagement, increased traffic, improved SEO, trust building, and affordability.

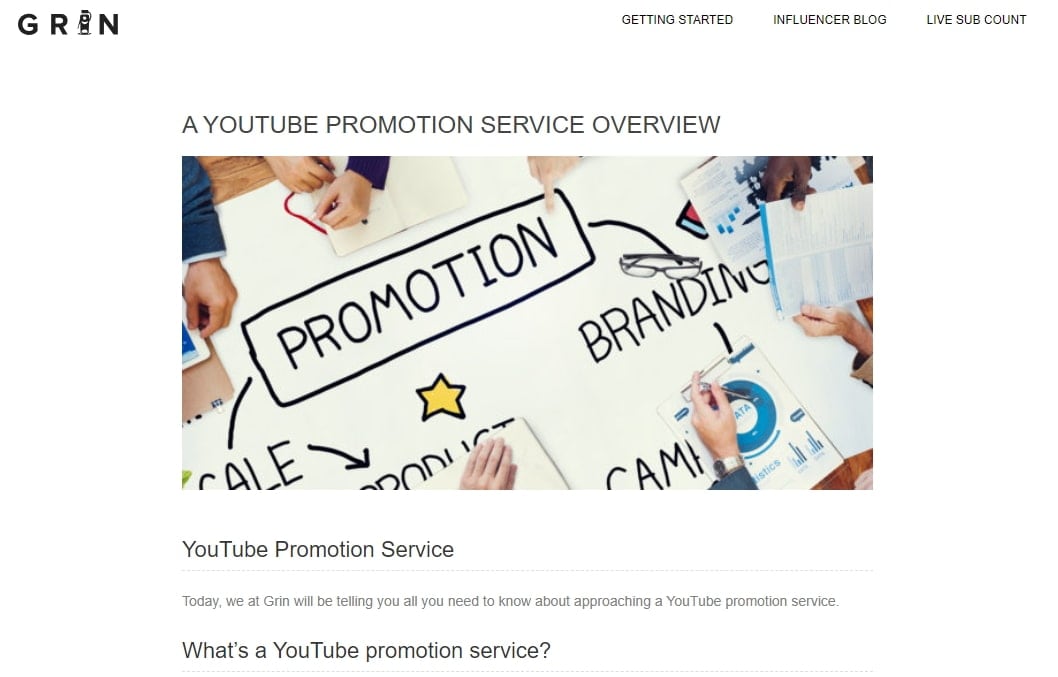
4. Grin
Grin is a real YouTube promotion service that helps you with shoutouts from superior YouTubers, criticism, and opinion from your counterparts and other YouTubers, partnerships with superior YouTubers and experts for a range of video editing/production. Shoutouts and collaborations can easily help new individual video creators to grow. If you want your YouTube video channel to look professional, you may hire designers, artists, motion editors, and audio technicians on our Marketplace and pay them.
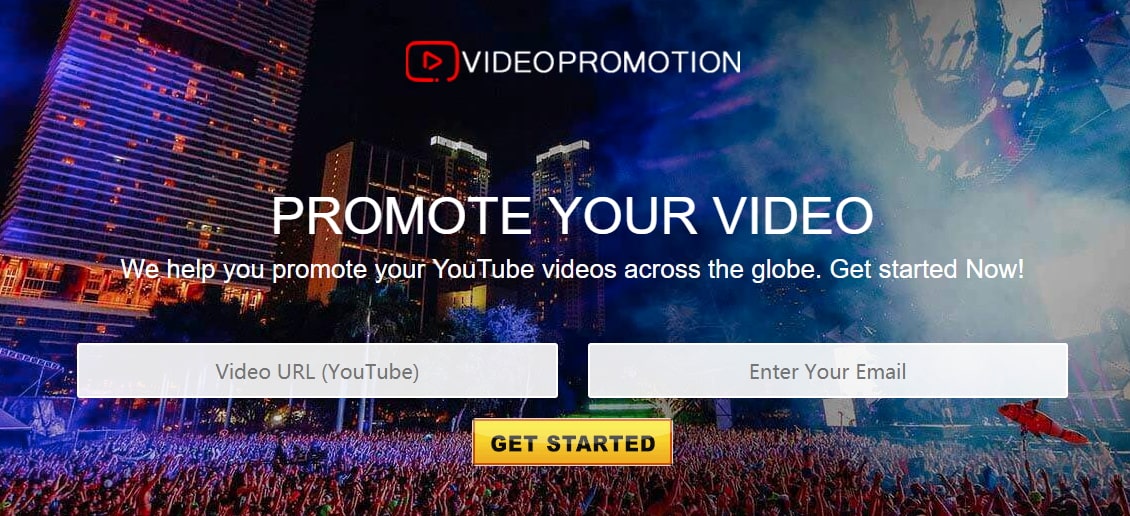
5. Video Promotion
One of the best and most reliable YouTube video promotion services, Video Promotion helps to bring in online engagement, target the viewers and creates exposure for your video to help it in becoming viral. Video Promotion helps to promote your videos on YouTube as well as other display networks and partners.
You can promote your video in just 3 easy steps. Enter the video URL you wish to promote, select the number of views you want and the country you want your video to be played. Then, use PayPal or the other available options to pay for the views and finally submit your order and wait for the representative to call you. The video is live for the viewers until it does not reach the number of views you have paid for.
6. RNS Agency
RNS Agency is one of the easiest YouTube promotion services providers as in just 4 easy steps you can promote your YouTube video with this real YouTube promotion tool. Just sign up on the RNS website to promote your video.
You need to point the video that you wish to run the ad campaign on and select the number of audiences you are targeting. Your video is promoted across the globe to the relevant set of viewers who engage with your video and make you a successful and popular YouTuber. There are 6 packages with several payment options for you to choose from.

7. Juss Russ
Juss Russ offers two packages for real YouTube promotion. The basic package is priced at $49.99 and includes 1000 new views. Your videos get featured on their Twitter handle and also on Juss Russ radio. The video blast is for around 500 subscribers.
The premium package is priced at $149.99 and includes 5000 views. Apart from the views, you receive comments and likes, your video is featured on Juss Russ Twitter handle, Radio, and on Artists sounds. Juss Russ places your content in strategic places to locate your target audience.
8. Sparxit Solutions
With Sparxit Solutions YouTube promotion services, your video searchability on this most popular platform is effectively enhanced. The YouTube video promotion service offered by Sparxit Solutions allows you to boost your YouTube video and make it a brand amongst the users. The effective and powerful services help you out to appear more prominently in the YouTube search results.
Conclusion
Now, that you know how important YouTube video promotion services are, you may opt for anyone from the above list of real YouTube video promotion providers to enhance your video and garner relevant viewers, likes and comments. Increase the awareness of your brand and/or product among the masses by opting for the right YouTube video promotion service.
Liza Brown
Liza Brown is a writer and a lover of all things video.
Follow @Liza Brown
Liza Brown
Apr 28, 2024• Proven solutions
You don’t want to create a YouTube channel to post pointless and weird videos. It takes a lot of time and energy to create YouTube videos and to bring it to the forefront, so it is important to use a YouTube video promotion service. You would definitely want your videos to reach millions of people and not just get stuck within a few 100 views.
The YouTube promotion services are a highly effective tool for demonstrating your proficiency, creating your brand awareness, sharing information and facts, promoting events, engaging with the customers, and for building trustworthiness. With several benefits of promotional services, have you ever thought of promoting your YouTube videos? For real YouTube promotion of videos, here are the 8 best YouTube video promotion services that you may consider.
Best YouTube video maker - Filmora
If your budget is limited, here you can use Filmora to make amazing videos with free-to-use effects/audio/images. Download it now to have a try!
Download Mac Version ](https://tools.techidaily.com/wondershare/filmora/download/ )
Best YouTube Video Promotion Service
1. Fiverr
If you wish to successfully complete your project’s goals and deadlines, turn to the best YouTube promotional service, Fiverr. For real YouTube promotion of videos, you may choose from the premiere, standard and basic plans priced at $50 for 13 days, $25 for 10 days, and $5 for 9 days respectively.
You just need to describe your gig, compare and select packages, check out the recommendations and reviews and start the YouTube video promotion service. There are various categories like digital marketing, graphic designs, video animation, writing translation, etc. under which you can tag your video.
2. Push Views
If you wish to garner traffic or increase the fan following, opt for the Push views real YouTube promotion services. It is a simple yet effective tool that works on a fair pricing subscription. Push Views never dig a hole in your pocket as you may keep changing your promotional budget each week. The best part is you are not fooled by the gimmicks to overspend when you are using Push Views YouTube video promotion service.
3. SEO Task
Are you disheartened to find no views in your YouTube video? SEO Task is one of the best YouTube promotion services that offer focused solutions for the professionals targeting success in the world of the Internet. SEO Task is rapidly growing and keeps you in advance curve of the business with endless updates and releases. It helps with incredible reach, high engagement, increased traffic, improved SEO, trust building, and affordability.
4. Grin
Grin is a real YouTube promotion service that helps you with shoutouts from superior YouTubers, criticism, and opinion from your counterparts and other YouTubers, partnerships with superior YouTubers and experts for a range of video editing/production. Shoutouts and collaborations can easily help new individual video creators to grow. If you want your YouTube video channel to look professional, you may hire designers, artists, motion editors, and audio technicians on our Marketplace and pay them.
5. Video Promotion
One of the best and most reliable YouTube video promotion services, Video Promotion helps to bring in online engagement, target the viewers and creates exposure for your video to help it in becoming viral. Video Promotion helps to promote your videos on YouTube as well as other display networks and partners.
You can promote your video in just 3 easy steps. Enter the video URL you wish to promote, select the number of views you want and the country you want your video to be played. Then, use PayPal or the other available options to pay for the views and finally submit your order and wait for the representative to call you. The video is live for the viewers until it does not reach the number of views you have paid for.
6. RNS Agency
RNS Agency is one of the easiest YouTube promotion services providers as in just 4 easy steps you can promote your YouTube video with this real YouTube promotion tool. Just sign up on the RNS website to promote your video.
You need to point the video that you wish to run the ad campaign on and select the number of audiences you are targeting. Your video is promoted across the globe to the relevant set of viewers who engage with your video and make you a successful and popular YouTuber. There are 6 packages with several payment options for you to choose from.
7. Juss Russ
Juss Russ offers two packages for real YouTube promotion. The basic package is priced at $49.99 and includes 1000 new views. Your videos get featured on their Twitter handle and also on Juss Russ radio. The video blast is for around 500 subscribers.
The premium package is priced at $149.99 and includes 5000 views. Apart from the views, you receive comments and likes, your video is featured on Juss Russ Twitter handle, Radio, and on Artists sounds. Juss Russ places your content in strategic places to locate your target audience.
8. Sparxit Solutions
With Sparxit Solutions YouTube promotion services, your video searchability on this most popular platform is effectively enhanced. The YouTube video promotion service offered by Sparxit Solutions allows you to boost your YouTube video and make it a brand amongst the users. The effective and powerful services help you out to appear more prominently in the YouTube search results.
Conclusion
Now, that you know how important YouTube video promotion services are, you may opt for anyone from the above list of real YouTube video promotion providers to enhance your video and garner relevant viewers, likes and comments. Increase the awareness of your brand and/or product among the masses by opting for the right YouTube video promotion service.
Liza Brown
Liza Brown is a writer and a lover of all things video.
Follow @Liza Brown
Also read:
- In 2024, Clearing Up that Persistent Green Tint in YouTube Videos on Mac
- [Updated] Essential Tips for Editing Your Videos in YouTube Studio
- Craft Your Story with Immersive YouTube Video Editing Tips
- 2024 Approved Boost Your Video Impact Expert Tips on Using WM Maker
- Beginning a Blogging Journey Profit From Your Passion for 2024
- Coordinating a Course Through Combined YouTube Watches
- Elevate Your YouTube Presence Filmmaking with Filmora
- In 2024, Economical Camera Options Best Deals for DIY Vloggers
- Settle in for a Screen Spectacle – The Best Free Movies on YouTube
- 2024 Approved Elevating Content Strategy Through YouTube Metrics
- Cultivate Creativity 10+ Channel-Driven Video Suggestions
- 24 Hour Heavyweights Top 10 Most Watched on YT
- [Updated] Essential YouTube Equipment For Starting Your Channel - What Do You Really Need?
- [New] 7 Uncomplicated Steps for Skyrocketing Subscribers
- In 2024, Audio Anomalies Essential Rhythm Altering Tools
- Direct Video Transfer A Compreenas Guide to YouTube + TikTok Integration for 2024
- Enhance Visibility YouTube Thumbnails Made Simple for 2024
- A Complete List of Creative and Catchy YouTube Channel Titles for Modern Blogging (Maximum Length 156 Characters) for 2024
- [New] Dancing to the Tune YouTube's Hottest Music Video Responses, '23
- The Ultimate Audio Companion Top 5 Gaming Devices
- In 2024, Constructive Communication Leads to More Subscribers
- The Ultimate SEO Playbook Increase Channels with Effortless Techniques
- [Updated] Tranquility Trove PC's Best Bets for 2024
- Updated Unearth the Sound Artifact Signifying a Bells Ring
- In 2024, How To Unlock iPhone 13 mini Without Passcode? 4 Easy Methods
- How to recover old messages from your Honor X8b
- Full Guide How To Fix Connection Is Not Private on Realme C51 | Dr.fone
- In 2024, Catch or Beat Sleeping Snorlax on Pokemon Go For Honor Magic V2 | Dr.fone
- In 2024, Pure Video Downloads From TikTok – No Watermark Required
- 2024 Approved Produce Professional-Looking Videos with FCPX Stabilization Tools
- [Updated] 2024 Approved Swift Systems Simplified Screen Capture Procedures (Dell)
- 7 Fixes for Unfortunately, Phone Has Stopped on Xiaomi Redmi Note 12 Pro 5G | Dr.fone
- TikTok Groove Made Simple for Mac Users
- In 2024, Cutting-Edge Techniques for Efficient HP Notebook Screen Recording
- [New] Discover Easy MP4 File Capture Methods for 2024
- Real-Time Unfollowers Detection on Insta for 2024
- Title: Infuse Vibrancy in YT Image Previews with Neon Touches
- Author: Brian
- Created at : 2024-05-25 12:17:01
- Updated at : 2024-05-26 12:17:01
- Link: https://youtube-video-recordings.techidaily.com/infuse-vibrancy-in-yt-image-previews-with-neon-touches/
- License: This work is licensed under CC BY-NC-SA 4.0.
