
:max_bytes(150000):strip_icc()/GettyImages-153126740-584f1ddc3df78c491e4b2c60.jpg)
In 2024, Essential Recording Steps for YouTube Audio Extraction
Essential Recording Steps for YouTube Audio Extraction
How to Record Audio from YouTube

Max Wales
Mar 27, 2024• Proven solutions
It happens several times when we are watching some videos on YouTube and the background music of the videos appeal us the most. We go online and start searching for that unknown but heart touching song. Unfortunately, the song is not available online. But it doesn’t mean that you cannot add that song to your playlist. The great news is that there are so many advanced audio recording software tools that allow users to record audios directly from YouTube videos.
Sometimes, we are interested to play our favorite music during a long hour journey, but the missing internet connectivity does not allow us to stream it online. In such a situation also, you can get your free music easily on your iPad, iPhone, or any handheld device and it can be later burnt into CD as well. Now you might be interested to know how all this can happen without the “Record Audio” button on YouTube. Don’t worry! Below we have highlighted three simple methods to do this task:
- Method 1: Capture Audio from YouTube with Online YouTube2MP3 Converter
- Method 2: Recording YouTube Audio with Audacity
- Method 3: Recording Sound with Streaming Audio Recorder
- Method 4: Record Audio with Filmora
Note: We resolutely oppose all forms of copyright-infringing downloads. This tutorial is only for downloading YouTube videos/audio materials from your own channel.
![]()

The All-in-One Screen Recorder & Video Editor
- Record desktop screen , voiceover, and webcam simultaneously
- Edit recorded clips quickly with a wide range of professional tools
- Built-in plentiful templates and effects
- Export to MP4, MOV, MKV, GIF and multiple formats
For Win 7 or later (64-bit)
For macOS 10.12 or later
 Secure Download
Method 1: Capture Audio from YouTube with Online YouTube2MP3 Converter
The simplest technique to record audio from YouTube videos is to use a trustworthy online application that can perform the conversion from video to MP3 file . In this article, I am going to show you how to capture audio from YouTube with the assist of a free online convert tool named YouTube to MP3. To do this, simply follow these simple steps:

- Visit the YouTube video page and copy the URL of the video whose audio you want to get in form of an MP3
- Go to the internet and open the online YouTube to MP3 converter tool.
- Paste your video URL in the text field available at the top of the website page.
- Choose your output file format as mp3.
- Hit the Convert conversion button.
- When the conversion is done, you will get a download button on the screen. Hit the Download button and soon your file will be saved to your device.
If you think using YouTube to MP3 Converter to capture audio from YouTube meets your needs, you can visit this online converter: youtubetomp3music.com . While, if you find need a better solution, then keep reading.
Method 2: Recording Sound from YouTube with Audacity
In case if you are interested to record yourself or want to capture just a small portion of the video’s sound, it is good to start with the Audacity program. Following simple steps will assist you to complete your recording process with this handy tool:
- First, download the Audacity program on your system. Note that it is available for free, so anyone can get it easily from the internet.
- Run the setup to begin the installation process and follow on-screen guidelines to finish the process.
- Open Audacity software on your system and from the top menu bar hit the Edit option and then go to Preferences.

- In the Device section of Preferences window, switch to the Recording section.
- Choose Stereo Mix option. In case if it is disabled by default, you may need to enable it first. To do this, go to the control panel of your computer, go to Hardware and Sound section and then switch to Sound section. Now go to Recording tab and right click with the mouse on the blank space of the screen. From the drop-down menu choose Show Disabled Devices option. You will find Stereo Mix Device option on the screen; right click on this device and hit Enable option.

- Hit Ok to save the new sound settings. After these settings, you will have to open the Audacity program again to work with Stereo Mix option.
- It is time to open your YouTube video and hit the record button. Make sure the connection is fast enough to play video without any interruption, otherwise keep it loaded in advance. Play the video and when done, hit the stop button on Audacity program.
- This file can be exported and saved to a device with the MP3 file format.
Method 3: Recording Sound with Streaming Audio Recorder
The third choice for recording YouTube audios is using Streaming Audio Recorder . The great news is that this software cannot only record audios for you rather at the same time it is loaded with advanced editor tool that allows easy cutting and splicing of sounds for the creation of customized videos. With Streaming Audio Recorder, you can also convert your videos into various file formats.
You will be happy to hear that this recorder is not just dedicated to YouTube platform only rather it can also work perfectly with Grooveshark, Jango, and Spotify. Below are few simple steps that you can use to complete the audio recording task with Streaming Audio Recorder:

- Go to the internet and download Streaming Audio Recorder. Install and open the program.
- Hit gear icon on the main interface and then move to settings. Set source of the audio input as System Sound.
- Start playing your desired YouTube video and on recorder, hit the record button instantly.
- As soon as the recording task is complete, hit the Stop button and your recorded audio will be soon saved to the targeted folder.
Recommended: Record Audio and Save to MP3 Format with Wondershare Filmora


You can also use Filmora to record your YouTube audio and then save the recorded audio or the video to MP3 format at exporting and then you can listen to the recorded audio and music even when there is no network connection.
With these advanced tools, the audio recording task becomes quite simple and easy. Even beginners can handle with without any trouble. If you are interested to capture your favorite tracks from online videos, it is right time to choose any of the above suitable methods and start recording your audio.
You can change the voice in audio , or add fade in and fade out effects, or edit the recorded audio file with more tools. The recorded media files can be further customized as well as shared on other social media platforms. It is a great idea for today’s creative young generation. These handy tools can make your audio recording task quite easier and resultant files can be saved in a variety of file formats for further sharing.
If you want to edit the record audio further, like adjust the audio pitch, remove background noise, mix the audio balance, equalize the audio, you can also try Filmora. It allows you to record the audio, webcam and desktop screen automatically . And it works on 64-bit Windows7/8/10, and Mac OS X 10.11 El Capitan and late.
Max Wales
Max Wales is a writer and a lover of all things video.
Follow @Max Wales
Max Wales
Mar 27, 2024• Proven solutions
It happens several times when we are watching some videos on YouTube and the background music of the videos appeal us the most. We go online and start searching for that unknown but heart touching song. Unfortunately, the song is not available online. But it doesn’t mean that you cannot add that song to your playlist. The great news is that there are so many advanced audio recording software tools that allow users to record audios directly from YouTube videos.
Sometimes, we are interested to play our favorite music during a long hour journey, but the missing internet connectivity does not allow us to stream it online. In such a situation also, you can get your free music easily on your iPad, iPhone, or any handheld device and it can be later burnt into CD as well. Now you might be interested to know how all this can happen without the “Record Audio” button on YouTube. Don’t worry! Below we have highlighted three simple methods to do this task:
- Method 1: Capture Audio from YouTube with Online YouTube2MP3 Converter
- Method 2: Recording YouTube Audio with Audacity
- Method 3: Recording Sound with Streaming Audio Recorder
- Method 4: Record Audio with Filmora
Note: We resolutely oppose all forms of copyright-infringing downloads. This tutorial is only for downloading YouTube videos/audio materials from your own channel.
![]()
The All-in-One Screen Recorder & Video Editor
- Record desktop screen , voiceover, and webcam simultaneously
- Edit recorded clips quickly with a wide range of professional tools
- Built-in plentiful templates and effects
- Export to MP4, MOV, MKV, GIF and multiple formats
For Win 7 or later (64-bit)
For macOS 10.12 or later
Secure Download
Method 1: Capture Audio from YouTube with Online YouTube2MP3 Converter
The simplest technique to record audio from YouTube videos is to use a trustworthy online application that can perform the conversion from video to MP3 file . In this article, I am going to show you how to capture audio from YouTube with the assist of a free online convert tool named YouTube to MP3. To do this, simply follow these simple steps:
- Visit the YouTube video page and copy the URL of the video whose audio you want to get in form of an MP3
- Go to the internet and open the online YouTube to MP3 converter tool.
- Paste your video URL in the text field available at the top of the website page.
- Choose your output file format as mp3.
- Hit the Convert conversion button.
- When the conversion is done, you will get a download button on the screen. Hit the Download button and soon your file will be saved to your device.
If you think using YouTube to MP3 Converter to capture audio from YouTube meets your needs, you can visit this online converter: youtubetomp3music.com . While, if you find need a better solution, then keep reading.
Method 2: Recording Sound from YouTube with Audacity
In case if you are interested to record yourself or want to capture just a small portion of the video’s sound, it is good to start with the Audacity program. Following simple steps will assist you to complete your recording process with this handy tool:
- First, download the Audacity program on your system. Note that it is available for free, so anyone can get it easily from the internet.
- Run the setup to begin the installation process and follow on-screen guidelines to finish the process.
- Open Audacity software on your system and from the top menu bar hit the Edit option and then go to Preferences.
- In the Device section of Preferences window, switch to the Recording section.
- Choose Stereo Mix option. In case if it is disabled by default, you may need to enable it first. To do this, go to the control panel of your computer, go to Hardware and Sound section and then switch to Sound section. Now go to Recording tab and right click with the mouse on the blank space of the screen. From the drop-down menu choose Show Disabled Devices option. You will find Stereo Mix Device option on the screen; right click on this device and hit Enable option.
- Hit Ok to save the new sound settings. After these settings, you will have to open the Audacity program again to work with Stereo Mix option.
- It is time to open your YouTube video and hit the record button. Make sure the connection is fast enough to play video without any interruption, otherwise keep it loaded in advance. Play the video and when done, hit the stop button on Audacity program.
- This file can be exported and saved to a device with the MP3 file format.
Method 3: Recording Sound with Streaming Audio Recorder
The third choice for recording YouTube audios is using Streaming Audio Recorder . The great news is that this software cannot only record audios for you rather at the same time it is loaded with advanced editor tool that allows easy cutting and splicing of sounds for the creation of customized videos. With Streaming Audio Recorder, you can also convert your videos into various file formats.
You will be happy to hear that this recorder is not just dedicated to YouTube platform only rather it can also work perfectly with Grooveshark, Jango, and Spotify. Below are few simple steps that you can use to complete the audio recording task with Streaming Audio Recorder:
- Go to the internet and download Streaming Audio Recorder. Install and open the program.
- Hit gear icon on the main interface and then move to settings. Set source of the audio input as System Sound.
- Start playing your desired YouTube video and on recorder, hit the record button instantly.
- As soon as the recording task is complete, hit the Stop button and your recorded audio will be soon saved to the targeted folder.
Recommended: Record Audio and Save to MP3 Format with Wondershare Filmora
You can also use Filmora to record your YouTube audio and then save the recorded audio or the video to MP3 format at exporting and then you can listen to the recorded audio and music even when there is no network connection.
With these advanced tools, the audio recording task becomes quite simple and easy. Even beginners can handle with without any trouble. If you are interested to capture your favorite tracks from online videos, it is right time to choose any of the above suitable methods and start recording your audio.
You can change the voice in audio , or add fade in and fade out effects, or edit the recorded audio file with more tools. The recorded media files can be further customized as well as shared on other social media platforms. It is a great idea for today’s creative young generation. These handy tools can make your audio recording task quite easier and resultant files can be saved in a variety of file formats for further sharing.
If you want to edit the record audio further, like adjust the audio pitch, remove background noise, mix the audio balance, equalize the audio, you can also try Filmora. It allows you to record the audio, webcam and desktop screen automatically . And it works on 64-bit Windows7/8/10, and Mac OS X 10.11 El Capitan and late.
Max Wales
Max Wales is a writer and a lover of all things video.
Follow @Max Wales
Foundations First: What To Invest In for YouTubing
Essential YouTube Equipment For Starting Your Channel - What Do You Really Need?

Richard Bennett
Oct 26, 2023• Proven solutions
Check out our most updated guide on this topic: YouTube Equipment Starter Guide For Beginners .
The first thing to make sure of before starting a YouTube channel is having all that you need to record and upload high-quality videos regularly. That doesn’t mean you have to take out a loan and spend thousands to purchase a brand new camera and all other gadgets that professional filmmakers use.
The smartest way to get started is to go through a list of necessary equipment for YouTube and check whether or not you already own some of it. Once your channel starts growing, you can then start thinking about whether you want to invest in upgraded equipment. Here is a quick overview of all items that you need to start entertaining your online audience and gaining subscribers to your YouTube channel:
- Your YouTube Camera
- Microphones and Audio
- Lighting Gear for YouTube
- Tripods and Camera Stands
- Smartphone Camera Gear
YouTube Cameras
The short version: Use whatever you already have, even if it’s your phone or webcam. It’s nice to have sharp, fine-tuned, 4K footage, but viewers will forgive lower visual quality if your content is good.
The long version: You will need a camera, but there are a lot of different devices you can use including DSLRs, point and shoots, webcams, and your smartphone.
Your choice of camera will have a tremendous impact on the visual quality of your content and might drive your decisions regarding other pieces of equipment. However, you shouldn’t feel obliged to work with a top-notch camera from day one, especially since cheaper options can produce great results if used the right way.
On one end of the spectrum, you have basic smartphone cameras and web cameras, which are easy to come by and simple to operate. These days, high-end phones come equipped with quite powerful cameras that are more than sufficient for the needs of the average YouTuber. Better webcams can also do the job, although high-performance webcam models can get pretty expensive too. It is probably wise to resist the urge to start broadcasting with the built-in camera in your laptop and at least get a webcam or use your phone, but your computer’s camera is still always an option. Not having a better camera should never stop you from making YouTube videos.
If you already have a DSLR camera then it’s a good idea to familiarize yourself with it. You have far more freedom to adjust the settings and achieve a professional look for your videos with a DSLR, but that does mean it’ll take some time to become an expert at using it. Ultra-high resolution is not required for YouTube, but it certainly won’t hurt to have additional sharpness and more detail in the scene. If you’re shopping for a DSLR, look for one with a flip screen that allows you to quickly check what your viewers see.
YouTube Microphone and Audio
The short version: Audio quality is extremely important. If you can buy either a new camera or an external microphone, but not both, it might be better to go for the microphone. Click here for advice on upping your audio quality without an external microphone.
The long version: Sound capturing is every bit as important for your success as your video feed. In fact, poor audio can be even more damaging to your subscriber count than grainy video, since people won’t spend their time listening to something they have to put effort into understanding.
Again, most YouTube video makers have a limited budget at their disposal, so professional microphones are mostly off the table. However, investing in a directional microphone (‘shotgun mic’) that can pick up your voice clearly and without background noise is certainly a smart move. Such microphones can be pointed towards you while you speak, and since most YouTubers sit still while doing their shows there won’t be too much need for in-session adjustments.
If you’re not ready to invest in a shotgun mic, you can also find very inexpensive (often under $20) LAV mics. These small microphones can be pinned to your shirt, which allows them to record very clear dialogue because they’re so close to your mouth.
Lights for YouTube
The short version: You need as much light as you can get. Lighting kits can be affordable on Amazon, but you can also achieve a great look using daylight/windows and ‘daylight’ lightbulbs.
The long version: If you’ve ever tried to make a video indoors, you already know that it’s necessary to have additional light. Often just filming with the normal lights in a room will cause your footage to look dark and grainy, and possibly be tinted orange. To overcome these problems you need to increase the amount of light you have available.
Sometimes, it is enough to film near windows and/or bring more household lamps into your filming area. For any household lamps or lighting fixtures you use, make sure to put in white or ‘daylight’ lightbulbs instead of using the orange/tungsten bulbs that you might have for everyday use (this is how you avoid tinting things orange).
If you have the budget available to get some lighting equipment, you can find softbox lights or LED panel lights available fairly inexpensively online. Softbox lights are great because they provide even, diffused, light.
Another useful piece of lighting equipment to have is a reflector. A reflector is usually a piece of white, silver, or gold fabric stretched over a frame. You can use it to bounce light from one light source back towards yourself (this is a great way to fill shadows cast by your main light). Reflectors tend to be inexpensive, but you can also use white cardboard or tinfoil in place of purchasing a reflector.
Tripods and Camera Stands
The short version: You need something to hold your camera. If you mostly film in your own home that can be a desk or a stack of books, but if you make a lot of videos while you’re on the go you probably need a tripod or gimbal. Heavier cameras need heavier tripods.
The long version: While handheld cameras can deliver solid results for vloggers and casual streamers, viewers do expect reasonably stable footage. For many types of videos, the camera needs to be completely still and flatly positioned on a horizontal plane. Tripods and camera stands can cost very little, so it’s a good idea to look into getting some kind of stabilizer.
When you are choosing a tripod, pay attention to how much it weighs. If the camera that needs to be mounted on it is very heavy (like some DSLR models), you want to ensure that the structure itself weighs enough not to be easily tipped over. Too thin tripods can put your camera at risk, and that’s the last thing you want. Smaller cameras such as GoPros are more flexible in this regard and can be placed on a wider range of tripods.
Even if you are using a phone or a webcam to record YouTube videos, you should consider mounting the device on a stable stand. It is possible to find mini tripods ideal for smartphones for as little as $10. These tripods are small enough to carry in your pocket, so you will be prepared to start making a video no matter where your adventures take you. If you are using a web camera, you should attach it to the stand so that it won’t move accidentally after you touch the surface it is placed on.
Smartphone Camera Gear
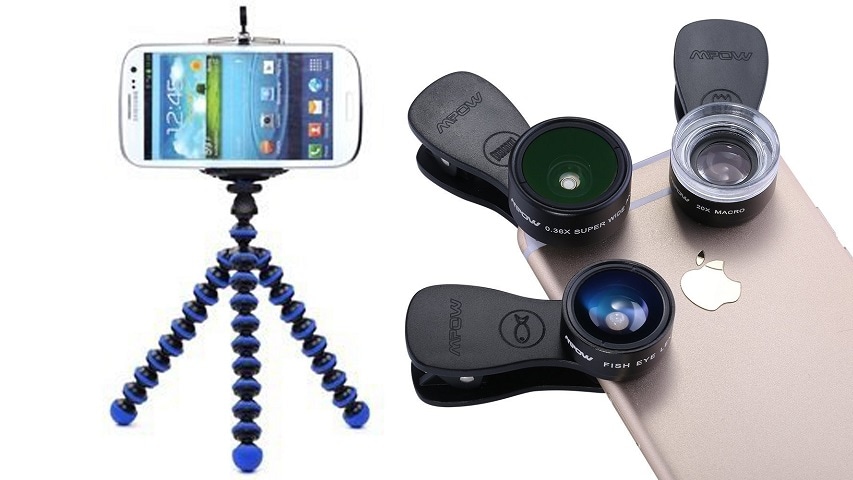
The short version: There’s a lot of gear out there designed with smartphone photos and videos in mind, including clip-on lenses, tripod mounts, phone-mounted LED lights, and inexpensive microphones that plug into the audio jack.
The long version: Recording your videos with a mobile phone can be a good decision. It all depends on the phone you have and the range of add-ons and apps that you complement it with. Almost every high-end model released in the past five years can shoot videos in 1080p or higher. Some can even produce 4K footage. If you perfect your smartphone filming technique, your YouTube videos could look as if they were made with pro equipment.
On the flip side, smartphone cameras typically perform poorly in low light. It is possible to download an app that lets you play around with settings to overcome this, but a phone-mounted LED light is probably a better solution. An external microphone might also be a necessity, but there are some good (inexpensive) options that can simply be plugged in through the headphone jack.
Another common downside of smartphone cameras is that most of them use digital zoom, which is vastly inferior to optical zoom. If you intend to shoot anything that’s further away than a few feet, you need a clip-on lens that goes on top of the built-in camera. This inexpensive device will give you a lot of freedom to work in space, and allow you to make spectacular shots even without high-end YouTube equipment.
Equipment with Easy-to-Use Video Editor
Richard Bennett
Richard Bennett is a writer and a lover of all things video.
Follow @Richard Bennett
Richard Bennett
Oct 26, 2023• Proven solutions
Check out our most updated guide on this topic: YouTube Equipment Starter Guide For Beginners .
The first thing to make sure of before starting a YouTube channel is having all that you need to record and upload high-quality videos regularly. That doesn’t mean you have to take out a loan and spend thousands to purchase a brand new camera and all other gadgets that professional filmmakers use.
The smartest way to get started is to go through a list of necessary equipment for YouTube and check whether or not you already own some of it. Once your channel starts growing, you can then start thinking about whether you want to invest in upgraded equipment. Here is a quick overview of all items that you need to start entertaining your online audience and gaining subscribers to your YouTube channel:
- Your YouTube Camera
- Microphones and Audio
- Lighting Gear for YouTube
- Tripods and Camera Stands
- Smartphone Camera Gear
YouTube Cameras
The short version: Use whatever you already have, even if it’s your phone or webcam. It’s nice to have sharp, fine-tuned, 4K footage, but viewers will forgive lower visual quality if your content is good.
The long version: You will need a camera, but there are a lot of different devices you can use including DSLRs, point and shoots, webcams, and your smartphone.
Your choice of camera will have a tremendous impact on the visual quality of your content and might drive your decisions regarding other pieces of equipment. However, you shouldn’t feel obliged to work with a top-notch camera from day one, especially since cheaper options can produce great results if used the right way.
On one end of the spectrum, you have basic smartphone cameras and web cameras, which are easy to come by and simple to operate. These days, high-end phones come equipped with quite powerful cameras that are more than sufficient for the needs of the average YouTuber. Better webcams can also do the job, although high-performance webcam models can get pretty expensive too. It is probably wise to resist the urge to start broadcasting with the built-in camera in your laptop and at least get a webcam or use your phone, but your computer’s camera is still always an option. Not having a better camera should never stop you from making YouTube videos.
If you already have a DSLR camera then it’s a good idea to familiarize yourself with it. You have far more freedom to adjust the settings and achieve a professional look for your videos with a DSLR, but that does mean it’ll take some time to become an expert at using it. Ultra-high resolution is not required for YouTube, but it certainly won’t hurt to have additional sharpness and more detail in the scene. If you’re shopping for a DSLR, look for one with a flip screen that allows you to quickly check what your viewers see.
YouTube Microphone and Audio
The short version: Audio quality is extremely important. If you can buy either a new camera or an external microphone, but not both, it might be better to go for the microphone. Click here for advice on upping your audio quality without an external microphone.
The long version: Sound capturing is every bit as important for your success as your video feed. In fact, poor audio can be even more damaging to your subscriber count than grainy video, since people won’t spend their time listening to something they have to put effort into understanding.
Again, most YouTube video makers have a limited budget at their disposal, so professional microphones are mostly off the table. However, investing in a directional microphone (‘shotgun mic’) that can pick up your voice clearly and without background noise is certainly a smart move. Such microphones can be pointed towards you while you speak, and since most YouTubers sit still while doing their shows there won’t be too much need for in-session adjustments.
If you’re not ready to invest in a shotgun mic, you can also find very inexpensive (often under $20) LAV mics. These small microphones can be pinned to your shirt, which allows them to record very clear dialogue because they’re so close to your mouth.
Lights for YouTube
The short version: You need as much light as you can get. Lighting kits can be affordable on Amazon, but you can also achieve a great look using daylight/windows and ‘daylight’ lightbulbs.
The long version: If you’ve ever tried to make a video indoors, you already know that it’s necessary to have additional light. Often just filming with the normal lights in a room will cause your footage to look dark and grainy, and possibly be tinted orange. To overcome these problems you need to increase the amount of light you have available.
Sometimes, it is enough to film near windows and/or bring more household lamps into your filming area. For any household lamps or lighting fixtures you use, make sure to put in white or ‘daylight’ lightbulbs instead of using the orange/tungsten bulbs that you might have for everyday use (this is how you avoid tinting things orange).
If you have the budget available to get some lighting equipment, you can find softbox lights or LED panel lights available fairly inexpensively online. Softbox lights are great because they provide even, diffused, light.
Another useful piece of lighting equipment to have is a reflector. A reflector is usually a piece of white, silver, or gold fabric stretched over a frame. You can use it to bounce light from one light source back towards yourself (this is a great way to fill shadows cast by your main light). Reflectors tend to be inexpensive, but you can also use white cardboard or tinfoil in place of purchasing a reflector.
Tripods and Camera Stands
The short version: You need something to hold your camera. If you mostly film in your own home that can be a desk or a stack of books, but if you make a lot of videos while you’re on the go you probably need a tripod or gimbal. Heavier cameras need heavier tripods.
The long version: While handheld cameras can deliver solid results for vloggers and casual streamers, viewers do expect reasonably stable footage. For many types of videos, the camera needs to be completely still and flatly positioned on a horizontal plane. Tripods and camera stands can cost very little, so it’s a good idea to look into getting some kind of stabilizer.
When you are choosing a tripod, pay attention to how much it weighs. If the camera that needs to be mounted on it is very heavy (like some DSLR models), you want to ensure that the structure itself weighs enough not to be easily tipped over. Too thin tripods can put your camera at risk, and that’s the last thing you want. Smaller cameras such as GoPros are more flexible in this regard and can be placed on a wider range of tripods.
Even if you are using a phone or a webcam to record YouTube videos, you should consider mounting the device on a stable stand. It is possible to find mini tripods ideal for smartphones for as little as $10. These tripods are small enough to carry in your pocket, so you will be prepared to start making a video no matter where your adventures take you. If you are using a web camera, you should attach it to the stand so that it won’t move accidentally after you touch the surface it is placed on.
Smartphone Camera Gear
The short version: There’s a lot of gear out there designed with smartphone photos and videos in mind, including clip-on lenses, tripod mounts, phone-mounted LED lights, and inexpensive microphones that plug into the audio jack.
The long version: Recording your videos with a mobile phone can be a good decision. It all depends on the phone you have and the range of add-ons and apps that you complement it with. Almost every high-end model released in the past five years can shoot videos in 1080p or higher. Some can even produce 4K footage. If you perfect your smartphone filming technique, your YouTube videos could look as if they were made with pro equipment.
On the flip side, smartphone cameras typically perform poorly in low light. It is possible to download an app that lets you play around with settings to overcome this, but a phone-mounted LED light is probably a better solution. An external microphone might also be a necessity, but there are some good (inexpensive) options that can simply be plugged in through the headphone jack.
Another common downside of smartphone cameras is that most of them use digital zoom, which is vastly inferior to optical zoom. If you intend to shoot anything that’s further away than a few feet, you need a clip-on lens that goes on top of the built-in camera. This inexpensive device will give you a lot of freedom to work in space, and allow you to make spectacular shots even without high-end YouTube equipment.
Equipment with Easy-to-Use Video Editor
Richard Bennett
Richard Bennett is a writer and a lover of all things video.
Follow @Richard Bennett
Also read:
- How Often to Post A Guide to YouTube Video Upload Patterns for Success
- [New] Channel-Size-Independent Strategies for Securing Sponsors
- Automating the Creation of YouTube Subscriber Links
- In 2024, Audiovisual Interpretation Engine
- Essential Media Makers' Software Linux Edition for 2024
- [New] Discover the Top 8 Services to Amplify Video Content
- [Updated] Become a Livestream King The Best Webcams for YouTube Stars
- Enhance Video Popularity with Strategic Timestamps
- In 2024, Embarking on Style & Niche Discovery Journey
- 2024 Approved Cinematic Delights for a Low Price - Top 10 Free Movies on YouTube
- Unleashing Your Creative Spark Stylistic Self-Discovery [High CTR]
- 2024 Approved Enhance and Clean Up YouTube Footage Borderless Tutorial
- Analytics Unlocked Your Step-by-Step YouTube Guide
- [New] Crafting GIFs From YouTube Detailed Step-by-Step Guide for PC/Mobile
- Comprehensive Tutorial on Youtube Annotation
- Boost Click-Through Rates Adding Allure with Artistic Backdrops for Thumbnails
- A Step-by-Step Breakdown Creating Your Best YT Shorts for 2024
- Crafting Engaging YouTube Channel Names for Vlogger Success (No More Than 156) for 2024
- The Artist's Toolbox Essential Video Tips for Musicians on YouTube
- YouTube's Golden Rule for Profit Partnership
- Easy Steps to Directly Share Videos From iPhone/iPad
- Essential Guidelines to Create Impactful YouTube Banners for 2024
- [Updated] Earnings Escalate 500-Subscriber Marker Achieved
- In 2024, Comedy Central The Best Laughter-Inducing Channels Online
- [Updated] Becoming a Master at the Art of Engaging Thumbnails
- In 2024, Evaluating Best YouTube Extractors Available on Android
- Classic Cinema Revisited Step-by-Step Video Guide for 2024
- Acquiring Free Music YouTube Video Edition for 2024
- Enhancing Exposure Do Buy Views Accelerate Channel Growth?
- [New] Eluding YouTube Ban Protective Measures
- In 2024, Discover the Top 9 Free Online Tools to Craft Your Logo
- [Updated] Dazzle and Stand Out 50 FREE YouTube Branding Pieces
- [New] Delving Into YouTube's Complex Calculation of Viewer Stats
- [New] A Closer Look at YouTube’s ‘Unlisted’ Content Category
- 2024 Approved Best Camera Stabilizers for YouTube
- [New] Crafting Impactful Video Campaigns for Startups
- Mastering YouTube Creation Standard Studio or Innovative Beta
- Unlocking Creativity in YouTube Shorts Template Development
- In 2024, 1St Place Video Saver - Download Anywhere, Anytime
- Accelerate YouTube Visibility - Select Top 8 Rank Watchers
- Brain Mechanisms Guiding High-Stakes Business Conclusions for 2024
- Unveiling the Mechanisms That Govern YouTube After a Video Is Live
- In 2024, Digital Storyboard Studio
- Enriched Viewing Experience with These Free Downloader Apps for YouTubes
- [Updated] Creating a Link-Building Foundation for Video Marketers
- Acquiring Free Music YouTube Video Edition
- Leveraging Jump Cuts to Improve Video Flow
- In 2024, Era's Endwatchers Top YouTube Viewership
- 4 Feasible Ways to Fake Location on Facebook For your Infinix Hot 30i | Dr.fone
- [Updated] ScreenMaster Review The Latest in Tech Capture for 2024
- Hard Reset Vivo S18 in 3 Efficient Ways | Dr.fone
- Wondering the Best Alternative to Hola On HTC U23? Here Is the Answer | Dr.fone
- The Best Android Unlock Software For Oppo A18 Device Top 5 Picks to Remove Android Locks
- [New] Instagram Video Promotion Mastery Craft Your Winning Market Plan for 2024
- In 2024, Nine Effective Ways to Record System Audio & Mic Outputs
- Updated 2024 Approved Something You Should Know About TwistedWave Audio Editor
- 2024 Approved Concluding an Online Journey in a Discord Server
- [Updated] 2024 Approved Effortlessly Record Audio on Your Mac Using Audacity
- New S Top Picks Video Brightening Apps for Android and iPhone Users for 2024
- 2024 Approved The Cutting-Edge of Audio Production Adding Professional Voiceovers to Your Vids
- Updated 2024 Approved Time-Lapse Video Editing Made Easy Top Software Free&Paid
- Best Pokemons for PVP Matches in Pokemon Go For Tecno Phantom V Fold | Dr.fone
- How to Restore Deleted Nokia 150 (2023) Pictures An Easy Method Explained.
- Updated 2024 Approved Get the Best Visuals Top 5 HD Video Editing Programs
- New In 2024, Color Code Cracked How to Match Video Clips in PowerDirector Like a Pro
- [New] Visualizing Stories Turning Your Favorite Vimeo Into Dynamic GIFs for 2024
- 3 Easy Solutions to Hard Reset OnePlus Ace 2V | Dr.fone
- Solved Warning Camera Failed on Motorola Moto G04 | Dr.fone
- Mastering Twitter Cleanup Top Apps for Efficient Management for 2024
- [Updated] In 2024, Clear Screen Techniques Focus on Your Message, Not the Ambiance
- Digital Collection Mastery Extracting Twitter's Animated Tweets for 2024
- Heard Words, Spoken Ideas – No Price
- Sign .svd file Online for Free
- [Updated] Capturing Chats Complete FBM Conversation History
- 5 Hassle-Free Solutions to Fake Location on Find My Friends Of Realme C55 | Dr.fone
- In 2024, How To Bypass Honor 90 Pro FRP In 3 Different Ways
- In 2024, How To Unlock Cricket Apple iPhone 12 mini for Free
- In 2024, How Do You Get Sun Stone Evolutions in Pokémon For Poco M6 5G? | Dr.fone
- Expert Tips for Utilizing Snapchat Highlights Effectively
- 2024 Approved Converting MP4 Video File to an MP3 File Format Is a Simple Process. Read on if You Would Like to Learn More About the Best MP4 to MP3 Converters You Can Use Online or on PC and Mac Computers
- [Updated] In 2024, Unleash Creative Potential on TikTok Perfecting Sound and Visual Sync
- Beats & Brilliance Creating Soundtracked Instagram Feeds for 2024
- [Updated] Elite Streaming & Recording Hub
- Title: In 2024, Essential Recording Steps for YouTube Audio Extraction
- Author: Brian
- Created at : 2024-05-25 12:16:00
- Updated at : 2024-05-26 12:16:00
- Link: https://youtube-video-recordings.techidaily.com/in-2024-essential-recording-steps-for-youtube-audio-extraction/
- License: This work is licensed under CC BY-NC-SA 4.0.
