
:max_bytes(150000):strip_icc()/ScreenShot2022-04-08at12.07.28PM-362efc4e7603490a932bf9ac6e0f0113.png)
"In 2024, Elevate Your YouTube Thumbnails - Triple Neon Border Techniques"
Elevate Your YouTube Thumbnails - Triple Neon Border Techniques
Your YouTube video, or any other clip published on any forum, gets a larger number of hits if it has an attractive thumbnail. And, the fact is, a thumbnail becomes 10x more attractive when the main character that the image has have a neon border around it.
With that said, in the following sections, you will learn a couple of methods on how to add a YouTube thumbnail border around the main characters and/or objects that are significant to the clip.
In this article
01 Add Glowing Neon Border to YouTube Thumbnail with Filmora
02 Add a Glowing Neon Border in YouTube Thumbnail with Canva
03 Outline a Person in a YouTube Thumbnail with Photoshop
Part 1: How to Add Neon Border to YouTube Thumbnail for Free with Filmora
Being one of the most versatile and intuitive post-production tools available in the market today, Wondershare Filmora X allows you to add a neon border to a YouTube thumbnail quite conveniently. You can learn how to get this done on Windows or Mac by following the steps given below.
For Win 7 or later (64-bit)
For macOS 10.12 or later
Step 1: Define Project Settings and Add Image to the Timeline
Launch Wondershare Filmora X on your PC (a MacBook Pro M1 is used here), ensure that the project aspect ratio is set to 16:9 (Widescreen) on the splash screen, and click New Project. On the main interface, click the Preview quality and display settings icon from the upper-right area of the Timeline, click Change Project Aspect Ratio, click to select 1280 x 720 (HD) from the Resolution menu of the Project Settings box, and click OK to save the custom project settings.

Then select My Media from the menu bar if not already selected, click Project Media from the navigation pane, and click Import from the Media box to select and import the image of the main character or object that you want to use in the thumbnail.

Now, drag the image from the Media box to the Timeline at the bottom.

Step 2: Clear Image Background, Add Border, and Add Custom Background
Go to Effects from the menu bar, click to select the Default tab and then AI Portrait from the navigation pane, and click and drag the Human Segmentation preset from the right box, and place it over the image track in the Timeline.

Double-click the image layer, scroll down the upper-left box to the Video Effects section, and use the Edge Thickness and Edge Feather sliders to adjust the character’s edges to make them as realistic as possible. Click OK when done.

Next, click and drag the Human Border preset over the image track in the Timeline, and follow the same procedure to customize the border. This will give the character a neon border effect.

Now, use the method explained earlier to import a custom image for the background, and drag and place it under the previous track in the Timeline.

If you are running the latest version of Filmora, you will find there are some neon light effects available under AI Portrait as well.

Step 3: Add Titles to Thumbnail
Go to Titles from the menu bar, click to select the Default tab and then Lower 3rds from the navigation pane, and click and drag your preferred lower-third preset from the right window to a separate layer in the Timeline. Double-click the lower-third layer, and use the available options in the upper-left window to change the text, its color, etc., and drag the textbox to place it to your preferred position on the image as well. Click OK to save the changes.
Next, click to select Titles from the navigation pane, and drag your preferred title from the right window to the upper-most track in the Timeline. Now use the method explained earlier to edit the text, its color, position, etc. to make it look professional.

For more tips and tricks for creating YouTube thumbnail, you can check this You Tube thumbnail creating guide.
Step 4: Get the Neon Border Thumbnail
Click the Snapshot (Camera) icon from the upper-right area of the Timeline, go to My Media from the menu bar, right-click the thumbnail of the screenshot you captured, and click Reveal in Finder (on Mac) or Reveal in Explorer (on Windows) to get to the folder the YouTube thumbnail border is saved in.

Part 2: How to Add a Glowing Neon Border in Your YouTube Thumbnail with Canva
Canva is another intuitive editing program that works on the web interface rather than having you download and install an app on your PC. You can add a neon border for YouTube thumbnails using Canva by following the instructions given below:
Step 1: Define Project Settings and Add a Background
After signing in to your Canva account, click Create a design from the top-right corner of the page, click Custom size from the bottom, define 1280 and 720 in the Width and Height fields on the box that appears respectively, and click Create new design.

Now, click to select Background from the navigation bar on the left (if the Background tool is not visible, click More and then choose Background from the expanded list), and click to select a background from the images available in the center pane.

Step 2: Upload an Image and Add Effects
Click Uploads from the navigation bar, click the More icon from the right of the Upload media button present at the top of the center pane, choose your preferred method to upload the image (with the transparent background) that you want to use, upload the image, and drag it from the center pane to the Canvas.
Note: You can use any of the tools available online to remove the background from your image for free.

To add a YouTube thumbnail border, make sure that the image that you added to the Canvas is selected, click the Duplicate icon from the upper-right area, and use the scaling handles of the copy of the image to increase its size a bit. Reposition the image back to its original location as well.
Then, click Edit image from the upper-left corner of the Canvas, click Duotone from the Edit image pane at the center, if need be, click See all, choose your preferred duotone effect to apply on the image, choose your preferred highlight and shadow colors from the box that appears next, and click Back from the top of the pane.

Next, click See all next to the Adjust section from the center pane, and drag the Blur slider to the right to increase the blur effect on the image.

Step 3: Position the Layers
While keeping the duplicate image selected, click the Position button from the upper-right area of the Canvas, and click Background to send the second image behind the first one to get the neon border effect for the photo.

Part 3: How to Outline a Person in a YouTube Thumbnail with Photoshop
Because YouTube thumbnails are nothing but static images, creating YouTube thumbnail border with Adobe Photoshop is comparatively easier. The process of doing this is given below:
Step 1: Define Document Preferences and Import an Image
Launch Adobe Photoshop on your PC, click Create new, and on the New Document customization box, define the width and height values to 1280 and 720 pixels respectively. Select Transparent from the Background Contents menu as well if not already selected. Click Create from the bottom to create a new Photoshop document with the specified document settings. Next, open the folder that contains the source image, drag the photo to Photoshop, and press Enter to place the photo.

Step 2: Remove Background from the Image
Make sure that the image layer is selected in the Layers panel on the right, go to Select from the menu bar at the top, and click Subject. From the bottom of the Layers panel, click the Add a mask icon to get rid of the background, leaving only the human on the Canvas.

Step 3: Add a Custom Background and an Outline Around the Subject
Use the method explained earlier to import a background image of your choice to Photoshop. Drag the background image layer to the bottom in the Layers panel. Double-click the masked layer, click to select Stroke from the left pane of the Layer Style box, and use the options available on the right to manage the size, color, position, etc. of the stroke that has been added around the human subject. Click OK when done, and then export the image normally to use it as a YouTube thumbnail border.

Summary
It is important to know that the default resolution of a YouTube thumbnail is 1280 x 720 pixels that is usually written and referred to as 720p. While adding a YouTube thumbnail border, it is also imperative to have a good sense of color combination and fonts. Furthermore, a decent tool like Wondershare Filmora X must be used to add an appealing neon border around the main subject in the thumbnail image easily and quickly.
02 Add a Glowing Neon Border in YouTube Thumbnail with Canva
03 Outline a Person in a YouTube Thumbnail with Photoshop
Part 1: How to Add Neon Border to YouTube Thumbnail for Free with Filmora
Being one of the most versatile and intuitive post-production tools available in the market today, Wondershare Filmora X allows you to add a neon border to a YouTube thumbnail quite conveniently. You can learn how to get this done on Windows or Mac by following the steps given below.
For Win 7 or later (64-bit)
For macOS 10.12 or later
Step 1: Define Project Settings and Add Image to the Timeline
Launch Wondershare Filmora X on your PC (a MacBook Pro M1 is used here), ensure that the project aspect ratio is set to 16:9 (Widescreen) on the splash screen, and click New Project. On the main interface, click the Preview quality and display settings icon from the upper-right area of the Timeline, click Change Project Aspect Ratio, click to select 1280 x 720 (HD) from the Resolution menu of the Project Settings box, and click OK to save the custom project settings.
Then select My Media from the menu bar if not already selected, click Project Media from the navigation pane, and click Import from the Media box to select and import the image of the main character or object that you want to use in the thumbnail.
Now, drag the image from the Media box to the Timeline at the bottom.
Step 2: Clear Image Background, Add Border, and Add Custom Background
Go to Effects from the menu bar, click to select the Default tab and then AI Portrait from the navigation pane, and click and drag the Human Segmentation preset from the right box, and place it over the image track in the Timeline.
Double-click the image layer, scroll down the upper-left box to the Video Effects section, and use the Edge Thickness and Edge Feather sliders to adjust the character’s edges to make them as realistic as possible. Click OK when done.
Next, click and drag the Human Border preset over the image track in the Timeline, and follow the same procedure to customize the border. This will give the character a neon border effect.
Now, use the method explained earlier to import a custom image for the background, and drag and place it under the previous track in the Timeline.
If you are running the latest version of Filmora, you will find there are some neon light effects available under AI Portrait as well.
Step 3: Add Titles to Thumbnail
Go to Titles from the menu bar, click to select the Default tab and then Lower 3rds from the navigation pane, and click and drag your preferred lower-third preset from the right window to a separate layer in the Timeline. Double-click the lower-third layer, and use the available options in the upper-left window to change the text, its color, etc., and drag the textbox to place it to your preferred position on the image as well. Click OK to save the changes.
Next, click to select Titles from the navigation pane, and drag your preferred title from the right window to the upper-most track in the Timeline. Now use the method explained earlier to edit the text, its color, position, etc. to make it look professional.
For more tips and tricks for creating YouTube thumbnail, you can check this You Tube thumbnail creating guide.
Step 4: Get the Neon Border Thumbnail
Click the Snapshot (Camera) icon from the upper-right area of the Timeline, go to My Media from the menu bar, right-click the thumbnail of the screenshot you captured, and click Reveal in Finder (on Mac) or Reveal in Explorer (on Windows) to get to the folder the YouTube thumbnail border is saved in.
Part 2: How to Add a Glowing Neon Border in Your YouTube Thumbnail with Canva
Canva is another intuitive editing program that works on the web interface rather than having you download and install an app on your PC. You can add a neon border for YouTube thumbnails using Canva by following the instructions given below:
Step 1: Define Project Settings and Add a Background
After signing in to your Canva account, click Create a design from the top-right corner of the page, click Custom size from the bottom, define 1280 and 720 in the Width and Height fields on the box that appears respectively, and click Create new design.
Now, click to select Background from the navigation bar on the left (if the Background tool is not visible, click More and then choose Background from the expanded list), and click to select a background from the images available in the center pane.
Step 2: Upload an Image and Add Effects
Click Uploads from the navigation bar, click the More icon from the right of the Upload media button present at the top of the center pane, choose your preferred method to upload the image (with the transparent background) that you want to use, upload the image, and drag it from the center pane to the Canvas.
Note: You can use any of the tools available online to remove the background from your image for free.
To add a YouTube thumbnail border, make sure that the image that you added to the Canvas is selected, click the Duplicate icon from the upper-right area, and use the scaling handles of the copy of the image to increase its size a bit. Reposition the image back to its original location as well.
Then, click Edit image from the upper-left corner of the Canvas, click Duotone from the Edit image pane at the center, if need be, click See all, choose your preferred duotone effect to apply on the image, choose your preferred highlight and shadow colors from the box that appears next, and click Back from the top of the pane.
Next, click See all next to the Adjust section from the center pane, and drag the Blur slider to the right to increase the blur effect on the image.
Step 3: Position the Layers
While keeping the duplicate image selected, click the Position button from the upper-right area of the Canvas, and click Background to send the second image behind the first one to get the neon border effect for the photo.
Part 3: How to Outline a Person in a YouTube Thumbnail with Photoshop
Because YouTube thumbnails are nothing but static images, creating YouTube thumbnail border with Adobe Photoshop is comparatively easier. The process of doing this is given below:
Step 1: Define Document Preferences and Import an Image
Launch Adobe Photoshop on your PC, click Create new, and on the New Document customization box, define the width and height values to 1280 and 720 pixels respectively. Select Transparent from the Background Contents menu as well if not already selected. Click Create from the bottom to create a new Photoshop document with the specified document settings. Next, open the folder that contains the source image, drag the photo to Photoshop, and press Enter to place the photo.
Step 2: Remove Background from the Image
Make sure that the image layer is selected in the Layers panel on the right, go to Select from the menu bar at the top, and click Subject. From the bottom of the Layers panel, click the Add a mask icon to get rid of the background, leaving only the human on the Canvas.
Step 3: Add a Custom Background and an Outline Around the Subject
Use the method explained earlier to import a background image of your choice to Photoshop. Drag the background image layer to the bottom in the Layers panel. Double-click the masked layer, click to select Stroke from the left pane of the Layer Style box, and use the options available on the right to manage the size, color, position, etc. of the stroke that has been added around the human subject. Click OK when done, and then export the image normally to use it as a YouTube thumbnail border.
Summary
It is important to know that the default resolution of a YouTube thumbnail is 1280 x 720 pixels that is usually written and referred to as 720p. While adding a YouTube thumbnail border, it is also imperative to have a good sense of color combination and fonts. Furthermore, a decent tool like Wondershare Filmora X must be used to add an appealing neon border around the main subject in the thumbnail image easily and quickly.
Shaking Up the Status Quo: Unique Naming Tips for Filmmakers
How To Pick a YouTube Channel Name

Richard Bennett
Mar 27, 2024• Proven solutions
Choosing the name of your YouTube channel is one of the most important decisions you will make as a vlogger. If your channel name sticks in the minds of people who watch your videos it will help to ensure viewers return and watch more of your work. An especially catchy channel name can even draw in new viewers who just have to find out what kind of videos somebody with that particular name makes. Most successful noted YouTubers carefully planned their names.
How to come up with the best YouTube name? Below we will introduce some useful tips that you should think about before choosing a YouTube channel name and some best online YouTube name generators that you can use to pick up a good YouTube name.
- Part 1: How To Pick a Name for Your YouTube Channel
- Part 2: Best Free Online Name Generator Tools for YouTube Channel
- Part 3: YouTube Channel Name vs. YouTube Usernames
- Part 4: How to Change YouTube Channel Name
Best YouTube Video Editor - Filmora
It is not easy to come up with a good YouTube channel and user name, but it is easy to edit an excellent YouTube video with Filmora. It is designed for beginner users who want to edit videos easily for YouTube channel! You can add royalty-free music and various filters/effects to touch up your videos with dragging and dropping. After editing, you can directly upload the video to the YouTube platform. Download it now to have a try!


Part 1: How To Pick a YouTube Channel Name: 5 Tips for Choosing a Better YouTube Name
Of course, it is best to choose an amazing channel name in the first place so you never have to worry about changing it. Here are five tips for naming your YouTube channel.
1. Keep it Short and Impressive
In order to be memorable, your channel name should be short and catchy. Generally, it is a bad idea to have a name that is more than five syllables long. Longer channel names are both harder to remember, and harder to tell your friends about since they do not tend to roll off the tongue.
The worst way you can end up with an overly long username is by adding numbers or extra letters to the end of it. People often decide to do this because their desired channel name was taken. It is always a terrible idea. Your username might still look short, but that is deceptive. A username like ‘Lucas423’ is really ‘Lucasfourtwentythree’. Nobody will remember the exact numbers. If anyone remembers that username at all they will only remember ‘Lucas’, which will make it extremely difficult for them to find your channel again.
For the sake of keeping their channel names short and memorable, some successful YouTubers have actually made up words, i.e ‘Smosh’. This only works if a silly made-up word suits the tone of your channel, and even a lot of made-up words are taken by this point.
2. It’s All About You
Regardless of the topic of your vlog, your vlog will also be about you as a personality, so your channel name should have something to do with who you are as a person. It can even include your real name or some variation of it. Real-life nicknames work great.
If you do not want to use your actual name, or do not think your actual name would stick in people’s minds very well, then think about what your hobbies are and what kind of words could be used to describe you. Come up with a list of nouns and describing words and try out different combinations. You might even decide to try out some of your describing words with your real name.
3. It’s Also About Your Audience
Your name should reflect who you are, but it should also be relevant to the people who will be watching your vlog. For example, people who are tuning in to a daily life vlog might appreciate it if you use your real name or some variation on your name. People who are tuning into a vlog to learn something – beauty or cooking tips, for example – will be confused if your channel name is something like ‘LucasIsCool’. If you have a channel that is about anything besides your daily life, experiences, or opinions then your channel name needs to reference your topic. If Lucas’s channel is about baking then rather than ‘LucasIsCool’ he should try something like ‘LucasBakes’ or ‘CookiesByLucas’.
4. Test Drive It
It is a bad idea to rush over to YouTube and sign up for the first channel name you decide you like. First, say it out loud and see if it sounds as catchy as it seemed in your head. If it does, then there are still a couple of other “test drives” you need to do.
Plunk the channel name you are considering into a search engine to make sure it is not already strongly associated with something besides you. If there is actually a website with your channel name as its URL then you should almost definitely discard that name and choose a new one. If you have some success with your vlog then you will probably want to acquire the associated URL later on. Even if you do not think you want a website it is a bad idea to choose a channel name that already has a strong association with something else. For example, if you play music on your channel and your channel has the same name as a music festival people might automatically think you and that festival are affiliated.
You will also want to check and make sure nobody is using your channel name as their username on Instagram, Vimeo, or any other social media site. If your name is already being used elsewhere then it will be difficult for you to expand.
5. Don’t Give up
YouTube is a huge site and a lot of the really good names are already being used or – more frustratingly – have been taken by people who are not actually using them. The first few names you come up with will probably be unavailable. This is where a lot of YouTubers get discouraged and start weakening their channel name by typing numbers after it. It is easy to get pulled into settling for any name that sort of sounds like the one you want, but which is actually available. Do not do this! You will be able to create a catchy, unique, name that is all you own.
Coming up with the perfect name for your channel can take time, sometimes a lot of time. If you can get it done in one evening then you are lucky because this is something that can take days. The name of your YouTube channel is extremely important and you should take as long as you need to pick a good one.
Part 2: 5 Best Free Online YouTube Name Generators in 2021
1. YouTube Name Generator:
In case if you need a YouTube name with a specific keyword, this YouTube Name Generator tool can help you better. The unique algorithm of this online tool is capable enough to generate unique channel names that can match certain keywords of your need. All that you need to do is provide it with the total number of names it should generate for you along with your target keyword. It will soon open a long list of actual names and made-up names that you can choose for your channel.
2. Kparser:
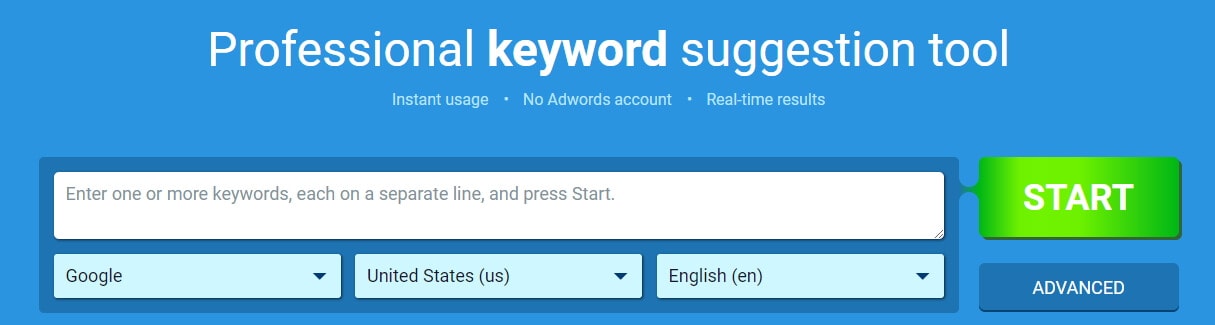
Those who are more focused on the SEO ranking of their YouTube channel instead of the uniqueness of the YouTube channel name can avail great benefits from Kparser. It is well known as a keyword suggestion tool that is also used as a YouTube Name Generator due to its awesome algorithm that brings out top SEO-ranked channel names from the web. By upgrading to the Pro version of this tool, you can also get information about the volume and CPC of the listed keyword.
3. SpinXo:
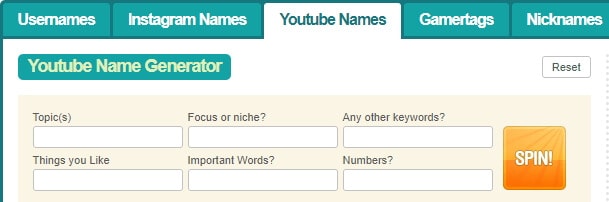
Here is the most comprehensive tool for YouTube channel name generation and it provides satisfactory results to most users who don’t have specific requirements. You can add few specific details to this platform in terms of topic, keywords, niche, interests, and important word; SpinXo will soon generate the best channel names by utilizing that information. Observations say that most of the names generated by this tool are of three words. As soon as you like a certain keyword on this platform, you can see its availability on other social media platforms like Instagram, Twitter, and Blogger, etc.
4. Best Username Generator:
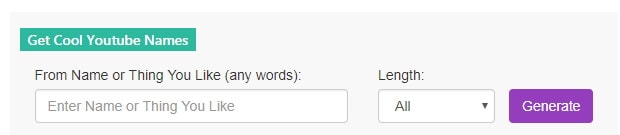
It is almost the same as that of the YouTube Username Generator tool as it also brings out made-up YouTube names with its search results. But the great news is that it is also loaded with unique customization options. After listing the essential keyword, this tool also allows users to provide details about the number of characters they want in the name. When you like any one of the generated names, you can also check their availability on YouTube as well as 9 other popular social media websites.
5. Name Generator 2:
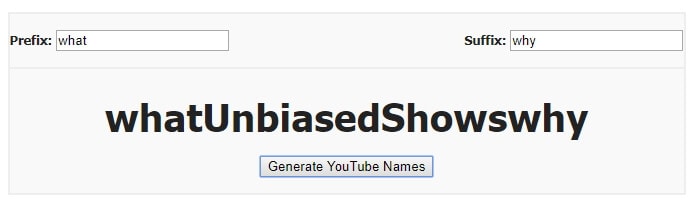
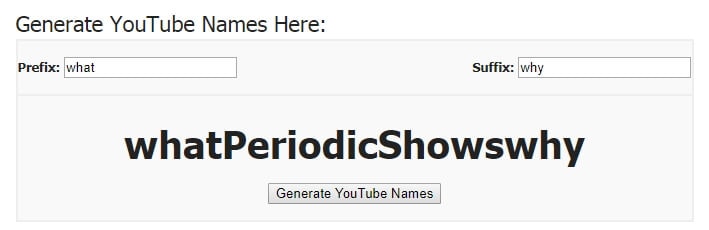
When you are interested in getting a funny YouTube channel name to grab the attention of more viewers online, Name Generator 2 is probably the best platform for you. Although it cannot provide you with a long list of keywords, whatever it provides is always full of humor. Note that, this tool does not allow customization options for YouTube Channel Name generations, users can simply add prefix or suffix details and it will combine them to provide you with something unique out of its database.
Part 3: YouTube Channel Name vs. YouTube Usernames
Are you aware of the difference between YouTube Channel name and YouTube Usernames? Most people are confused about this fact, but there is something that you really need to know about. Go through the details below to clear your doubt:
1. YouTube Channel Names
It is the name by which your channel is known on the network online. When viewers watch your videos online, your channel name appears on their screen, and they can click on this name to reach your channel to watch more collections. In a few cases, the channel name can be a username as well, but it is not always so.
2. YouTube Usernames

The YouTube Username is the one that appears on your URL when you visit your channel page. The time when you started your YouTube channel for the very first time, it appeared automatically containing a random string of characters. In the past, you can not change the URL but now YouTube allows you to customize it when you have more than 100 subscribers and your channel is at least 30 days old. For more details about claiming a custom URL for YouTube, check it here.

Since we have already known the differences between YouTube Channel Name and YouTube User name, you may wonder why the YouTube channel name is so important. While the flip side of that is that not choosing a good channel name can really hurt your chances of getting views and subscribers. Your videos might be great, but if viewers who like them cannot remember your name then it will be hard for them to find you again. Other videos of yours might even show up in their searches and be ignored because the viewer does not recognize your name. Also, while the very best channel names make people curious about what you do, the very worst channel names will be a deterrent for people when they are deciding whether to watch your videos. For example, including a sequence of numbers after your name will give people on YouTube the impression that you do not know what you are doing.
You May Also Like:
YouTube SEO Guide: How to Improve Search Rankings For Your YouTube Videos >>
How to Get More Subscribers on YouTube >>
Part 4: How to Change YouTube Channel Name
YouTube does allow you to change the name that is displayed for your channel now (in the past you could not). However, while your display name can be changed, the URL of your channel is permanent. If you change your display name then the two things will no longer match. Also if you manage to build up a following using one name you will probably lose some of those people if you change it. If you feel like your channel name is holding you back then you should definitely update it to something better, but you should also consider whether it is holding you back enough that it is worth losing some of the regular viewers you already have. It probably will be, if you feel like your channel will start growing faster after the change.
Even after selecting the best name for your YouTube channel, if one day you realize that it must be modified to have much better results; you can definitely change it without deleting the existing account. Note that your Google account name is the same as your YouTube Channel name. So, whenever you want to change the name of the channel; you can follow these simple steps to execute this task:
Step 1: First of all, simply sign in to YouTube.com and then hit on the Settings icon option available on the top right corner of your screen.
Step 2: Now go to the settings button and then choose the “Edit on Google” link.
Step 3: It is time to enter the updated Channel name and then finally hit the Ok button on the screen.
You are done with it, and now you can visit your YouTube channel once again to see the new name appearing on it.
Note: changing the channel name in this way will change all your names across Google services, such as Gmail and Google Drive. If you want to use a YouTube channel name different from that in your Google account, you can connect your channel to a Brand Account. For more details about that, please check: Use a different name on YouTube than your Google Account.
Conclusion
Above are some tips about how to pick up a YouTube channel name and some useful online YouTube name generator tools that you can use to choose a YouTube name quickly. Hope these tips and tools can help you when you building your YouTube channel. If can’t think of a good YouTube name, you can take a look at your similar channels’ names, which will give you a hint. InflueNex , the helpful influencer marketing platform, will help you to find similar channels in one click.
Download Mac Version ](https://tools.techidaily.com/wondershare/filmora/download/ )
Richard Bennett
Richard Bennett is a writer and a lover of all things video.
Follow @Richard Bennett
Richard Bennett
Mar 27, 2024• Proven solutions
Choosing the name of your YouTube channel is one of the most important decisions you will make as a vlogger. If your channel name sticks in the minds of people who watch your videos it will help to ensure viewers return and watch more of your work. An especially catchy channel name can even draw in new viewers who just have to find out what kind of videos somebody with that particular name makes. Most successful noted YouTubers carefully planned their names.
How to come up with the best YouTube name? Below we will introduce some useful tips that you should think about before choosing a YouTube channel name and some best online YouTube name generators that you can use to pick up a good YouTube name.
- Part 1: How To Pick a Name for Your YouTube Channel
- Part 2: Best Free Online Name Generator Tools for YouTube Channel
- Part 3: YouTube Channel Name vs. YouTube Usernames
- Part 4: How to Change YouTube Channel Name
Best YouTube Video Editor - Filmora
It is not easy to come up with a good YouTube channel and user name, but it is easy to edit an excellent YouTube video with Filmora. It is designed for beginner users who want to edit videos easily for YouTube channel! You can add royalty-free music and various filters/effects to touch up your videos with dragging and dropping. After editing, you can directly upload the video to the YouTube platform. Download it now to have a try!
Part 1: How To Pick a YouTube Channel Name: 5 Tips for Choosing a Better YouTube Name
Of course, it is best to choose an amazing channel name in the first place so you never have to worry about changing it. Here are five tips for naming your YouTube channel.
1. Keep it Short and Impressive
In order to be memorable, your channel name should be short and catchy. Generally, it is a bad idea to have a name that is more than five syllables long. Longer channel names are both harder to remember, and harder to tell your friends about since they do not tend to roll off the tongue.
The worst way you can end up with an overly long username is by adding numbers or extra letters to the end of it. People often decide to do this because their desired channel name was taken. It is always a terrible idea. Your username might still look short, but that is deceptive. A username like ‘Lucas423’ is really ‘Lucasfourtwentythree’. Nobody will remember the exact numbers. If anyone remembers that username at all they will only remember ‘Lucas’, which will make it extremely difficult for them to find your channel again.
For the sake of keeping their channel names short and memorable, some successful YouTubers have actually made up words, i.e ‘Smosh’. This only works if a silly made-up word suits the tone of your channel, and even a lot of made-up words are taken by this point.
2. It’s All About You
Regardless of the topic of your vlog, your vlog will also be about you as a personality, so your channel name should have something to do with who you are as a person. It can even include your real name or some variation of it. Real-life nicknames work great.
If you do not want to use your actual name, or do not think your actual name would stick in people’s minds very well, then think about what your hobbies are and what kind of words could be used to describe you. Come up with a list of nouns and describing words and try out different combinations. You might even decide to try out some of your describing words with your real name.
3. It’s Also About Your Audience
Your name should reflect who you are, but it should also be relevant to the people who will be watching your vlog. For example, people who are tuning in to a daily life vlog might appreciate it if you use your real name or some variation on your name. People who are tuning into a vlog to learn something – beauty or cooking tips, for example – will be confused if your channel name is something like ‘LucasIsCool’. If you have a channel that is about anything besides your daily life, experiences, or opinions then your channel name needs to reference your topic. If Lucas’s channel is about baking then rather than ‘LucasIsCool’ he should try something like ‘LucasBakes’ or ‘CookiesByLucas’.
4. Test Drive It
It is a bad idea to rush over to YouTube and sign up for the first channel name you decide you like. First, say it out loud and see if it sounds as catchy as it seemed in your head. If it does, then there are still a couple of other “test drives” you need to do.
Plunk the channel name you are considering into a search engine to make sure it is not already strongly associated with something besides you. If there is actually a website with your channel name as its URL then you should almost definitely discard that name and choose a new one. If you have some success with your vlog then you will probably want to acquire the associated URL later on. Even if you do not think you want a website it is a bad idea to choose a channel name that already has a strong association with something else. For example, if you play music on your channel and your channel has the same name as a music festival people might automatically think you and that festival are affiliated.
You will also want to check and make sure nobody is using your channel name as their username on Instagram, Vimeo, or any other social media site. If your name is already being used elsewhere then it will be difficult for you to expand.
5. Don’t Give up
YouTube is a huge site and a lot of the really good names are already being used or – more frustratingly – have been taken by people who are not actually using them. The first few names you come up with will probably be unavailable. This is where a lot of YouTubers get discouraged and start weakening their channel name by typing numbers after it. It is easy to get pulled into settling for any name that sort of sounds like the one you want, but which is actually available. Do not do this! You will be able to create a catchy, unique, name that is all you own.
Coming up with the perfect name for your channel can take time, sometimes a lot of time. If you can get it done in one evening then you are lucky because this is something that can take days. The name of your YouTube channel is extremely important and you should take as long as you need to pick a good one.
Part 2: 5 Best Free Online YouTube Name Generators in 2021
1. YouTube Name Generator:
In case if you need a YouTube name with a specific keyword, this YouTube Name Generator tool can help you better. The unique algorithm of this online tool is capable enough to generate unique channel names that can match certain keywords of your need. All that you need to do is provide it with the total number of names it should generate for you along with your target keyword. It will soon open a long list of actual names and made-up names that you can choose for your channel.
2. Kparser:
Those who are more focused on the SEO ranking of their YouTube channel instead of the uniqueness of the YouTube channel name can avail great benefits from Kparser. It is well known as a keyword suggestion tool that is also used as a YouTube Name Generator due to its awesome algorithm that brings out top SEO-ranked channel names from the web. By upgrading to the Pro version of this tool, you can also get information about the volume and CPC of the listed keyword.
3. SpinXo:
Here is the most comprehensive tool for YouTube channel name generation and it provides satisfactory results to most users who don’t have specific requirements. You can add few specific details to this platform in terms of topic, keywords, niche, interests, and important word; SpinXo will soon generate the best channel names by utilizing that information. Observations say that most of the names generated by this tool are of three words. As soon as you like a certain keyword on this platform, you can see its availability on other social media platforms like Instagram, Twitter, and Blogger, etc.
4. Best Username Generator:
It is almost the same as that of the YouTube Username Generator tool as it also brings out made-up YouTube names with its search results. But the great news is that it is also loaded with unique customization options. After listing the essential keyword, this tool also allows users to provide details about the number of characters they want in the name. When you like any one of the generated names, you can also check their availability on YouTube as well as 9 other popular social media websites.
5. Name Generator 2:
When you are interested in getting a funny YouTube channel name to grab the attention of more viewers online, Name Generator 2 is probably the best platform for you. Although it cannot provide you with a long list of keywords, whatever it provides is always full of humor. Note that, this tool does not allow customization options for YouTube Channel Name generations, users can simply add prefix or suffix details and it will combine them to provide you with something unique out of its database.
Part 3: YouTube Channel Name vs. YouTube Usernames
Are you aware of the difference between YouTube Channel name and YouTube Usernames? Most people are confused about this fact, but there is something that you really need to know about. Go through the details below to clear your doubt:
1. YouTube Channel Names
It is the name by which your channel is known on the network online. When viewers watch your videos online, your channel name appears on their screen, and they can click on this name to reach your channel to watch more collections. In a few cases, the channel name can be a username as well, but it is not always so.
2. YouTube Usernames
The YouTube Username is the one that appears on your URL when you visit your channel page. The time when you started your YouTube channel for the very first time, it appeared automatically containing a random string of characters. In the past, you can not change the URL but now YouTube allows you to customize it when you have more than 100 subscribers and your channel is at least 30 days old. For more details about claiming a custom URL for YouTube, check it here.
Since we have already known the differences between YouTube Channel Name and YouTube User name, you may wonder why the YouTube channel name is so important. While the flip side of that is that not choosing a good channel name can really hurt your chances of getting views and subscribers. Your videos might be great, but if viewers who like them cannot remember your name then it will be hard for them to find you again. Other videos of yours might even show up in their searches and be ignored because the viewer does not recognize your name. Also, while the very best channel names make people curious about what you do, the very worst channel names will be a deterrent for people when they are deciding whether to watch your videos. For example, including a sequence of numbers after your name will give people on YouTube the impression that you do not know what you are doing.
You May Also Like:
YouTube SEO Guide: How to Improve Search Rankings For Your YouTube Videos >>
How to Get More Subscribers on YouTube >>
Part 4: How to Change YouTube Channel Name
YouTube does allow you to change the name that is displayed for your channel now (in the past you could not). However, while your display name can be changed, the URL of your channel is permanent. If you change your display name then the two things will no longer match. Also if you manage to build up a following using one name you will probably lose some of those people if you change it. If you feel like your channel name is holding you back then you should definitely update it to something better, but you should also consider whether it is holding you back enough that it is worth losing some of the regular viewers you already have. It probably will be, if you feel like your channel will start growing faster after the change.
Even after selecting the best name for your YouTube channel, if one day you realize that it must be modified to have much better results; you can definitely change it without deleting the existing account. Note that your Google account name is the same as your YouTube Channel name. So, whenever you want to change the name of the channel; you can follow these simple steps to execute this task:
Step 1: First of all, simply sign in to YouTube.com and then hit on the Settings icon option available on the top right corner of your screen.
Step 2: Now go to the settings button and then choose the “Edit on Google” link.
Step 3: It is time to enter the updated Channel name and then finally hit the Ok button on the screen.
You are done with it, and now you can visit your YouTube channel once again to see the new name appearing on it.
Note: changing the channel name in this way will change all your names across Google services, such as Gmail and Google Drive. If you want to use a YouTube channel name different from that in your Google account, you can connect your channel to a Brand Account. For more details about that, please check: Use a different name on YouTube than your Google Account.
Conclusion
Above are some tips about how to pick up a YouTube channel name and some useful online YouTube name generator tools that you can use to choose a YouTube name quickly. Hope these tips and tools can help you when you building your YouTube channel. If can’t think of a good YouTube name, you can take a look at your similar channels’ names, which will give you a hint. InflueNex , the helpful influencer marketing platform, will help you to find similar channels in one click.
Download Mac Version ](https://tools.techidaily.com/wondershare/filmora/download/ )
Richard Bennett
Richard Bennett is a writer and a lover of all things video.
Follow @Richard Bennett
Also read:
- Boldly Step Up Claim Your Set of 50 Exquisite, Cost-Free YouTube Promo Materials
- [New] 10 Budget-Friendly Platforms for YouTube Branding Mastery
- [New] Boosting Views with Analytics in YouTube Strategy
- In 2024, Brighten Up Your Videos Implementing Neons on Thumbnails
- Launching Into the World of Web-Flipping Videos From Mac
- Basic to Breakthrough Content Crafting the Top 10 Simplest YouTube Projects for 2024
- [New] Creative Vlog Ideas for Daily Use
- [New] Digital Dynamics Mastering YouTube Video Distribution on Facebook
- [New] Accelerate Your YouTube Journey - Achieve the Essential 10K Vistas
- Innovative Editing Methods for YT Videos with Windows Movie Maker
- In 2024, Cutting-Edge Editing A Roadmap for High-Quality YouTube Sounds
- Discovering the Power Behind YouTube Statistics Interpretation
- What's Your Potential Income From YouTube Sponsored Videos?
- 2024 Approved Discover 5 Exceptional Non-YouTube Video Platforms Today
- Spotlight on Top 8 Authentic YouTube Growth Tactics
- Enriched Viewing Experience with These Free Downloader Apps for YouTubes
- [Updated] Deciphering Your Pathway to YouTube's Maker Land
- [Updated] Achieve Professional-Level YouTube Transcription Without Spending
- In 2024, Crafting Chorus in a Click Essential Insights Into Shortform Song Videos
- [Updated] Enhancing Video Discoverability with Ideal Thumbnail Widths and Height
- Enchanting Edit YouTube's Ultimate Magic Tricks for 2024
- AddROM Bypass An Android Tool to Unlock FRP Lock Screen For your Motorola Edge 40
- In 2024, Mastering Mac Webcam Video Recording 5 Straightforward Steps to Success
- Best Practices for Distance Dialogue Capture for 2024
- 2024 Approved You Have a Chromebook and Want to Edit Videos but Are Not Sure Which Video Editor Works on Chromebook Perfectly? Dont Worry, Here Is a List of the Best Video Editors for Chromebook
- [New] 2024 Approved Perfecting the Art of Twitter Broadcasts
- The Ultimate Checklist for Adjusting Netflix Video Speed
- [New] 2024 Approved Unveiling the Best Practices for Timing and Organizing Google Collaborations
- In 2024, Cutting Edge Tips for Stitching Your Best TikTok Ever
- [New] In 2024, Perfect Your Presentations Leading Free Mac Screen Capture Tools
- [New] 2024 Approved Crafting Irresistible Profile Videos
- How To Unlock Stolen iPhone 13 Pro Max In Different Conditionsin | Dr.fone
- New Clone Yourself in Videos with Filmora
- [New] Capturing the Essence of Time-Lapse Videos Pro Techniques for GoPro Hero 10 Users
- Updated 2024 Approved Demystifying HD Video Pixel Size, Aspect Ratio, and Beyond
- Title: "In 2024, Elevate Your YouTube Thumbnails - Triple Neon Border Techniques"
- Author: Brian
- Created at : 2024-05-25 12:13:54
- Updated at : 2024-05-26 12:13:54
- Link: https://youtube-video-recordings.techidaily.com/in-2024-elevate-your-youtube-thumbnails-triple-neon-border-techniques/
- License: This work is licensed under CC BY-NC-SA 4.0.
