
:max_bytes(150000):strip_icc()/GettyImages-1224786282-2d9033313a164d34a921f3bbf068ae50.jpg)
In 2024, Easy Ways to Add Music to iMovie From YouTube
Easy Ways to Add Music to iMovie From YouTube
How to Add Music to iMovie from YouTube?

Marion Dubois
Nov 07, 2023• Proven solutions
Adding background music to videos makes the video more unique and interesting to see. iMovie is a professional video editing tool that lets you pimp your videos the way you want it with your desired music and other sound effects. With the introduction of background music, your video would become unique and stand out.
Though it is not easy to find the right music for your background music, YouTube is a good place to search for good sounds. That’s why in this article, we’ll see how to add music to iMovie from YouTube.
- Is It Possible to Add Music to iMovie from YouTube?
- Add YouTube Music to iMovie from iPhone & Mac [All-In-One Platform]
- How to Add Music to iMovie from YouTube on iPhone?
- How to Put Music from YouTube to iMovie on Mac?
Part 1. Is It Possible to Add Music to iMovie from YouTube?
iMovie is a tool developed by Apple for video editing designed to help users create unique, fun videos quickly. This outstanding video editor works only on Apple devices which includes macOS, iOS, and iPadOS. It embodies excellent tools for a media organization, color grading, soundtracks, and green-screen effects for your videos. To crown it all, it supports a few media formats.
If your media source is unavailable on your device, it could be since iMovie doesn’t support the format, or it may be under the protection of Digital Rights Management.
Now, even though you’ve downloaded the songs from YouTube to listen to them offline, you are allowed to stream them within the music player only and not apply them to other media forms.
So, if you want to add YouTube music to iMovie, you must remove the DRM restrictions first before converting the YouTube song to a format supported by iMovie. A professional YouTube music downloader can help you with all of this.
Part 2. Add YouTube Music to iMovie from iPhone & Mac
Here is an all-in-one method that to add a YouTube song to iMovie whether through iPhone or Mac. First, record the YouTube music, then add extracted audio files to iMovie.
Step 1: First download and install Filmora Video Editor from the button below and use the built-in ‘Screen Recorder‘ tool to record the YouTube video/music that you want to rip the audio from.
For Win 7 or later (64-bit)
 Secure Download
For macOS 10.14 or later
Secure Download


Step 2: Import the recorded video to Filmora, right click on the video track and select ‘Detach Audio‘ to seperate the audio track and the video track. Select the audio track and click the ‘Export‘ button to save ripped audio files.
Step 3: And now, you can use the extracted YouTube audio files to iMovie for forther editing. Plus, Filmora Video Editor provides with a music library, where you can choose background music or sound effect for your project according to your needs. It is also an expert in creating videos, worth to have a try!
Tips You May Not Want to Miss
Filmora is the best iMovie alternative on the market, which provides the best methods, tools, and techniques to add music to videos, video cutting easily, joining, inversion, and editing. It allows you to easily make movies, edit audio, apply effects and share your new movies on YouTube, Vimeo, DVD, TV, iPhone, iPad, iPod, etc.
Therefore, if you are using Filmora, adding music to videos is just a piece of cake. Just select the audio clip in the timeline, click the “Video and Audio Effects” button, and go to the “Audio Effects” option. Now you can freely choose any audio effect.
For Win 7 or later (64-bit)
Secure Download
For macOS 10.14 or later
Secure Download
Part 3. How to Add Music to iMovie from YouTube on iPhone?
In this part, let us read the most straightforward tutorial on how to add music from YouTube to iMovie on iPhone.
First Download Music from YouTube on iPhone
Downloading YouTube videos on your iPhone is confusing since Apple provides the apps available in the App store. If you jailbreak your phone, there are various other options, but here’s the simplest way if you don’t want to go that route.
Step 1: Download the app Documents by Readdle.
Step 2: Select the compass icon and go to https://www.videosolo.com/online-video-downloader/

Step 3: Paste a YouTube video link in the text box and select “Download”. After some seconds, the video will decode and produce a list of different output quality and format options.
Step 4: Hit the “Download” on the preferred output option.
Step 5: Enter a name and download location for the video.
Step 6: Hit the Downloads tab in the bottom navigation bar to view your downloaded videos within the Documents app.
Step 7: Go back to the Documents app home screen to save your downloaded video and open your Downloads folder.
Step 8: Look for the video you wish to edit and tap the three dots icon on it.
Step 9: Hit the Share button and then Save Video.
Step 10: You can search the downloaded YouTube videos in the Photos app.
Add Downloaded Music to iMovie
Step 1: Launch iMovie and Create a Project
Open the iMovie app and pick the “+” icon to create a project. Then, select a movie file from the media to which you want to add the music and add it to the created project.
Step2: Create Movie
Immediately the movie is added to the project, click on the “Create Movie”, enhance the quality of your video using any of iMovie’s many themes, and add the correct ambiance. Click on the icon like a gear and toggle “Theme Music”. Now you have to choose the theme you desire for your video.
Step 3: Select My Music
Now, it’s time to add audio of your choice, and if you don’t want to select from your existing collection, tap on the “+” icon below on the left side of your screen. Next, choose “Audio” and then select “My Music”.
Step 4: Select Audio from Playlist
Select from the playlist, artist, individual songs, or select from the albums you already have on your device and click on the “+” icon to add to your video. It is important to note that you cannot add multiple songs at once. Just add and adjust the sound as desired.
Finally, after the song has been added to the video successfully, export it to your gallery using the “Export” button and save it on your phone.

Filmora Video Editor
Best iMovie Alternative - Filmora Video Editor
Filmora Video Editor is an expert in creating and editing videos, it offers a ChatGPT plug-in and AI tools to enhance your creative vision. Make your idea into reality.
Try It Free Try It Free Try It Free Learn More >
Part 4. How to Add Music to iMovie from YouTube on Mac?
It is elementary to use YouTube songs in iMovie on Mac. You can easily drag the YouTube music file into your project from the Finder and the desktop. The YouTube music added into the project timeline behaves differently depending on the place you added them.
Download Music from YouTube on Mac
Various programs and tools can assist you in downloading YouTube videos on a Mac.
A straightforward way is to use the inbuilt screen capture tool of macOS. Hit the Command + Shift + 5 tabs to bring up the screen recording options.
You can either record an entire screen or choose a window and alter the options to add audio from your Mac’s internal microphone.

The ideal tool or app for downloading YouTube videos on Mac in high-tech quality is a 4K Video Downloader.
It’s free for a max of 30 downloads per day, or you can upgrade to one of its premium plans. The software can also download videos in around 8K quality and various other high-tech formats. And 4K Video Downloader can also grab whole playlists of YouTube.
Here’s how to use it:
Step 1: Launch the 4K Video Downloader and open the program.
Step 2: Find a YouTube video and copy the link.
Step 3: Hit the Paste Link button in the menu.
Step 4: Select the Download button after choosing from the list of quality and format options.
Step 5: Download the video and then click the three-dot icon, so you can play.
How to Add Music to iMovie
Step 1: Add YouTube Music to the Clip
To add a YouTube music file to a particular video clip, drag the YouTube music file under the video clip so that a bar appears. Next, release the button when you see the green “Add” symbol to set the music as a background song in your iMovie project.
To add a YouTube music file to the iMovie project: drag and drop the YouTube music file to your project, release the mouse button once you see the green color. Add a symbol to add a YouTube song to the iMovie project as background music.
Step 2: Add YouTube Music File to the iMovie Project
Just drag and drop the YouTube video file to your project. Then, release the button once you see the green “Add” sign to add background music from the YouTube file to your project.
Conclusion
So, guys, now, can you add music from YouTube to iMovie? I’m pretty sure you have a positive answer as you saw how to add music to iMovie from YouTube using a simple step method. Moreover, have fun and create magic with your discovery of Filmora Video Editor , as it allows you to explore its numerous features to make a movie.
For Win 7 or later (64-bit)
Secure Download
For macOS 10.14 or later
Secure Download
Marion Dubois
Marion Dubois is a writer and a lover of all things video.
Follow @Marion Dubois
Marion Dubois
Nov 07, 2023• Proven solutions
Adding background music to videos makes the video more unique and interesting to see. iMovie is a professional video editing tool that lets you pimp your videos the way you want it with your desired music and other sound effects. With the introduction of background music, your video would become unique and stand out.
Though it is not easy to find the right music for your background music, YouTube is a good place to search for good sounds. That’s why in this article, we’ll see how to add music to iMovie from YouTube.
- Is It Possible to Add Music to iMovie from YouTube?
- Add YouTube Music to iMovie from iPhone & Mac [All-In-One Platform]
- How to Add Music to iMovie from YouTube on iPhone?
- How to Put Music from YouTube to iMovie on Mac?
Part 1. Is It Possible to Add Music to iMovie from YouTube?
iMovie is a tool developed by Apple for video editing designed to help users create unique, fun videos quickly. This outstanding video editor works only on Apple devices which includes macOS, iOS, and iPadOS. It embodies excellent tools for a media organization, color grading, soundtracks, and green-screen effects for your videos. To crown it all, it supports a few media formats.
If your media source is unavailable on your device, it could be since iMovie doesn’t support the format, or it may be under the protection of Digital Rights Management.
Now, even though you’ve downloaded the songs from YouTube to listen to them offline, you are allowed to stream them within the music player only and not apply them to other media forms.
So, if you want to add YouTube music to iMovie, you must remove the DRM restrictions first before converting the YouTube song to a format supported by iMovie. A professional YouTube music downloader can help you with all of this.
Part 2. Add YouTube Music to iMovie from iPhone & Mac
Here is an all-in-one method that to add a YouTube song to iMovie whether through iPhone or Mac. First, record the YouTube music, then add extracted audio files to iMovie.
Step 1: First download and install Filmora Video Editor from the button below and use the built-in ‘Screen Recorder‘ tool to record the YouTube video/music that you want to rip the audio from.
For Win 7 or later (64-bit)
Secure Download
For macOS 10.14 or later
Secure Download
Step 2: Import the recorded video to Filmora, right click on the video track and select ‘Detach Audio‘ to seperate the audio track and the video track. Select the audio track and click the ‘Export‘ button to save ripped audio files.
Step 3: And now, you can use the extracted YouTube audio files to iMovie for forther editing. Plus, Filmora Video Editor provides with a music library, where you can choose background music or sound effect for your project according to your needs. It is also an expert in creating videos, worth to have a try!
Tips You May Not Want to Miss
Filmora is the best iMovie alternative on the market, which provides the best methods, tools, and techniques to add music to videos, video cutting easily, joining, inversion, and editing. It allows you to easily make movies, edit audio, apply effects and share your new movies on YouTube, Vimeo, DVD, TV, iPhone, iPad, iPod, etc.
Therefore, if you are using Filmora, adding music to videos is just a piece of cake. Just select the audio clip in the timeline, click the “Video and Audio Effects” button, and go to the “Audio Effects” option. Now you can freely choose any audio effect.
For Win 7 or later (64-bit)
Secure Download
For macOS 10.14 or later
Secure Download
Part 3. How to Add Music to iMovie from YouTube on iPhone?
In this part, let us read the most straightforward tutorial on how to add music from YouTube to iMovie on iPhone.
First Download Music from YouTube on iPhone
Downloading YouTube videos on your iPhone is confusing since Apple provides the apps available in the App store. If you jailbreak your phone, there are various other options, but here’s the simplest way if you don’t want to go that route.
Step 1: Download the app Documents by Readdle.
Step 2: Select the compass icon and go to https://www.videosolo.com/online-video-downloader/
Step 3: Paste a YouTube video link in the text box and select “Download”. After some seconds, the video will decode and produce a list of different output quality and format options.
Step 4: Hit the “Download” on the preferred output option.
Step 5: Enter a name and download location for the video.
Step 6: Hit the Downloads tab in the bottom navigation bar to view your downloaded videos within the Documents app.
Step 7: Go back to the Documents app home screen to save your downloaded video and open your Downloads folder.
Step 8: Look for the video you wish to edit and tap the three dots icon on it.
Step 9: Hit the Share button and then Save Video.
Step 10: You can search the downloaded YouTube videos in the Photos app.
Add Downloaded Music to iMovie
Step 1: Launch iMovie and Create a Project
Open the iMovie app and pick the “+” icon to create a project. Then, select a movie file from the media to which you want to add the music and add it to the created project.
Step2: Create Movie
Immediately the movie is added to the project, click on the “Create Movie”, enhance the quality of your video using any of iMovie’s many themes, and add the correct ambiance. Click on the icon like a gear and toggle “Theme Music”. Now you have to choose the theme you desire for your video.
Step 3: Select My Music
Now, it’s time to add audio of your choice, and if you don’t want to select from your existing collection, tap on the “+” icon below on the left side of your screen. Next, choose “Audio” and then select “My Music”.
Step 4: Select Audio from Playlist
Select from the playlist, artist, individual songs, or select from the albums you already have on your device and click on the “+” icon to add to your video. It is important to note that you cannot add multiple songs at once. Just add and adjust the sound as desired.
Finally, after the song has been added to the video successfully, export it to your gallery using the “Export” button and save it on your phone.
Filmora Video Editor
Best iMovie Alternative - Filmora Video Editor
Filmora Video Editor is an expert in creating and editing videos, it offers a ChatGPT plug-in and AI tools to enhance your creative vision. Make your idea into reality.
Try It Free Try It Free Try It Free Learn More >
Part 4. How to Add Music to iMovie from YouTube on Mac?
It is elementary to use YouTube songs in iMovie on Mac. You can easily drag the YouTube music file into your project from the Finder and the desktop. The YouTube music added into the project timeline behaves differently depending on the place you added them.
Download Music from YouTube on Mac
Various programs and tools can assist you in downloading YouTube videos on a Mac.
A straightforward way is to use the inbuilt screen capture tool of macOS. Hit the Command + Shift + 5 tabs to bring up the screen recording options.
You can either record an entire screen or choose a window and alter the options to add audio from your Mac’s internal microphone.
The ideal tool or app for downloading YouTube videos on Mac in high-tech quality is a 4K Video Downloader.
It’s free for a max of 30 downloads per day, or you can upgrade to one of its premium plans. The software can also download videos in around 8K quality and various other high-tech formats. And 4K Video Downloader can also grab whole playlists of YouTube.
Here’s how to use it:
Step 1: Launch the 4K Video Downloader and open the program.
Step 2: Find a YouTube video and copy the link.
Step 3: Hit the Paste Link button in the menu.
Step 4: Select the Download button after choosing from the list of quality and format options.
Step 5: Download the video and then click the three-dot icon, so you can play.
How to Add Music to iMovie
Step 1: Add YouTube Music to the Clip
To add a YouTube music file to a particular video clip, drag the YouTube music file under the video clip so that a bar appears. Next, release the button when you see the green “Add” symbol to set the music as a background song in your iMovie project.
To add a YouTube music file to the iMovie project: drag and drop the YouTube music file to your project, release the mouse button once you see the green color. Add a symbol to add a YouTube song to the iMovie project as background music.
Step 2: Add YouTube Music File to the iMovie Project
Just drag and drop the YouTube video file to your project. Then, release the button once you see the green “Add” sign to add background music from the YouTube file to your project.
Conclusion
So, guys, now, can you add music from YouTube to iMovie? I’m pretty sure you have a positive answer as you saw how to add music to iMovie from YouTube using a simple step method. Moreover, have fun and create magic with your discovery of Filmora Video Editor , as it allows you to explore its numerous features to make a movie.
For Win 7 or later (64-bit)
Secure Download
For macOS 10.14 or later
Secure Download
Marion Dubois
Marion Dubois is a writer and a lover of all things video.
Follow @Marion Dubois
Navigate Your Way to Perfect Content: Top 12 Flipscreen Cams
12 Best Vlogging Cameras with a Flip Screen

Richard Bennett
Nov 01, 2022• Proven solutions
A flip screen is a very important feature on a camera for vloggers. With a flip screen, you can preview whether or not your shot is composed the way you want it to be, all in real-time. Below is our top list and review of the twelve best vlogging cameras with a flip screen.
WHAT TO LOOK FOR IN A VLOGGING CAMERA
1. Fully articulated screen (flip screen)
2. Good continual autofocus while recording video
3. Good focus priority through face recognition
4. Touch to focus
5. Good low-light performance
6. external mic jack, hot/cold shoe bracket
7. optical image stabilization
8. good battery life
Check out my full list of 10 Things To Look For In A Vlogging Camera to understand the importance of these camera features.
THE 12 BEST VLOGGING CAMERAS WITH A FLIP SCREEN (2018)
| Camera | Release Date | Camera Type | Flip Screen Type | Mic Port | Price | |
|---|---|---|---|---|---|---|
| CanonEOSM50 | 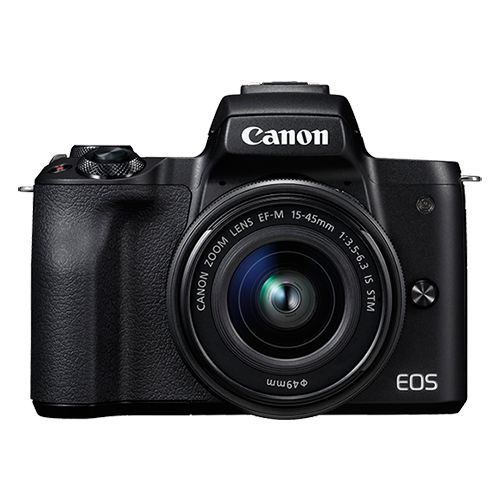 |
February2018 | Mirrorless | Fully Articulated | Yes | $- |
| PanasonicLumixDC-GH5S | 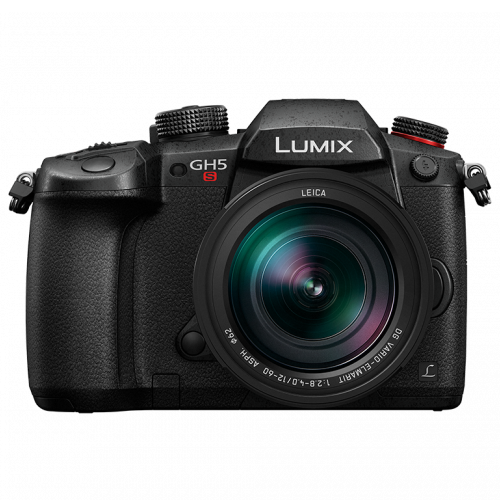 |
January2018 | Mirrorless | Fully Articulated | Yes | $$$ |
| CanonEOSM100 | 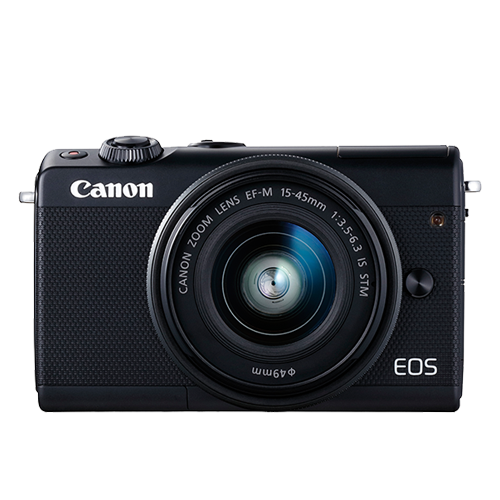 |
August2017 | Mirrorless | Flip Up | No | $ |
| CanonEOS6D Mark II | 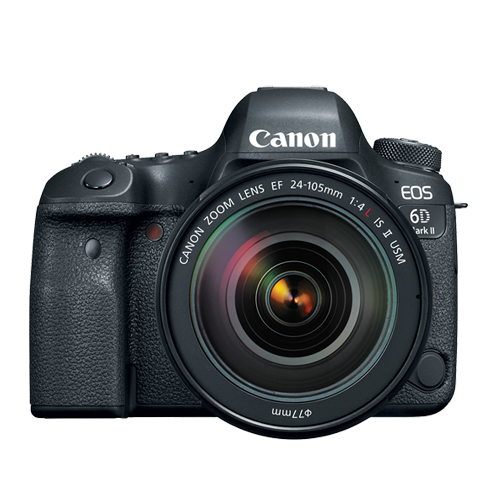 |
June2017 | Mid-size SLR | Fully Articulated | Yes | $$ |
| CanonEOS RebelSL2 |  |
June2017 | Compact SLR | Fully Articulated | Yes | $ |
| CanonEOS RebelT7i | 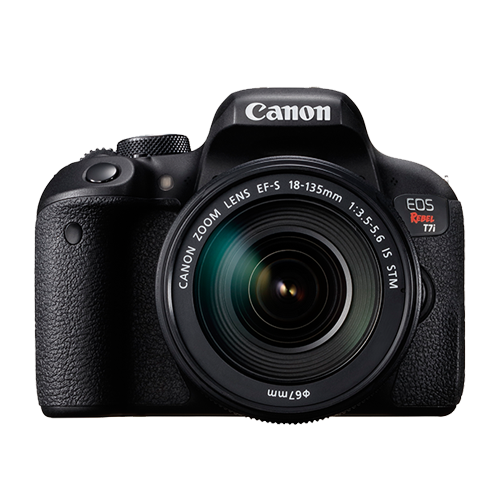 |
February2017 | Mid-size SLR | Fully Articulated | Yes | $- |
| CanonEOSM6 | 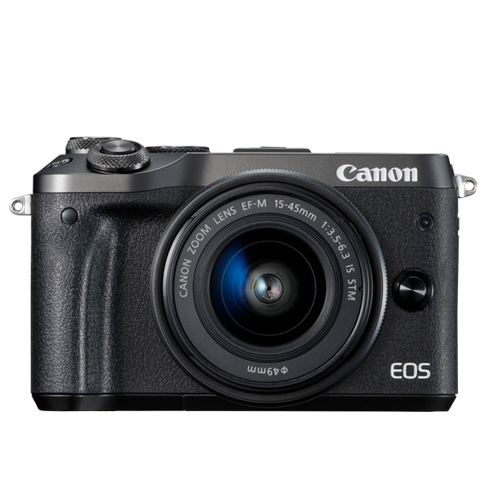 |
February2017 | Mirrorless | Flip Up | Yes | $ |
| NikonD5600 | 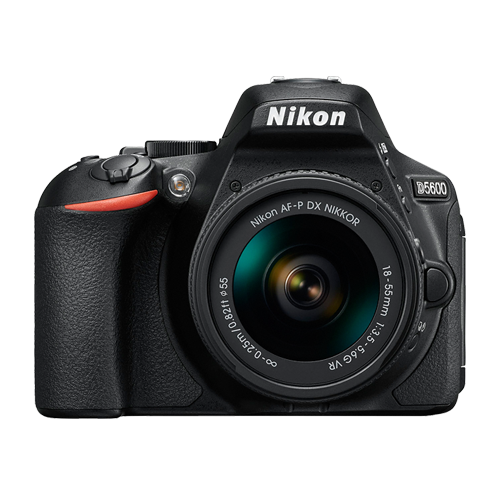 |
November2016 | Compact SLR | Fully Articulated | Yes | $- |
| SonyCyber-Shot DSCRX 100 V | 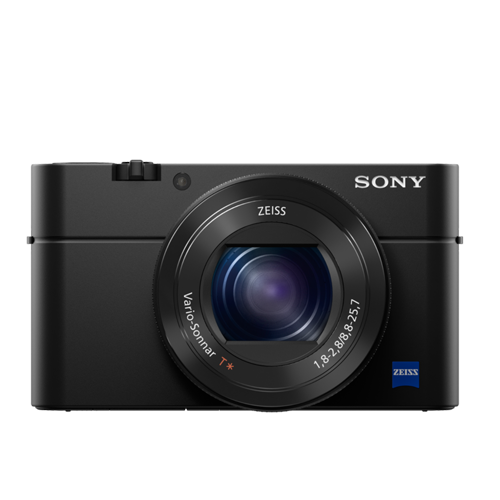 |
October2016 | Compact | Flip Up | No | $- |
| PanasonicLumixDMC-G85 | 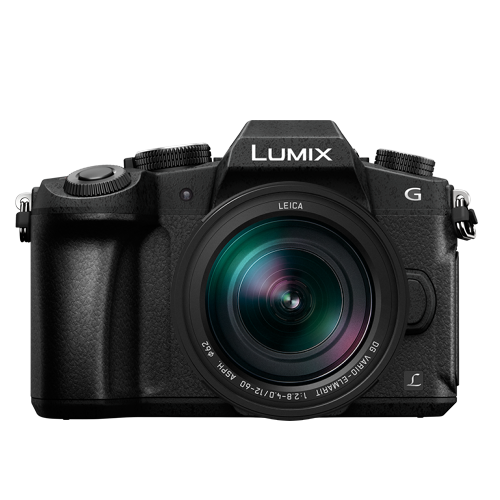 |
September2016 | Mirrorless | Flip Up | Yes | $- |
| CanonEOS80D | 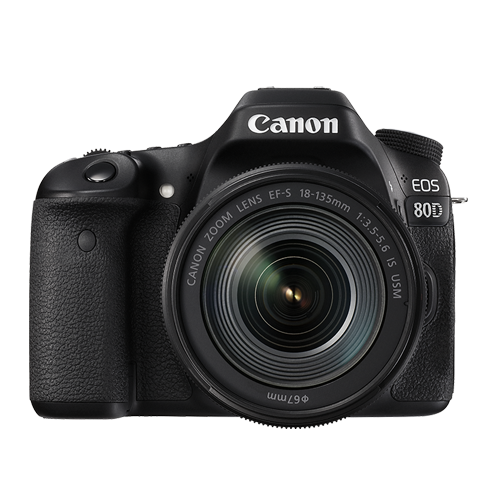 |
February2016 | Mid-size SLR | Fully Articulated | Yes | $$ |
| CanonPowerShotG7 X Mark II | 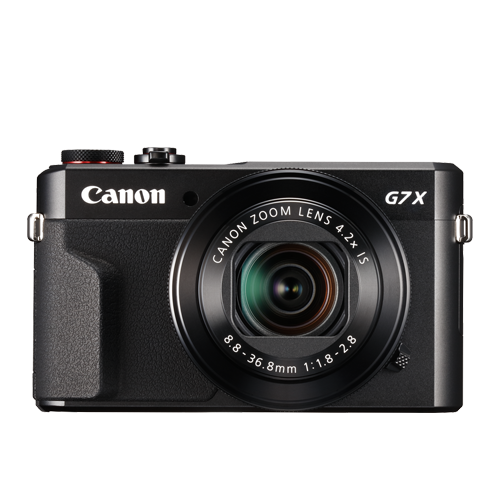 |
February2016 | Compact | Flip Up | No | $ |
|
Best daily vlogging camera with a flip screen: Sony Cyber-Shot DSC-RX 100 V If you want to use a compact camera with a flip screen, Sony’s Cyber-shot DSC-RX 100 V is an exceptional daily vlogging camera. This camera’s 20.1 MP Exmor RS BSI CMOS sensor with a maximum of 12800 in ISO sensitivity, can record footage in UHD 4K at 30 or 24 fps. The lens on this camera, a non-interchangeable Carl Zeiss Vario Sonnar T lens, performs well even under low-light conditions. With its fast hybrid AF system with 315 phase-detection points and an anti-motion blur mode, you can expect your shots to be accurately focused. The Sony RX 100 V packs so much power into such a small, portable camera, making it a great daily vlogging device. PROS - Light and easy to carry around - Produces high-res videos CONS - Short battery life - Lacking a touchscreen |
|---|---|
|
Best cheap vlogging camera with a flip screen: Canon EOS M100 The Canon EOS M100 is another great small vlogging camera with a flip screen. This mirrorless camera shoots up to full HD 1080p videos at 60 fps. Its 24.2 MP APS-C CMOS sensor and DIGIC 7 image processor will accurately lock the right focus and produce videos with rich detail. The camera’s ISO sensitivity goes as high as ISO 25600. Even in difficult light conditions, this camera will be able to capture a scene. You can control and navigate through the difficult functions of this camera using its 3-inch touchscreen LCD. This camera has a flip screen that flips upward so that you can see yourself while you vlog. With built-in Wi-Fi and NFC, you can also transfer your videos seamlessly to a computer without any cables. If you don’t want to spend a fortune but still want to produce videos with great picture quality, the Canon EOS M100 is the best entry-level camera for daily vlogging that’s currently on the market. PROS - Affordable - Great connectivity options CONS - Lacks advanced video recording features - No viewfinder |
|
Best entry-level mirrorless camera with a flip screen for vlogging: Canon EOS M100 The Canon EOS M100 is the best entry-level mirrorless camera with a flip screen for vlogging. In case you missed it, check out my review on the Canon EOS M100. |
|
Best mid-range mirrorless camera with a flip screen for vlogging: Canon EOS M50 The Canon EOS M50 is already regarded as one of the best mirrorless cameras for vlogging though it has only been on the market for just a few months. This mirrorless camera comes with the newer DIGIC 8 Image Processor that find a focus for your footage even better than the last generation’s image processor. You can crank up the ISO sensitivity to ISO 51200 with the Canon EOS M50. The Canon EOS M50 can shoot UHD 4K videos at 23.98 fps. You can also capture 720p slow-motion videos at 120 fps. PROS - Has an external microphone port - Has a 2.36m-dot OLED electronic viewfinder CONS - No image stabilization - Battery life could be longer |
|
Best professional mirrorless camera with a flip screen for vlogging: Panasonic Lumix DC-GH5S When Panasonic made its Lumix DC-GH5, it was a hybrid camera that performed equally well in both photo and video. In response to customers’ interest in a video-focused camera, Panasonic released the GH5S. This camera is equipped with a micro four-thirds sensor and can shoot UHD 4K and DCI videos at 60 fps, up to 150 Mbps. If you want to capture slow-motion footage, you can shoot full HD 1080p videos at 240 fps as well. With its 10.28MP multi-aspect ratio MOS sensor, you’ll be able to produce high-quality videos even under very challenging lighting conditions. In a fraction of a second, this camera can also automatically grab focus during your video with its advanced depth-from-focus technology. It is also equipped with a microphone jack so that you can record better audio while shooting with this camera. The GH5S has a fully articulated touchscreen so that you can compose your shot from any angle. PROS - ISO sensitivity goes up to 204800 - High video bit rates CONS - Expensive - The camera body weighs about 1.5 lbs |
|
Best entry-level DSLR camera with a flip screen for vlogging: Canon EOS SL2 If you’re looking for a low priced entry-level vlogging camera with a flip screen, the Canon EOS Rebel SL2 is the best option. You can precisely and quickly grab focus during video recording with its 9-point AF system and dual pixel CMOS AF technology. The camera powers these functions with its DIGIC 7 image processor. You can shoot up to full HD 1080p videos at 60 fps with its 24.2 MP APS-C CMOS sensor and crank the ISO up to ISO 51200 in case you need to shoot under low light conditions. If you want better audio for your vlogs, you can connect an external microphone to the SL2’s microphone jack. PROS - Microphone jack - Wi-Fi connectivity CONS - No 4K video support - Optical image stabilizer could be better |
|
Best mid-range DSLR camera with a flip screen for vlogging: Canon EOS 80D The 80D is the best camera to go with if you’re looking for a mid-range DLSR vlogging camera with a flip screen. It is equipped with a 24.2 MP APS-C CMOS sensor, comes with the DIGIC 6 image processor, and shoots up to full HD 1080p videos at 60 fps. For low lighting conditions, you can set the camera’s ISO to as high as ISO 25600. The 80D is great for autofocusing during video recording as it comes with a 45-point all cross phase detection autofocus system and a dual pixel CMOS AF system. PROS - Feature-rich - Continuous AF feature performs beautifully while recording high-res videos CONS - Just one SD card slot - PC sync connection features could be better |
|
Best professional DSLR camera with a flip screen for vlogging: Canon 6D Mark II The 6D Mark II is currently (at the time of writing this review) the only full-frame DSLR camera that comes with both a fully-articulated screen and a microphone jack. It is equipped with a 26.2 MP full-frame CMOS sensor, comes with the DIGIC 7 image processor, and shoots up to full HD 1080p videos at 60 fps. The 6D is also equipped with the same 45-point all cross-phase detection and dual pixel CMOS autofocusing system as the 80D. If you’re wanting to vlog with a full-frame camera, the 6D Mark II is the best option. PROS - ISO sensitivity goes up to 102400 - Amazing touchscreen controls CONS - No 4K video recording option - No USB 3.0 |
Want to compare even more cameras? Check out…
12 Best Vlogging Cameras (2018)
Top 11 Cheap Vlogging Cameras (2018)
7 Best DSLR Cameras For Vlogging (2018)
8 Best Mirrorless Cameras For Vlogging (2018)
Richard Bennett
Richard Bennett is a writer and a lover of all things video.
Follow @Richard Bennett
Richard Bennett
Nov 01, 2022• Proven solutions
A flip screen is a very important feature on a camera for vloggers. With a flip screen, you can preview whether or not your shot is composed the way you want it to be, all in real-time. Below is our top list and review of the twelve best vlogging cameras with a flip screen.
WHAT TO LOOK FOR IN A VLOGGING CAMERA
1. Fully articulated screen (flip screen)
2. Good continual autofocus while recording video
3. Good focus priority through face recognition
4. Touch to focus
5. Good low-light performance
6. external mic jack, hot/cold shoe bracket
7. optical image stabilization
8. good battery life
Check out my full list of 10 Things To Look For In A Vlogging Camera to understand the importance of these camera features.
THE 12 BEST VLOGGING CAMERAS WITH A FLIP SCREEN (2018)
| Camera | Release Date | Camera Type | Flip Screen Type | Mic Port | Price | |
|---|---|---|---|---|---|---|
| CanonEOSM50 | |
February2018 | Mirrorless | Fully Articulated | Yes | $- |
| PanasonicLumixDC-GH5S | |
January2018 | Mirrorless | Fully Articulated | Yes | $$$ |
| CanonEOSM100 | |
August2017 | Mirrorless | Flip Up | No | $ |
| CanonEOS6D Mark II | |
June2017 | Mid-size SLR | Fully Articulated | Yes | $$ |
| CanonEOS RebelSL2 | |
June2017 | Compact SLR | Fully Articulated | Yes | $ |
| CanonEOS RebelT7i | |
February2017 | Mid-size SLR | Fully Articulated | Yes | $- |
| CanonEOSM6 | |
February2017 | Mirrorless | Flip Up | Yes | $ |
| NikonD5600 | |
November2016 | Compact SLR | Fully Articulated | Yes | $- |
| SonyCyber-Shot DSCRX 100 V | |
October2016 | Compact | Flip Up | No | $- |
| PanasonicLumixDMC-G85 | |
September2016 | Mirrorless | Flip Up | Yes | $- |
| CanonEOS80D | |
February2016 | Mid-size SLR | Fully Articulated | Yes | $$ |
| CanonPowerShotG7 X Mark II | |
February2016 | Compact | Flip Up | No | $ |
|
Best daily vlogging camera with a flip screen: Sony Cyber-Shot DSC-RX 100 V If you want to use a compact camera with a flip screen, Sony’s Cyber-shot DSC-RX 100 V is an exceptional daily vlogging camera. This camera’s 20.1 MP Exmor RS BSI CMOS sensor with a maximum of 12800 in ISO sensitivity, can record footage in UHD 4K at 30 or 24 fps. The lens on this camera, a non-interchangeable Carl Zeiss Vario Sonnar T lens, performs well even under low-light conditions. With its fast hybrid AF system with 315 phase-detection points and an anti-motion blur mode, you can expect your shots to be accurately focused. The Sony RX 100 V packs so much power into such a small, portable camera, making it a great daily vlogging device. PROS - Light and easy to carry around - Produces high-res videos CONS - Short battery life - Lacking a touchscreen |
|---|---|
|
Best cheap vlogging camera with a flip screen: Canon EOS M100 The Canon EOS M100 is another great small vlogging camera with a flip screen. This mirrorless camera shoots up to full HD 1080p videos at 60 fps. Its 24.2 MP APS-C CMOS sensor and DIGIC 7 image processor will accurately lock the right focus and produce videos with rich detail. The camera’s ISO sensitivity goes as high as ISO 25600. Even in difficult light conditions, this camera will be able to capture a scene. You can control and navigate through the difficult functions of this camera using its 3-inch touchscreen LCD. This camera has a flip screen that flips upward so that you can see yourself while you vlog. With built-in Wi-Fi and NFC, you can also transfer your videos seamlessly to a computer without any cables. If you don’t want to spend a fortune but still want to produce videos with great picture quality, the Canon EOS M100 is the best entry-level camera for daily vlogging that’s currently on the market. PROS - Affordable - Great connectivity options CONS - Lacks advanced video recording features - No viewfinder |
|
Best entry-level mirrorless camera with a flip screen for vlogging: Canon EOS M100 The Canon EOS M100 is the best entry-level mirrorless camera with a flip screen for vlogging. In case you missed it, check out my review on the Canon EOS M100. |
|
Best mid-range mirrorless camera with a flip screen for vlogging: Canon EOS M50 The Canon EOS M50 is already regarded as one of the best mirrorless cameras for vlogging though it has only been on the market for just a few months. This mirrorless camera comes with the newer DIGIC 8 Image Processor that find a focus for your footage even better than the last generation’s image processor. You can crank up the ISO sensitivity to ISO 51200 with the Canon EOS M50. The Canon EOS M50 can shoot UHD 4K videos at 23.98 fps. You can also capture 720p slow-motion videos at 120 fps. PROS - Has an external microphone port - Has a 2.36m-dot OLED electronic viewfinder CONS - No image stabilization - Battery life could be longer |
|
Best professional mirrorless camera with a flip screen for vlogging: Panasonic Lumix DC-GH5S When Panasonic made its Lumix DC-GH5, it was a hybrid camera that performed equally well in both photo and video. In response to customers’ interest in a video-focused camera, Panasonic released the GH5S. This camera is equipped with a micro four-thirds sensor and can shoot UHD 4K and DCI videos at 60 fps, up to 150 Mbps. If you want to capture slow-motion footage, you can shoot full HD 1080p videos at 240 fps as well. With its 10.28MP multi-aspect ratio MOS sensor, you’ll be able to produce high-quality videos even under very challenging lighting conditions. In a fraction of a second, this camera can also automatically grab focus during your video with its advanced depth-from-focus technology. It is also equipped with a microphone jack so that you can record better audio while shooting with this camera. The GH5S has a fully articulated touchscreen so that you can compose your shot from any angle. PROS - ISO sensitivity goes up to 204800 - High video bit rates CONS - Expensive - The camera body weighs about 1.5 lbs |
|
Best entry-level DSLR camera with a flip screen for vlogging: Canon EOS SL2 If you’re looking for a low priced entry-level vlogging camera with a flip screen, the Canon EOS Rebel SL2 is the best option. You can precisely and quickly grab focus during video recording with its 9-point AF system and dual pixel CMOS AF technology. The camera powers these functions with its DIGIC 7 image processor. You can shoot up to full HD 1080p videos at 60 fps with its 24.2 MP APS-C CMOS sensor and crank the ISO up to ISO 51200 in case you need to shoot under low light conditions. If you want better audio for your vlogs, you can connect an external microphone to the SL2’s microphone jack. PROS - Microphone jack - Wi-Fi connectivity CONS - No 4K video support - Optical image stabilizer could be better |
|
Best mid-range DSLR camera with a flip screen for vlogging: Canon EOS 80D The 80D is the best camera to go with if you’re looking for a mid-range DLSR vlogging camera with a flip screen. It is equipped with a 24.2 MP APS-C CMOS sensor, comes with the DIGIC 6 image processor, and shoots up to full HD 1080p videos at 60 fps. For low lighting conditions, you can set the camera’s ISO to as high as ISO 25600. The 80D is great for autofocusing during video recording as it comes with a 45-point all cross phase detection autofocus system and a dual pixel CMOS AF system. PROS - Feature-rich - Continuous AF feature performs beautifully while recording high-res videos CONS - Just one SD card slot - PC sync connection features could be better |
|
Best professional DSLR camera with a flip screen for vlogging: Canon 6D Mark II The 6D Mark II is currently (at the time of writing this review) the only full-frame DSLR camera that comes with both a fully-articulated screen and a microphone jack. It is equipped with a 26.2 MP full-frame CMOS sensor, comes with the DIGIC 7 image processor, and shoots up to full HD 1080p videos at 60 fps. The 6D is also equipped with the same 45-point all cross-phase detection and dual pixel CMOS autofocusing system as the 80D. If you’re wanting to vlog with a full-frame camera, the 6D Mark II is the best option. PROS - ISO sensitivity goes up to 102400 - Amazing touchscreen controls CONS - No 4K video recording option - No USB 3.0 |
Want to compare even more cameras? Check out…
12 Best Vlogging Cameras (2018)
Top 11 Cheap Vlogging Cameras (2018)
7 Best DSLR Cameras For Vlogging (2018)
8 Best Mirrorless Cameras For Vlogging (2018)
Richard Bennett
Richard Bennett is a writer and a lover of all things video.
Follow @Richard Bennett
Also read:
- Designing a Personalized YouTube Subscribe Link
- Analyzing YouTube's Process for Selective Comment Showcasing for 2024
- Alternative Cinema Choices for Every Fan for 2024
- Spark Inspiration Free, Premium Designs for Video Marketers
- [New] Breaking Into YouTube's Top 100 With Effective SEO
- [Updated] Break It Down Free Techniques to Go Frame by Frame on YouTube
- In 2024, Delving Into YouTube's Complex Calculation of Viewer Stats
- [New] Elevate Your Viewing Game with Concurrent Channel Watches
- [Updated] Cutting-Edge Free Audio for YouTube Visionaries
- Swift Sketching for Fortnite Game Titles
- [Updated] Amplify Your Storytelling Seamlessly Insert Music Into YouTube Videos
- 2024 Approved Channel Boosting Mastery Unveiling the Best 5 Video Marketing Strategies
- [Updated] Beyond Boundaries Recognizing Leading Women in Digital Storytelling
- Collect Priceless Imagery From Trusted 4 YouTube Directories
- [New] Clubbing Essentials Top-Rated DJ Template Vids
- In 2024, How to Reset Gmail Password on Vivo Y200 Devices
- Supercharge Collaboration Essential Facebook Planners Decoded for 2024
- 2024 Approved Infinity Refresh Top 5 HDMI 2Ranetixx Gaming Screens [PS5]
- In 2024, Hassle-Free Ways to Remove FRP Lock from Oppo Find X7 Phones with/without a PC
- How To Recover Lost Data on Apple iPhone SE? | Dr.fone
- [Updated] In 2024, Ephemeral Insights Into FB Episodes
- Updated 6 Unexpected Ways Gif Animation Maker Can Affect Your Marketing for 2024
- Solutions to restore deleted files from Nokia
- Learn the Basics of Mastering Your TikTok Camera for 2024
- New Trim Your Videos with Ease Top 10 PC and Web Solutions
- 2024 Approved Digital Broadcasting Made Simple Your Essential Guide to 4 Recording Tips
- [New] 2024 Approved QuickCapture Ultimate Scan
- Title: In 2024, Easy Ways to Add Music to iMovie From YouTube
- Author: Brian
- Created at : 2024-05-25 12:12:22
- Updated at : 2024-05-26 12:12:22
- Link: https://youtube-video-recordings.techidaily.com/in-2024-easy-ways-to-add-music-to-imovie-from-youtube/
- License: This work is licensed under CC BY-NC-SA 4.0.
