In 2024, DIY Tripods| How to Stabilize Your Camera without Buying a Tripod
Stand Alone, Hold Tight: Camera Stability Techniques
DIY Tripods| How to Stabilize Your Camera without Buying a Tripod

Richard Bennett
Oct 26, 2023• Proven solutions
When you’re trying to grow a channel on YouTube it can feel like equipment is a barrier, but it shouldn’t be. If you can’t afford a high-end tripod, for example, there are loads of ways to get by without one.
DIY Your Video with Wondershare Filmora
Wondershare Filmora has the best video stabilization tool is your videos have a bad frame or were recorded in dim lights. If a video is shot in bad weather or unfriendly situation where you don’t have all the equipment required for a quality recording, Wondershare Filmora can help you in the background to edit your videos like a pro. And it has all the relevant tools like effects, transitions, background removal, overlays, and background music that could turn your normal video to a professional one.


Here are 3 of our favorite DIY tripods.
DIY smartphone tripod using binder clips or hair clips
You’re a solo operation and your best camera is on your phone. That’s pretty common.
If you have a DSLR then you can set it down on any stable surface while filming yourself, but your phone can’t stand up by itself. It needs something or someone to hold it. Do you just accept that and shoot everything as a selfie?
No. No, you don’t, because there are common household items that can help you out of this problem. For this DIY tripod, you need either 2 binder clips or 2 ‘claw clips’ (also called ‘hair jaws’).
Hold your phone in landscape mode (horizontally, so it’s long rather than tall) and attach clips to the bottom corners. If you are worried about scratching your screen, fold up some paper to place between your clip and your phone.
Here it is with binder clips:

And here it is with hair clips:

Now you can set your smartphone upon any stable surface, like a table or a stack of books.
Here are some more cool ideas!
DIY adjustable tripod using books and a towel
You’ve probably heard a million times that you can stabilize your camera by sitting it down on any stable surface – on your desk, on a stack of books, up in a tree, etc. This is very true!
But if you can use any stable surface, why do people buy tripods?
Because it isn’t convenient to rearrange your furniture whenever you want to make a video, and also because tripods are adjustable. You can change their height, you can use them to pan or tilt, and it’s pretty easy to move them a bit forwards or backward while you’re setting up your shot.
To get similar functions from the ‘any stable surface’ solution you can use a table, a stack of books, and a towel.
- Set up the area where you’re going to sit while you’re filming on one end of the table.
- Put the towel down over the approximate spot you want your camera to be.
- Stack your books on top of the towel.
- Put your camera on top of the books.
Now if your camera isn’t up high enough, or is too high, you can adjust it just by adding or taking away books. If you want to move it closer or farther away from you, just pull the towel forwards or backward.

DIY gripping ‘Gorillapod’ using wire and tape
Gorillapod’s are cool because you can use them like normal tripods, carry them around like selfie sticks, or attach them to things like fences and posts. Here’s how you can make something similar using wire, electrical tape or duct tape, and a 1/4 bolt.
Your wire should be fairly stiff and you’ll need three pieces the same length, which should be at least 10 inches. Old clothes hangers work well. This needs to be something strong enough to support the weight of your camera, but soft enough that it’s not impossible for you to bend.

All of your supplies plus the finished product.
Readying your legs
Step 1: Bend 2 inches at one end of each wire into a ‘U’ shape. You will probably need pliers for this.
Step 2: Pick up one of your pieces of wire and wrap one end with electrical tape. Go around 5-10 times (to prevent it from coming undone at the end) and then, without cutting your tape, start moving up and wrapping the rest of your wire. Stop before your ‘U’ section.
Repeat this with the other two wires.
Attaching your legs
Step 1: Place the ‘U’ section of a leg against your bolt. The bolt’s threading should be pointing away from the leg. Now, use your tape to attach them. Wind it around 2 or 3 times, then repeat the process with both of the other legs individually.
Step 2: After all the legs are attached, wrap some more tape around all 3 as tightly as you can.
Your camera will mount onto the bolt! You’ll be able to use this as a normal table-top tripod or use the flexible legs to grab onto different things like a Gorillapod. Read more at Instructables.
Note: make sure the bolt is a fit for your camera before you get too far into this process.
Richard Bennett
Richard Bennett is a writer and a lover of all things video.
Follow @Richard Bennett
Richard Bennett
Oct 26, 2023• Proven solutions
When you’re trying to grow a channel on YouTube it can feel like equipment is a barrier, but it shouldn’t be. If you can’t afford a high-end tripod, for example, there are loads of ways to get by without one.
DIY Your Video with Wondershare Filmora
Wondershare Filmora has the best video stabilization tool is your videos have a bad frame or were recorded in dim lights. If a video is shot in bad weather or unfriendly situation where you don’t have all the equipment required for a quality recording, Wondershare Filmora can help you in the background to edit your videos like a pro. And it has all the relevant tools like effects, transitions, background removal, overlays, and background music that could turn your normal video to a professional one.
Here are 3 of our favorite DIY tripods.
DIY smartphone tripod using binder clips or hair clips
You’re a solo operation and your best camera is on your phone. That’s pretty common.
If you have a DSLR then you can set it down on any stable surface while filming yourself, but your phone can’t stand up by itself. It needs something or someone to hold it. Do you just accept that and shoot everything as a selfie?
No. No, you don’t, because there are common household items that can help you out of this problem. For this DIY tripod, you need either 2 binder clips or 2 ‘claw clips’ (also called ‘hair jaws’).
Hold your phone in landscape mode (horizontally, so it’s long rather than tall) and attach clips to the bottom corners. If you are worried about scratching your screen, fold up some paper to place between your clip and your phone.
Here it is with binder clips:
And here it is with hair clips:
Now you can set your smartphone upon any stable surface, like a table or a stack of books.
Here are some more cool ideas!
DIY adjustable tripod using books and a towel
You’ve probably heard a million times that you can stabilize your camera by sitting it down on any stable surface – on your desk, on a stack of books, up in a tree, etc. This is very true!
But if you can use any stable surface, why do people buy tripods?
Because it isn’t convenient to rearrange your furniture whenever you want to make a video, and also because tripods are adjustable. You can change their height, you can use them to pan or tilt, and it’s pretty easy to move them a bit forwards or backward while you’re setting up your shot.
To get similar functions from the ‘any stable surface’ solution you can use a table, a stack of books, and a towel.
- Set up the area where you’re going to sit while you’re filming on one end of the table.
- Put the towel down over the approximate spot you want your camera to be.
- Stack your books on top of the towel.
- Put your camera on top of the books.
Now if your camera isn’t up high enough, or is too high, you can adjust it just by adding or taking away books. If you want to move it closer or farther away from you, just pull the towel forwards or backward.
DIY gripping ‘Gorillapod’ using wire and tape
Gorillapod’s are cool because you can use them like normal tripods, carry them around like selfie sticks, or attach them to things like fences and posts. Here’s how you can make something similar using wire, electrical tape or duct tape, and a 1/4 bolt.
Your wire should be fairly stiff and you’ll need three pieces the same length, which should be at least 10 inches. Old clothes hangers work well. This needs to be something strong enough to support the weight of your camera, but soft enough that it’s not impossible for you to bend.
All of your supplies plus the finished product.
Readying your legs
Step 1: Bend 2 inches at one end of each wire into a ‘U’ shape. You will probably need pliers for this.
Step 2: Pick up one of your pieces of wire and wrap one end with electrical tape. Go around 5-10 times (to prevent it from coming undone at the end) and then, without cutting your tape, start moving up and wrapping the rest of your wire. Stop before your ‘U’ section.
Repeat this with the other two wires.
Attaching your legs
Step 1: Place the ‘U’ section of a leg against your bolt. The bolt’s threading should be pointing away from the leg. Now, use your tape to attach them. Wind it around 2 or 3 times, then repeat the process with both of the other legs individually.
Step 2: After all the legs are attached, wrap some more tape around all 3 as tightly as you can.
Your camera will mount onto the bolt! You’ll be able to use this as a normal table-top tripod or use the flexible legs to grab onto different things like a Gorillapod. Read more at Instructables.
Note: make sure the bolt is a fit for your camera before you get too far into this process.
Richard Bennett
Richard Bennett is a writer and a lover of all things video.
Follow @Richard Bennett
Free Traffic on YouTube: Tips That Actually Work
Easy Ways To Get Free Views on YouTube! Alternative Methods
Richard Bennett
Oct 26, 2023• Proven solutions
If you’re looking to get free views on YouTube, rather than just assuming views are free, it probably means you’re looking into alternative ways to jumpstart the growth of your channel (i.e. buying views ). The best way to grow your channel is to focus on putting out quality content consistently. We do not recommend the following methods, but they do exist. Here are a couple of alternatives to purchasing views which are along those same lines (if you want to know how to grow organically without resorting to tactics like these, click here ) When YouTube first started, getting views and subscribers was a lot easier. That’s not to say that creator didn’t have to work hard on their channels, just that they had a lot less competition.
YouTube has become so popular now that it is not uncommon for creators to look for alternative ways to stand out. Some might choose to buy views to kick start the organic growth of their channels (which is not a good idea), while others are looking for free ways of getting those views.
Two of these alternative methods are:
Part 1: Get More Views with View Exchange Platforms
Part 2: Get More YouTube Views with Bots
#1: View Exchange Platforms
There are a variety of websites to choose from, but the main purpose is the same: you watch other people’s videos in order for them to watch your videos.
Here are the most popular view exchange platforms:
1. View2be
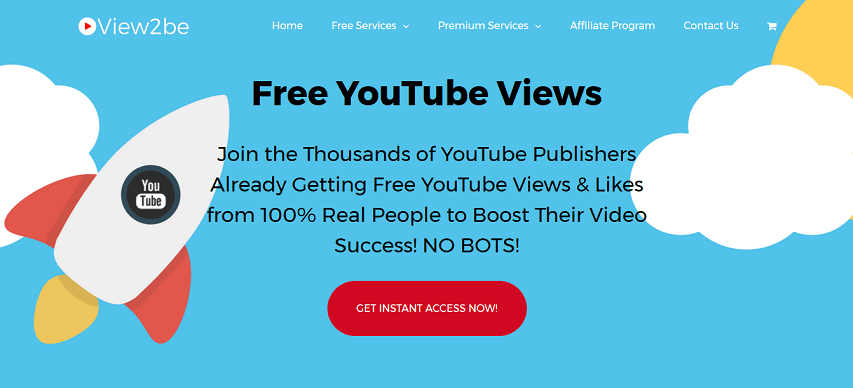
View2be accounts are free. After you sign up, you will need to start watching videos from other YouTube publishers who are also members at View2be in order to earn coins. One of the differences between View2be and other view exchange platforms is that here, you can also complete some other tasks such as liking videos in order to earn more coins.
You can then spend the coins on views and likes for your own videos.
2. GrowViews
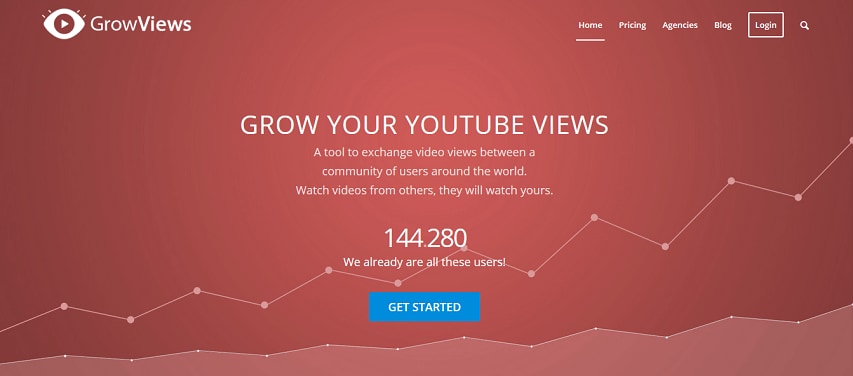
With GrowViews, you will need to login with your YouTube account. This is how the platform lists your YouTube videos.
After signing in, you just need to click on the Play button. The site’s player will work on the background, playing videos from other YouTube creators.
For each video that you watch, you will get 1 credit that you can then exchange for views on your own videos.
3. YTMonster
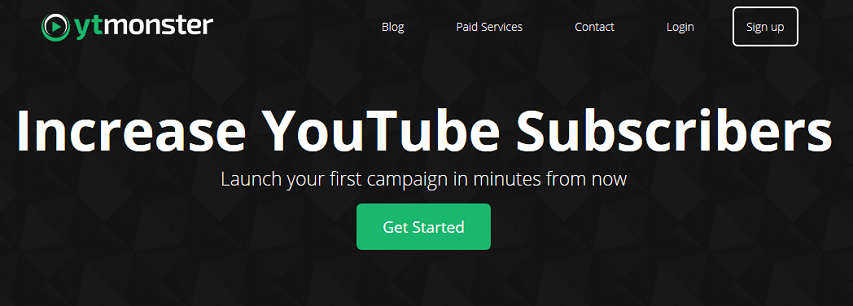
Just like with the previous two view exchange platforms mentioned, you can also create a free account with YTMonster. This will give you access to a dashboard where you can choose how to use the credits that you earn as well as keep track of what you have already spent credits on.
With YTMonster, you will be able to contact other video publishers like you and exchange not only views but comments, likes, and even subscriptions as well. You can even start campaigns to grow your YouTube channel as quickly as you can.
4. KingdomLikes

At KingdomLikes, you also create a free account. This platform isn’t only for YouTube views, it is for the exchange of social actions across multiple websites. One of the main advantages of using the KingdomLikes is that you can also use this same platform to get likes or views on Facebook, Twitter, or Instagram, as well as on YouTube.
Just like with the other platforms, you will need to watch other people’s videos in order to earn views for yourself.
5. AddVisits
After creating your free account on AddVisits you’ll get to a dashboard where you’ll need to enter the URL of the YouTube video you want free views for.
AddVisits reviews each video submitted in this way to ensure that it complies with YouTube’s Terms of Service. Once your video is approved, you define how many points you are willing to give to people who watch your videos or like them. In exchange, you watch other people’s videos and get points as compensation. You can then exchange those points for more views or likes.
#2: Get More Views with YouTube View Bots
When most people think about getting free views on YouTube, they immediately think about bots.
Bots can be dangerous for your channel. The wrong bot can really hurt your search rankings and if you get caught using bots you can lose your account.
If you are going to try a bot, make sure you choose one that offers high retention views (most can’t, but may say they can). High retention views mean YouTube interprets the data as someone watching your video for a period of time, vs just clicking on it and then leaving the page. A bot that can’t offer high retention views just ends up making it look like a lot of people clicked on your video, but none of them liked it enough to watch. That will cause YouTube to rank your video very low in its search results.
Making great content and polishing up your YouTube SEO skills will help you grow your channel over time, and this is probably the best way to go. However, you have a lot of options for how to get free views on YouTube if you want to try to kick start that growth. Besides, using a good video editing software is also important. Filmora provides lots of templates and effects which allows you to edit YouTube videos faster and better.
Richard Bennett
Richard Bennett is a writer and a lover of all things video.
Follow @Richard Bennett
Richard Bennett
Oct 26, 2023• Proven solutions
If you’re looking to get free views on YouTube, rather than just assuming views are free, it probably means you’re looking into alternative ways to jumpstart the growth of your channel (i.e. buying views ). The best way to grow your channel is to focus on putting out quality content consistently. We do not recommend the following methods, but they do exist. Here are a couple of alternatives to purchasing views which are along those same lines (if you want to know how to grow organically without resorting to tactics like these, click here ) When YouTube first started, getting views and subscribers was a lot easier. That’s not to say that creator didn’t have to work hard on their channels, just that they had a lot less competition.
YouTube has become so popular now that it is not uncommon for creators to look for alternative ways to stand out. Some might choose to buy views to kick start the organic growth of their channels (which is not a good idea), while others are looking for free ways of getting those views.
Two of these alternative methods are:
Part 1: Get More Views with View Exchange Platforms
Part 2: Get More YouTube Views with Bots
#1: View Exchange Platforms
There are a variety of websites to choose from, but the main purpose is the same: you watch other people’s videos in order for them to watch your videos.
Here are the most popular view exchange platforms:
1. View2be
View2be accounts are free. After you sign up, you will need to start watching videos from other YouTube publishers who are also members at View2be in order to earn coins. One of the differences between View2be and other view exchange platforms is that here, you can also complete some other tasks such as liking videos in order to earn more coins.
You can then spend the coins on views and likes for your own videos.
2. GrowViews
With GrowViews, you will need to login with your YouTube account. This is how the platform lists your YouTube videos.
After signing in, you just need to click on the Play button. The site’s player will work on the background, playing videos from other YouTube creators.
For each video that you watch, you will get 1 credit that you can then exchange for views on your own videos.
3. YTMonster
Just like with the previous two view exchange platforms mentioned, you can also create a free account with YTMonster. This will give you access to a dashboard where you can choose how to use the credits that you earn as well as keep track of what you have already spent credits on.
With YTMonster, you will be able to contact other video publishers like you and exchange not only views but comments, likes, and even subscriptions as well. You can even start campaigns to grow your YouTube channel as quickly as you can.
4. KingdomLikes
At KingdomLikes, you also create a free account. This platform isn’t only for YouTube views, it is for the exchange of social actions across multiple websites. One of the main advantages of using the KingdomLikes is that you can also use this same platform to get likes or views on Facebook, Twitter, or Instagram, as well as on YouTube.
Just like with the other platforms, you will need to watch other people’s videos in order to earn views for yourself.
5. AddVisits
After creating your free account on AddVisits you’ll get to a dashboard where you’ll need to enter the URL of the YouTube video you want free views for.
AddVisits reviews each video submitted in this way to ensure that it complies with YouTube’s Terms of Service. Once your video is approved, you define how many points you are willing to give to people who watch your videos or like them. In exchange, you watch other people’s videos and get points as compensation. You can then exchange those points for more views or likes.
#2: Get More Views with YouTube View Bots
When most people think about getting free views on YouTube, they immediately think about bots.
Bots can be dangerous for your channel. The wrong bot can really hurt your search rankings and if you get caught using bots you can lose your account.
If you are going to try a bot, make sure you choose one that offers high retention views (most can’t, but may say they can). High retention views mean YouTube interprets the data as someone watching your video for a period of time, vs just clicking on it and then leaving the page. A bot that can’t offer high retention views just ends up making it look like a lot of people clicked on your video, but none of them liked it enough to watch. That will cause YouTube to rank your video very low in its search results.
Making great content and polishing up your YouTube SEO skills will help you grow your channel over time, and this is probably the best way to go. However, you have a lot of options for how to get free views on YouTube if you want to try to kick start that growth. Besides, using a good video editing software is also important. Filmora provides lots of templates and effects which allows you to edit YouTube videos faster and better.
Richard Bennett
Richard Bennett is a writer and a lover of all things video.
Follow @Richard Bennett
Also read:
- [New] 2024 Approved From Camera to Community Shared Videos on Twt+Tumble
- [New] A Comprehensive Look at Lighting Your YouTube Videos Right
- [New] Direct Conversion of Spotify Music 5 Tools for YouTube Streaming
- [New] Earnings Breakdown One Million Glances at Youtube
- [New] Getting Started with Windows 10 Sound Recording
- [New] In 2024, Six Simplest Strategies to Craft Your MC Dwelling
- [New] Maximize Impact Best Practices for FB Video Posts for 2024
- [Updated] Step by Step Navigating the Full Spectrum of Storage in the Adobe Cloud Ecosystem
- [Updated] The Voice-Over Advantage Elevating Video Quality
- 【GIF作成手順】最もおすすめのPC・iPhone・Androidアプリ紹介! ソフトウェア・サイトを含むGoogle検索エンジン用方法ガイド
- 2024 Approved Delving Into How T-Series Earnings Work on Youtube
- Chuckle Fest The Ultimate List of Hilarious YouTube Personalities
- How To Repair Apple iPhone 14 Plus iOS? | Dr.fone
- Maximize Engagement - Learn From TubeBuddy Experts
- Transition Worldwide: Set Xbox Time in New Regions
- Title: In 2024, DIY Tripods| How to Stabilize Your Camera without Buying a Tripod
- Author: Brian
- Created at : 2024-11-08 05:35:05
- Updated at : 2024-11-14 17:33:43
- Link: https://youtube-video-recordings.techidaily.com/in-2024-diy-tripods-how-to-stabilize-your-camera-without-buying-a-tripod/
- License: This work is licensed under CC BY-NC-SA 4.0.