
In 2024, Crafting Shorts for a Seamless User Experience
Crafting Shorts for a Seamless User Experience
Versatile Video Editor - Wondershare Filmora
An easy yet powerful editor
Numerous effects to choose from
Detailed tutorials provided by the official channel
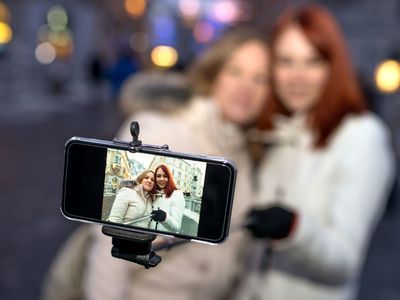
The vertical video went to a mainstream media style. Nowadays, it’s common for online video, especially on social apps. Mobile video has become the most common way to watch online videos. It makes sense then that vertical is the preferred familiarization for videos. Users don’t want to twist their phones to watch a 30-second ad. Knowing YouTube shorts vertical size is important as well as Facebook vertical video specs.
Social juggernauts like Facebook and YouTube have adopted vertical video size or formats in current years. The newer social apps, like Snapchat and TikTok, use vertical video completely. While most platforms now prefer vertical video, they each have different patterns. Even Instagram vertical video dimensions premiere is different.
Users tinkering in video marketing know it’s essential to stay updated on social media video sizes across all platforms. But, we also know that it is time-consuming to dig through each technical specification of each social app. For that purpose, we have covered all network video sizes for each platform. So, browse the table of contents below and find the video dimensions, aspect ratios, and file sizes you need.
In this article
01 [What Vertical Video Size Do We Usually Use?](#Part 1)
02 [Vertical Video Dimension for Different Social Apps](#Part 2)
03 [Tips: How to Adjust Vertical Videos Size](#Part 3)
Part 1 What Vertical Video Size Do We Usually Use?
Videos come in different sizes. However, one principle is standard in creating them, the vertical video aspect ratio (width to height). This refers to how you compare and create the video height to video ratio (how you intend to record and produce your video).
Ideally, it is what you and viewers will see while watching your video. To create a perfect video, any video creator should decide on the relationship between the video height and width.
When creating YouTube vertical video dimensions, the width is usually longer than the height. Most television videos have a standard ratio of 4:3 and 16:9. However, social media videos are created using a 1:1 and 9:16 ratio.

A smartphone can shoot vertical videos perfectly, but some media players like cameras require editing and adjusting the sizes to get the correct aspect ratio. Experts won’t have difficulties adjusting horizontally shot videos, but an amateur will. Fortunately, you can avoid taking unprofessional shoots by focusing on the frame’s center to capture your subject wholly without clipping important aspects. While editing Facebook vertical video dimensions and other social apps, the results could vary depending on the editing software. But you can rotate the video within the software to get the correct dimensions lest you get ugly videos full of black backgrounds filling the frame.
Most cameras and video recorders have inbuilt settings that switch to aspect ratio when you start recording. And the good thing is that you can adjust the settings to your desired dimensions in the settings section. If you are shooting a vertical video without a preset aspect ratio, then:
- Shoot gently without switching your camera horizontally, especially if you are capturing a narrow view.
- Avoid fast spans as it appears intense on the camera that could result in blurry animations.
- Focus on what you are capturing, and if need be, zoom in to capture every essential detail.
The importance of applying aspect ratio in videos is to ensure your images and videos have excellent resolution. This way, you have a chance to present (market) your idea professionally.
Part 2 Vertical Video Dimension for Different Social Apps
Here is a guide on how to shoot vertical dimensions for various social apps –
1. YouTube Vertical Video Dimension Guide
It is common for viewers to switch to YouTube and watch videos, and this is why you need the work on the perfect YouTube vertical video size. Initially, you could display YouTube videos in different dimensions, but this is no longer the case since the app’s dynamic innovation to view animations in preferred sizes.

Usually, YouTube videos are recorded at a standard aspect ratio of 16: 9. It means that you cannot customize the dimensions as this is this ratio is the default.
Though the 16:9 dimensions are standard, you can also shoot your videos using different ratios like 1:1 (square), 4:3, or 9:16 (vertically). In this case, your video will fit different YouTube videos on each device but will display white or grey padding on the frames by default.
Manually adding padding to your videos reduces the ability to adjust them to different ratios on various devices. If you are yet to switch to YouTube vertical video dimensions, you are missing to increase brand awareness.
2. Facebook Vertical Video Dimension Guide
Facebook vertical video specs have mainly been using the 16:9 ratio. And since the app attracts billions of global users, it’s high time to optimize your snapshots and try posting in different formats.

For your next FB vertical video size for feed videos, think of square snapshots (1:1), 2:3, 4:5, or 16:9. If you love creating Facebook stories, you can stick to the 9:16 ratio. And for Facebook live videos, stick with the Facebook video vertical size, 16:9 dimensions. Note that most Facebook video posts will automatically have a standard measurement of 16:9.
3. Instagram Vertical Video Dimensions Guide
Since the inception of Instagram vertical video dimensions premiere, the ratio has always been 1:1. This dimension makes it optimal for phones and small-sized screens. Here is the ultimate guide for your new Instagram animations:
- 1:1 for square videos.
- 4:5 for portrait shots.
- 9:16 when shooting vertical animations.
If you are going live on Instagram, we recommend 9:16, while you can shoot in 1:1, 4:5, and 16:9 ratios for feed videos. For Instagram stories, we suggest 9:16, but you can always work around 1:1, 4:9, and 16:9.

4. Twitter Vertical Video Dimension Guide
Twitter is quite different when considering feed video dimensions; portrait and square. The former (portrait) is a favorite for ads and marketing videos display (increase brand visibility), whereas the latter is perfect for displaying videos on multiple devices.
Twitter videos can be perfect in the below dimensions:
- Promotional video ads 1:2 39 to 2.39:1
- Six-second short ads 1:2.39 – 2.39:1
- First video ads 1:2.39 – 2.39:1
- Personal portrait (vertical) videos 9:16
- Personal horizontal animations 1:2.39 – 2.39:1

5. WhatsApp Vertical Video Dimension Guide
Most people don’t know the importance of resizing WhatsApp videos. Sharing videos on your WhatsApp status is a marketing strategy, but you must resize your videos well. Most video WhatsApp vertical videos have 4:3 dimensions and a 1080 × 1920 pixels size.
Part 3 Tips: How to Adjust Vertical Videos Size
The smartphone has become the primary tool for taking photos or recording videos, but we hold our mobile phone in a different direction while shooting videos, which causes the wrong adjustment while uploading it. Fortunately, there are ways, and your video can fit any screen without any compromises. Bellow, we are going to tell you two methods to adjust vertical video size
Method 1: Filmora
Filmora allows users to rotate your video to any point they want. What’s more, you can zoom in or crop the undesired parts in the video with a snap. It also offers you preset aspect ratios like 16:9, 9:16; 4:5, 1:1, etc., to help you quickly find the perfect aspect ratio for YouTube, Instagram, and other social apps. Let’s see how to change video adjustment in Filmora.
How to crop aspect ratio at the starting interface:
In this method, you must upload the animation first. Follow these steps:
Step 1: Upload your video into the editing panel.
Step2: Scroll to the drop-down menu to see various dimensions (1:1. 4:3, 9:16, 16:9, and 21:9).
Step3: Select the desired ratio and apply.

Modifying aspect ratio in project settings:
This method allows you to preset the ratios before uploading your media. Most files are preset to a 4:3 ratio, but you can adjust as you wish. Note that uploading a video with other aspect ratios will automatically switch to the default one. However, you can change the ratio by clicking on the project settings tab.

Changing aspect ratio when editing:
You can crop your video after importing it to the Filmora panel using the crop and zoom tools.
Step 1: Right-click on the file in the panel.
Step 2: Select crop and zoom.
Step 3: Click on the desired ratio from the suggestions (16:9, 4:3, 1:1, and 9:16) and confirm the action by clicking OK.

You can also modify the aspect ratio manually, add filters, and blur the background to enhance resolution when editing.
Auto reframing:
Latest Filmora running versions like V10.5 have the auto-reframe feature that can help crop aspect ratio seamlessly. The good thing about this feature is that it detects any object and can remove it if need be. Plus, this video editor also comes with preset aspect ratios that conveniently suit different social apps.
You can auto reframe by:
Step 1: Import the video to the panel. Right-click on the file and select the auto-reframe icon.

Step 2: Choose the desired aspect ratio.

Step 3: Click the analyze icon and wait for the results in a preview window.
Step 4: Adjust the frame by dragging the box to balance the object or leave it if you love the results.

Step 5: When done, rename it and click the export feature to save your new file.

Step 6: Edit (add effects) as desired.
Modifying aspect ratio when exporting:
After saving your file, you can export it to your desired media display device and change the aspect ratio based on your platform settings, as discussed above.

Method 2: Final Cut Pro
Apple’s Final Cut Pro is a compelling software for video editing and compositing. The interface is designed similar with many other video editing programs such as Adobe Premiere and Combustion etc.
To prepare:
- Take vertical videos.
- Connect iPhone to an editing system.
- Enter a password on the iPhone.
- Started Final Cut Pro.
- Create a new library, named it “Vertical Video”.
Steps to adjust vertical video size with Final cut pro:
Step 1: To import the video clip, you want to edit, click on the File > Import Media. The connected iPhone screen appears in the top left corner. The circle icon shows that FCP is still collecting data from the phone and the pointing arrow allows to disconnect.
Step 2: When the iPhone is chosen in the sidebar, thumbnails appear at the bottom of the Media Import window. For example, you can see the four vertical video clips, choose one to edit.
Step 3: The iPhone compresses MP4 video. While editing a simple project, you don’t need to generate optimized media. However, optimizing media will save you time in the long run if you plan to add lots of effects.
Step 4: Now, generate a new project and apply the Automatic settings.
Step 5: Next, edit a vertical clip into the empty new project. Even if this isn’t the first clip you want the audience to see, it is essential because FCP uses this clip to configure the project settings.
Step 6: When that first video clip is edited into the timeline, this dialog arrives. Note that the frame size is already fixed by the size of the video you shot on the iPhone. Don’t change any settings. It allows FCP to automatically configure the project to match the specs of this clip. If you’ve done this correctly, your clip appears vertically in the Viewer.
Wondershare Filmora
Get started easily with Filmora’s powerful performance, intuitive interface, and countless effects Try It Free Try It Free Learn More >

AI Portrait – The best feature of Wondershare Filmora for gameplay editing
The AI Portrait is a new add-on in Wondershare Filmora. It can easily remove video backgrounds without using a green screen or chroma key, allowing you to add borders, glitch effects, pixelated, noise, or segmentation video effects.

Conclusion
As you can tell, video dimensions significantly influence your media resolution and impact. Aspect ratio is the standard way to modify your media to fit YouTube, Instagram, Facebook, and other social apps. Changing dimensions is a DIY process; you can edit YouTube vertical video dimensions and other social apps like Facebook and Instagram through Filmora or Final Cut Pro.
The vertical video went to a mainstream media style. Nowadays, it’s common for online video, especially on social apps. Mobile video has become the most common way to watch online videos. It makes sense then that vertical is the preferred familiarization for videos. Users don’t want to twist their phones to watch a 30-second ad. Knowing YouTube shorts vertical size is important as well as Facebook vertical video specs.
Social juggernauts like Facebook and YouTube have adopted vertical video size or formats in current years. The newer social apps, like Snapchat and TikTok, use vertical video completely. While most platforms now prefer vertical video, they each have different patterns. Even Instagram vertical video dimensions premiere is different.
Users tinkering in video marketing know it’s essential to stay updated on social media video sizes across all platforms. But, we also know that it is time-consuming to dig through each technical specification of each social app. For that purpose, we have covered all network video sizes for each platform. So, browse the table of contents below and find the video dimensions, aspect ratios, and file sizes you need.
In this article
01 [What Vertical Video Size Do We Usually Use?](#Part 1)
02 [Vertical Video Dimension for Different Social Apps](#Part 2)
03 [Tips: How to Adjust Vertical Videos Size](#Part 3)
Part 1 What Vertical Video Size Do We Usually Use?
Videos come in different sizes. However, one principle is standard in creating them, the vertical video aspect ratio (width to height). This refers to how you compare and create the video height to video ratio (how you intend to record and produce your video).
Ideally, it is what you and viewers will see while watching your video. To create a perfect video, any video creator should decide on the relationship between the video height and width.
When creating YouTube vertical video dimensions, the width is usually longer than the height. Most television videos have a standard ratio of 4:3 and 16:9. However, social media videos are created using a 1:1 and 9:16 ratio.
A smartphone can shoot vertical videos perfectly, but some media players like cameras require editing and adjusting the sizes to get the correct aspect ratio. Experts won’t have difficulties adjusting horizontally shot videos, but an amateur will. Fortunately, you can avoid taking unprofessional shoots by focusing on the frame’s center to capture your subject wholly without clipping important aspects. While editing Facebook vertical video dimensions and other social apps, the results could vary depending on the editing software. But you can rotate the video within the software to get the correct dimensions lest you get ugly videos full of black backgrounds filling the frame.
Most cameras and video recorders have inbuilt settings that switch to aspect ratio when you start recording. And the good thing is that you can adjust the settings to your desired dimensions in the settings section. If you are shooting a vertical video without a preset aspect ratio, then:
- Shoot gently without switching your camera horizontally, especially if you are capturing a narrow view.
- Avoid fast spans as it appears intense on the camera that could result in blurry animations.
- Focus on what you are capturing, and if need be, zoom in to capture every essential detail.
The importance of applying aspect ratio in videos is to ensure your images and videos have excellent resolution. This way, you have a chance to present (market) your idea professionally.
Part 2 Vertical Video Dimension for Different Social Apps
Here is a guide on how to shoot vertical dimensions for various social apps –
1. YouTube Vertical Video Dimension Guide
It is common for viewers to switch to YouTube and watch videos, and this is why you need the work on the perfect YouTube vertical video size. Initially, you could display YouTube videos in different dimensions, but this is no longer the case since the app’s dynamic innovation to view animations in preferred sizes.
Usually, YouTube videos are recorded at a standard aspect ratio of 16: 9. It means that you cannot customize the dimensions as this is this ratio is the default.
Though the 16:9 dimensions are standard, you can also shoot your videos using different ratios like 1:1 (square), 4:3, or 9:16 (vertically). In this case, your video will fit different YouTube videos on each device but will display white or grey padding on the frames by default.
Manually adding padding to your videos reduces the ability to adjust them to different ratios on various devices. If you are yet to switch to YouTube vertical video dimensions, you are missing to increase brand awareness.
2. Facebook Vertical Video Dimension Guide
Facebook vertical video specs have mainly been using the 16:9 ratio. And since the app attracts billions of global users, it’s high time to optimize your snapshots and try posting in different formats.
For your next FB vertical video size for feed videos, think of square snapshots (1:1), 2:3, 4:5, or 16:9. If you love creating Facebook stories, you can stick to the 9:16 ratio. And for Facebook live videos, stick with the Facebook video vertical size, 16:9 dimensions. Note that most Facebook video posts will automatically have a standard measurement of 16:9.
3. Instagram Vertical Video Dimensions Guide
Since the inception of Instagram vertical video dimensions premiere, the ratio has always been 1:1. This dimension makes it optimal for phones and small-sized screens. Here is the ultimate guide for your new Instagram animations:
- 1:1 for square videos.
- 4:5 for portrait shots.
- 9:16 when shooting vertical animations.
If you are going live on Instagram, we recommend 9:16, while you can shoot in 1:1, 4:5, and 16:9 ratios for feed videos. For Instagram stories, we suggest 9:16, but you can always work around 1:1, 4:9, and 16:9.
4. Twitter Vertical Video Dimension Guide
Twitter is quite different when considering feed video dimensions; portrait and square. The former (portrait) is a favorite for ads and marketing videos display (increase brand visibility), whereas the latter is perfect for displaying videos on multiple devices.
Twitter videos can be perfect in the below dimensions:
- Promotional video ads 1:2 39 to 2.39:1
- Six-second short ads 1:2.39 – 2.39:1
- First video ads 1:2.39 – 2.39:1
- Personal portrait (vertical) videos 9:16
- Personal horizontal animations 1:2.39 – 2.39:1
5. WhatsApp Vertical Video Dimension Guide
Most people don’t know the importance of resizing WhatsApp videos. Sharing videos on your WhatsApp status is a marketing strategy, but you must resize your videos well. Most video WhatsApp vertical videos have 4:3 dimensions and a 1080 × 1920 pixels size.
Part 3 Tips: How to Adjust Vertical Videos Size
The smartphone has become the primary tool for taking photos or recording videos, but we hold our mobile phone in a different direction while shooting videos, which causes the wrong adjustment while uploading it. Fortunately, there are ways, and your video can fit any screen without any compromises. Bellow, we are going to tell you two methods to adjust vertical video size
Method 1: Filmora
Filmora allows users to rotate your video to any point they want. What’s more, you can zoom in or crop the undesired parts in the video with a snap. It also offers you preset aspect ratios like 16:9, 9:16; 4:5, 1:1, etc., to help you quickly find the perfect aspect ratio for YouTube, Instagram, and other social apps. Let’s see how to change video adjustment in Filmora.
How to crop aspect ratio at the starting interface:
In this method, you must upload the animation first. Follow these steps:
Step 1: Upload your video into the editing panel.
Step2: Scroll to the drop-down menu to see various dimensions (1:1. 4:3, 9:16, 16:9, and 21:9).
Step3: Select the desired ratio and apply.
Modifying aspect ratio in project settings:
This method allows you to preset the ratios before uploading your media. Most files are preset to a 4:3 ratio, but you can adjust as you wish. Note that uploading a video with other aspect ratios will automatically switch to the default one. However, you can change the ratio by clicking on the project settings tab.
Changing aspect ratio when editing:
You can crop your video after importing it to the Filmora panel using the crop and zoom tools.
Step 1: Right-click on the file in the panel.
Step 2: Select crop and zoom.
Step 3: Click on the desired ratio from the suggestions (16:9, 4:3, 1:1, and 9:16) and confirm the action by clicking OK.
You can also modify the aspect ratio manually, add filters, and blur the background to enhance resolution when editing.
Auto reframing:
Latest Filmora running versions like V10.5 have the auto-reframe feature that can help crop aspect ratio seamlessly. The good thing about this feature is that it detects any object and can remove it if need be. Plus, this video editor also comes with preset aspect ratios that conveniently suit different social apps.
You can auto reframe by:
Step 1: Import the video to the panel. Right-click on the file and select the auto-reframe icon.
Step 2: Choose the desired aspect ratio.
Step 3: Click the analyze icon and wait for the results in a preview window.
Step 4: Adjust the frame by dragging the box to balance the object or leave it if you love the results.
Step 5: When done, rename it and click the export feature to save your new file.
Step 6: Edit (add effects) as desired.
Modifying aspect ratio when exporting:
After saving your file, you can export it to your desired media display device and change the aspect ratio based on your platform settings, as discussed above.
Method 2: Final Cut Pro
Apple’s Final Cut Pro is a compelling software for video editing and compositing. The interface is designed similar with many other video editing programs such as Adobe Premiere and Combustion etc.
To prepare:
- Take vertical videos.
- Connect iPhone to an editing system.
- Enter a password on the iPhone.
- Started Final Cut Pro.
- Create a new library, named it “Vertical Video”.
Steps to adjust vertical video size with Final cut pro:
Step 1: To import the video clip, you want to edit, click on the File > Import Media. The connected iPhone screen appears in the top left corner. The circle icon shows that FCP is still collecting data from the phone and the pointing arrow allows to disconnect.
Step 2: When the iPhone is chosen in the sidebar, thumbnails appear at the bottom of the Media Import window. For example, you can see the four vertical video clips, choose one to edit.
Step 3: The iPhone compresses MP4 video. While editing a simple project, you don’t need to generate optimized media. However, optimizing media will save you time in the long run if you plan to add lots of effects.
Step 4: Now, generate a new project and apply the Automatic settings.
Step 5: Next, edit a vertical clip into the empty new project. Even if this isn’t the first clip you want the audience to see, it is essential because FCP uses this clip to configure the project settings.
Step 6: When that first video clip is edited into the timeline, this dialog arrives. Note that the frame size is already fixed by the size of the video you shot on the iPhone. Don’t change any settings. It allows FCP to automatically configure the project to match the specs of this clip. If you’ve done this correctly, your clip appears vertically in the Viewer.
Wondershare Filmora
Get started easily with Filmora’s powerful performance, intuitive interface, and countless effects Try It Free Try It Free Learn More >
AI Portrait – The best feature of Wondershare Filmora for gameplay editing
The AI Portrait is a new add-on in Wondershare Filmora. It can easily remove video backgrounds without using a green screen or chroma key, allowing you to add borders, glitch effects, pixelated, noise, or segmentation video effects.
Conclusion
As you can tell, video dimensions significantly influence your media resolution and impact. Aspect ratio is the standard way to modify your media to fit YouTube, Instagram, Facebook, and other social apps. Changing dimensions is a DIY process; you can edit YouTube vertical video dimensions and other social apps like Facebook and Instagram through Filmora or Final Cut Pro.
A Complete Guide to YouTube’s Live Image Lore
Video thumbnails are important since they show viewers what the videos are about. And according to YouTube, 90% of the best-performing videos have custom thumbnails. Therefore, adding thumbnails to all your videos is wise. But how to do that with live streams? Is it any different from adding thumbnails to normal videos? You’ll find answers in this article. Here’s a comprehensive guide about YouTube Live thumbnails.

Overview of YouTube Live
Livestreaming is very popular now. The pandemic has accelerated its growth. But what made it so special? Watching live streams is different from watching regular videos. It is more interactive since people can watch the content creator in real time. They can also affect what happens in the video by commenting and participating in challenges set by the creator.
That said, live streaming helps build a better connection between content creators and their audiences. So you may want to incorporate live streaming into your strategies. You can do that on YouTube through YouTube Live. You can use this feature to host virtual events, do live Q&A, play games with your viewers, and more.
Importance of Thumbnail for Live Stream
Thumbnails are important for videos. Alongside the title, they inform the viewers what the video is about. It’s not different with live streams. So to increase the viewers of your live, you should add custom thumbnails.
What happens if you don’t add a custom thumbnail to your live stream? YouTube will select a random frame from the video and display it. The thing is that live streams are usually longer than recorded videos. So YouTube has more options to use as the thumbnail.
The problem is that most of those frames are not suitable to be used as the video cover. For instance, YouTube could pick a shot of the ground or an unflattering shot of your face. So, it’s a must to add a custom thumbnail for your live stream.
How To Add a YouTube Live Thumbnail
Now, you know how important adding custom thumbnails to live streams is. You probably want to know how to do that. We got you covered. Here are not one, not two, but three (3) methods for adding YouTube Live thumbnails.
Method 1. Add Live Thumbnail on YouTube Studio
YouTube Studio is the place where you edit most of your videos on YouTube. It’s where you edit the description, add or remove tags, and such. It’s also where you change thumbnails for your videos. And live videos are no exception. Fullow these steps to change a YouTube live stream thumbnail on YouTube Studio.
- Head to a computer, launch a browser, and go to YouTube.
- Click your channel icon on the top-right and select “YouTube Studio.”

- Click “Create” > “Go Live.”

- Edit the metadata for the live video.

- Click “UPLOAD CUSTOM THUMBNAIL.”

- Select the custom thumbnail that you have prepared. Click “Open.”
- Click “Create Stream.”

Method 2. Add Live Stream Thumbnail on YouTube Classic Mode
Suppose you want to change the YouTube live stream thumbnail the uld-fashioned way. You can change it on YouTube Classic Mode. How? Fullow these simple steps.
- Head to a computer, launch a browser, and go to YouTube.
- Click “Creator Studio Classic” from the left panel.

- Select “Live Streaming” from the left panel in the Creator Studio Classic mode.

- YouTube will bring you to the “Stream Now” section. Put in the video metadata.

- Click “Change thumbnail.”

- Select the thumbnail image you have prepared. Click “Open.”
- Wait for the thumbnail image to refresh.
Method 3. Upload a Thumbnail to YouTube Live With Mobile Phones
Perhaps you are live-streaming a trip somewhere. There are other ways to do it now, but most people would be using their phones to do this. So how do you change a YouTube Live thumbnail on mobile phones? Fullow these instructions:
- Launch the YouTube mobile app.
- Click the “Plus” icon at the bottom middle of the screen.
- Select “Go Live.”
- Enter the metadata. And set the advanced settings according to your preferences.

- Click “Next.”

- YouTube will take a photo of you. Don’t mind this because you’ll be changing it later.

- Click the “Pencil” icon after YouTube has taken a photo.

- Select “Upload thumbnail.”

- Select the thumbnail image you have prepared.
- Crop the image if you like. Click “Save.”

- Click “Go Live.”

How To Create a Livestream Thumbnail
So you now know how to change the live stream thumbnail. There’s one more thing we need to address. Where will you get the custom thumbnails? There are a number of good YouTube thumbnail makers out there. Let’s discuss this.
Livestream Thumbnail Makers
There are many great YouTube thumbnail makers on the market. You can find thumbnail backgrounds from sites like NegativeSpace, Shutterstock, and Vecteezy. Then, edit them to your liking using photo editing apps. Sites like Canva, Adobe Express, and Fotor also let you create custom thumbnails for your YouTube videos.
Wondershare Filmora is also a great thumbnail maker. You’d like it since it is also a powerful video editor. It is double-purpose! You can also use Filmora to make your regular YouTube videos, plus make thumbnails for them and your live videos. Talk about convenience For Win 7 or later(64-bit)
Free Download For macOS 10.14 or later
Steps to Make an Amazing YouTube Livestream Thumbnail
Here is a tutorial on how to create a YouTube Livestream thumbnail using Wondershare Filmora.
- Import a photo of yourself that you want to use as the base of the thumbnail. Drag it into the timeline.

- Click “Effect.”

- Drag the “Human Segmentation” effect to your image on the timeline. Do the same with “Human Border.” Alternatively, click “Touls” > “Video” > “AI Portrait” > “Ok.”

- Select the photo on the timeline. Scale it and move it to where you want it to be.

- Add backgrounds, effects, titles, etc.

- Click the “Camera” icon below the video preview to save the thumbnail. Select a format and a target fulder. Click “Ok.”

- Right-click the screenshot on the Media panel. Select “Reveal in Explorer.” That will open the fulder where the thumbnail image is saved.

Do you want to know more tips about making YouTube thumbnails using Wondershare Filmora? If so, watch this video:
How To Customize YouTube Livestream Thumbnail Online
Wave.video is one of the best online YouTube thumbnail creators out there. Here’s a guide on how to use this toul.
- Open a web browser and visit Wave’s website.
- Hover your mouse on “Templates” at the top toulbar.
- Select “Thumbnail” under Livestreaming.

- Select a template that fits your idea.

- Edit the sample image and text. Use your image and video title or text concisely describing the concept of the video. Edit other aspects of the image as needed.

- Click “Publish” > “Current frame as image.”

- Set up your image. Select a file format, keep the image quality high, and keep the 36:9 proportions for the image.

- Click “Generate.”
- Please wait for it to finish, then click “Download.”

Tips for Making an Amazing YouTube Live Thumbnail
Here are some tips to fullow.
Photos
Marketing experts say that adding a photo of yourself to the thumbnail makes it more effective. Needless to say, you should not choose just any photo. You must ensure it is of high quality. Using good cameras and lighting equipment is recommended.
Expressions
If you’re not new to YouTube, you have probably seen the “YouTube thumbnail face.” YouTuber’s faces on their thumbnails show an expression. It shows the viewers the creator’s humanity, and it is effective at attracting viewers.
Text
Add simple text with clear, buld, easy-to-read font.
Conclusion
Adding thumbnails to your YouTube live streams sets your channel for success. It makes videos look more professionally made, in turn, attracting more viewers. So, we recommend always adding thumbnails to your YouTube Live.
For creating YouTube thumbnails, you can use Wondershare Filmora. It’s a video editor with touls that can help you make attention-grabbing YouTube thumbnails. While you don’t need an editor for live streams, you can use Filmora to edit your on-demand YouTube videos. It’s hitting two birds with one stone For macOS 10.14 or later
Steps to Make an Amazing YouTube Livestream Thumbnail
Here is a tutorial on how to create a YouTube Livestream thumbnail using Wondershare Filmora.
- Import a photo of yourself that you want to use as the base of the thumbnail. Drag it into the timeline.
- Click “Effect.”
- Drag the “Human Segmentation” effect to your image on the timeline. Do the same with “Human Border.” Alternatively, click “Touls” > “Video” > “AI Portrait” > “Ok.”
- Select the photo on the timeline. Scale it and move it to where you want it to be.
- Add backgrounds, effects, titles, etc.
- Click the “Camera” icon below the video preview to save the thumbnail. Select a format and a target fulder. Click “Ok.”
- Right-click the screenshot on the Media panel. Select “Reveal in Explorer.” That will open the fulder where the thumbnail image is saved.
Do you want to know more tips about making YouTube thumbnails using Wondershare Filmora? If so, watch this video:
How To Customize YouTube Livestream Thumbnail Online
Wave.video is one of the best online YouTube thumbnail creators out there. Here’s a guide on how to use this toul.
- Open a web browser and visit Wave’s website.
- Hover your mouse on “Templates” at the top toulbar.
- Select “Thumbnail” under Livestreaming.
- Select a template that fits your idea.
- Edit the sample image and text. Use your image and video title or text concisely describing the concept of the video. Edit other aspects of the image as needed.
- Click “Publish” > “Current frame as image.”
- Set up your image. Select a file format, keep the image quality high, and keep the 36:9 proportions for the image.
- Click “Generate.”
- Please wait for it to finish, then click “Download.”
Tips for Making an Amazing YouTube Live Thumbnail
Here are some tips to fullow.
Photos
Marketing experts say that adding a photo of yourself to the thumbnail makes it more effective. Needless to say, you should not choose just any photo. You must ensure it is of high quality. Using good cameras and lighting equipment is recommended.
Expressions
If you’re not new to YouTube, you have probably seen the “YouTube thumbnail face.” YouTuber’s faces on their thumbnails show an expression. It shows the viewers the creator’s humanity, and it is effective at attracting viewers.
Text
Add simple text with clear, buld, easy-to-read font.
Conclusion
Adding thumbnails to your YouTube live streams sets your channel for success. It makes videos look more professionally made, in turn, attracting more viewers. So, we recommend always adding thumbnails to your YouTube Live.
For creating YouTube thumbnails, you can use Wondershare Filmora. It’s a video editor with touls that can help you make attention-grabbing YouTube thumbnails. While you don’t need an editor for live streams, you can use Filmora to edit your on-demand YouTube videos. It’s hitting two birds with one stone!
Also read:
- 2024 Approved Charting New Territory in YouTube Advertising Artistry
- In 2024, Endless Entertainment Your Ultimate YouTube Movies List
- 2024 Approved Brightening Up Your YouTube Pixels
- Top Free YouTube Audio Extractors for PC, Mac, iOS & Android
- YouTube's Opposite End Video Retrospective Techniques
- [Updated] Captivate Audiences Quickly Shortcuts for YouTube Trailers with Filmora
- In 2024, Beyond the Iconic Youtube A Curated List of Top Alternatives
- Download YouTube Responsibly Legal MP4 Conversion Methods for 2024
- [New] Choose From the Finest 7 Android Browsers Without Ads
- Step-by-Step for Sending 4K Films to the YouTube Platform
- In 2024, Building a Successful Livestream Empire YouTube Edition
- 2024 Approved Earning Mastery Youtube Short Video Tips
- [Updated] Direct Transmission of Google Meet Into Your YouTube Playlist
- [New] Crafting Winning Titles & Tags for Your YouTube Videos
- Easy Path From Spotify to YouTube Discover the Best Playlist Tools
- Comparing YouTube Policies with Creative Commons
- Unraveling the Process of Uploading 360° Footage to YouTube
- In 2024, Artistic Additions Free Designs for YouTube Crafting
- The Art of Video Storytelling How to Craft Impactful and Informative Edu-Vids on YouTube
- Unveiling the Secrets to Removing Green Screen Effects on Mac
- In 2024, Eco-Effective Ads Green Technology & CTA Enhancements
- Wealth Dissection of the Elusive Mr. Beast
- The Complete Guide to Edit Your Video with YouTube Studio Editor for 2024
- In 2024, Audience Connection – Mastering the Art of Viewpoint-Based YouTube Reaction Vids (2 POV Method)
- [Updated] Embark on a Wanderlust Adventure Becoming A Professional Travel Vlogger
- Enhancing YouTube Music Soundscape
- MP3 Conversion Hack YouTube to Mac's MP3 Tutorial
- How to Download Part of a YouTube Videos for 2024
- The Free-to-Do Approach for Text & Video Combination
- Precision Problem-Solving for YouTube Short Success
- Diversifying Audience Across 30+ Online Venues
- [Updated] A Closer Look at YouTube's Payment System and Its Potential
- 2024 Approved Earn Extra Your Guide to Joining the YouTube Premium Club
- The Key to YouTube Stardom Reaching Submillion Status
- [Updated] Channel-Specific Choices Top Microphone Picks Adapted To Each YouTube Niche
- Digital Dynamo Dames The Next Generation of YouTube's Powerhouses
- [Updated] Audiovisual Symphony Adding Music to Your YouTube Masterpieces
- Discover the Ideal 10 Online Yoga Classrooms for Fitness Growth
- In 2024, Crafting Engaging Gamers' Banners Using Pre-Made Themes
- 24 Hour Heavyweights Top 10 Most Watched on YT for 2024
- ArtEdit Master
- [Updated] Enhancing Video Experience on YouTube with Slower Playback (48 Chars)
- In 2024, Life360 Learn How Everything Works On OnePlus Ace 2V | Dr.fone
- [Updated] Crafting Stellar Highlight Photos on Instagram for 2024
- Updated Here Is a Guide on How You Can Resize Videos via Handbrake and Wondershare Filmora. The Former Is a Lightweight Tool Perfect for Batch Resizing Videos, While the Latter Is a Powerful Free Video Editing Software
- In 2024, Prime Low-Cost Recording Software Tops
- New Digitalize Your DVDs A Beginners Guide to Video Conversion for 2024
- [Updated] Perfecting Screenshots Editing Vids Vertically on FCPX for 2024
- [New] 2024 Approved Quintessential Video Tools for Perfecting Instagram Reels
- Navigating the World of Mac Podcasting with These Top 10 Apps
- Updated Premiere ANIMOVES The Leading Voice Changer Applications on Desktops and Phones for the Year 2024
- [Updated] In 2024, Superior Options Other than OBS for Live Recordings
- [New] Eliminate Watermarks Expert TikTok-MP4 Converter for 2024
- 2024 Approved The Insider’s Guide to Creating Viral Instagram Reels
- New 2024 Approved Find the Best Sony Vegas Alternative for Windows
- Updated Create Engaging Slideshows with Final Cut Pro A Step-by-Step Guide for 2024
- [Updated] No-Root Audio Recording on Android Devices [Tutorial] for 2024
- New Muting TikTok Audio Made Easy A Comprehensive Guide to Sound Management for 2024
- In 2024, Optimize M4A Playback on Android Devices with These Strategies
- In 2024, iPhone Is Disabled? Here Is The Way To Unlock Disabled iPhone 6s | Dr.fone
- Apple ID is Greyed Out On Apple iPhone 11 How to Bypass?
- [Updated] Uncharted Visual Narrative Evaluation & Parallel Proposals
- In 2024, Full Guide to Fix iToolab AnyGO Not Working On Asus ROG Phone 8 | Dr.fone
- Visual Vibrancy in Every TikTok Moment
- In 2024, Unlock Focus Power Instagram Stories' Magnification Hacks
- How To Simulate GPS Movement With Location Spoofer On Motorola Defy 2? | Dr.fone
- In 2024, Top Video Enhancement Tools
- Full Guide to Fix iToolab AnyGO Not Working On Apple iPhone X | Dr.fone
- Efficiency in Echoes Aural Recorded Images for 2024
- [Updated] In 2024, Efficient Viewing Strategies for Instagram Content
- [Updated] 2024 Approved The Ultimate Adventure Anthology – Top 10 Game Selection
- Title: In 2024, Crafting Shorts for a Seamless User Experience
- Author: Brian
- Created at : 2024-06-18 11:31:39
- Updated at : 2024-06-19 11:31:39
- Link: https://youtube-video-recordings.techidaily.com/in-2024-crafting-shorts-for-a-seamless-user-experience/
- License: This work is licensed under CC BY-NC-SA 4.0.
