
:max_bytes(150000):strip_icc()/ConnectedCarTech_metamorworks_GettyImages-966859036_CROPPED-a9460403602c4b67a7a8c1acd599c9be.jpg)
"In 2024, Crafting Clearer Communication The Art of Adding Text to Video Media"
Crafting Clearer Communication: The Art of Adding Text to Video Media
How to Add Text to YouTube Video Before or After Uploading

Richard Bennett
Mar 27, 2024• Proven solutions
A great way to emphasize something you say in your vlog is to have your words appear next to you as you say them . Adding text to YouTube videos can look really professional. You might put a title at the beginning of your video, use bullet points to help people keep track of your monologue, or to highlight an important point by writing it on your screen. When you use text in your videos there are a few things you need to keep in mind. In this article, I will share with you 2 ways to add text/subtitles/captions to YouTube videos, whether you need to add text to the video during editing and upload it to YouTube later, or you have uploaded the video to YouTube already and want to add some captions and subtitles to complement it.
- Part 1: Add text to video before uploading YouTube
- Part 2: Add Text to YouTube video after uploading
- Part 3: Top 3 YouTube Video Text Tips
How to Add Text to YouTube Video Before Uploading
Before uploading the video to YouTube, it is recommended to add text to the video first. You can add simple texts and captions to videos with the free video editing software. To add more text effects to the video, you can use Filmora, Sony Vegas Movie Studio and Adobe Premiere CC based on your video editing skills and needs. These software programs are great video editors, which can help you input text easily.
1. Use Filmora to Add text to Videos
There are plenty of Text effects built in Filmora, you can apply motions and animation to texts, titles, subtitles, end credits and openers as well. Each title preset will present different effects. You can add multiple text boxes and place the text to any position in need. Besides writing texts to video, you can select the target font, size and color and customize the text effect in detail as well. To add text to a video in Filmora is easy, just follow the steps below:

- Open up Filmora and drag a clip into your timeline. Then, go to Text/Credit.
- Find a style that you like and drag it into your timeline where you want your text to appear. Make sure your text is selected in your timeline and click the Advanced Text Editing icon, which looks like a pen and paper.
- Insert your own words and drag your text to where you want it on the screen. Adjust the size by dragging the blue squares which surround your text.
- To change the color of your text, go into the Customize menu. You will find it near the top left of your screen. While you are in Customize there will be a section called Fill. This is where you select the color of your text. You can even change the fill type to ‘gradient fill’ and have your text transition between two colors.
- All of Filmora’s text options are animated – they fade, move around the screen, or perform some other type of action as they appear and disappear. To change the animation of your text select Animation next to Customize. A selection of different animations will appear. Double click on the one you want to apply to your text.
 Download Mac Version ](https://tools.techidaily.com/wondershare/filmora/download/ )
Check the detailed steps of how to add text to video in Filmora.
2. Use Windows Movie Maker
As a simple video editing software, Windows Movie Maker also allows you to add text to videos. It provides 3 different options for you to add Title, Caption and Credits to the YouTube videos. You can follow the steps below to add text to the video in WMM.

- To start, launch the Windows Movie Maker.
- After, select import video to insert the video that you want to add text with.
- Select edit movie then click make credits or titles.
- Then add the text that you want to include.
For the step by step tutorial of adding text to YouTube video, check How to Add Text to Video with Windows Movie Maker . Besides adding text to video, you can use Windows Movie Maker to edit YouTube video further. Learn How to trim, cut, combine, split video and add transitions and upload video to YouTube in Windows Movie Maker?
3. Use Sony Vegas Movie Studio
Adding text to YouTube videos in Sony Vegas is not so complicated if you are new to this software. You can adjust the color, size, font and duration of the text effect and add fade in and fade out effects. Follow the steps below to add texts to video in Vegas:

- Launch Sony Vegas Movie Studio.
- Click the View Menu then select Media Generators.
- Choose the generator that you want to use.
- After, drag the generator you have chosen on the timeline.
- Then, the video event FX dialogue box will appear.
- Enter the text that you want and modify it by changing the font, size and style.
4. Use Adobe Premiere CC
For professionals who are looking for a professional way to adding text to video and also have a sufficient budget, Adobe Premiere CC is always recommended. You can check the video and the steps below to add text to video in Premiere:
- Click open or create a project.
- Click the file menu then choose new and title.
- After, the text window will appear then utilize the text tool to add text.
- You can also edit your text using the commands that are provided in the Title Menu.
- Save the text that you have made by clicking the file menu then choose Save As.
How to Add Text to video in YouTube after uploading
Sometimes, we have uploaded a video to YouTube and then want to add subtitles/cc to the video later. The good news is that YouTube is not only a site for videos but is also the place where you can edit your videos in an instant. As you have read, adding text and captions to the uploaded YouTube videos is just a breeze.
Of course, you can only add and edit texts and captions to the video under your YouTube account. Here are the steps on how you can add text to your videos with YouTube Video Editor after the video is uploaded.
- Go to youtube.com then sign in to your account. After sign in your YouTube account, click your avatar and select Creator Studio to enter the creator studio interface.
- Click the Video Manager tab and in Videos section you will see all your videos uploaded to YouTube. Select the video that you want to add captions to and then select Subtitles/CC after clicking Edit button.
- Add Captions/Subtitles

While YouTube may have already created the subtitles automatically for your video with its speech recognition technology. If it does, you will see something like Published: English (Automatic) to the right of your video. If the automatically generated subtitles is not correct, you can edit it to improve the accuracy. Select the line that needs modification to make the edits.
If there is no auto-subtitles, you can choose from 3 ways to add subtitles and closed captions to the video: Upload a file, Transcribe and auto-sync and create new subtitles or CC.

Upload a file: upload a text transcript or timed subtitles file.
Transcribe and auto-sync: Type or paste in a full transcript of the video and subtitle timings will be set automatically.
Create new subtitles or CC: Create subtitles and closed captions by typing them in as you watch the video.
If you already have a caption file which contains both text and time codes, just click Upload a file and upload the text to the video.
- Once everything is okay, you can change the name of the video and you can do it in the box beside Project.
Cons of Using YouTube Video Editor
When you make use of this editor, you cannot shorten the clips for music. Moreover, since it is an online editor, you need to refresh the page in order to do the changes. Aside from YouTube Video Editor, you can use Adobe Premier Pro, MAGIX Vegas Pro, OpenShot and Avidemux.
From 20th September 2017 users will no longer be able to use the complementary editing suite. Check the best YouTube video editor alternatives from this complete guide to find out more YouTube video editor alternatives if you want to add text to video with more features and customization.
Top 3 Tips for Adding Text to YouTube Videos
1. Leave Room
If you know you are going to add text to your video then make sure you leave room for it in your frame. Consider standing off to one side instead of directly in front of your camera. You do not want to have to choose between not using text, making your text really small, or placing it over your face.
While planning out your frame and leaving room for your text, consider what color you are going to make the words and whether it will stand out and look good against your background.
2. Bigger is Better
People should be able to read your text without putting in any extra effort, such as straining their eyes to make out small words. If it takes effort to read your text then a lot of people will just ignore it. Your text should be big enough that somebody watching your video on their smartphone screen – where everything is shrunk down – can read it easily.
It is easier to make your text larger when you stick to titles, keywords, and short sentences.
3. Do Not Overuse
Text is a great tool for making something stand out. However, if you try to use text to emphasize too much of what you say it will lose its effect. Text does not stand out anymore once viewers get too used to seeing it. Too much text can even get annoying and cause people to click away from your videos.
Try to use text to emphasize only the most important things you say.

Richard Bennett
Richard Bennett is a writer and a lover of all things video.
Follow @Richard Bennett
Richard Bennett
Mar 27, 2024• Proven solutions
A great way to emphasize something you say in your vlog is to have your words appear next to you as you say them . Adding text to YouTube videos can look really professional. You might put a title at the beginning of your video, use bullet points to help people keep track of your monologue, or to highlight an important point by writing it on your screen. When you use text in your videos there are a few things you need to keep in mind. In this article, I will share with you 2 ways to add text/subtitles/captions to YouTube videos, whether you need to add text to the video during editing and upload it to YouTube later, or you have uploaded the video to YouTube already and want to add some captions and subtitles to complement it.
- Part 1: Add text to video before uploading YouTube
- Part 2: Add Text to YouTube video after uploading
- Part 3: Top 3 YouTube Video Text Tips
How to Add Text to YouTube Video Before Uploading
Before uploading the video to YouTube, it is recommended to add text to the video first. You can add simple texts and captions to videos with the free video editing software. To add more text effects to the video, you can use Filmora, Sony Vegas Movie Studio and Adobe Premiere CC based on your video editing skills and needs. These software programs are great video editors, which can help you input text easily.
1. Use Filmora to Add text to Videos
There are plenty of Text effects built in Filmora, you can apply motions and animation to texts, titles, subtitles, end credits and openers as well. Each title preset will present different effects. You can add multiple text boxes and place the text to any position in need. Besides writing texts to video, you can select the target font, size and color and customize the text effect in detail as well. To add text to a video in Filmora is easy, just follow the steps below:
- Open up Filmora and drag a clip into your timeline. Then, go to Text/Credit.
- Find a style that you like and drag it into your timeline where you want your text to appear. Make sure your text is selected in your timeline and click the Advanced Text Editing icon, which looks like a pen and paper.
- Insert your own words and drag your text to where you want it on the screen. Adjust the size by dragging the blue squares which surround your text.
- To change the color of your text, go into the Customize menu. You will find it near the top left of your screen. While you are in Customize there will be a section called Fill. This is where you select the color of your text. You can even change the fill type to ‘gradient fill’ and have your text transition between two colors.
- All of Filmora’s text options are animated – they fade, move around the screen, or perform some other type of action as they appear and disappear. To change the animation of your text select Animation next to Customize. A selection of different animations will appear. Double click on the one you want to apply to your text.
Download Mac Version ](https://tools.techidaily.com/wondershare/filmora/download/ )
Check the detailed steps of how to add text to video in Filmora.
2. Use Windows Movie Maker
As a simple video editing software, Windows Movie Maker also allows you to add text to videos. It provides 3 different options for you to add Title, Caption and Credits to the YouTube videos. You can follow the steps below to add text to the video in WMM.
- To start, launch the Windows Movie Maker.
- After, select import video to insert the video that you want to add text with.
- Select edit movie then click make credits or titles.
- Then add the text that you want to include.
For the step by step tutorial of adding text to YouTube video, check How to Add Text to Video with Windows Movie Maker . Besides adding text to video, you can use Windows Movie Maker to edit YouTube video further. Learn How to trim, cut, combine, split video and add transitions and upload video to YouTube in Windows Movie Maker?
3. Use Sony Vegas Movie Studio
Adding text to YouTube videos in Sony Vegas is not so complicated if you are new to this software. You can adjust the color, size, font and duration of the text effect and add fade in and fade out effects. Follow the steps below to add texts to video in Vegas:
- Launch Sony Vegas Movie Studio.
- Click the View Menu then select Media Generators.
- Choose the generator that you want to use.
- After, drag the generator you have chosen on the timeline.
- Then, the video event FX dialogue box will appear.
- Enter the text that you want and modify it by changing the font, size and style.
4. Use Adobe Premiere CC
For professionals who are looking for a professional way to adding text to video and also have a sufficient budget, Adobe Premiere CC is always recommended. You can check the video and the steps below to add text to video in Premiere:
- Click open or create a project.
- Click the file menu then choose new and title.
- After, the text window will appear then utilize the text tool to add text.
- You can also edit your text using the commands that are provided in the Title Menu.
- Save the text that you have made by clicking the file menu then choose Save As.
How to Add Text to video in YouTube after uploading
Sometimes, we have uploaded a video to YouTube and then want to add subtitles/cc to the video later. The good news is that YouTube is not only a site for videos but is also the place where you can edit your videos in an instant. As you have read, adding text and captions to the uploaded YouTube videos is just a breeze.
Of course, you can only add and edit texts and captions to the video under your YouTube account. Here are the steps on how you can add text to your videos with YouTube Video Editor after the video is uploaded.
- Go to youtube.com then sign in to your account. After sign in your YouTube account, click your avatar and select Creator Studio to enter the creator studio interface.
- Click the Video Manager tab and in Videos section you will see all your videos uploaded to YouTube. Select the video that you want to add captions to and then select Subtitles/CC after clicking Edit button.
- Add Captions/Subtitles
While YouTube may have already created the subtitles automatically for your video with its speech recognition technology. If it does, you will see something like Published: English (Automatic) to the right of your video. If the automatically generated subtitles is not correct, you can edit it to improve the accuracy. Select the line that needs modification to make the edits.
If there is no auto-subtitles, you can choose from 3 ways to add subtitles and closed captions to the video: Upload a file, Transcribe and auto-sync and create new subtitles or CC.
Upload a file: upload a text transcript or timed subtitles file.
Transcribe and auto-sync: Type or paste in a full transcript of the video and subtitle timings will be set automatically.
Create new subtitles or CC: Create subtitles and closed captions by typing them in as you watch the video.
If you already have a caption file which contains both text and time codes, just click Upload a file and upload the text to the video.
- Once everything is okay, you can change the name of the video and you can do it in the box beside Project.
Cons of Using YouTube Video Editor
When you make use of this editor, you cannot shorten the clips for music. Moreover, since it is an online editor, you need to refresh the page in order to do the changes. Aside from YouTube Video Editor, you can use Adobe Premier Pro, MAGIX Vegas Pro, OpenShot and Avidemux.
From 20th September 2017 users will no longer be able to use the complementary editing suite. Check the best YouTube video editor alternatives from this complete guide to find out more YouTube video editor alternatives if you want to add text to video with more features and customization.
Top 3 Tips for Adding Text to YouTube Videos
1. Leave Room
If you know you are going to add text to your video then make sure you leave room for it in your frame. Consider standing off to one side instead of directly in front of your camera. You do not want to have to choose between not using text, making your text really small, or placing it over your face.
While planning out your frame and leaving room for your text, consider what color you are going to make the words and whether it will stand out and look good against your background.
2. Bigger is Better
People should be able to read your text without putting in any extra effort, such as straining their eyes to make out small words. If it takes effort to read your text then a lot of people will just ignore it. Your text should be big enough that somebody watching your video on their smartphone screen – where everything is shrunk down – can read it easily.
It is easier to make your text larger when you stick to titles, keywords, and short sentences.
3. Do Not Overuse
Text is a great tool for making something stand out. However, if you try to use text to emphasize too much of what you say it will lose its effect. Text does not stand out anymore once viewers get too used to seeing it. Too much text can even get annoying and cause people to click away from your videos.
Try to use text to emphasize only the most important things you say.
Richard Bennett
Richard Bennett is a writer and a lover of all things video.
Follow @Richard Bennett
Top 10 Volume Surge Controllers for Windows/MacOS
Best 10 YouTube Volume Boosters for Windows, macOS, Android, and iPhone

Shanoon Cox
Mar 27, 2024• Proven solutions
Have you ever listened to a YouTube video on max volume but still the sound wasn’t audible - even after turning up the YouTube volume as well as device audio? It is super annoying and inconvenient when you increase volume to max yet the video remains inaudible. YouTube volume issue could be due to various reasons such as poor audio quality of the built-in speakers or low original video sound. Well, there is a simple way to combat this problem i.e., sound booster. You can set different volume levels for the YouTube app on your PC or smartphone’s native volume controls. There are different YouTube volume boosters for Android, Windows, macOS, and iOS devices.
From listening to your favorite podcast to watching vlogs with your friends, you can use the best volume booster apps to increase the media sound volume and quality!
- Part 1: Best YouTube Volume Boosters for Windows and macOS
- Part 2: Best YouTube Volume Boosters for Android and iOS
- Part 3: Best YouTube Video Editing Software-Wondershare Filmora (Bonus Tip)
Part 1: Best YouTube Volume Boosters for Windows and macOS
Let’s introduce the best YouTube volume boosters for Windows and macOS:
1. FxSound (Windows and Mac)
FxSound is a very powerful tool that is made for Windows and macOS to enhance and boost the quality and volume of sound. This app comes with many features. For example, this audio software provides better sound quality, volume booster, and sound effects. Now you can listen to music, watch movies and play games without any distortion. Easily boost base, get customized effects and play with custom presets. You can download this app for your PC for free through the official website. People like this equalizer because it can make any audio format sound good even if it is 100 years old!

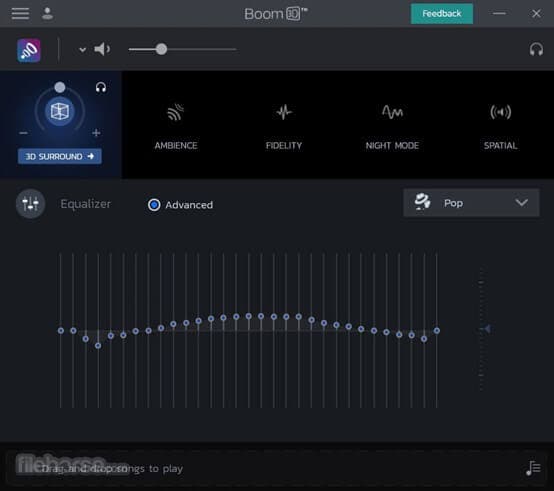
2. Boom 3D (Windows and macOS)
Boom 3D is a very popular app among many Windows and macOS users. This software is designed to help improve the audio on speakers or headphones that are connected to your computer. Boom 3D audio booster software also works with the Bluetooth devices that are connected to your PC. It can make any sound louder, clearer, and much better without buying any external devices. It provides us a 3D audio experience and works with any music player, video player, etc.!
3. Chrome Volume Booster Plugin (Windows)
This plugin has been rated 5 stars on the chrome web store as it is the best plugin for boosting up your volume on windows PC. This booster is so easy to download; you just have to go to the chrome web store and add the extension to your Google Chrome Browser. After adding it you can simply click on the icon and boost your volume up to 1000%! This plugin is free in the chrome store, just add it and choose how much louder you want your sound to be.

4. Letasoft Sound Booster (Windows)
Letasoft Sound Booster can only be used on windows. You can download it through the official website of Letasoft. It comes with a 14 days free trial period but after that, you have to buy their license to keep using it. This software is made to be used as an extra amplifier to boost up the volume of your audio or video if you think it is too low. The Letasoft Sound Booster app is very easy to use as you can control the volume from the slider. Moreover, it auto-starts and has no sound distortion.

5. Froyosoft Sound Booster (Mac)
Froyosoft Sound Booster is made for macOS users so they can boost video and audio file volumes. Individual application volumes can also be adjusted with the help of the Froyosoft Sound Booster. The good thing about this booster is that it is free for all users and it is 100% safe - you will not get any virus on your PC. You can download it from their website and increase the volume as high as you want to. So, get ready to get a clear and enhanced sound with the help of this app!

Part 2: Best YouTube Volume Boosters for Android and iOS
Following are the best YouTube sound boosters for Android and iOS devices:
1. AmpMe (Android and iOS)
With the help of AmpMe, you can start your little party through music apps. You don’t just get to listen to music but you can also chat with your friends - yup that’s right, it is a two-in-one app! The AmpMe app helps you to play the same music with your friends at the same time. It is one of the best volume booster apps that is available for both Android and iOS. It uses Bluetooth to connect with several devices, and the more the devices the higher the volume of the music. AmpMe offers a free trial and it costs $9.99 per week.

2. Super Volume Booster (Android)
To enjoy your music more than ever, you need a good volume enhancer. And, what can be better than an app that is free and boosts your audio? Android users are in luck because Super Volume Booster is a user-friendly app that allows you to increase the volume of YouTube and other apps. It gives you the best music experience. Moreover, it is clean, simple and has a one-touch operation. Not to forget that it has amazing reviews on Playstore. This app also increases the bass and also supports headphones and Bluetooth.

3. Volume Booster GOODEV (Android)
Volume Booster GOODEV is another app that boosts up the audio for you from 20 to 30% more! If you want to listen to an audiobook, watch a YouTube video or a movie on Netflix, volume Booster GOODEV can help you increase the volume of any media on any app! The volume can get so high that it might be dangerous for your ears so be careful. It offers a sound equalizer and is simple to use.

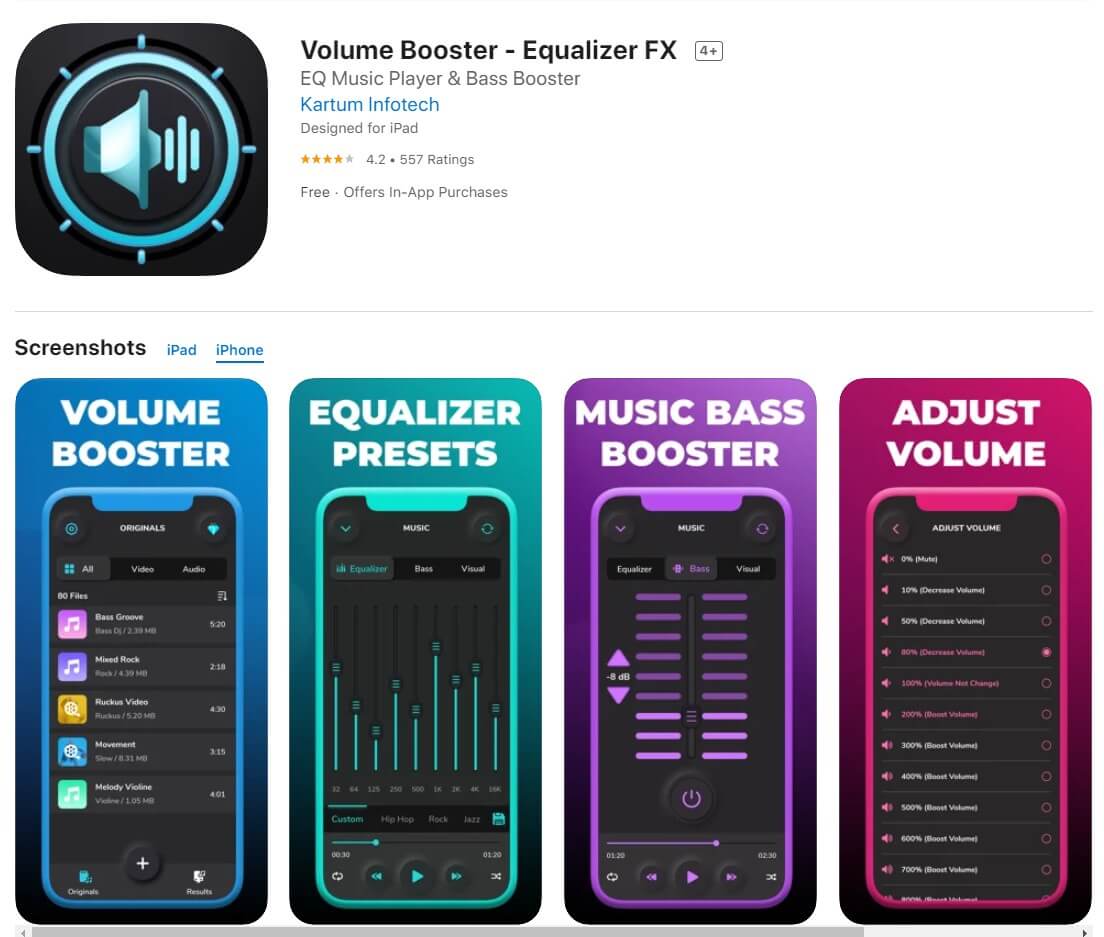
4. Volume Booster - Equalizer FX (iOS)
Volume Booster Equalizer FX can increase your volume higher than the default audio controller. With the help of this app, your device’s speaker will give the best result. You can adjust the sound effect levels according to your need. It makes the sound quality better and boosts up the volume with a single tap. You can get a weekly, monthly or yearly subscription. It is a great premium YouTube Volume booster for all iOS devices.
5. Max Volume Booster (iOS)
Max Volume Booster, as the name shows, boosts the volume to the maximum. You can find this app in the AppStore for free but it offers a premium version as well. With the help of the premium version, you can get an ad-free experience with no time limit. You can decrease or increase the volume based on your needs. Max Volume Booster gives you the experience and you will get addicted to it because it is a high-quality YouTube volume booster.

Part 3: Best YouTube Video Editing Software-Wondershare Filmora (Bonus Tip)
Wondershare Filmora is one of the most popular and user-friendly video editing software available. From beginners to pros, this app world for all. With Filmora you can create home videos, vlogs, Instagram reels, tutorials, guides, podcasts, and more! Wondershare Filmora is also the best YouTube video editor you will find! From editing to volume booster, you will find all the tools to create the perfect YouTube videos.
Here are some of the key features of Filmora that can help YouTubers make their YouTube videos:
- Offers multiple drawing video editing tools like speed control, volume booster, and color grading
- Offers special effects to enhance the appearance of your videos
- Allows you to custom create different animations
- Green Screen feature to help you change backgrounds and make the perfect videos
- Cross-platform accessibility as you can use it on both Windows and Mac
- Supports multiple file formats
- Ultra 4k HD support for the best quality of videos
- Free download and super easy to use with an intuitive interface
- Anyone can use it whether beginner or pro
- Online customer support available 24/7
Summing up
Stop worrying about low audio. Use one of the YouTube volume booster apps mentioned in this article. If you are making vlogs, tutorials, and other YouTube content, you can increase volume and create ideal videos with Wondershare video editor. So, to create the perfect videos with high-quality sound get Wondershare Filmora!
Shanoon Cox
Shanoon Cox is a writer and a lover of all things video.
Follow @Shanoon Cox
Shanoon Cox
Mar 27, 2024• Proven solutions
Have you ever listened to a YouTube video on max volume but still the sound wasn’t audible - even after turning up the YouTube volume as well as device audio? It is super annoying and inconvenient when you increase volume to max yet the video remains inaudible. YouTube volume issue could be due to various reasons such as poor audio quality of the built-in speakers or low original video sound. Well, there is a simple way to combat this problem i.e., sound booster. You can set different volume levels for the YouTube app on your PC or smartphone’s native volume controls. There are different YouTube volume boosters for Android, Windows, macOS, and iOS devices.
From listening to your favorite podcast to watching vlogs with your friends, you can use the best volume booster apps to increase the media sound volume and quality!
- Part 1: Best YouTube Volume Boosters for Windows and macOS
- Part 2: Best YouTube Volume Boosters for Android and iOS
- Part 3: Best YouTube Video Editing Software-Wondershare Filmora (Bonus Tip)
Part 1: Best YouTube Volume Boosters for Windows and macOS
Let’s introduce the best YouTube volume boosters for Windows and macOS:
1. FxSound (Windows and Mac)
FxSound is a very powerful tool that is made for Windows and macOS to enhance and boost the quality and volume of sound. This app comes with many features. For example, this audio software provides better sound quality, volume booster, and sound effects. Now you can listen to music, watch movies and play games without any distortion. Easily boost base, get customized effects and play with custom presets. You can download this app for your PC for free through the official website. People like this equalizer because it can make any audio format sound good even if it is 100 years old!
2. Boom 3D (Windows and macOS)
Boom 3D is a very popular app among many Windows and macOS users. This software is designed to help improve the audio on speakers or headphones that are connected to your computer. Boom 3D audio booster software also works with the Bluetooth devices that are connected to your PC. It can make any sound louder, clearer, and much better without buying any external devices. It provides us a 3D audio experience and works with any music player, video player, etc.!
3. Chrome Volume Booster Plugin (Windows)
This plugin has been rated 5 stars on the chrome web store as it is the best plugin for boosting up your volume on windows PC. This booster is so easy to download; you just have to go to the chrome web store and add the extension to your Google Chrome Browser. After adding it you can simply click on the icon and boost your volume up to 1000%! This plugin is free in the chrome store, just add it and choose how much louder you want your sound to be.
4. Letasoft Sound Booster (Windows)
Letasoft Sound Booster can only be used on windows. You can download it through the official website of Letasoft. It comes with a 14 days free trial period but after that, you have to buy their license to keep using it. This software is made to be used as an extra amplifier to boost up the volume of your audio or video if you think it is too low. The Letasoft Sound Booster app is very easy to use as you can control the volume from the slider. Moreover, it auto-starts and has no sound distortion.
5. Froyosoft Sound Booster (Mac)
Froyosoft Sound Booster is made for macOS users so they can boost video and audio file volumes. Individual application volumes can also be adjusted with the help of the Froyosoft Sound Booster. The good thing about this booster is that it is free for all users and it is 100% safe - you will not get any virus on your PC. You can download it from their website and increase the volume as high as you want to. So, get ready to get a clear and enhanced sound with the help of this app!
Part 2: Best YouTube Volume Boosters for Android and iOS
Following are the best YouTube sound boosters for Android and iOS devices:
1. AmpMe (Android and iOS)
With the help of AmpMe, you can start your little party through music apps. You don’t just get to listen to music but you can also chat with your friends - yup that’s right, it is a two-in-one app! The AmpMe app helps you to play the same music with your friends at the same time. It is one of the best volume booster apps that is available for both Android and iOS. It uses Bluetooth to connect with several devices, and the more the devices the higher the volume of the music. AmpMe offers a free trial and it costs $9.99 per week.
2. Super Volume Booster (Android)
To enjoy your music more than ever, you need a good volume enhancer. And, what can be better than an app that is free and boosts your audio? Android users are in luck because Super Volume Booster is a user-friendly app that allows you to increase the volume of YouTube and other apps. It gives you the best music experience. Moreover, it is clean, simple and has a one-touch operation. Not to forget that it has amazing reviews on Playstore. This app also increases the bass and also supports headphones and Bluetooth.
3. Volume Booster GOODEV (Android)
Volume Booster GOODEV is another app that boosts up the audio for you from 20 to 30% more! If you want to listen to an audiobook, watch a YouTube video or a movie on Netflix, volume Booster GOODEV can help you increase the volume of any media on any app! The volume can get so high that it might be dangerous for your ears so be careful. It offers a sound equalizer and is simple to use.
4. Volume Booster - Equalizer FX (iOS)
Volume Booster Equalizer FX can increase your volume higher than the default audio controller. With the help of this app, your device’s speaker will give the best result. You can adjust the sound effect levels according to your need. It makes the sound quality better and boosts up the volume with a single tap. You can get a weekly, monthly or yearly subscription. It is a great premium YouTube Volume booster for all iOS devices.
5. Max Volume Booster (iOS)
Max Volume Booster, as the name shows, boosts the volume to the maximum. You can find this app in the AppStore for free but it offers a premium version as well. With the help of the premium version, you can get an ad-free experience with no time limit. You can decrease or increase the volume based on your needs. Max Volume Booster gives you the experience and you will get addicted to it because it is a high-quality YouTube volume booster.
Part 3: Best YouTube Video Editing Software-Wondershare Filmora (Bonus Tip)
Wondershare Filmora is one of the most popular and user-friendly video editing software available. From beginners to pros, this app world for all. With Filmora you can create home videos, vlogs, Instagram reels, tutorials, guides, podcasts, and more! Wondershare Filmora is also the best YouTube video editor you will find! From editing to volume booster, you will find all the tools to create the perfect YouTube videos.
Here are some of the key features of Filmora that can help YouTubers make their YouTube videos:
- Offers multiple drawing video editing tools like speed control, volume booster, and color grading
- Offers special effects to enhance the appearance of your videos
- Allows you to custom create different animations
- Green Screen feature to help you change backgrounds and make the perfect videos
- Cross-platform accessibility as you can use it on both Windows and Mac
- Supports multiple file formats
- Ultra 4k HD support for the best quality of videos
- Free download and super easy to use with an intuitive interface
- Anyone can use it whether beginner or pro
- Online customer support available 24/7
Summing up
Stop worrying about low audio. Use one of the YouTube volume booster apps mentioned in this article. If you are making vlogs, tutorials, and other YouTube content, you can increase volume and create ideal videos with Wondershare video editor. So, to create the perfect videos with high-quality sound get Wondershare Filmora!
Shanoon Cox
Shanoon Cox is a writer and a lover of all things video.
Follow @Shanoon Cox
Also read:
- [Updated] Best Soundshapers for Content Makers on YouTube
- 2024 Approved Crafting Powerful Thumbnails with Top 20 Font Options
- How to Live Stream on YouTube Gaming?
- Unpacking the World of Creative Commons Licensing
- Locate Lively Video Community Spots
- 11 FREE YouTube Playlist Downloaders [Online/PC/Android/iOS]
- In 2024, Effortless Video Upload From Apple Devices to YouTube Channel
- Historical Knowledge at Your Fingertips Best YT History Channels
- [New] Avoiding the Common Path The Route to Unique Streamer Identities
- Proven Techniques to Enhance Subscriber Count with Effective Channel Branding
- [New] Deciphering Digital Domination A Deep Dive Into Directors' Videos
- The Top 10 Reasons Behind Zero Views on YouTube Videos
- Conquered Everlasting Deactivation of YouTube Shorts for 2024
- ClipCraft Designer for 2024
- Youtube Shorts Money-Making Guide Key Requirements & Potential Income
- Quick-Paced Fortnite Visual Artistry
- The Economics of Evaluating Everything on Electronic Streams
- Deciphering YouTube’s Cost Per Mille (CPM) Structure for 2024
- Essential Low-Cost Footage Source Directory
- 2024 Approved Analytics Unlocked Your Step-by-Step YouTube Guide
- Revitalizing Urban Areas with Environmental Vision and Purpose
- Cashing In on Content The Carminati Effect (AJay)
- In 2024, Earning Estimates for YouTube Creators AdSense Pay-Out per 1,000 Viewers
- [New] Downloading YouTube Playlists Made Simple & Easy
- Banner Brilliance Elevating Your Game Channel Image
- Discover the Art of YouTube Playlist Shuffling for 2024
- [Updated] Enlarge Your Video's Thumbnail on YouTube Easily
- [Updated] Downloading YouTube Playlists Made Simple & Easy
- [New] Best 3D Software for Dynamic YouTube Intros
- Maximizing Stability The Art of Tripod Placement in Vlogs
- Mirthful Melodies Comical Cover Tunes
- Ultimate Guide to Purchasing ASMR Microphones
- Fresh Footage, Frequent Flows Do's & Don'ts for Streamlining Video Content
- Google's Goldmine A Simplified Three-Step Blueprint for Calculating Subscriber Earning Potential
- Wow-Tastic Editing YouTube Edition of Greatest Magic Tricks
- Top 20 ASMR Youtubers to Watch
- 5 Simple Yet Powerful Strategies to Skyrocket Your YouTube Views
- [New] Crafting a YouTube Future Scaling Up or Staying Independent?
- 2024 Approved A Symphony of Streams Harmonizing Your Multiple YouTube Views
- Boundless Creativity Fantasy Backdrops on Thumbnails
- Unveiling Secrets Sharing Restricted YouTube Content via Email
- Charting the Course to YouTube Livestream Mastery for 2024
- [Updated] 2024 Gaming Earnings on YouTube
- [New] Entryway Investments Cost-Effective Channels for Newbies
- [New] Beyond Borders Blurring Techniques for Global Audienes
- 2024 Approved Dive Into Digital Green Magic Top 4 YouTube Sources for No-Cost Background Workshops
- [Updated] Mastering WhatsApp Call Recording Techniques for 2024
- [New] Shadowy Snapshots Skills for Stunning Night Images for 2024
- [New] Clear Acoustic Advantages Review of the Top 6 Stream-Ready Mic Models
- 10 Free Location Spoofers to Fake GPS Location on your Honor Play 7T | Dr.fone
- 9 Solutions to Fix Process System Isnt Responding Error on Honor Magic 6 Pro | Dr.fone
- Top 15 Apps To Hack WiFi Password On Realme 11 Pro
- [New] Bridging the Gap Between TikTok & Facebook Sharing for 2024
- The New Era of Social Media A Side-By-Side Comparison Between TikTok and Snap
- How to Restore Contacts on iPhone 6 Plus (4 Methods) | Stellar
- In 2024, S Top Rated Cartoon Video Editors for Newbies
- New How to Add Music to Photo for Free PC & Mobile
- 2024 Approved Rise Through the Instagram Rankings Fast
- [New] In 2024, Step-by-Step Guide to Personalize and Change Video Covers on Facebook
- [Updated] In 2024, Spotlight on TikTok's Newest Dance Moves
- In 2024, Hacks to do pokemon go trainer battles For Apple iPhone 13 Pro | Dr.fone
- [Updated] 10 Ultimate Simulators for Android's GB Games for 2024
- New In 2024, S Top Music Video Makers Elevate Your Sound with Style
- Vivo Y55s 5G (2023) Camera Not Working Unexpected Error? Fix It Now | Dr.fone
- Full Guide to Bypass Oppo A56s 5G FRP
- Two Ways to Track My Boyfriends Vivo Y02T without Him Knowing | Dr.fone
- In 2024, How to Fake Snapchat Location without Jailbreak On Apple iPhone 14 Pro | Dr.fone
- In 2024, Immediate Access, Future Legacy Preserving Your Digital Moments
- Which Pokémon can Evolve with a Moon Stone For Vivo X90S? | Dr.fone
- Seamless Web Browsing on Edge with Picture-in-Picture Mode
- [New] Precision Gameplay Savings Made Easy with FBX Filming for 2024
- Fixing Foneazy MockGo Not Working On Poco C65 | Dr.fone
- How To Remove Flashlight From iPhone 14 Pro Max Lock Screen | Dr.fone
- [New] Creative Control Preparing TikToks for Legal Upload for 2024
- Discover the Secret to Downloading High-Quality YouTube Audio
- [New] Augmenting Your Stardew Experience with Seven Top Mods for 2024
- In 2024, How to Turn Off Google Location to Stop Tracking You on Vivo Y77t | Dr.fone
- Updated In 2024, Top Glitch Video Editing Software for Windows and Mac Users
- Title: "In 2024, Crafting Clearer Communication The Art of Adding Text to Video Media"
- Author: Brian
- Created at : 2024-05-25 12:07:50
- Updated at : 2024-05-26 12:07:50
- Link: https://youtube-video-recordings.techidaily.com/in-2024-crafting-clearer-communication-the-art-of-adding-text-to-video-media/
- License: This work is licensed under CC BY-NC-SA 4.0.
