
:max_bytes(150000):strip_icc()/GettyImages-1350230158-d78404597298485cb96ba037827a6f0c.jpg)
"In 2024, A Step-by-Step Approach to Ad Revenue in YouTube Videos"
A Step-by-Step Approach to Ad Revenue in YouTube Videos
Monetize YouTube Videos | The Ultimate Guide to Ad Revenue

Richard Bennett
Oct 26, 2023• Proven solutions
Want to make money on YouTube? There are qualifications you have to meet before you can monetize your videos with ads, but you don’t have to have a huge channel.
Here’s everything you need to know to join the YouTube Partner Program and start earning ad revenue:
- Qualifying for the YouTube Partner Program
- How to Apply for Monetization on YouTube
- What is Ad Friendly Content?
- How to Get Paid Through AdSense
- Which YouTube Videos Get the Highest Paying Ads?
- Useful Terminology (CPM, CPV, CPC)
What is the YouTube Partner Program
YouTube’s Partner Program, or YPP, allows creators to monetize their YouTube videos through ads. If you are a YouTube Partner, that means you are earning revenue from the ads being shown before and during your videos.
Before you dive into the below guide, you may need a video editor to start your monetizing on Youtube. Filmora video editor will be the best choice.
Becoming a skilled video editor takes years of practice, but with Wondershare Filmora video editor, you can produce YouTube videos that have a professional look and feel, even if you are new to the world of video editing. This YouTube Video Creator has big icons and an intuitive interface, so those YouTubers who edit videos for the first time can quickly make a video.

Qualifying for the YouTube Partner Program
In order to qualify for YPP, you need to prove that you’re creating consistent, original, content and that people are watching your content. YouTube believes that has been proven when you reach these qualifications:
- 1000 Subscribers
- 4000 Hours of Watch Time (over the past 12 months)
Not quite there yet? Here’s a list of actionable tips that can help you grow your channel.
If you meet these requirements and are approved for monetization, but then drop below them, your channel will not be automatically demonetized. YouTube may review your content and demonetize you if you seem to have stopped posting videos, but this will not be automatic.
Remember: meeting these milestones does not grant you automatic monetization.
You can apply for YPP when you reach the milestones above, but your channel will still need to be reviewed by a human working for YouTube. Reviewers will be watching for:
- Nudity or sexual content
- Harmful, dangerous, threatening, or hateful content
- Violent or graphic content
- Harassment or cyberbullying
- Spam, scams, and misleading metadata
- Copyright infringement or impersonation
- Privacy violations
- Fake subscribers
- Other guidelines violations
If your content violates any of YouTube’s Community Guidelines you may be denied monetization. Learn more about YouTube’s Community Guidelines here.
How to Apply for Monetization on YouTube
Once you qualify for YPP, applying for monetization is easy.
- In the Creator Studio, select Channel > Status and features.
- Under ‘Monetization’, click Enable and follow the steps that appear to accept YouTube’s terms.
- Wait to be approved.
If you’re approved, you can start earning money as soon as your AdSense account is set up!
If you’re not approved, you can apply again in 30 days.
To make sure you’re approved the next time you apply, review all of YouTube’s related policies (Partner Program policies , Terms of Service , spam policies , and Community Guidelines ) and remove the content that might be holding you back.
In order to start monetizing, you’ll need to link your channel with an AdSense account. You must be over 18 to create an AdSense account. YouTube creators under 18 can link to the AdSense accounts of their parents or guardians.
Here’s how to sign up for AdSense through YouTube:
- Under Channel > Status and features in your Creator Studio, look for Paid content. Click where it says ‘active AdSense account’.
- On the following ‘Monetization’ screen, click Next to go to AdSense.
- You will be asked whether you want to use the Google account you’re already signed in to for AdSense, or if you want to use a different account.
- The next step is ‘Your Website’. This will automatically be filled in with your channel. Click Accept association if it’s right.
Note: you can only have one AdSense account. Do not make a second one if you already have one. Duplicate accounts may be banned, which will stop you from monetizing your videos.
What is Ad Friendly content?
Not all content that meets YouTube’s Community Guidelines will be considered ‘advertiser-friendly’. Companies don’t want to run ads alongside content that doesn’t match the values of their brands.
YouTube may disable ads on any video it doesn’t think is ad-friendly. Videos which may be flagged as inappropriate for ads include (but are not limited to):
- Videos that cover controversial or sensitive subjects.
- Videos depicting the use of drugs or dangerous products.
- Videos may encourage harmful or dangerous behavior.
- Videos with swearing (but not ALL videos with swearing – quantity and context are factors).
- Videos which contain hate speech.
- Videos that depict family entertainment characters (i.e. Disney princesses) engaged in inappropriate behavior (even if you’re being satirical).
If you want to make sure all of your content is advertiser-friendly, here are some best practices suggested by YouTube:
- Be respectful of your viewers and any people or groups you may include or mention in your video.
- Extend this respectful tone to your thumbnails and video titles, and make sure your thumbnails and metadata accurately depict your video’s content.
- Don’t try to monetize videos that already contain ads (i.e. paid product placement ).
How to Get Paid Through AdSense
In order to receive a payment from AdSense, you need to earn at least $100.
For example, if you only earn $10 in a month, you will not receive a payment that month. You will not lose that $10 – you will receive it when your total earnings reach or exceed $100.
You will also need to provide AdSense with tax information and verify your identity and address in order to start being paid.
The most popular way to get paid through AdSense is via an EFT (Electronic Funds Transfer). To receive your payments this way, you’ll need to link your bank account to your AdSense account.
Here’s how:
- Log in to AdSense.
- Click Settings in the menu on the left, and then select Payments.
- On the Payments page, click Manage payment options.
- Click the Add payment method.
- You’ll be prompted to add your bank account details.
- Make sure the name on your AdSense account matches the name on your bank account (if you’re under 18 and cannot make your own AdSense account, this may mean you’re using your parent or guardian’s bank account).
Which YouTube Videos Get the Highest Paying Ads?
Not all ads pay the same, and not all videos will be able to attract the ads that pay the most.
How much money your video has the potential to earn depends on:
- The size of your channel
- Your niche on YouTube
- The specific topic of the video
That the size of your channel matters probably isn’t a surprise. The biggest brands want to run their ads beside videos that are getting more views.
Whether or not your YouTube niche has a high potential for profit will depend on a couple things:
- How many other channels are in your niche?
The more people there are making similar videos to you, the thinner the available ads are spread.
- How many cheap or expensive products are being advertised in your niche?
If the products are free or inexpensive (i.e. free online games) then that limits your earning ability. In large niches like gaming, the few higher paying ads will go to the most popular channels and the low-paying ads will be spread amongst everyone else.
If you have a very specific niche, i.e. luxury cars, then you will have less competition and the ads available will likely be for more expensive products (and thus the ads themselves will be higher paying).
Even if you are in a large niche, you can still make videos on specific topics designed to attract higher-paying ads and more revenue. Pay attention to the analytics in your Creator Studio to learn which of your videos earn the most. Then, make more videos on similar topics to boost your earnings.
Another factor that can affect what ads appear alongside your videos is the viewing habits of individual viewers. People are shown ads that YouTube believes are more relevant to their interests.
Useful Terminology (CPM, CPC, CPV)
A lot of people think your ad revenue is determined by your view count. This isn’t true – it’s determined by ad impressions.
How much revenue you earn from the ads running around your videos depends on these three things:
CPC: ‘cost per click’. Most of the ads on YouTube are CPC, meaning that an ad impression is only recorded when an ad is clicked on.
CPV: ‘cost per view’. Skippable pre-roll ads are the only ads on YouTube which record ad impressions without clicks. These ads record ad impressions when viewers watch 30 seconds of the ad instead of skipping it.
CPM: ‘cost per mille’ or ‘cost per thousand’. This refers to how much money gets paid out for 1000 ad impressions.
Your CPM will be affected by a multitude of things including the ads themselves and the size of your channel. AdSense has made it a rule that you cannot disclose your CPM to anyone, which makes it difficult to determine what you should expect.
Note: never click on ads near your own videos or instruct your viewers/friends to do so. If your clicks are higher than what AdSense considers normal they may ban you.
Sites like Social Blade provide estimated earnings for any channel you want to look up. Looking up channels that are where you plan to be in the near future could help you set your own expectations.
Are you able to monetize your videos? How many more subscribers or hours of watch time do you need?
Richard Bennett
Richard Bennett is a writer and a lover of all things video.
Follow @Richard Bennett
Richard Bennett
Oct 26, 2023• Proven solutions
Want to make money on YouTube? There are qualifications you have to meet before you can monetize your videos with ads, but you don’t have to have a huge channel.
Here’s everything you need to know to join the YouTube Partner Program and start earning ad revenue:
- Qualifying for the YouTube Partner Program
- How to Apply for Monetization on YouTube
- What is Ad Friendly Content?
- How to Get Paid Through AdSense
- Which YouTube Videos Get the Highest Paying Ads?
- Useful Terminology (CPM, CPV, CPC)
What is the YouTube Partner Program
YouTube’s Partner Program, or YPP, allows creators to monetize their YouTube videos through ads. If you are a YouTube Partner, that means you are earning revenue from the ads being shown before and during your videos.
Before you dive into the below guide, you may need a video editor to start your monetizing on Youtube. Filmora video editor will be the best choice.
Becoming a skilled video editor takes years of practice, but with Wondershare Filmora video editor, you can produce YouTube videos that have a professional look and feel, even if you are new to the world of video editing. This YouTube Video Creator has big icons and an intuitive interface, so those YouTubers who edit videos for the first time can quickly make a video.
Qualifying for the YouTube Partner Program
In order to qualify for YPP, you need to prove that you’re creating consistent, original, content and that people are watching your content. YouTube believes that has been proven when you reach these qualifications:
- 1000 Subscribers
- 4000 Hours of Watch Time (over the past 12 months)
Not quite there yet? Here’s a list of actionable tips that can help you grow your channel.
If you meet these requirements and are approved for monetization, but then drop below them, your channel will not be automatically demonetized. YouTube may review your content and demonetize you if you seem to have stopped posting videos, but this will not be automatic.
Remember: meeting these milestones does not grant you automatic monetization.
You can apply for YPP when you reach the milestones above, but your channel will still need to be reviewed by a human working for YouTube. Reviewers will be watching for:
- Nudity or sexual content
- Harmful, dangerous, threatening, or hateful content
- Violent or graphic content
- Harassment or cyberbullying
- Spam, scams, and misleading metadata
- Copyright infringement or impersonation
- Privacy violations
- Fake subscribers
- Other guidelines violations
If your content violates any of YouTube’s Community Guidelines you may be denied monetization. Learn more about YouTube’s Community Guidelines here.
How to Apply for Monetization on YouTube
Once you qualify for YPP, applying for monetization is easy.
- In the Creator Studio, select Channel > Status and features.
- Under ‘Monetization’, click Enable and follow the steps that appear to accept YouTube’s terms.
- Wait to be approved.
If you’re approved, you can start earning money as soon as your AdSense account is set up!
If you’re not approved, you can apply again in 30 days.
To make sure you’re approved the next time you apply, review all of YouTube’s related policies (Partner Program policies , Terms of Service , spam policies , and Community Guidelines ) and remove the content that might be holding you back.
In order to start monetizing, you’ll need to link your channel with an AdSense account. You must be over 18 to create an AdSense account. YouTube creators under 18 can link to the AdSense accounts of their parents or guardians.
Here’s how to sign up for AdSense through YouTube:
- Under Channel > Status and features in your Creator Studio, look for Paid content. Click where it says ‘active AdSense account’.
- On the following ‘Monetization’ screen, click Next to go to AdSense.
- You will be asked whether you want to use the Google account you’re already signed in to for AdSense, or if you want to use a different account.
- The next step is ‘Your Website’. This will automatically be filled in with your channel. Click Accept association if it’s right.
Note: you can only have one AdSense account. Do not make a second one if you already have one. Duplicate accounts may be banned, which will stop you from monetizing your videos.
What is Ad Friendly content?
Not all content that meets YouTube’s Community Guidelines will be considered ‘advertiser-friendly’. Companies don’t want to run ads alongside content that doesn’t match the values of their brands.
YouTube may disable ads on any video it doesn’t think is ad-friendly. Videos which may be flagged as inappropriate for ads include (but are not limited to):
- Videos that cover controversial or sensitive subjects.
- Videos depicting the use of drugs or dangerous products.
- Videos may encourage harmful or dangerous behavior.
- Videos with swearing (but not ALL videos with swearing – quantity and context are factors).
- Videos which contain hate speech.
- Videos that depict family entertainment characters (i.e. Disney princesses) engaged in inappropriate behavior (even if you’re being satirical).
If you want to make sure all of your content is advertiser-friendly, here are some best practices suggested by YouTube:
- Be respectful of your viewers and any people or groups you may include or mention in your video.
- Extend this respectful tone to your thumbnails and video titles, and make sure your thumbnails and metadata accurately depict your video’s content.
- Don’t try to monetize videos that already contain ads (i.e. paid product placement ).
How to Get Paid Through AdSense
In order to receive a payment from AdSense, you need to earn at least $100.
For example, if you only earn $10 in a month, you will not receive a payment that month. You will not lose that $10 – you will receive it when your total earnings reach or exceed $100.
You will also need to provide AdSense with tax information and verify your identity and address in order to start being paid.
The most popular way to get paid through AdSense is via an EFT (Electronic Funds Transfer). To receive your payments this way, you’ll need to link your bank account to your AdSense account.
Here’s how:
- Log in to AdSense.
- Click Settings in the menu on the left, and then select Payments.
- On the Payments page, click Manage payment options.
- Click the Add payment method.
- You’ll be prompted to add your bank account details.
- Make sure the name on your AdSense account matches the name on your bank account (if you’re under 18 and cannot make your own AdSense account, this may mean you’re using your parent or guardian’s bank account).
Which YouTube Videos Get the Highest Paying Ads?
Not all ads pay the same, and not all videos will be able to attract the ads that pay the most.
How much money your video has the potential to earn depends on:
- The size of your channel
- Your niche on YouTube
- The specific topic of the video
That the size of your channel matters probably isn’t a surprise. The biggest brands want to run their ads beside videos that are getting more views.
Whether or not your YouTube niche has a high potential for profit will depend on a couple things:
- How many other channels are in your niche?
The more people there are making similar videos to you, the thinner the available ads are spread.
- How many cheap or expensive products are being advertised in your niche?
If the products are free or inexpensive (i.e. free online games) then that limits your earning ability. In large niches like gaming, the few higher paying ads will go to the most popular channels and the low-paying ads will be spread amongst everyone else.
If you have a very specific niche, i.e. luxury cars, then you will have less competition and the ads available will likely be for more expensive products (and thus the ads themselves will be higher paying).
Even if you are in a large niche, you can still make videos on specific topics designed to attract higher-paying ads and more revenue. Pay attention to the analytics in your Creator Studio to learn which of your videos earn the most. Then, make more videos on similar topics to boost your earnings.
Another factor that can affect what ads appear alongside your videos is the viewing habits of individual viewers. People are shown ads that YouTube believes are more relevant to their interests.
Useful Terminology (CPM, CPC, CPV)
A lot of people think your ad revenue is determined by your view count. This isn’t true – it’s determined by ad impressions.
How much revenue you earn from the ads running around your videos depends on these three things:
CPC: ‘cost per click’. Most of the ads on YouTube are CPC, meaning that an ad impression is only recorded when an ad is clicked on.
CPV: ‘cost per view’. Skippable pre-roll ads are the only ads on YouTube which record ad impressions without clicks. These ads record ad impressions when viewers watch 30 seconds of the ad instead of skipping it.
CPM: ‘cost per mille’ or ‘cost per thousand’. This refers to how much money gets paid out for 1000 ad impressions.
Your CPM will be affected by a multitude of things including the ads themselves and the size of your channel. AdSense has made it a rule that you cannot disclose your CPM to anyone, which makes it difficult to determine what you should expect.
Note: never click on ads near your own videos or instruct your viewers/friends to do so. If your clicks are higher than what AdSense considers normal they may ban you.
Sites like Social Blade provide estimated earnings for any channel you want to look up. Looking up channels that are where you plan to be in the near future could help you set your own expectations.
Are you able to monetize your videos? How many more subscribers or hours of watch time do you need?
Richard Bennett
Richard Bennett is a writer and a lover of all things video.
Follow @Richard Bennett
Optimizing Content: Editing YouTube Descriptions & Titles for Growth
How to Optimize YouTube Tags/Title/Description for More Views
Richard Bennett
Mar 27, 2024• Proven solutions
Making awesome video content is just the first hurdle to overcome. Getting people to watch them is the next and a much bigger obstacle in your path. Just as a blogger must work hard to get people to read their blog, so a YouTuber needs to find ways to get more views on their videos.
For any piece of content on the internet, discoverability is key to exposure. After all, nobody will watch your video or read your blog if they can’t find it, right? A blogger would do this by lacing their content with SEO - search engine optimization. But how can a YouTuber do the same? The answer lies in something known as YouTube tags optimization. In this article, we will let you know how to add, edit and optimize YouTube tags easily for more views, and some tips on YouTube title and description.
Quick Jump Menu
- What are YouTube tags and why they are so important
- How to come up with YouTube tags and optimize them
- How to Tag YouTube and Add Title, Description
- How to Improve YouTube video Metadata: Tags, Title, Description
- Tips for Tagging YouTube and Writing Title, Description
Before we get started, I want to recommend the best video editing software for YouTubers - Wondershare Filmora , an easy to use while powerful video editor that allows you not only to cut, split, crop, resize, reverse your videos, but also offers you multiple video effects specially designed for Fashion, Beauty, Gaming, Travel, Education, etc. Check the video to know more fantastic features:
 Download Mac Version ](https://tools.techidaily.com/wondershare/filmora/download/ )
Part 1: What are YouTube tags and why they are so important
YouTube tags are used when you upload a video on YouTube. You need to specify the type of video. In other words, you need to describe your video with keywords. But you might think about why you need to add these words. YouTube can’t figure out what my videos are about? Unfortunately, YouTube can’t though its algorithm is much more advanced than before.
You must know the competition between videos is furious since 500 hours of video per minute are uploaded on YouTube . In this case, it is important to let the YouTube algorithm know your video by adding related tags to have a higher ranking. So the better tags we choose, the higher chance to rank in the top 1, which means you will get more views!
Using YouTube meta tags wisely can broaden your reach and help new people discover your content. However, don’t be tempted to insert irrelevant tags just because you know they are high traffic. You will be found out and penalized as a result. Just as you did with your description, research your keywords, place the most important ones first and use as many as you can.
What are the three YouTube tag types?
YouTube has three different types of tags and each of them has a specific purpose. The tags are-
Specific – The specific tag types are keywords-oriented. These keywords specifically pertain to the content of your video. In this tag type, the particular video is highlighted with the keyword tags. Often while typing the keywords in your mind, YouTube suggests phrases and keywords according to the content of your video. You may apply the suggestions and also add more general or common versions of the same keywords.
Compound – The compound tags are usually using more than two words. Many a time it is seen that users prefer tagging the complete title of the video. If you are using your video title as the compound tag, ensure that you do not include the prepositions like or, as, and, etc. This is because YouTube allows just 500 characters in the title and ignore the prepositions. It is always advised to use all the 500 characters YouTube has allowed without wasting the characters on prepositions as it will automatically be ignored.
Generic – The generic tags are the ones that describe the entire video in one or two words. These tags are used in all the videos of yours. These tags are used across your channel for all the videos you post. It is important to have such general constant tags.
Part 2: How to add YouTube tags and optimize them
The more relevant tags you add, the better it is. The best part is YouTube doesn’t restrict the number of tags but adding all is not possible and adding something irrelevant doesn’t make sense. So, your YouTube video tags must be the smart ones for more views. Educated tagging is what is required.
1. Brand-Specific Tags Addition - Every business wants their brand name to show up in the search results on YouTube and Google. Self-referencing your video or tagging your brand name in a number of variations is a smart way of letting others know your brand.
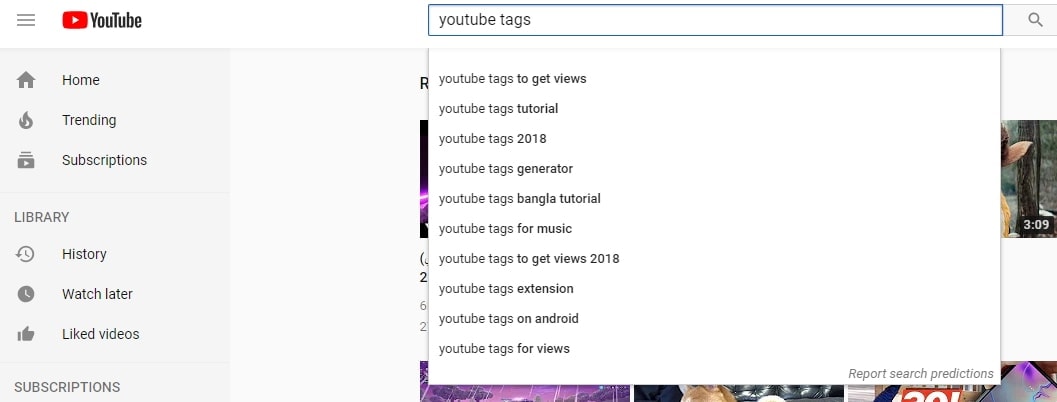
2. Using YouTube Auto Suggest – Play with the search option on YouTube and check out the YouTube suggestions when you search. Try to recognize the common videos that pop up while searching for something important and relevant to yours. Try searching for random keywords according to your YouTube search experience.
3. Use the YouTube Keyword Search Tool – Lastly, you may use the YouTube keyword suggestion tool. It helps you to extract the relevant keywords from the videos of your competitors and create suggestions according to the basic term provided by you.
4. Use Specific Tags - After using tools, you need to narrow down your tags specifically, like tags “learn 3D paper cutting”. The search volume may not be huge, but these kinds of tags can let YouTube know your video very well. Give it a try!
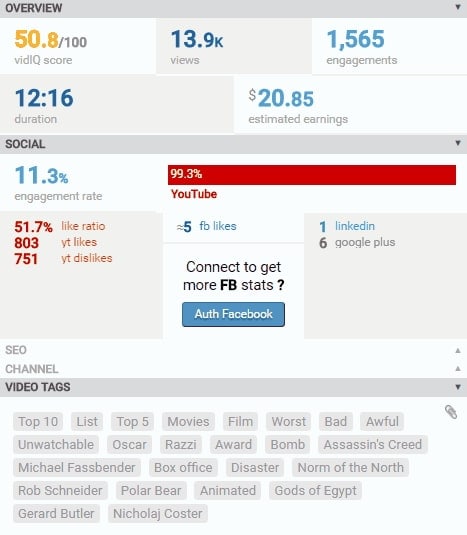
5. Check competitor’s Tags - When you check tags from other brands, it is not suggested to copy them all. What you need to do is find what you are missing and try to cover that area. However, only third-party tools can help you do that. In the market, VidIQ is highly used. It has a free version. Most of all data including tags can be found for higher views.
YouTube Tags Bonus Tips
Here you can learn some tips when optimizing tags. You can use singular and plural tags. Sometimes remember to add some misspelling tags because users tend to mistype some words, so it’s better to cover this kind of tag. You can get more information on misspelled words . More tips are listed below.
- Build on what you learned in your keyword research and use high traffic keywords as tags
- Use as many tags as possible, but without being spammy
- Build related playlists using particular tags
- Be generic; ‘big’, ‘funny’ and ‘sweet’ are fine, but ‘luscious’, ‘delightful’ and ‘splendid’ don’t make the best tags
- Put the most important tags first
- Mix single word tags with ‘long tail’ tags, e.g. ‘how to’
Part 3: How to Tag YouTube and Add Title, Description
For a New Video
- Step 1. The first thing you need to do is to sign in to your YouTube account .
- Step 2. Then click the Upload button that’s found on the top right corner of the window.

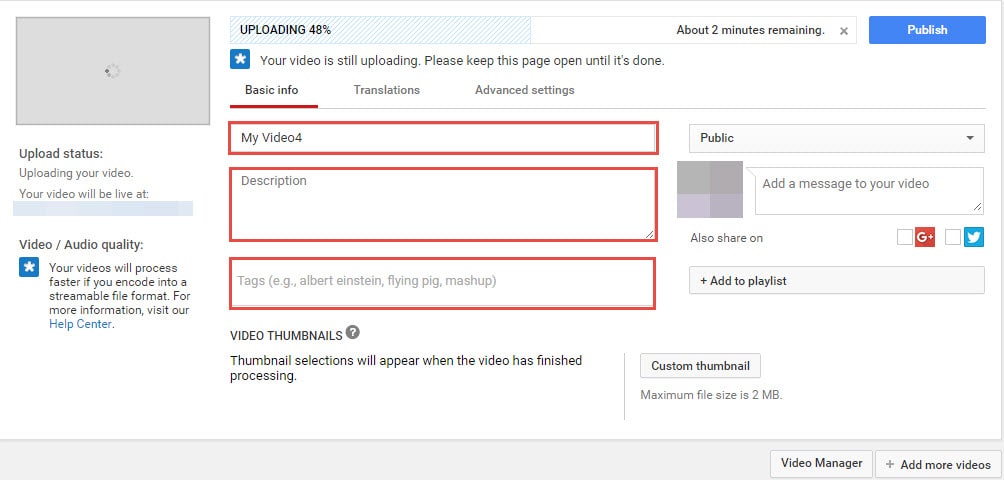
- Step 3. Then select the video that you want to upload. You will be asked to add a title, description, and tags.
- Step 4. After uploading, you can still edit the YouTube title, description, and tags.
For a Published Video
There are times when you want to change the title, description or tag of an already published video. The good news is that YouTube allows you to re-edit them whenever you want to.
- Step 1. Log into your YouTube account
- Step 2. Click the account name found at the top right-hand corner of the screen. Then you will have a dropdown menu. Select Video Manager to show a list of your uploaded videos.

- Step 3. Click the Edit button that’s found right next to the video that you want to modify. In the Video Information, you can now change the title, description or any of the tags. Click on the Save Changes button when you are done.
Part 4: How to Improve YouTube Video Title and Description
Metadata on YouTube is where both the viewers and the platform itself can find out what your video is all about. It helps people search for your video, helps YouTube to categorize it correctly and, when done well, can broaden the reach of your content. YouTube meta consists of three main parts: tags, title and description. Here’s how you can use each of these three elements to create powerful metadata for your video:
1. Title
YouTube titles play a big part in the ranking factors for search. That means you’ve got to think about what the people most likely to want to see your video will type into the search bar, as well as the words that accurately describe your video.
For example, if you have a clip of your cat Fluffy climbing a tree, calling your video ‘Fluffy climbs a tree’ is not the best idea. Nobody knows who Fluffy is; it could be your rabbit, dog, daughter or feather duster for all the YouTube community knows, and nobody is going to be searching for it.
A better title would be ‘cat climbs a tree, but you could even improve on that. How about ‘funny cat climbs a tree’, which would capture all those people looking for funny cat videos. Or, even better, ‘funny Persian cat climbs a tree’, also capturing those people who adore Persian cats.
You can see how building awesome YouTube titles can happen organically like this, but it’s also worth doing your homework too. We have collected a handful of YouTube Keyword tools for you to improve your YouTube meta, so check out the suggestions and work forwards from there.
Best practices
- Research your keywords and include high traffic keywords at the start of the title
- Keep titles under 70 characters
- Branding, episode number, and other non-essential info should be at the end of the title
- Review your YouTube titles from time to time and update with new keywords as search trends change
- Avoid clickbait titles or misleading titles as this will affect your view time and subsequently your ranking in search
2. Description
Your description is a much longer piece of YouTube meta, so you can really go to town with your YouTube keywords here. You’ve got up to 5,000 characters to fill in, and we strongly advise that you aim to use every single one. This really is a golden opportunity, not only to get people motivated to watch all of your video, but also to be indexed correctly through well researched YouTube keywords.
You may have noticed that, on the search page itself, only a small part of the description actually shows up; 120 characters of it to be precise. This doesn’t affect indexing, but it does mean you have to plan your YouTube description carefully to really hook people into clicking through from just the first sentence or two.
Best practices
- Make the first sentence or two compelling and captivating to get people to click
- Research the best YouTube keywords to use to ensure your video is correctly indexed
- At the end of your YouTube description, include a call to action to direct viewers on what to do next (subscribe, click through to the website, look at a product, watch more videos, etc.)
- If your video is long, consider placing time codes in your description to help users jump to their areas of interest
- Add links to products showcased, your social channels, or website as you wish
- Don’t forget to credit any music you’ve used here
Part 5: Tips for Tagging YouTube and Writing Title, Description
So, now we’ve got the basics down, let’s move on to some top tips for getting your metadata just right:
- 1. Do not spam
Irrelevant keywords will not do you any favors in the long run. Using a popular search term such as ‘funny cat’ when actually it’s a video of you unboxing your product will simply irritate your viewers. You’ll get more views, but for shorter durations, and that will hurt not only your ranking but also your reputation. The people you want to draw in with your YouTube meta should be those who are genuinely interested in your videos, as these are the people who will share, comment and interact with you.
- 2. Don’t put tags in the description
YouTube has given you a place to put your tags, and that’s not in the description area of your meta. Placing tags in the description area is known as tag stuffing and can lead to videos being removed or penalized.
- 3. Update regularly
YouTube meta is not a static thing. Trends change, search statistics fluctuate, and the needs of your viewers alter as time goes on. For this reason, you should look to update your meta from time to time, at least once every six months or so. Re-research your keywords and optimize for today’s trending search terms.
You May Also Like: YouTube SEO Complete Guide
Conclusion
Take some time to perfect your meta on YouTube and see how many more views it helps you get. Let us know if you have any other tips for developing powerful metadata, and how optimizing your meta has worked for you!
Download Mac Version ](https://tools.techidaily.com/wondershare/filmora/download/ )
Richard Bennett
Richard Bennett is a writer and a lover of all things video.
Follow @Richard Bennett
Richard Bennett
Mar 27, 2024• Proven solutions
Making awesome video content is just the first hurdle to overcome. Getting people to watch them is the next and a much bigger obstacle in your path. Just as a blogger must work hard to get people to read their blog, so a YouTuber needs to find ways to get more views on their videos.
For any piece of content on the internet, discoverability is key to exposure. After all, nobody will watch your video or read your blog if they can’t find it, right? A blogger would do this by lacing their content with SEO - search engine optimization. But how can a YouTuber do the same? The answer lies in something known as YouTube tags optimization. In this article, we will let you know how to add, edit and optimize YouTube tags easily for more views, and some tips on YouTube title and description.
Quick Jump Menu
- What are YouTube tags and why they are so important
- How to come up with YouTube tags and optimize them
- How to Tag YouTube and Add Title, Description
- How to Improve YouTube video Metadata: Tags, Title, Description
- Tips for Tagging YouTube and Writing Title, Description
Before we get started, I want to recommend the best video editing software for YouTubers - Wondershare Filmora , an easy to use while powerful video editor that allows you not only to cut, split, crop, resize, reverse your videos, but also offers you multiple video effects specially designed for Fashion, Beauty, Gaming, Travel, Education, etc. Check the video to know more fantastic features:
Download Mac Version ](https://tools.techidaily.com/wondershare/filmora/download/ )
Part 1: What are YouTube tags and why they are so important
YouTube tags are used when you upload a video on YouTube. You need to specify the type of video. In other words, you need to describe your video with keywords. But you might think about why you need to add these words. YouTube can’t figure out what my videos are about? Unfortunately, YouTube can’t though its algorithm is much more advanced than before.
You must know the competition between videos is furious since 500 hours of video per minute are uploaded on YouTube . In this case, it is important to let the YouTube algorithm know your video by adding related tags to have a higher ranking. So the better tags we choose, the higher chance to rank in the top 1, which means you will get more views!
Using YouTube meta tags wisely can broaden your reach and help new people discover your content. However, don’t be tempted to insert irrelevant tags just because you know they are high traffic. You will be found out and penalized as a result. Just as you did with your description, research your keywords, place the most important ones first and use as many as you can.
What are the three YouTube tag types?
YouTube has three different types of tags and each of them has a specific purpose. The tags are-
Specific – The specific tag types are keywords-oriented. These keywords specifically pertain to the content of your video. In this tag type, the particular video is highlighted with the keyword tags. Often while typing the keywords in your mind, YouTube suggests phrases and keywords according to the content of your video. You may apply the suggestions and also add more general or common versions of the same keywords.
Compound – The compound tags are usually using more than two words. Many a time it is seen that users prefer tagging the complete title of the video. If you are using your video title as the compound tag, ensure that you do not include the prepositions like or, as, and, etc. This is because YouTube allows just 500 characters in the title and ignore the prepositions. It is always advised to use all the 500 characters YouTube has allowed without wasting the characters on prepositions as it will automatically be ignored.
Generic – The generic tags are the ones that describe the entire video in one or two words. These tags are used in all the videos of yours. These tags are used across your channel for all the videos you post. It is important to have such general constant tags.
Part 2: How to add YouTube tags and optimize them
The more relevant tags you add, the better it is. The best part is YouTube doesn’t restrict the number of tags but adding all is not possible and adding something irrelevant doesn’t make sense. So, your YouTube video tags must be the smart ones for more views. Educated tagging is what is required.
1. Brand-Specific Tags Addition - Every business wants their brand name to show up in the search results on YouTube and Google. Self-referencing your video or tagging your brand name in a number of variations is a smart way of letting others know your brand.
2. Using YouTube Auto Suggest – Play with the search option on YouTube and check out the YouTube suggestions when you search. Try to recognize the common videos that pop up while searching for something important and relevant to yours. Try searching for random keywords according to your YouTube search experience.
3. Use the YouTube Keyword Search Tool – Lastly, you may use the YouTube keyword suggestion tool. It helps you to extract the relevant keywords from the videos of your competitors and create suggestions according to the basic term provided by you.
4. Use Specific Tags - After using tools, you need to narrow down your tags specifically, like tags “learn 3D paper cutting”. The search volume may not be huge, but these kinds of tags can let YouTube know your video very well. Give it a try!
5. Check competitor’s Tags - When you check tags from other brands, it is not suggested to copy them all. What you need to do is find what you are missing and try to cover that area. However, only third-party tools can help you do that. In the market, VidIQ is highly used. It has a free version. Most of all data including tags can be found for higher views.
YouTube Tags Bonus Tips
Here you can learn some tips when optimizing tags. You can use singular and plural tags. Sometimes remember to add some misspelling tags because users tend to mistype some words, so it’s better to cover this kind of tag. You can get more information on misspelled words . More tips are listed below.
- Build on what you learned in your keyword research and use high traffic keywords as tags
- Use as many tags as possible, but without being spammy
- Build related playlists using particular tags
- Be generic; ‘big’, ‘funny’ and ‘sweet’ are fine, but ‘luscious’, ‘delightful’ and ‘splendid’ don’t make the best tags
- Put the most important tags first
- Mix single word tags with ‘long tail’ tags, e.g. ‘how to’
Part 3: How to Tag YouTube and Add Title, Description
For a New Video
- Step 1. The first thing you need to do is to sign in to your YouTube account .
- Step 2. Then click the Upload button that’s found on the top right corner of the window.
- Step 3. Then select the video that you want to upload. You will be asked to add a title, description, and tags.
- Step 4. After uploading, you can still edit the YouTube title, description, and tags.
For a Published Video
There are times when you want to change the title, description or tag of an already published video. The good news is that YouTube allows you to re-edit them whenever you want to.
- Step 1. Log into your YouTube account
- Step 2. Click the account name found at the top right-hand corner of the screen. Then you will have a dropdown menu. Select Video Manager to show a list of your uploaded videos.
- Step 3. Click the Edit button that’s found right next to the video that you want to modify. In the Video Information, you can now change the title, description or any of the tags. Click on the Save Changes button when you are done.
Part 4: How to Improve YouTube Video Title and Description
Metadata on YouTube is where both the viewers and the platform itself can find out what your video is all about. It helps people search for your video, helps YouTube to categorize it correctly and, when done well, can broaden the reach of your content. YouTube meta consists of three main parts: tags, title and description. Here’s how you can use each of these three elements to create powerful metadata for your video:
1. Title
YouTube titles play a big part in the ranking factors for search. That means you’ve got to think about what the people most likely to want to see your video will type into the search bar, as well as the words that accurately describe your video.
For example, if you have a clip of your cat Fluffy climbing a tree, calling your video ‘Fluffy climbs a tree’ is not the best idea. Nobody knows who Fluffy is; it could be your rabbit, dog, daughter or feather duster for all the YouTube community knows, and nobody is going to be searching for it.
A better title would be ‘cat climbs a tree, but you could even improve on that. How about ‘funny cat climbs a tree’, which would capture all those people looking for funny cat videos. Or, even better, ‘funny Persian cat climbs a tree’, also capturing those people who adore Persian cats.
You can see how building awesome YouTube titles can happen organically like this, but it’s also worth doing your homework too. We have collected a handful of YouTube Keyword tools for you to improve your YouTube meta, so check out the suggestions and work forwards from there.
Best practices
- Research your keywords and include high traffic keywords at the start of the title
- Keep titles under 70 characters
- Branding, episode number, and other non-essential info should be at the end of the title
- Review your YouTube titles from time to time and update with new keywords as search trends change
- Avoid clickbait titles or misleading titles as this will affect your view time and subsequently your ranking in search
2. Description
Your description is a much longer piece of YouTube meta, so you can really go to town with your YouTube keywords here. You’ve got up to 5,000 characters to fill in, and we strongly advise that you aim to use every single one. This really is a golden opportunity, not only to get people motivated to watch all of your video, but also to be indexed correctly through well researched YouTube keywords.
You may have noticed that, on the search page itself, only a small part of the description actually shows up; 120 characters of it to be precise. This doesn’t affect indexing, but it does mean you have to plan your YouTube description carefully to really hook people into clicking through from just the first sentence or two.
Best practices
- Make the first sentence or two compelling and captivating to get people to click
- Research the best YouTube keywords to use to ensure your video is correctly indexed
- At the end of your YouTube description, include a call to action to direct viewers on what to do next (subscribe, click through to the website, look at a product, watch more videos, etc.)
- If your video is long, consider placing time codes in your description to help users jump to their areas of interest
- Add links to products showcased, your social channels, or website as you wish
- Don’t forget to credit any music you’ve used here
Part 5: Tips for Tagging YouTube and Writing Title, Description
So, now we’ve got the basics down, let’s move on to some top tips for getting your metadata just right:
- 1. Do not spam
Irrelevant keywords will not do you any favors in the long run. Using a popular search term such as ‘funny cat’ when actually it’s a video of you unboxing your product will simply irritate your viewers. You’ll get more views, but for shorter durations, and that will hurt not only your ranking but also your reputation. The people you want to draw in with your YouTube meta should be those who are genuinely interested in your videos, as these are the people who will share, comment and interact with you.
- 2. Don’t put tags in the description
YouTube has given you a place to put your tags, and that’s not in the description area of your meta. Placing tags in the description area is known as tag stuffing and can lead to videos being removed or penalized.
- 3. Update regularly
YouTube meta is not a static thing. Trends change, search statistics fluctuate, and the needs of your viewers alter as time goes on. For this reason, you should look to update your meta from time to time, at least once every six months or so. Re-research your keywords and optimize for today’s trending search terms.
You May Also Like: YouTube SEO Complete Guide
Conclusion
Take some time to perfect your meta on YouTube and see how many more views it helps you get. Let us know if you have any other tips for developing powerful metadata, and how optimizing your meta has worked for you!
Download Mac Version ](https://tools.techidaily.com/wondershare/filmora/download/ )
Richard Bennett
Richard Bennett is a writer and a lover of all things video.
Follow @Richard Bennett
Also read:
- ArtEdit Master
- [Updated] Ensuring Long-Term YouTube Success with Creative Commons Mainteninas
- [New] Adapting to Social Media Video Demands
- 2024 Approved Best 14 YouTube Gaming Video Ideas to Boost Gaming Channels
- Grow Your Channelnode Through Joint Videography Endeavors
- Building a Solid Foundation YouTube Video Script Basics for 2024
- In 2024, Elevate Your Video Game YouTube Production Mastery
- In 2024, Boost Your Game Presence A Comprehensible Guide to FreeGame Hashtags
- [Updated] Discover 10 Swift-Growing YouTube Sources for Inspiration
- In 2024, Essentials to Skyrocketing Video Views on YouTube
- Launching a YouTube Channel Key Pieces of Equipment
- In 2024, Augment Video Timeframe on YouTube Platform
- [New] Editing Excellence Identifying 10 Superior Online Trimmer Apps
- 2024 Approved Crafting Dynamic YouTube Content as Animated GIFs Without Downloads
- [Updated] 2024 Streaming Games for Profit
- Free YouTube End Screen Resources - Enhance Video Impact
- In 2024, Can You Lawfully Archive YouTube Content?
- Behind the Scenes How-To Create YouTube Trailers in Filmora for 2024
- In 2024, Essential Knowledge for Aspiring YouTube Subscribers
- Effortless Fusion of YouTube Audio with iMovie Masterpieces
- [New] A Step-by-Step Manual on Repetitive Watch Experiences in YT
- Viral Verve Top 10 Music to Match Your Freshest YT Shorts
- [Updated] 30 Leading Free Platforms for Exceptional YouTube Intros
- Unwind the Clock Pioneering Techniques for YouTube Video Reversal
- [New] Demystifying YouTube's Keyword Power Play
- Unbox the Joy of 9 Premium, Complete Christmas Movies for Free
- In 2024, Editing Excellence Sports Videos That Stand Out
- [New] Detailed Methods for Seamless WireCast Livestreams on YouTube
- Unveiling the Power of a Sturdy Tripod in Video Content Production
- Boosting Your Short-Form Video Content on Youtube
- 2024 Approved Beyond YouTube Elite Video Sharing Hubs Revealed
- In 2024, Delightful, No-Cost Access to YouTube's Nine Full-Length Yule Celebrations
- In 2024, Crafting Compelling End Screens in YouTube Videos
- Endless Eradication Guide Bypassing YouTube's Snappy Content for 2024
- [Updated] Boosting Watch Time and Reducing Churn on YouTube The Ultimate List of Methods
- Engage More Users with Dual-Stream Approach (YT+Twitch) for 2024
- 2024 Approved Channel Your Creativity Convert YouTube Clips Into Dynamic Gifs
- Top Tips How to Avoid the 8 Deadliest YouTube Dos and Don'ts for Newbies
- 10 Premier Yoga Educators on YouTube
- [Updated] Captivating Your Audience YouTube Intro Excellence with iMovie
- 2024 Approved Epic Moments in Gameplay with Casters
- A Filmmaker's Guide Seamless Editing & Uploading 360-Degree Footage for YouTube
- Updated Best-in-Class Audio Editing Software for Professionals Top Picks for 2024
- [New] 2024 Approved Mastering Instagram's Musical Licensing Landscape
- New In 2024, Cutting 3GP Videos Made Easy A Beginners Guide
- [New] Building Dynamic Photographic Ensembles
- In 2024, How to Remove Activation Lock From the Apple iPhone 11 Pro Without Previous Owner?
- [New] From Download to Usage Setting Up OBS on a Mac
- [Updated] Steps to Adobe Audition Fade In
- 5 Ways to Restart Motorola Razr 40 Ultra Without Power Button | Dr.fone
- In 2024, How to Get and Use Pokemon Go Promo Codes On Apple iPhone XS | Dr.fone
- [New] TikTok's Viral Voyagers Top 15 for Life Enhancement
- In 2024, Full Guide to Fix iToolab AnyGO Not Working On Poco X6 Pro | Dr.fone
- [New] Mastering the Art of Backwards Videos on Instagram
- In 2024, How Can We Unlock Our Vivo Y100i Phone Screen?
- How To Use Allshare Cast To Turn On Screen Mirroring On Xiaomi Mix Fold 3 | Dr.fone
- 2024 Approved Interpreting Instagram's Per-Video Timeframe Rule
- How Can I Catch the Regional Pokémon without Traveling On Poco F5 5G | Dr.fone
- Title: "In 2024, A Step-by-Step Approach to Ad Revenue in YouTube Videos"
- Author: Brian
- Created at : 2024-05-25 12:00:00
- Updated at : 2024-05-26 12:00:00
- Link: https://youtube-video-recordings.techidaily.com/in-2024-a-step-by-step-approach-to-ad-revenue-in-youtube-videos/
- License: This work is licensed under CC BY-NC-SA 4.0.
