
In 2024, A Guide to Crafting Engaging Videos in Adobe Premiere
A Guide to Crafting Engaging Videos in Adobe Premiere
How to Edit YouTube Videos in Adobe Premiere

Richard Bennett
Mar 27, 2024• Proven solutions
You just made a few videos, and you want to edit them first before uploading to YouTube. The truth is that you may find the editing part a bit more challenging compared to uploading. However, there are now tools like Adobe Premiere that can help make the editing process easier. Read on and learn how to edit YouTube videos with Adobe Premier so that you can create amazing videos.
Related article:Adobe Premiere User Guide
Adobe Premiere is largely targeted towards professional users, and the best alternative you can use today, whether you are a professional user or just a casual YouTube user, is Wondershare Filmora . This is not only a highly effective video editing program, but it is also user-friendly and very easy to use.
 Download Mac Version ](https://tools.techidaily.com/wondershare/filmora/download/ )
Adobe is well known for having some of the leading video production tools in the industry. In fact, most of their tools ranging from the Premier Pro and Photoshop to Audition and many others have been used in many video and movie productions, including some of the popular theatrical releases of our times. Their latest professional video editor, Adobe Premier can be summarized as one of the best editors with versatility, depth, and power for high-quality video editing.
How to edit YouTube Videos with Adobe Premier
Step 1: Import the Video Clips
The first step in how to edit YouTube videos with Adobe Premier is to basically import the video clips you want to edit. This is achieved using a simple process of clicking “import” from the “file” drop-down menu. Once you have finished importing your photos or video files, you can then drag them from the sidebar and into the editing area.

Note
- If the videos you want to import are already published online, you can start the process by first downloading them directly from YouTube first, making sure to save them as MP4 files.
- The best way of importing videos from YouTube is by using an innovative video converter like Wondershare Video Converter Ultimate. This program will help in downloading and converting files to a format that is supported by Adobe Premier.
Step 2: Editing
The next step in how edit YouTube videos with Adobe Premiere is to start modifying the video files or photos the way you want. To achieve this, click on “Effects Control” and apply the desired effects. If you want to insert some text or words into your video, select “title” and then click “new title.” Now choose how you would like the words to behave, for instance, “Default Roll” makes the text roll upwards in the page.
Now drag the text that you have created into the editor area. If you want to edit the text, simply double-click to select it, and it will bring up a separate page where you can make further edits. You can then modify the text, font, and the positioning as well. This page also allows you to set whether the text will crawl or roll.

The final part of the process is to import your chosen audio file. This could be the chosen soundtrack for your presentation. Simply drag the audio file onto your editor. You can then modify how the length of your videos or photos by selecting and dragging the specific photo or video. Finally, press enter and your video will start rendering.
Step 3: Save the Edited File and Upload to YouTube
It is important to note that even as you edit YouTube videos with Adobe Premier, the software does not allow direct uploads to YouTube. This means you will need to save the edited file first on your computer and ensure you use a YouTube supported format. The most effective option is to use the codec, which will then save your file in the MPEG-4 format. This is the preferred format for YouTube and Video uploads.
Richard Bennett
Richard Bennett is a writer and a lover of all things video.
Follow @Richard Bennett
Richard Bennett
Mar 27, 2024• Proven solutions
You just made a few videos, and you want to edit them first before uploading to YouTube. The truth is that you may find the editing part a bit more challenging compared to uploading. However, there are now tools like Adobe Premiere that can help make the editing process easier. Read on and learn how to edit YouTube videos with Adobe Premier so that you can create amazing videos.
Related article:Adobe Premiere User Guide
Adobe Premiere is largely targeted towards professional users, and the best alternative you can use today, whether you are a professional user or just a casual YouTube user, is Wondershare Filmora . This is not only a highly effective video editing program, but it is also user-friendly and very easy to use.
Download Mac Version ](https://tools.techidaily.com/wondershare/filmora/download/ )
Adobe is well known for having some of the leading video production tools in the industry. In fact, most of their tools ranging from the Premier Pro and Photoshop to Audition and many others have been used in many video and movie productions, including some of the popular theatrical releases of our times. Their latest professional video editor, Adobe Premier can be summarized as one of the best editors with versatility, depth, and power for high-quality video editing.
How to edit YouTube Videos with Adobe Premier
Step 1: Import the Video Clips
The first step in how to edit YouTube videos with Adobe Premier is to basically import the video clips you want to edit. This is achieved using a simple process of clicking “import” from the “file” drop-down menu. Once you have finished importing your photos or video files, you can then drag them from the sidebar and into the editing area.
Note
- If the videos you want to import are already published online, you can start the process by first downloading them directly from YouTube first, making sure to save them as MP4 files.
- The best way of importing videos from YouTube is by using an innovative video converter like Wondershare Video Converter Ultimate. This program will help in downloading and converting files to a format that is supported by Adobe Premier.
Step 2: Editing
The next step in how edit YouTube videos with Adobe Premiere is to start modifying the video files or photos the way you want. To achieve this, click on “Effects Control” and apply the desired effects. If you want to insert some text or words into your video, select “title” and then click “new title.” Now choose how you would like the words to behave, for instance, “Default Roll” makes the text roll upwards in the page.
Now drag the text that you have created into the editor area. If you want to edit the text, simply double-click to select it, and it will bring up a separate page where you can make further edits. You can then modify the text, font, and the positioning as well. This page also allows you to set whether the text will crawl or roll.
The final part of the process is to import your chosen audio file. This could be the chosen soundtrack for your presentation. Simply drag the audio file onto your editor. You can then modify how the length of your videos or photos by selecting and dragging the specific photo or video. Finally, press enter and your video will start rendering.
Step 3: Save the Edited File and Upload to YouTube
It is important to note that even as you edit YouTube videos with Adobe Premier, the software does not allow direct uploads to YouTube. This means you will need to save the edited file first on your computer and ensure you use a YouTube supported format. The most effective option is to use the codec, which will then save your file in the MPEG-4 format. This is the preferred format for YouTube and Video uploads.
Richard Bennett
Richard Bennett is a writer and a lover of all things video.
Follow @Richard Bennett
Detailed Guide: YouTube’s End Screens Explained
Free YouTube End Screen Templates
Richard Bennett
Oct 26, 2023• Proven solutions
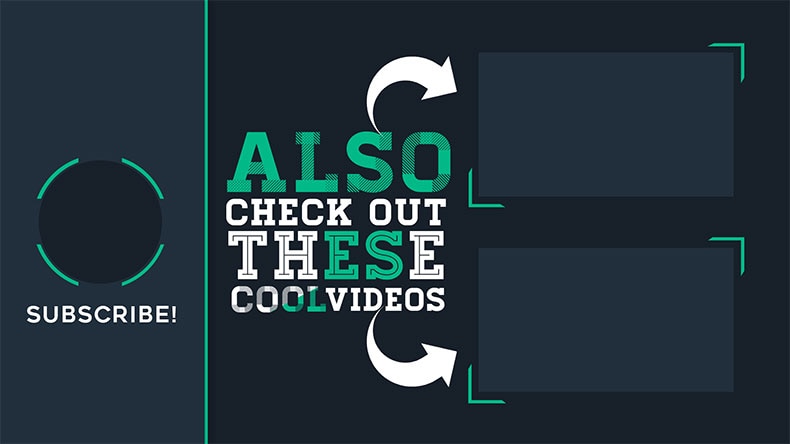
YouTube end screens are a great way to get your viewers who have watched your YouTube video until the end to subscribe to your channel, visit your website, or watch more of your videos. End screens work on all devices, including mobile phones and tablets. This was not the case for annotations (YouTube’s former way of doing these things). As more YouTubers have jumped onto using end screens, the need for well-designed end screen templates have rapidly grown. In this post, I will
- List some places you can download free end screen templates
- Give you a step-by-step tutorial on how to build your own outro for free

Part 1: Free End Screen Templates Download
Wondershare Filmstock Gaming Video Editing Skils ](https://filmstock.wondershare.com/creative-theme-game?source%5Fchannel=seo%5Farticle?spm=rs.filmora%5Fweb )
(The images displayed below are for preview purposes only. For the highest quality and ideal dimensions to add into your own video, click the image and follow the links that we provide)
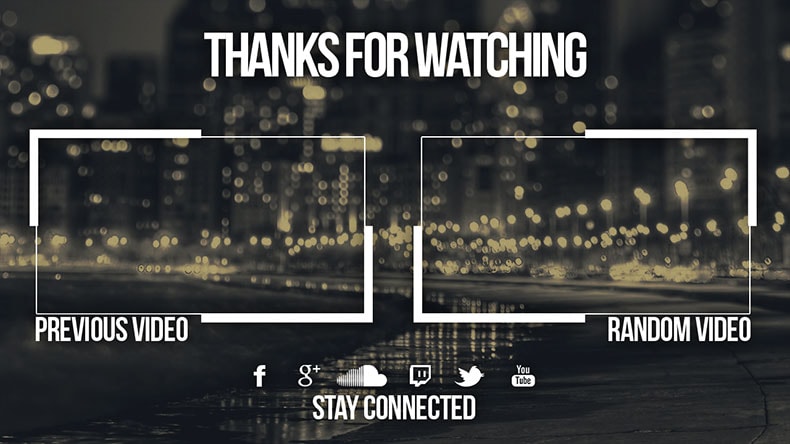
1. The Sales Lion
In exchange for your name and e-mail address, the Sales Lion will let you download their YouTube templates pack, which includes a PhotoShop PSD file of their designed YouTube end screen.
sales-lion-outro-end-screen ](https://www.thesaleslion.com/download-youtube-templates-pack/ “The Sales Lion YouTube Templates Pack”)
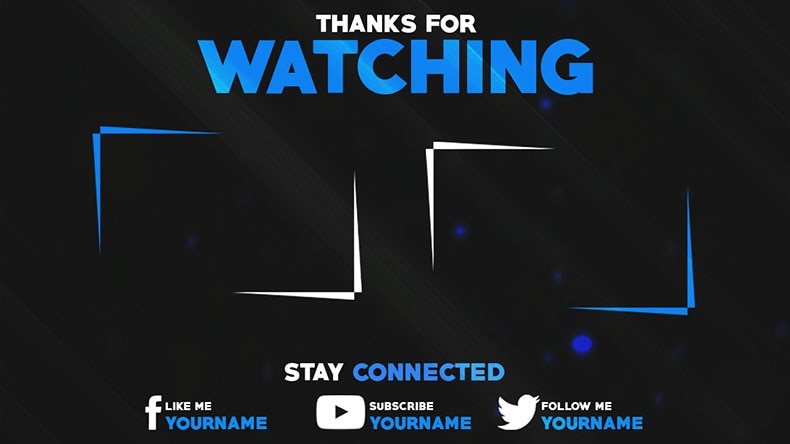
2. Grabster
Grabster offers five free YouTube end screen templates. With each download, you’ll get a PhotoShop PSD file and a font file so that you can change the text.
grabster-outro ](https://mega.nz/#!l5VVwR7J!w9hv%5FBgVIN2SsEdlf5IZViISJvXgmkDbErhG4A3gGYQ “Grabster Channel Art Template”)
grabster-your-channel-name-outro ](https://mega.nz/#!RoMXlTbR!ALzroPD6CNRVuDABR7Uv3WAPajr0WJ1BT9ZVDwF4m0Y “Grabster Channel Art Template”)
grabster-youtube-end-screen ](https://mega.nz/#!B8sAhL6Q!iIaTl4uGojXONee6k%5FdTLWdSVrGOiRWPQu4BjU2zJ5o “Grabster Channel Art Template”)
grabster-youtube-end-screen-2 ](https://mega.nz/#!RokxlYTK!vuKGcwG-ymNdR9tBfSp8xjhynNIkn%5F4PC9ob%5Fq2TvWc “Grabster Channel Art Template”)
grabster-youtube-end-screen-3 ](https://mega.nz/#!otc2wRaK!pk%5F7smhaRSuymYkKpf6DVPh2yt40Vlhz8xd8wRuu9Oo “Grabster Channel Art Template”)
3. Taha Chimar
Those who do not have PhotoShop can use Taha Chimar’s end screen designs that come in png file format.
To download, you will have to follow a URL link in the description box of the YouTube videos. Be careful, though, as a lot of the links lead to free hosting websites with pop-ups that can harm your computer if you are easily fooled by them.
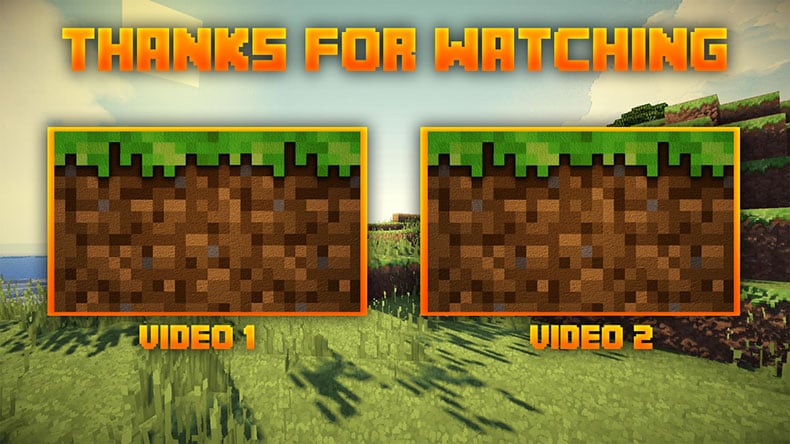
4. SoapyEdits
SoapyEdits is a YouTuber with a channel offering a whole playlist of PhotoShop PSD file end screen designs.
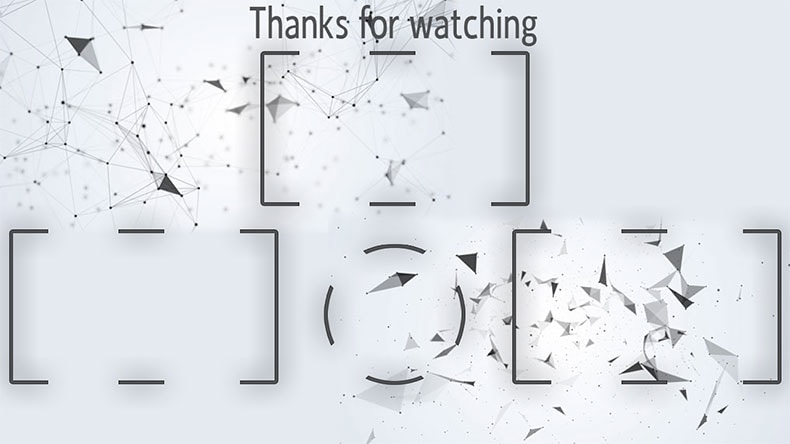
Here are some of our favorite ones.
Here’s one for the Minecraft fans:
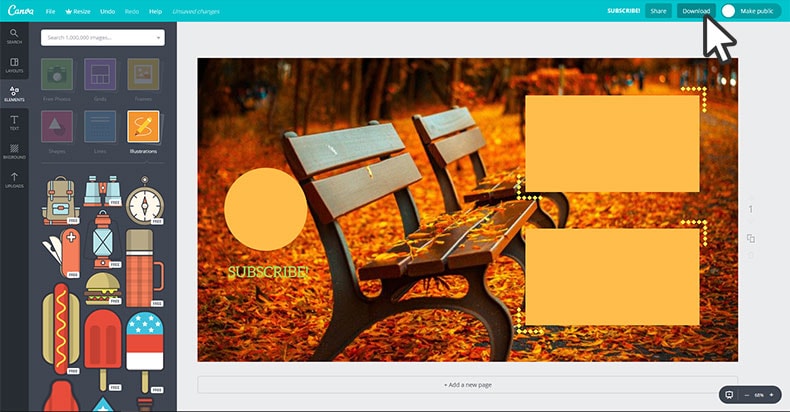
Another way to get your YouTube end screens for free, of course, is to make them yourself. Canva is a great free online design tool for this.
Part 2: How To Build Your Outro For Free (Step-by-step Canva Tutorial)
1. First, you have to sign up with an e-mail address

2. Once logged in, select “use custom dimensions” and plug in “1920” pixels as your width and “1080” pixels as your height (this, of course, may vary depending on the resolution of your video project).
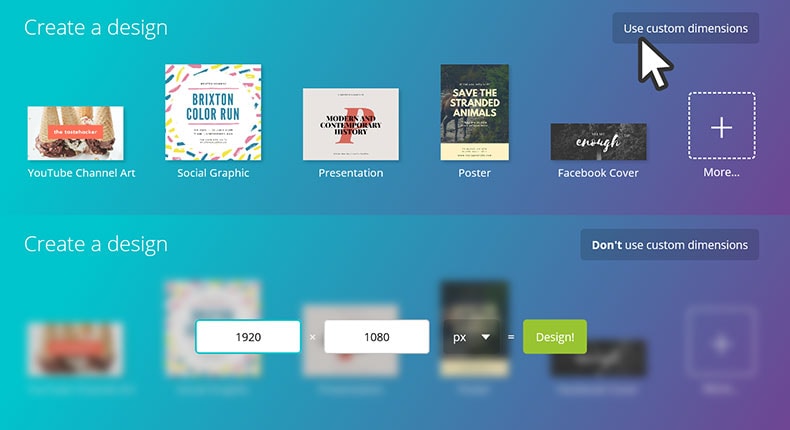
3. After clicking “Design!,” a new browser will open with a blank canvas.
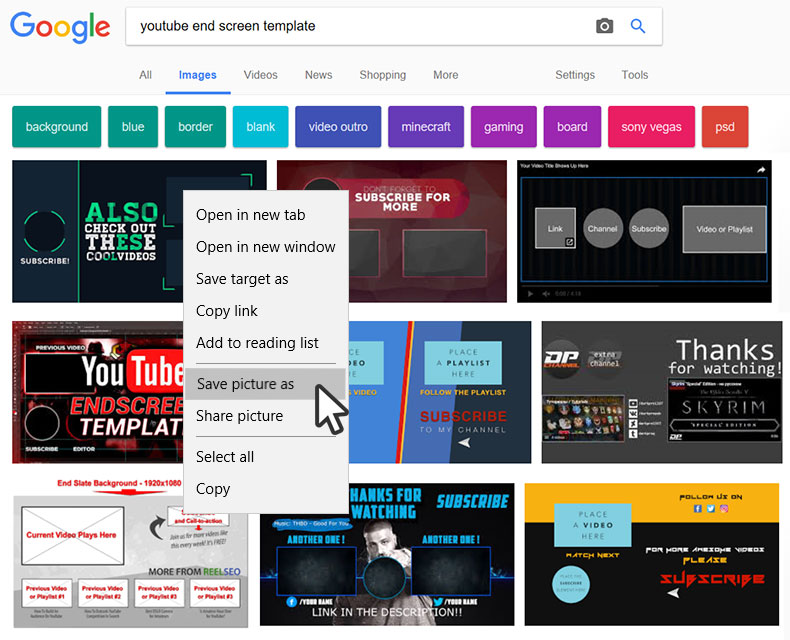
4. Next, do an image search for “YouTube End Screen,” choose an end screen with a layout that you would like to build off of, and save the image onto your computer.
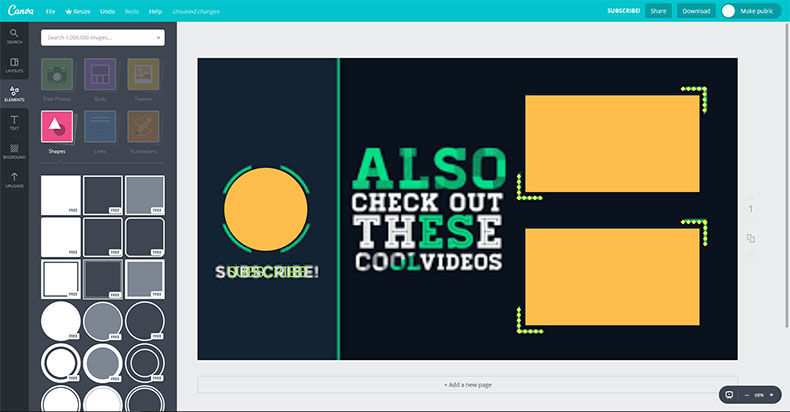
5. Upload the image onto your Canva project.

6. Stretch your image to the ends of your canvas.

7. Insert your own shapes, lines, colours, images, and text over the image.
8. When you’re done, delete the original image so that you’re left with just your own design. Go ahead and click “download.”
If you’re looking for other options to design your end screen, make sure to also check out our article on The YouTube Outro Guide . To edit the YouTube video with more effects and templates, you can try Wondershare Filmora video editor.
Richard Bennett
Richard Bennett is a writer and a lover of all things video.
Follow @Richard Bennett
Richard Bennett
Oct 26, 2023• Proven solutions
YouTube end screens are a great way to get your viewers who have watched your YouTube video until the end to subscribe to your channel, visit your website, or watch more of your videos. End screens work on all devices, including mobile phones and tablets. This was not the case for annotations (YouTube’s former way of doing these things). As more YouTubers have jumped onto using end screens, the need for well-designed end screen templates have rapidly grown. In this post, I will
- List some places you can download free end screen templates
- Give you a step-by-step tutorial on how to build your own outro for free
Part 1: Free End Screen Templates Download
Wondershare Filmstock Gaming Video Editing Skils ](https://filmstock.wondershare.com/creative-theme-game?source%5Fchannel=seo%5Farticle?spm=rs.filmora%5Fweb )
(The images displayed below are for preview purposes only. For the highest quality and ideal dimensions to add into your own video, click the image and follow the links that we provide)
1. The Sales Lion
In exchange for your name and e-mail address, the Sales Lion will let you download their YouTube templates pack, which includes a PhotoShop PSD file of their designed YouTube end screen.
sales-lion-outro-end-screen ](https://www.thesaleslion.com/download-youtube-templates-pack/ “The Sales Lion YouTube Templates Pack”)
2. Grabster
Grabster offers five free YouTube end screen templates. With each download, you’ll get a PhotoShop PSD file and a font file so that you can change the text.
grabster-outro ](https://mega.nz/#!l5VVwR7J!w9hv%5FBgVIN2SsEdlf5IZViISJvXgmkDbErhG4A3gGYQ “Grabster Channel Art Template”)
grabster-your-channel-name-outro ](https://mega.nz/#!RoMXlTbR!ALzroPD6CNRVuDABR7Uv3WAPajr0WJ1BT9ZVDwF4m0Y “Grabster Channel Art Template”)
grabster-youtube-end-screen ](https://mega.nz/#!B8sAhL6Q!iIaTl4uGojXONee6k%5FdTLWdSVrGOiRWPQu4BjU2zJ5o “Grabster Channel Art Template”)
grabster-youtube-end-screen-2 ](https://mega.nz/#!RokxlYTK!vuKGcwG-ymNdR9tBfSp8xjhynNIkn%5F4PC9ob%5Fq2TvWc “Grabster Channel Art Template”)
grabster-youtube-end-screen-3 ](https://mega.nz/#!otc2wRaK!pk%5F7smhaRSuymYkKpf6DVPh2yt40Vlhz8xd8wRuu9Oo “Grabster Channel Art Template”)
3. Taha Chimar
Those who do not have PhotoShop can use Taha Chimar’s end screen designs that come in png file format.
To download, you will have to follow a URL link in the description box of the YouTube videos. Be careful, though, as a lot of the links lead to free hosting websites with pop-ups that can harm your computer if you are easily fooled by them.
4. SoapyEdits
SoapyEdits is a YouTuber with a channel offering a whole playlist of PhotoShop PSD file end screen designs.
Here are some of our favorite ones.
Here’s one for the Minecraft fans:
Another way to get your YouTube end screens for free, of course, is to make them yourself. Canva is a great free online design tool for this.
Part 2: How To Build Your Outro For Free (Step-by-step Canva Tutorial)
1. First, you have to sign up with an e-mail address
2. Once logged in, select “use custom dimensions” and plug in “1920” pixels as your width and “1080” pixels as your height (this, of course, may vary depending on the resolution of your video project).
3. After clicking “Design!,” a new browser will open with a blank canvas.
4. Next, do an image search for “YouTube End Screen,” choose an end screen with a layout that you would like to build off of, and save the image onto your computer.
5. Upload the image onto your Canva project.
6. Stretch your image to the ends of your canvas.
7. Insert your own shapes, lines, colours, images, and text over the image.
8. When you’re done, delete the original image so that you’re left with just your own design. Go ahead and click “download.”
If you’re looking for other options to design your end screen, make sure to also check out our article on The YouTube Outro Guide . To edit the YouTube video with more effects and templates, you can try Wondershare Filmora video editor.
Richard Bennett
Richard Bennett is a writer and a lover of all things video.
Follow @Richard Bennett
Also read:
- [New] Best Apps for 3D Video Intros on Social Platforms
- [New] Boosting Visuals Mastering YouTube's Video Enhancement Tools
- [Updated] Combat Blurry iPhone HDRI 4 Pivotal Tips for Premiere Pro Users
- [Updated] In 2024, SoundSnatch Aural Replay Analysis
- 2024 Approved Designing Short Trailers That Tell a Story
- Discovering the Hidden Truth Behind YouTube's Viewer Numbers for 2024
- Effortless Integration of Latest Lexmark Printer Driver
- Enhanced User Experience with Automated Ad Targeting: The Power of Cookiebot Technology
- Expressing Emotionally Using Emojis for YT Comments
- Get Lost Ark Running Again : Expert Tips for Launch Failures
- Google's Goldmine A Simplified Three-Step Blueprint for Calculating Subscriber Earning Potential
- In 2024, Crafting Captivating Thumbnails A Comprehensive Guide for YouTube Creators
- Integrating YouTube Into TV Sets with Loop Features
- New 2024 Approved 10 Best Free Apps for Blurring Faces in Photos and Videos How to Blur Faces in Video (Beginners Guide)
- Reinstating Reliable Windows Protection on Win 11
- Screen Recorders for Low-End PC
- Simple Steps: Installing the Latest Epson Drivers on Your Windows PC
- Title: In 2024, A Guide to Crafting Engaging Videos in Adobe Premiere
- Author: Brian
- Created at : 2024-11-08 17:09:29
- Updated at : 2024-11-15 03:17:51
- Link: https://youtube-video-recordings.techidaily.com/in-2024-a-guide-to-crafting-engaging-videos-in-adobe-premiere/
- License: This work is licensed under CC BY-NC-SA 4.0.