
:max_bytes(150000):strip_icc()/d-link-router-4705a41645354fa29320d679d7f7e819.jpg)
In 2024, A Beginner's Guide to Elevating Auditory Experiences on YouTube
A Beginner’s Guide to Elevating Auditory Experiences on YouTube
How to Edit Audio on YouTube

Richard Bennett
Mar 27, 2024• Proven solutions
In this article, we are going to show you how to edit audio with YouTube Video Editor, and the tips on adding your own audio file to YouTube.
- Part 1: Add your Own Audio File to YouTube Video
- Part 2: How to Edit Audio with YouTube Video Editor
Part 1: Add your Own Audio File to YouTube Video
Tools You Are Going to Need
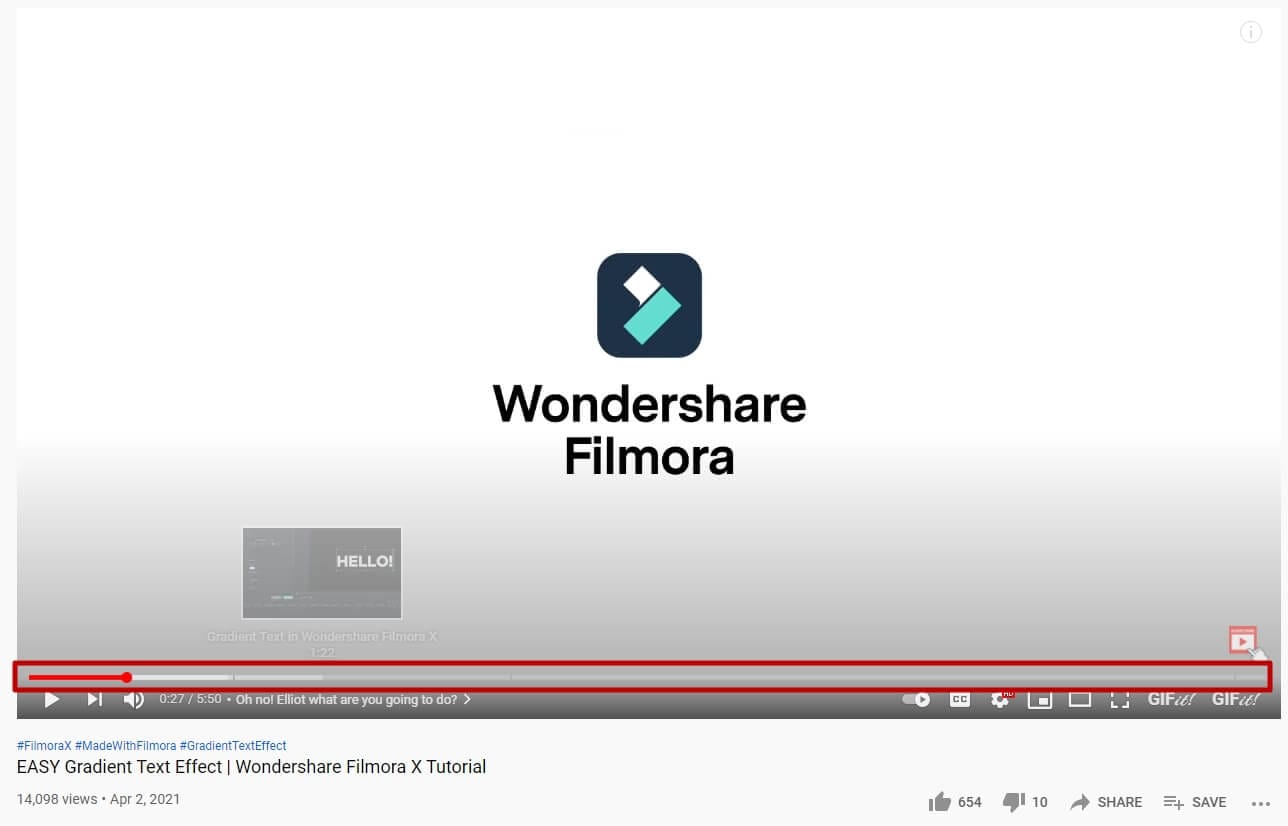
YouTube video editor is far from meeting the needs of people who want to have more control on their audio. On the bright side, if you are interested in learning how to edit audio on YouTube, there is a solution. There are many video editors in the market that allow you to add your own music or audio files to a video. Windows Movie Maker, iMovie, Adobe Premiere, and Magisto are some of the video editors available for you to choose from. In this guide, we recommend the Wondershare Filmora video editor. Below is a quick tutorial about how to edit audio in Filmora.
 Download Mac Version ](https://tools.techidaily.com/wondershare/filmora/download/ )
Why Should You Choose Wondershare Filmora?
There are many advantages associated with the use of Wondershare Filmora. You will see that it allows you to fully edit any audio file and gain 100% control over your files. It is an integrated solution that lacks nothing in terms of efficiency and quality standards. To be more specific, Filmora offers the following unique features:
- Built-in audio editing tools that allow you to gain full control of your audio in an easy way
- Exclusive audio track that enables you to mute, detach or even de-noise the audio from video
- All audio effects can easily be adjusted with one click only
- The built-in Equalizer is capable enough to create amazing audio effects
- Directly upload your video to YouTube, Facebook or Vimeo from Wondershare Filmora
How to add audio files to YouTube video with Wondershare Filmora
Do you want to know more about audio editing? Please read this article: How to add audio to video.
Step 1 Import Video Clips into Filmora
Filmora supports a wide range of video formats, such as MKV, MOV, AVI, WebM and MP4, you can import the video clip shot with Camera, smartphone or camcorder easily to it.
Step 2 Detach Audio
If you want to edit the original audio of the video, you can choose to split the audio file from the video by using the Audio Detach option on Wondershare Filmora. Then, the audio file will be shown in the audio track, and you can cut or trim it.

Note: If you do not want to keep the original audio file in the video, you can delete it from the audio track directly.
Step 3Add Audio Files
Wondershare Filmora offers you multiple royalty free audio effects and music in its rich audio library. What is more, you can also import your own music or audio file from your computer or iTunes. Of course, you should know that the audio should be royalty free for you to make use of. In a different situation, you cannot upload it and benefit from its quality and nature.
Step 4Edit Audio
In this step, you can adjust the audio volume and pitch, etc. There are multiple options for you to benefit from, including the Audio Equalizer, Music, Mix Audio. In this way, you can make sure that the audio is exactly like you have wanted it to be. For further information as to how you can improve the sound quality of your recorded videos, you can check out: How to improve sound quality of recorded videos.
Step 5Save Your Work and Upload on YouTube
If you are satisfied with your work on the audio file and you wish to publish it, the process is quite simple. You just hit Export and select to upload the video to YouTube. After signing in to your YouTube account, you will be ready to start uploading the audio file.

In case you wish to edit the audio from an already published video, you have to download the video first. Then, you can follow the steps above to edit the audio file in Filmora. As one of the widely used video editing software for YouTubers, Filmora is here to empower your imagination. Just download the free trial version and try it now.

Part 2: How to Edit Audio with YouTube Video Editor
Unfortunately, YouTube does not allow users to upload audio files such as MP3, WAV, etc. Instead, you can only upload audio files which are offered by YouTube in the first place. Since YouTube has got a plentiful audio library, you can find a lot of audio there. In this part, we will show you how to add and edit audio with YouTube Video Editor.
You may also like: How to Add Music to YouTube Videos >>
Note: From 20th September 2017 users will no longer be able to use the complimentary editing suite. Check the best YouTube video editor alternatives from this complete guide. In the following part, I will show you how to add audio track , replace the original audio and adjust the audio position and length as well.
- Step 1: Sign in to your YouTube account
- **Step 2:**Click your profile avatar and select Creator Studio option.
- Step 3: In the left pane, go to Video Manager and then click Videos. In the Videos list, choose the video that you want to add new audio track, and then select Audio from the Edit button.

- Step 4: Now you can add or replace the audio in your video. Here you will find that there are various songs and audio files you can choose from. Click ADD TO VIDEO and the audio track will be added to the video directly.

- Step 5: Now you will see the audio track appears at the bottom of the player. Here you can trim and drag the audio bar to adjust the audio positon and length. To Trim the audio, click the beginning or the end of the audio bar and then drag it to the left or right. After trimming, drag it to meet the target position.

Conclusion
Normally, it would be better to add and edit audio to video before updating to YouTube. In this case, Filmora is highly recommended as one of the best video editor for YouTubers , which provides some royalty free music sound in the Music Library to choose from and also the audio editing tools like remove background noise from the video, add fade in and fade out effects with ease or play the video backward or fast forward.
Richard Bennett
Richard Bennett is a writer and a lover of all things video.
Follow @Richard Bennett
Richard Bennett
Mar 27, 2024• Proven solutions
In this article, we are going to show you how to edit audio with YouTube Video Editor, and the tips on adding your own audio file to YouTube.
- Part 1: Add your Own Audio File to YouTube Video
- Part 2: How to Edit Audio with YouTube Video Editor
Part 1: Add your Own Audio File to YouTube Video
Tools You Are Going to Need
YouTube video editor is far from meeting the needs of people who want to have more control on their audio. On the bright side, if you are interested in learning how to edit audio on YouTube, there is a solution. There are many video editors in the market that allow you to add your own music or audio files to a video. Windows Movie Maker, iMovie, Adobe Premiere, and Magisto are some of the video editors available for you to choose from. In this guide, we recommend the Wondershare Filmora video editor. Below is a quick tutorial about how to edit audio in Filmora.
Download Mac Version ](https://tools.techidaily.com/wondershare/filmora/download/ )
Why Should You Choose Wondershare Filmora?
There are many advantages associated with the use of Wondershare Filmora. You will see that it allows you to fully edit any audio file and gain 100% control over your files. It is an integrated solution that lacks nothing in terms of efficiency and quality standards. To be more specific, Filmora offers the following unique features:
- Built-in audio editing tools that allow you to gain full control of your audio in an easy way
- Exclusive audio track that enables you to mute, detach or even de-noise the audio from video
- All audio effects can easily be adjusted with one click only
- The built-in Equalizer is capable enough to create amazing audio effects
- Directly upload your video to YouTube, Facebook or Vimeo from Wondershare Filmora
How to add audio files to YouTube video with Wondershare Filmora
Do you want to know more about audio editing? Please read this article: How to add audio to video.
Step 1 Import Video Clips into Filmora
Filmora supports a wide range of video formats, such as MKV, MOV, AVI, WebM and MP4, you can import the video clip shot with Camera, smartphone or camcorder easily to it.
Step 2 Detach Audio
If you want to edit the original audio of the video, you can choose to split the audio file from the video by using the Audio Detach option on Wondershare Filmora. Then, the audio file will be shown in the audio track, and you can cut or trim it.
Note: If you do not want to keep the original audio file in the video, you can delete it from the audio track directly.
Step 3Add Audio Files
Wondershare Filmora offers you multiple royalty free audio effects and music in its rich audio library. What is more, you can also import your own music or audio file from your computer or iTunes. Of course, you should know that the audio should be royalty free for you to make use of. In a different situation, you cannot upload it and benefit from its quality and nature.
Step 4Edit Audio
In this step, you can adjust the audio volume and pitch, etc. There are multiple options for you to benefit from, including the Audio Equalizer, Music, Mix Audio. In this way, you can make sure that the audio is exactly like you have wanted it to be. For further information as to how you can improve the sound quality of your recorded videos, you can check out: How to improve sound quality of recorded videos.
Step 5Save Your Work and Upload on YouTube
If you are satisfied with your work on the audio file and you wish to publish it, the process is quite simple. You just hit Export and select to upload the video to YouTube. After signing in to your YouTube account, you will be ready to start uploading the audio file.
In case you wish to edit the audio from an already published video, you have to download the video first. Then, you can follow the steps above to edit the audio file in Filmora. As one of the widely used video editing software for YouTubers, Filmora is here to empower your imagination. Just download the free trial version and try it now.
Part 2: How to Edit Audio with YouTube Video Editor
Unfortunately, YouTube does not allow users to upload audio files such as MP3, WAV, etc. Instead, you can only upload audio files which are offered by YouTube in the first place. Since YouTube has got a plentiful audio library, you can find a lot of audio there. In this part, we will show you how to add and edit audio with YouTube Video Editor.
You may also like: How to Add Music to YouTube Videos >>
Note: From 20th September 2017 users will no longer be able to use the complimentary editing suite. Check the best YouTube video editor alternatives from this complete guide. In the following part, I will show you how to add audio track , replace the original audio and adjust the audio position and length as well.
- Step 1: Sign in to your YouTube account
- **Step 2:**Click your profile avatar and select Creator Studio option.
- Step 3: In the left pane, go to Video Manager and then click Videos. In the Videos list, choose the video that you want to add new audio track, and then select Audio from the Edit button.
- Step 4: Now you can add or replace the audio in your video. Here you will find that there are various songs and audio files you can choose from. Click ADD TO VIDEO and the audio track will be added to the video directly.
- Step 5: Now you will see the audio track appears at the bottom of the player. Here you can trim and drag the audio bar to adjust the audio positon and length. To Trim the audio, click the beginning or the end of the audio bar and then drag it to the left or right. After trimming, drag it to meet the target position.
Conclusion
Normally, it would be better to add and edit audio to video before updating to YouTube. In this case, Filmora is highly recommended as one of the best video editor for YouTubers , which provides some royalty free music sound in the Music Library to choose from and also the audio editing tools like remove background noise from the video, add fade in and fade out effects with ease or play the video backward or fast forward.
Richard Bennett
Richard Bennett is a writer and a lover of all things video.
Follow @Richard Bennett
Unlock the Potential of YouTube Videos: The Ultimate Chapter Addition Technique
How to Add Chapters to YouTube Videos
Richard Bennett
Mar 27, 2024• Proven solutions
If you have seen chapter markers on YouTube of our official channel, you might be wondering how someone can create chapters on YouTube? What is the way to mark different parts of the videos, and how can you add markers to all the existing videos on YouTube? Don’t worry; this article will discuss everything about YouTube chapters that you need to know. Keep reading to find all the details and learn the step-by-step instructions to add chapters to your YouTube videos for better engagement.
- Part 1: What Are YouTube Chapters?
- Part 2: How to Add Chapter to YouTube Video Progress Bar?
- Part 3: Why Add Chapters to Videos?
- Part 4: When Add Chapters on YouTube?
- Part 5: Will Chapter Decrease Watching Time?
- Part 6: Video Chapter Adding Tips
- Part 7: Why YouTube Chapter is Not Working?
Part 1: What Are YouTube Chapters?
YouTube video chapters are an excellent way to optimize your YouTube content. When you have chapters for your YouTube video, each chapter will have an individual preview. Chapters will break your YouTube video into multiple parts allowing your audience to have better context and information.
As per YouTube, chapters let the audience navigate better through videos. Chapters will let your audience watch different video parts, which will eventually lead to better engagement. If you want to organize your YouTube content, chapters are one of the best ways to go about it. By using labeled timestamps, your video will be divided into multiple sections. Your audience will be able to see the preview of the content and easily skip to the part they want to see within the video’s progress bar.
Part 2: How to Add Chapter to YouTube Video Progress Bar?
If you are a YouTube creator and want to know how you can add chapters to your YouTube content, here’s what you need to do. Follow these instructions carefully:
Step 1: First things first, please sign in to your YouTube account.
Step 2: Select the video that you want to edit and add chapters.
Step 3: Click on the edit video option. This option will be there under the video.
Step 4: On the add details page, you will see the description box. Here, you need to add the list of titles and timestamps.

Please keep in mind that you must add the first timestamp with “00:00”. You will have to add a minimum of three timestamps with a minimum of 10 seconds for each chapter. Here is how it looks like in the description after published.

Part 3: Why YouTubers Should Add Chapters to videos?
There are two primary advantages of adding chapters to your YouTube videos. Apart from making your YouTube video look organized and neat, chapters will let you provide a better user experience to everyone watching your video because they will find all the information about your video faster and easier within a video. And the second benefit is that your YouTube video will show up in search results. This is a way to optimize your content for more users to find your content.
YouTube chapters are beneficial for both creators and viewers. On the progress bar, these clickable chapters can be added. This will allow a viewer to skip and scrub through a video quickly and skip to parts they actually want to watch.
This feature is quite helpful for videos that are pretty long. Chapters will let you segment the videos into important chapters so that the viewer can rewatch already watched chapters or skip to other chapters in the video. YouTube chapters have been recently added to this platform for better navigation and engagement.
Better User Experience for Users
Just like Google wants browsers to find what they are looking for when they add a keyword, YouTube also wants to help viewers find what they are looking for. Chapters can be immensely beneficial for extended content. For example, if you are uploading a video of your convert video, let the users jump straight to their favorite songs.
Even in tutorial video content, viewers will now have a chance to get straight to the main part of the video. With chapters being added, viewers will have an opportunity to decide whether they want to watch the whole video or not. They won’t have to keep skipping one part to another blindly. Chapters will allow them to find what they are looking for in an instant.
For Creators: Increased Visibility
If you know about the Google algorithm, you must be aware that it regularly changes its algorithm to let people find the information they are looking for easily. Adding chapters to your video will encourage Google to display them more often when someone searches for them, and this will include adding your videos to its featured snippets.
While adding chapters, you need to make sure that it is labeled with correct keywords, and it is clear and descriptive. YouTube videos are often showed as Google snippet when someone tries to find something on the search engine. Adding a chapter will let Google understand the content better, thereby letting your videos gain more search traffic.
Part 4: When should I add or not chapters on YouTube?
If you are wondering whether all videos on YouTube should have chapters, the answer to this is no. A two minutes long video won’t require chapters because it won’t make sense. Think about whether you would want your audience to have reduced watch time. Another thing to pay attention to is audience retention.
We mentioned earlier that adding chapters to long videos will be a good idea, but before you jump in and start adding chapters, you need to understand whether it will help you and should be done in your particular case?
If you are uploading a video on education, science and technology, how-to, news and politics, Q and A, and other similar videos, adding chapters will definitely help. In these kinds of videos, you will let your audience rewatch a section they liked the most over and over again.
However, if you are uploading music, entertainment, comedy, and film and animation videos, we will recommend not to add chapters because this will reduce the watch time.
Part 5: Do YouTube Video Chapters Decrease Channel Watch Time?
One of the most commonly asked questions regarding adding chapters to YouTube videos is whether it will reduce the watch time of a video. Video chapters are a pretty good feature and can enable your videos to engage with the viewers.
Since chapters allow your audience to skip through video content, they are not really watching the whole video, which can’t be suitable for audience retention! Here’s what we have to say to this: don’t put your 100% focus on watch time right now. Your focus should be creating informative and engaging content, which will keep your audience hooked to their screens. Even if you add chapters, if your audience doesn’t find it engaging, they will choose not to go on with the content.
Video chapters are a tiny part of the overall content. Chapters provide value to your audience, and you should try them. If you are uploading a concise video, animation video, funny video, and more, don’t add chapters.
Even some of the most watched videos on YouTube have chapters. Learn from them. These video makers could have thought about numbers rather than giving value to their audience, but they did just the opposite, and here they are with over a million views!
Part 6: Tips for adding chapters to YouTube video
Each video on YouTube is different, and that’s why there is no one-size-fits-all answer. There are some cases where you should not think about adding chapters at all. Whereas in other cases, you will have to experiment a bit before adding chapters.
Here are some tips that will help you.
Do Some Testing
Before adding chapters to a new video that you are thinking to upload, try adding chapters to an old video. See what happens to that video. Have the views increased? How about average view duration? Track these metrics first, and then try adding chapters to your upcoming videos to benefit from videos. Along with these metrics, you will also have to evaluate if adding chapters decreases or increases the watch time and number of views.
Label Your Chapters Using Keywords
Another thing to do that will help you have better traction is using a good keyword strategy. Look at what people are using while searching for content, which is similar to yours? Using names based on keywords that have better search volume will help your videos to rank higher.
Part 7: Why Video Chapter is Not working? [Problem solved]
There are a few mandatory things that you need to do before adding chapters to your YouTube video. Here are some of the common reasons why the video chapter is not working. See if any one of them is true in your case, and rectify it right away.
- Your video doesn’t have the 00:00 timestamp.
- Your video has less than three chapters.
- You have added a chapter that is less than 10 seconds long.
- You have not added the timestamps in chronological order.
- Rather than using “:” you have entered “.” for timecodes.
- If your channel has active copyright strikes, video chapters won’t work.
- Your channel doesn’t have more than 1k subscribers.
- Your video chapters are not suitable for some viewers.
Richard Bennett
Richard Bennett is a writer and a lover of all things video.
Follow @Richard Bennett
Richard Bennett
Mar 27, 2024• Proven solutions
If you have seen chapter markers on YouTube of our official channel, you might be wondering how someone can create chapters on YouTube? What is the way to mark different parts of the videos, and how can you add markers to all the existing videos on YouTube? Don’t worry; this article will discuss everything about YouTube chapters that you need to know. Keep reading to find all the details and learn the step-by-step instructions to add chapters to your YouTube videos for better engagement.
- Part 1: What Are YouTube Chapters?
- Part 2: How to Add Chapter to YouTube Video Progress Bar?
- Part 3: Why Add Chapters to Videos?
- Part 4: When Add Chapters on YouTube?
- Part 5: Will Chapter Decrease Watching Time?
- Part 6: Video Chapter Adding Tips
- Part 7: Why YouTube Chapter is Not Working?
Part 1: What Are YouTube Chapters?
YouTube video chapters are an excellent way to optimize your YouTube content. When you have chapters for your YouTube video, each chapter will have an individual preview. Chapters will break your YouTube video into multiple parts allowing your audience to have better context and information.
As per YouTube, chapters let the audience navigate better through videos. Chapters will let your audience watch different video parts, which will eventually lead to better engagement. If you want to organize your YouTube content, chapters are one of the best ways to go about it. By using labeled timestamps, your video will be divided into multiple sections. Your audience will be able to see the preview of the content and easily skip to the part they want to see within the video’s progress bar.
Part 2: How to Add Chapter to YouTube Video Progress Bar?
If you are a YouTube creator and want to know how you can add chapters to your YouTube content, here’s what you need to do. Follow these instructions carefully:
Step 1: First things first, please sign in to your YouTube account.
Step 2: Select the video that you want to edit and add chapters.
Step 3: Click on the edit video option. This option will be there under the video.
Step 4: On the add details page, you will see the description box. Here, you need to add the list of titles and timestamps.
Please keep in mind that you must add the first timestamp with “00:00”. You will have to add a minimum of three timestamps with a minimum of 10 seconds for each chapter. Here is how it looks like in the description after published.
Part 3: Why YouTubers Should Add Chapters to videos?
There are two primary advantages of adding chapters to your YouTube videos. Apart from making your YouTube video look organized and neat, chapters will let you provide a better user experience to everyone watching your video because they will find all the information about your video faster and easier within a video. And the second benefit is that your YouTube video will show up in search results. This is a way to optimize your content for more users to find your content.
YouTube chapters are beneficial for both creators and viewers. On the progress bar, these clickable chapters can be added. This will allow a viewer to skip and scrub through a video quickly and skip to parts they actually want to watch.
This feature is quite helpful for videos that are pretty long. Chapters will let you segment the videos into important chapters so that the viewer can rewatch already watched chapters or skip to other chapters in the video. YouTube chapters have been recently added to this platform for better navigation and engagement.
Better User Experience for Users
Just like Google wants browsers to find what they are looking for when they add a keyword, YouTube also wants to help viewers find what they are looking for. Chapters can be immensely beneficial for extended content. For example, if you are uploading a video of your convert video, let the users jump straight to their favorite songs.
Even in tutorial video content, viewers will now have a chance to get straight to the main part of the video. With chapters being added, viewers will have an opportunity to decide whether they want to watch the whole video or not. They won’t have to keep skipping one part to another blindly. Chapters will allow them to find what they are looking for in an instant.
For Creators: Increased Visibility
If you know about the Google algorithm, you must be aware that it regularly changes its algorithm to let people find the information they are looking for easily. Adding chapters to your video will encourage Google to display them more often when someone searches for them, and this will include adding your videos to its featured snippets.
While adding chapters, you need to make sure that it is labeled with correct keywords, and it is clear and descriptive. YouTube videos are often showed as Google snippet when someone tries to find something on the search engine. Adding a chapter will let Google understand the content better, thereby letting your videos gain more search traffic.
Part 4: When should I add or not chapters on YouTube?
If you are wondering whether all videos on YouTube should have chapters, the answer to this is no. A two minutes long video won’t require chapters because it won’t make sense. Think about whether you would want your audience to have reduced watch time. Another thing to pay attention to is audience retention.
We mentioned earlier that adding chapters to long videos will be a good idea, but before you jump in and start adding chapters, you need to understand whether it will help you and should be done in your particular case?
If you are uploading a video on education, science and technology, how-to, news and politics, Q and A, and other similar videos, adding chapters will definitely help. In these kinds of videos, you will let your audience rewatch a section they liked the most over and over again.
However, if you are uploading music, entertainment, comedy, and film and animation videos, we will recommend not to add chapters because this will reduce the watch time.
Part 5: Do YouTube Video Chapters Decrease Channel Watch Time?
One of the most commonly asked questions regarding adding chapters to YouTube videos is whether it will reduce the watch time of a video. Video chapters are a pretty good feature and can enable your videos to engage with the viewers.
Since chapters allow your audience to skip through video content, they are not really watching the whole video, which can’t be suitable for audience retention! Here’s what we have to say to this: don’t put your 100% focus on watch time right now. Your focus should be creating informative and engaging content, which will keep your audience hooked to their screens. Even if you add chapters, if your audience doesn’t find it engaging, they will choose not to go on with the content.
Video chapters are a tiny part of the overall content. Chapters provide value to your audience, and you should try them. If you are uploading a concise video, animation video, funny video, and more, don’t add chapters.
Even some of the most watched videos on YouTube have chapters. Learn from them. These video makers could have thought about numbers rather than giving value to their audience, but they did just the opposite, and here they are with over a million views!
Part 6: Tips for adding chapters to YouTube video
Each video on YouTube is different, and that’s why there is no one-size-fits-all answer. There are some cases where you should not think about adding chapters at all. Whereas in other cases, you will have to experiment a bit before adding chapters.
Here are some tips that will help you.
Do Some Testing
Before adding chapters to a new video that you are thinking to upload, try adding chapters to an old video. See what happens to that video. Have the views increased? How about average view duration? Track these metrics first, and then try adding chapters to your upcoming videos to benefit from videos. Along with these metrics, you will also have to evaluate if adding chapters decreases or increases the watch time and number of views.
Label Your Chapters Using Keywords
Another thing to do that will help you have better traction is using a good keyword strategy. Look at what people are using while searching for content, which is similar to yours? Using names based on keywords that have better search volume will help your videos to rank higher.
Part 7: Why Video Chapter is Not working? [Problem solved]
There are a few mandatory things that you need to do before adding chapters to your YouTube video. Here are some of the common reasons why the video chapter is not working. See if any one of them is true in your case, and rectify it right away.
- Your video doesn’t have the 00:00 timestamp.
- Your video has less than three chapters.
- You have added a chapter that is less than 10 seconds long.
- You have not added the timestamps in chronological order.
- Rather than using “:” you have entered “.” for timecodes.
- If your channel has active copyright strikes, video chapters won’t work.
- Your channel doesn’t have more than 1k subscribers.
- Your video chapters are not suitable for some viewers.
Richard Bennett
Richard Bennett is a writer and a lover of all things video.
Follow @Richard Bennett
Also read:
- Sharpen Content Edge with Studio's Advanced Features
- In 2024, Beyond The Algorithm A Look at 27 Non-YouTube Platforms
- [Updated] Cutting Edge Computing Select the Optimal Device for Video Editing
- FrameFixer Editor
- Hilarity Unleashed Top 7 Amusing YouTube Channel Skits
- Subscription Rate Monitoring Software
- [New] Channel Marketing Making a Trailer that Sells More
- Video Editing for Dummies 10 Essential YouTube Insights
- Exploring New Frontiers in Online Videos The Best Non-YouTube Alternatives
- Spotlight Secrets Perfecting Vlogger Lights
- The Ultimate List of 10 Highest Subscribed YouTube Stars
- Erasing Extra Borders for Smooth YouTube Playback
- Seamless Integration of YouTube Media in GSlides
- Mastering YouTube Shorts Key Facts
- The Art of Applying Skin Secrets Establishing an Online Beauty Platform
- Budget-Friendly Vlogging Cameras Unveiled Our Picks for 2024
- [New] Amplify Your Video's Value Anywhere on Multiple Devices
- The Secret Sauce for Successful YouTubers Channel Featuring Techniques
- In 2024, Audio Alchemy Free, Perfectly Crafted DJ Template Videos
- Disabling YouTube Ads Across Chrome, Firefox, Android & iOS Browsers for 2024
- In 2024, Conquer Small Screen Navigate Through These Best Free & Online Downloader Tools
- Create a Standout Presence with YouTube Custom Imagery
- [Updated] Breakthrough Strategies for Peak Video Viewership Times
- 2024 Approved Elevate Your Content SEO Mastery Starts Here
- Ideal Subscription List 10 YouTube Analysts' Picks
- Bursting Boundaries, Breaking Barriers The Top Ten Reasons for Your YouTube Viewer Void for 2024
- Navigating YouTube's Rules The Safe Way
- Enhance Editing Unlimited Free Audio Samples!
- Ramp Up Visibility Strategies for Engaging Shorts on YouTub
- [New] Optimal Free Screen Capture Suites Reviewed
- In 2024, How to Spy on Text Messages from Computer & ZTE Axon 40 Lite | Dr.fone
- Chuckling Chapter The Most Shared Comedic Content on TikTok
- Updated Instant Silence Muting Zoom Sound From Your Computer or Smartphone
- 2024 Approved Shrouded Screen Images Techniques for Redacting Info
- Xiaomi Redmi K70 Screen Unresponsive? Heres How to Fix It | Dr.fone
- New In 2024, 12 Aesthetic GIF Instagram for Marketers and Creatives
- Updated 2024 Approved Resize Your Videos in No Time A Simple, Stress-Free Method
- In 2024, Does Apple iPhone 13 mini Have Find My Friends? | Dr.fone
- In 2024, Capture and Convert FB Videos Immediitsly to MP3
- How to Fix when Apple Account Locked On iPhone 13 Pro?
- Title: In 2024, A Beginner's Guide to Elevating Auditory Experiences on YouTube
- Author: Brian
- Created at : 2024-05-25 11:59:30
- Updated at : 2024-05-26 11:59:30
- Link: https://youtube-video-recordings.techidaily.com/in-2024-a-beginners-guide-to-elevating-auditory-experiences-on-youtube/
- License: This work is licensed under CC BY-NC-SA 4.0.
