
:max_bytes(150000):strip_icc()/152838720-56a6c46a5f9b58b7d0e47fcf.jpg)
Foremost Directors of Cinematic Harmony
Foremost Directors of Cinematic Harmony
People capture loads of photos of the places they visit and the events they attend for social media and future memories. If you check the online trend, users are shifting from static photos to short videos for a better visual experience. That is why you can consider creating videos out of the photos you have captured and adding suitable music in the background to make your memories visually pleasing.
All you need is a video maker with music and pictures. There is no dearth of video makers, but not all live up to the expectation. There are online video markers as well as video maker software applications available. In this article, we have picked the best video maker with photos and music and illustrated how to make a video with music and photos. We have also listed the popular video makers for your consideration.
Part 1. Best Video maker with music and pictures
We recommend Wondershare Filmora as the best video maker with photos and music. Filmora is considered one of the best video makers and editors in the world. Filmora allows you to import photos of different file formats so that you can make slideshow-like video. There are loads of transitions as well as effects available that you can place in between the photos so that the transition becomes eye-pleasing.
Similarly, you can import any audio or music file. Besides, there are stock music files available that you can apply to your slideshow video. You can even add colourful titles and graphical elements to enhance the video content. Here are the steps on how to make a video with your photos and music.
For Win 7 or later (64-bit)
For macOS 10.12 or later
Step 1: Install Filmora and Start Your Project
Download and install Wondershare Filmora as per your operating system. Filmora is available for Windows and Mac. Launch Filmora and click on New Project. Drag and drop your photos on Project Media folder.
Step 2: Import Photos and Arrange Them in Order
Drag and drop the photos on the timeline as per your sequence you want in your slideshow video. You can change the order of the photos as well as stretch durations of photos in the video from the timeline. You have to arrange the photos side by side without any gap so that there is no black screen in between the transition.

Step 3: Add Transition Effects
After arranging the photos side by side, you have to apply transition effects so that the change from one photo to another is eye-soothing. There are loads of transitions available and you can get them from Transition option located at the top bar.
Go through the different categories of transitions. Drag and drop the transition you want on to the photo after which you want the transition effect to play. Do the same for all photos except the last one. You can apply different transitions effects for different photos as per your preference.

Step 4: Add Background Music
Now it is time to add a background music to the entire video. You can drag and drop any music file from your hard drive to Filmora Project Media. Thereafter, you can drag and drop the audio file on the audio timeline below the photo timeline. You can also add audio effects from the top bar if required.

Step 5: Export Your Video
Once you are done adding photos, transitions, and music, you should play the video on Filmora and make adjustments wherever required. Thereafter, click on Export button and save the video file on your hard drive in your desired file format.

Part 2. Popular video makers with photos and music
Here is the list of the popular premium and free video maker with music and pictures that you can consider for making slideshow videos.
1. Invideo
Invideo is a popular online video maker with music and pictures along with 5000 customizable templates. These templates help users to transform photos into videos with background music in a few minutes. Besides, the platform offers a wide range of stock media files. You can create videos in more than 70 languages, and the editor is user-friendly for users of all ages.
All you need to do is select a template and customize it if required. Thereafter, you need to import the photos, add text effects, and finally add music. There are options for trimming, cropping, and adding stickers, texts and transitions. The free version lets you export 60 videos per month but with a watermark. Here are the top features of Invideo.
- 5000+ customizable templates for all video types.
- 9+ million stocks videos, photos, and audio files.
- Add transitions, stickers, animations, and texts to videos.
- Trim and crop videos and audio files.
- Add voiceover as well as fade-in and fade-out effects.
- Work in collaboration with team members.

2. Icecream slideshow maker
Icecream slideshow maker is a free video maker with music and pictures for Windows users only. The software is compatible with Windows 10, 8, 7 and XP. You can create a high-quality video from your photos with music instantly. There is no need for any prior experience to use the video maker. There are beautiful transitions available that will enhance the video quality and make your presentation stand out. The free version allows up to 10 slides per video and saving the video in Webm file format. You can upgrade to Pro version to get rid of the limitations.
You can change photo and transition duration as per requirements. The software supports various audio file formats that you can import for your video. You can also add animations to texts so that they can shine in your video. The software allows sharing the video directly to YouTube. Besides, you can save it on Google Drive and Dropbox. Here are all the features of Icecream slideshow maker that you should be aware of.
- Super intuitive user interface for all users.
- Add colourful text, transitions, and animations.
- Save and resume project work as per time availability.
- Pro version allows saving video in 4K resolution.
- Video output in MP4, AVI, MOV and WEBM formats.
- Suitable for low-end computers.

3. PhotoStage Slideshow
PhotoStage Slideshow by NCH Software is another video maker software for Windows users. The software comes with an easy and automated wizard for users to transform photos with a video instantly. There is also an image editor available to adjust different parameters of your photos before making a video out of them.
Besides, there are various transitions available to apply and you can add captions and narration as per your requirements. In fact, along with photos, you can add video clips to create the ultimate video. Moreover, there are tools available to edit your audio and music file and add different effects. Here are the top features of PhotoStage Slideshow Software.
- Supports Full HD and 4K video resolution.
- Edit and fine-tune photos and add captions.
- Wide range of eye-catching and popular transitions.
- Edit audio and music file and add different effects.
- Save video file in MOV, MP4, GIF, AVI, 3GP and more.
- Directly share on YouTube, Vimeo, Flickr, HTML5.

4. Clideo video maker
Clideo Video Maker is a free online video maker with song. All you need to do is upload photos from your hard drive and choose a preset depending on the online platform where you want to upload the video. Thereafter, add audio and trim it as per video length. Then add smooth transitions and the video will be ready to export on your hard drive or cloud storage.
The online video maker supports different video and audio file format for importing and exporting. You can use the editor on any device starting from Windows and Mac to Android and iPhone. The user interface is very simple to use and it does not store video files for more than a day. Here are all the features of Clideo video maker.
- Upload photos from hard drive, and cloud storage.
- Presets for Instagram, Stories, YouTube, and Facebook videos.
- Add different photos, audio, and video clips to make videos.
- Zoom & crop option along with image duration elongation.
- Suitable for computer and mobile phone users.

5. Movavi Slideshow Maker
Movavi Slideshow Maker is available for both Windows and Mac users. The software comes with a wizard to allow users to create video from photos. However, advanced users can create video from photos manually as well. You get to add photos, audio files and video clips of different file formats. Most importantly, there are various templates available to create professional-quality videos.
There are loads of effects, filters, titles, and stickers available to apply on your video. The free version is limited to seven days usage. The output video will have watermark on it and you can purchase the premium version to avoid all limitations. Here are the top features of Movavi Slideshow Maker.
- Slideshow wizard for fast and easy video creation.
- Manual mode for advanced users to create customized video.
- Supports different types of media file formats.
- Different types of templates for instant video making.
- Wide ranges of transitions, filters, titles, and stickers.

Conclusion
If you are making a video from your photos, you can use an online video maker with photos and music free. If you are someone who wants to make professional-quality videos from photos, a premium video maker is best for you. If you are going to upload your slideshow videos on social media and video streaming platforms, we recommend Wondershare Filmora as the best video maker with music and pictures.
For macOS 10.12 or later
Step 1: Install Filmora and Start Your Project
Download and install Wondershare Filmora as per your operating system. Filmora is available for Windows and Mac. Launch Filmora and click on New Project. Drag and drop your photos on Project Media folder.
Step 2: Import Photos and Arrange Them in Order
Drag and drop the photos on the timeline as per your sequence you want in your slideshow video. You can change the order of the photos as well as stretch durations of photos in the video from the timeline. You have to arrange the photos side by side without any gap so that there is no black screen in between the transition.
Step 3: Add Transition Effects
After arranging the photos side by side, you have to apply transition effects so that the change from one photo to another is eye-soothing. There are loads of transitions available and you can get them from Transition option located at the top bar.
Go through the different categories of transitions. Drag and drop the transition you want on to the photo after which you want the transition effect to play. Do the same for all photos except the last one. You can apply different transitions effects for different photos as per your preference.
Step 4: Add Background Music
Now it is time to add a background music to the entire video. You can drag and drop any music file from your hard drive to Filmora Project Media. Thereafter, you can drag and drop the audio file on the audio timeline below the photo timeline. You can also add audio effects from the top bar if required.
Step 5: Export Your Video
Once you are done adding photos, transitions, and music, you should play the video on Filmora and make adjustments wherever required. Thereafter, click on Export button and save the video file on your hard drive in your desired file format.
Part 2. Popular video makers with photos and music
Here is the list of the popular premium and free video maker with music and pictures that you can consider for making slideshow videos.
1. Invideo
Invideo is a popular online video maker with music and pictures along with 5000 customizable templates. These templates help users to transform photos into videos with background music in a few minutes. Besides, the platform offers a wide range of stock media files. You can create videos in more than 70 languages, and the editor is user-friendly for users of all ages.
All you need to do is select a template and customize it if required. Thereafter, you need to import the photos, add text effects, and finally add music. There are options for trimming, cropping, and adding stickers, texts and transitions. The free version lets you export 60 videos per month but with a watermark. Here are the top features of Invideo.
- 5000+ customizable templates for all video types.
- 9+ million stocks videos, photos, and audio files.
- Add transitions, stickers, animations, and texts to videos.
- Trim and crop videos and audio files.
- Add voiceover as well as fade-in and fade-out effects.
- Work in collaboration with team members.
2. Icecream slideshow maker
Icecream slideshow maker is a free video maker with music and pictures for Windows users only. The software is compatible with Windows 10, 8, 7 and XP. You can create a high-quality video from your photos with music instantly. There is no need for any prior experience to use the video maker. There are beautiful transitions available that will enhance the video quality and make your presentation stand out. The free version allows up to 10 slides per video and saving the video in Webm file format. You can upgrade to Pro version to get rid of the limitations.
You can change photo and transition duration as per requirements. The software supports various audio file formats that you can import for your video. You can also add animations to texts so that they can shine in your video. The software allows sharing the video directly to YouTube. Besides, you can save it on Google Drive and Dropbox. Here are all the features of Icecream slideshow maker that you should be aware of.
- Super intuitive user interface for all users.
- Add colourful text, transitions, and animations.
- Save and resume project work as per time availability.
- Pro version allows saving video in 4K resolution.
- Video output in MP4, AVI, MOV and WEBM formats.
- Suitable for low-end computers.
3. PhotoStage Slideshow
PhotoStage Slideshow by NCH Software is another video maker software for Windows users. The software comes with an easy and automated wizard for users to transform photos with a video instantly. There is also an image editor available to adjust different parameters of your photos before making a video out of them.
Besides, there are various transitions available to apply and you can add captions and narration as per your requirements. In fact, along with photos, you can add video clips to create the ultimate video. Moreover, there are tools available to edit your audio and music file and add different effects. Here are the top features of PhotoStage Slideshow Software.
- Supports Full HD and 4K video resolution.
- Edit and fine-tune photos and add captions.
- Wide range of eye-catching and popular transitions.
- Edit audio and music file and add different effects.
- Save video file in MOV, MP4, GIF, AVI, 3GP and more.
- Directly share on YouTube, Vimeo, Flickr, HTML5.
4. Clideo video maker
Clideo Video Maker is a free online video maker with song. All you need to do is upload photos from your hard drive and choose a preset depending on the online platform where you want to upload the video. Thereafter, add audio and trim it as per video length. Then add smooth transitions and the video will be ready to export on your hard drive or cloud storage.
The online video maker supports different video and audio file format for importing and exporting. You can use the editor on any device starting from Windows and Mac to Android and iPhone. The user interface is very simple to use and it does not store video files for more than a day. Here are all the features of Clideo video maker.
- Upload photos from hard drive, and cloud storage.
- Presets for Instagram, Stories, YouTube, and Facebook videos.
- Add different photos, audio, and video clips to make videos.
- Zoom & crop option along with image duration elongation.
- Suitable for computer and mobile phone users.
5. Movavi Slideshow Maker
Movavi Slideshow Maker is available for both Windows and Mac users. The software comes with a wizard to allow users to create video from photos. However, advanced users can create video from photos manually as well. You get to add photos, audio files and video clips of different file formats. Most importantly, there are various templates available to create professional-quality videos.
There are loads of effects, filters, titles, and stickers available to apply on your video. The free version is limited to seven days usage. The output video will have watermark on it and you can purchase the premium version to avoid all limitations. Here are the top features of Movavi Slideshow Maker.
- Slideshow wizard for fast and easy video creation.
- Manual mode for advanced users to create customized video.
- Supports different types of media file formats.
- Different types of templates for instant video making.
- Wide ranges of transitions, filters, titles, and stickers.
Conclusion
If you are making a video from your photos, you can use an online video maker with photos and music free. If you are someone who wants to make professional-quality videos from photos, a premium video maker is best for you. If you are going to upload your slideshow videos on social media and video streaming platforms, we recommend Wondershare Filmora as the best video maker with music and pictures.
Tracing Trending Commentary Across Videos
What Is the YouTube Highlighted Comment?

Liza Brown
Mar 27, 2024• Proven solutions
Did you just come across a comment tagged with Highlight on YouTube and wondering what it means? In our guide, you will find an answer to this, along with related queries like how YouTube highlighted comment works, the removal process, its benefits, and more.
If you own a YouTube channel or are starting one, even you can do this. Without further ado, let’s jump straight into the core of YouTube’s highlighted comments. We’ve categorized this article into a total of 8 parts for simple and better understanding.
- Part 1: What Does Highlighted Comment Mean On YouTube?
- Part 2: What Does Highlighted Comments Look Like on YouTube?
- Part 3: How to Make Comment Highlighted?
- Part 4: How to Highlighted Comments URL?
- Part 5: How to Reply to Highlighted Comments?
- Part 6: How to Remove Highlighted Comments?
- Part 7: Tips for Writing a Comment
- Part 8: Benefits of Highlighted Comments
Part 1: What Does The Highlighted Comment Mean On YouTube?
Before you get on with highlighting your comments, you must understand what it means exactly. You may follow comments on the videos posted by several YouTubers, but the highlighted ones are always making it to the top of the list.
Having said that, neither the content creator nor users or moderators choose to highlight YouTube comments to begin with. They are no rocket science, but only a tad bit more than what you know as a bookmarking feature.
Think of highlighted comments as a “tag”. You might notice this in the form of a ‘new activity YouTube notification’ link you receive on your registered email. Only you can see this tag when you click the notification and arrive at Youtube.com to either view or reply to a comment.
Highlighting comments (HC’s) are an automatic feature generated by YouTube. It draws the YouTuber’s & viewer’s attention to relevant activities. Don’t fail to notice that the highlight disappears once you are done interacting in the tagged comment thread. However, they are reloadable by tapping the comment timestamp.
For instance, you may want to check the following links. The 2 URLs lead you to the same video, but only one of them shows a highlighted comment.
- https://www.youtube.com/watch?v=XWhjJjhpmQA&lc=Ugya-89WYAlutJurKGh4AaABAg
- https://www.youtube.com/watch?v=XWhjJjhpmQA
Notice the name “lc” in the first URL- that stands for linked comment. YouTube might include this additional parameter. If a reply comment (HR) gets highlighted, the parent comment gets raised to the top.
Part 2: What Does The Highlighted Comment Look Like?
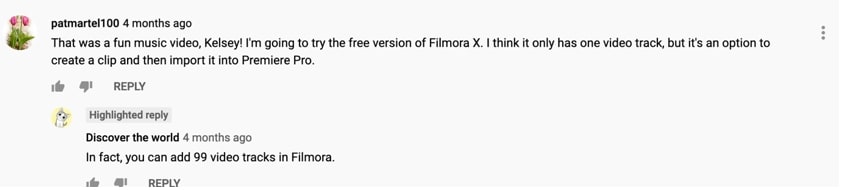
YouTube has been working on improving the navigation of the comment section for videos, and highlighted comments are one of them. These comments appear even above the pinned comments on a video. The label of a highlighted comment is displayed above the commentator’s name in a light grey shade.

YouTube labels comment replies as well and call it “Highlighted Reply.” You can see this tag above the replier’s name in the same color tone.
Part 3: How to Make My Comment Highlighted?
Now, making YouTube highlight your comment on a popular video is nothing less than an art. YouTube doesn’t make it easy for you. The advantage of getting your comment highlighted on YouTube is limitless.
Thus, anybody who wants to get their YouTube comment an HC tag has to follow a few simple steps, which we will discuss below in another section. Finding the correct or relevant video content that can benefit your channel from such a comment is an excellent place to start.
For example, if you are a YouTuber who deals in tech information, you need to look for a popular video or channel with a similar genre, in this case, technical knowledge. The more popular the channel is, the more is the chance of a viewer checking the comments on its videos. You will only benefit if you’re comment is highlighted on pages of Youtuber’s who are huge.
Part 4: How to Get the URL of Highlighted Comments?
The ways to acquire the URL or link for a highlighted comment are different for both parties- viewer and host.
Suppose you are a viewer who is going through the comments section of a video. If you want to get the highlighted URL for the comment, simply click on the timestamp (e.g., 2 weeks ago) beside the commentator’s username.
On the other hand, for a YouTuber, getting access to the comment URL is relatively straightforward. The host will get a notification on his or her registered email-id when a viewer publishes a comment on their posted video. You will find the link to the highlighted comment in the notification
Part 5: How to Reply to Highlighted Comments?
Replying to “highlighted comments” on your YouTube channel is pretty easy since this feature was developed, keeping the user’s convenience in mind. If you want to follow up or reply to such comments, you can do so from your email or YouTube Dashboard.
If you click the notification bell icon, whenever a viewer drops a new comment on one of your videos, YouTube will send you a notification via email. On opening the email, you will find a clickable “Reply” option. Or else, if you follow the comment section in the YouTube Dashboard, you can directly view or reply to highlighted comments from here as well.
Have you ever wondered why a highlighted comment always shows at the top of the comment list? Both the above options will lead you to the comment thread on YouTube. To help you find the new activity easily, it appears with the highlight tag on it. The purpose is to remind you that you are here for that specific comment.
Part 6: How to Remove Highlighted Comments?
Can you, as a video maker, remove highlighted comments on YouTube? The direct answer to this would be a ‘No.’ It is because based on how you have opened the specific video, YouTube does it automatically.
Alternatively, you can try out a few temporary solutions.
- You can edit the particular URL of the video where the highlighted tag is showing. Remove the red part of the URL (example given below) starting with “&”:
https://www.youtube.com/watch?v=XWhjJjhpmQA&lc=Ugya-89WYAlutJurKGh4AaABAg After removing the above parameter, reload the original video link (below):
https://www.youtube.com/watch?v=XWhjJjhpmQA
- Try logging out from your Google Account and browse YouTube (anonymously). Doing this will ensure that you no longer see any highlighted comments. However, at the same time, this will restrict you from interacting in any way with that video, let alone leaving a comment.
Part 7: Tips for Writing a Comment that will be Pinned as a Highlighted Comment?
Many frequently inquire on the internet about how they can improve the chances of getting their comment pinned, as highlighted on YouTube. The secret lies in how you write the statement. We’ve listed a few pro tips below that can help:
- First, go through all the posted comments under the video. It will help you identify what is missing. You can comment or write the missing point in comprehendible and straightforward words. Also, never forget to acknowledge the YouTuber’s talent.
- Remember, no one has the time to read long comments. So, when you know what you want to write, try to shorten your sentences. A short and crisp comment draws more attention.
- After you have framed your comment, make sure that it is grammatically correct. YouTube and Google hate grammatical errors.
- Do not hit the post option already. Before publishing it, you must cross-check that your comment has all the above points in place.
- Lastly, you have to wait after publishing on the video’s comment section. YouTube will highlight your comment if it passes according to the YouTube policy and if the search engine finds it unique.
Part 8: Are Highlighted Comments Beneficial?
Being a convenience feature, a highlighted comment on YouTube is 100% beneficial. That is especially true if you are looking for ways to optimize your channel.
YouTube is undeniably the second largest search engine on the web. Highlight comments can potentially increase the outreach of your content and, consequently, your brand presence.
As said earlier, these comments always show first on the comment section. Needless to say, many people who watch the videos also scroll down to the comments section to start a conversation or see what other viewers are saying about this video.
In the process, alongside the interaction, they also check out the channels or profiles of the commentators. Viewers often visit the pages of these channels, and if they happen to enjoy the video content, they will subscribe to the YouTuber’s channel. If your comment gets highlighted, your YouTube channel can be one of them.
Conclusion
YouTube can be an intimidating tool for marketing and more so for newcomers. Every YouTuber wishes that their channel performs better than the previous day. Even though the highlighted comment or highlighted reply feature doesn’t have any direct benefits, it can indeed help in optimizing your YouTube channel.
It can connect you with potential viewers and increase the number of people that visit your channel regularly. However, how many of them stay and hit the “Subscribe” button is a different story altogether and is wholly based on whether they like what you share through your videos.
In this article, we have shared facts on YouTube’s commonly seen highlighted comment feature. Yet, the term is a heavily misleading one, as far as viewers and Youtuber’s are concerned. We have also covered all other aspects and queries related to this term. Here’s hoping they clarify all your doubts.
Liza Brown
Liza Brown is a writer and a lover of all things video.
Follow @Liza Brown
Liza Brown
Mar 27, 2024• Proven solutions
Did you just come across a comment tagged with Highlight on YouTube and wondering what it means? In our guide, you will find an answer to this, along with related queries like how YouTube highlighted comment works, the removal process, its benefits, and more.
If you own a YouTube channel or are starting one, even you can do this. Without further ado, let’s jump straight into the core of YouTube’s highlighted comments. We’ve categorized this article into a total of 8 parts for simple and better understanding.
- Part 1: What Does Highlighted Comment Mean On YouTube?
- Part 2: What Does Highlighted Comments Look Like on YouTube?
- Part 3: How to Make Comment Highlighted?
- Part 4: How to Highlighted Comments URL?
- Part 5: How to Reply to Highlighted Comments?
- Part 6: How to Remove Highlighted Comments?
- Part 7: Tips for Writing a Comment
- Part 8: Benefits of Highlighted Comments
Part 1: What Does The Highlighted Comment Mean On YouTube?
Before you get on with highlighting your comments, you must understand what it means exactly. You may follow comments on the videos posted by several YouTubers, but the highlighted ones are always making it to the top of the list.
Having said that, neither the content creator nor users or moderators choose to highlight YouTube comments to begin with. They are no rocket science, but only a tad bit more than what you know as a bookmarking feature.
Think of highlighted comments as a “tag”. You might notice this in the form of a ‘new activity YouTube notification’ link you receive on your registered email. Only you can see this tag when you click the notification and arrive at Youtube.com to either view or reply to a comment.
Highlighting comments (HC’s) are an automatic feature generated by YouTube. It draws the YouTuber’s & viewer’s attention to relevant activities. Don’t fail to notice that the highlight disappears once you are done interacting in the tagged comment thread. However, they are reloadable by tapping the comment timestamp.
For instance, you may want to check the following links. The 2 URLs lead you to the same video, but only one of them shows a highlighted comment.
- https://www.youtube.com/watch?v=XWhjJjhpmQA&lc=Ugya-89WYAlutJurKGh4AaABAg
- https://www.youtube.com/watch?v=XWhjJjhpmQA
Notice the name “lc” in the first URL- that stands for linked comment. YouTube might include this additional parameter. If a reply comment (HR) gets highlighted, the parent comment gets raised to the top.
Part 2: What Does The Highlighted Comment Look Like?
YouTube has been working on improving the navigation of the comment section for videos, and highlighted comments are one of them. These comments appear even above the pinned comments on a video. The label of a highlighted comment is displayed above the commentator’s name in a light grey shade.
YouTube labels comment replies as well and call it “Highlighted Reply.” You can see this tag above the replier’s name in the same color tone.
Part 3: How to Make My Comment Highlighted?
Now, making YouTube highlight your comment on a popular video is nothing less than an art. YouTube doesn’t make it easy for you. The advantage of getting your comment highlighted on YouTube is limitless.
Thus, anybody who wants to get their YouTube comment an HC tag has to follow a few simple steps, which we will discuss below in another section. Finding the correct or relevant video content that can benefit your channel from such a comment is an excellent place to start.
For example, if you are a YouTuber who deals in tech information, you need to look for a popular video or channel with a similar genre, in this case, technical knowledge. The more popular the channel is, the more is the chance of a viewer checking the comments on its videos. You will only benefit if you’re comment is highlighted on pages of Youtuber’s who are huge.
Part 4: How to Get the URL of Highlighted Comments?
The ways to acquire the URL or link for a highlighted comment are different for both parties- viewer and host.
Suppose you are a viewer who is going through the comments section of a video. If you want to get the highlighted URL for the comment, simply click on the timestamp (e.g., 2 weeks ago) beside the commentator’s username.
On the other hand, for a YouTuber, getting access to the comment URL is relatively straightforward. The host will get a notification on his or her registered email-id when a viewer publishes a comment on their posted video. You will find the link to the highlighted comment in the notification
Part 5: How to Reply to Highlighted Comments?
Replying to “highlighted comments” on your YouTube channel is pretty easy since this feature was developed, keeping the user’s convenience in mind. If you want to follow up or reply to such comments, you can do so from your email or YouTube Dashboard.
If you click the notification bell icon, whenever a viewer drops a new comment on one of your videos, YouTube will send you a notification via email. On opening the email, you will find a clickable “Reply” option. Or else, if you follow the comment section in the YouTube Dashboard, you can directly view or reply to highlighted comments from here as well.
Have you ever wondered why a highlighted comment always shows at the top of the comment list? Both the above options will lead you to the comment thread on YouTube. To help you find the new activity easily, it appears with the highlight tag on it. The purpose is to remind you that you are here for that specific comment.
Part 6: How to Remove Highlighted Comments?
Can you, as a video maker, remove highlighted comments on YouTube? The direct answer to this would be a ‘No.’ It is because based on how you have opened the specific video, YouTube does it automatically.
Alternatively, you can try out a few temporary solutions.
- You can edit the particular URL of the video where the highlighted tag is showing. Remove the red part of the URL (example given below) starting with “&”:
https://www.youtube.com/watch?v=XWhjJjhpmQA&lc=Ugya-89WYAlutJurKGh4AaABAg After removing the above parameter, reload the original video link (below):
https://www.youtube.com/watch?v=XWhjJjhpmQA
- Try logging out from your Google Account and browse YouTube (anonymously). Doing this will ensure that you no longer see any highlighted comments. However, at the same time, this will restrict you from interacting in any way with that video, let alone leaving a comment.
Part 7: Tips for Writing a Comment that will be Pinned as a Highlighted Comment?
Many frequently inquire on the internet about how they can improve the chances of getting their comment pinned, as highlighted on YouTube. The secret lies in how you write the statement. We’ve listed a few pro tips below that can help:
- First, go through all the posted comments under the video. It will help you identify what is missing. You can comment or write the missing point in comprehendible and straightforward words. Also, never forget to acknowledge the YouTuber’s talent.
- Remember, no one has the time to read long comments. So, when you know what you want to write, try to shorten your sentences. A short and crisp comment draws more attention.
- After you have framed your comment, make sure that it is grammatically correct. YouTube and Google hate grammatical errors.
- Do not hit the post option already. Before publishing it, you must cross-check that your comment has all the above points in place.
- Lastly, you have to wait after publishing on the video’s comment section. YouTube will highlight your comment if it passes according to the YouTube policy and if the search engine finds it unique.
Part 8: Are Highlighted Comments Beneficial?
Being a convenience feature, a highlighted comment on YouTube is 100% beneficial. That is especially true if you are looking for ways to optimize your channel.
YouTube is undeniably the second largest search engine on the web. Highlight comments can potentially increase the outreach of your content and, consequently, your brand presence.
As said earlier, these comments always show first on the comment section. Needless to say, many people who watch the videos also scroll down to the comments section to start a conversation or see what other viewers are saying about this video.
In the process, alongside the interaction, they also check out the channels or profiles of the commentators. Viewers often visit the pages of these channels, and if they happen to enjoy the video content, they will subscribe to the YouTuber’s channel. If your comment gets highlighted, your YouTube channel can be one of them.
Conclusion
YouTube can be an intimidating tool for marketing and more so for newcomers. Every YouTuber wishes that their channel performs better than the previous day. Even though the highlighted comment or highlighted reply feature doesn’t have any direct benefits, it can indeed help in optimizing your YouTube channel.
It can connect you with potential viewers and increase the number of people that visit your channel regularly. However, how many of them stay and hit the “Subscribe” button is a different story altogether and is wholly based on whether they like what you share through your videos.
In this article, we have shared facts on YouTube’s commonly seen highlighted comment feature. Yet, the term is a heavily misleading one, as far as viewers and Youtuber’s are concerned. We have also covered all other aspects and queries related to this term. Here’s hoping they clarify all your doubts.
Liza Brown
Liza Brown is a writer and a lover of all things video.
Follow @Liza Brown
Also read:
- Elevating Engagement Professional Tips for YouTube Video Tweaks
- [New] Channel Charisma Techniques for Amplifying YouTube Visibility
- UniquePC Vision Editing with Flawless Sound
- In 2024, Building a Solid Foundation for Authenticity in Design
- 2024 Approved Delve Into YouTube Metrics Using the Power of Social Blade
- 2024 Approved Downloading YouTube's Iconic Icons via Web, Windows/Mac Methods
- [Updated] Create a Standout Presence with YouTube Custom Imagery
- [New] Essential Tips for WireCast Live Streaming to Youtube
- Pinpointing Potential A Youtube Niche Journey
- 2024 Approved Best Free Video Editing Programs You Should Know
- Earning Potential Steps to Join the YouTube Premium Club for 2024
- [Updated] Demystifying YouTube's SEO A Keyword Research Guide
- 2024 Approved Convert Your Shorts to Mp4 Video Enhancement Techniques
- [Updated] Captivate Audiences Quickly Shortcuts for YouTube Trailers with Filmora
- A Step-by-Step Approach to Discard YouTube Watch Later Items
- 2024 Approved Decrypting YouTube Live Thumbnails for Success
- Bringing the Web to Reality Embedding YouTube Videos in Slides for 2024
- [Updated] Crafting Impactful Try-On Hauls for Maximum Views
- Craft Your Vision Best Cameras for Video Creators
- 2024 Approved Behind the Scenes YouTube's View Count Algorithm
- In 2024, Boundless Creativity Celebrating Our Top 10 Female YouTubers
- Top 5 Choices in Professional 3D Intros
- 2024 Approved Eliminate YouTube Shorts Permanent Guide
- [Updated] Direct Pathway Transferring YouTube Content to Dailymotion
- In 2024, Discover 9 Affordable Online Editors for YouTube
- 2024 Approved Enhancing Viewer Engagement with Smart End Screen Techniques
- 2024 Approved Discovering and Dominating Unique Segments in YouTube
- Creative Vanguard Audio-Visual Convergence
- [Updated] Enhance Views with Premier YouTube Rank Tracking Tools
- [Updated] Decoding Revenue How Much Do Creators Earn on Youtube?
- [Updated] Adding Subtitles A Step-by-Step YouTube Video Approach
- The Ultimate Resource for YouTube Studio Edition Crafting
- Effortless Audio Downloads These 24 Tools Split YouTube Sounds
- [New] Clearing Up Your Video Quality Issues
- [Updated] A Beginner's Blueprint Setting Up on YouTube
- The Leading Substitutes to YouTube for Quality Videos
- From Zero to Hero YouTube Tech Required
- [New] Crafting Clicks Top Tags for Gamers' Content
- In 2024, End Scenes Unlocked Tutorials to Enhance Viewing Experience
- [Updated] Ensuring Thumbnails Show Shorts Video Troubleshooting
- 1K Fans on YT Your Strategic Playbook for Success for 2024
- Deciphering How to Spot Your Video Enthusiasts for 2024
- Crack the Code Unearthing Hidden Gems in YouTube's Archive for 2024
- Updated From Still to Wow How to Create Stop Motion Videos on Instagram for 2024
- [New] In 2024, The Ultimate TikTok Live Jump A How-To Guide
- [Updated] In 2024, Bizarre Playtime TikTok's Wildest Games Ranked
- Why Is My Vivo X100 Offline? Troubleshooting Guide | Dr.fone
- Compelling MP4 Player Selections Reviewed
- Fixes for Apps Keep Crashing on Oppo K11 5G | Dr.fone
- [Updated] Boosting Connections on Snapchat Master the Art of Sharing GIFs for 2024
- In 2024, How to enter the iSpoofer discord server On Apple iPhone 14 Pro | Dr.fone
- [Updated] 2024 Approved Simple Guide Transforming FB Videos Into 720P/1080p MP4 Format (Free)
- How to bypass Xiaomi Redmi Note 13 Pro+ 5G’s lock screen pattern, PIN or password
- In 2024, How to Bypass FRP on Motorola Edge 40 Neo?
- New How To Quick Guide for Creating Google Slideshows
- How to retrieve lost files from Poco X6?
- The Best AI Translator to Translate Videos Online
- 2024 Approved Instagram's Filter Arsenal for Revamping Your Archive
- Adding Movies to Your Playlist An Intuitive Process for YouTube Users for 2024
- Best 4K Laptops for Ultimate Gaming for 2024
- 9 Best Phone Monitoring Apps for OnePlus 11 5G | Dr.fone
- 3 Ways to Erase Apple iPhone 13 When Its Locked Within Seconds | Dr.fone
- 2024 Approved Auditory Purity in FFmpeg A Format-Friendly Perspective
- In 2024, How to Watch Hulu Outside US On Vivo V30 | Dr.fone
- [Updated] 2024 Approved Top Video Conference Solutions Security First for Businesses
- In 2024, 10 Free Location Spoofers to Fake GPS Location on your Lava Blaze Curve 5G | Dr.fone
- How To Change Country on App Store for Apple iPhone 12 Pro With 7 Methods | Dr.fone
- In 2024, How to Transfer Data from Poco C55 to Samsung Phone | Dr.fone
- In 2024, The Step-by-Step Guide To Stunning Profile Photos for Discord Users
- In 2024, Set Your Preferred Job Location on LinkedIn App of your Apple iPhone 13 Pro Max | Dr.fone
- [Updated] 2023 Twitter Trends The Most Engaged Viewers
- New Hear the World on a Budget Discover Free Music Downloads Today
- [New] In 2024, Enhancing Instagram Video Performance (Desktop)
- How to Fix Android.Process.Media Has Stopped on Infinix Note 30 | Dr.fone
- Best of the Best Select Photo/Video Makers with Musical Accents for 2024
- [New] Vigorous Voice Examination - Iteration No. 8 for 2024
- FRP Hijacker by Hagard Download and Bypass your Infinix Note 30 VIP Racing Edition FRP Locks
- In 2024, How To Change Your Apple ID Password On your iPhone 6s | Dr.fone
- [Updated] 2024 Approved Transition Magic Quick Fade Tactics
- Setting up PIP Mode in the YouTube App for iOS Devices
- [New] 2024 Approved Auditory Cataloguing PC Noises & Speech Recordings
- How to Mirror PC Screen to Lava Blaze 2 Pro Phones? | Dr.fone
- How to Reset Samsung Galaxy F15 5G without Losing Data | Dr.fone
- In 2024, Best Xiaomi Redmi Note 12R Pattern Lock Removal Tools Remove Android Pattern Lock Without Losing Data
- Title: Foremost Directors of Cinematic Harmony
- Author: Brian
- Created at : 2024-05-25 11:53:22
- Updated at : 2024-05-26 11:53:22
- Link: https://youtube-video-recordings.techidaily.com/foremost-directors-of-cinematic-harmony/
- License: This work is licensed under CC BY-NC-SA 4.0.
