
"Essential Guide to Writing Click-Worthy Youtube Titles"
Essential Guide to Writing Click-Worthy Youtube Titles
How to Use Video Titles and YouTube Tags for More Views?

Richard Bennett
Nov 01, 2022• Proven solutions
In order to make sure that your videos get the appreciation they deserve, you will need to optimize your titles and YouTube tags for more views. By optimizing your titles and tags, I mean using the right keywords so that YouTube knows how to sort your videos and the viewers who are interested in your content can find it.
YouTube videos rank on Google just like any other piece of content, and YouTube itself is a lot of people’s go-to search engine. The success of your YouTube videos will largely depend on your ability to optimize your videos so they are ranked in people’s search results. People can’t fall in love with your videos they never stumble across them.
If you optimize your titles, tags, and descriptions to include relevant keywords you will see much better traffic from Google as well as from YouTube’s search results. Here are some tips:
Find the Best Keywords
One of the most important steps to ensuring SEO success is to identify the keywords that you should be using.
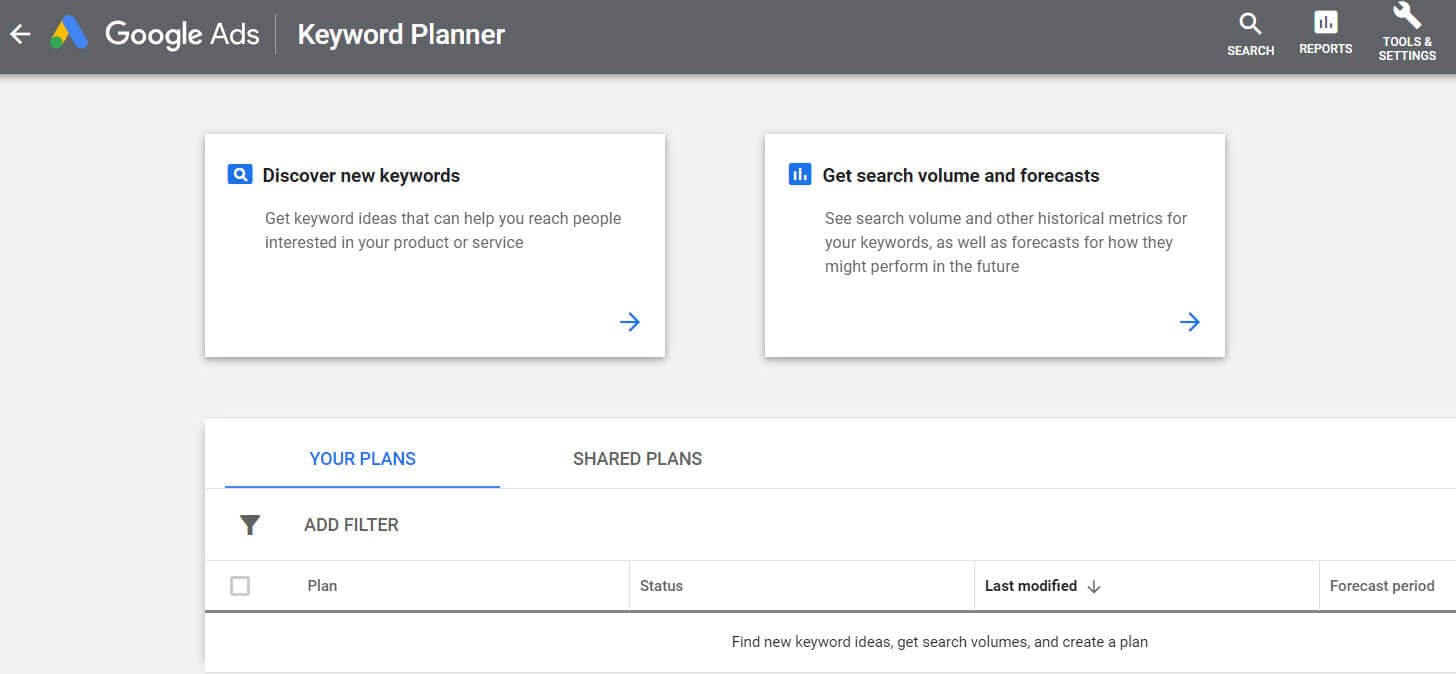
You can use the Google keyword planner to find keywords related to your video’s topic. Input one of your competitors’ video links to detect some of the top searches that were used to find the video. The keyword planner will scan through the top searches for that video link and determine the keywords that are used most often.
The keyword list can be a bit overwhelming the first time. Remember to use keywords that get at least 300 searches per month on Google. Using popular keywords will help you match up against competitors in your niche.
How to Optimize Your Titles, Descriptions, and Tags
Your keyword research will help you craft title, description, and tags of your videos.
How to Optimize YouTube Titles
The ideal YouTube title intrigues the potential viewer, drawing them in and making them want to click the link.
A video title should include your most important keyword. Usually, your most important keyword will be the first word in your title. Great titles are accurate and descriptive, but also exciting and captivating.
You should also consider using general keywords that are popular on Google like “funny video” “Tutorial” “Review” and “Fitness”.
How to Optimize Your Video’s Description
The description of your video is the next big important challenge. The text description of your video is how Google and other search engines determine the subject matter of your video for ranking.
Some tips for success with your description include; using 2-3 important keywords in the first 25 words and making each YouTube description more than 250 words.
Your ideal description will help to index your video without over-utilizing keywords and being flagged as spam.
How to Optimize YouTube Tags
Tags will help decide which videos your video will be displayed beside as similar content and which searches it will appear in.
By using targeted and optimized tags you can gain more traffic and views. Some of the top rules that you should consider with tags are; using 8-12 in every video and making sure the top keyword you used in your title is included as a tag.
Tags on previous videos can also be rearranged and edited as you do keyword research. This will help improve the ranking of some of your older videos. If you all the tags you usually use to a notepad or text edit file and separate them with commas you can paste them all back into YouTube in the new order. This is the simplest way to mass edit tags.
Click here for more tips about YouTube search optimization.
These tips will help you optimize your YouTube tags for more views, as well as your other YouTube metadata.
Richard Bennett
Richard Bennett is a writer and a lover of all things video.
Follow @Richard Bennett
Richard Bennett
Nov 01, 2022• Proven solutions
In order to make sure that your videos get the appreciation they deserve, you will need to optimize your titles and YouTube tags for more views. By optimizing your titles and tags, I mean using the right keywords so that YouTube knows how to sort your videos and the viewers who are interested in your content can find it.
YouTube videos rank on Google just like any other piece of content, and YouTube itself is a lot of people’s go-to search engine. The success of your YouTube videos will largely depend on your ability to optimize your videos so they are ranked in people’s search results. People can’t fall in love with your videos they never stumble across them.
If you optimize your titles, tags, and descriptions to include relevant keywords you will see much better traffic from Google as well as from YouTube’s search results. Here are some tips:
Find the Best Keywords
One of the most important steps to ensuring SEO success is to identify the keywords that you should be using.
You can use the Google keyword planner to find keywords related to your video’s topic. Input one of your competitors’ video links to detect some of the top searches that were used to find the video. The keyword planner will scan through the top searches for that video link and determine the keywords that are used most often.
The keyword list can be a bit overwhelming the first time. Remember to use keywords that get at least 300 searches per month on Google. Using popular keywords will help you match up against competitors in your niche.
How to Optimize Your Titles, Descriptions, and Tags
Your keyword research will help you craft title, description, and tags of your videos.
How to Optimize YouTube Titles
The ideal YouTube title intrigues the potential viewer, drawing them in and making them want to click the link.
A video title should include your most important keyword. Usually, your most important keyword will be the first word in your title. Great titles are accurate and descriptive, but also exciting and captivating.
You should also consider using general keywords that are popular on Google like “funny video” “Tutorial” “Review” and “Fitness”.
How to Optimize Your Video’s Description
The description of your video is the next big important challenge. The text description of your video is how Google and other search engines determine the subject matter of your video for ranking.
Some tips for success with your description include; using 2-3 important keywords in the first 25 words and making each YouTube description more than 250 words.
Your ideal description will help to index your video without over-utilizing keywords and being flagged as spam.
How to Optimize YouTube Tags
Tags will help decide which videos your video will be displayed beside as similar content and which searches it will appear in.
By using targeted and optimized tags you can gain more traffic and views. Some of the top rules that you should consider with tags are; using 8-12 in every video and making sure the top keyword you used in your title is included as a tag.
Tags on previous videos can also be rearranged and edited as you do keyword research. This will help improve the ranking of some of your older videos. If you all the tags you usually use to a notepad or text edit file and separate them with commas you can paste them all back into YouTube in the new order. This is the simplest way to mass edit tags.
Click here for more tips about YouTube search optimization.
These tips will help you optimize your YouTube tags for more views, as well as your other YouTube metadata.
Richard Bennett
Richard Bennett is a writer and a lover of all things video.
Follow @Richard Bennett
Quick-Fix Closed Captioning & Subtitling for YouTube Amateurs
How to Easily Add Subtitles and Closed Captions to YouTube Video
Richard Bennett
Mar 27, 2024• Proven solutions
In this article, we are going to show you how important it is to add subtitle and closed captions in your YouTube video, and how to add them.
The best video editor for YouTubers - Wondershare Filmora , not only allows you to cut, crop, rotate, reverse videos, but also offers your advanced features like PIP, Green Screen, or audio mixing. What’s more, you can find lots of effects for Fashion, gaming, education, tutorial, sports, etc. Check this article to know more.


Why subtitle and closed captions are important for YouTube videos?
- Forced closed captions and subtitles actually help the viewers to understand the content in your video if the audio quality of your video is bad, muffled or barely audible. Reading makes it easier for them to understand.
- This also helps people with hearing impairments. People with troubled ears can still watch and understand your content.
- It’s a great aid to such videos which have been recorded in other foreign languages that you don’t understand. Hence it will increase the number of viewers all around the world.
- They both are generally added for easy accessibility to the viewers who wish to watch in sound sensitive environments.
So, here we are going to show you two ways to add subtittles to video: directly or uploading caption or transcript files
Adding subtitles and closed captions manually
To add subtitles and closed captions to your YouTube video, fisrt, you should sign in to your YouTube account. On left right below ‘Home’ you will find ‘My Channel’. It will direct you to your personal YouTube page. On the top, right next to your subscribers lays the ‘Video manager’, giving you the list of your uploaded videos.
Select the video and click on edit to get a drop down menu. Click on subtitles and CC. This will take you to the subtitling interface. To the right of video select ‘add new subtitles’ and then ‘create new subtitles’. Select the subtitle language. Play the video to listen to the content and type down in the box. Click on ‘+’ button once you are done.
This will create a subtitle timeline right beneath the video. You can manage by dragging and expanding the subtitle duration according to the audio of the video. The subtitle will appear at the bottom of the video screen. Click ‘publish’ once done.
An interruption might occur with appearing of subtitles in accordance with video. Hence a lot precision is required while doing so.
Uploading Caption or Transcript Files automatically
To upload Caption or Transcript Files to YouTube Videos you first need to create a format on a text editor. For windows use Notepad and for Mac you may use TextEdit. Create a format of putting the number of subtitle first, time stamp and then text of the subtitle. For example
1\
00:02:34:12 using a format of (hour : minute : second : millisecond)
2. *text*
This is the sample text for first subtitle at zero hours, two minutes, thirty four seconds and twelve milliseconds. Once done with this. Go to file, select ‘save as’. Write the file name with an extension of .srt and select ‘All files’ for type of file. Click encoding menu and select UTF-8. Once saved, sign in to your YouTube account.
On left right below ‘Home’ you will find ‘My Channel’. It will direct you to your personal YouTube page. On the top, right next to your subscribers lays the ‘Video manager’, giving you the list of your uploaded videos.
Select the video and click on edit to get a drop down menu. Click on subtitles and CC. Go to ‘add subtitles’ and then ‘upload a file’. A pop-up menu will appear select ‘subtitles file’. Click upload. The file will send subtitles to your video.
This will create a subtitle timeline right beneath the video. You can manage by dragging and expanding the subtitle duration according to the audio of the video. The subtitle will appear at the bottom of the video screen. Click ‘publish’ once done.
3 Best Tools for add/managing video Subtitles/CC
1. Amara
Amara is a smart video editor which helps insert captions and subtitles to videos. It also helps in transcribing the videos. It takes help of crowd sourcing to subtitle any YouTube video. They take help from viewers to subtitle the videos. By making crowd subtitling available for any YouTube creator, they are allowing them to reach more viewers in more languages
2. DIY Captions
DIY captions help you to transcribe the YouTube videos, if not in most accurate manner, then in a little easier way. All you have to do is just paste the URL of the YouTube video and it will provide you all the subtitles. These may not be accurate but will provide you major base material which can be tweaked a bit here and there and is far better than making all the subtitles starting from scratch.
3 Subtitles for YouTube
Subtitles for YouTube is a Google Chrome extension which provides subtitles for YouTube videos. For this you will have to provide a subtitle file with .srt extension. The attractive feature of this is that you won’t have to download the video and still run the subtitles on it. This is very much helpful for people who work on YouTube or watch movies without subtitles.
Richard Bennett
Richard Bennett is a writer and a lover of all things video.
Follow @Richard Bennett
Richard Bennett
Mar 27, 2024• Proven solutions
In this article, we are going to show you how important it is to add subtitle and closed captions in your YouTube video, and how to add them.
The best video editor for YouTubers - Wondershare Filmora , not only allows you to cut, crop, rotate, reverse videos, but also offers your advanced features like PIP, Green Screen, or audio mixing. What’s more, you can find lots of effects for Fashion, gaming, education, tutorial, sports, etc. Check this article to know more.
Why subtitle and closed captions are important for YouTube videos?
- Forced closed captions and subtitles actually help the viewers to understand the content in your video if the audio quality of your video is bad, muffled or barely audible. Reading makes it easier for them to understand.
- This also helps people with hearing impairments. People with troubled ears can still watch and understand your content.
- It’s a great aid to such videos which have been recorded in other foreign languages that you don’t understand. Hence it will increase the number of viewers all around the world.
- They both are generally added for easy accessibility to the viewers who wish to watch in sound sensitive environments.
So, here we are going to show you two ways to add subtittles to video: directly or uploading caption or transcript files
Adding subtitles and closed captions manually
To add subtitles and closed captions to your YouTube video, fisrt, you should sign in to your YouTube account. On left right below ‘Home’ you will find ‘My Channel’. It will direct you to your personal YouTube page. On the top, right next to your subscribers lays the ‘Video manager’, giving you the list of your uploaded videos.
Select the video and click on edit to get a drop down menu. Click on subtitles and CC. This will take you to the subtitling interface. To the right of video select ‘add new subtitles’ and then ‘create new subtitles’. Select the subtitle language. Play the video to listen to the content and type down in the box. Click on ‘+’ button once you are done.
This will create a subtitle timeline right beneath the video. You can manage by dragging and expanding the subtitle duration according to the audio of the video. The subtitle will appear at the bottom of the video screen. Click ‘publish’ once done.
An interruption might occur with appearing of subtitles in accordance with video. Hence a lot precision is required while doing so.
Uploading Caption or Transcript Files automatically
To upload Caption or Transcript Files to YouTube Videos you first need to create a format on a text editor. For windows use Notepad and for Mac you may use TextEdit. Create a format of putting the number of subtitle first, time stamp and then text of the subtitle. For example
1\
00:02:34:12 using a format of (hour : minute : second : millisecond)
2. *text*
This is the sample text for first subtitle at zero hours, two minutes, thirty four seconds and twelve milliseconds. Once done with this. Go to file, select ‘save as’. Write the file name with an extension of .srt and select ‘All files’ for type of file. Click encoding menu and select UTF-8. Once saved, sign in to your YouTube account.
On left right below ‘Home’ you will find ‘My Channel’. It will direct you to your personal YouTube page. On the top, right next to your subscribers lays the ‘Video manager’, giving you the list of your uploaded videos.
Select the video and click on edit to get a drop down menu. Click on subtitles and CC. Go to ‘add subtitles’ and then ‘upload a file’. A pop-up menu will appear select ‘subtitles file’. Click upload. The file will send subtitles to your video.
This will create a subtitle timeline right beneath the video. You can manage by dragging and expanding the subtitle duration according to the audio of the video. The subtitle will appear at the bottom of the video screen. Click ‘publish’ once done.
3 Best Tools for add/managing video Subtitles/CC
1. Amara
Amara is a smart video editor which helps insert captions and subtitles to videos. It also helps in transcribing the videos. It takes help of crowd sourcing to subtitle any YouTube video. They take help from viewers to subtitle the videos. By making crowd subtitling available for any YouTube creator, they are allowing them to reach more viewers in more languages
2. DIY Captions
DIY captions help you to transcribe the YouTube videos, if not in most accurate manner, then in a little easier way. All you have to do is just paste the URL of the YouTube video and it will provide you all the subtitles. These may not be accurate but will provide you major base material which can be tweaked a bit here and there and is far better than making all the subtitles starting from scratch.
3 Subtitles for YouTube
Subtitles for YouTube is a Google Chrome extension which provides subtitles for YouTube videos. For this you will have to provide a subtitle file with .srt extension. The attractive feature of this is that you won’t have to download the video and still run the subtitles on it. This is very much helpful for people who work on YouTube or watch movies without subtitles.
Richard Bennett
Richard Bennett is a writer and a lover of all things video.
Follow @Richard Bennett
Also read:
- [New] Elevating Your Video Content for a Fanbase Boom
- [New] Enjoy Uninterrupted YouTube with Effective Adblocking Methods
- [Updated] In 2024, Panoramic Precision Battle Gear Vs LGCam Showdown
- [Updated] In 2024, Top FBX Capture Tools Beyond Traditional Recorders
- Chuckle Campaign 7 Ingenious Ideas for Funny YouTube Videos for 2024
- DIY Photography Support Systems
- Exploring the COM Objects Property Pane
- In 2024, How to Change Google Play Location On Xiaomi Redmi A2+ | Dr.fone
- Movavi Slideshow Maker
- Read This Guide to Find a Reliable Alternative to Fake GPS On Honor X7b | Dr.fone
- Top 8 Steps to Make Your Instagram Unboxing Reels Viral for 2024
- Title: Essential Guide to Writing Click-Worthy Youtube Titles
- Author: Brian
- Created at : 2024-11-29 17:47:33
- Updated at : 2024-12-03 05:09:41
- Link: https://youtube-video-recordings.techidaily.com/essential-guide-to-writing-click-worthy-youtube-titles/
- License: This work is licensed under CC BY-NC-SA 4.0.