Enhancing YouTube Content via FinalCut Pro Techniques for 2024
Enhancing YouTube Content via FinalCut Pro Techniques
How to Edit YouTube Videos in Final Cut Pro

Richard Bennett
Mar 27, 2024• Proven solutions
With its user friendly interface and versatile features, Fincal Cut Pro is definitely one of the best choices for making videos for Mac users. Using it isn’t that hard, but it’s definitely not a walk in the park, so we’ve taken the liberty to provide you with a comprehensive yet concise guide on how to edit YouTube videos with Final Cut Pro.
Even though FCP is good software, there’s no denying that it’s pretty pricy and a little bit complicated for most beginners. Wondershare Filmora for Mac is definitely better alternatives for Final Cut Pro. It’s a lot more user-friendly and requires no previous experience in video editing. With Wondershare Filmora, you can ignite your YouTube videos with over 300 effects like Fashion, Beauty, Block Buster, Travel, etc.


How to Edit YouTube Videos in Final Cut Pro
In this section, we are going to take a quick look at the steps that you need to take in order to properly edit YouTube videos in Final Cut Pro. Without any further ado, let’s take a look.
Step 1: Importing the video clip into FCP
This is, of course, the first thing that you need to do. Regardless of whether the original footage was taken by your smart phone, taken from the Internet or you’ve left it over from some past event that’s long overdue, you can easily import it into the FCP in order to edit it. FCP supports a variety of different formats, so it’s a good idea to try and import the video even if you are not quite sure about its extension. In order to do so, open the program, go to the File button, click on Import and select the file or the folder. This is going to get you to a regular finder window which would enable you to pick the clip that you want to do. If it’s not highlighted or you aren’t able to select it, the software doesn’t support it, and it’s not compatible.

Keep in mind that if you want to import videos which have been published already, you can download them directly from the channel as MP4 files. If you want to store videos from different channels, you can use the Wondershare Video Converter Ultimate in order to get them converted and stored on your computer in a format that is supported by FCP.
Step 2: Edit YouTube Videos in Final Cut Pro
That’s the fun part. There are a few things that you can do with Final Cut Pro, and they are all quite professional.
- First, you can sync an audio track with your video as the DSLR cameras usually have terrible quality of the sound. This is why you want to get the audio recorded separately. The only thing you need to do is select the audio clip and click on the Synchronize Clips, and you are good to go.

- Furthermore, you can do proper color balancing with the program quickly and incredibly easy. Go on Modify and then click on Balance Color and the software is going to take care of the rest on its own.

- You can also create previews when the video ends. In order to do so, you need to import your main clip, select a solid background color and place the preview video above it. You will then be able to trim and edit it conveniently. Adjust the scale and the position and you are good to go. Afterwards, you can also apply annotation on top of the preview.
Step 3: Upload to YouTube from the software directly

This one is rather easy. Here is the sequence that you need to do. Go to File -> Share -> Master File -> Setting -> File -> Share -> YouTube. That’s basically it. Then you need to sign in to your YouTube account and simply click on Next -> Publish and the entire thing is done. That’s all you need to do in order to quickly and conveniently upload your video to YouTube directly from the FCP.
Check this video tutorial to see how YouTube creators edit their YouTubes videos with Final Cut Pro
Richard Bennett
Richard Bennett is a writer and a lover of all things video.
Follow @Richard Bennett
Richard Bennett
Mar 27, 2024• Proven solutions
With its user friendly interface and versatile features, Fincal Cut Pro is definitely one of the best choices for making videos for Mac users. Using it isn’t that hard, but it’s definitely not a walk in the park, so we’ve taken the liberty to provide you with a comprehensive yet concise guide on how to edit YouTube videos with Final Cut Pro.
Even though FCP is good software, there’s no denying that it’s pretty pricy and a little bit complicated for most beginners. Wondershare Filmora for Mac is definitely better alternatives for Final Cut Pro. It’s a lot more user-friendly and requires no previous experience in video editing. With Wondershare Filmora, you can ignite your YouTube videos with over 300 effects like Fashion, Beauty, Block Buster, Travel, etc.
How to Edit YouTube Videos in Final Cut Pro
In this section, we are going to take a quick look at the steps that you need to take in order to properly edit YouTube videos in Final Cut Pro. Without any further ado, let’s take a look.
Step 1: Importing the video clip into FCP
This is, of course, the first thing that you need to do. Regardless of whether the original footage was taken by your smart phone, taken from the Internet or you’ve left it over from some past event that’s long overdue, you can easily import it into the FCP in order to edit it. FCP supports a variety of different formats, so it’s a good idea to try and import the video even if you are not quite sure about its extension. In order to do so, open the program, go to the File button, click on Import and select the file or the folder. This is going to get you to a regular finder window which would enable you to pick the clip that you want to do. If it’s not highlighted or you aren’t able to select it, the software doesn’t support it, and it’s not compatible.
Keep in mind that if you want to import videos which have been published already, you can download them directly from the channel as MP4 files. If you want to store videos from different channels, you can use the Wondershare Video Converter Ultimate in order to get them converted and stored on your computer in a format that is supported by FCP.
Step 2: Edit YouTube Videos in Final Cut Pro
That’s the fun part. There are a few things that you can do with Final Cut Pro, and they are all quite professional.
- First, you can sync an audio track with your video as the DSLR cameras usually have terrible quality of the sound. This is why you want to get the audio recorded separately. The only thing you need to do is select the audio clip and click on the Synchronize Clips, and you are good to go.
- Furthermore, you can do proper color balancing with the program quickly and incredibly easy. Go on Modify and then click on Balance Color and the software is going to take care of the rest on its own.
- You can also create previews when the video ends. In order to do so, you need to import your main clip, select a solid background color and place the preview video above it. You will then be able to trim and edit it conveniently. Adjust the scale and the position and you are good to go. Afterwards, you can also apply annotation on top of the preview.
Step 3: Upload to YouTube from the software directly
This one is rather easy. Here is the sequence that you need to do. Go to File -> Share -> Master File -> Setting -> File -> Share -> YouTube. That’s basically it. Then you need to sign in to your YouTube account and simply click on Next -> Publish and the entire thing is done. That’s all you need to do in order to quickly and conveniently upload your video to YouTube directly from the FCP.
Check this video tutorial to see how YouTube creators edit their YouTubes videos with Final Cut Pro
Richard Bennett
Richard Bennett is a writer and a lover of all things video.
Follow @Richard Bennett
Journey Through Joint Video Viewing: The Youtube Way
Facebook Video Maker - Wondershare Filmora
Provide abundant video effects - A creative video editor
Powerful color correction and grading
Detailed tutorials provided by the official channel
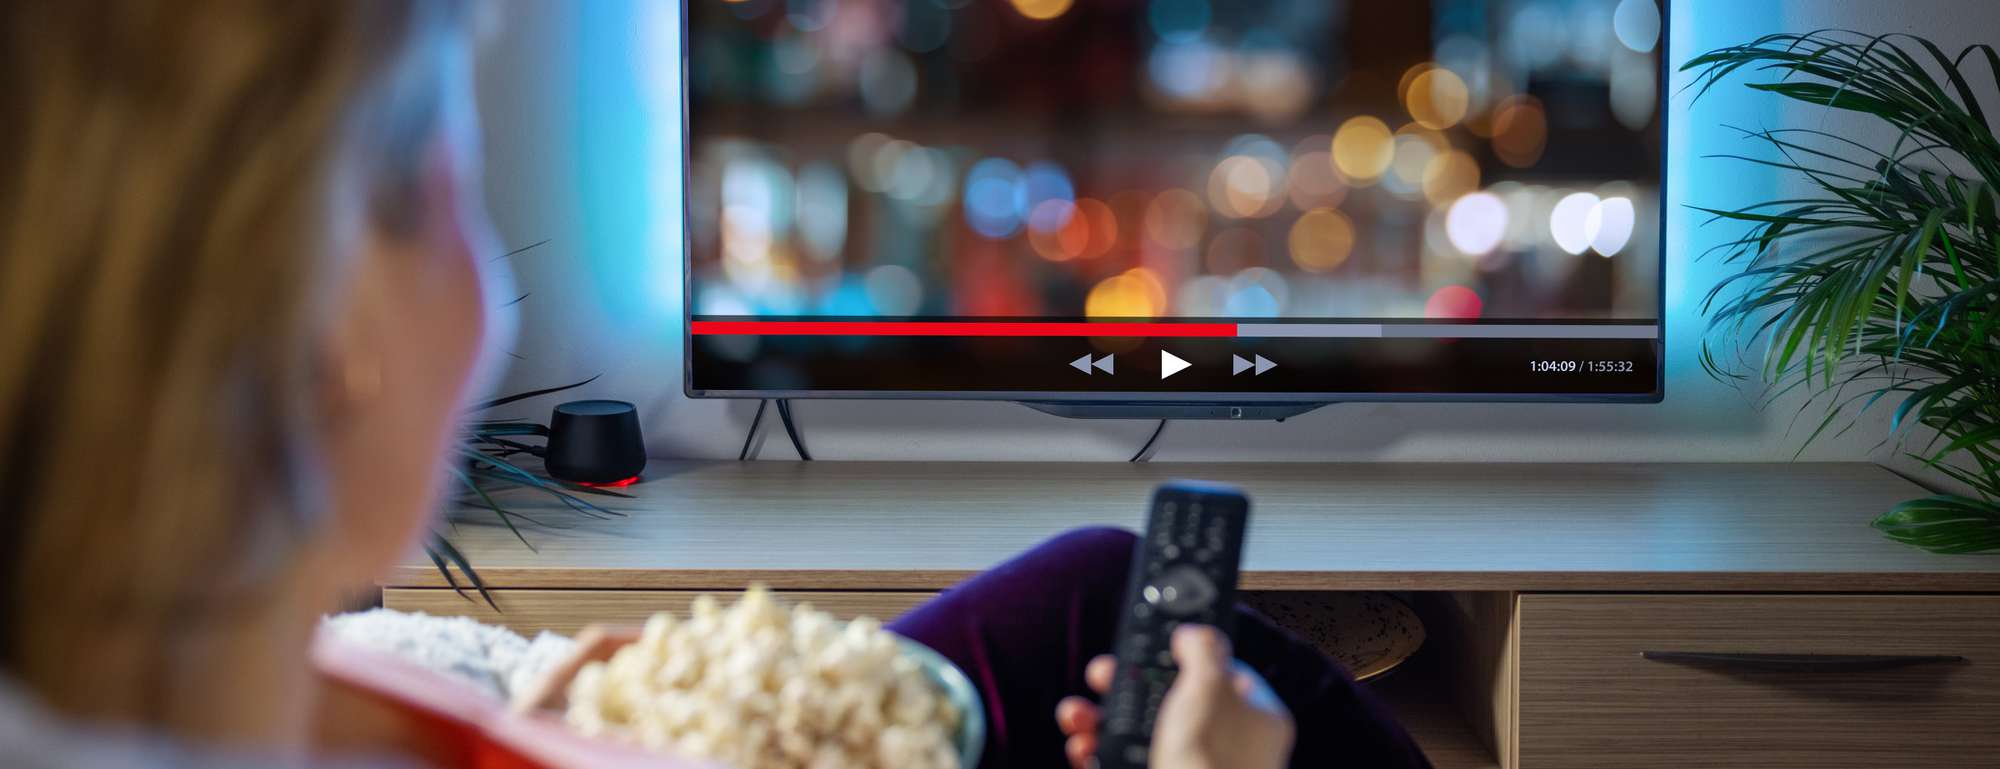
There are some unfortunate times when two of your favorite games or streams from your favorite content creators have the same timing, or you want to watch multiple videos on a single screen at the same time for comparison or any other reason.
It is a hassle to continuously switch between tabs or to drag and minimize windows continuously just to watch a few glimpses of each stream. Thanks to technological advances, there are now third-party services that allow you to watch multiple YouTube videos at one time on a single screen.
Below are some of the services and websites that save you from this hassle.
In this article
Part 1: YouTube Multistream
Part 2: ViewSync
Part 3: WonderShare Filmora
Part 1: YouTube Multistream
YouTube Multistream is a free service that quite effectively simplifies things for you and allows you to watch live streams or play up to 4 videos at the same time. Below are the steps you need to follow in order to play videos simultaneously.
The only caveats are that you cannot sync audio and it does not allow you to play more than 4 videos at the same time.
Step 1: Open YouTube Multistream
Open the website using the link:
You will see 4 boxes where you can input the links of your desired videos you wish to watch.

Step 2: Input Links
After opening the website, copy and paste the links of your desired videos that you wish to watch at the same time.

Step 3: Play What You Like
After copying and pasting the links of the YouTube videos, click on ‘Confirm’. It will redirect you to another page with all 4 videos on one screen and then you can decide which one to play or if you want to stream all 4 at the same time, that is also possible.

It is up to you if you want to stream 2, 3, or 4 videos at the same time and you can play or pause them at any time. It is also helpful if you want to overlap audio of different instruments just for fun or you can stream your favorite games along with any e-sport competition and add in some music to make the environment lively.
Part 2: ViewSync
ViewSync is a free multiplayer for YouTube videos. It was designed to watch Mindcrack UHC videos but it can also be used to watch multiple YouTube videos at the same time. You can add links and watch as many YouTube videos at the same time as you wish.
Another amazing feature of ViewSync is that you can sync audio if the videos share the same voice audio or you can even create pleasing mashups by syncing different audio cues from each video. Below are the steps you need to follow to watch multiple YouTube videos at the same time.
Step 1: Open ViewSync
Open ViewSync using the link:

Step 2: Input Links
Click the + icon and paste the link to the YouTube video you want to watch. Repeat the process and add as many links to YouTube videos as you desire to watch.

Step 3: Adjust Audio Cues
After adding the links, if the videos share the same audio voice, you can adjust the audio cues as in where each video will start from so the audio is in sync. You can play and check the audio or just manually put the exact time in the dialogue box under the video.

Step 4: Test Audio
After adjusting the audio cues, click Test Audio and it will play the audio for you so you can make sure it is perfectly in sync.
Step 5: Generate Link
Click on the ViewSync! button and it will generate a final ViewSync link for you where you can watch the finalized and synced videos. Copy and paste the link in your browser.
Step 6: Buffer the videos
Once you have opened the link generated by ViewSync, click on each video once to start the buffering process.

After buffering is complete, the master controller will start to show from which you can play and pause all the videos at the same time or even resync them.

Step 7: All Set
Now you are all set to play all your desired YouTube videos at the same time. You can also tweak the audio and video quality settings and can choose which video should play audio and all other settings will be available once you click the gear icon on the master controller.

Part 3: WonderShare Filmora
WonderShare Filmora is a great tool for editing your videos and content that you can eventually upload on YouTube or other platforms and share with the world. If you are a content creator or gamer yourself and frequently collaborate with other creators, you can use WonderShare Filmora to eliminate the need for a separate multiplayer.
WonderShare Filmora is very powerful and simple to use. You can easily add multiple video frames and combine them into one e.g. join videos from your fellow creators and then sync the audio in-app using the easy-to-use tools and features in this user-friendly application.
This will eliminate the need for a Multi Stream service.
Conclusion
Now you don’t have to worry about missing one of your favorite games or streams from your favorite content creators or gamers just because the timing overlaps. You can now watch multiple YouTube videos at the same time with great ease and it will not only save your time but immensely relieve the pressure of missing a live game or stream.
You can now sync audio and create a realistic moment as if you are sitting among the streamers and watching them play in real-time that too on a single screen!
There are some unfortunate times when two of your favorite games or streams from your favorite content creators have the same timing, or you want to watch multiple videos on a single screen at the same time for comparison or any other reason.
It is a hassle to continuously switch between tabs or to drag and minimize windows continuously just to watch a few glimpses of each stream. Thanks to technological advances, there are now third-party services that allow you to watch multiple YouTube videos at one time on a single screen.
Below are some of the services and websites that save you from this hassle.
In this article
Part 1: YouTube Multistream
Part 2: ViewSync
Part 3: WonderShare Filmora
Part 1: YouTube Multistream
YouTube Multistream is a free service that quite effectively simplifies things for you and allows you to watch live streams or play up to 4 videos at the same time. Below are the steps you need to follow in order to play videos simultaneously.
The only caveats are that you cannot sync audio and it does not allow you to play more than 4 videos at the same time.
Step 1: Open YouTube Multistream
Open the website using the link:
You will see 4 boxes where you can input the links of your desired videos you wish to watch.
Step 2: Input Links
After opening the website, copy and paste the links of your desired videos that you wish to watch at the same time.
Step 3: Play What You Like
After copying and pasting the links of the YouTube videos, click on ‘Confirm’. It will redirect you to another page with all 4 videos on one screen and then you can decide which one to play or if you want to stream all 4 at the same time, that is also possible.
It is up to you if you want to stream 2, 3, or 4 videos at the same time and you can play or pause them at any time. It is also helpful if you want to overlap audio of different instruments just for fun or you can stream your favorite games along with any e-sport competition and add in some music to make the environment lively.
Part 2: ViewSync
ViewSync is a free multiplayer for YouTube videos. It was designed to watch Mindcrack UHC videos but it can also be used to watch multiple YouTube videos at the same time. You can add links and watch as many YouTube videos at the same time as you wish.
Another amazing feature of ViewSync is that you can sync audio if the videos share the same voice audio or you can even create pleasing mashups by syncing different audio cues from each video. Below are the steps you need to follow to watch multiple YouTube videos at the same time.
Step 1: Open ViewSync
Open ViewSync using the link:
Step 2: Input Links
Click the + icon and paste the link to the YouTube video you want to watch. Repeat the process and add as many links to YouTube videos as you desire to watch.
Step 3: Adjust Audio Cues
After adding the links, if the videos share the same audio voice, you can adjust the audio cues as in where each video will start from so the audio is in sync. You can play and check the audio or just manually put the exact time in the dialogue box under the video.
Step 4: Test Audio
After adjusting the audio cues, click Test Audio and it will play the audio for you so you can make sure it is perfectly in sync.
Step 5: Generate Link
Click on the ViewSync! button and it will generate a final ViewSync link for you where you can watch the finalized and synced videos. Copy and paste the link in your browser.
Step 6: Buffer the videos
Once you have opened the link generated by ViewSync, click on each video once to start the buffering process.
After buffering is complete, the master controller will start to show from which you can play and pause all the videos at the same time or even resync them.
Step 7: All Set
Now you are all set to play all your desired YouTube videos at the same time. You can also tweak the audio and video quality settings and can choose which video should play audio and all other settings will be available once you click the gear icon on the master controller.
Part 3: WonderShare Filmora
WonderShare Filmora is a great tool for editing your videos and content that you can eventually upload on YouTube or other platforms and share with the world. If you are a content creator or gamer yourself and frequently collaborate with other creators, you can use WonderShare Filmora to eliminate the need for a separate multiplayer.
WonderShare Filmora is very powerful and simple to use. You can easily add multiple video frames and combine them into one e.g. join videos from your fellow creators and then sync the audio in-app using the easy-to-use tools and features in this user-friendly application.
This will eliminate the need for a Multi Stream service.
Conclusion
Now you don’t have to worry about missing one of your favorite games or streams from your favorite content creators or gamers just because the timing overlaps. You can now watch multiple YouTube videos at the same time with great ease and it will not only save your time but immensely relieve the pressure of missing a live game or stream.
You can now sync audio and create a realistic moment as if you are sitting among the streamers and watching them play in real-time that too on a single screen!
Also read:
- [New] Enhance YouTube Creations with Soundtrack Perfection Guide for 2024
- [Updated] Aural Adventures Discovering the Top 15 Instructional Music Videos
- 2024 Edition The Definitive Strategy for YouTube Monetization
- Boost Your Channel's Popularity - Optimal Post Dates
- Charting the Course for Profitable Youtube Videos
- Fixes & Workarounds for Smooth FPS Playthrough on Your Computer: Sifu Edition
- Harness 10 Tools for FREE Thumbnail Acquisition
- How to Download & Install Toshiba Copiers' Drivers in Windows OS
- In 2024, Elite Stabilization Solutions for Video Creators
- In 2024, How to use Pokemon Go Joystick on Google Pixel 8? | Dr.fone
- In 2024, Unlocking iPhone XS Passcode without a Computer | Dr.fone
- Pinnacle Speech-to-Text Applications
- Virtual Cam Tech: Seamless Livestreaming Features Powered by ManyCam Compatibility
- Title: Enhancing YouTube Content via FinalCut Pro Techniques for 2024
- Author: Brian
- Created at : 2024-11-30 20:45:23
- Updated at : 2024-12-03 11:04:15
- Link: https://youtube-video-recordings.techidaily.com/enhancing-youtube-content-via-finalcut-pro-techniques-for-2024/
- License: This work is licensed under CC BY-NC-SA 4.0.