
DIY Tripods| How to Stabilize Your Camera without Buying a Tripod
Self-Balancing: Snap Shots Without Supports
DIY Tripods| How to Stabilize Your Camera without Buying a Tripod

Richard Bennett
Oct 26, 2023• Proven solutions
When you’re trying to grow a channel on YouTube it can feel like equipment is a barrier, but it shouldn’t be. If you can’t afford a high-end tripod, for example, there are loads of ways to get by without one.
DIY Your Video with Wondershare Filmora
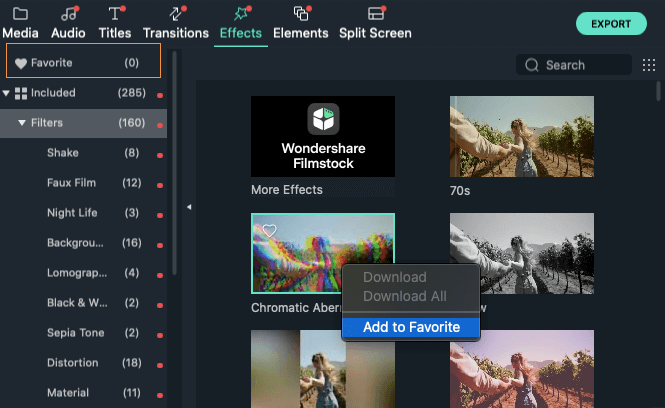
Wondershare Filmora has the best video stabilization tool is your videos have a bad frame or were recorded in dim lights. If a video is shot in bad weather or unfriendly situation where you don’t have all the equipment required for a quality recording, Wondershare Filmora can help you in the background to edit your videos like a pro. And it has all the relevant tools like effects, transitions, background removal, overlays, and background music that could turn your normal video to a professional one.


Here are 3 of our favorite DIY tripods.
DIY smartphone tripod using binder clips or hair clips
You’re a solo operation and your best camera is on your phone. That’s pretty common.
If you have a DSLR then you can set it down on any stable surface while filming yourself, but your phone can’t stand up by itself. It needs something or someone to hold it. Do you just accept that and shoot everything as a selfie?
No. No, you don’t, because there are common household items that can help you out of this problem. For this DIY tripod, you need either 2 binder clips or 2 ‘claw clips’ (also called ‘hair jaws’).
Hold your phone in landscape mode (horizontally, so it’s long rather than tall) and attach clips to the bottom corners. If you are worried about scratching your screen, fold up some paper to place between your clip and your phone.
Here it is with binder clips:

And here it is with hair clips:

Now you can set your smartphone upon any stable surface, like a table or a stack of books.
Here are some more cool ideas!
DIY adjustable tripod using books and a towel
You’ve probably heard a million times that you can stabilize your camera by sitting it down on any stable surface – on your desk, on a stack of books, up in a tree, etc. This is very true!
But if you can use any stable surface, why do people buy tripods?
Because it isn’t convenient to rearrange your furniture whenever you want to make a video, and also because tripods are adjustable. You can change their height, you can use them to pan or tilt, and it’s pretty easy to move them a bit forwards or backward while you’re setting up your shot.
To get similar functions from the ‘any stable surface’ solution you can use a table, a stack of books, and a towel.
- Set up the area where you’re going to sit while you’re filming on one end of the table.
- Put the towel down over the approximate spot you want your camera to be.
- Stack your books on top of the towel.
- Put your camera on top of the books.
Now if your camera isn’t up high enough, or is too high, you can adjust it just by adding or taking away books. If you want to move it closer or farther away from you, just pull the towel forwards or backward.
DIY gripping ‘Gorillapod’ using wire and tape
Gorillapod’s are cool because you can use them like normal tripods, carry them around like selfie sticks, or attach them to things like fences and posts. Here’s how you can make something similar using wire, electrical tape or duct tape, and a 1/4 bolt.
Your wire should be fairly stiff and you’ll need three pieces the same length, which should be at least 10 inches. Old clothes hangers work well. This needs to be something strong enough to support the weight of your camera, but soft enough that it’s not impossible for you to bend.

All of your supplies plus the finished product.
Readying your legs
Step 1: Bend 2 inches at one end of each wire into a ‘U’ shape. You will probably need pliers for this.
Step 2: Pick up one of your pieces of wire and wrap one end with electrical tape. Go around 5-10 times (to prevent it from coming undone at the end) and then, without cutting your tape, start moving up and wrapping the rest of your wire. Stop before your ‘U’ section.
Repeat this with the other two wires.
Attaching your legs
Step 1: Place the ‘U’ section of a leg against your bolt. The bolt’s threading should be pointing away from the leg. Now, use your tape to attach them. Wind it around 2 or 3 times, then repeat the process with both of the other legs individually.
Step 2: After all the legs are attached, wrap some more tape around all 3 as tightly as you can.
Your camera will mount onto the bolt! You’ll be able to use this as a normal table-top tripod or use the flexible legs to grab onto different things like a Gorillapod. Read more at Instructables.
Note: make sure the bolt is a fit for your camera before you get too far into this process.
Richard Bennett
Richard Bennett is a writer and a lover of all things video.
Follow @Richard Bennett
Richard Bennett
Oct 26, 2023• Proven solutions
When you’re trying to grow a channel on YouTube it can feel like equipment is a barrier, but it shouldn’t be. If you can’t afford a high-end tripod, for example, there are loads of ways to get by without one.
DIY Your Video with Wondershare Filmora
Wondershare Filmora has the best video stabilization tool is your videos have a bad frame or were recorded in dim lights. If a video is shot in bad weather or unfriendly situation where you don’t have all the equipment required for a quality recording, Wondershare Filmora can help you in the background to edit your videos like a pro. And it has all the relevant tools like effects, transitions, background removal, overlays, and background music that could turn your normal video to a professional one.
Here are 3 of our favorite DIY tripods.
DIY smartphone tripod using binder clips or hair clips
You’re a solo operation and your best camera is on your phone. That’s pretty common.
If you have a DSLR then you can set it down on any stable surface while filming yourself, but your phone can’t stand up by itself. It needs something or someone to hold it. Do you just accept that and shoot everything as a selfie?
No. No, you don’t, because there are common household items that can help you out of this problem. For this DIY tripod, you need either 2 binder clips or 2 ‘claw clips’ (also called ‘hair jaws’).
Hold your phone in landscape mode (horizontally, so it’s long rather than tall) and attach clips to the bottom corners. If you are worried about scratching your screen, fold up some paper to place between your clip and your phone.
Here it is with binder clips:
And here it is with hair clips:
Now you can set your smartphone upon any stable surface, like a table or a stack of books.
Here are some more cool ideas!
DIY adjustable tripod using books and a towel
You’ve probably heard a million times that you can stabilize your camera by sitting it down on any stable surface – on your desk, on a stack of books, up in a tree, etc. This is very true!
But if you can use any stable surface, why do people buy tripods?
Because it isn’t convenient to rearrange your furniture whenever you want to make a video, and also because tripods are adjustable. You can change their height, you can use them to pan or tilt, and it’s pretty easy to move them a bit forwards or backward while you’re setting up your shot.
To get similar functions from the ‘any stable surface’ solution you can use a table, a stack of books, and a towel.
- Set up the area where you’re going to sit while you’re filming on one end of the table.
- Put the towel down over the approximate spot you want your camera to be.
- Stack your books on top of the towel.
- Put your camera on top of the books.
Now if your camera isn’t up high enough, or is too high, you can adjust it just by adding or taking away books. If you want to move it closer or farther away from you, just pull the towel forwards or backward.
DIY gripping ‘Gorillapod’ using wire and tape
Gorillapod’s are cool because you can use them like normal tripods, carry them around like selfie sticks, or attach them to things like fences and posts. Here’s how you can make something similar using wire, electrical tape or duct tape, and a 1/4 bolt.
Your wire should be fairly stiff and you’ll need three pieces the same length, which should be at least 10 inches. Old clothes hangers work well. This needs to be something strong enough to support the weight of your camera, but soft enough that it’s not impossible for you to bend.
All of your supplies plus the finished product.
Readying your legs
Step 1: Bend 2 inches at one end of each wire into a ‘U’ shape. You will probably need pliers for this.
Step 2: Pick up one of your pieces of wire and wrap one end with electrical tape. Go around 5-10 times (to prevent it from coming undone at the end) and then, without cutting your tape, start moving up and wrapping the rest of your wire. Stop before your ‘U’ section.
Repeat this with the other two wires.
Attaching your legs
Step 1: Place the ‘U’ section of a leg against your bolt. The bolt’s threading should be pointing away from the leg. Now, use your tape to attach them. Wind it around 2 or 3 times, then repeat the process with both of the other legs individually.
Step 2: After all the legs are attached, wrap some more tape around all 3 as tightly as you can.
Your camera will mount onto the bolt! You’ll be able to use this as a normal table-top tripod or use the flexible legs to grab onto different things like a Gorillapod. Read more at Instructables.
Note: make sure the bolt is a fit for your camera before you get too far into this process.
Richard Bennett
Richard Bennett is a writer and a lover of all things video.
Follow @Richard Bennett
Creating Impressive Video Tracks with a Newbie Mac User
How do Beginners Make a Cool Video for YouTube on Mac

Shanoon Cox
Dec 14, 2023• Proven solutions
To get the right video editors to cut a video for YouTube on your Mac can be a bit of a problem for beginners. It is understandable that there will be a learning curve if you just want to get tons of subscribers on your channel – who doesn’t? Ultimately, in getting a standard video that will attract and sustain the interest of the viewers, you will need to employ certain strategies that will enhance your credibility.
Let’s tell each other the truth, no one wants to watch a video that is not aesthetically appealing even if it is a close friend. So, if you have got the relevant content and the video to pull traffic to your channel, what you will need is editing software that will help you make the correct adjustments to your video
Nobody wants a random viewer to comment “This video is a little bit tacky, touch-up properly”, that will definitely leave a sting. As such, understand the best technique that works for you as well as the software that meets your needs based on the current level of expertise. It is okay for you to grow.

Five Video Cutting Skills Youtubers Must Have
As much as the enthusiasm is brewing to get on your mac and upload the video you just shot, there are certain elements you need to implement to make a cool video for YouTube. Beginners sometimes feel their content is the best, the excitement of posting their very first series can be overwhelming. Sometimes, it blocks off other ideas for making the video better.
However, having amazing content dies not to exclude the need for the right editing technique. Here are five methods for editing your YouTube videos:
1.Control the video duration
The length of a particular scene can have different meanings depending on how long or short it is in a video. This means the duration can impact the message you are trying to pass across to your viewers, hence it is important to know what places to accelerate and cut in the video.
You can have a system where each part of the content is labeled in their order of importance such as A, B, C. This means from the most important to the least important. Consequently, you will be able to sieve through the content and make the appropriate changes while editing the video.
![]()
2.Customize the intro and end of the video
It is possible to grab the attention of the viewer in the intro and even more likely to lose someone once the opening montage comes in. Creating an intro that is captivating and appealing to drag the audience to your video is an important technique for editing your videos. Also, the end of the video, from the signing out to the closing montage has to appeal to the audience. You will be surprised by the number of people that love seeing end credits if the closing montage is good. Customize the intro and the end of the video so the audience is tuned all through.
You May Like: Best YouTube Banner Size and Channel Art Dimension (The Ultimate Guide)
You May Like: How to Add Logo or Watermark to YouTube Video
3.Use Cool transitions or filters
If there is anything the audience love to see, it is the way you move from different points in the vudeo. The ability to use transition that does not affect their attention but leaves them wanting more is very key. Use fanciful transitions that do noy hurt the eyes and allows for easy comprehension.
4.Match the cuts
Whatever you cut has to match the next phase of the video. You do not want to leave the audience behind as they will wonder how the last scene correlates with a new one. You need to ensure that all cuts match the next scenes.
5.Cutaway shots
This is very good in providing the audience context. You can take shots of the room or item that you are trying to discuss in your video. If people keep staring at a particular thing for long, they get bored, cutaway shots keep the excitement alive for the audience.
What Editing Software can Meet Your Needs?
As a beginner, it is important to use software that is easily adaptable to your needs. If you want to make a cool video for you be on your mac, getting software that allows you to be creative without confusion is key. Here are two software for making cool YouTube videos for your Mac;
Filmora X
This is one of the simplest yet powerful tools that is lightweight and apt for your Mac. One of the perks of using the Filmora X is the feature that allows you to upload the video directly to YouTube, saving you any extended hassles.
There are also 400+ transition effects as well as a stylish text editor that is fun to use. There is also a built-in music and sound effect feature that enables you to select sounds to match the video you are editing. This is if you do not have the music you want for the video already.
Other pros of Filmora are:
• It has fast rendering sped for your video
• The lifetime price is affordable.
However, there are some disadvantages to the usage of Filmora X, which are:
• The free version contains the Filmora X watermark
• The color grading tool is limited.
Blender
If you are looking for software for the model, game creating, and animation then opting for Blender will be a good fit. You can trim videos, insert filters, and add as many videos as you want.
Pros
- The 3D graphics make it suitable for editing YouTube videos.
- Composting system and node-based material
- It supports your Mac.
Cons:
- It could be slow when running
- Some think it might be a bit complicated.
Although there is other editing software for your Mac, Filmora X simplifies the whole process. If you are looking for quality wrapped in affordability and convenience, then Filmora X will be right for you. Start editing and enjoy the ride!
Learn More: YouTuber Skillshare: Essential Video Cutting Skills For YouTubers
Shanoon Cox
Shanoon Cox is a writer and a lover of all things video.
Follow @Shanoon Cox
Shanoon Cox
Dec 14, 2023• Proven solutions
To get the right video editors to cut a video for YouTube on your Mac can be a bit of a problem for beginners. It is understandable that there will be a learning curve if you just want to get tons of subscribers on your channel – who doesn’t? Ultimately, in getting a standard video that will attract and sustain the interest of the viewers, you will need to employ certain strategies that will enhance your credibility.
Let’s tell each other the truth, no one wants to watch a video that is not aesthetically appealing even if it is a close friend. So, if you have got the relevant content and the video to pull traffic to your channel, what you will need is editing software that will help you make the correct adjustments to your video
Nobody wants a random viewer to comment “This video is a little bit tacky, touch-up properly”, that will definitely leave a sting. As such, understand the best technique that works for you as well as the software that meets your needs based on the current level of expertise. It is okay for you to grow.
Five Video Cutting Skills Youtubers Must Have
As much as the enthusiasm is brewing to get on your mac and upload the video you just shot, there are certain elements you need to implement to make a cool video for YouTube. Beginners sometimes feel their content is the best, the excitement of posting their very first series can be overwhelming. Sometimes, it blocks off other ideas for making the video better.
However, having amazing content dies not to exclude the need for the right editing technique. Here are five methods for editing your YouTube videos:
1.Control the video duration
The length of a particular scene can have different meanings depending on how long or short it is in a video. This means the duration can impact the message you are trying to pass across to your viewers, hence it is important to know what places to accelerate and cut in the video.
You can have a system where each part of the content is labeled in their order of importance such as A, B, C. This means from the most important to the least important. Consequently, you will be able to sieve through the content and make the appropriate changes while editing the video.
![]()
2.Customize the intro and end of the video
It is possible to grab the attention of the viewer in the intro and even more likely to lose someone once the opening montage comes in. Creating an intro that is captivating and appealing to drag the audience to your video is an important technique for editing your videos. Also, the end of the video, from the signing out to the closing montage has to appeal to the audience. You will be surprised by the number of people that love seeing end credits if the closing montage is good. Customize the intro and the end of the video so the audience is tuned all through.
You May Like: Best YouTube Banner Size and Channel Art Dimension (The Ultimate Guide)
You May Like: How to Add Logo or Watermark to YouTube Video
3.Use Cool transitions or filters
If there is anything the audience love to see, it is the way you move from different points in the vudeo. The ability to use transition that does not affect their attention but leaves them wanting more is very key. Use fanciful transitions that do noy hurt the eyes and allows for easy comprehension.
4.Match the cuts
Whatever you cut has to match the next phase of the video. You do not want to leave the audience behind as they will wonder how the last scene correlates with a new one. You need to ensure that all cuts match the next scenes.
5.Cutaway shots
This is very good in providing the audience context. You can take shots of the room or item that you are trying to discuss in your video. If people keep staring at a particular thing for long, they get bored, cutaway shots keep the excitement alive for the audience.
What Editing Software can Meet Your Needs?
As a beginner, it is important to use software that is easily adaptable to your needs. If you want to make a cool video for you be on your mac, getting software that allows you to be creative without confusion is key. Here are two software for making cool YouTube videos for your Mac;
Filmora X
This is one of the simplest yet powerful tools that is lightweight and apt for your Mac. One of the perks of using the Filmora X is the feature that allows you to upload the video directly to YouTube, saving you any extended hassles.
There are also 400+ transition effects as well as a stylish text editor that is fun to use. There is also a built-in music and sound effect feature that enables you to select sounds to match the video you are editing. This is if you do not have the music you want for the video already.
Other pros of Filmora are:
• It has fast rendering sped for your video
• The lifetime price is affordable.
However, there are some disadvantages to the usage of Filmora X, which are:
• The free version contains the Filmora X watermark
• The color grading tool is limited.
Blender
If you are looking for software for the model, game creating, and animation then opting for Blender will be a good fit. You can trim videos, insert filters, and add as many videos as you want.
Pros
- The 3D graphics make it suitable for editing YouTube videos.
- Composting system and node-based material
- It supports your Mac.
Cons:
- It could be slow when running
- Some think it might be a bit complicated.
Although there is other editing software for your Mac, Filmora X simplifies the whole process. If you are looking for quality wrapped in affordability and convenience, then Filmora X will be right for you. Start editing and enjoy the ride!
Learn More: YouTuber Skillshare: Essential Video Cutting Skills For YouTubers
Shanoon Cox
Shanoon Cox is a writer and a lover of all things video.
Follow @Shanoon Cox
Also read:
- [New] Bringing Bygone Era Filmmaking to Life Today
- [New] Complete Guidebook to Evaluating Your Video's Impact and Earning Power
- [New] Enhancing On-Screen Appeal Essential Tips for Talking-Head Shots
- [New] In 2024, Beat the Blank Screen Overcoming Top Vlogging Anxieties
- [New] In 2024, Instagram Pro Tips 10 Crucial Tools to Increase Followers
- [New] Open and Play SRT on Different Platforms
- [Updated] 2024 Approved Ideal Tools Leading Mac Video Recording Programs
- [Updated] 2024 Approved Unlock Smooth Video Flow From Your Photobooth App
- [Updated] 3 Techniques to Retrieve & Save YouTube's Iconic Images
- [Updated] Decode YouTube Shorts A Complete Breakdown
- [Updated] Distinctive FB Video Aspects for 2024
- 2024 Approved Effortless Music Extraction Choose the Right Apps for YouTube & MP3
- Adaptieren Zum New Normal: Wie Fraunhofer Und ABBYY Die Prozessdigitalisierung Revolutionieren
- Convenient Viewing Setting Up YouTube on Large TV Panels
- Enriching Vlog Topics to Share for 2024
- Fixing the Issue: How to Troubleshoot a Non-Functional Mic on Your SteelSeries Arctis Prime Headset
- iPogo will be the new iSpoofer On Vivo Y36? | Dr.fone
- Maximize Your Wallet: Exclusive Offers to Shop On eBay Pre-Prime Day 2024 | TechCrunch
- Scrutinizing the Financial Lifelines that Drive TSeries' Youtube Success
- Title: DIY Tripods| How to Stabilize Your Camera without Buying a Tripod
- Author: Brian
- Created at : 2024-12-01 06:42:06
- Updated at : 2024-12-03 05:08:30
- Link: https://youtube-video-recordings.techidaily.com/diy-tripods-how-to-stabilize-your-camera-without-buying-a-tripod/
- License: This work is licensed under CC BY-NC-SA 4.0.